rear view mirror KIA TELLURIDE 2020 Features and Functions Guide
[x] Cancel search | Manufacturer: KIA, Model Year: 2020, Model line: TELLURIDE, Model: KIA TELLURIDE 2020Pages: 66, PDF Size: 8.05 MB
Page 3 of 66
1*IF EQUIPPED ALWAYS CHECK THE OWNER’S MANUAL FOR COMPLE TE OPER ATING INFORMATION AND SAFE T Y WARNINGS.
TABLE OF CONTENTS
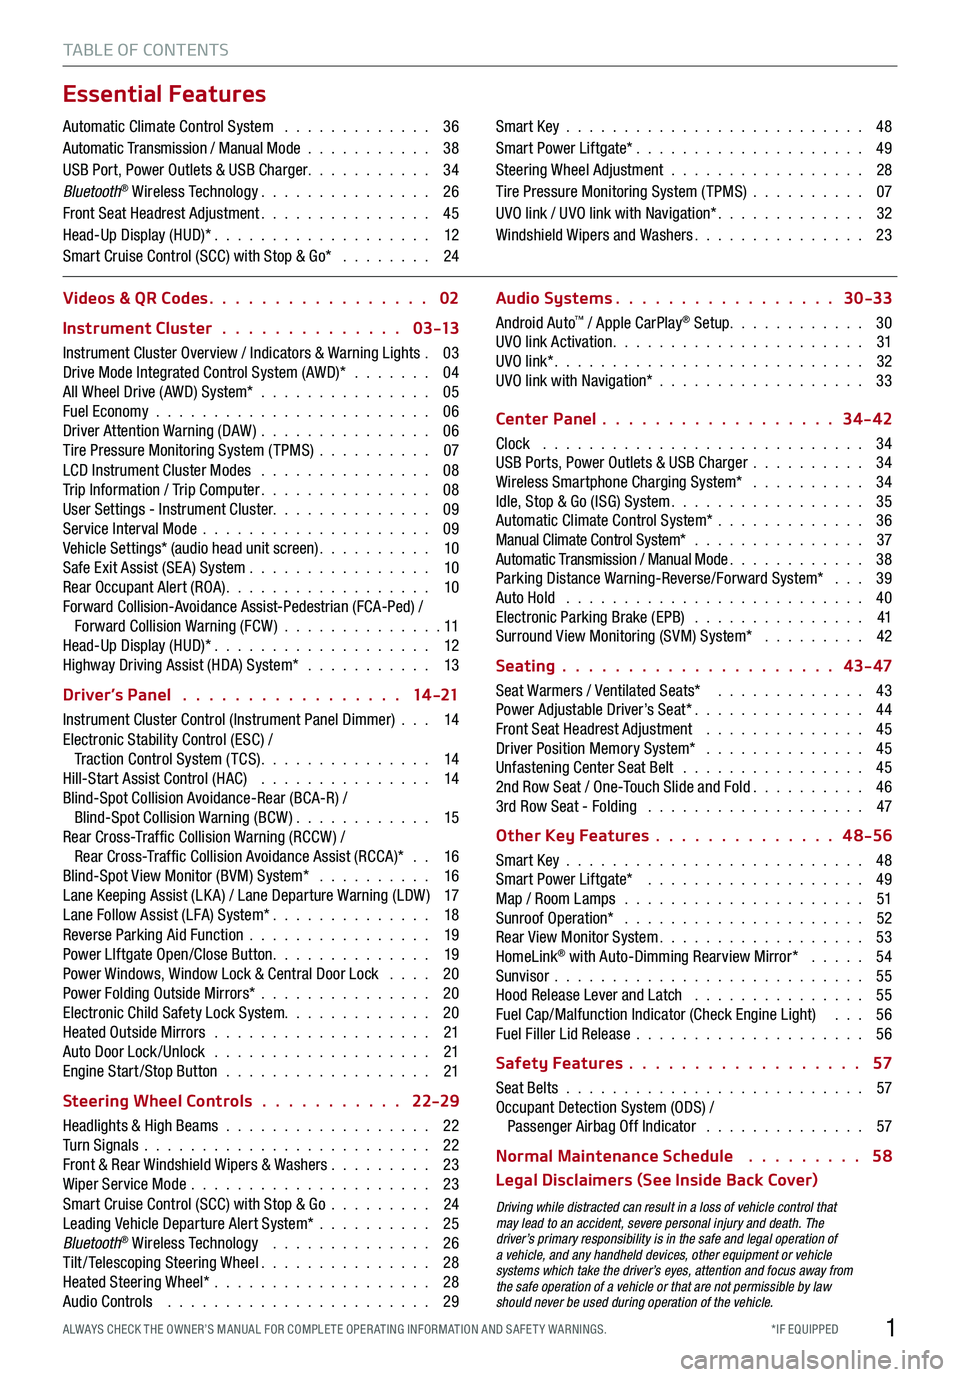
Essential Features
Automatic Climate Control System . . . . . . . . . . . . . 36Automatic Transmission / Manual Mode . . . . . . . . . . . 38USB Port, Power Outlets & USB Charger . . . . . . . . . . . 34Bluetooth® Wireless Technology . . . . . . . . . . . . . . . 26Front Seat Headrest Adjustment . . . . . . . . . . . . . . . 45Head-Up Display (HUD)* . . . . . . . . . . . . . . . . . . . 12Smart Cruise Control (SCC) with Stop & Go* . . . . . . . . 24
Smart Key . . . . . . . . . . . . . . . . . . . . . . . . . . 48Smart Power Liftgate* . . . . . . . . . . . . . . . . . . . . 49Steering Wheel Adjustment . . . . . . . . . . . . . . . . . 28Tire Pressure Monitoring System (TPMS) . . . . . . . . . . 07UVO link / UVO link with Navigation* . . . . . . . . . . . . . 32Windshield Wipers and Washers . . . . . . . . . . . . . . . 23
Videos & QR Codes 02
Instrument Cluster 0 3 -13
Instrument Cluster Overview / Indicators & Warning Lights . 03Drive Mode Integrated Control System (AWD)* . . . . . . . 04All Wheel Drive (AWD) System* . . . . . . . . . . . . . . . 05Fuel Economy . . . . . . . . . . . . . . . . . . . . . . . . 06Driver Attention Warning (DAW) . . . . . . . . . . . . . . . 06Tire Pressure Monitoring System (TPMS) . . . . . . . . . . 07LCD Instrument Cluster Modes . . . . . . . . . . . . . . . 08Trip Information / Trip Computer . . . . . . . . . . . . . . . 08User Settings - Instrument Cluster. . . . . . . . . . . . . . 09Service Interval Mode . . . . . . . . . . . . . . . . . . . . 09Vehicle Settings* (audio head unit screen) . . . . . . . . . . 10Safe Exit Assist (SE A) System . . . . . . . . . . . . . . . . 10Rear Occupant Alert (ROA) . . . . . . . . . . . . . . . . . . 10Forward Collision-Avoidance Assist-Pedestrian (FCA-Ped) / Forward Collision Warning (FCW ) . . . . . . . . . . . . . . 11Head-Up Display (HUD)* . . . . . . . . . . . . . . . . . . . 12Highway Driving Assist (HDA) System* . . . . . . . . . . . 13
Driver’s Panel 14 -21
Instrument Cluster Control (Instrument Panel Dimmer) . . . 14Electronic Stability Control (ESC) / Traction Control System ( TCS) . . . . . . . . . . . . . . . 14Hill-Start Assist Control (HAC) . . . . . . . . . . . . . . . 14Blind-Spot Collision Avoidance-Rear (BCA-R) / Blind-Spot Collision Warning (BCW ) . . . . . . . . . . . . 15Rear Cross-Traf fic Collision Warning (RCCW ) / Rear Cross-Traf fic Collision Avoidance Assist (RCCA)* . . 16Blind-Spot View Monitor (BVM) System* . . . . . . . . . . 16Lane Keeping Assist (LK A) / Lane Departure Warning (LDW ) 17Lane Follow Assist (LFA) System* . . . . . . . . . . . . . . 18Reverse Parking Aid Function . . . . . . . . . . . . . . . . 19Power LIftgate Open/Close Button . . . . . . . . . . . . . . 19Power Windows, Window Lock & Central Door Lock . . . . 20Power Folding Outside Mirrors* . . . . . . . . . . . . . . . 20Electronic Child Safety Lock System. . . . . . . . . . . . . 20Heated Outside Mirrors . . . . . . . . . . . . . . . . . . . 21Auto Door Lock /Unlock . . . . . . . . . . . . . . . . . . . 21Engine Start /Stop Button . . . . . . . . . . . . . . . . . . 21
Steering Wheel Controls 22-29
Headlights & High Beams . . . . . . . . . . . . . . . . . . 22Turn Signals . . . . . . . . . . . . . . . . . . . . . . . . . 22Front & Rear Windshield Wipers & Washers . . . . . . . . . 23Wiper Service Mode . . . . . . . . . . . . . . . . . . . . . 23Smart Cruise Control (SCC) with Stop & Go . . . . . . . . . 24Leading Vehicle Departure Alert System* . . . . . . . . . . 25Bluetooth® Wireless Technology . . . . . . . . . . . . . . 26Tilt/ Telescoping Steering Wheel . . . . . . . . . . . . . . . 28Heated Steering Wheel* . . . . . . . . . . . . . . . . . . . 28Audio Controls . . . . . . . . . . . . . . . . . . . . . . . 29
Audio Systems 30-33
Android Auto™ / Apple CarPlay® Setup. . . . . . . . . . . . 30UVO link Activation . . . . . . . . . . . . . . . . . . . . . . 31UVO link* . . . . . . . . . . . . . . . . . . . . . . . . . . . 32UVO link with Navigation* . . . . . . . . . . . . . . . . . . 33
Center Panel 34-42
Clock . . . . . . . . . . . . . . . . . . . . . . . . . . . . 34USB Ports, Power Outlets & USB Charger . . . . . . . . . . 34Wireless Smartphone Charging System* . . . . . . . . . . 34Idle, Stop & Go (ISG) System . . . . . . . . . . . . . . . . . 35Automatic Climate Control System* . . . . . . . . . . . . . 36Manual Climate Control System* . . . . . . . . . . . . . . . 37Automatic Transmission / Manual Mode . . . . . . . . . . . . 38Parking Distance Warning-Reverse/Forward System* . . . 39Auto Hold . . . . . . . . . . . . . . . . . . . . . . . . . . 40Electronic Parking Brake (EPB) . . . . . . . . . . . . . . . 41Surround View Monitoring (SVM) System* . . . . . . . . . 42
Seating 43- 47
Seat Warmers / Ventilated Seats* . . . . . . . . . . . . . 43Power Adjustable Driver’s Seat* . . . . . . . . . . . . . . . 44Front Seat Headrest Adjustment . . . . . . . . . . . . . . 45Driver Position Memory System* . . . . . . . . . . . . . . 45Unfastening Center Seat Belt . . . . . . . . . . . . . . . . 452nd Row Seat / One-Touch Slide and Fold . . . . . . . . . . 463rd Row Seat - Folding . . . . . . . . . . . . . . . . . . . 47
Other Key Features 4 8-56
Smart Key . . . . . . . . . . . . . . . . . . . . . . . . . . 48Smart Power Liftgate* . . . . . . . . . . . . . . . . . . . 49Map / Room Lamps . . . . . . . . . . . . . . . . . . . . . 51Sunroof Operation* . . . . . . . . . . . . . . . . . . . . . 52Rear View Monitor System . . . . . . . . . . . . . . . . . . 53HomeLink® with Auto-Dimming Rearview Mirror* . . . . . 54Sunvisor . . . . . . . . . . . . . . . . . . . . . . . . . . . 55Hood Release Lever and Latch . . . . . . . . . . . . . . . 55Fuel Cap/Malfunction Indicator (Check Engine Light) . . . 56Fuel Filler Lid Release . . . . . . . . . . . . . . . . . . . . 56
Safety Features 57
Seat Belts . . . . . . . . . . . . . . . . . . . . . . . . . . 57Occupant Detection System (ODS) / Passenger Airbag Off Indicator . . . . . . . . . . . . . . 57
Normal Maintenance Schedule 58
Legal Disclaimers (See Inside Back Cover)
Driving while distracted can result in a loss of vehicle control that may lead to an accident, severe personal injury and death. The driver’s primary responsibility is in the safe and legal operation of a vehicle, and any handheld devices, other equipment or vehicle systems which take the driver’s eyes, attention and focus away from the safe operation of a vehicle or that are not permissible by law should never be used during operation of the vehicle.
Page 11 of 66
INSTRUMENT CLUSTER
9*IF EQUIPPED ALWAYS CHECK THE OWNER’S MANUAL FOR COMPLE TE OPER ATING INFORMATION AND SAFE T Y WARNINGS.
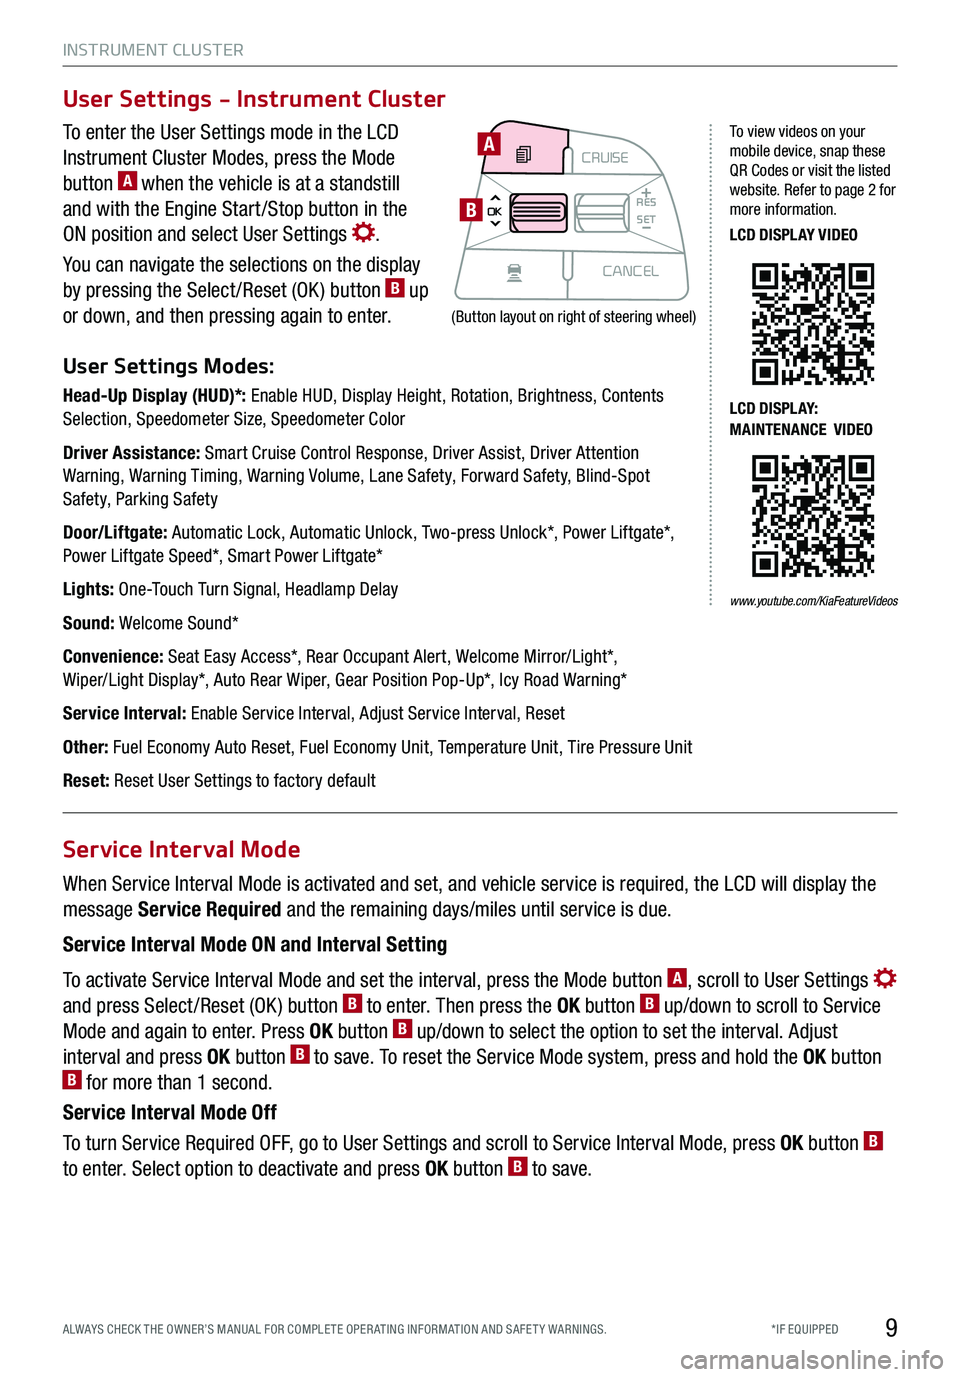
To enter the User Settings mode in the LCD
Instrument Cluster Modes, press the Mode
button A when the vehicle is at a standstill
and with the Engine Start /Stop button in the
ON position and select User Settings .
You can navigate the selections on the display
by pressing the Select /Reset (OK ) button B up
or down, and then pressing again to enter.
User Settings Modes:
Head-Up Display (HUD)*: Enable HUD, Display Height, Rotation, Brightness, Contents Selection, Speedometer Size, Speedometer Color
Driver Assistance: Smart Cruise Control Response, Driver Assist, Driver Attention Warning, Warning Timing, Warning Volume, Lane Safety, Forward Safety, Blind-Spot Safety, Parking Safety
Door/Liftgate: Automatic Lock, Automatic Unlock, Two-press Unlock*, Power Liftgate*, Power Liftgate Speed*, Smart Power Liftgate*
Lights: One-Touch Turn Signal, Headlamp Delay
Sound: Welcome Sound*
Convenience: Seat Easy Access*, Rear Occupant Alert, Welcome Mirror/Light*, Wiper/Light Display*, Auto Rear Wiper, Gear Position Pop-Up*, Icy Road Warning*
Service Interval: Enable Service Interval, Adjust Service Interval, Reset
Other: Fuel Economy Auto Reset, Fuel Economy Unit, Temperature Unit, Tire Pressure Unit
Reset: Reset User Settings to factory default
When Service Interval Mode is activated and set, and vehicle service is required, the LCD will display the
message Service Required and the remaining days/miles until service is due.
Service Interval Mode ON and Interval Setting
To activate Service Interval Mode and set the interval, press the Mode button A, scroll to User Settings
and press Select /Reset (OK ) button B to enter. Then press the OK button B up/down to scroll to Service
Mode and again to enter. Press OK button B up/down to select the option to set the interval. Adjust
interval and press OK button B to save. To reset the Service Mode system, press and hold the OK button B for more than 1 second.
Service Interval Mode Off
To turn Service Required OFF, go to User Settings and scroll to Service Interval Mode, press OK button B
to enter. Select option to deactivate and press OK button B to save.
User Settings - Instrument Cluster
Service Interval Mode
MODECRUISE
CANCEL
RES
OK SET
CRUISE
CANCEL
RES
OK SET
MODE CRUISE
CANCEL
RES
OK SET
MODECRUISE
CANCEL
RES
OK SET
MODECRUISE
CANCEL
RES
OK SET
A
B
To view videos on your mobile device, snap these QR Codes or visit the listed website. Refer to page 2 for more information.
LCD DISPLAY VIDEO
LCD DISPLAY: MAINTENANCE VIDEO
(Button layout on right of steering wheel)
www.youtube.com/KiaFeatureVideos
Page 17 of 66
DRIVER’S PANEL
15
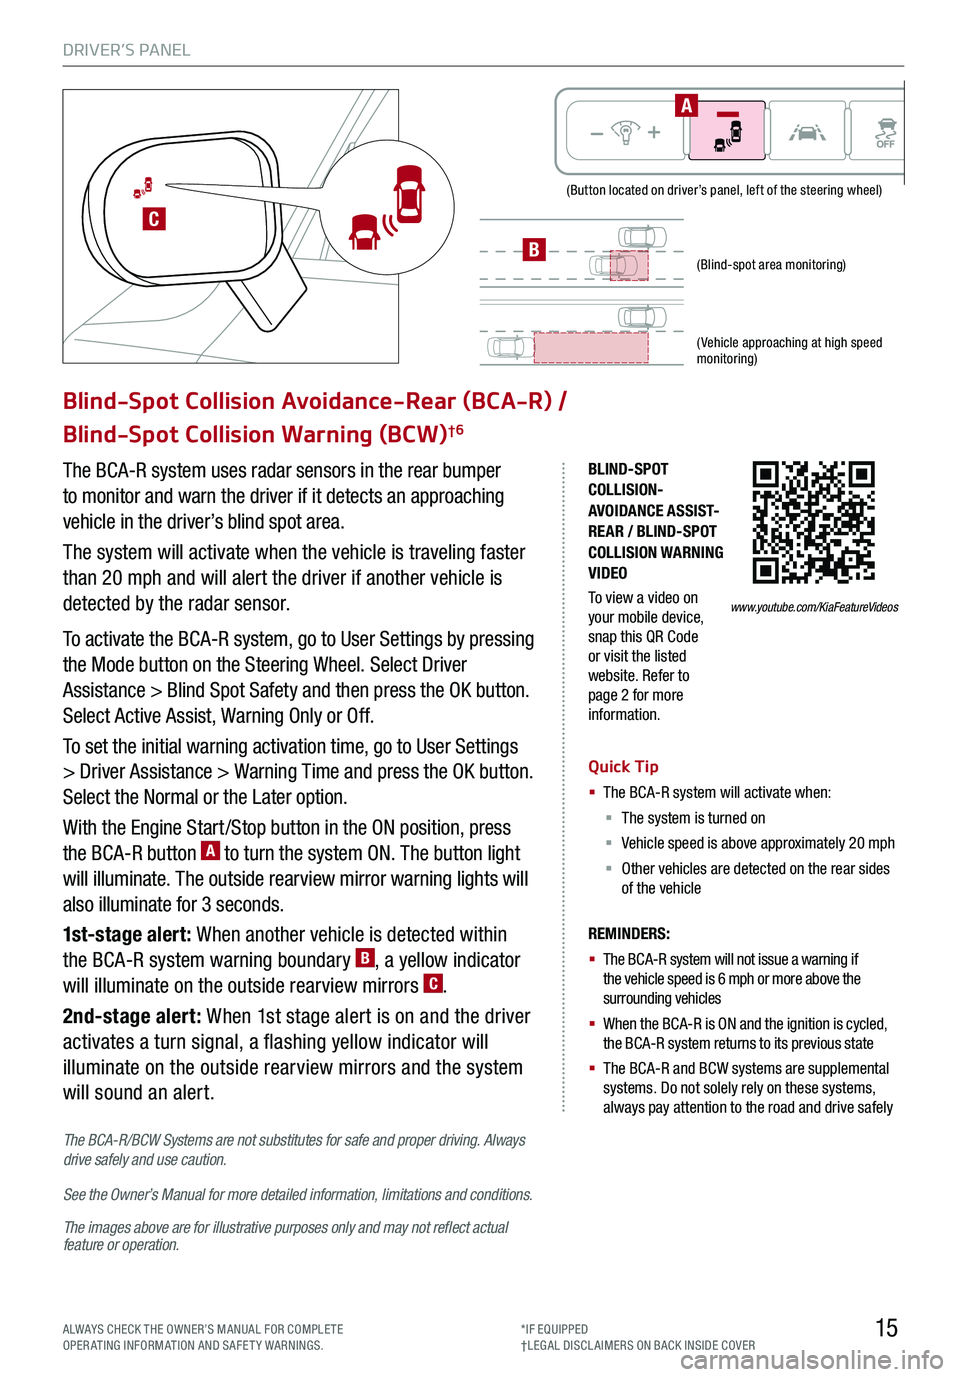
(Button located on driver’s panel, left of the steering wheel)
(Blind-spot area monitoring)
( Vehicle approaching at high speed monitoring)
BLIND-SPOT COLLISION-AVOIDANCE ASSIST-REAR / BLIND-SPOT COLLISION WARNING VIDEO
To view a video on your mobile device, snap this QR Code or visit the listed website. Refer to page 2 for more information.
Blind-Spot Collision Avoidance-Rear (BCA-R) /
Blind-Spot Collision Warning (BCW)†6
The BCA-R system uses radar sensors in the rear bumper
to monitor and warn the driver if it detects an approaching
vehicle in the driver’s blind spot area.
The system will activate when the vehicle is traveling faster
than 20 mph and will alert the driver if another vehicle is
detected by the radar sensor.
To activate the BCA-R system, go to User Settings by pressing
the Mode button on the Steering Wheel. Select Driver
Assistance > Blind Spot Safety and then press the OK button.
Select Active Assist, Warning Only or Off.
To set the initial warning activation time, go to User Settings
> Driver Assistance > Warning Time and press the OK button.
Select the Normal or the Later option.
With the Engine Start /Stop button in the ON position, press
the BCA-R button A to turn the system ON. The button light
will illuminate. The outside rearview mirror warning lights will
also illuminate for 3 seconds.
1st-stage alert: When another vehicle is detected within
the BCA-R system warning boundary B, a yellow indicator
will illuminate on the outside rearview mirrors C.
2nd-stage alert: When 1st stage alert is on and the driver
activates a turn signal, a flashing yellow indicator will
illuminate on the outside rearview mirrors and the system
will sound an alert.
REMINDERS:
§ The BCA-R system will not issue a warning if the vehicle speed is 6 mph or more above the surrounding vehicles
§ When the BCA-R is ON and the ignition is cycled, the BCA-R system returns to its previous state
§
The BCA-R and BCW systems are supplemental systems. Do not solely rely on these systems, always pay attention to the road and drive safely
Quick Tip
§ The BCA-R system will activate when:
§ The system is turned on
§ Vehicle speed is above approximately 20 mph
§ Other vehicles are detected on the rear sides of the vehicle
C
B
www.youtube.com/KiaFeatureVideos
The BCA-R/BCW Systems are not substitutes for safe and proper driving. Always drive safely and use caution.
See the Owner’s Manual for more detailed information, limitations and conditions.
The images above are for illustrative purposes only and may not reflect actual feature or operation.
A
ALWAYS CHECK THE OWNER’S MANUAL FOR COMPLE TE OPERATING INFORMATION AND SAFETY WARNINGS.*IF EQUIPPED†LEG AL DISCL AIMERS ON BACK INSIDE COVER
Page 18 of 66
DRIVER’S PANEL
*IF EQUIPPED16
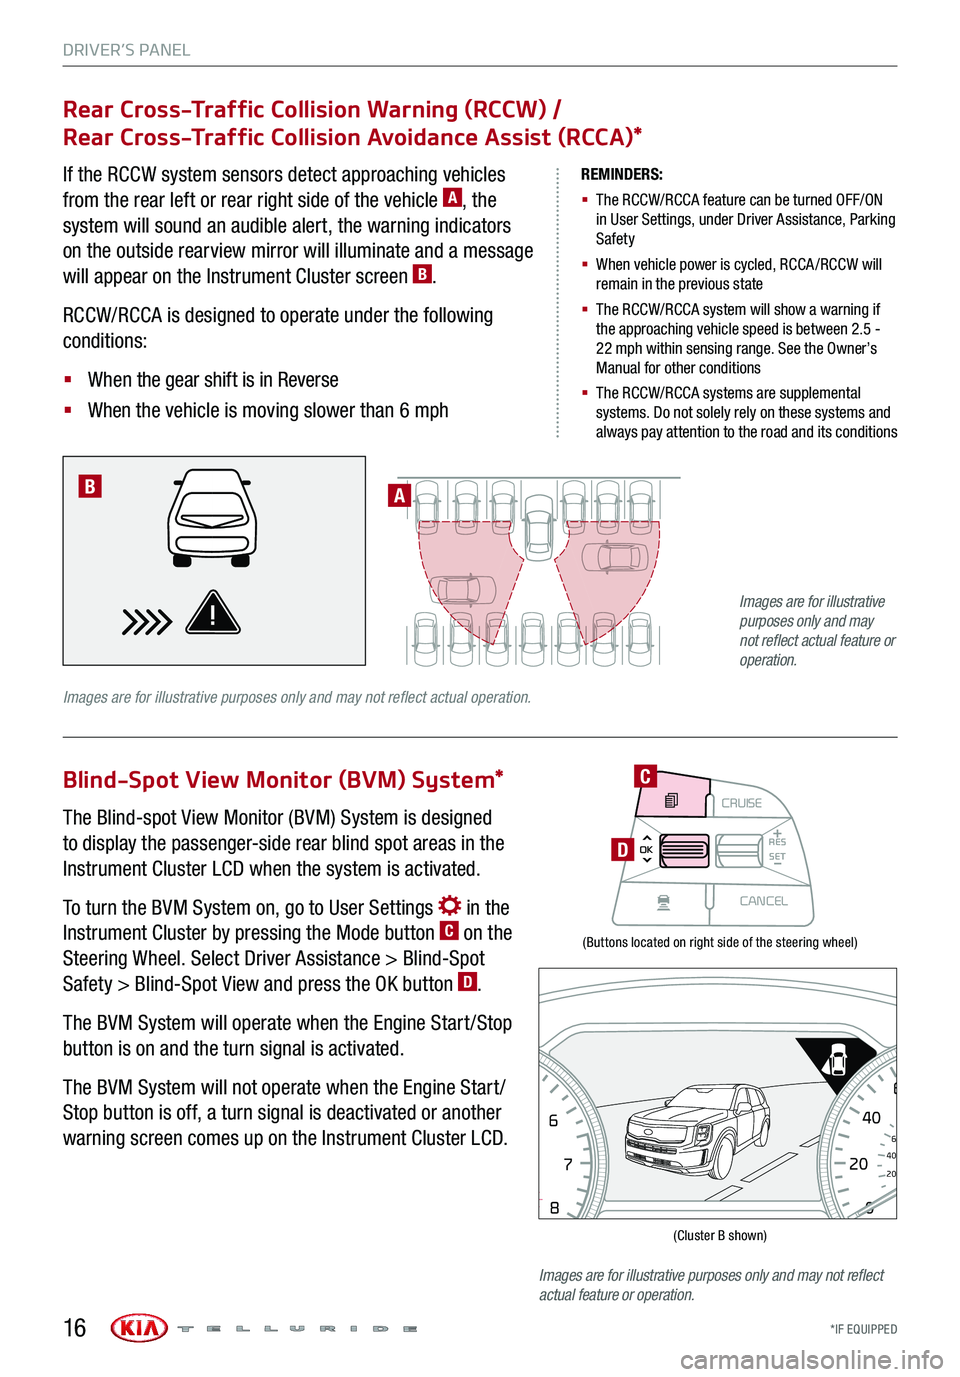
(Buttons located on right side of the steering wheel)
(Cluster B shown)
Rear Cross-Traffic Collision Warning (RCCW) /
Rear Cross-Traffic Collision Avoidance Assist (RCCA)*
Blind-Spot View Monitor (BVM) System*
If the RCCW system sensors detect approaching vehicles
from the rear left or rear right side of the vehicle A, the
system will sound an audible alert, the warning indicators
on the outside rearview mirror will illuminate and a message
will appear on the Instrument Cluster screen B.
RCCW/RCCA is designed to operate under the following
conditions:
§ When the gear shift is in Reverse
§ When the vehicle is moving slower than 6 mph
The Blind-spot View Monitor (BVM) System is designed
to display the passenger-side rear blind spot areas in the
Instrument Cluster LCD when the system is activated.
To turn the BVM System on, go to User Settings in the
Instrument Cluster by pressing the Mode button C on the
Steering Wheel. Select Driver Assistance > Blind-Spot
Safety > Blind-Spot View and press the OK button D.
The BVM System will operate when the Engine Start /Stop
button is on and the turn signal is activated.
The BVM System will not operate when the Engine Start /
Stop button is off, a turn signal is deactivated or another
warning screen comes up on the Instrument Cluster LCD.
REMINDERS:
§ The RCCW/RCCA feature can be turned OFF/ON in User Settings, under Driver Assistance, Parking Safety
§ When vehicle power is cycled, RCCA /RCCW will remain in the previous state
§ The RCCW/RCCA system will show a warning if the approaching vehicle speed is between 2.5 - 22 mph within sensing range. See the Owner’s Manual for other conditions
§ The RCCW/RCCA systems are supplemental systems. Do not solely rely on these systems and always pay attention to the road and its conditions
A
Images are for illustrative purposes only and may not reflect actual operation.
B
MODECRUISE
CANCEL
RES
OK SET
CRUISE
CANCEL
RES
OK SET
MODE CRUISE
CANCEL
RES
OK SET
MODECRUISE
CANCEL
RES
OK SET
MODECRUISE
CANCEL
RES
OK SET
C
D
08
CH
12
3
4
5
6
7
x1000rpmAUTO
HOLD
160
00
20
40
60
200
220
240
260
80
180
100
160
1
20 140
E F
2040
60
80
100
12 0
1 4 0MPH
km/h
Images are for illustrative purposes only and may not reflect actual feature or operation.
Images are for illustrative purposes only and may not reflect actual feature or operation.
Page 21 of 66
DRIVER’S PANEL
19*IF EQUIPPED ALWAYS CHECK THE OWNER’S MANUAL FOR COMPLE TE OPER ATING INFORMATION AND SAFE T Y WARNINGS.
REMINDERS:
§ The Engine Start /Stop button needs to be on
§ The Gear Shift needs to be in (P) Park
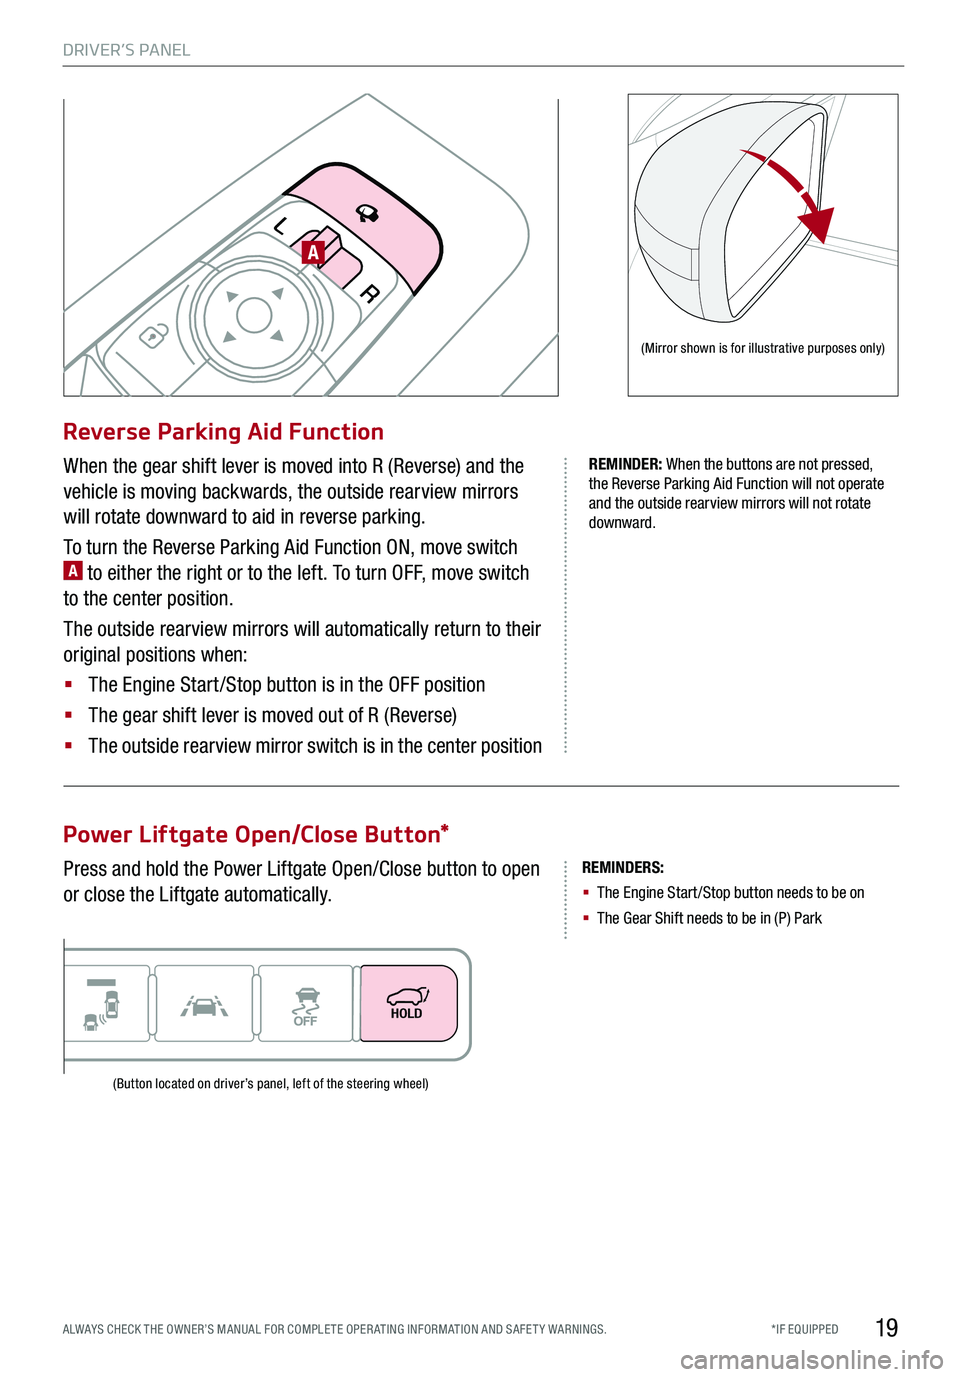
Reverse Parking Aid Function
Power Liftgate Open/Close Button*
When the gear shift lever is moved into R (Reverse) and the
vehicle is moving backwards, the outside rearview mirrors
will rotate downward to aid in reverse parking.
To turn the Reverse Parking Aid Function ON, move switch A to either the right or to the left. To turn OFF, move switch
to the center position.
The outside rearview mirrors will automatically return to their
original positions when:
§ The Engine Start /Stop button is in the OFF position
§ The gear shift lever is moved out of R (Reverse)
§
The outside rearview mirror switch is in the center position
Press and hold the Power Liftgate Open/Close button to open
or close the Liftgate automatically.
R
L
(Mirror shown is for illustrative purposes only)
(Button located on driver’s panel, left of the steering wheel)
REMINDER: When the buttons are not pressed, the Reverse Parking Aid Function will not operate and the outside rearview mirrors will not rotate downward.
A
Page 22 of 66

DRIVER’S PANEL
*IF EQUIPPED20
REMINDER: When you press C, the rear window controls for the Rear Passenger Windows are disabled
Button configuration may vary depending on vehicle model
REMINDER: When activated or button is pressed, the rear passenger windows will not operate from the rear controls.
Quick Tips
§ Pull/Press button A again to stop Auto Up/Down function
§ Auto Door Lock /Unlock* will engage when gear shift is moved into or out of the P (Park) position
§
To turn Auto Door Lock /Unlock* OFF, go to User Settings* in the LCD Instrument Cluster Modes
D Toggle switch D to the L or R to select the left or
right mirrors
E Press button arrows left /right or up/down to adjust
mirror position
F Toggle button left /right to unfold/fold the outside
rearview mirrors
F Toggle button to center to automatically fold/unfold
mirrors when:
§ Smart Key lock /unlock buttons are pressed
§ Outside door handle button is pressed
§ Driver approaches the vehicle with the Smart Key (if
activated in User Settings)
Press C to lock the rear passenger doors. An indicator will
illuminate G showing the system is active.
This system is on by default, and then activated once the
button C is pressed. To deactivate, press the button again.
Quick Tip
The mirrors will automatically unfold when the Smart Key* is within close proximity to the vehicle (if activated in User Settings).
REMINDERS:
§ When the mirror toggle button is in the center, press the lock button twice on the Smart Key to automatically fold mirrors when exiting vehicle
§ To lock the mirror position, toggle button to the neutral (center) position
A Pull/Press to operate driver and front passenger’s
window auto up/down
B Press to unlock /lock all doors
C Press to disable the rear passenger window controls
Power Windows, Window Lock & Central Door Lock
Power Folding Outside Mirrors*
Electronic Child Safety Lock System
R
L
A
CB
BG
DEF
Page 23 of 66
DRIVER’S PANEL
21
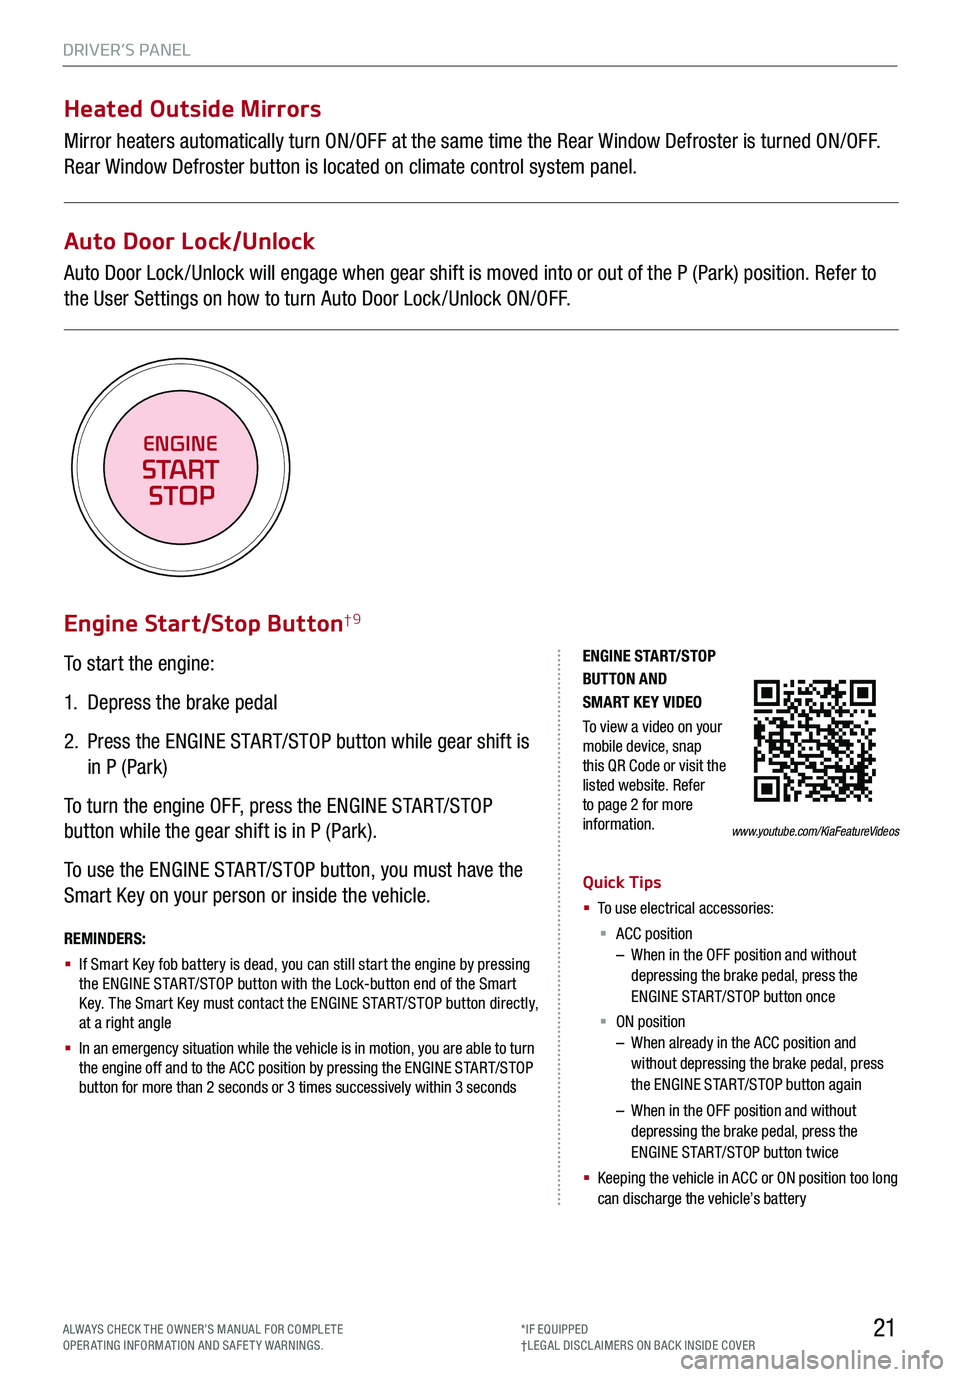
To start the engine:
1. Depress the brake pedal
2.
Press the ENGINE START/STOP button while gear shift is
in P (Park)
To turn the engine OFF, press the ENGINE START/STOP
button while the gear shift is in P (Park).
To use the ENGINE START/STOP button, you must have the
Smart Key on your person or inside the vehicle.
Engine Start/Stop Button†9
ENGINE STA RT/STOP BUTTON AND SMART KEY VIDEO
To view a video on your mobile device, snap this QR Code or visit the listed website. Refer to page 2 for more information.
REMINDERS:
§ If Smart Key fob battery is dead, you can still start the engine by pressing the ENGINE START/STOP button with the Lock-button end of the Smart Key. The Smart Key must contact the ENGINE START/STOP button directly, at a right angle
§ In an emergency situation while the vehicle is in motion, you are able to turn the engine off and to the ACC position by pressing the ENGINE START/STOP button for more than 2 seconds or 3 times successively within 3 seconds
Quick Tips
§ To use electrical accessories:
§ ACC position – When in the OFF position and without depressing the brake pedal, press the ENGINE START/STOP button once
§ ON position – When already in the ACC position and without depressing the brake pedal, press the ENGINE START/STOP button again
– When in the OFF position and without depressing the brake pedal, press the ENGINE START/STOP button twice
§ Keeping the vehicle in ACC or ON position too long can discharge the vehicle’s battery
www.youtube.com/KiaFeatureVideos
ENGINE
START
STOP
Heated Outside Mirrors
Mirror heaters automatically turn ON/OFF at the same time the Rear Window Defroster is turned ON/OFF.
Rear Window Defroster button is located on climate control system panel.
Auto Door Lock/Unlock
Auto Door Lock /Unlock will engage when gear shift is moved into or out of the P (Park) position. Refer to
the User Settings on how to turn Auto Door Lock /Unlock ON/OFF.
ALWAYS CHECK THE OWNER’S MANUAL FOR COMPLE TE OPERATING INFORMATION AND SAFETY WARNINGS.*IF EQUIPPED†LEG AL DISCL AIMERS ON BACK INSIDE COVER
Page 47 of 66
45
S E AT I N G
ALWAYS CHECK THE OWNER’S MANUAL FOR COMPLE TE OPERATING INFORMATION AND SAFETY WARNINGS.*IF EQUIPPED†LEG AL DISCL AIMERS ON BACK INSIDE COVER
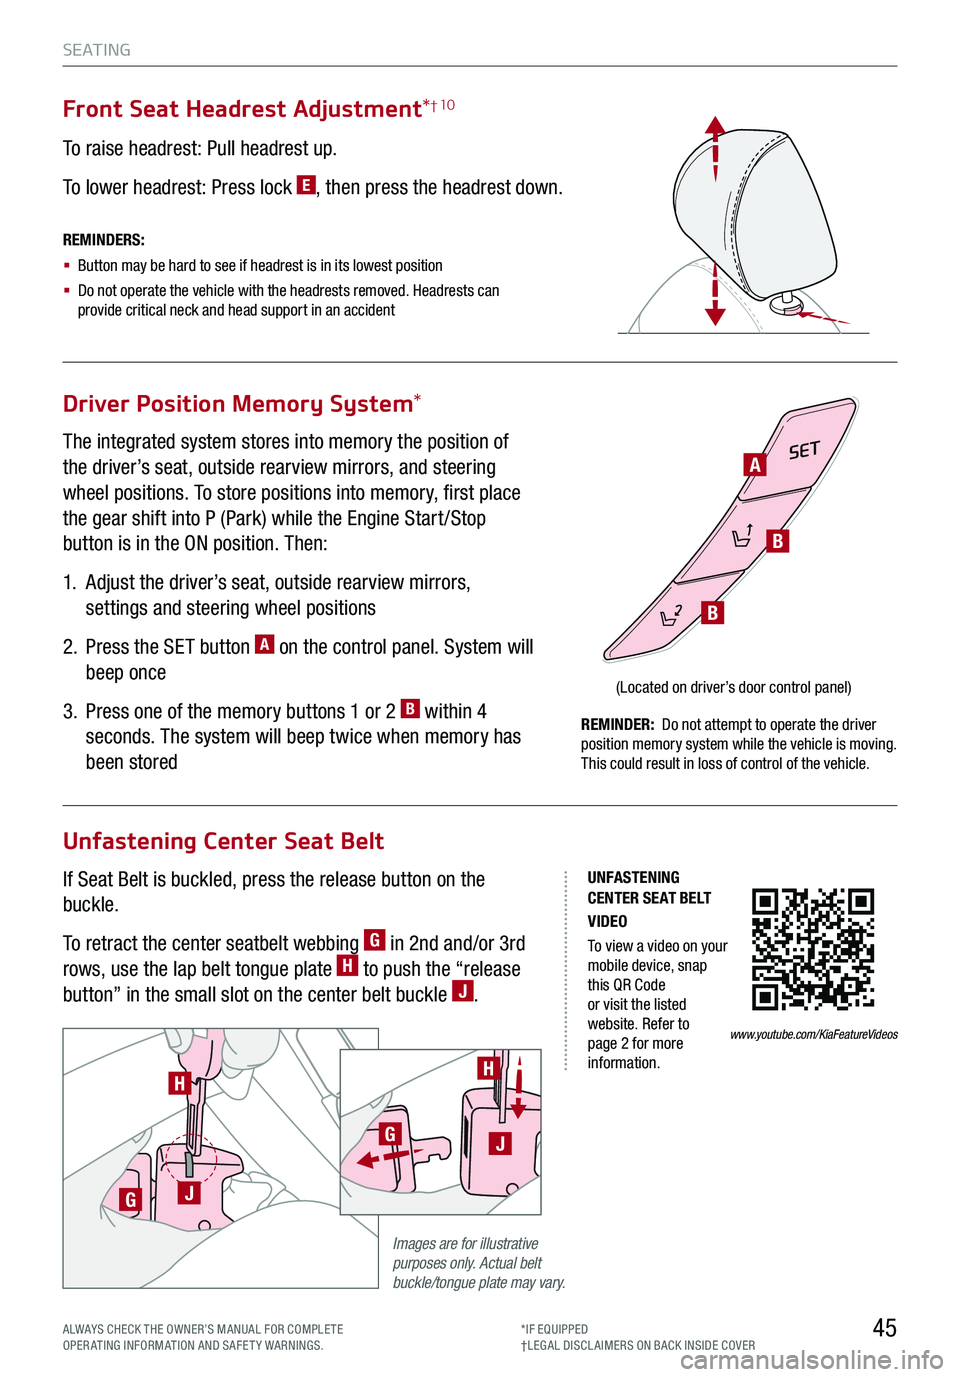
Driver Position Memory System*
Unfastening Center Seat Belt
The integrated system stores into memory the position of
the driver’s seat, outside rearview mirrors, and steering
wheel positions. To store positions into memory, first place
the gear shift into P (Park) while the Engine Start /Stop
button is in the ON position. Then:
1.
Adjust the driver’s seat, outside rearview mirrors,
settings and steering wheel positions
2.
Press the SET button A on the control panel. System will
beep once
3.
Press one of the memory buttons 1 or 2 B within 4
seconds. The system will beep twice when memory has
been stored
If Seat Belt is buckled, press the release button on the
buckle.
To retract the center seatbelt webbing G in 2nd and/or 3rd
rows, use the lap belt tongue plate H to push the “release
button” in the small slot on the center belt buckle J.
Front Seat Headrest Adjustment*† 10
To raise headrest: Pull headrest up.
To lower headrest: Press lock E, then press the headrest down.
SET
(Located on driver’s door control panel)
REMINDERS:
§ Button may be hard to see if headrest is in its lowest position
§
Do not operate the vehicle with the headrests removed. Headrests can provide critical neck and head support in an accident
REMINDER: Do not attempt to operate the driver position memory system while the vehicle is moving. This could result in loss of control of the vehicle.
Images are for illustrative purposes only. Actual belt buckle/tongue plate may vary.
H
GJ
H
GJ
A
B
B
UNFASTENING CENTER SEAT BELT VIDEO
To view a video on your mobile device, snap this QR Code or visit the listed website. Refer to page 2 for more information.
www.youtube.com/KiaFeatureVideos
Page 56 of 66

OTHER KEY FEATURES
54
ABCDEFG
Auto-Dimming Rearview Mirror
Designed to help reduce glare from a vehicle’s headlights
located in the rear and also to connect up to three electronic
transmitters in one location.
REMINDER: Mirror indicator light will illuminate when automatic dimming is ON.
HomeLink® Setup - How to Sync Transmitter
If programming for the first time, begin with Step 1 (repeating this step will delete all information).
To program non-rolling and rolling code garage door openers and other devices:
1. Press and hold the left A and center D buttons simultaneously until the indicator light C begins
to flash (to reprogram buttons, skip this step)
2. Press and hold the desired button A, B or D and hold the button on the transmitter while it is
approximately 1 to 3 inches away from the mirror. The HomeLink® Indicator light C will flash
rapidly once the frequency signal has been successfully programmed
To finish programming rolling code garage door
openers, complete these steps:
3. Locate the “learn” or “smart” button on the garage door’s
motor head unit. Press and release the button and complete
Step 4 within 30 seconds
4. Firmly press and release the programmed HomeLink®
button up to three times
Operating HomeLink®:
Press one of the programmed HomeLink® buttons.
Erasing programmed buttons:
Press and hold the left A and center D buttons
simultaneously for approximately 20 seconds, and
then release both buttons within 30 seconds.
HomeLink® with Auto-Dimming Rearview Mirror† 13
A HomeLink® button B HomeLink® button C Indicator lightD HomeLink® button
E Glare detection sensorF Automatic dimming ONG Automatic dimming OFF
If your garage door opener was manufactured in 2011 or later, and you’re unable to program your vehicle’s HomeLink® system, you may need to purchase a HomeLink Repeater Kit. For more information, go to www.HomeLink.com or call (800) 355-3515.
Quick Tips
§ You can reprogram a single HomeLink® button by repeating Step 2
§ Erasing programmed buttons will delete all trained transmitters
HOMELINK REARVIEW MIRROR SETUP VIDEO
To view a video on your mobile device, snap this QR Code or visit the listed website. Refer to page 2 for more information.www.youtube.com/KiaFeatureVideos
*IF EQUIPPED†LEG AL DISCL AIMERS ON BACK INSIDE COVER
Page 64 of 66
Sales Consultant:
Sales Manager:
Customer:
Date:
Date:
Date:
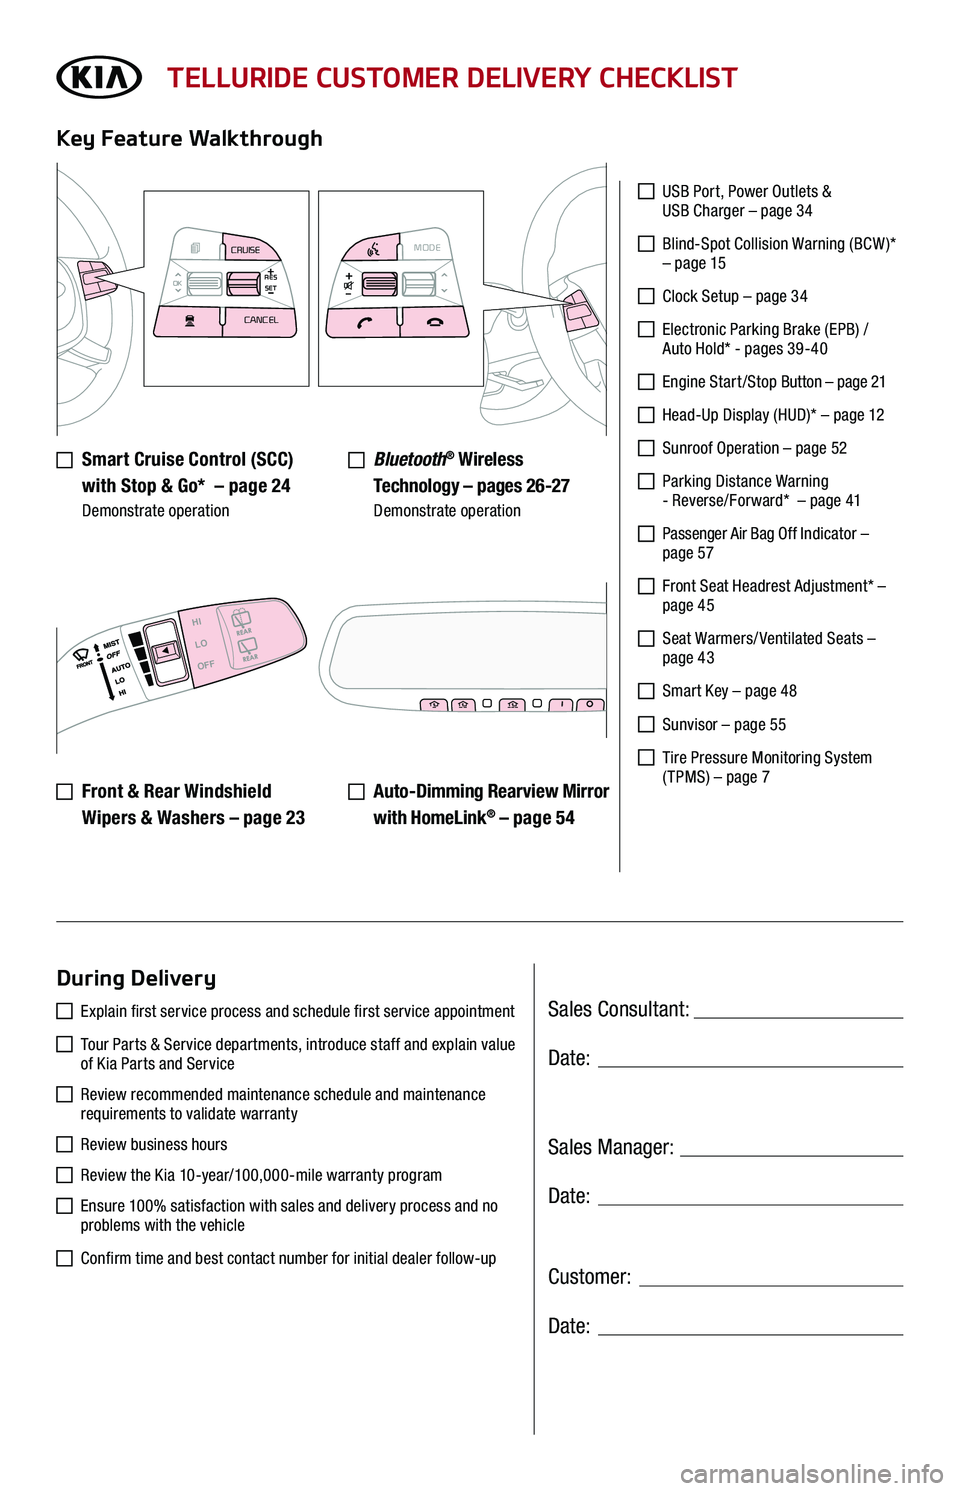
TELLURIDE CUSTOMER DELIVERY CHECKLIST
Smart Cruise Control (SCC)
with Stop & Go* – page 24 Demonstrate operation
Key Feature Walkthrough
During Delivery
USB Port, Power Outlets & USB Charger – page 34
Blind-Spot Collision Warning (BCW )* – page 15
Clock Setup – page 34
Electronic Parking Brake (EPB) / Auto Hold* - pages 39-40
Engine S tar t / S top Button – page 21
Head-Up Display (HUD)* – page 12
Sunroof Operation – page 52
Parking Distance Warning - Reverse/Forward* – page 41
Passenger Air Bag Off Indicator – page 57
Front Seat Headrest Adjustment* – page 45
Seat Warmers/ Ventilated Seats – page 43
Smart Key – page 48
Sunvisor – page 55
Tire Pressure Monitoring System ( TPMS) – page 7
Explain first service process and schedule first service appointment
Tour Parts & Service departments, introduce staff and explain value of Kia Parts and Service
Review recommended maintenance schedule and maintenance requirements to validate warranty
Review business hours
Review the Kia 10-year/100,000-mile warranty program
Ensure 100% satisfaction with sales and delivery process and no problems with the vehicle
Confirm time and best contact number for initial dealer follow-up
Bluetooth® Wireless
Technology – pages 26-27 Demonstrate operation
Auto-Dimming Rearview Mirror
with HomeLink® – page 5 4
Front & Rear Windshield
Wipers & Washers – page 23
MODE
CRUISE
CANCEL
RES
OK SET
CRUISE
CANCEL
RES
OK SET
MODECRUISE
CANCEL
RES
OK SET
MODECRUISE
CANCEL
RES
OK SET
MODECRUISE
CANCEL
RES
OK SET
MODECRUISE
CANCEL
RES
OK SET
CRUISE
CANCEL
RES
OK SET
MODE CRUISE
CANCEL
RES
OK SET
MODECRUISE
CANCEL
RES
OK SET
MODECRUISE
CANCEL
RES
OK SET
HI
LO
OFF