KIA VENGA 2011 Owners Manual
Manufacturer: KIA, Model Year: 2011, Model line: VENGA, Model: KIA VENGA 2011Pages: 761, PDF Size: 34.65 MB
Page 141 of 761
465
Features of your vehicle
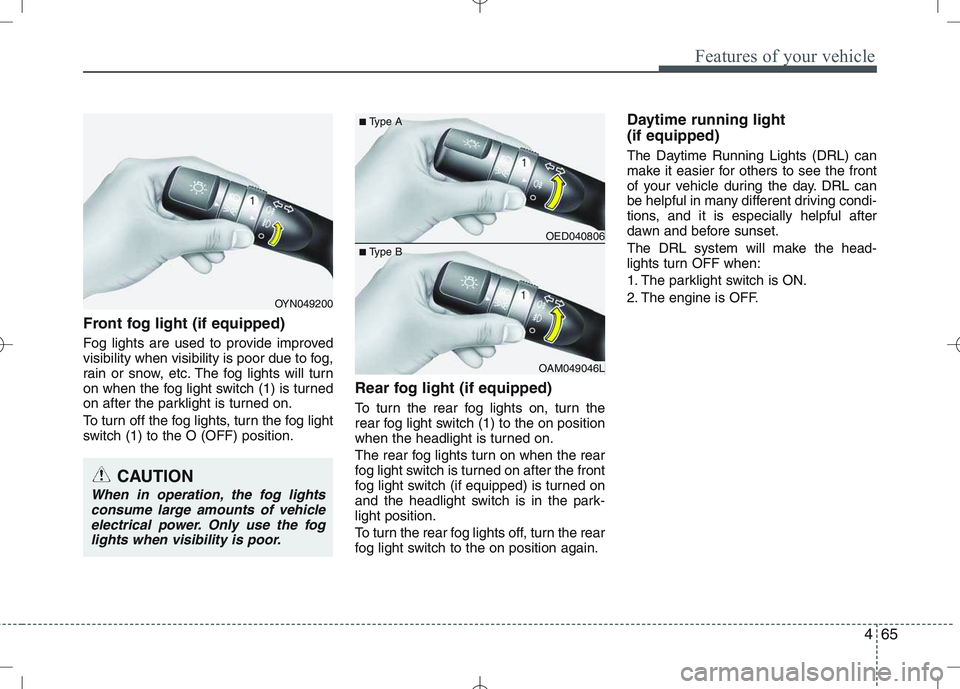
Front fog light (if equipped)
Fog lights are used to provide improved
visibility when visibility is poor due to fog,
rain or snow, etc. The fog lights will turn
on when the fog light switch (1) is turned
on after the parklight is turned on.
To turn off the fog lights, turn the fog light
switch (1) to the O (OFF) position.Rear fog light (if equipped)
To turn the rear fog lights on, turn the
rear fog light switch (1) to the on position
when the headlight is turned on.
The rear fog lights turn on when the rear
fog light switch is turned on after the front
fog light switch (if equipped) is turned on
and the headlight switch is in the park-light position.
To turn the rear fog lights off, turn the rear
fog light switch to the on position again.Daytime running light (if equipped)
The Daytime Running Lights (DRL) can
make it easier for others to see the front
of your vehicle during the day. DRL can
be helpful in many different driving condi-
tions, and it is especially helpful after
dawn and before sunset.
The DRL system will make the head-
lights turn OFF when:
1. The parklight switch is ON.
2. The engine is OFF.
OED040806
OAM049046L
■
Type A
■ Type B
OYN049200
CAUTION
When in operation, the fog lights
consume large amounts of vehicleelectrical power. Only use the fog
lights when visibility is poor.
Page 142 of 761
Features of your vehicle
66
4
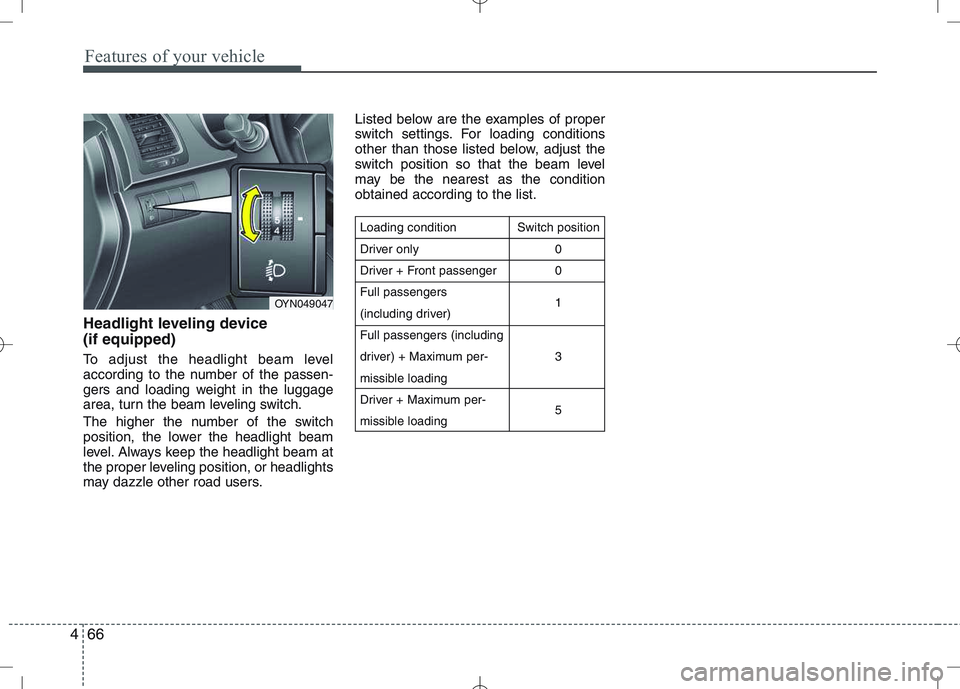
Headlight leveling device (if equipped)
To adjust the headlight beam level
according to the number of the passen-
gers and loading weight in the luggage
area, turn the beam leveling switch.
The higher the number of the switch
position, the lower the headlight beam
level. Always keep the headlight beam at
the proper leveling position, or headlights
may dazzle other road users. Listed below are the examples of proper
switch settings. For loading conditions
other than those listed below, adjust the
switch position so that the beam level
may be the nearest as the conditionobtained according to the list.
Loading condition
Driver only
Driver + Front passengerFull passengers
(including driver)Full passengers (including
driver) + Maximum per-
missible loading
Driver + Maximum per-
missible loading
Switch position
00 1 3 5
OYN049047
Page 143 of 761
467
Features of your vehicle
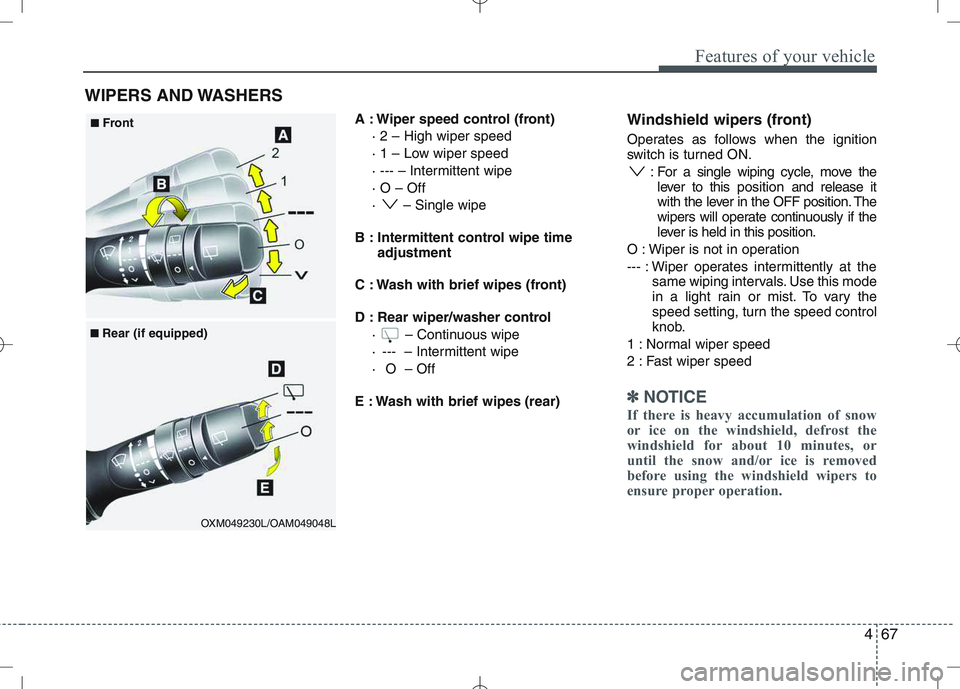
A : Wiper speed control (front)· 2 – High wiper speed
· 1 – Low wiper speed
· --- – Intermittent wipe · O – Off
· – Single wipe
B : Intermittent control wipe time adjustment
C : Wash with brief wipes (front)
D : Rear wiper/washer control · – Continuous wipe
· --- – Intermittent wipe
· O – Off
E : Wash with brief wipes (rear) Windshield wipers (front)
Operates as follows when the ignition
switch is turned ON.
: For a single wiping cycle, move thelever to this position and release it
with the lever in the OFF position. The
wipers will operate continuously if the
lever is held in this position.
O : Wiper is not in operation
--- : Wiper operates intermittently at the same wiping intervals. Use this mode
in a light rain or mist. To vary the
speed setting, turn the speed control
knob.
1 : Normal wiper speed
2 : Fast wiper speed
✽✽ NOTICE
If there is heavy accumulation of snow
or ice on the windshield, defrost the
windshield for about 10 minutes, or
until the snow and/or ice is removed
before using the windshield wipers to
ensure proper operation.
WIPERS AND WASHERS
OXM049230L/OAM049048L
■
■
Front
■
■ Rear (if equipped)
Page 144 of 761
Features of your vehicle
68
4
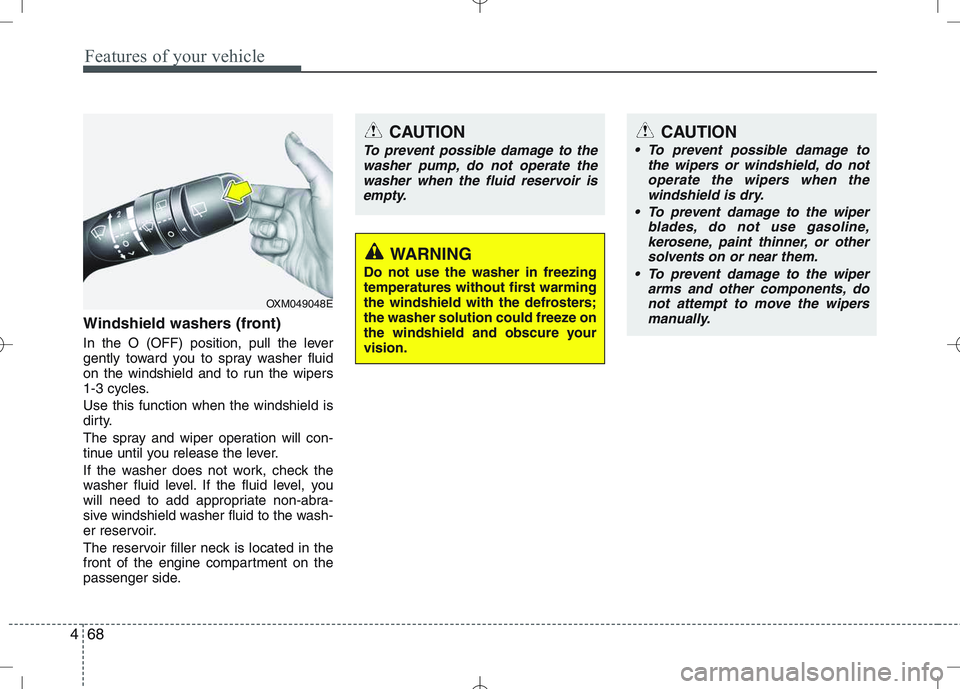
Windshield washers (front)
In the O (OFF) position, pull the lever
gently toward you to spray washer fluid
on the windshield and to run the wipers
1-3 cycles. Use this function when the windshield is
dirty.
The spray and wiper operation will con-
tinue until you release the lever.
If the washer does not work, check the
washer fluid level. If the fluid level, you
will need to add appropriate non-abra-
sive windshield washer fluid to the wash-
er reservoir.
The reservoir filler neck is located in the
front of the engine compartment on the
passenger side.
OXM049048E
WARNING
Do not use the washer in freezing
temperatures without first warming
the windshield with the defrosters;
the washer solution could freeze on
the windshield and obscure yourvision.
CAUTION
To prevent possible damage to the wipers or windshield, do notoperate the wipers when the
windshield is dry.
To prevent damage to the wiper blades, do not use gasoline,
kerosene, paint thinner, or othersolvents on or near them.
To prevent damage to the wiper arms and other components, do
not attempt to move the wipersmanually.
CAUTION
To prevent possible damage to the
washer pump, do not operate the
washer when the fluid reservoir isempty.
Page 145 of 761
469
Features of your vehicle
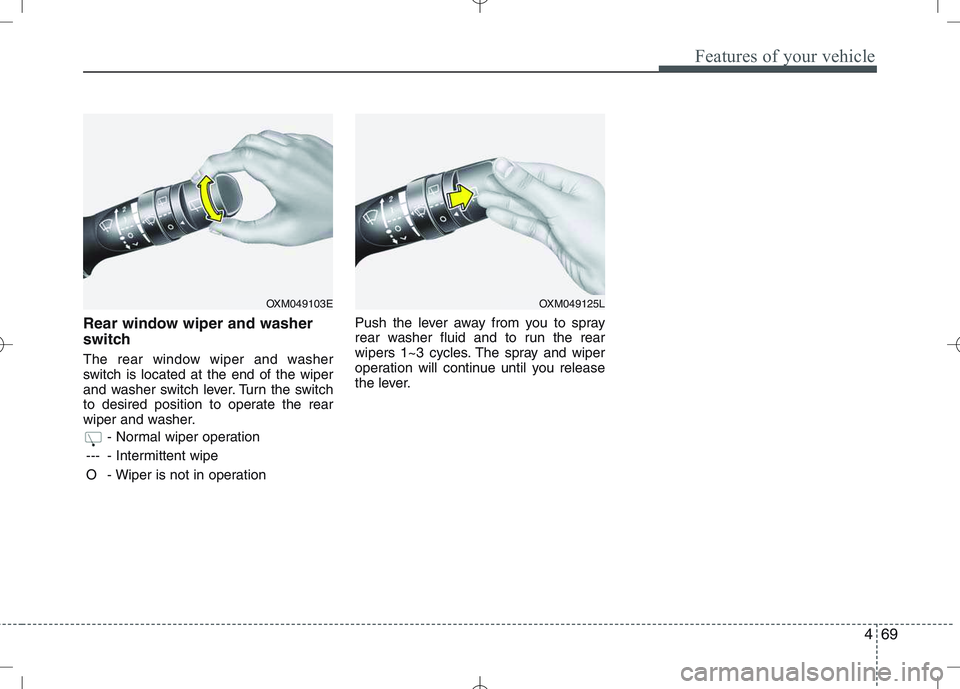
Rear window wiper and washer
switch
The rear window wiper and washer
switch is located at the end of the wiper
and washer switch lever. Turn the switch
to desired position to operate the rear
wiper and washer.- Normal wiper operation
--- - Intermittent wipe
O - Wiper is not in operation Push the lever away from you to spray
rear washer fluid and to run the rear
wipers 1~3 cycles. The spray and wiper
operation will continue until you release
the lever.
OXM049103EOXM049125L
Page 146 of 761
Features of your vehicle
70
4
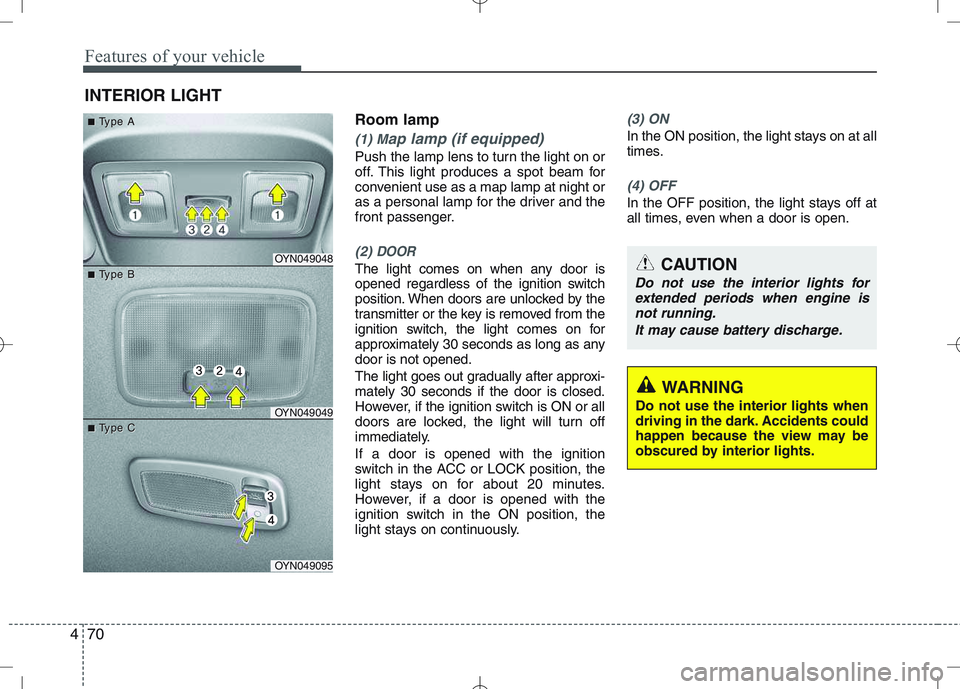
Room lamp
(1) Map lamp (if equipped)
Push the lamp lens to turn the light on or
off. This light produces a spot beam for
convenient use as a map lamp at night or
as a personal lamp for the driver and the
front passenger.
(2) DOOR
The light comes on when any door is
opened regardless of the ignition switch
position. When doors are unlocked by the
transmitter or the key is removed from the
ignition switch, the light comes on for
approximately 30 seconds as long as anydoor is not opened.
The light goes out gradually after approxi- mately 30 seconds if the door is closed.
However, if the ignition switch is ON or all
doors are locked, the light will turn off
immediately. If a door is opened with the ignition
switch in the ACC or LOCK position, the
light stays on for about 20 minutes.
However, if a door is opened with the
ignition switch in the ON position, the
light stays on continuously.
(3) ON
In the ON position, the light stays on at all
times.
(4) OFF
In the OFF position, the light stays off at
all times, even when a door is open.
INTERIOR LIGHT
CAUTION
Do not use the interior lights for
extended periods when engine isnot running.
It may cause battery discharge.
OYN049048
OYN049049
OYN049095
■■TType Aype A
■■TType Bype B
■■TType Cype C
WARNING
Do not use the interior lights when
driving in the dark. Accidents could
happen because the view may be
obscured by interior lights.
Page 147 of 761
471
Features of your vehicle
✽✽NOTICE
If you want to defrost and defog the
front windshield, refer to “Windshield
defrosting and defogging” in this sec-
tion.
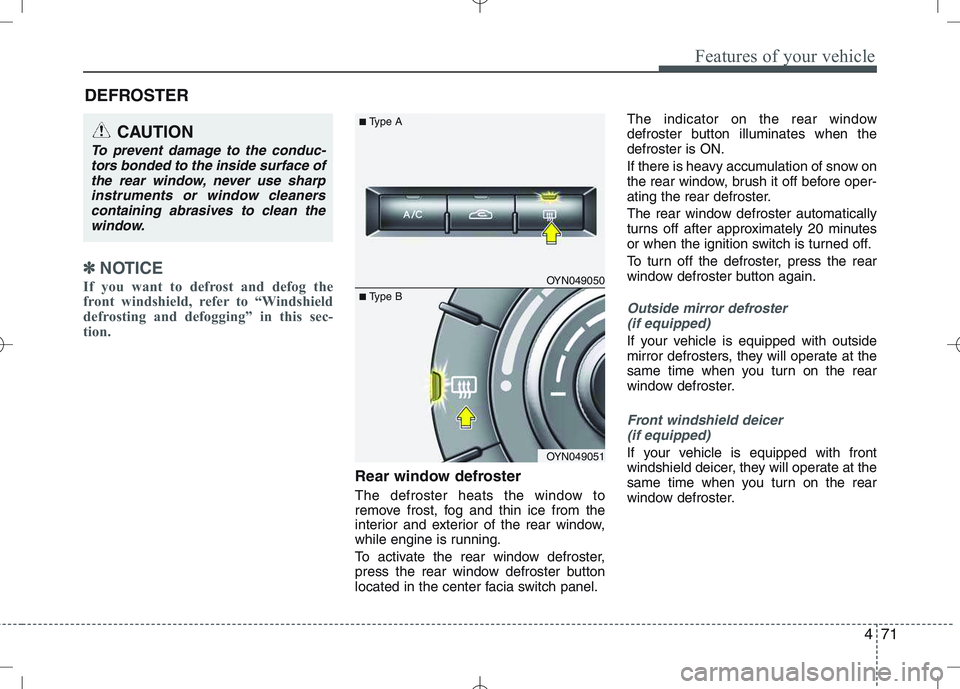
Rear window defroster
The defroster heats the window to
remove frost, fog and thin ice from the
interior and exterior of the rear window,
while engine is running.
To activate the rear window defroster,
press the rear window defroster button
located in the center facia switch panel. The indicator on the rear window
defroster button illuminates when thedefroster is ON.
If there is heavy accumulation of snow on
the rear window, brush it off before oper-
ating the rear defroster.
The rear window defroster automatically
turns off after approximately 20 minutes
or when the ignition switch is turned off.
To turn off the defroster, press the rear
window defroster button again.
Outside mirror defroster
(if equipped)
If your vehicle is equipped with outside
mirror defrosters, they will operate at the
same time when you turn on the rear
window defroster.
Front windshield deicer (if equipped)
If your vehicle is equipped with front
windshield deicer, they will operate at the
same time when you turn on the rear
window defroster.
DEFROSTER
CAUTION
To prevent damage to the conduc-
tors bonded to the inside surface of
the rear window, never use sharpinstruments or window cleanerscontaining abrasives to clean the window.
OYN049050
OYN049051
■ Type A
■Type B
Page 148 of 761
Features of your vehicle
72
4
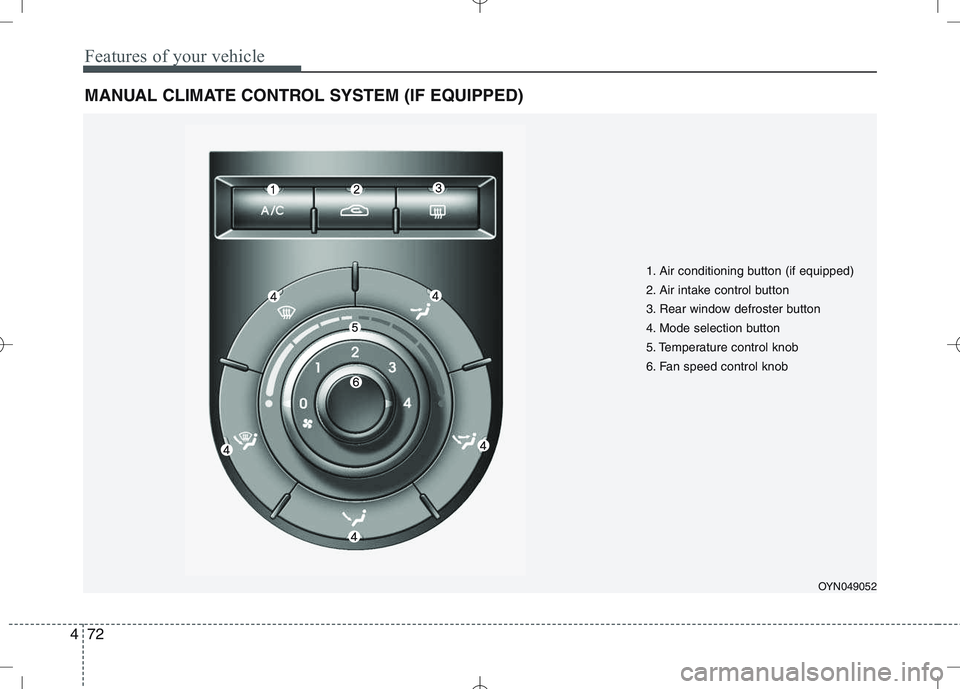
MANUAL CLIMATE CONTROL SYSTEM (IF EQUIPPED)
OYN049052
1. Air conditioning button (if equipped)
2. Air intake control button
3. Rear window defroster button
4. Mode selection button
5. Temperature control knob
6. Fan speed control knob
Page 149 of 761
473
Features of your vehicle
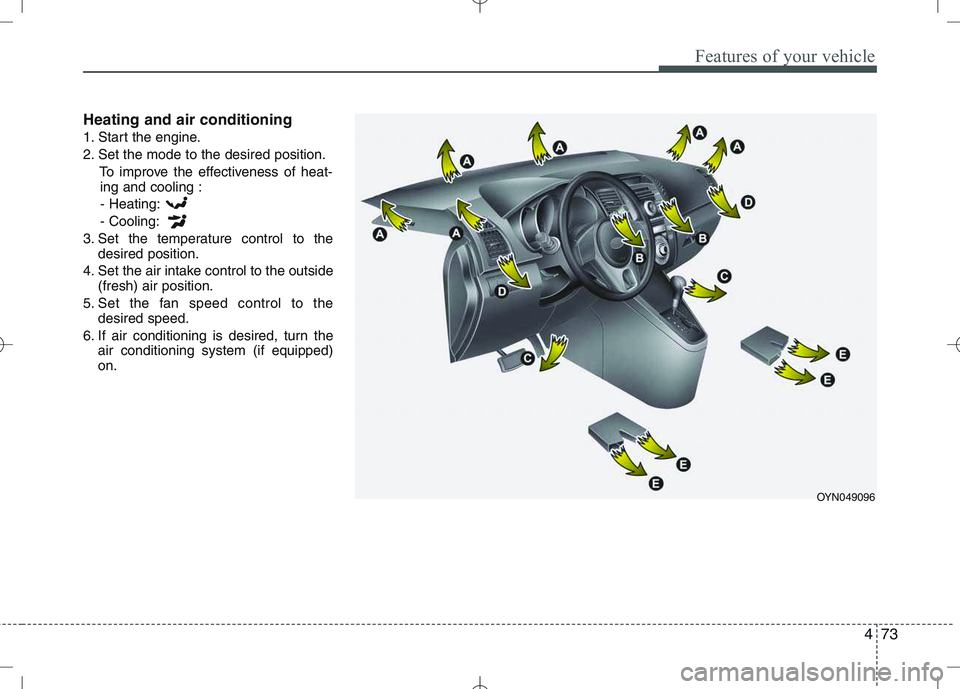
Heating and air conditioning
1. Start the engine.
2. Set the mode to the desired position.To improve the effectiveness of heat-ing and cooling :
- Heating:- Cooling:
3. Set the temperature control to the desired position.
4. Set the air intake control to the outside (fresh) air position.
5. Set the fan speed control to the desired speed.
6. If air conditioning is desired, turn the air conditioning system (if equipped) on.
OYN049096
Page 150 of 761
Features of your vehicle
74
4
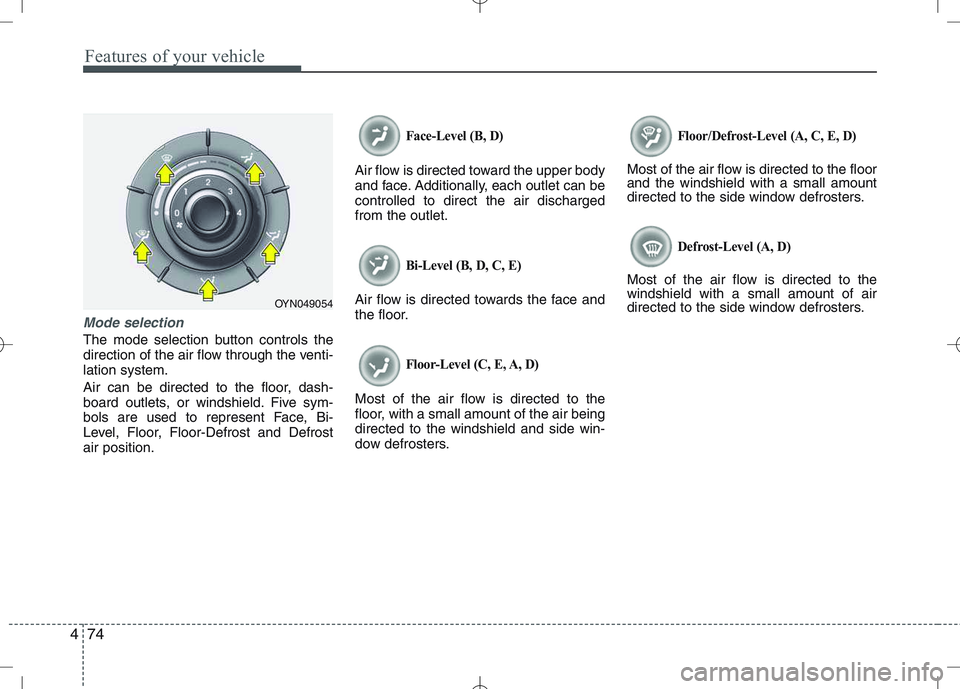
Mode selection
The mode selection button controls the
direction of the air flow through the venti-lation system.
Air can be directed to the floor, dash-
board outlets, or windshield. Five sym-
bols are used to represent Face, Bi-
Level, Floor, Floor-Defrost and Defrostair position.
Face-Level (B, D)
Air flow is directed toward the upper body
and face. Additionally, each outlet can becontrolled to direct the air dischargedfrom the outlet.
Bi-Level (B, D, C, E)
Air flow is directed towards the face and
the floor.
Floor-Level (C, E, A, D)
Most of the air flow is directed to the
floor, with a small amount of the air beingdirected to the windshield and side win-
dow defrosters.
Floor/Defrost-Level (A, C, E, D)
Most of the air flow is directed to the floor and the windshield with a small amount
directed to the side window defrosters.
Defrost-Level (A, D)
Most of the air flow is directed to thewindshield with a small amount of air
directed to the side window defrosters.
OYN049054