KIA VENGA 2011 Owners Manual
Manufacturer: KIA, Model Year: 2011, Model line: VENGA, Model: KIA VENGA 2011Pages: 761, PDF Size: 34.65 MB
Page 111 of 761

435
Features of your vehicle
Inside rearview mirror
Adjust the rearview mirror so that the
center view through the rear window is
seen. Make this adjustment before you
start driving.
Day/night rearview mirror (if equipped)
Make this adjustment before you start
driving and while the day/night lever is in
the day position.
Pull the day/night lever toward you to reduce glare from the headlights of the
vehicles behind you during night driving.
Remember that you lose some rearviewclarity in the night position.
Electrochromic mirror (ECM)
(if equipped)
The electric rearview mirror automatical- ly controls the glare from the headlights
of the car behind you in nighttime or low
light driving conditions. The sensormounted in the mirror senses the light
level around the vehicle, and automati-cally controls the headlight glare from
vehicles behind you.
When the engine is running, the glare is
automatically controlled by the sensor
mounted in the rearview mirror.
Whenever the shift lever is shifted into
reverse (R), the mirror will automatically
go to the brightest setting in order to
improve the drivers view behind the vehi-
cle.
MIRRORS
OAM049023
CAUTION
When cleaning the mirror, use a
paper towel or similar material dampened with glass cleaner. Donot spray glass cleaner directly on
the mirror as that may cause the liq-uid cleaner to enter the mirror hous-ing.
Day
Night
WARNING - Rear visibility
Do not place objects in the rear
seat or cargo area which would
interfere with your vision out the
rear window.
WARNING
Do not adjust the rearview mirror
while the vehicle is moving. This
could result in loss of control, and
an accident which could cause
death, serious injury or property
damage.
WARNING
Do not modify the inside mirror and
do not install a wide mirror. It could
result in injury, during an accident
or deployment of the air bag.
Page 112 of 761

Features of your vehicle
36
4
To operate the electric rearview mirror:
The mirror defaults to the ON position
whenever the ignition switch is turned on. Press the ON/OFF button (1) to turn
the automatic dimming function off.
The mirror indicator light will turn off.
Press the ON/OFF button (1) to turn the automatic dimming function on.
The mirror indicator light will illuminate. Outside rearview mirror Be sure to adjust the mirror angles
before driving.
Your vehicle is equipped with both left-
hand and right-hand outside rearview
mirrors. The mirrors can be adjusted
remotely with the remote switch (if
equipped). The mirror heads can be fold-
ed back to prevent damage during an
automatic car wash or when passing
through a narrow street.
WARNING -
Rearview mir-
rors
The right outside rearview mirror is convex. In some countries, the
left outside rearview mirror is
also convex. Objects seen in the
mirror are closer than they
appear.
Use your interior rearview mirror or direct observation to deter-
mine the actual distance of fol-
lowing vehicles when changinglanes.
OYN049030
OYN049031
■Type A
■ Type B
IndicatorSensor
Indicator
SensorRearview display
Page 113 of 761
437
Features of your vehicle
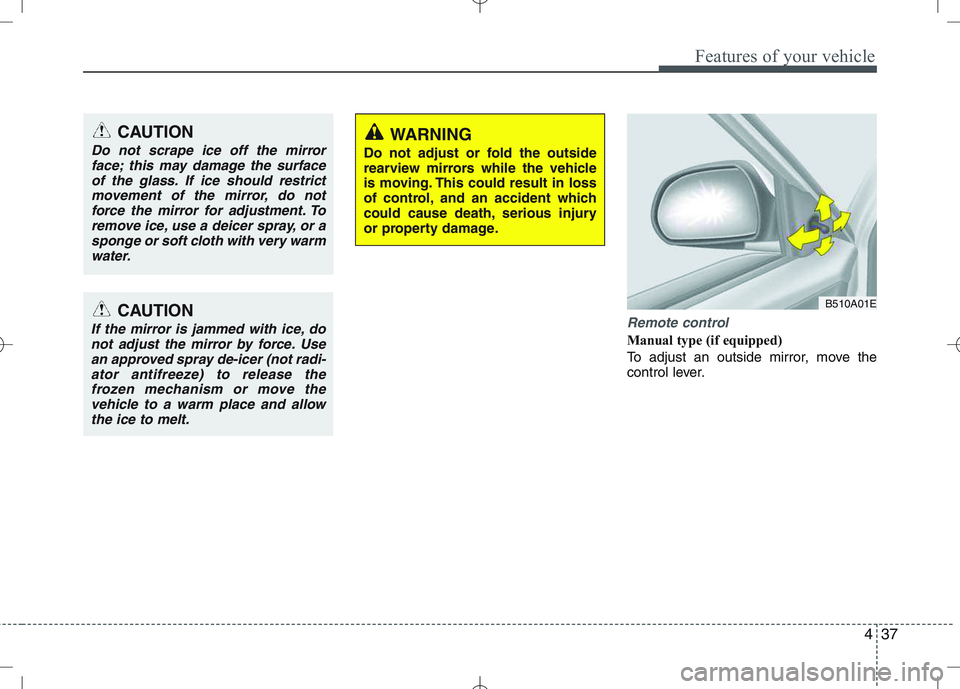
Remote control
Manual type (if equipped)
To adjust an outside mirror, move the
control lever.
CAUTION
Do not scrape ice off the mirrorface; this may damage the surface
of the glass. If ice should restrictmovement of the mirror, do notforce the mirror for adjustment. To remove ice, use a deicer spray, or a
sponge or soft cloth with very warmwater.
CAUTION
If the mirror is jammed with ice, donot adjust the mirror by force. Use
an approved spray de-icer (not radi-ator antifreeze) to release thefrozen mechanism or move thevehicle to a warm place and allow
the ice to melt.
WARNING
Do not adjust or fold the outside
rearview mirrors while the vehicle
is moving. This could result in loss
of control, and an accident which
could cause death, serious injury
or property damage.
B510A01E
Page 114 of 761
Features of your vehicle
38
4
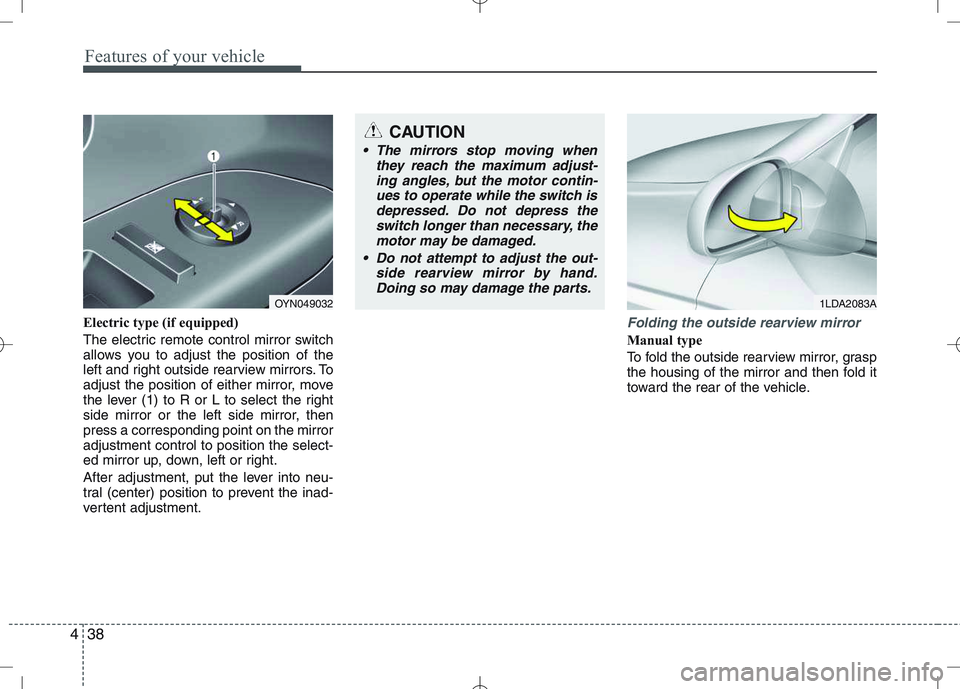
Electric type (if equipped)
The electric remote control mirror switch
allows you to adjust the position of the
left and right outside rearview mirrors. To
adjust the position of either mirror, move
the lever (1) to R or L to select the right
side mirror or the left side mirror, thenpress a corresponding point on the mirroradjustment control to position the select-
ed mirror up, down, left or right.
After adjustment, put the lever into neu-
tral (center) position to prevent the inad-
vertent adjustment.Folding the outside rearview mirror
Manual type
To fold the outside rearview mirror, grasp
the housing of the mirror and then fold it
toward the rear of the vehicle.
CAUTION
The mirrors stop moving when
they reach the maximum adjust-
ing angles, but the motor contin-ues to operate while the switch isdepressed. Do not depress the switch longer than necessary, the
motor may be damaged.
Do not attempt to adjust the out- side rearview mirror by hand.Doing so may damage the parts.
OYN0490321LDA2083A
Page 115 of 761
439
Features of your vehicle
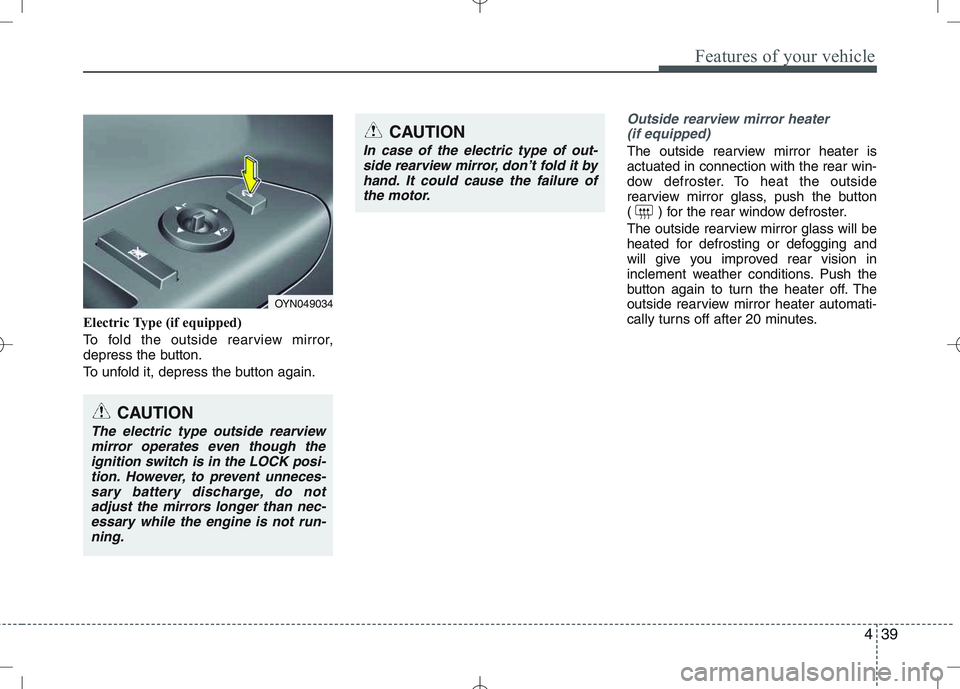
Electric Type (if equipped)
To fold the outside rearview mirror,
depress the button.
To unfold it, depress the button again.
Outside rearview mirror heater (if equipped)
The outside rearview mirror heater is actuated in connection with the rear win-
dow defroster. To heat the outside
rearview mirror glass, push the button
( ) for the rear window defroster.
The outside rearview mirror glass will be
heated for defrosting or defogging and
will give you improved rear vision in
inclement weather conditions. Push the
button again to turn the heater off. The
outside rearview mirror heater automati-
cally turns off after 20 minutes.
CAUTION
In case of the electric type of out- side rearview mirror, don’t fold it by
hand. It could cause the failure ofthe motor.
CAUTION
The electric type outside rearviewmirror operates even though the
ignition switch is in the LOCK posi-tion. However, to prevent unneces-sary battery discharge, do notadjust the mirrors longer than nec-
essary while the engine is not run-ning.
OYN049034
Page 116 of 761
Features of your vehicle
40
4
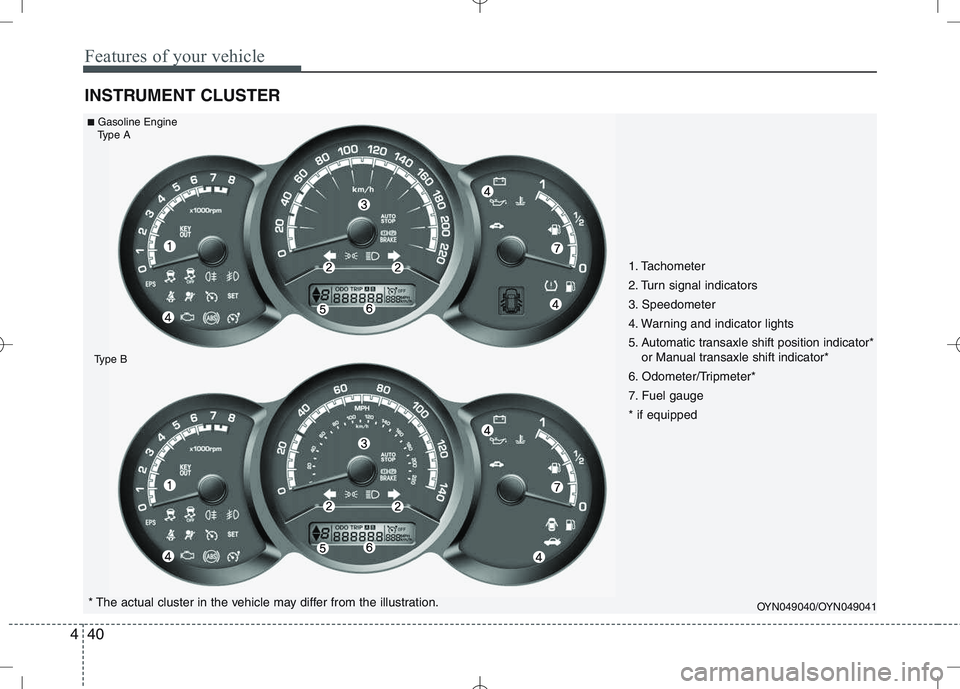
INSTRUMENT CLUSTER
OYN049040/OYN049041* The actual cluster in the vehicle may differ from the illustration.
■
Gasoline Engine
Type A
Type B
1. Tachometer
2. Turn signal indicators
3. Speedometer
4. Warning and indicator lights
5. Automatic transaxle shift position indicator* or Manual transaxle shift indicator*
6. Odometer/Tripmeter*
7. Fuel gauge* if equipped
Page 117 of 761
441
Features of your vehicle
OYN049042/OYN049043* The actual cluster in the vehicle may differ from the illustration.
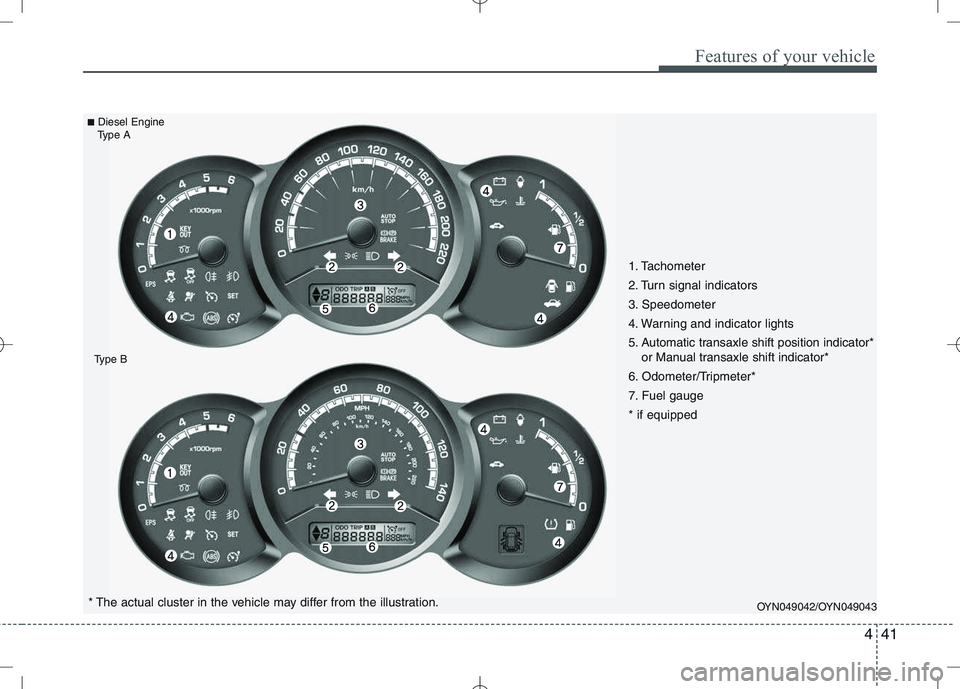
■
Diesel Engine
Type A
Type B
1. Tachometer
2. Turn signal indicators
3. Speedometer
4. Warning and indicator lights
5. Automatic transaxle shift position indicator* or Manual transaxle shift indicator*
6. Odometer/Tripmeter*
7. Fuel gauge* if equipped
Page 118 of 761
Features of your vehicle
42
4
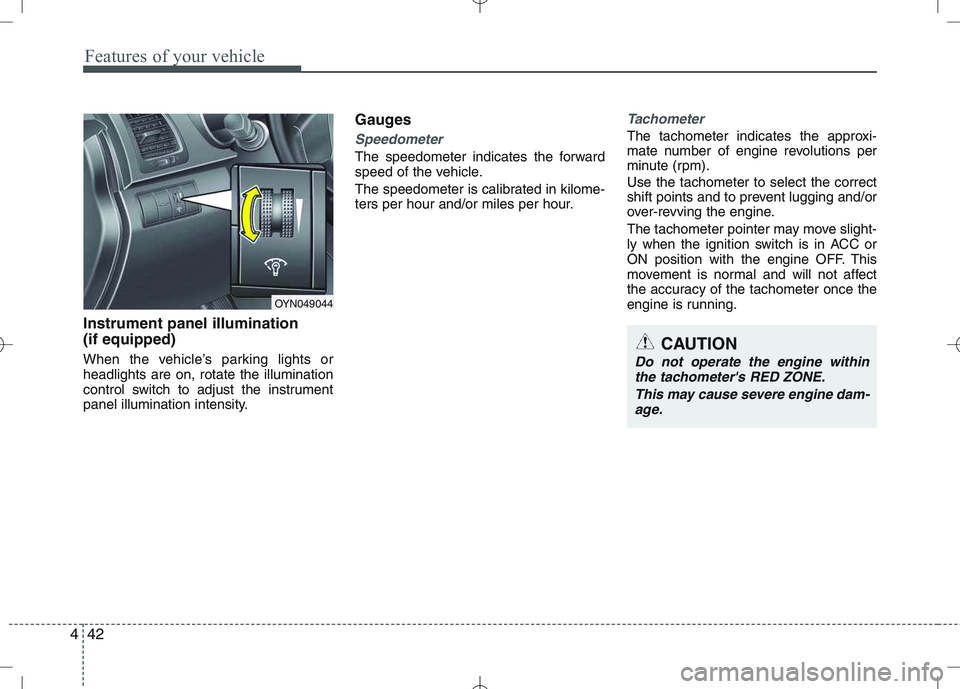
Instrument panel illumination (if equipped)
When the vehicle’s parking lights or headlights are on, rotate the illumination
control switch to adjust the instrument
panel illumination intensity. Gauges
Speedometer
The speedometer indicates the forward
speed of the vehicle.
The speedometer is calibrated in kilome-
ters per hour and/or miles per hour.
Tachometer
The tachometer indicates the approxi-
mate number of engine revolutions per
minute (rpm). Use the tachometer to select the correct
shift points and to prevent lugging and/or
over-revving the engine.
The tachometer pointer may move slight-
ly when the ignition switch is in ACC or
ON position with the engine OFF. This
movement is normal and will not affect
the accuracy of the tachometer once the
engine is running.
OYN049044
CAUTION
Do not operate the engine within
the tachometer's RED ZONE.
This may cause severe engine dam-age.
Page 119 of 761
443
Features of your vehicle
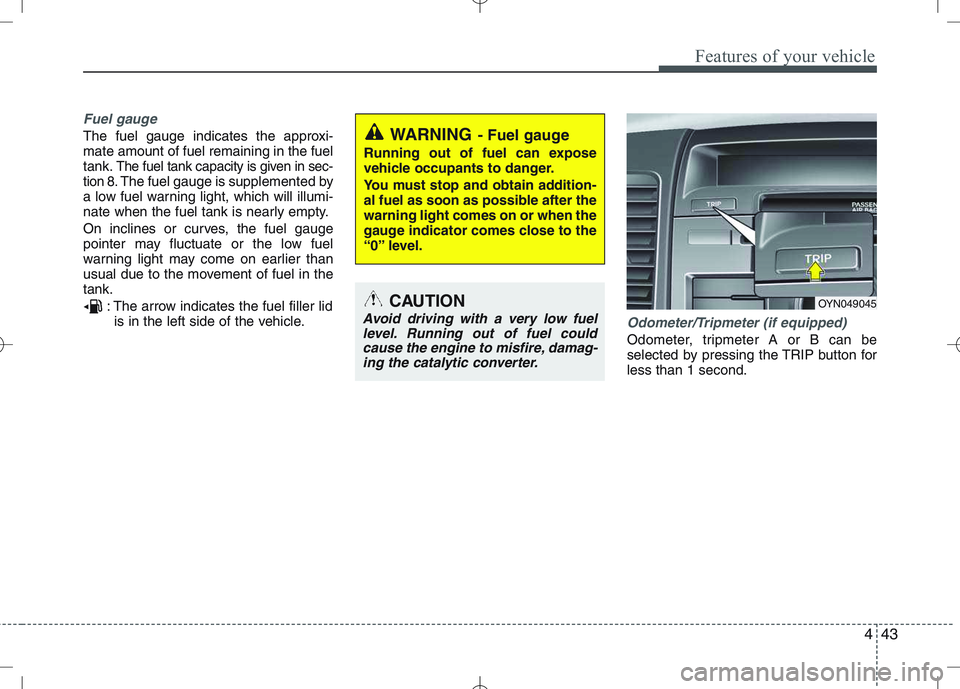
Fuel gauge
The fuel gauge indicates the approxi- mate amount of fuel remaining in the fueltank.
The fuel tank capacity is given in sec-
tion 8.The fuel gauge is supplemented by
a low fuel warning light, which will illumi-
nate when the fuel tank is nearly empty.
On inclines or curves, the fuel gauge
pointer may fluctuate or the low fuel
warning light may come on earlier than
usual due to the movement of fuel in thetank.
: The arrow indicates the fuel filler lidis in the left side of the vehicle.
Odometer/Tripmeter (if equipped)
Odometer, tripmeter A or B can be
selected by pressing the TRIP button forless than 1 second.
WARNING - Fuel gauge
Running out of fuel can expose
vehicle occupants to danger.
You must stop and obtain addition-
al fuel as soon as possible after thewarning light comes on or when the
gauge indicator comes close to the
“0” level.
CAUTION
Avoid driving with a very low fuel level. Running out of fuel could cause the engine to misfire, damag-ing the catalytic converter.
OYN049045
Page 120 of 761
Features of your vehicle
44
4
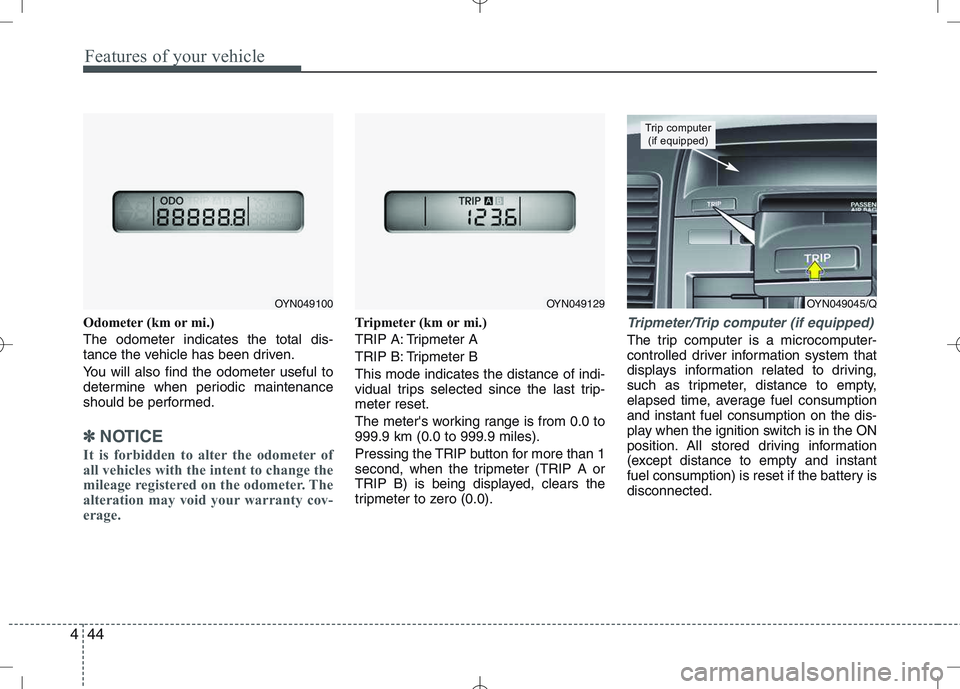
Odometer (km or mi.) The odometer indicates the total dis-
tance the vehicle has been driven.
You will also find the odometer useful to
determine when periodic maintenance
should be performed.
✽✽
NOTICE
It is forbidden to alter the odometer of
all vehicles with the intent to change the
mileage registered on the odometer. The
alteration may void your warranty cov-
erage.
Tripmeter (km or mi.)
TRIP A: Tripmeter A
TRIP B: Tripmeter BThis mode indicates the distance of indi-
vidual trips selected since the last trip-meter reset.
The meter's working range is from 0.0 to 999.9 km (0.0 to 999.9 miles).
Pressing the TRIP button for more than 1
second, when the tripmeter (TRIP A or
TRIP B) is being displayed, clears the
tripmeter to zero (0.0).Tripmeter/Trip computer (if equipped)
The trip computer is a microcomputer-
controlled driver information system that
displays information related to driving,
such as tripmeter, distance to empty,
elapsed time, average fuel consumptionand instant fuel consumption on the dis-
play when the ignition switch is in the ON
position. All stored driving information
(except distance to empty and instant
fuel consumption) is reset if the battery isdisconnected.
OYN049045/Q
Trip computer (if equipped)
OYN049100OYN049129