headlights KIA VENGA 2016 Owners Manual
[x] Cancel search | Manufacturer: KIA, Model Year: 2016, Model line: VENGA, Model: KIA VENGA 2016Pages: 404, PDF Size: 21.96 MB
Page 109 of 404
435
Features of your vehicle
Inside rearview mirror
Adjust the rearview mirror so that the
center view through the rear window is
seen. Make this adjustment before you
start driving.
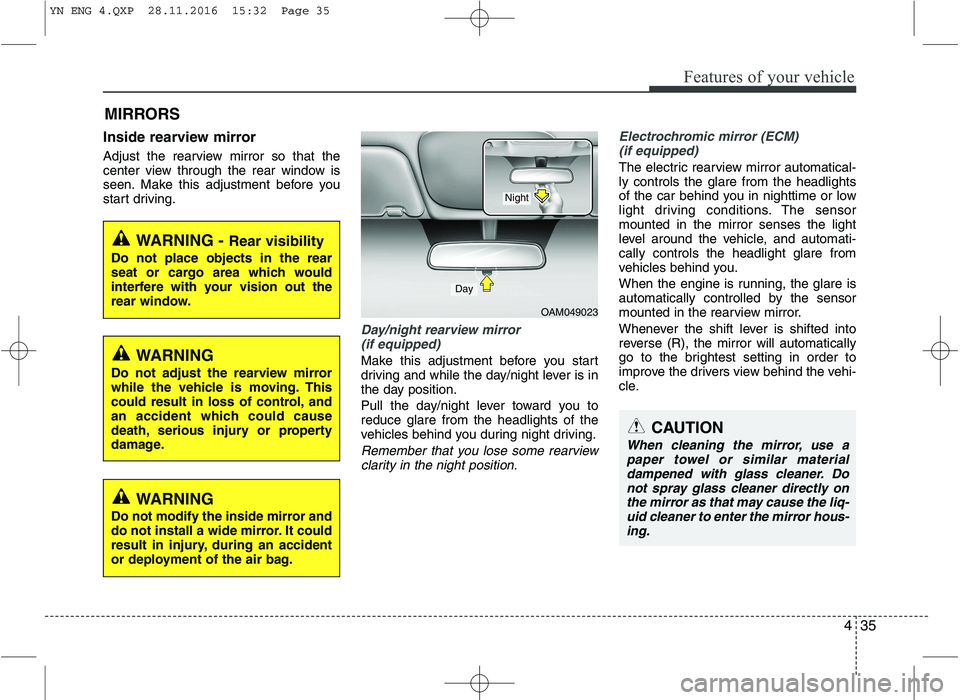
Day/night rearview mirror (if equipped)
Make this adjustment before you start
driving and while the day/night lever is in
the day position.
Pull the day/night lever toward you to reduce glare from the headlights of the
vehicles behind you during night driving.
Remember that you lose some rearview clarity in the night position.
Electrochromic mirror (ECM)
(if equipped)
The electric rearview mirror automatical- ly controls the glare from the headlights
of the car behind you in nighttime or low
light driving conditions. The sensormounted in the mirror senses the light
level around the vehicle, and automati-cally controls the headlight glare from
vehicles behind you.
When the engine is running, the glare is
automatically controlled by the sensor
mounted in the rearview mirror.
Whenever the shift lever is shifted into
reverse (R), the mirror will automatically
go to the brightest setting in order to
improve the drivers view behind the vehi-
cle.
MIRRORS
OAM049023
CAUTION
When cleaning the mirror, use a
paper towel or similar material
dampened with glass cleaner. Donot spray glass cleaner directly onthe mirror as that may cause the liq- uid cleaner to enter the mirror hous-
ing.
Day
Night
WARNING - Rear visibility
Do not place objects in the rear
seat or cargo area which would
interfere with your vision out the
rear window.
WARNING
Do not adjust the rearview mirror
while the vehicle is moving. This
could result in loss of control, and
an accident which could cause
death, serious injury or property
damage.
WARNING
Do not modify the inside mirror and
do not install a wide mirror. It could
result in injury, during an accident
or deployment of the air bag.
YN ENG 4.QXP 28.11.2016 15:32 Page 35
Page 116 of 404
Features of your vehicle
42
4
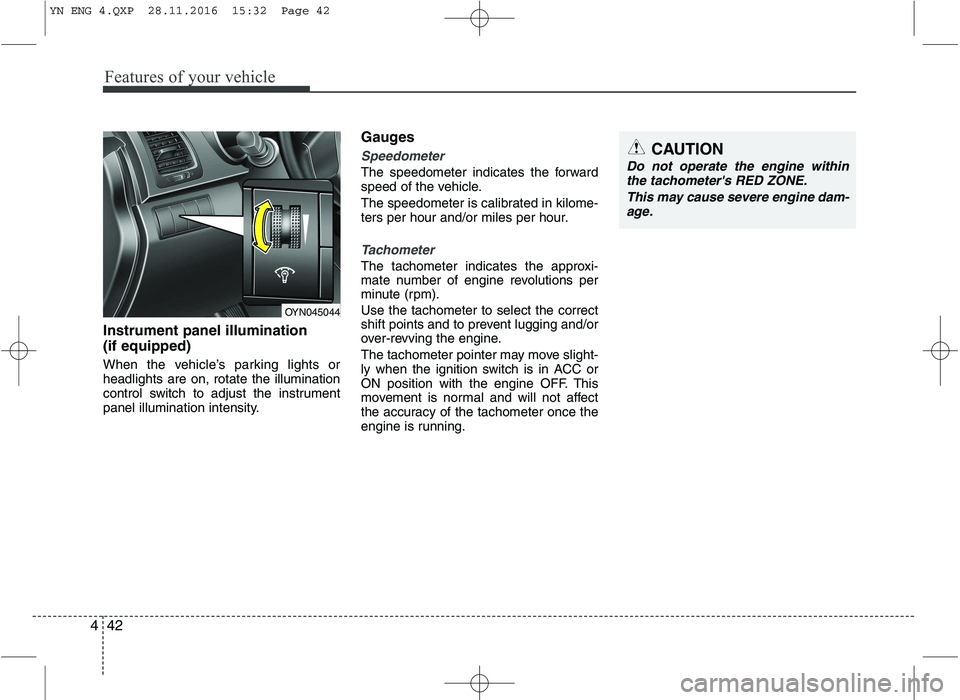
Instrument panel illumination (if equipped)
When the vehicle’s parking lights or headlights are on, rotate the illumination
control switch to adjust the instrument
panel illumination intensity. Gauges
Speedometer
The speedometer indicates the forward
speed of the vehicle.
The speedometer is calibrated in kilome-
ters per hour and/or miles per hour.
Tachometer
The tachometer indicates the approxi-
mate number of engine revolutions per
minute (rpm). Use the tachometer to select the correct
shift points and to prevent lugging and/or
over-revving the engine.
The tachometer pointer may move slight-
ly when the ignition switch is in ACC or
ON position with the engine OFF. This
movement is normal and will not affect
the accuracy of the tachometer once the
engine is running.
OYN045044
CAUTION
Do not operate the engine within
the tachometer's RED ZONE.
This may cause severe engine dam-age.
YN ENG 4.QXP 28.11.2016 15:32 Page 42
Page 124 of 404
Features of your vehicle
50
4
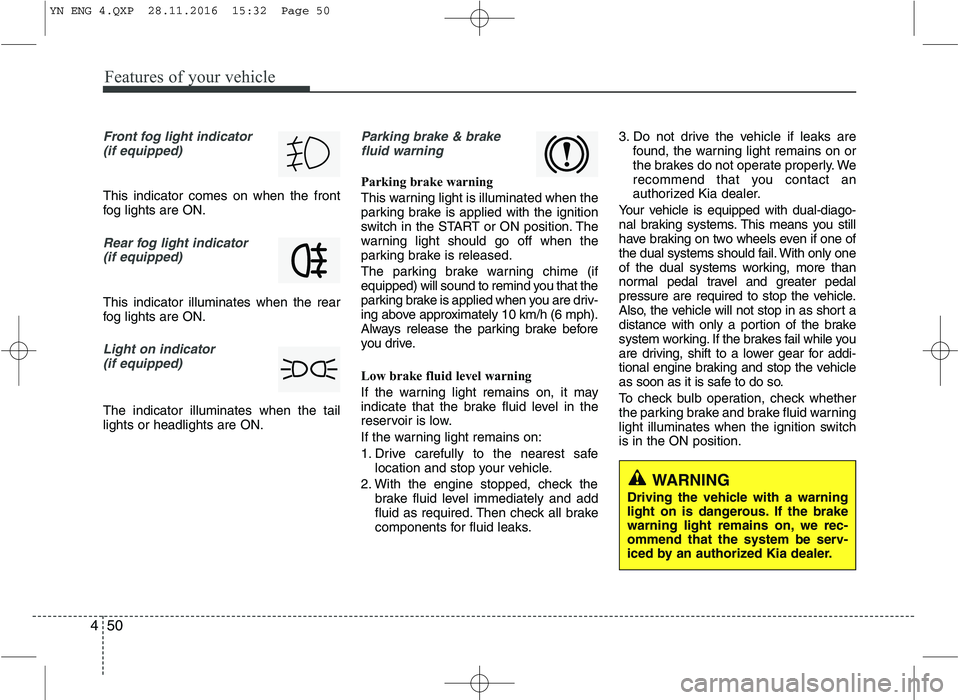
Front fog light indicator
(if equipped)
This indicator comes on when the front
fog lights are ON.
Rear fog light indicator (if equipped)
This indicator illuminates when the rear
fog lights are ON.
Light on indicator (if equipped)
The indicator illuminates when the tail lights or headlights are ON.
Parking brake & brakefluid warning
Parking brake warning
This warning light is illuminated when the
parking brake is applied with the ignition
switch in the START or ON position. The
warning light should go off when the
parking brake is released.
The parking brake warning chime (if
equipped) will sound to remind you that the
parking brake is applied when you are driv-
ing above approximately 10 km/h (6 mph).
Always release the parking brake before
you drive.
Low brake fluid level warning
If the warning light remains on, it may
indicate that the brake fluid level in the
reservoir is low.
If the warning light remains on:
1. Drive carefully to the nearest safe location and stop your vehicle.
2. With the engine stopped, check the brake fluid level immediately and add
fluid as required. Then check all brake
components for fluid leaks. 3. Do not drive the vehicle if leaks are
found, the warning light remains on or
the brakes do not operate properly. We
recommend that you contact an
authorized Kia dealer.
Your vehicle is equipped with dual-diago-
nal braking systems. This means you still
have braking on two wheels even if one of
the dual systems should fail. With only one
of the dual systems working, more than
normal pedal travel and greater pedal
pressure are required to stop the vehicle.
Also, the vehicle will not stop in as short a
distance with only a portion of the brake
system working. If the brakes fail while you
are driving, shift to a lower gear for addi-
tional engine braking and stop the vehicle
as soon as it is safe to do so.
To check bulb operation, check whether
the parking brake and brake fluid warning
light illuminates when the ignition switchis in the ON position.
WARNING
Driving the vehicle with a warning
light on is dangerous. If the brake
warning light remains on, we rec-
ommend that the system be serv-
iced by an authorized Kia dealer.
YN ENG 4.QXP 28.11.2016 15:32 Page 50
Page 135 of 404
461
Features of your vehicle
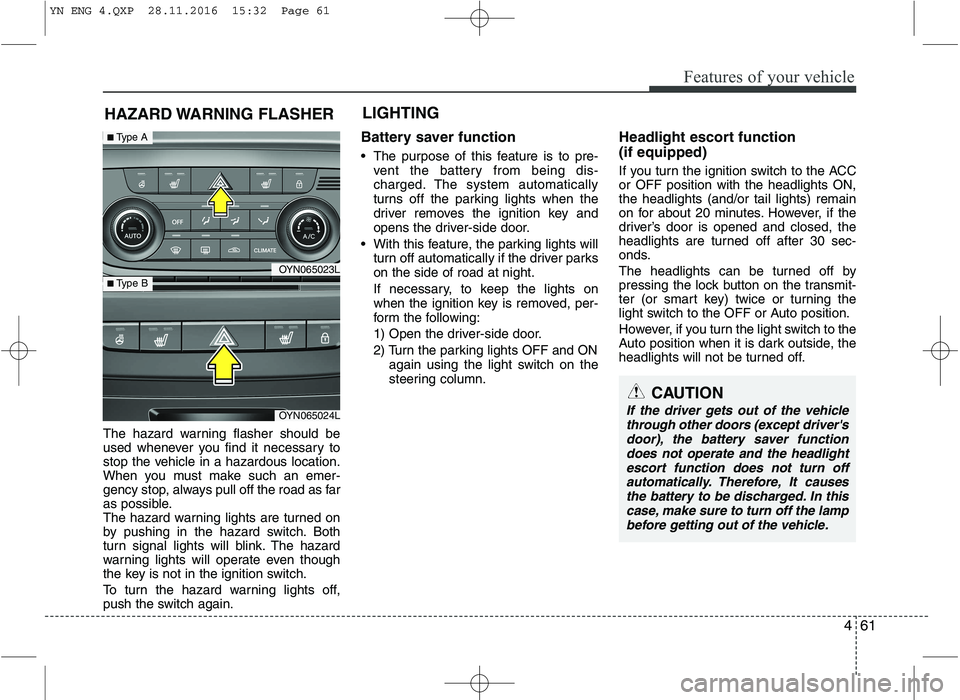
The hazard warning flasher should be
used whenever you find it necessary to
stop the vehicle in a hazardous location.
When you must make such an emer-
gency stop, always pull off the road as far
as possible.
The hazard warning lights are turned on
by pushing in the hazard switch. Both
turn signal lights will blink. The hazard
warning lights will operate even though
the key is not in the ignition switch.
To turn the hazard warning lights off,
push the switch again.Battery saver function
The purpose of this feature is to pre-
vent the battery from being dis-
charged. The system automatically
turns off the parking lights when the
driver removes the ignition key and
opens the driver-side door.
With this feature, the parking lights will turn off automatically if the driver parkson the side of road at night.
If necessary, to keep the lights on
when the ignition key is removed, per-
form the following:
1) Open the driver-side door.
2) Turn the parking lights OFF and ON again using the light switch on the
steering column. Headlight escort function (if equipped)
If you turn the ignition switch to the ACC or OFF position with the headlights ON,the headlights (and/or tail lights) remain
on for about 20 minutes. However, if the
driver’s door is opened and closed, the
headlights are turned off after 30 sec-
onds.
The headlights can be turned off by
pressing the lock button on the transmit-
ter (or smart key) twice or turning the
light switch to the OFF or Auto position.
However, if you turn the light switch to the
Auto position when it is dark outside, the
headlights will not be turned off.
HAZARD WARNING FLASHER
CAUTION
If the driver gets out of the vehicle
through other doors (except driver'sdoor), the battery saver function
does not operate and the headlightescort function does not turn off automatically. Therefore, It causesthe battery to be discharged. In this case, make sure to turn off the lamp
before getting out of the vehicle.
LIGHTING
OYN065023L
OYN065024L
■ Type A
■ Type B
YN ENG 4.QXP 28.11.2016 15:32 Page 61
Page 136 of 404
Features of your vehicle
62
4
Headlight welcome function (if equipped)
When the headlight switch is in the ON or
AUTO position and all doors (and tail-
gate) are closed and locked, if you press
the door unlock button on the transmitter
(or smart key), the headlights will come
on for about 15 seconds.
If the headlight switch is in the AUTO
position, the function can only operate atnight.
At this time, if you press the door unlock
button again or door lock button on the
transmitter (or smart key), the headlights
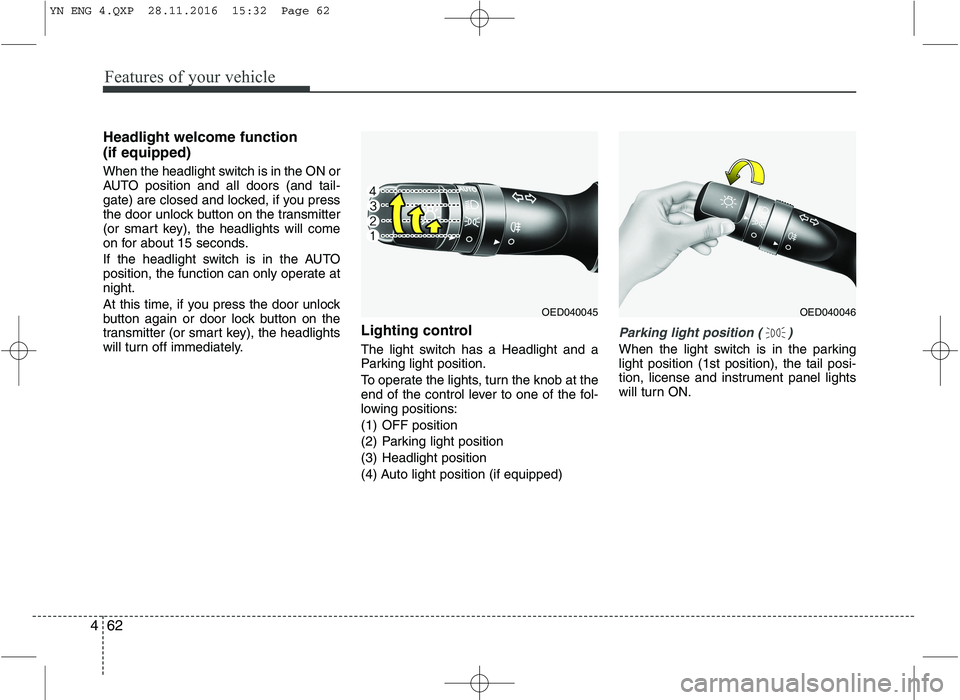
will turn off immediately. Lighting control
The light switch has a Headlight and a
Parking light position.
To operate the lights, turn the knob at the
end of the control lever to one of the fol-
lowing positions:
(1) OFF position
(2) Parking light position
(3) Headlight position
(4) Auto light position (if equipped)
Parking light position ( )
When the light switch is in the parking light position (1st position), the tail posi-
tion, license and instrument panel lights
will turn ON.
OED040046OED040045
YN ENG 4.QXP 28.11.2016 15:32 Page 62
Page 137 of 404
463
Features of your vehicle
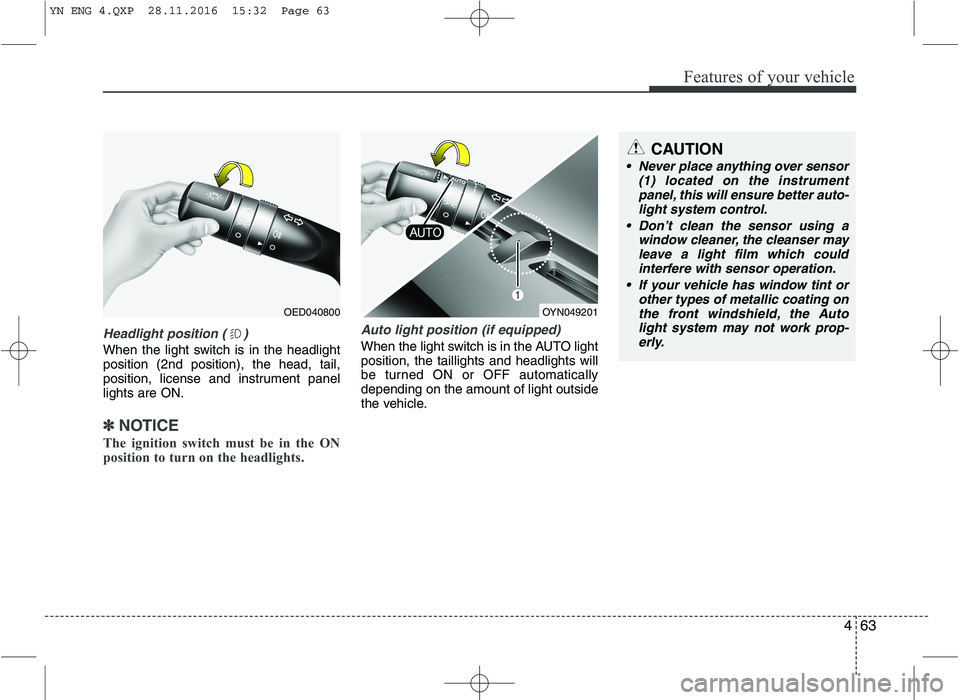
Headlight position ( )
When the light switch is in the headlight position (2nd position), the head, tail,
position, license and instrument panellights are ON.
✽✽NOTICE
The ignition switch must be in the ON
position to turn on the headlights.
Auto light position (if equipped)
When the light switch is in the AUTO light position, the taillights and headlights will
be turned ON or OFF automaticallydepending on the amount of light outside
the vehicle.
OED040800
CAUTION
Never place anything over sensor (1) located on the instrumentpanel, this will ensure better auto-light system control.
Don’t clean the sensor using a window cleaner, the cleanser mayleave a light film which couldinterfere with sensor operation.
If your vehicle has window tint or other types of metallic coating on
the front windshield, the Auto light system may not work prop-erly.
OYN049201
YN ENG 4.QXP 28.11.2016 15:32 Page 63
Page 138 of 404
Features of your vehicle
64
4
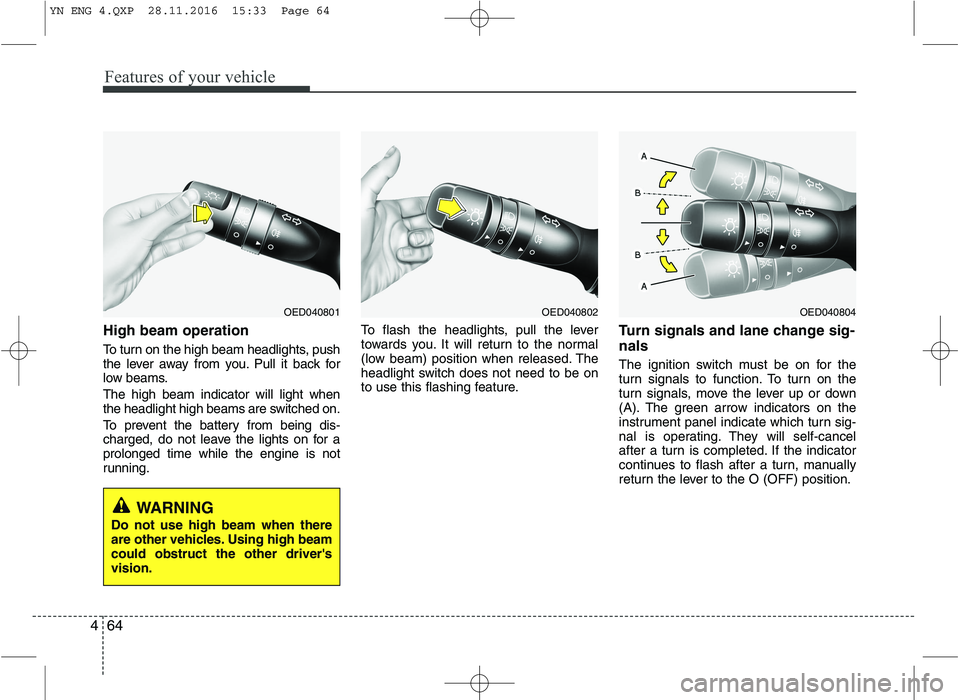
High beam operation
To turn on the high beam headlights, push
the lever away from you. Pull it back for
low beams. The high beam indicator will light when
the headlight high beams are switched on.
To prevent the battery from being dis-
charged, do not leave the lights on for aprolonged time while the engine is not
running. To flash the headlights, pull the lever
towards you. It will return to the normal
(low beam) position when released. The
headlight switch does not need to be on
to use this flashing feature.
Turn signals and lane change sig- nals
The ignition switch must be on for the
turn signals to function. To turn on the
turn signals, move the lever up or down
(A). The green arrow indicators on the
instrument panel indicate which turn sig-
nal is operating. They will self-cancel
after a turn is completed. If the indicator
continues to flash after a turn, manually
return the lever to the O (OFF) position.
OED040804OED040802OED040801
WARNING
Do not use high beam when there
are other vehicles. Using high beamcould obstruct the other driver'svision.
YN ENG 4.QXP 28.11.2016 15:33 Page 64
Page 140 of 404
Features of your vehicle
66
4
Daytime running light (if equipped)
The Daytime Running Lights (DRL) can
make it easier for others to see the front
of your vehicle during the day. DRL can
be helpful in many different driving condi-
tions, and it is especially helpful after
dawn and before sunset.
The DRL system will make the head-
lights turn OFF when:
1. Headlight or front fog light switch is ON.
2. The engine is OFF.
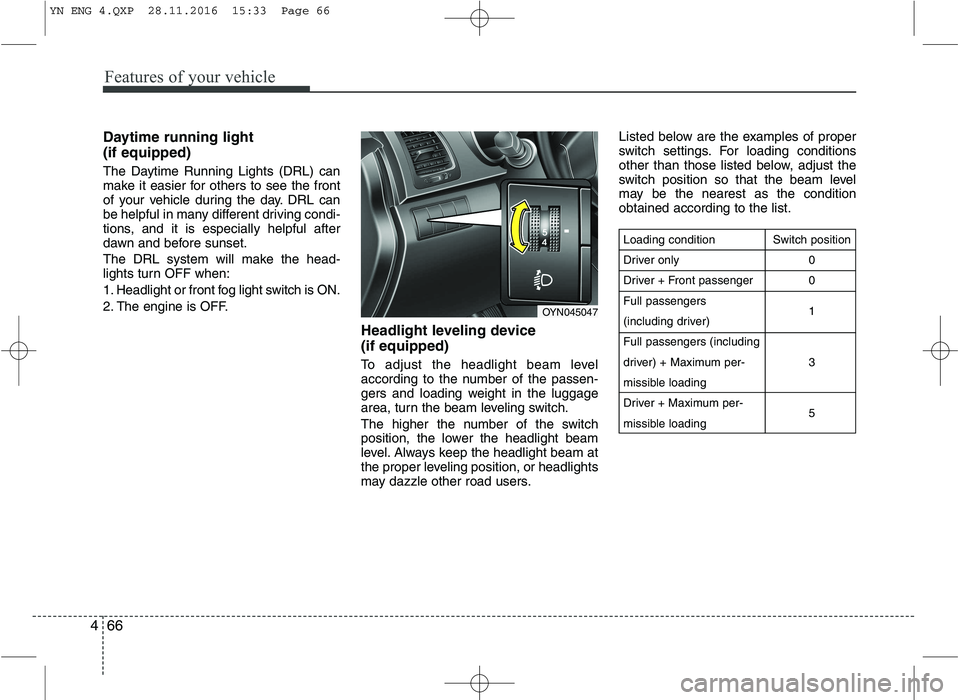
Headlight leveling device (if equipped)
To adjust the headlight beam level
according to the number of the passen-
gers and loading weight in the luggage
area, turn the beam leveling switch.
The higher the number of the switch
position, the lower the headlight beam
level. Always keep the headlight beam at
the proper leveling position, or headlights
may dazzle other road users.Listed below are the examples of proper
switch settings. For loading conditions
other than those listed below, adjust the
switch position so that the beam level
may be the nearest as the conditionobtained according to the list.
Loading condition
Driver only
Driver + Front passengerFull passengers
(including driver)Full passengers (including
driver) + Maximum per-
missible loading
Driver + Maximum per-
missible loading
Switch position
00 1 3 5
OYN045047
YN ENG 4.QXP 28.11.2016 15:33 Page 66
Page 258 of 404
Driving your vehicle
48
5
Adjust your mirrors to reduce the glare
from other driver's headlights.
Keep your headlights clean and prop- erly aimed on vehicles not equipped with the automatic headlight aiming
feature. Dirty or improperly aimed
headlights will make it much more diffi-cult to see at night.
Avoid staring directly at the headlights of oncoming vehicles. You could be
temporarily blinded, and it will take
several seconds for your eyes to read-
just to the darkness.
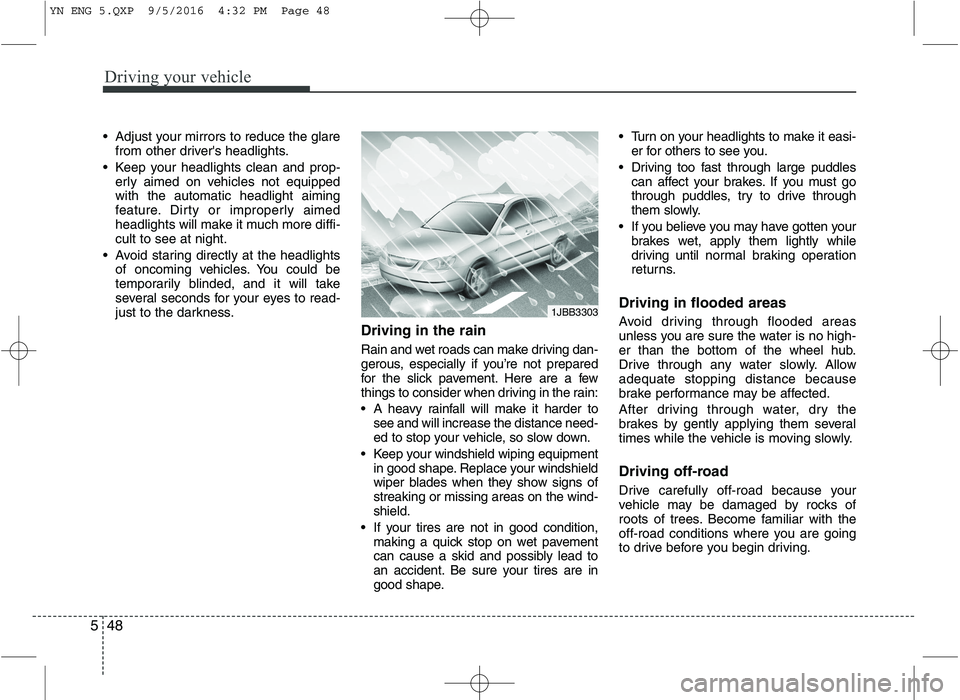
Driving in the rain
Rain and wet roads can make driving dan-
gerous, especially if you’re not prepared
for the slick pavement. Here are a few
things to consider when driving in the rain:
A heavy rainfall will make it harder tosee and will increase the distance need-
ed to stop your vehicle, so slow down.
Keep your windshield wiping equipment in good shape. Replace your windshield
wiper blades when they show signs ofstreaking or missing areas on the wind-shield.
If your tires are not in good condition, making a quick stop on wet pavement
can cause a skid and possibly lead to
an accident. Be sure your tires are in
good shape. Turn on your headlights to make it easi-
er for others to see you.
Driving too fast through large puddles can affect your brakes. If you must go
through puddles, try to drive through
them slowly.
If you believe you may have gotten your brakes wet, apply them lightly while
driving until nor mal braking operation
returns.
Driving in flooded areas
Avoid driving through flooded areas
unless you are sure the water is no high-
er than the bottom of the wheel hub.
Drive through any water slowly. Allowadequate stopping distance because
brake performance may be affected.
After driving through water, dry the
brakes by gently applying them several
times while the vehicle is moving slowly.
Driving off-road
Drive carefully off-road because your
vehicle may be damaged by rocks of
roots of trees. Become familiar with the
off-road conditions where you are going
to drive before you begin driving.
1JBB3303
YN ENG 5.QXP 9/5/2016 4:32 PM Page 48
Page 341 of 404
Maintenance
38
7
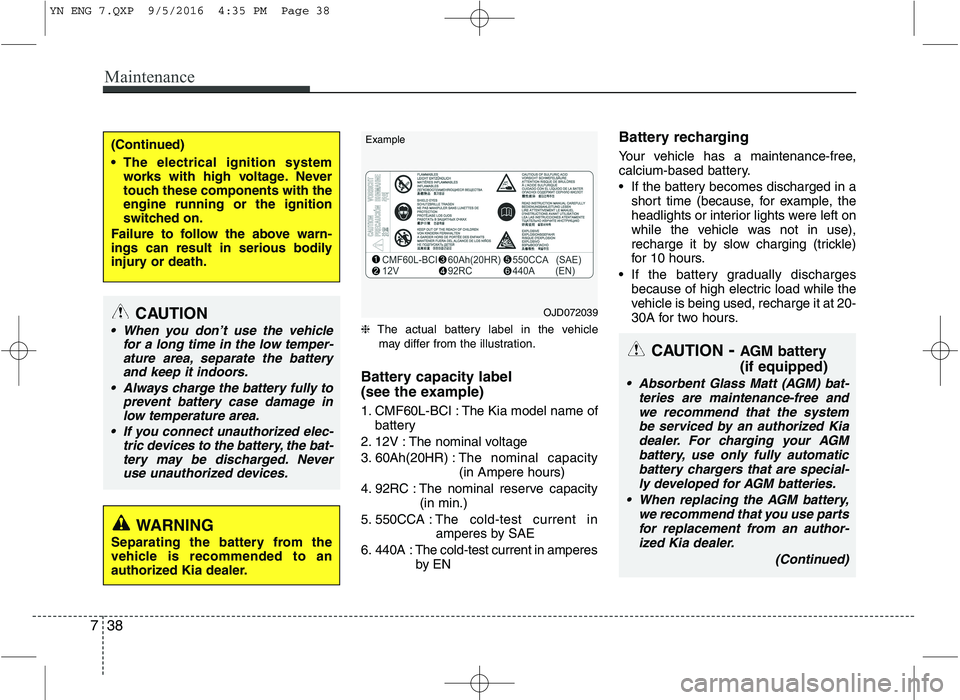
❈ The actual battery label in the vehicle
may differ from the illustration.
Battery capacity label
(see the example)
1. CMF60L-BCI : The Kia model name of battery
2. 12V : The nominal voltage
3. 60Ah(20HR) : The nominal capacity
(in Ampere hours)
4. 92RC : The nominal reserve capacity (in min.)
5. 550CCA : The cold-test current in
amperes by SAE
6. 440A : The cold-test current in amperes by EN Battery recharging
Your vehicle has a maintenance-free,
calcium-based battery.
If the battery becomes discharged in a
short time (because, for example, the
headlights or interior lights were left on
while the vehicle was not in use),
recharge it by slow charging (trickle)
for 10 hours.
If the battery gradually discharges because of high electric load while the
vehicle is being used, recharge it at 20-
30A for two hours.
(Continued)
The electrical ignition systemworks with high voltage. Never
touch these components with theengine running or the ignition
switched on.
Failure to follow the above warn-
ings can result in serious bodily
injury or death.
CAUTION - AGM battery (if equipped)
Absorbent Glass Matt (AGM) bat-
teries are maintenance-free andwe recommend that the systembe serviced by an authorized Kia
dealer. For charging your AGMbattery, use only fully automatic battery chargers that are special-ly developed for AGM batteries.
When replacing the AGM battery, we recommend that you use partsfor replacement from an author-ized Kia dealer.
(Continued)
CAUTION
When you don’t use the vehiclefor a long time in the low temper-ature area, separate the battery and keep it indoors.
Always charge the battery fully to prevent battery case damage inlow temperature area.
If you connect unauthorized elec- tric devices to the battery, the bat-tery may be discharged. Neveruse unauthorized devices.
WARNING
Separating the battery from the
vehicle is recommended to an
authorized Kia dealer.
OJD072039
Example
YN ENG 7.QXP 9/5/2016 4:35 PM Page 38