headlights Lancia Flavia 2012 Owner handbook (in English)
[x] Cancel search | Manufacturer: LANCIA, Model Year: 2012, Model line: Flavia, Model: Lancia Flavia 2012Pages: 233, PDF Size: 2.61 MB
Page 57 of 233
OPERATION . . . . . . . . . . . . . . . . . . . . . . . . . . 66
PHONE CALL FEATURES . . . . . . . . . . . . . . . . 70
UCONNECT™ PHONE FEATURES . . . . . . . . . . 72
ADVANCED PHONE CONNECTIVITY . . . . . . . 75
THINGS YOU SHOULD KNOW ABOUTYOUR UCONNECT™ PHONE . . . . . . . . . . . . . . 76
VOICE COMMAND . . . . . . . . . . . . . . . . . . . . . . . . 82 VOICE COMMAND SYSTEM OPERATION . . . . 82
COMMANDS . . . . . . . . . . . . . . . . . . . . . . . . . . 83
VOICE TRAINING . . . . . . . . . . . . . . . . . . . . . . 85
SEATS . . . . . . . . . . . . . . . . . . . . . . . . . . . . . . . . . 85 POWER SEATS . . . . . . . . . . . . . . . . . . . . . . . . 85
HEATED SEATS . . . . . . . . . . . . . . . . . . . . . . . . 86
RECLINER ADJUSTMENT . . . . . . . . . . . . . . . . 87
LUMBAR SUPPORT . . . . . . . . . . . . . . . . . . . . . 87
EASY ENTRY SYSTEM . . . . . . . . . . . . . . . . . . 88
HEAD RESTRAINTS . . . . . . . . . . . . . . . . . . . . 88
TO OPEN AND CLOSE THE HOOD . . . . . . . . . . . 90
LIGHTS . . . . . . . . . . . . . . . . . . . . . . . . . . . . . . . . 91 MULTIFUNCTION LEVER . . . . . . . . . . . . . . . . 91
HEADLIGHTS AND PARKING LIGHTS . . . . . . 91
LIGHTS-ON REMINDER . . . . . . . . . . . . . . . . . 91
AUTOMATIC HEADLIGHTS . . . . . . . . . . . . . . . 91
HEADLIGHTS WITH WIPERS (AVAILABLEWITH AUTOMATIC HEADLIGHTS ONLY) . . . . 91
HEADLIGHT TIME DELAY . . . . . . . . . . . . . . . 92
50
Page 58 of 233
INSTRUMENT PANEL DIMMER . . . . . . . . . . . 92
FOG LIGHTS . . . . . . . . . . . . . . . . . . . . . . . . . . 92
Rear Fog Lights . . . . . . . . . . . . . . . . . . . . . . . . 93
TURN SIGNALS . . . . . . . . . . . . . . . . . . . . . . . . 93
LANE CHANGE ASSIST . . . . . . . . . . . . . . . . . . 93
HIGH/LOW BEAM SWITCH . . . . . . . . . . . . . . . 93
FLASH-TO-PASS . . . . . . . . . . . . . . . . . . . . . . . 93
INTERIOR LIGHTS . . . . . . . . . . . . . . . . . . . . . 93
Headlight Leveling System . . . . . . . . . . . . . . . . 94
BATTERY SAVER FEATURE . . . . . . . . . . . . . . 94
WINDSHIELD WIPERS AND WASHERS . . . . . . . 94 INTERMITTENT WIPER SYSTEM . . . . . . . . . . 95
WINDSHIELD WASHERS . . . . . . . . . . . . . . . . 95
MIST FEATURE . . . . . . . . . . . . . . . . . . . . . . . . 96
HEADLIGHTS WITH WIPERS FEATURE(AVAILABLE WITH AUTOMATIC
HEADLIGHTS ONLY) . . . . . . . . . . . . . . . . . . . . 96
TILT/TELESCOPING STEERING COLUMN . . . . . 96
ELECTRONIC SPEED CONTROL . . . . . . . . . . . . . 97 TO ACTIVATE . . . . . . . . . . . . . . . . . . . . . . . . . 97
TO SET A DESIRED SPEED . . . . . . . . . . . . . . 97
TO DEACTIVATE . . . . . . . . . . . . . . . . . . . . . . . 98
TO RESUME SPEED . . . . . . . . . . . . . . . . . . . . 98
TO VARY THE SPEED SETTING . . . . . . . . . . . 98
TO ACCELERATE FOR PASSING . . . . . . . . . . . 98
ELECTRICAL POWER OUTLETS . . . . . . . . . . . . 98
51
Page 98 of 233

LIGHTS
MULTIFUNCTION LEVER
The multifunction lever on the left
side of the steering column controls
the operation of the headlights, park-
ing lights, turn signal lights, instru-
ment panel lights, instrument panel
light dimming, interior lights and fog
lights.
HEADLIGHTS AND
PARKING LIGHTS
Turn the end of the multifunction le-
ver to the first detent for parking light
operation. Turn the end of the lever to
the second detent for headlight opera-
tion.LIGHTS-ON REMINDER
If the headlights or parking lights are
on after the ignition is turned to the
LOCK position, a chime will sound to
alert the driver when the
driver's door
is opened.
AUTOMATIC HEADLIGHTS
This system automatically turns the
headlights on or off according to am-
bient light levels. To turn the system
on, turn the end of the multifunction
lever to the AUTO position. When the
system is on, the Headlight Time De-
lay feature is also on. This means the
headlights will stay on for up to
90 seconds after you turn the ignition
switch to the LOCK position. To turn
the Automatic System off, turn the end of the multifunction lever out of
the AUTO position.
NOTE:
The engine must be running before
the headlights will turn on in the
Automatic mode.
HEADLIGHTS WITH
WIPERS (AVAILABLE
WITH AUTOMATIC
HEADLIGHTS ONLY)
When this feature is active, the head-
lights will turn on approximately
10 seconds after the wipers are turned
on if the multifunction lever is placed
in the AUTO position. In addition, the
headlights will turn off when the wip-
ers are turned off if they were turned
on by this feature.
Multifunction Lever
Headlight Switch
Headlight Switch
91
Page 99 of 233
The Headlights with Wipers feature
can be turned on or off through the
Electronic Vehicle Information Center
(EVIC). Refer to “Electronic Vehicle
Information Center (EVIC)/
Customer-Programmable Features”
in “Understanding Your Instrument
Panel” for further information.
HEADLIGHT TIME DELAY
This feature is particularly useful
when exiting your vehicle in an unlit
area. It provides the safety of head-
light illumination for up to 90 seconds
after turning the ignition switch to the
LOCK position.
To activate the delay, turn the ignition
switch to the LOCK position while the
headlights are still on. Then, turn off
the headlights within 45 seconds. The
delay interval begins when you turn
off the headlights. Only the headlights
will illuminate during this time.
If you turn the headlights, parking
lights, or ignition switch ON again,
the system will cancel the delay.If you turn the headlights off before
the ignition, they will turn off in the
normal manner.
The Headlight delay time is program-
mable on vehicles equipped with the
Electronic Vehicle Information Center
(EVIC). Refer to “Electronic Vehicle
Information Center (EVIC)/
Customer-Programmable Features”
in “Understanding Your Instrument
Panel” for further information.
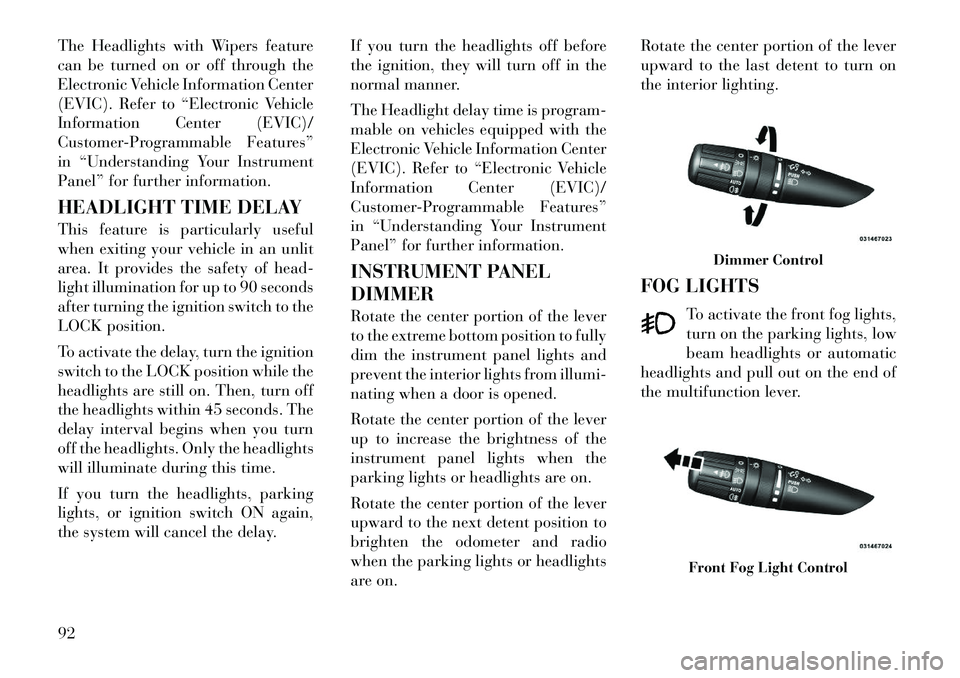
INSTRUMENT PANEL
DIMMER
Rotate the center portion of the lever
to the extreme bottom position to fully
dim the instrument panel lights and
prevent the interior lights from illumi-
nating when a door is opened.
Rotate the center portion of the lever
up to increase the brightness of the
instrument panel lights when the
parking lights or headlights are on.
Rotate the center portion of the lever
upward to the next detent position to
brighten the odometer and radio
when the parking lights or headlights
are on.Rotate the center portion of the lever
upward to the last detent to turn on
the interior lighting.
FOG LIGHTS
To activate the front fog lights,
turn on the parking lights, low
beam headlights or automatic
headlights and pull out on the end of
the multifunction lever.
Dimmer Control
Front Fog Light Control
92
Page 100 of 233
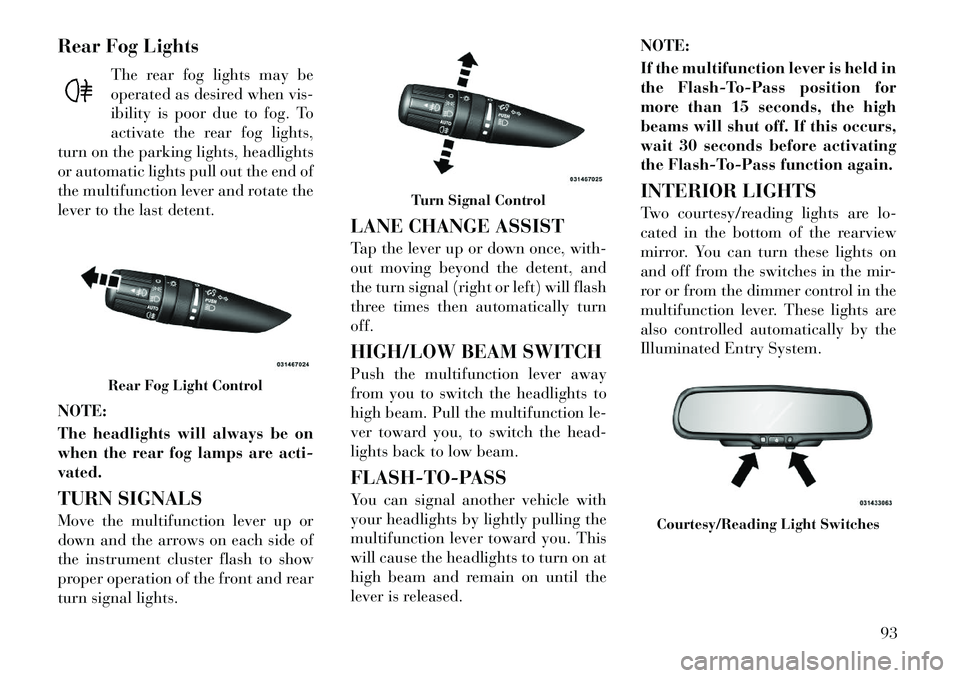
Rear Fog LightsThe rear fog lights may be
operated as desired when vis-
ibility is poor due to fog. To
activate the rear fog lights,
turn on the parking lights, headlights
or automatic lights pull out the end of
the multifunction lever and rotate the
lever to the last detent.
NOTE:
The headlights will always be on
when the rear fog lamps are acti-
vated.
TURN SIGNALS
Move the multifunction lever up or
down and the arrows on each side of
the instrument cluster flash to show
proper operation of the front and rear
turn signal lights. LANE CHANGE ASSIST
Tap the lever up or down once, with-
out moving beyond the detent, and
the turn signal (right or left) will flash
three times then automatically turn
off.
HIGH/LOW BEAM SWITCH
Push the multifunction lever away
from you to switch the headlights to
high beam. Pull the multifunction le-
ver toward you, to switch the head-
lights back to low beam.
FLASH-TO-PASS
You can signal another vehicle with
your headlights by lightly pulling the
multifunction lever toward you. This
will cause the headlights to turn on at
high beam and remain on until the
lever is released.NOTE:
If the multifunction lever is held in
the Flash-To-Pass position for
more than 15 seconds, the high
beams will shut off. If this occurs,
wait 30 seconds before activating
the Flash-To-Pass function again.
INTERIOR LIGHTS
Two courtesy/reading lights are lo-
cated in the bottom of the rearview
mirror. You can turn these lights on
and off from the switches in the mir-
ror or from the dimmer control in the
multifunction lever. These lights are
also controlled automatically by the
Illuminated Entry System.
Rear Fog Light Control
Turn Signal Control
Courtesy/Reading Light Switches
93
Page 103 of 233

If you activate the washer while the
wiper control is in the off position, the
wipers will operate for two wipe cycles
and then turn off.WARNING!
Sudden loss of visibility through the
windshield could lead to a collision.
You might not see other vehicles or
other obstacles. To avoid sudden ic-
ing of the windshield during freezing
weather, warm the windshield with
defroster before and during wind-
shield washer use.
MIST FEATURE
Push down on the wiper control lever
to activate a single wipe to clear the
windshield of road mist or spray from
a passing vehicle. As long as the lever
is held down, the wipers will continue
to operate.
NOTE:
The mist feature does not activate
the washer pump; therefore, no
washer fluid will be sprayed on the
windshield. The wash function
must be used in order to spray the
windshield with washer fluid. HEADLIGHTS WITH
WIPERS FEATURE
(AVAILABLE WITH
AUTOMATIC HEADLIGHTS
ONLY)
When this feature is active, the head-
lights will turn on approximately
10 seconds after the wipers are turned
on if the multifunction lever (on the
left side of the steering column) is
placed in the AUTO position. In addi-
tion, the headlights will turn off when
the wipers are turned off if they were
turned on by this feature.The headlights with wipers feature
can be turned on or off through the
Electronic Vehicle Information Center
(EVIC). Refer to “Electronic Vehicle
Information Center (EVIC)/Personal
Settings (Customer-Programmable
Features)” in “Understanding Your
Instrument Panel” for further infor-
mation.
TILT/TELESCOPING
STEERING COLUMN
This feature allows you to tilt the
steering column upward or down-
ward. It also allows you to lengthen or
shorten the steering column. The tilt/
telescoping lever is located below the
steering wheel at the end of the steer-
ing column.
Mist Control
Tilt/Telescoping Lever
96
Page 118 of 233
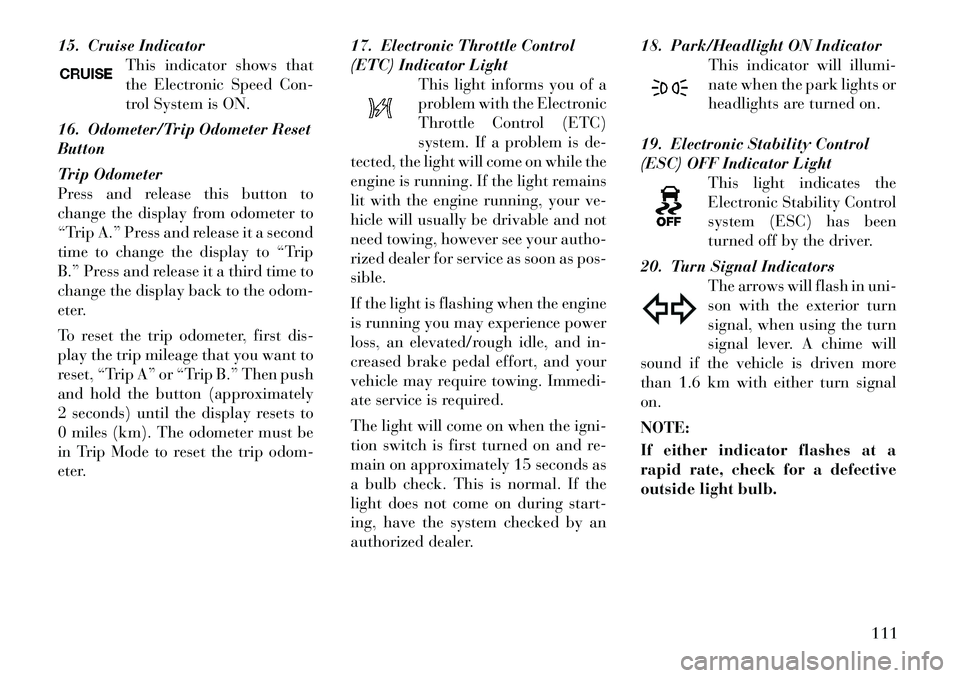
15. Cruise IndicatorThis indicator shows that
the Electronic Speed Con-
trol System is ON.
16. Odometer/Trip Odometer Reset
Button
Trip Odometer
Press and release this button to
change the display from odometer to
“Trip A.” Press and release it a second
time to change the display to “Trip
B.” Press and release it a third time to
change the display back to the odom-
eter.
To reset the trip odometer, first dis-
play the trip mileage that you want to
reset, “Trip A” or “Trip B.” Then push
and hold the button (approximately
2 seconds) until the display resets to
0 miles (km). The odometer must be
in Trip Mode to reset the trip odom-
eter. 17. Electronic Throttle Control
(ETC) Indicator Light
This light informs you of a
problem with the Electronic
Throttle Control (ETC)
system. If a problem is de-
tected, the light will come on while the
engine is running. If the light remains
lit with the engine running, your ve-
hicle will usually be drivable and not
need towing, however see your autho-
rized dealer for service as soon as pos-
sible.
If the light is flashing when the engine
is running you may experience power
loss, an elevated/rough idle, and in-
creased brake pedal effort, and your
vehicle may require towing. Immedi-
ate service is required.
The light will come on when the igni-
tion switch is first turned on and re-
main on approximately 15 seconds as
a bulb check. This is normal. If the
light does not come on during start-
ing, have the system checked by an
authorized dealer. 18. Park/Headlight ON Indicator
This indicator will illumi-
nate when the park lights or
headlights are turned on.
19. Electronic Stability Control
(ESC) OFF Indicator Light This light indicates the
Electronic Stability Control
system (ESC) has been
turned off by the driver.
20. Turn Signal Indicators The arrows will flash in uni-
son with the exterior turn
signal, when using the turn
signal lever. A chime will
sound if the vehicle is driven more
than 1.6 km with either turn signal
on.
NOTE:
If either indicator flashes at a
rapid rate, check for a defective
outside light bulb.
111
Page 121 of 233
Certain conditions, such as a loose or
missing gas cap, poor fuel quality,
etc., may illuminate the light after
engine start. The vehicle should be
serviced if the light stays on through
several of your typical driving cycles.
In most situations, the vehicle will
drive normally and will not require
towing.CAUTION!
Prolonged driving with the MIL on
could cause damage to the engine
control system. It also could affect
fuel economy and drivability. If the
MIL is flashing, severe catalytic con-
verter damage and power loss will
soon occur. Immediate service is re-
quired.
WARNING!
A malfunctioning catalytic con-
verter, as referenced above, can
reach higher temperatures than in
normal operating conditions. This
can cause a fire if you drive slowly or
park over flammable substances
such as dry plants, wood, cardboard,
etc. This could result in death or
serious injury to the driver, occu-
pants or others.
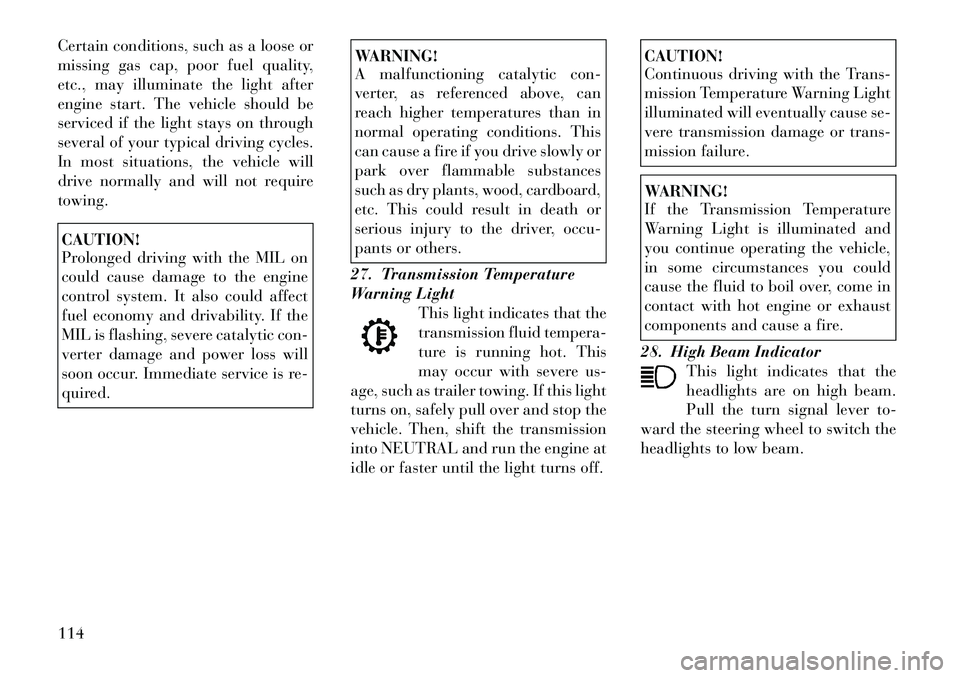
27. Transmission Temperature
Warning Light This light indicates that the
transmission fluid tempera-
ture is running hot. This
may occur with severe us-
age, such as trailer towing. If this light
turns on, safely pull over and stop the
vehicle. Then, shift the transmission
into NEUTRAL and run the engine at
idle or faster until the light turns off.
CAUTION!
Continuous driving with the Trans-
mission Temperature Warning Light
illuminated will eventually cause se-
vere transmission damage or trans-
mission failure.WARNING!
If the Transmission Temperature
Warning Light is illuminated and
you continue operating the vehicle,
in some circumstances you could
cause the fluid to boil over, come in
contact with hot engine or exhaust
components and cause a fire.
28. High Beam Indicator This light indicates that the
headlights are on high beam.
Pull the turn signal lever to-
ward the steering wheel to switch the
headlights to low beam.
114
Page 128 of 233
SYSTEM STATUS
Displays SYSTEM OK if there are no
active Warning Messages stored.
Pressing and releasing the DOWN
button when SYSTEM OK is dis-
played will do nothing. Displays SYS-
TEM WARNINGS PRESENT if there
are active Warning Messages stored.
Pressing and releasing the DOWN
button when SYSTEM WARNINGS
PRESENT is displayed will display
each stored warning for each button
press. Press and Release the MENU
button to return to the Main Menu.
PERSONAL SETTINGS
(CUSTOMER-
PROGRAMMABLE
FEATURES)
Personal Settings allows the driver to
set and recall features when the auto-
matic transaxle is in PARK.
Press and release the MENU button
until “Personal Settings” displays in
the EVIC.
Press and release the DOWN button
to display the following program-
mable features:Language
When in this display you may select
different languages for all display no-
menclature, including the trip func-
tions. Pressing the SELECT button
while in this display selects English,
Spanish, French, German, Italian, or
Dutch depending on availability. As
you continue, the displayed informa-
tion will be shown in the selected lan-
guage.
Auto Unlock On Exit
When ON is selected and the transaxle
is in the PARK or NEUTRAL position,
all doors will unlock when the
driver's
door is opened. To make your selec-
tion, press the SELECT button until
ON or OFF appears.
RKE Unlock
When “Driver Door 1st Press” is se-
lected, only the driver's door will un-
lock on the first press of the Remote
Keyless Entry (RKE) transmitter UN-
LOCK button. When Driver Door 1st
Press is selected, you must press the
RKE transmitter UNLOCK button
twice to unlock the passenger's doors.
When “All Doors 1st Press” is se-
lected, all of the doors will unlock on the first press of the RKE transmitter
UNLOCK button. To make your se-
lection, press and release the SELECT
button until “Driver Door 1st Press”
or “All Doors 1st Press” appears.
Flash Lamp with LOCK
When ON is selected, the front and
rear turn signals will flash when the
doors are locked or unlocked with the
RKE transmitter. This feature may be
selected with or without the Sound
Horn with LOCK feature selected. To
make your selection, press and release
the SELECT button until ON or OFF
appears.
Headlamp Off Delay
When this feature is selected, the
driver can choose to have the head-
lights remain on for 0, 30, 60, or
90 seconds when exiting the vehicle.
To make your selection, press the SE-
LECT button until 0, 30, 60, or 90
appears.
Headlamps With Wipers
(Available with Auto Headlights
Only)
When ON is selected, and the head-
light switch is in the AUTO position,
121
Page 129 of 233

the headlights will turn on approxi-
mately 10 seconds after the wipers are
turned on. The headlights will also
turn off when the wipers are turned
off if they were turned on by this
feature. To make your selection, press
the SELECT button until ON or OFF
appears.
NOTE:
Turning the headlights on during
the daytime causes the instrument
panel lights to dim. To increase the
brightness, refer to “Lights” in
“Understanding The Features Of
Your Vehicle.”
Key Off Power Delay
When this feature is selected, the
power window switches, radio,
Uconnect™ phone, and power outlets
will remain active for up to 10 min-
utes after the ignition switch is turned
to the LOCK position. Opening either
front vehicle door will cancel this fea-
ture. To make your selection, press the
SELECT button until OFF, 45 sec, 5
min, or 10 min appears.Illumin. Approach
When this feature is selected, the
headlights will activate and remain on
for up to 90 seconds when the doors
are unlocked with the remote keyless
entry transmitter. To make your selec-
tion, press the SELECT button until
“OFF,” “30 sec,” “60 sec,” or
“90 sec” appears.
Display Units In
The EVIC and odometer can be
changed between English and Metric
units of measure. To make your selec-
tion, press and release the SELECT
button until “U.S.” or “METRIC” ap-
pears.
Compass Variance
Refer to “Compass Display” for more
information.
Calibrate Compass
Refer to “Compass Display” for more
information.
SOUND SYSTEMS
Refer to your Sound Systems Booklet.
SETTING THE ANALOG
CLOCK
To set the analog clock, located at the
top center of the instrument panel,
press and hold the button in until the
setting is correct. The clock will adjust
slowly at first and then quicker the
longer the button is held.
Setting The Analog Clock
122