keyless Lancia Flavia 2012 Owner handbook (in English)
[x] Cancel search | Manufacturer: LANCIA, Model Year: 2012, Model line: Flavia, Model: Lancia Flavia 2012Pages: 233, PDF Size: 2.61 MB
Page 16 of 233

2
THINGS TO KNOW BEFORE STARTING
YOUR VEHICLE
A WORD ABOUT YOUR KEYS . . . . . . . . . . . . . . . 12 IGNITION KEY REMOVAL . . . . . . . . . . . . . . . . 12
KEY-IN-IGNITION REMINDER . . . . . . . . . . . . 13
LOCKING THE DOORS WITH THE KEY . . . . . 13
SENTRY KEY® . . . . . . . . . . . . . . . . . . . . . . . . . . 13 REPLACEMENT KEYS . . . . . . . . . . . . . . . . . . 14
CUSTOMER KEY PROGRAMMING . . . . . . . . . 14
GENERAL INFORMATION . . . . . . . . . . . . . . . . 14
VEHICLE SECURITY ALARM . . . . . . . . . . . . . . . 14 REARMING OF THE SYSTEM . . . . . . . . . . . . . 15
TO ARM THE SYSTEM . . . . . . . . . . . . . . . . . . 15
TO DISARM THE SYSTEM . . . . . . . . . . . . . . . 15
SECURITY MANUAL OVERRIDE . . . . . . . . . . . 16
ILLUMINATED ENTRY . . . . . . . . . . . . . . . . . . . . 16
REMOTE KEYLESS ENTRY (RKE) . . . . . . . . . . . 16 TO UNLOCK THE DOORS . . . . . . . . . . . . . . . . 16
TO LOCK THE DOORS . . . . . . . . . . . . . . . . . . 16
TO UNLATCH THE TRUNK . . . . . . . . . . . . . . . 16
FLASH LIGHTS WITH LOCK . . . . . . . . . . . . . 17
9
Page 22 of 233

If something triggers the alarm, the
Vehicle Security Alarm will sound the
horn intermittently, flash the head-
lights, the park lights, and the tail-
lights, and flash the Vehicle Security
Light in the cluster.
REARMING OF THE
SYSTEM
If something triggers the alarm, and
no action is taken to disarm it, the
Vehicle Security Alarm will turn off
the horn after three minutes, turn off
all of the visual signals after 15 min-
utes, and then the Vehicle Security
Alarm will rearm itself.
TO ARM THE SYSTEM
1. Remove the keys from the ignition
switch and exit the vehicle.
2. Lock the doors by pressing the
power door lock switch or the LOCK
button on the Remote Keyless Entry
(RKE) transmitter.
NOTE:
The Vehicle Security Alarm will
not arm if you lock the doors with
the manual door lock plungers.3. Close all doors. The Vehicle Secu-
rity Light in the instrument cluster
will flash rapidly for 16 seconds. This
shows that the Vehicle Security Alarm
is arming. After 16 seconds, the Ve-
hicle Security Light will flash slowly.
This shows that the Vehicle Security
Alarm is fully armed.
NOTE:
During the 16–second arming
period, if a door is opened or the
ignition switch is turned to ON/
RUN, the Vehicle Security Alarm
will automatically disarm.
While the Vehicle Security Alarm is armed, interior
switches for door locks and
decklid release are disabled.
TO DISARM THE SYSTEM
Either press the UNLOCK button on
the RKE transmitter or insert a valid
Sentry Key® into the ignition switch
lock cylinder and turn the key to the
ON/RUN or START position.
NOTE:
The driver's door key cylinder and the trunk button on the RKE transmitter cannot arm or dis-
arm the Vehicle Security Alarm.
The Vehicle Security Alarm re- mains armed during trunk entry.
Pressing the trunk button will
not disarm the Vehicle Security
Alarm. If someone enters the ve-
hicle through the trunk and
opens any door, the alarm will
sound.
When the Vehicle Security Alarm is armed, the interior
power door lock switches will
not unlock the doors.
The Vehicle Security Alarm is de-
signed to protect your vehicle; how-
ever, you can create conditions where
the Vehicle Security Alarm will give
you a false alarm. If one of the previ-
ously described arming sequences has
occurred, the Vehicle Security Alarm
will arm regardless of whether you are
in the vehicle or not. If you remain in
the vehicle and open a door, the alarm
will sound. If this occurs, disarm the
Vehicle Security Alarm.
If the Vehicle Security Alarm is armed
and the battery becomes discon-
15
Page 23 of 233
nected, the Vehicle Security Alarm
will remain armed when the battery is
reconnected. The exterior lights will
flash, and the horn will sound. If this
occurs, disarm the Vehicle Security
Alarm.
SECURITY MANUAL
OVERRIDE
The Vehicle Security Alarm will not
arm if you lock the doors using the
manual door lock plunger.
ILLUMINATED ENTRY
The courtesy lights will turn on when
you press the unlock button on the
Remote Keyless Entry (RKE) trans-
mitter or open any door.
The interior lights will fade to off after
approximately 30 seconds or they will
immediately fade to off once the igni-
tion switch is turned to ON/RUN from
the OFF position.
NOTE:
The front courtesy overheadconsole and door courtesy lights
will turn on if the dimmer con-
trol is in the "Dome ON" position
(extreme top position). The Illuminated Entry system
will not operate if the dimmer
control is in the “Dome defeat”
position (extreme bottom posi-
tion).
REMOTE KEYLESS
ENTRY (RKE)
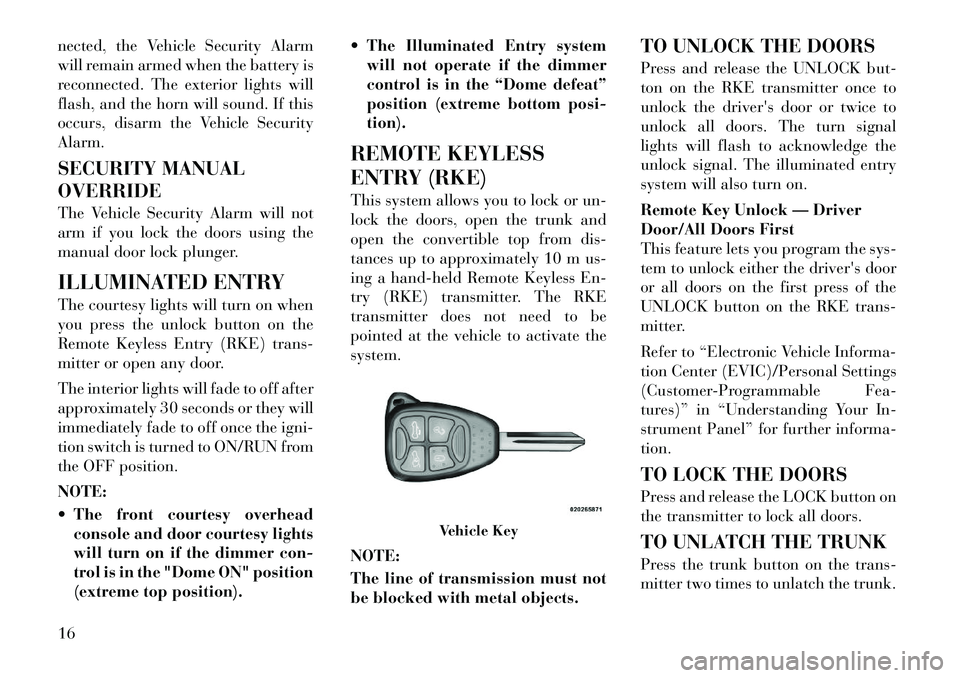
This system allows you to lock or un-
lock the doors, open the trunk and
open the convertible top from dis-
tances up to approximately 10 m us-
ing a hand-held Remote Keyless En-
try (RKE) transmitter. The RKE
transmitter does not need to be
pointed at the vehicle to activate the
system.
NOTE:
The line of transmission must not
be blocked with metal objects. TO UNLOCK THE DOORS
Press and release the UNLOCK but-
ton on the RKE transmitter once to
unlock the driver's door or twice to
unlock all doors. The turn signal
lights will flash to acknowledge the
unlock signal. The illuminated entry
system will also turn on.
Remote Key Unlock — Driver
Door/All Doors First
This feature lets you program the sys-
tem to unlock either the driver's door
or all doors on the first press of the
UNLOCK button on the RKE trans-
mitter.
Refer to “Electronic Vehicle Informa-
tion Center (EVIC)/Personal Settings
(Customer-Programmable Fea-
tures)” in “Understanding Your In-
strument Panel” for further informa-
tion.
TO LOCK THE DOORS
Press and release the LOCK button on
the transmitter to lock all doors.
TO UNLATCH THE TRUNK
Press the trunk button on the trans-
mitter two times to unlatch the trunk.
Vehicle Key
16
Page 28 of 233
NOTE:
The convertible top must be ei-ther closed and latched or open
and latched to release the trunk.
The transmission must be in PARK before the button will op-
erate.
The trunk release
button on the dash
will be disabled if
the vehicle is
locked by pressing
the power door
lock switch or by
pressing the LOCK
button on the Re-
mote Keyless Entry (RKE) transmit-
ter. The trunk release button will be
enabled when the vehicle is unlocked
by the RKE or if the key is inserted
into the ignition and turned to ON/
RUN or START.
NOTE:
This provides a locked area in the
vehicle even if the convertible top
is open.
To unlatch the trunk lid from outside
the vehicle, press and release the TRUNK RELEASE button on the
RKE transmitter two times.
The words “Trunk Ajar” will display
in the Electronic Vehicle Information
Center (EVIC).
TRUNK SAFETY
WARNING
WARNING!
Do not allow children to have access
to the trunk, either by climbing into
the trunk from outside, or through
the inside of the vehicle. Always
close the trunk lid when your vehicle
is unattended. Once in the trunk,
young children may not be able to
escape, even if they entered through
the rear seat. If trapped in the trunk,
children can die from suffocation or
heat stroke.
TRUNK INTERNAL
EMERGENCY RELEASE
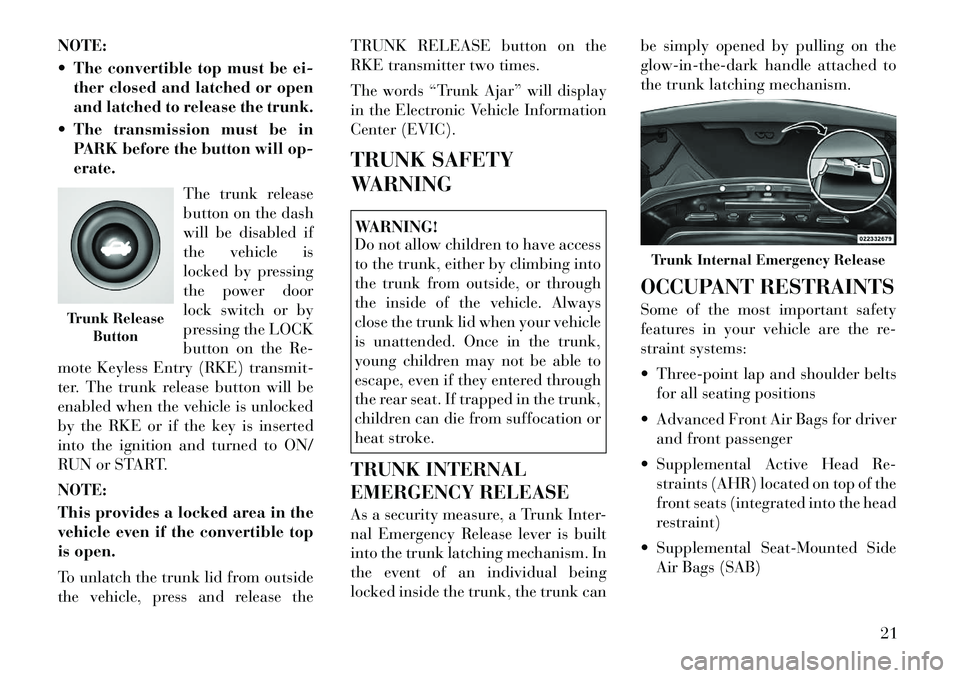
As a security measure, a Trunk Inter-
nal Emergency Release lever is built
into the trunk latching mechanism. In
the event of an individual being
locked inside the trunk, the trunk can be simply opened by pulling on the
glow-in-the-dark handle attached to
the trunk latching mechanism.
OCCUPANT RESTRAINTS
Some of the most important safety
features in your vehicle are the re-
straint systems:
Three-point lap and shoulder belts
for all seating positions
Advanced Front Air Bags for driver and front passenger
Supplemental Active Head Re- straints (AHR) located on top of the
front seats (integrated into the head
restraint)
Supplemental Seat-Mounted Side Air Bags (SAB)
Trunk Release Button
Trunk Internal Emergency Release
21
Page 60 of 233

CONVERTIBLE TOP
OPERATIONCAUTION!
Failure to follow these cautions may
cause interior water damage, stains
or mildew on the top material:
Avoid high-pressure car washes,as they can damage the top mate-
rial. Also, increased water pres-
sure may force water past the
weather strips.
Remove any standing water from
the top and dry the surface before
opening it. Operating the top,
opening a door or lowering a win-
dow while the top is wet may al-
low water to drip into the vehicles
interior.
Use care when washing the ve-
hicle, water pressure directed at
the weather strip seals may cause
water to leak into the vehicles in-
terior.
WARNING!
The convertible top does not provide
the structural protection that a rein-
forced metal roof does and the fabric
top cannot be expected to prevent
the ejection of the occupants in a
collision. Therefore, it is important
that all occupants wear their seat
belts at all times. Death or serious
injuries could occur if you are
ejected from the vehicle during a
collision.
You can lower or raise the power con-
vertible top from inside the vehicle or
lower the top remotely using the Re-
mote Keyless Entry (RKE) transmit-
ter. Either operation takes approxi-
mately 30 seconds. The entire
process, including unlatching or
latching the top at the windshield
header is automatic.
The top does take up some space in
the trunk when retracted. However,
the trunk will still hold a significant
amount of cargo. When operating the power convert-
ible top, the trunk lid will pivot at the
rear of the vehicle, swing open by the
rear window, and then pivot back-
ward. This allows room for the top to
retract into or unfold from its stowage
area in the trunk.
When lowering the top, the system
extends the hard tonneau cover,
which stows conveniently underneath
the trunk lid. The tonneau cover
closes the area between the rear seats
and the trunk lid to conceal the top
when stowed.
When raising the top, the system re-
tracts the hard tonneau cover back
into its stowage area underneath the
trunk lid.
To complete either operation, the
trunk lid returns to its normal posi-
tion and then latches.
Spring-loaded flipper doors, which
provide clearance for the linkage,
close off notches in the quarter trim
panels when the top is down.
53
Page 64 of 233
POWER CONVERTIBLE
TOP CONTROLS
The power top switch is located on the
front of the center console.
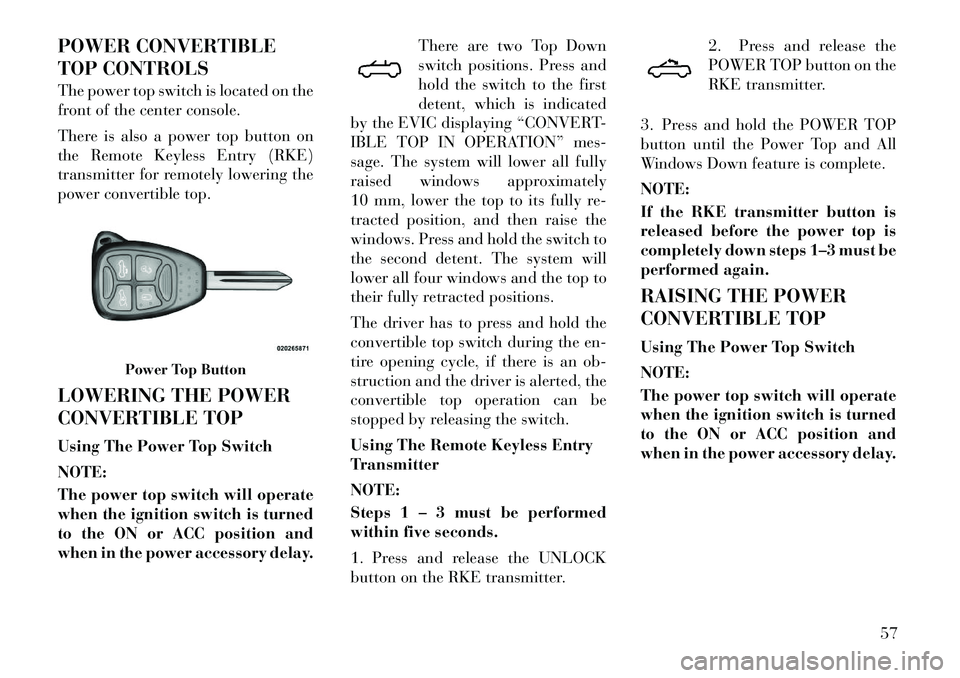
There is also a power top button on
the Remote Keyless Entry (RKE)
transmitter for remotely lowering the
power convertible top.
LOWERING THE POWER
CONVERTIBLE TOP
Using The Power Top Switch
NOTE:
The power top switch will operate
when the ignition switch is turned
to the ON or ACC position and
when in the power accessory delay.There are two Top Down
switch positions. Press and
hold the switch to the first
detent, which is indicated
by the EVIC displaying “CONVERT-
IBLE TOP IN OPERATION” mes-
sage. The system will lower all fully
raised windows approximately
10 mm, lower the top to its fully re-
tracted position, and then raise the
windows. Press and hold the switch to
the second detent. The system will
lower all four windows and the top to
their fully retracted positions.
The driver has to press and hold the
convertible top switch during the en-
tire opening cycle, if there is an ob-
struction and the driver is alerted, the
convertible top operation can be
stopped by releasing the switch.
Using The Remote Keyless Entry
Transmitter
NOTE:
Steps 1 – 3 must be performed
within five seconds.
1. Press and release the UNLOCK
button on the RKE transmitter. 2. Press and release the
POWER TOP button on the
RKE transmitter.
3. Press and hold the POWER TOP
button until the Power Top and All
Windows Down feature is complete.
NOTE:
If the RKE transmitter button is
released before the power top is
completely down steps 1–3 must be
performed again.
RAISING THE POWER
CONVERTIBLE TOP
Using The Power Top Switch
NOTE:
The power top switch will operate
when the ignition switch is turned
to the ON or ACC position and
when in the power accessory delay.
Power Top Button
57
Page 65 of 233
Press and hold the switch in
the Top Up position, “CON-
VERTIBLE TOP IN OP-
ERATION” message is dis-
played in the EVIC at this time. Keep
holding the switch until the operation
of raising the top and latching it is
complete, which is indicated by the
system also raising the windows and
displaying “CONVERTIBLE TOP
COMPLETE” message in the EVIC.
Using The Remote Keyless Entry
Transmitter
You cannot use the power top button
on the RKE transmitter to raise the
power convertible top. You must use
the power top switch inside the ve-
hicle to perform this operation.
Manually Raising
Raising the power convertible top
manually should only be performed
by an authorized dealer. In the event
that you experience a malfunction
when operating the power convertible
top:
1. Read all of the Notes, Cautions,
and Warning found under “Power Convertible Top Usage Precautions”
to verify all operating conditions are
met.
2. Check for Operation and Warning
Messages as described under “Power
Convertible Top Operation and Warn-
ing Messages.” If applicable, perform
the related action to correct the con-
dition present.
3. If Steps 1 and 2 do not resolve the
problem, refer to “Emergency Bypass
Mode”.
WIND STOP
The Wind Stop installs in the backseat
area of the vehicle. The Wind Stop
will not interfere with power top op-
eration. Therefore, it can remain in-
stalled when the top is up. However,
when not in use, the Wind Stop folds
to allow for convenient storage under-
neath the cargo shield in the trunk.
NOTE:
It is recommended that you lower
the convertible top before install-
ing or removing the Wind Stop.
Installing The Wind Stop
1. Remove the Wind Stop from the
trunk.
2. Unfold the Wind Stop framework.
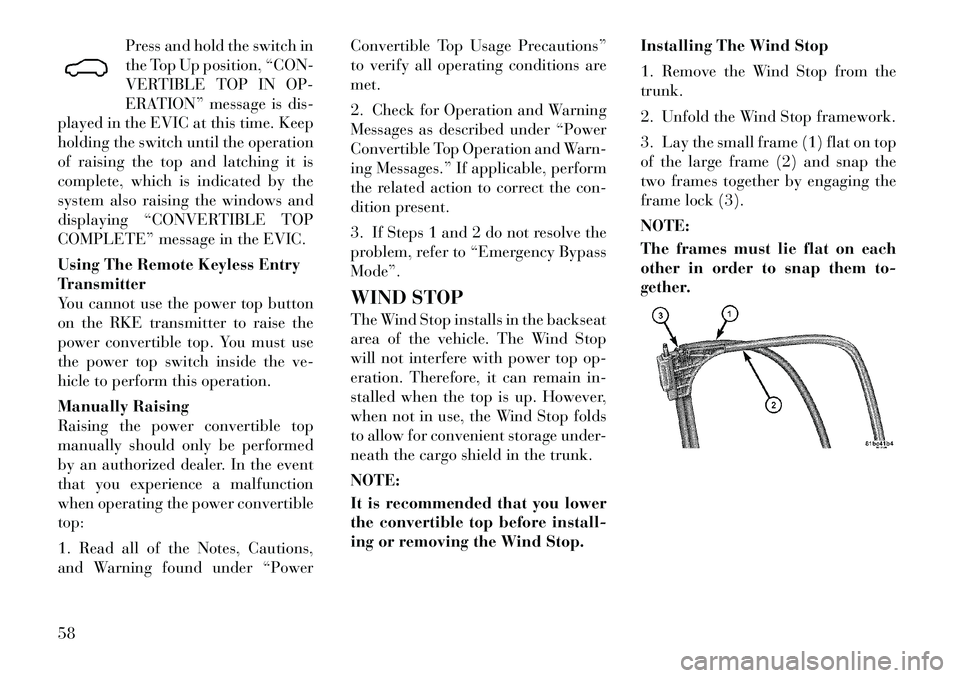
3. Lay the small frame (1) flat on top
of the large frame (2) and snap the
two frames together by engaging the
frame lock (3).
NOTE:
The frames must lie flat on each
other in order to snap them to-
gether.
58
Page 123 of 233
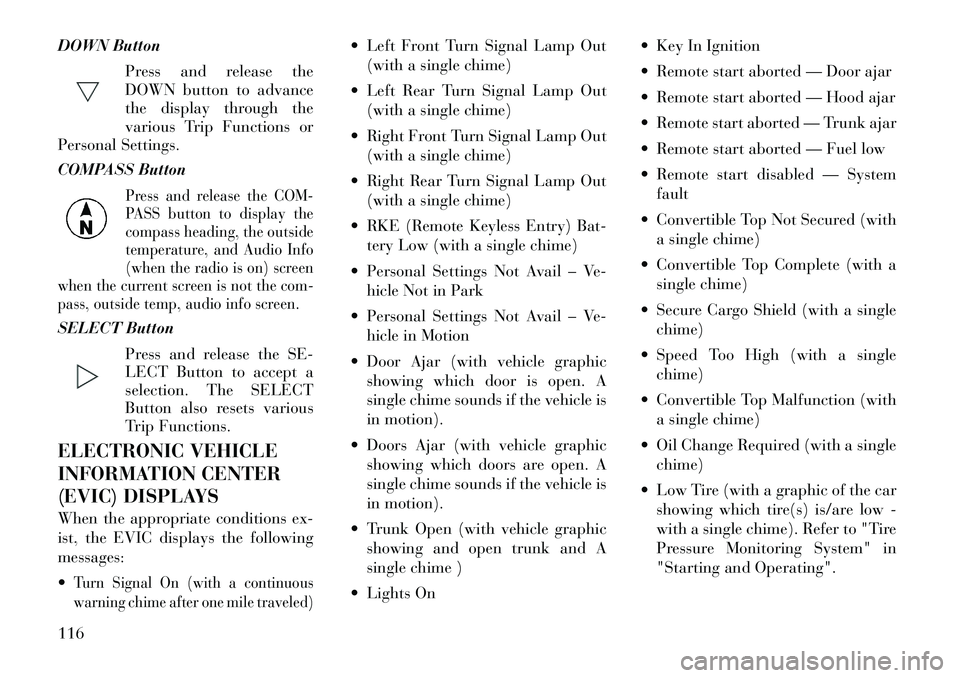
DOWN ButtonPress and release the
DOWN button to advance
the display through the
various Trip Functions or
Personal Settings.
COMPASS Button
Press and release the COM-
PASS button to display the
compass heading, the outside
temperature, and Audio Info
(when the radio is on) screen
when the current screen is not the com-
pass, outside temp, audio info screen.
SELECT Button
Press and release the SE-
LECT Button to accept a
selection. The SELECT
Button also resets various
Trip Functions.
ELECTRONIC VEHICLE
INFORMATION CENTER
(EVIC) DISPLAYS
When the appropriate conditions ex-
ist, the EVIC displays the following
messages:
Turn Signal On (with a continuous
warning chime after one mile traveled)
Left Front Turn Signal Lamp Out (with a single chime)
Left Rear Turn Signal Lamp Out (with a single chime)
Right Front Turn Signal Lamp Out (with a single chime)
Right Rear Turn Signal Lamp Out (with a single chime)
RKE (Remote Keyless Entry) Bat- tery Low (with a single chime)
Personal Settings Not Avail – Ve- hicle Not in Park
Personal Settings Not Avail – Ve- hicle in Motion
Door Ajar (with vehicle graphic showing which door is open. A
single chime sounds if the vehicle is
in motion).
Doors Ajar (with vehicle graphic showing which doors are open. A
single chime sounds if the vehicle is
in motion).
Trunk Open (with vehicle graphic showing and open trunk and A
single chime )
Lights On Key In Ignition
Remote start aborted — Door ajar
Remote start aborted — Hood ajar
Remote start aborted — Trunk ajar
Remote start aborted — Fuel low
Remote start disabled — System
fault
Convertible Top Not Secured (with a single chime)
Convertible Top Complete (with a single chime)
Secure Cargo Shield (with a single chime)
Speed Too High (with a single chime)
Convertible Top Malfunction (with a single chime)
Oil Change Required (with a single chime)
Low Tire (with a graphic of the car showing which tire(s) is/are low -
with a single chime). Refer to "Tire
Pressure Monitoring System" in
"Starting and Operating".
116
Page 128 of 233
SYSTEM STATUS
Displays SYSTEM OK if there are no
active Warning Messages stored.
Pressing and releasing the DOWN
button when SYSTEM OK is dis-
played will do nothing. Displays SYS-
TEM WARNINGS PRESENT if there
are active Warning Messages stored.
Pressing and releasing the DOWN
button when SYSTEM WARNINGS
PRESENT is displayed will display
each stored warning for each button
press. Press and Release the MENU
button to return to the Main Menu.
PERSONAL SETTINGS
(CUSTOMER-
PROGRAMMABLE
FEATURES)
Personal Settings allows the driver to
set and recall features when the auto-
matic transaxle is in PARK.
Press and release the MENU button
until “Personal Settings” displays in
the EVIC.
Press and release the DOWN button
to display the following program-
mable features:Language
When in this display you may select
different languages for all display no-
menclature, including the trip func-
tions. Pressing the SELECT button
while in this display selects English,
Spanish, French, German, Italian, or
Dutch depending on availability. As
you continue, the displayed informa-
tion will be shown in the selected lan-
guage.
Auto Unlock On Exit
When ON is selected and the transaxle
is in the PARK or NEUTRAL position,
all doors will unlock when the
driver's
door is opened. To make your selec-
tion, press the SELECT button until
ON or OFF appears.
RKE Unlock
When “Driver Door 1st Press” is se-
lected, only the driver's door will un-
lock on the first press of the Remote
Keyless Entry (RKE) transmitter UN-
LOCK button. When Driver Door 1st
Press is selected, you must press the
RKE transmitter UNLOCK button
twice to unlock the passenger's doors.
When “All Doors 1st Press” is se-
lected, all of the doors will unlock on the first press of the RKE transmitter
UNLOCK button. To make your se-
lection, press and release the SELECT
button until “Driver Door 1st Press”
or “All Doors 1st Press” appears.
Flash Lamp with LOCK
When ON is selected, the front and
rear turn signals will flash when the
doors are locked or unlocked with the
RKE transmitter. This feature may be
selected with or without the Sound
Horn with LOCK feature selected. To
make your selection, press and release
the SELECT button until ON or OFF
appears.
Headlamp Off Delay
When this feature is selected, the
driver can choose to have the head-
lights remain on for 0, 30, 60, or
90 seconds when exiting the vehicle.
To make your selection, press the SE-
LECT button until 0, 30, 60, or 90
appears.
Headlamps With Wipers
(Available with Auto Headlights
Only)
When ON is selected, and the head-
light switch is in the AUTO position,
121
Page 129 of 233

the headlights will turn on approxi-
mately 10 seconds after the wipers are
turned on. The headlights will also
turn off when the wipers are turned
off if they were turned on by this
feature. To make your selection, press
the SELECT button until ON or OFF
appears.
NOTE:
Turning the headlights on during
the daytime causes the instrument
panel lights to dim. To increase the
brightness, refer to “Lights” in
“Understanding The Features Of
Your Vehicle.”
Key Off Power Delay
When this feature is selected, the
power window switches, radio,
Uconnect™ phone, and power outlets
will remain active for up to 10 min-
utes after the ignition switch is turned
to the LOCK position. Opening either
front vehicle door will cancel this fea-
ture. To make your selection, press the
SELECT button until OFF, 45 sec, 5
min, or 10 min appears.Illumin. Approach
When this feature is selected, the
headlights will activate and remain on
for up to 90 seconds when the doors
are unlocked with the remote keyless
entry transmitter. To make your selec-
tion, press the SELECT button until
“OFF,” “30 sec,” “60 sec,” or
“90 sec” appears.
Display Units In
The EVIC and odometer can be
changed between English and Metric
units of measure. To make your selec-
tion, press and release the SELECT
button until “U.S.” or “METRIC” ap-
pears.
Compass Variance
Refer to “Compass Display” for more
information.
Calibrate Compass
Refer to “Compass Display” for more
information.
SOUND SYSTEMS
Refer to your Sound Systems Booklet.
SETTING THE ANALOG
CLOCK
To set the analog clock, located at the
top center of the instrument panel,
press and hold the button in until the
setting is correct. The clock will adjust
slowly at first and then quicker the
longer the button is held.
Setting The Analog Clock
122