buttons Lancia Musa 2009 Owner handbook (in English)
[x] Cancel search | Manufacturer: LANCIA, Model Year: 2009, Model line: Musa, Model: Lancia Musa 2009Pages: 218, PDF Size: 3.7 MB
Page 55 of 218
54
SAFETY
DEVICES
STARTING
AND
DRIVING
WARNING
LIGHTS AND
MESSAGES
IN AN
EMERGENCY
MAINTENANCE
AND CARE
TECHNICALSPECIFICATIONS
INDEX
DASHBOARD
AND CONTROLS
During fully automatic operation the
set temperatures, the air distribution
and fan speed can be changed using
the corresponding supplied buttons or
knobs at any time. The system will
automatically change the settings to
adapt to the new request.
During fully automatic operation
(FULL AUTO), the word FULLwill
disappear if the air distribution, air
speed, compressor and/or recircula-
tion settings are changed. In this way,
the functions will switch from auto-
matic to manual control until AUTO
is pressed again. There is only one fan
speed in all the areas of the passenger
compartment.
With on or more manually set func-
tions, the delivered air temperature is
still managed automatically by the
system, except for when the compres-
sor is off. In the case, the air delivered
into the passenger compartment can-
not be cooler than the outside air. During fully automatic operation, the
only functions that are enabled man-
ually are:
❒MONOto align the air tempera-
ture and distribution on the pas-
senger’s side with that on the dri-
ver’s side;
❒
…, air recirculation, to keep it
always on or off;
❒
-to speed up demisting/defrost-
ing of windscreen, side windows,
rear window and door mirrors;
❒
(to demist/defrost the rear win-
dow and door mirrors. USING THE CLIMATE
CONTROL SYSTEM
The system can be started in different
ways, but it is advisable to press one
of the AUTObuttons and then to turn
the knobs to set the temperatures re-
quired on the display.
As the system manages two zones in
the passenger compartment, the driver
and front passenger can select differ-
ent temperature values with a maxi-
mum difference of 7 °C.
The system starts running automati-
cally in this way in order to reach
comfortable temperature as quickly
as possible depending on the set tem-
perature values. The system adjusts
the temperature, amount and distrib-
ution of air delivered to the passenger
compartment. In addition, it manages
the recirculation function to engage
the climate control system compres-
sor.
038-094 MUSA 1ed GB 11-07-2008 14:10 Pagina 54
Page 57 of 218
56
SAFETY
DEVICES
STARTING
AND
DRIVING
WARNING
LIGHTS AND
MESSAGES
IN AN
EMERGENCY
MAINTENANCE
AND CARE
TECHNICALSPECIFICATIONS
INDEX
DASHBOARD
AND CONTROLS
˙
▼Air flow distributed between the
foot well vents (hotter air) and the
central and side dashboard vents
(cooler air). This distribution
mode is particularly useful in
spring and autumn on a sunny
day.
▲
▼Air flow distributed between foot
well vents and windscreen and
front side window
defrosting/demisting vents. This
distribution mode enables proper
heating of the passenger compart-
ment, thus preventing possible
window misting. The function is enabled when the pas-
senger compartment needs to be
cooled as quickly as possible, thus us-
ing the system operating capacity at
best. This function enables air recir-
culation and engages the climate con-
trol system compressor; air distribu-
tion and fan speed are managed by
the system based on ambient condi-
tions. All manual settings will be al-
lowed when this function is on.
To switch the function off, simply turn
the temperature knob clockwise and
set the required temperature.Air distribution
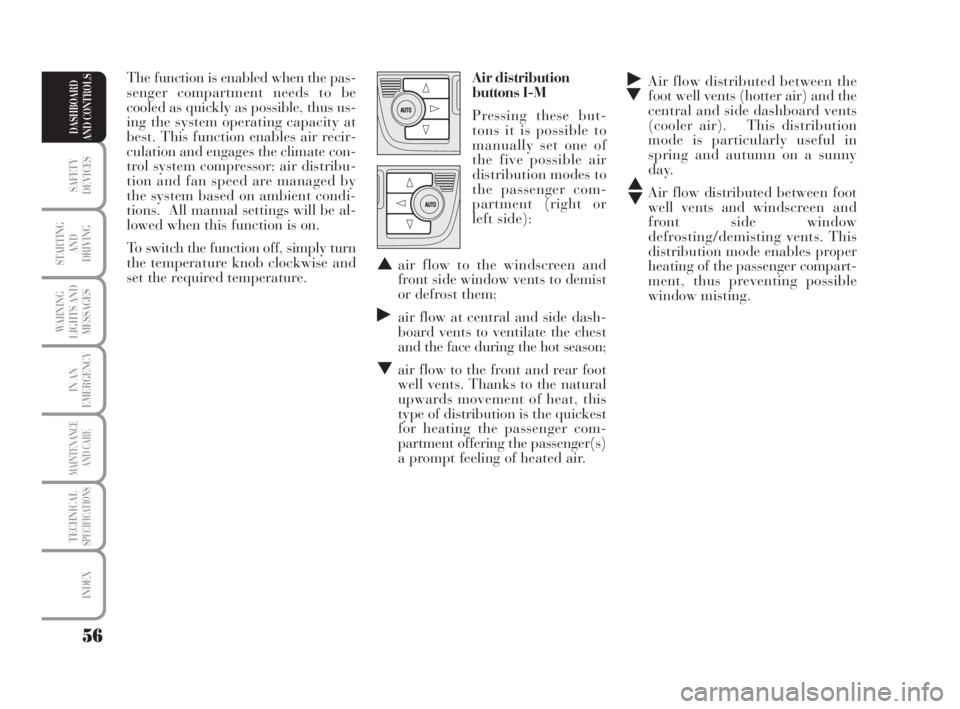
buttons I-M
Pressing these but-
tons it is possible to
manually set one of
the five possible air
distribution modes to
the passenger com-
partment (right or
left side):
▲air flow to the windscreen and
front side window vents to demist
or defrost them;
˙air flow at central and side dash-
board vents to ventilate the chest
and the face during the hot season;
▼air flow to the front and rear foot
well vents. Thanks to the natural
upwards movement of heat, this
type of distribution is the quickest
for heating the passenger com-
partment offering the passenger(s)
a prompt feeling of heated air.
038-094 MUSA 1ed GB 11-07-2008 14:10 Pagina 56
Page 58 of 218
57
SAFETY
DEVICES
STARTING
AND
DRIVING
WARNING
LIGHTS AND
MESSAGES
IN AN
EMERGENCY
MAINTENANCE
AND CARE
TECHNICALSPECIFICATIONS
INDEX
DASHBOARD
AND CONTROLS
The distribution mode set is indicated
by the LEDs that light up on the se-
lected buttons.
In combined function mode the rele-
vant function is enabled simultane-
ously with those already set by press-
ing the corresponding button. If a
button is pressed for a function that
is active, the operation is cancelled
and the corresponding LED goes off.
To restore automatic air distribution
control after a manual selection, press
buttonAUTO.
When the driver selects air distribu-
tion to the windscreen, the air distri-
bution on the passenger’s side too is
aligned to the windscreen. The pas-
senger can select a different distribu-
tion mode by pressing the corre-
sponding buttons.Buttons
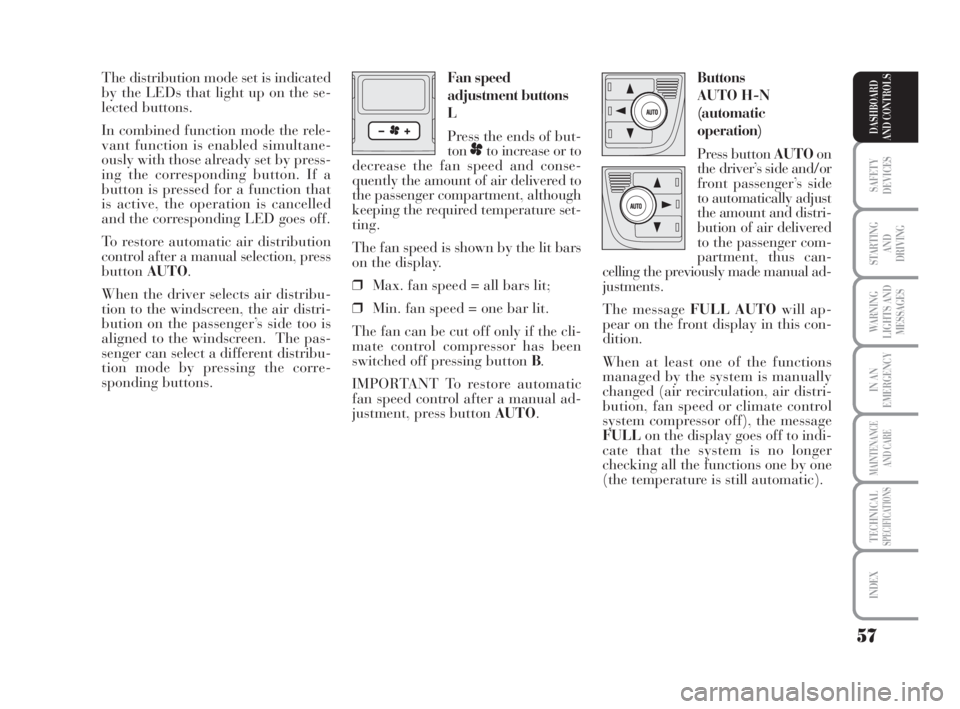
AUTO H-N
(automatic
operation)
Press button AUTOon
the driver’s side and/or
front passenger’s side
to automatically adjust
the amount and distri-
bution of air delivered
to the passenger com-
partment, thus can-
celling the previously made manual ad-
justments.
The message FULL AUTOwill ap-
pear on the front display in this con-
dition.
When at least one of the functions
managed by the system is manually
changed (air recirculation, air distri-
bution, fan speed or climate control
system compressor off), the message
FULLon the display goes off to indi-
cate that the system is no longer
checking all the functions one by one
(the temperature is still automatic). Fan speed
adjustment buttons
L
Press the ends of but-
ton
pto increase or to
decrease the fan speed and conse-
quently the amount of air delivered to
the passenger compartment, although
keeping the required temperature set-
ting.
The fan speed is shown by the lit bars
on the display.
❒Max. fan speed = all bars lit;
❒Min. fan speed = one bar lit.
The fan can be cut off only if the cli-
mate control compressor has been
switched off pressing button B.
IMPORTANT To restore automatic
fan speed control after a manual ad-
justment, press button AUTO.
038-094 MUSA 1ed GB 11-07-2008 14:10 Pagina 57
Page 65 of 218
64
SAFETY
DEVICES
STARTING
AND
DRIVING
WARNING
LIGHTS AND
MESSAGES
IN AN
EMERGENCY
MAINTENANCE
AND CARE
TECHNICALSPECIFICATIONS
INDEX
DASHBOARD
AND CONTROLS
WINDOW
WASHING
WINDSCREEN
WASHER/WIPER
The device can work only when the
ignition key is on MAR.
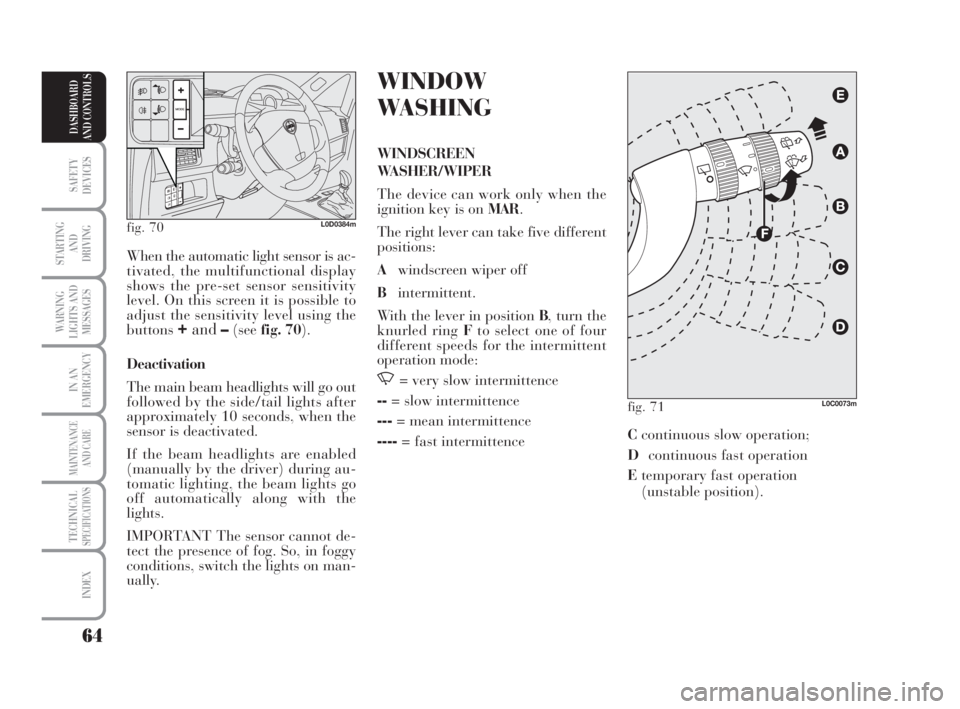
The right lever can take five different
positions:
Awindscreen wiper off
Bintermittent.
With the lever in position B, turn the
knurled ring Fto select one of four
different speeds for the intermittent
operation mode:
,= very slow intermittence
--= slow intermittence
---= mean intermittence
----= fast intermittence When the automatic light sensor is ac-
tivated, the multifunctional display
shows the pre-set sensor sensitivity
level. On this screen it is possible to
adjust the sensitivity level using the
buttons
+and–(seefig. 70).
Deactivation
The main beam headlights will go out
followed by the side/tail lights after
approximately 10 seconds, when the
sensor is deactivated.
If the beam headlights are enabled
(manually by the driver) during au-
tomatic lighting, the beam lights go
off automatically along with the
lights.
IMPORTANT The sensor cannot de-
tect the presence of fog. So, in foggy
conditions, switch the lights on man-
ually.
fig. 70L0D0384m
fig. 71L0C0073m
Ccontinuous slow operation;
Dcontinuous fast operation
Etemporary fast operation
(unstable position).
038-094 MUSA 1ed GB 11-07-2008 14:10 Pagina 64
Page 72 of 218
71
SAFETY
DEVICES
STARTING
AND
DRIVING
WARNING
LIGHTS AND
MESSAGES
IN AN
EMERGENCY
MAINTENANCE
AND CARE
TECHNICALSPECIFICATIONS
INDEX
DASHBOARD
AND CONTROLS
LIGHT CONTROL
BUTTONS
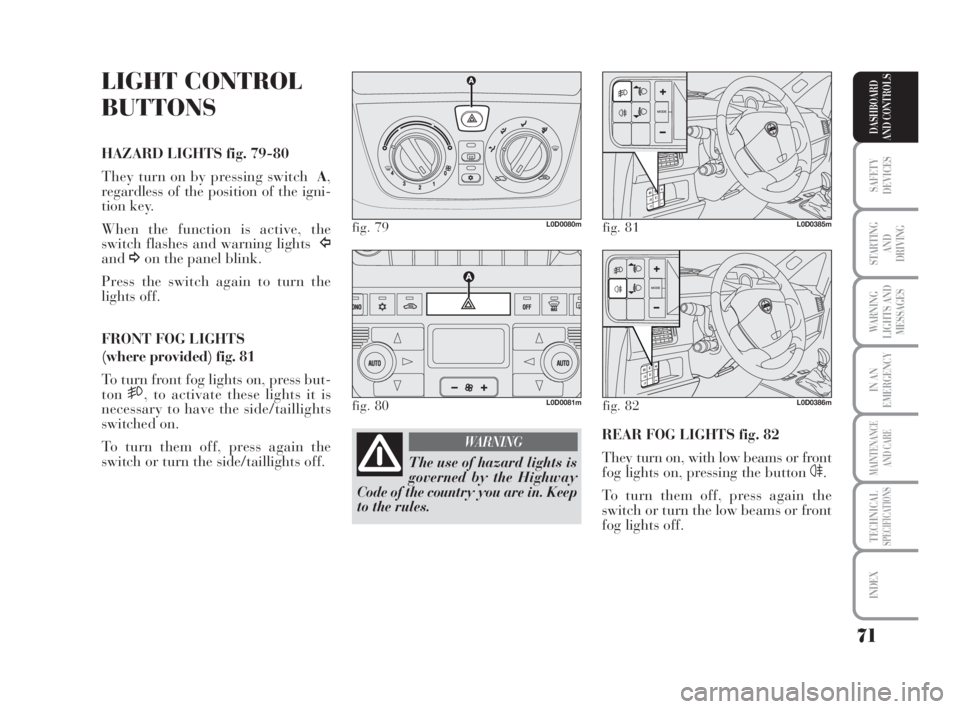
HAZARD LIGHTS fig. 79-80
They turn on by pressing switch A,
regardless of the position of the igni-
tion key.
When the function is active, the
switch flashes and warning lightsÎ
and¥on the panel blink.
Press the switch again to turn the
lights off.
FRONT FOG LIGHTS
(where provided) fig. 81
To turn front fog lights on, press but-
ton
5, to activate these lights it is
necessary to have the side/taillights
switched on.
To turn them off, press again the
switch or turn the side/taillights off.
fig. 79L0D0080m
fig. 80L0D0081m
fig. 81L0D0385m
The use of hazard lights is
governed by the Highway
Code of the country you are in. Keep
to the rules.
WARNINGREAR FOG LIGHTS fig. 82
They turn on, with low beams or front
fog lights on, pressing the button
4.
To turn them off, press again the
switch or turn the low beams or front
fog lights off.
fig. 82L0D0386m
038-094 MUSA 1ed GB 11-07-2008 14:10 Pagina 71
Page 80 of 218
79
SAFETY
DEVICES
STARTING
AND
DRIVING
WARNING
LIGHTS AND
MESSAGES
IN AN
EMERGENCY
MAINTENANCE
AND CARE
TECHNICALSPECIFICATIONS
INDEX
DASHBOARD
AND CONTROLS
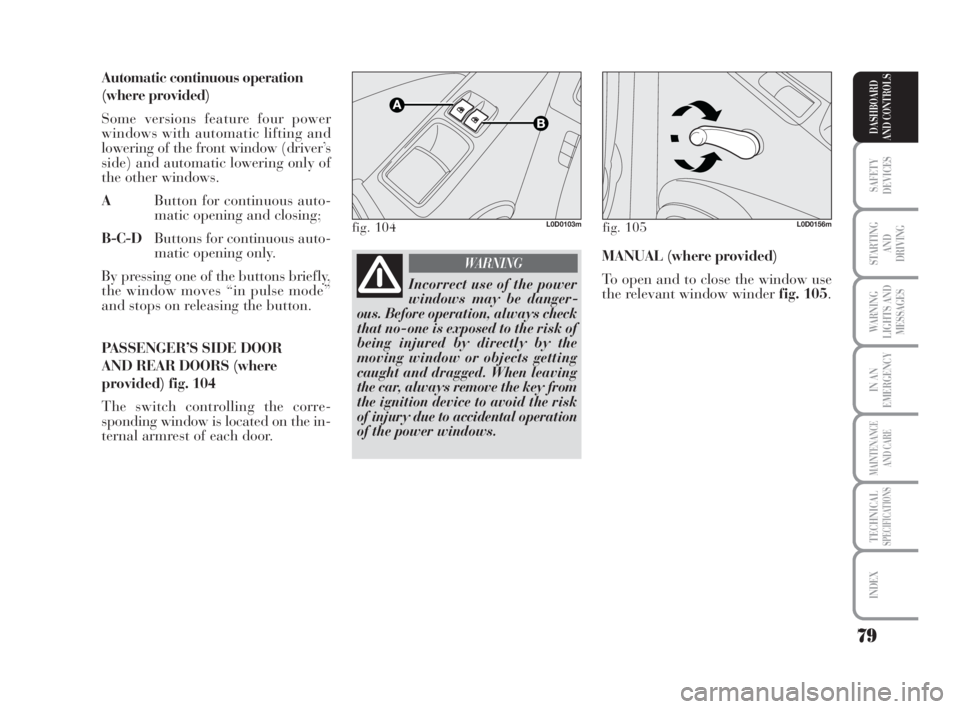
Automatic continuous operation
(where provided)
Some versions feature four power
windows with automatic lifting and
lowering of the front window (driver’s
side) and automatic lowering only of
the other windows.
AButton for continuous auto-
matic opening and closing;
B-C-DButtons for continuous auto-
matic opening only.
By pressing one of the buttons briefly,
the window moves “in pulse mode”
and stops on releasing the button.
PASSENGER’S SIDE DOOR
AND REAR DOORS (where
provided) fig. 104
The switch controlling the corre-
sponding window is located on the in-
ternal armrest of each door.
fig. 104L0D0103m
Incorrect use of the power
windows may be danger-
ous. Before operation, always check
that no-one is exposed to the risk of
being injured by directly by the
moving window or objects getting
caught and dragged. When leaving
the car, always remove the key from
the ignition device to avoid the risk
of injury due to accidental operation
of the power windows.
WARNING
fig. 105L0D0156m
MANUAL (where provided)
To open and to close the window use
the relevant window winderfig. 105.
038-094 MUSA 1ed GB 11-07-2008 14:10 Pagina 79
Page 85 of 218
84
SAFETY
DEVICES
STARTING
AND
DRIVING
WARNING
LIGHTS AND
MESSAGES
IN AN
EMERGENCY
MAINTENANCE
AND CARE
TECHNICALSPECIFICATIONS
INDEX
DASHBOARD
AND CONTROLS
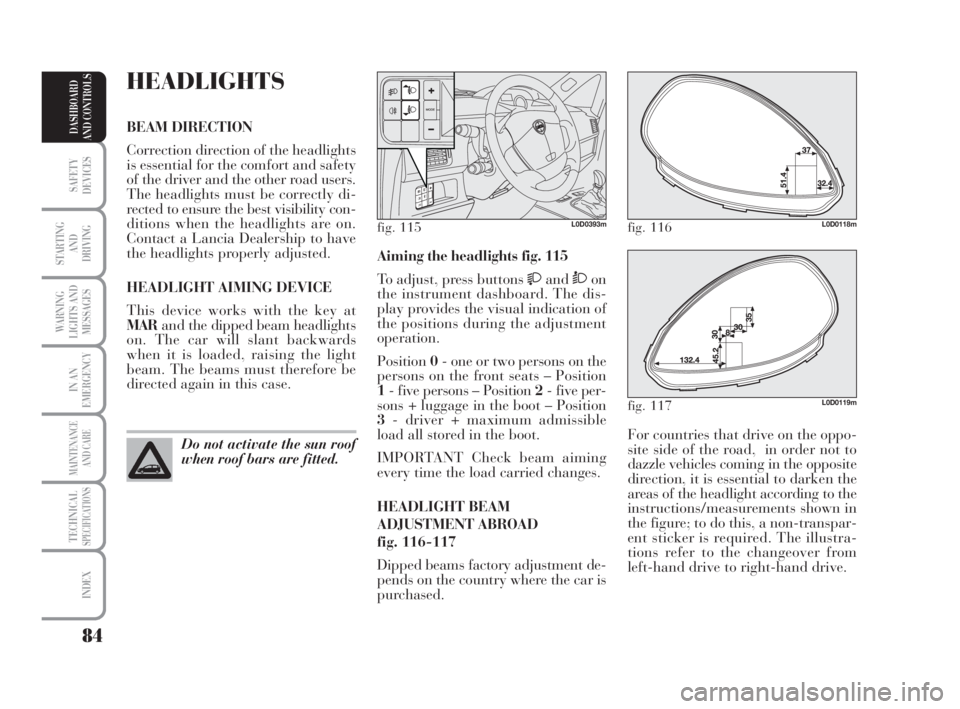
For countries that drive on the oppo-
site side of the road, in order not to
dazzle vehicles coming in the opposite
direction, it is essential to darken the
areas of the headlight according to the
instructions/measurements shown in
the figure; to do this, a non-transpar-
ent sticker is required. The illustra-
tions refer to the changeover from
left-hand drive to right-hand drive. Aiming the headlights fig. 115
To adjust, press buttons
andÒon
the instrument dashboard. The dis-
play provides the visual indication of
the positions during the adjustment
operation.
Position0- one or two persons on the
persons on the front seats – Position
1- five persons – Position 2- five per-
sons + luggage in the boot – Position
3- driver + maximum admissible
load all stored in the boot.
IMPORTANT Check beam aiming
every time the load carried changes.
HEADLIGHT BEAM
ADJUSTMENT ABROAD
fig. 116-117
Dipped beams factory adjustment de-
pends on the country where the car is
purchased.
HEADLIGHTS
BEAM DIRECTION
Correction direction of the headlights
is essential for the comfort and safety
of the driver and the other road users.
The headlights must be correctly di-
rected to ensure the best visibility con-
ditions when the headlights are on.
Contact a Lancia Dealership to have
the headlights properly adjusted.
HEADLIGHT AIMING DEVICE
This device works with the key at
MARand the dipped beam headlights
on. The car will slant backwards
when it is loaded, raising the light
beam. The beams must therefore be
directed again in this case.
Do not activate the sun roof
when roof bars are fitted.
fig. 115L0D0393mfig. 116L0D0118m
fig. 117L0D0119m
038-094 MUSA 1ed GB 11-07-2008 14:10 Pagina 84
Page 208 of 218
207
WARNING
LIGHTS AND
MESSAGES
DASHBOARD
AND CONTROLS
SAFETY
DEVICES
STARTING
AND
DRIVING
IN AN
EMERGENCY
MAINTENANCE
AND CARE
TECHNICALSPECIFICATIONS
INDEX
External lights ...................... 62
Fix&Go
(quick tyre repair kit) ........... 138
Fluids and lubricants ............ 202
Fog lights
– bulb replacement
procedure ..........................153-154
– control button .................. 71
FPS (inertial cut-off switch) .. 72
Front airbags ........................ 108
– driver’s front airbag .......... 108
– manual disabling front
air bag passenger side ........... 110
– passenger’s front airbag .... 109
Fuel
– consumption ..................... 204
– gauge ............................... 21
– inertial cut-off switch ....... 72
Fuel filler cap......................... 92
Fuses .................................... 156
Hazard lights
– control ............................ 71Head restraints ...................... 44
Headlights ............................ 84
Identification data.................. 188
Ignition device ...................... 20
In an emergency .................... 135
Instrument panel ................... 10
Instruments ........................... 21
Interior equipment
– card recess ....................... 74
– current outlets ................... 75
– glass recess / can recess ..... 74
– oddment compartments..... 73
– oddment shelf
on roof panel.......................... 74
– rear CD holder compartment
with can recess ....................... 75
– upper oddments drawers ... 73
Interiors ................................. 185
Isofix child seat ..................... 105
Jack ...................................... 144Key and door closing kits ....... 13
Lancia CODE (system) ......... 11
Levels
– check/control .................... 171
Lifting the car ....................... 162
Lubricants (specifications) ..... 202
Maintenance and care ........... 165
– scheduled servicing .......... 167
Manual climate control system 48
Mechanical gearbox (use)....... 117
Multifunctional display .........22-25
Multifunctional display
control buttons.......................22-25
Number plate light
– bulb replacement
procedure .............................. 154
Oddment compartments ........ 8
Parking sensors ..................... 90
Performance ......................... 199
206-216 MUSA 1ed GB 10-07-2008 11:08 Pagina 207