maintenance Lancia Thema 2012 Owner handbook (in English)
[x] Cancel search | Manufacturer: LANCIA, Model Year: 2012, Model line: Thema, Model: Lancia Thema 2012Pages: 316, PDF Size: 3.85 MB
Page 146 of 316

dows open, open the front and rear
windows together to minimize the
buffeting. If the buffeting occurs with
the sunroof open, adjust the sunroof
opening to minimize the buffeting or
open any window.
SUNROOF MAINTENANCE
Use only a non-abrasive cleaner and a
soft cloth to clean the glass panel.
IGNITION OFF OPERATION
For vehicles not equipped with the
Electronic Vehicle Information Center
(EVIC), the power sunroof switch will
remain active for 45 seconds after the
ignition switch is turned to the LOCK
position. Opening either front door
will cancel this feature.
NOTE:
For vehicles equipped with theEVIC, the power sunroof switch
will remain active for up to ap-
proximately ten minutes after
the ignition switch is turned to
the LOCK position. Opening ei-
ther front door will cancel this
feature.
The Ignition Off time is pro- grammable using the Uconnect Touch™ System. Refer to
“Uconnect Touch™ Settings” in
“Understanding Your Instru-
ment Panel” for further infor-
mation.
SUNROOF FULLY CLOSED
Press the switch forward and release
to ensure that the sunroof is fully
closed.
ELECTRICAL POWER
OUTLETS
There are three 12 Volt (13 Amp)
electrical power outlets on this ve-
hicle. The power outlets are protected
by a fuse.
Insert cigar lighter or accessory plug
into the power outlets for use to en-
sure proper operation.
CAUTION!
Do not exceed the maximum power of 160 Watts (13 Amps) at
12 Volts. If the 160 Watt
(13 Amp) power rating is ex-
ceeded, the fuse protecting the
system will need to be replaced.
(Continued)
CAUTION!(Continued)
Power outlets are designed for ac-
cessory plugs only. Do not insert
any other object in the power out-
lets as this will damage the outlet
and blow the fuse. Improper use
of the power outlet can cause
damage not covered by your New
Vehicle Limited Warranty.
The front 12 Volt power outlet has
power available only when the igni-
tion is placed in the ACC or RUN
position.
Front Power Outlet
140
Page 156 of 316

MESSAGES # . . . . . . . . . . . . . . . . . . . . . . . . . 167
TURN MENU OFF . . . . . . . . . . . . . . . . . . . . . 167
Uconnect Touch™ SETTINGS . . . . . . . . . . . . . . 167 HARD-KEYS . . . . . . . . . . . . . . . . . . . . . . . . . 167
SOFT-KEYS . . . . . . . . . . . . . . . . . . . . . . . . . . 167
CUSTOMER PROGRAMMABLE FEATURES— Uconnect Touch™ SYSTEM 8.4
SETTINGS . . . . . . . . . . . . . . . . . . . . . . . . . . . 168
SOUND SYSTEMS . . . . . . . . . . . . . . . . . . . . . . . 177
NAVIGATION SYSTEM (for versions/markets, where provided) . . . . . . . . . . . . . . . . . . . . . . . . . 177
SETTING THE ANALOG CLOCK . . . . . . . . . . . . 178
iPod®/USB/MP3 CONTROL (for vehicles/ markets, where provided) . . . . . . . . . . . . . . . . . 178
HARMAN KARDON® Logic7® HIGH PERFORMANCE MULTICHANNEL
SURROUND SOUND SYSTEM WITH
DRIVER-SELECTABLE SURROUND (DSS) (for
versions/markets, where required) . . . . . . . . . . . 178
STEERING WHEEL AUDIO CONTROLS . . . . . . 179 Radio Operation . . . . . . . . . . . . . . . . . . . . . . 179
CD Player . . . . . . . . . . . . . . . . . . . . . . . . . . . 179
CD/DVD DISC MAINTENANCE . . . . . . . . . . . . . 179
RADIO OPERATION AND MOBILE PHONES . . . 180
CLIMATE CONTROLS . . . . . . . . . . . . . . . . . . . . 180 GENERAL OVERVIEW . . . . . . . . . . . . . . . . . 180
150
Page 168 of 316

Adaptive Cruise Control (ACC)SET This telltale will illuminate
when the ACC is SET. For
further information, refer
to “Adaptive Cruise Control
(ACC)” in “Understanding The Fea-
tures Of Your Vehicle.”
EVIC AMBER TELLTALES
This area will show reconfigurable
amber caution telltales. These tell-
tales include:
Forward Collision Warning
(FCW) OFF This telltale informs the
driver that the Forward
Collision Warning feature is
Off. The telltale is On when
the front radar sensor is blocked and
requires cleaning, the ACC/FCW sen-
sors require service, or the ACC/FCW
system is unavailable because of a
system error. For further information,
refer to “Adaptive Cruise Control
(ACC)” in “Understanding The Fea-
tures Of Your Vehicle.” Low Fuel Telltale
When the fuel level reaches ap-
proximately 11.0 L this light
will turn on, and remain on until
fuel is added.
Windshield Washer Fluid Low Indicator This telltale will turn on to
indicate the windshield
washer fluid is low.
Adaptive Cruise Control (ACC) Malfunction This light will turn on when
a ACC is not operating and
needs service. For further
information, refer to
“Adaptive Cruise Control (ACC)” in
“Understanding The Features Of
Your Vehicle.”
Wait To Start Light — Diesel
Engines Only The Wait To Start Light will
turn on when the ignition key is
first turned to the ON/RUN position.
Wait until the Wait To Start Light
turns OFF to start the engine. (Refer to “Starting Procedures” in “Starting
And Operating” for further informa-
tion).
Water In Fuel Indicator Light —
Diesel Engines Only Indicates there is water de-
tected in the fuel filter. If
this light remains on, DO
NOT start the vehicle be-
fore you drain the water from the fuel
filter to prevent engine damage. Refer
to “Maintenance Procedures/ Drain-
ing Fuel/Water Separator Filter” in
“Maintaining Your Vehicle” for water
drain procedure.
EVIC RED TELLTALES
This area will show reconfigurable red
telltales. These telltales include:
Door Ajar
This telltale turns on when
one or more doors are ajar.
The telltale will show which
doors are ajar.162
Page 185 of 316

is described under Driver-Selectable
Surround (DSS). The Video Surround
Mode will only be available for video
media sources (DVDs, Video CDs, or
other video media supported by the
radio). Some audio will sound better
in DSS modes, others in Stereo mode.
When in “Audio Surround” mode,
balance is set automatically. Fader
control is available in surround mode
but should be set to the center position
for optimal surround performance.
STEERING WHEEL
AUDIO CONTROLS
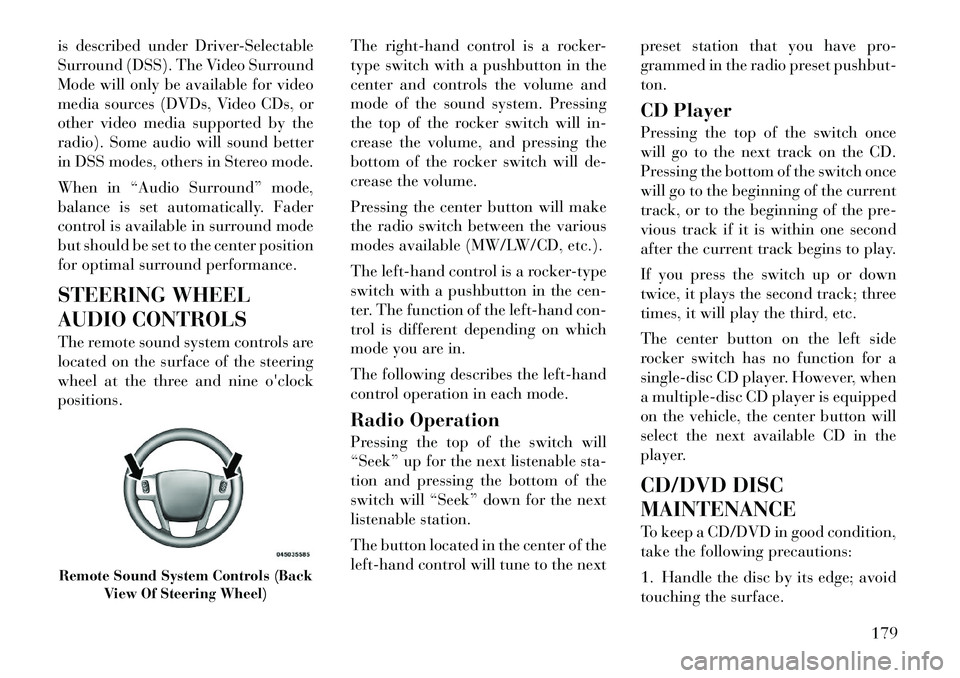
The remote sound system controls are
located on the surface of the steering
wheel at the three and nineo'clock
positions. The
right-hand control is a rocker-
type switch with a pushbutton in the
center and controls the volume and
mode of the sound system. Pressing
the top of the rocker switch will in-
crease the volume, and pressing the
bottom of the rocker switch will de-
crease the volume.
Pressing the center button will make
the radio switch between the various
modes available (MW/LW/CD, etc.).
The left-hand control is a rocker-type
switch with a pushbutton in the cen-
ter. The function of the left-hand con-
trol is different depending on which
mode you are in.
The following describes the left-hand
control operation in each mode.
Radio Operation
Pressing the top of the switch will
“Seek” up for the next listenable sta-
tion and pressing the bottom of the
switch will “Seek” down for the next
listenable station.
The button located in the center of the
left-hand control will tune to the next preset station that you have pro-
grammed in the radio preset pushbut-
ton.
CD Player
Pressing the top of the switch once
will go to the next track on the CD.
Pressing the bottom of the switch once
will go to the beginning of the current
track, or to the beginning of the pre-
vious track if it is within one second
after the current track begins to play.
If you press the switch up or down
twice, it plays the second track; three
times, it will play the third, etc.
The center button on the left side
rocker switch has no function for a
single-disc CD player. However, when
a multiple-disc CD player is equipped
on the vehicle, the center button will
select the next available CD in the
player.
CD/DVD DISC
MAINTENANCE
To keep a CD/DVD in good condition,
take the following precautions:
1. Handle the disc by its edge; avoid
touching the surface.Remote Sound System Controls (Back
View Of Steering Wheel)
179
Page 191 of 316

eration and Recirculation control can
also be manually selected in Manual
operation.
OPERATING TIPS
NOTE:
Refer to the chart at the end of this
section for suggested control set-
tings for various weather condi-
tions.
Summer Operation
The engine cooling system in air-
conditioned vehicles must be pro-
tected with a high-quality antifreeze
coolant to provide proper corrosion
protection and to protect against en-
gine overheating. A solution of 50%
ethylene glycol antifreeze coolant and
50% water is recommended. Refer to
“Maintenance Procedures” in “Main-
taining Your Vehicle” for proper cool-
ant selection.
Winter Operation
Use of the air Recirculation mode dur-
ing Winter months is not recom-
mended because it may cause window
fogging.Vacation Storage
Any time you store your vehicle or
keep it out of service (i.e., vacation)
for two weeks or more, run the air
conditioning system at idle for about
five minutes in the fresh air and high
blower setting. This will ensure ad-
equate system lubrication to minimize
the possibility of compressor damage
when the system is started again.
Window Fogging
Interior fogging on the windshield can
be quickly removed by turning the
mode selector to Defrost. The Defrost/
Floor mode can be used to maintain a
clear windshield and provide suffi-
cient heating. If side window fogging
becomes a problem increase blower
speed. Vehicle windows tend to fog on
the inside in mild but rainy or humid
weather.
NOTE:
Recirculate without A/C should
not be used for long periods, as
fogging may occur. Automatic Temperature Con-
trols (ATC) will automatically
adjust the climate control set-
tings to reduce or eliminate win-
dow fogging on the front wind-
shield.
Outside Air Intake
Make sure the air intake, located di-
rectly in front of the windshield, is
free of obstructions such as leaves.
Leaves collected in the air intake may
reduce airflow, and if they enter the
plenum, they could plug the water
drains. In Winter months, make sure
the air intake is clear of ice, slush, and
snow.
A/C Air Filter
The climate control system filters out-
side air containing dust, pollen and
some odors. Strong odors cannot be
totally filtered out. Refer to “Mainte-
nance Procedures” in “Maintaining
Your Vehicle” for filter replacement
instructions.
185
Page 225 of 316

CAUTION!(Continued)
Observe the tire chain manufac-
tur er's instructions on the method
of installation, operating speed,
and conditions for use. Always use
the lower suggested operating
speed of the chain manufacturer if
different from the speed r ecom-
mended by the manufacture.
NOTE:
In order to avoid damage to tires,
chains, and your vehicle do not
drive for a prolonged period on dry
pavement. Observe the tire chain
manufacturer's instructions on
method of installation, operating
speed, and conditions for usage.
Always use the lower suggested oper-
ating speed if both the chain manu-
facturer and vehicle manufacturer
suggest a maximum speed. This no-
tice applies to all chain traction de-
vices, including link and cable (ra-
dial) chains. TIRE ROTATION
RECOMMENDATIONS
Tires on the front and rear axles of
vehicles operate at different loads and
perform different steering, driving,
and braking functions. For these rea-
sons, they wear at unequal rates.
These effects can be reduced by timely
rotation of tires. The benefits of rota-
tion are especially worthwhile with ag-
gressive tread designs such as those on
all season type tires. Rotation will in-
crease tread life, help to maintain mud,
snow and wet traction levels, and con-
tribute to a smooth, quiet ride.Refer to the “Maintenance Schedule”
for the proper maintenance intervals.
The reasons for any rapid or unusual
wear should be corrected prior to ro-
tation being performed.
TIRE PRESSURE
MONITOR SYSTEM
(TPMS)
The Tire Pressure Monitor System
(TPMS) will warn the driver of a low
tire pressure based on the vehicle rec-
ommended cold placard pressure.The tire pressure will vary with tem-
perature by about 0.069 BAR for ev-
ery 6.5°C. This means that when the
outside temperature decreases, the
tire pressure will decrease. Tire pres-
sure should always be set based on
cold inflation tire pressure. This is
defined as the tire pressure after the
vehicle has not been driven for at least
three hours, or driven less than
1.6 km after a three hour period. The
cold tire inflation pressure must not
exceed the maximum inflation pres-
sure molded into the tire sidewall. Re-
fer to “Tires – General Information”
in “Starting and Operating” for infor-
mation on how to properly inflate the
vehicle’s tires. The tire pressure will
also increase as the vehicle is driven -
this is normal and there should be no
adjustment for this increased pres-
sure.
The TPMS will warn the driver of a
low tire pressure if the tire pressure
falls below the low-pressure warning
limit for any reason, including low
temperature effects and natural pres-
sure loss through the tire.
219
Page 226 of 316

The TPMS will continue to warn the
driver of low tire pressure as long as
the condition exists, and will not turn
off until the tire pressure is at or above
the recommended cold placard pres-
sure. Once the low tire pressure warn-
ing (Tire Pressure Monitoring [TPM]
Telltale Light) illuminates, you must
increase the tire pressure to the rec-
ommended cold placard pressure in
order for the TPM Telltale Light to
turn off. The system will automati-
cally update and the TPM Telltale
Light will turn off once the system
receives the updated tire pressures.
The vehicle may need to be driven for
up to 20 minutes above 24 km/h in
order for the TPMS to receive this
information.
For example, your vehicle may have a
recommended cold (parked for more
than three hours) placard pressure of
2.07 BAR. If the ambient temperature
is 20°C and the measured tire pres-
sure is 1.86 BAR, a temperature drop
to 7°C will decrease the tire pressure
to approximately 1.58 BAR. This tire
pressure is sufficiently low enough to
turn ON the TPM Telltale Light. Driv-ing the vehicle may cause the tire
pressure to rise to approximately 1.86
BAR, but the TPM Telltale Light will
still be ON. In this situation, the TPM
Telltale Light will turn OFF only after
the tires are inflated to the vehicle’s
recommended cold placard pressure
value.
CAUTION!
The TPMS has been optimized for
the original equipment tires and
wheels. TPMS pressures and
warning have been established for
the tire size equipped on your ve-
hicle. Undesirable system opera-
tion or sensor damage may result
when using replacement equip-
ment that is not of the same size,
type, and/or style. Aftermarket
wheels can cause sensor damage.
Do not use aftermarket tire seal-
ants or balance beads if your ve-
hicle is equipped with a TPMS, as
damage to the sensors may result.
(Continued)
CAUTION!(Continued)
After inspecting or adjusting the
tire pressure, always reinstall the
valve stem cap. This will prevent
moisture and dirt from entering
the valve stem, which could dam-
age the TPM sensor.
NOTE:
The TPMS is not intended to re- place normal tire care and
maintenance or to provide
warning of a tire failure or con-
dition.
The TPMS should not be used as a tire pressure gauge while ad-
justing your tire pressure.
Driving on a significantly under- inflated tire causes the tire to
overheat and can lead to tire
failure. Under-inflation also re-
duces fuel efficiency and tire
tread life, and may affect the ve-
hicle’s handling and stopping
ability.
The TPMS is not a substitute for proper tire maintenance, and it
is the driver’s responsibility to
maintain correct tire pressure
220
Page 231 of 316

Many of these materials intended for
gum and varnish removal may con-
tain active solvents or similar ingredi-
ents. These can harm fuel system gas-
ket and diaphragm materials.WARNING!
Carbon monoxide (CO) in exhaust
gases is deadly. Follow the precau-
tions below to prevent carbon mon-
oxide poisoning:
Do not inhale exhaust gases. Theycontain carbon monoxide, a color-
less and odorless gas which can
kill. Never run the engine in a
closed area, such as a garage, and
never sit in a parked vehicle with
the engine running for an ex-
tended period. If the vehicle is
stopped in an open area with the
engine running for more than a
short period, adjust the ventila-
tion system to force fresh, outside
air into the vehicle.
(Continued)
WARNING!(Continued)
Guard against carbon monoxide
with proper maintenance. Have
the exhaust system inspected ev-
ery time the vehicle is raised.
Have any abnormal conditions re-
paired promptly. Until repaired,
drive with all side windows fully
open.
Keep the trunk closed when driv-
ing your vehicle to prevent carbon
monoxide and other poisonous ex-
haust gases from entering the ve-
hicle.
FUEL REQUIREMENTS
— DIESEL ENGINES
This vehicle must only use pre-
mium diesel fuel that meets the
requirements of EN 590. Biodiesel
blends that meet EN 590 may also
be used.
CAUTION!
The manufacturer requires that you
must fuel this vehicle with Ultra
Low Sulfur Highway Diesel fuel
(15 ppm Sulfur maximum) and pro-
hibits the use of Low Sulfur High-
way Diesel fuel (500 ppm Sulfur
maximum) to avoid damage to the
emissions control system.WARNING!
Do not use alcohol or gasoline as a
fuel blending agent. They can be
unstable under certain conditions
and hazardous or explosive when
mixed with diesel fuel.Diesel fuel is seldom completely free of
water. To prevent fuel system trouble,
drain the accumulated water from the
fuel/water separator using the fuel/
water separator drain provided. If you
buy good quality fuel and follow the
cold weather advice above, fuel condi-
tioners should not be required in your
vehicle. If available in your area, a high
cetane “premium” diesel fuel may offer
improved cold-starting and warm-up
performance.
225
Page 241 of 316

Pin
Number Function Wire
Color
5 Right Rear
Position, SideMarker
Lights, and
Rear Registra- tion Plate
Illumination
Device.
b
Brown
6 Stoplights Red
7 Left Rear Position, SideMarker
Lights, and
Rear Registra-
tion Plate
Illumination Device.
b
Black
8 Reverse lights Red/ Black
9 Permanent
Power Supply(+12V) Brown/
White
10 Power Supply Controlled byIgnition
Switch
(+12V) Red
Pin
Number Function Wire
Color
11
a
Return for
Contact (Pin) 10 White
12 Reserve for Future Alloca-
tion Red/Blue
13
a
Return for
Contact (Pin) 9 White
Note: The allocation pin 12 has
been changed from “Coding for
coupled Trailer” to “Reserve for
Future Allocation.”
aThe three return circuits shall not
be connected electrically in the
trailer.bThe rear position registration
plate illumination device shall be
connected such that no light of the
device has a common connection
with both pins 5 and 7.
TOWING TIPS
Before setting out on a trip, practice
turning, stopping, and backing up the
trailer in an area located away from
heavy traffic. Automatic Transmission
The DRIVE range can be selected
when towing. However, if frequent
shifting occurs while in this range,
select a lower gear range using the
AutoStick® shift control (for
versions/markets, where provided).
NOTE:
Selecting a lower gear range while
operating the vehicle under heavy
operating conditions will improve
performance and extend transmis-
sion life by reducing excessive
shifting and heat buildup. This ac-
tion will also provide better engine
braking.
If you REGULARLY tow a trailer for
more than 45 minutes of continuous
operation, then change the automatic
transmission fluid and filter accord-
ing to the interval specified for “po-
lice, taxi, fleet, or frequent trailer tow-
ing.” Refer to the “Maintenance
Schedule” for the proper maintenance
intervals.
235
Page 259 of 316

7
MAINTAINING YOUR VEHICLE
ENGINE COMPARTMENT — 3.6L . . . . . . . . . . . 255
ENGINE COMPARTMENT — 3.0L DIESEL . . . . 256
ONBOARD DIAGNOSTIC SYSTEM — OBD II . . . 257
REPLACEMENT PARTS . . . . . . . . . . . . . . . . . . . 257
MAINTENANCE PROCEDURES . . . . . . . . . . . . . 257 ENGINE OIL – GASOLINE ENGINE . . . . . . . . 258
ENGINE OIL – DIESEL ENGINE . . . . . . . . . . 259
SYNTHETIC ENGINE OILS . . . . . . . . . . . . . . 259
MATERIALS ADDED TO ENGINE OILS . . . . . 259
DISPOSING OF USED ENGINE OIL ANDFILTERS . . . . . . . . . . . . . . . . . . . . . . . . . . . . 259
ENGINE OIL FILTER . . . . . . . . . . . . . . . . . . . 259
ENGINE AIR CLEANER FILTER . . . . . . . . . . 259
MAINTENANCE-FREE BATTERY . . . . . . . . . 260
AIR CONDITIONER MAINTENANCE . . . . . . . 261
A/C AIR FILTER . . . . . . . . . . . . . . . . . . . . . . 261
BODY LUBRICATION . . . . . . . . . . . . . . . . . . . 262
WINDSHIELD WIPER BLADES . . . . . . . . . . . 263
ADDING WASHER FLUID . . . . . . . . . . . . . . . 263
INTERVENTION REGENERATION STRATEGY – 3.0L DIESEL ENGINE . . . . . . . 264
253