reset Lancia Thema 2013 Owner handbook (in English)
[x] Cancel search | Manufacturer: LANCIA, Model Year: 2013, Model line: Thema, Model: Lancia Thema 2013Pages: 336, PDF Size: 3.87 MB
Page 129 of 336
The Cruise Control system has two
control modes:
Adaptive Cruise Control mode formaintaining an appropriate dis-
tance between vehicles.
Normal (fixed speed) cruise control mode is for cruising at a constant
preset speed. For additional infor-
mation, refer to “Normal (Fixed
Speed) Cruise Control Mode” in
this section.
NOTE: The system will not react
to preceding vehicles. Always be
aware of the mode selected.You can change the mode by using
the Cruise Control buttons. The two
control modes function differently. Al-
ways confirm which mode is selected.
ADAPTIVE CRUISE
CONTROL (ACC)
OPERATION
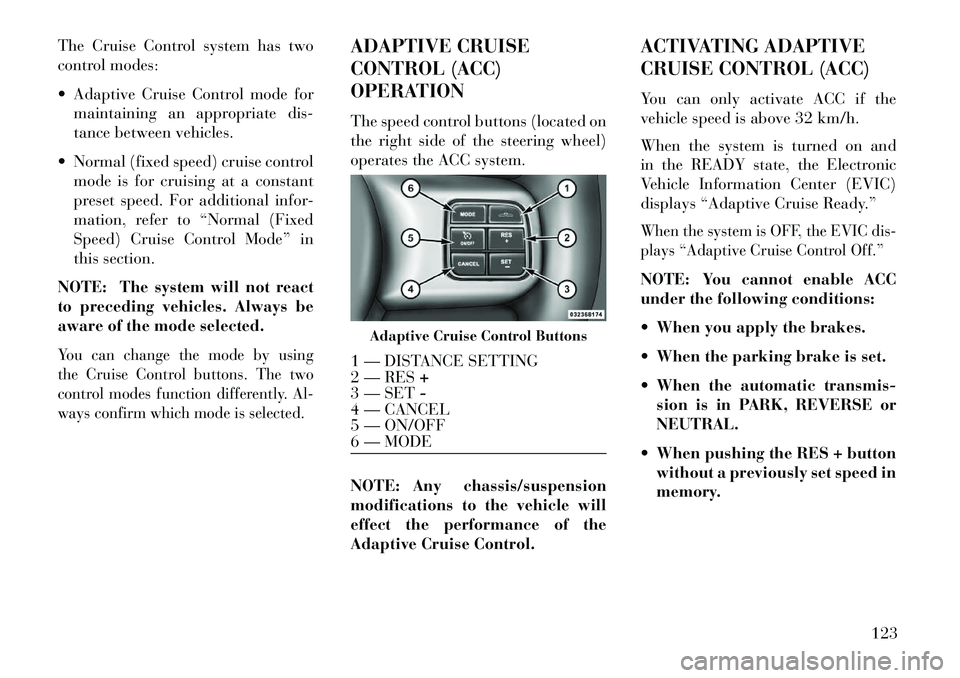
The speed control buttons (located on
the right side of the steering wheel)
operates the ACC system.
NOTE: Any chassis/suspension
modifications to the vehicle will
effect the performance of the
Adaptive Cruise Control. ACTIVATING ADAPTIVE
CRUISE CONTROL (ACC)
You can only activate ACC if the
vehicle speed is above 32 km/h.
When the system is turned on and
in the READY state, the Electronic
Vehicle Information Center (EVIC)
displays “Adaptive Cruise Ready.”
When the system is OFF, the EVIC dis-
plays “Adaptive Cruise Control Off.”NOTE: You cannot enable ACC
under the following conditions:
When you apply the brakes.
When the parking brake is set.
When the automatic transmis-
sion is in PARK, REVERSE or
NEUTRAL.
When pushing the RES + button without a previously set speed in
memory.
Adaptive Cruise Control Buttons
1 — DISTANCE SETTING
2 — RES +
3 — SET -
4 — CANCEL
5 — ON/OFF
6 — MODE
123
Page 158 of 336
If the sunshade is in the raised posi-
tion and the vehicle is placed in
REVERSE, the sunshade will auto-
matically fully lower. When the trans-
mission is shifted out of REVERSE
the sunshade will automatically re-
turn to the fully raised position after
approximately five seconds.
NOTE: The rear sunshade con-
trol switch can be locked out with
the rear passenger window con-
trols from the driver switch win-
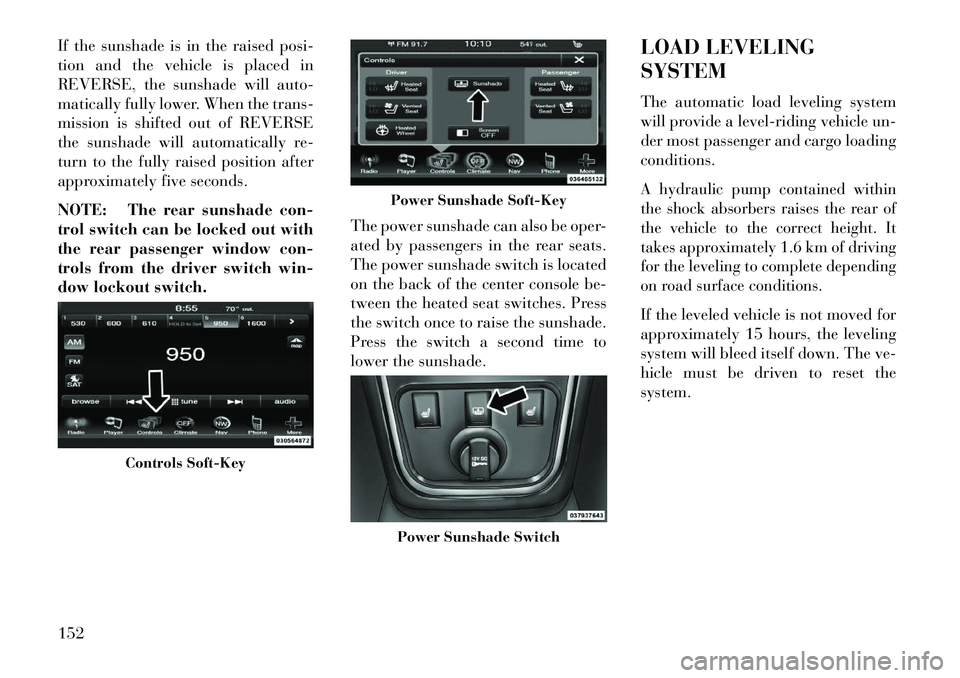
dow lockout switch.The power sunshade can also be oper-
ated by passengers in the rear seats.
The power sunshade switch is located
on the back of the center console be-
tween the heated seat switches. Press
the switch once to raise the sunshade.
Press the switch a second time to
lower the sunshade.LOAD LEVELING
SYSTEM
The automatic load leveling system
will provide a level-riding vehicle un-
der most passenger and cargo loading
conditions.
A hydraulic pump contained within
the shock absorbers raises the rear of
the vehicle to the correct height. It
takes approximately 1.6 km of driving
for the leveling to complete depending
on road surface conditions.If the leveled vehicle is not moved for
approximately 15 hours, the leveling
system will bleed itself down. The ve-
hicle must be driven to reset the
system.
Controls Soft-Key
Power Sunshade Soft-KeyPower Sunshade Switch
152
Page 170 of 336
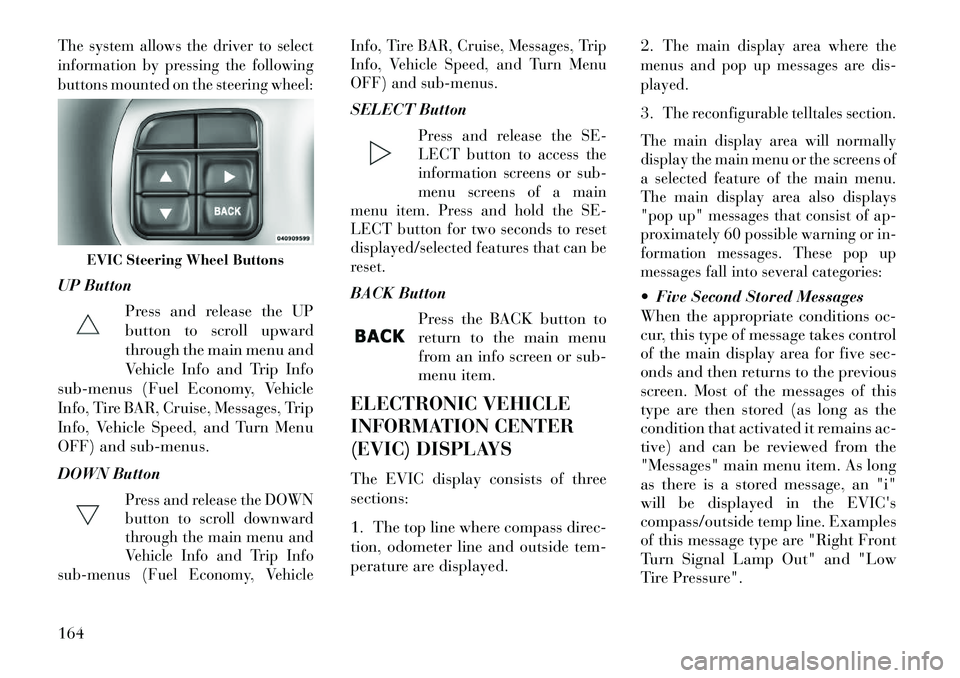
The system allows the driver to select
information by pressing the following
buttons mounted on the steering wheel:UP ButtonPress and release the UP
button to scroll upward
through the main menu and
Vehicle Info and Trip Info
sub-menus (Fuel Economy, Vehicle
Info, Tire BAR, Cruise, Messages, Trip
Info, Vehicle Speed, and Turn Menu
OFF) and sub-menus.
DOWN Button
Press and release the DOWN
button to scroll downward
through the main menu and
Vehicle Info and Trip Info
sub-menus (Fuel Economy, Vehicle Info, Tire BAR, Cruise, Messages, Trip
Info, Vehicle Speed, and Turn Menu
OFF) and sub-menus.
SELECT Button
Press and release the SE-
LECT button to access the
information screens or sub-
menu screens of a main
menu item. Press and hold the SE-
LECT button for two seconds to reset
displayed/selected features that can be
reset.
BACK Button
Press the BACK button to
return to the main menu
from an info screen or sub-
menu item.
ELECTRONIC VEHICLE
INFORMATION CENTER
(EVIC) DISPLAYS
The EVIC display consists of three
sections:
1. The top line where compass direc-
tion, odometer line and outside tem-
perature are displayed. 2.
The main display area where the
menus and pop up messages are dis-
played.
3.
The reconfigurable telltales section.
The main display area will normally
display the main menu or the screens of
a selected feature of the main menu.
The main display area also displays
"pop up" messages that consist of ap-
proximately 60 possible warning or in-
formation messages. These pop up
messages fall into several categories:
Five Second Stored Messages
When the appropriate conditions oc-
cur, this type of message takes control
of the main display area for five sec-
onds and then returns to the previous
screen. Most of the messages of this
type are then stored (as long as the
condition that activated it remains ac-
tive) and can be reviewed from the
"Messages" main menu item. As long
as there is a stored message, an "i"
will be displayed in the EVIC's
compass/outside temp line. Examples
of this message type are "Right Front
Turn Signal Lamp Out" and "Low
Tire Pressure".
EVIC Steering Wheel Buttons
164
Page 174 of 336
continuously flash and a continuous
chime will occur until the engine is
allowed to cool.
If the telltale turns on while driving,
safely pull over and stop the vehicle. If
the A/C system is on, turn it off. Also,
shift the transmission into NEUTRAL
and idle the vehicle. If the tempera-
ture reading does not return to nor-
mal, turn the engine off immediately
and call for service. Refer to “If Your
Engine Overheats” in “What To Do In
Emergencies” for more information.
Transmission Temperature
Warning Telltale
This telltale indicates that
the transmission fluid tem-
perature is running hot. This
may occur with severe usage,
such as trailer towing. If this telltale
turns on, safely pull over and stop the
vehicle. Then, shift the transmission
into PARK and run the engine at idle or
faster until the light turns off.
CAUTION!
Continuous driving with the Trans-
mission Temperature Warning Tell-
tale illuminated will eventually
cause severe transmission damage
or transmission failure.WARNING!
If the Transmission Temperature
Warning Telltale is illuminated and
you continue operating the vehicle,
in some circumstances you could
cause the fluid to boil over, come in
contact with hot engine or exhaust
components and cause a fire.
Electric Power Steering
Malfunction This telltale is on when the
Electric Power Steering is
not operating and needs
service. OIL CHANGE DUE
Your vehicle is equipped with an en-
gine oil change indicator system. The
“Oil Change Due” message will flash
in the EVIC display for approxi-
mately 10 seconds after a single chime
has sounded to indicate the next
scheduled oil change interval. The en-
gine oil change indicator system is
duty cycle based, which means the
engine oil change interval may fluctu-
ate dependent upon your personal
driving style.
Unless reset, this message will con-
tinue to display each time you cycle the
ignition to the ON/RUN position. To
turn off the message temporarily, press
and release the BACK button. To reset
the oil change indicator system please
refer to a Lancia Dealership.
168
Page 175 of 336
DIESEL PARTICULATE
FILTER (DPF) MESSAGES
Exhaust System — RegenerationRequired Now. Under conditions of
exclusive short duration and low
speed driving and low speed driv-
ing cycles, the engine and exhaust
after-treatment system may never
reach the conditions required to re-
move the trapped PM. If this occurs
the “Exhaust System Regeneration
Required Now” message will be
displayed on the EVIC. By driving
your vehicle at highway speeds
for as little as 30 minutes, you can
remedy the condition in the par-
ticulate filter system by allowing
the trapped PM to be removed to
restore the system to normal oper-
ating condition.
Exhaust Service Require — See Dealer Now. The engine will be de-
rated to prevent permanent dam-
age to the after-treatment system. If
this condition occurs, it is necessary
to have your vehicle serviced by
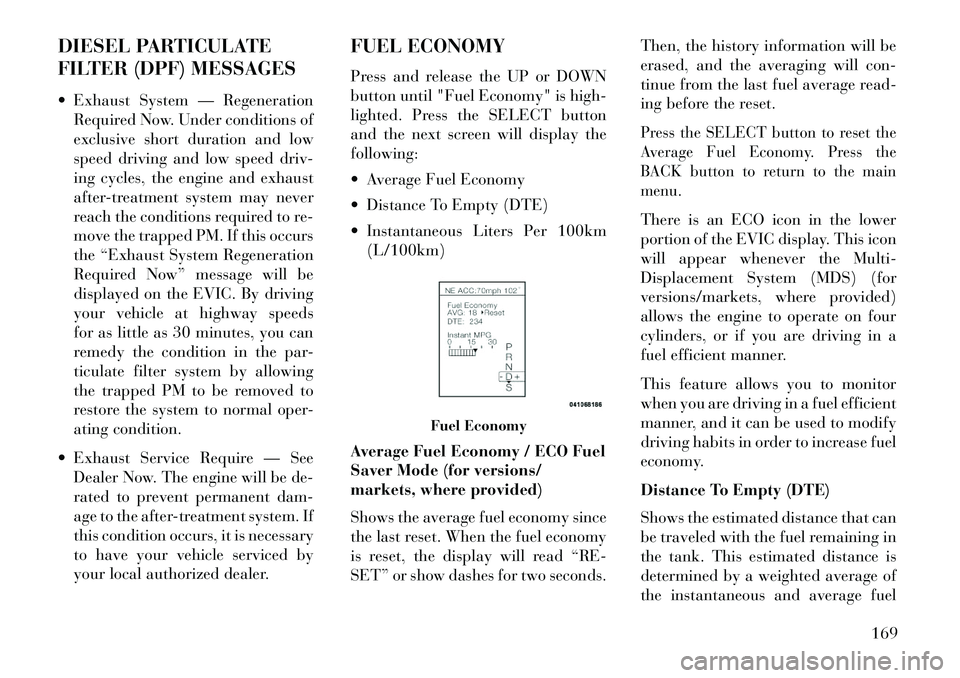
your local authorized dealer. FUEL ECONOMY
Press and release the UP or DOWN
button until "Fuel Economy" is high-
lighted. Press the SELECT button
and the next screen will display the
following:
Average Fuel Economy
Distance To Empty (DTE)
Instantaneous Liters Per 100km
(L/100km)
Average Fuel Economy / ECO Fuel
Saver Mode (for versions/
markets, where provided)
Shows the average fuel economy since
the last reset. When the fuel economy
is reset, the display will read “RE-
SET” or show dashes for two seconds. Then, the history information will be
erased, and the averaging will con-
tinue from the last fuel average read-
ing before the reset.
Press the SELECT button to reset the
Average Fuel Economy. Press the
BACK button to return to the main
menu.There is an ECO icon in the lower
portion of the EVIC display. This icon
will appear whenever the Multi-
Displacement System (MDS) (for
versions/markets, where provided)
allows the engine to operate on four
cylinders, or if you are driving in a
fuel efficient manner.
This feature allows you to monitor
when you are driving in a fuel efficient
manner, and it can be used to modify
driving habits in order to increase fuel
economy.
Distance To Empty (DTE)
Shows the estimated distance that can
be traveled with the fuel remaining in
the tank. This estimated distance is
determined by a weighted average of
the instantaneous and average fuel
Fuel Economy
169
Page 176 of 336

economy, according to the current
fuel tank level. DTE cannot be reset
through the SELECT button.
NOTE: Significant changes in
driving style or vehicle loading
will greatly affect the actual driv-
able distance of the vehicle, re-
gardless of the DTE displayed
value.
When the DTE value is less than
50 km estimated driving distance, the
DTE display will change to a “LOW
FUEL” message. This display will
continue until the vehicle runs out of
fuel. Adding a significant amount of
fuel to the vehicle will turn off the
“LOW FUEL” message and a new
DTE value will display. Press the
BACK button to return to the main
menu.
Liters Per 100km (L/100km)
The Liters Per 100km (L/100km)
feature displays instantaneous fuel
economy in a bar graph below the
DTE, this function cannot be reset.
Press the BACK button to return to
the main menu.CRUISE CONTROL
Press and release the UP or DOWN
button until "ACC" (for versions/
markets, where provided with Adap-
tive Cruise Control) or "Cruise" is
highlighted in the EVIC. Status of the
ACC or Cruise is displayed in the
menu line also. Press and release the
SELECT (right arrow) button to dis-
play the following information:
For versions/markets, where pro-
vided with ACC, one of several
messages will be displayed giving a
dynamic update of the status of the
feature as the driver changes fea-
ture status or following conditions
change. If ACC is active and a
warning or other feature is in the
EVIC main display, the ACC status
will be displayed in place of the
EVIC odometer line.
For vehicles with Cruise, one of sev- eral messages will be displayed giv-
ing a dynamic update of the status
of the feature as the driver changes feature status or conditions change.
If Cruise is active and a warning or
other feature is in the EVIC main
display, the Cruise status will be
displayed in place of the EVIC
odometer line.
Press and release the BACK button to
return to the main menu.
VEHICLE SPEED
Press and release the UP or DOWN
button until "Vehicle Speed" is high-
lighted in the EVIC. Press the SE-
LECT button to view a digital display
of the current speed in km/h or mph.
Pressing the SELECT button a sec-
ond time will toggle the unit of mea-
sure between km/h or mph. Press the
BACK button to return to the main
menu.
NOTE: Changing the unit of
measure in the Vehicle Speed
menu will not change the unit of
measure in the EVIC.
170
Page 177 of 336

TRIP INFO
Press and release the UP or DOWN
button until "Trip Info" is highlighted
in the EVIC. Press and release the
SELECT button to display the follow-
ing three trip features in the next
screen:
Trip A
Trip B
Elapsed Time
Press the UP/DOWN buttons to cycle
through all the Trip Computer func-
tions or press the BACK button to
return to the main menu.
The Trip Functions mode displays the
following information:
Trip A
Shows the total distance traveled for
Trip A since the last reset.
Trip B
Shows the total distance traveled for
Trip B since the last reset.Elapsed Time
Shows the total elapsed time of travel
since the last reset. Elapsed time will
increment when the ignition is in the
ON or START position.
Resetting A Trip Info Function
To Reset any of the three Trip Info
functions, select the function you
want to reset using the UP or DOWN
buttons. Push the SELECT button
until the feature displays zero.
TIRE BAR
Press and release the UP or DOWN
button until “Tire BAR” is high-
lighted in the EVIC. Press and release
the SELECT button and one of the
following will be displayed:
If tire pressure is OK for all tires a
vehicle ICON is displayed with tire
pressure values in each corner of
the ICON.
If one or more tires have low pres- sure, "Tire Pressure LOW" is dis-
played with the vehicle ICON and
the tire pressure values in each cor-
ner of the ICON. If the Tire Pressure system requires
service, "Service Tire Pressure Sys-
tem" is displayed.
Tire pressure is an information only
function and cannot be reset. Press
and release the BACK button to re-
turn to the main menu.
VEHICLE INFO (CUSTOMER
INFORMATION FEATURES)
(for versions/markets, where
provided)Press and release the UP or DOWN
button until "Vehicle Info" is high-
lighted in the EVIC. Press and release
the SELECT button and Coolant
Temp will be displayed. Press the UP
or DOWN button to scroll through the
following information displays.
Coolant Temp
Displays the actual coolant tem- perature.
Oil Pressure
Displays the actual oil pressure.
171
Page 186 of 336

Perform Compass CalibrationTouch the Calibration soft-key to
change this setting. This compass is
self-calibrating, which eliminates the
need to manually reset the compass.
When the vehicle is new, the compass
may appear erratic and the EVIC will
display CAL until the compass is
calibrated. You may also calibrate the
compass by pressing the ON soft-key
and completing one or more 360-de-
gree turns (in an area free from large
metal or metallic objects) until the CAL
indicator displayed in the EVIC turns
off. The compass will now function nor-
mally.
Audio
After pressing the Audio soft-key the
following settings will be available.
Balance/Fade
When in this display you may adjust
the Balance and Fade settings.
Compass Variance Map
180
Page 189 of 336
Mode will only be available for video
media sources (DVDs, Video CDs, or
other video media supported by the
radio). Some audio will sound better
in DSS modes, others in Stereo mode.
When in “Audio Surround” mode,
balance is set automatically. Fader
control is available in surround mode
but should be set to the center position
for optimal surround performance.
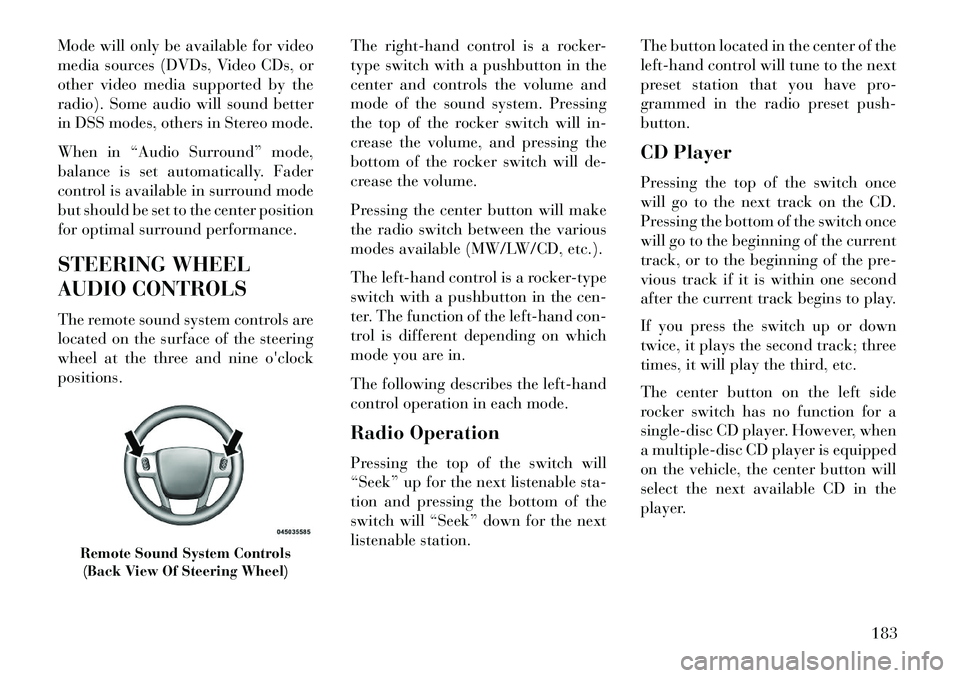
STEERING WHEEL
AUDIO CONTROLS
The remote sound system controls are
located on the surface of the steering
wheel at the three and nine o'clock
positions.The right-hand control is a rocker-
type switch with a pushbutton in the
center and controls the volume and
mode of the sound system. Pressing
the top of the rocker switch will in-
crease the volume, and pressing the
bottom of the rocker switch will de-
crease the volume.
Pressing the center button will make
the radio switch between the various
modes available (MW/LW/CD, etc.).
The left-hand control is a rocker-type
switch with a pushbutton in the cen-
ter. The function of the left-hand con-
trol is different depending on which
mode you are in.
The following describes the left-hand
control operation in each mode.
Radio Operation
Pressing the top of the switch will
“Seek” up for the next listenable sta-
tion and pressing the bottom of the
switch will “Seek” down for the next
listenable station.The button located in the center of the
left-hand control will tune to the next
preset station that you have pro-
grammed in the radio preset push-
button.
CD Player
Pressing the top of the switch once
will go to the next track on the CD.
Pressing the bottom of the switch once
will go to the beginning of the current
track, or to the beginning of the pre-
vious track if it is within one second
after the current track begins to play.
If you press the switch up or down
twice, it plays the second track; three
times, it will play the third, etc.
The center button on the left side
rocker switch has no function for a
single-disc CD player. However, when
a multiple-disc CD player is equipped
on the vehicle, the center button will
select the next available CD in the
player.
Remote Sound System Controls
(Back View Of Steering Wheel)
183
Page 210 of 336

In the event of a momentary problem,
the transmission can be reset to regain
all forward gears by performing the
following steps.
NOTE:
In cases where the instru-
ment cluster message indicates the
transmission may not re-engage af-
ter engine shutdown, perform this
procedure only in a desired loca-
tion (preferably, at your authorized
dealer).
1. Stop the vehicle.
2. Shift the transmission into PARK,
if possible.
3. Turn the engine OFF.
4. Wait approximately 30 seconds.
5. Restart the engine.
6. Shift into the desired gear range.
If the problem is no longer detected,
the transmission will return to normal
operation.
NOTE: Even if the transmission
can be reset, we recommend that
you visit your authorized dealer at your earliest possible conve-
nience. Your authorized dealer has
diagnostic equipment to deter-
mine if the problem could recur.
If the transmission cannot be reset,
authorized dealer service is required.
FIVE-SPEED AUTOMATIC
TRANSMISSION –
3.0L DIESEL ENGINE
The shift lever position display (lo-
cated in the instrument cluster) indi-
cates the transmission gear range. You
must press the brake pedal to move
the shift lever out of PARK (refer to
“Brake/Transmission Shift Interlock
System” in this section). To drive,
move the shift lever from PARK or
NEUTRAL to the DRIVE position.
The electronically-controlled trans-
mission provides a precise shift sched-
ule. The transmission electronics are
self-calibrating; therefore, the first few
shifts on a new vehicle may be some-
what abrupt. This is a normal condi-
tion, and precision shifts will develop
within a few hundred kilometers.
Only shifting from DRIVE to PARK or
REVERSE when the accelerator
pedal is released and the vehicle is
stopped. Be sure to keep your foot on
the brake pedal when shifting be-
tween these gears.
The transmission shift lever has only
PARK, REVERSE, NEUTRAL, and
DRIVE shift positions. Manual shifts
can be made using the “AutoStick®”
shift control (for versions/markets,
where provided; refer to
“AutoStick®” in this section). Mov-
ing the shift lever to the left or right
(-/+) while in the DRIVE position, or
tapping one of the steering wheel-
mounted shift paddles (-/+) (for
versions/markets, where provided),
will manually select the transmission
gear, and will display that gear in the
instrument cluster as 5, 4, 3, 2, 1.
Shift Lever
204