seats Lancia Thema 2014 Owner handbook (in English)
[x] Cancel search | Manufacturer: LANCIA, Model Year: 2014, Model line: Thema, Model: Lancia Thema 2014Pages: 332, PDF Size: 3.46 MB
Page 115 of 332

WARNING!
Be certain that the seatback issecurely locked into position. If
the seatback is not securely
locked into position, the seat will
not provide the proper stability
for child seats and/or passengers.
An improperly latched seat could
cause serious injury.
The cargo area in the rear of the vehicle (with the rear seatbacks
in the locked-up or folded down
position) should not be used as a
play area by children when the
vehicle is in motion. They could
be seriously injured in a collision.
Children should be seated and us-
ing the proper restraint system.
DRIVER MEMORY SEAT
(for versions/markets,
where provided)
This feature allows the driver to store
up to two different memory profiles
for easy recall through a memory
switch. Each memory profile contains
desired position settings for the driver seat, side mirrors, adjustable pedals
(for versions/markets, where pro-
vided), and power tilt and telescopic
steering column (for versions/
markets, where provided) and a set of
desired radio station presets. Your Re-
mote Keyless Entry (RKE) transmit-
ter can also be programmed to recall
the same positions when the UN-
LOCK button is pressed.
NOTE:
Only one RKE transmitter can
be linked to each of the memory
positions.
Passive Entry door handles can- not be linked to the memory
function. Use either the memory
recall switch or the RKE trans-
mitter (if linked to the memory
feature) to recall memory posi-
tions 1 or 2.
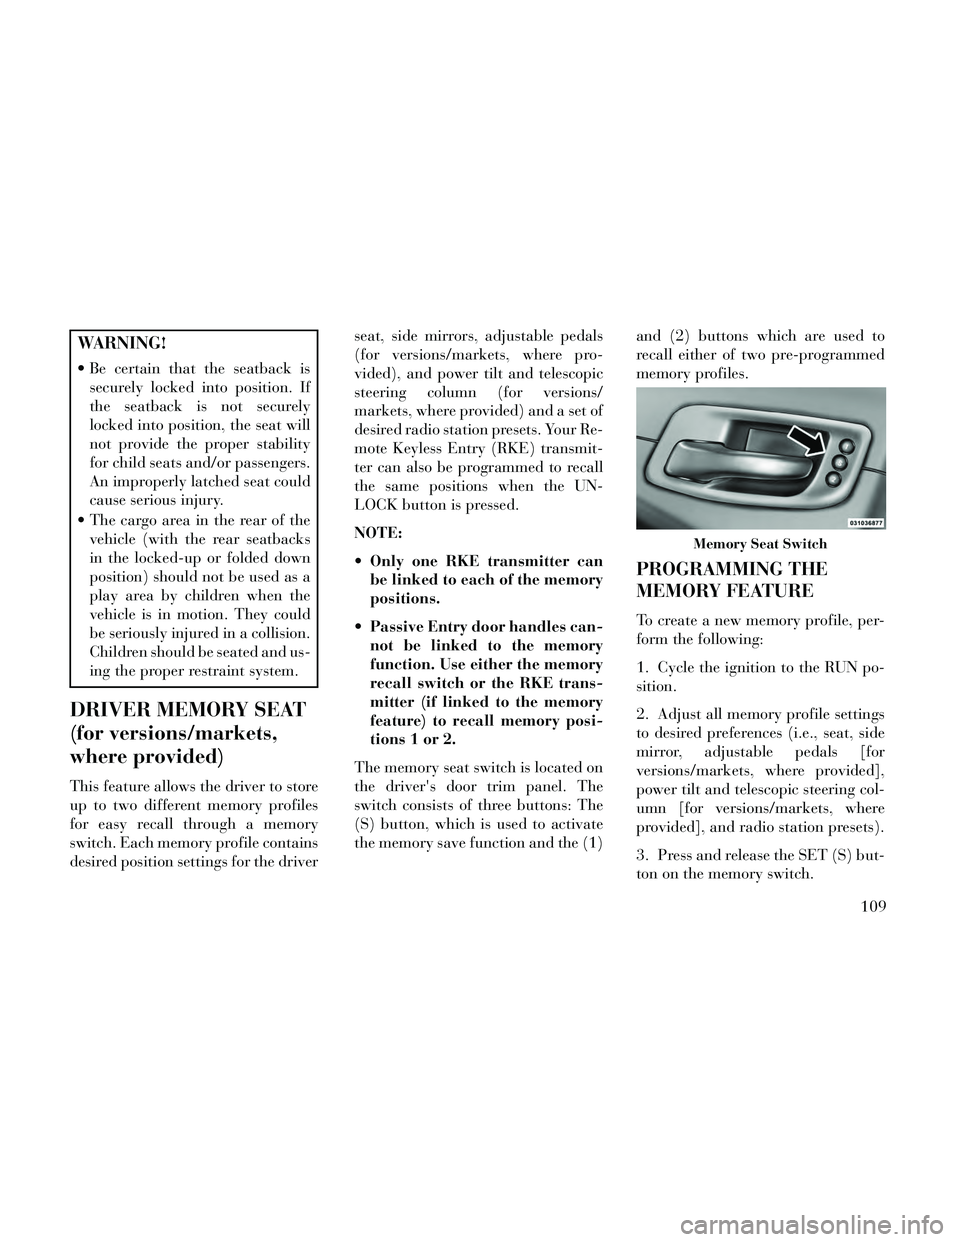
The memory seat switch is located on
the driver's door trim panel. The
switch consists of three buttons: The
(S) button, which is used to activate
the memory save function and the (1) and (2) buttons which are used to
recall either of two pre-programmed
memory profiles.
PROGRAMMING THE
MEMORY FEATURE
To create a new memory profile, per-
form the following:
1. Cycle the ignition to the RUN po-
sition.
2. Adjust all memory profile settings
to desired preferences (i.e., seat, side
mirror, adjustable pedals [for
versions/markets, where provided],
power tilt and telescopic steering col-
umn [for versions/markets, where
provided], and radio station presets).
3. Press and release the SET (S) but-
ton on the memory switch.
Memory Seat Switch
109
Page 156 of 332

REAR SEAT CUPHOLDERS
The rear seat cupholders are located
in the center armrest between the rear
seats. The cupholders are positioned
forward in the armrest and side-by-
side to provide convenient access to
beverage cans or bottles while main-
taining a resting place for the rear
occupant's elbows.
Lighted Cupholders
On some vehicles the rear cupholders
are equipped with a light ring that
illuminates the cupholders for the
rear passengers. The light ring is con-
trolled by the Dimmer Control. Refer
to “Lights” in “Understanding The
Features Of Your Vehicle” for further
information.
STORAGE
GLOVEBOX STORAGE
The glovebox storage compartment is
located on the passenger side of the
instrument panel.
CONSOLE FEATURES
There is a cubby bin located forward of
the shift lever. The cubby bin is cov-
ered with a push-push actuated door.
Push inward on the door to open it,
push the door a second time to close it.
Two separate storage compartments
are also located underneath the center
console armrest.Rear Seat Cupholders
Light Ring In Rear Cupholder
Glovebox Storage Compartment
Opened Glovebox StorageCompartment
Center Console
150
Page 157 of 332

Inside the center console armrest,
there is a removable upper storage
tray that can be slid forward/
rearward on rails for access to the
lower storage area. This tray has an
integrated coin holder, along with ad-
ditional area for small items like an
ipod or phone. Below the upper tray,
the lower storage compartment is
made for larger items, like CDs and
tissue boxes. In addition, the 12 volt
power outlet, USB and Aux jack are
located here.WARNING!
Do not operate this vehicle with a
console compartment lid in the
open position. Cellular phones, mu-
sic players, and other handheld
electronic devices should be stowed
while driving. Use of these devices
while driving can cause an accident
due to distraction, resulting in
death or injury.
DOOR STORAGE
The door panels contain storage ar-
eas.
REAR SEAT ARMREST
STORAGE (for
versions/markets, where
provided)
For rear passengers there is a storage
bin located in the armrest. Lift up-
ward on the latch to open the storage
compartment.
CARGO AREA — VEHICLES
EQUIPPED WITH 60/40
SPLIT-FOLDING REAR
SEAT
The 60/40 split-folding rear seat pro-
vides cargo-carrying versatility. The
seatbacks fold down easily by pulling
nylon tabs between the seatbacks and
the bolsters. When the seats are folded
Upper Storage Tray
Front Door Trim Storage
Rear Armrest Storage
151
Page 158 of 332

down, they provide a continuous,
nearly-flat extension of the load floor.
When the seatback is folded to the
upright position, make sure it is
latched by strongly pulling on the top
of the seatback above the seat strap.
WARNING!
Be certain that the seatback issecurely locked into position. If
the seatback is not securely
locked into position, the seat will
not provide the proper stability
for child seats and/or passengers.
An improperly latched seat could
cause serious injury.
The cargo area in the rear of the vehicle (with the rear seatbacks
in the locked-up or folded down
position) should not be used as a
play area by children when the
vehicle is in motion. They could
be seriously injured in a collision.
Children should be seated and us-
ing the proper restraint system.
(Continued)
WARNING!(Continued)
To help protect against personalinjury, passengers should not be
seated in the rear cargo area. The
rear cargo space is intended for
load carrying purposes only, not
for passengers, who should sit in
seats and use seat belts.
WARNING!
The weight and position of cargo
and passengers can change the ve-
hicle center of gravity and vehicle
handling. To avoid loss of control
resulting in personal injury, follow
these guidelines for loading your
vehicle:
Always place cargo evenly on thecargo floor. Put heavier objects as
low and as far forward as pos-
sible.
(Continued)
WARNING!(Continued)
Place as much cargo as possible infront of the rear axle. Too much
weight or improperly placed
weight over or behind the rear
axle can cause the rear of the ve-
hicle to sway.
Do not pile luggage or cargo higher than the top of the seat-
back. This could impair visibility
or become a dangerous projectile
in a sudden stop or collision.
CARGO AREA FEATURES
TRUNK MAT (for
versions/markets, where
provided)
A trunk mat covers the bottom of the
cargo area. The trunk mat is used to
protect the interior of the trunk from
mud, snow, and debris.
152
Page 160 of 332

The power sunshade can be operated
using the Uconnect® System.
Press the “Controls” soft-key and
then press the “Sunshade” soft-key to
raise the power sunscreen. Press the
“Sunshade” soft-key a second time to
lower the sunshade.
If the sunshade is in the raised posi-
tion and the vehicle is placed in RE-
VERSE, the sunshade will automati-
cally fully lower. When the
transmission is shifted out of RE-
VERSE the sunshade will automati-
cally return to the fully raised position
after approximately five seconds.
NOTE: The rear sunshade control
switch can be locked out with the
rear passenger window controls
from the driver switch window
lockout switch.The power sunshade can also be oper-
ated by passengers in the rear seats.
The power sunshade switch is located
on the back of the center console be-
tween the heated seat switches. Press
the switch once to raise the sunshade.
Press the switch a second time to
lower the sunshade.
LOAD LEVELING
SYSTEM
The automatic load leveling system
will provide a level-riding vehicle un-
der most passenger and cargo loading
conditions.
A hydraulic pump contained within
the shock absorbers raises the rear of
the vehicle to the correct height. It
takes approximately 1.6 km of driv-
ing for the leveling to complete de-
pending on road surface conditions.
If the leveled vehicle is not moved for
approximately 15 hours, the leveling
system will bleed itself down. The ve-
hicle must be driven to reset the
system.
Controls Soft-Key
Power Sunshade Soft-Key
Power Sunshade Switch
154
Page 187 of 332

is programmed touching the
handle more than once will only
result in the driver’s door opening.
If driver door first is selected, once
the driver door is opened, the inte-
rior door lock/unlock switch can
be used to unlock all doors (or use
RKE transmitter).
Passive Entry
This feature allows you to lock and
unlock the vehicle’s door(s) without
having to press the Remote Keyless
Entry (RKE) transmitter lock or un-
lock buttons. To make your selection,
touch the Passive Entry soft-key, until
a check-mark appears next to setting,
showing that setting has been selected.
Touch the back arrow soft-key to re-
turn to the previous menu. Refer to
“Keyless Enter-N-Go” in “Things To
Know Before Starting Your Vehicle”.
Personal Settings Linked To FOB
(for versions/markets, where pro-
vided)
This feature provides automatic
driver seat positioning to enhance
driver mobility when entering and ex-
iting the vehicle. To make your selec-
tion, touch the Personal SettingsLinked To FOB soft-key, until a
check-mark appears next to setting,
showing that setting has been se-
lected. Touch the back arrow soft-key
to return to the previous menu.
NOTE: The seat will return to the
memorized seat location (if Recall
Memory with Remote Key Unlock
is set to ON) when the Remote Key-
less Entry (RKE) transmitter is
used to unlock the door. Refer to
“Driver Memory Seat” in “Under-
standing The Features Of Your Ve-
hicle” for further information.
Engine Off Options
After pressing the Engine Off Options
soft-key the following settings will be
available.
Easy Exit Seat (for versions/
markets, where provided)
This feature provides automatic
driver seat positioning to enhance
driver mobility when entering and ex-
iting the vehicle. To make your selec-
tion, touch the Easy Exit Seats soft-
key, until a check-mark appears next
to setting, showing that setting has
been selected. Touch the back arrow
soft-key to return to the previous
menu.
Engine Off Power Delay (for
versions/markets, where provided)
When this feature is selected, the
power window switches, radio,
Uconnect® phone system (for
versions/markets, where provided),
DVD video system (for versions/
markets, where provided), power
sunroof (for versions/markets, where
provided), and power outlets will re-
main active for up to 10 minutes after
the ignition is cycled to OFF. Opening
either front door will cancel this fea-
ture. To change the Engine Off Power
Delay status touch the 0 seconds, 45
seconds, 5 minutes or 10 minutes
soft-key. Then touch the arrow back
soft-key.
Headlight Off Delay
When this feature is selected, the
driver can choose to have the head-
lights remain on for 0, 30, 60, or 90
seconds when exiting the vehicle. To
change the Headlight Off Delay status
touch the + or - soft-key to select your
181
Page 294 of 332

Your authorized dealer has touch
up paint to match the color of your
vehicle.
Wheel And Wheel Trim Care
All wheels and wheel trim, especially
aluminum and chrome-plated wheels
should be cleaned regularly with a
mild soap and water to prevent corro-
sion. To remove heavy soil and/or ex-
cessive brake dust, use a nonabrasive,
non-acidic cleaner. Do not use scour-
ing pads, steel wool, a bristle brush, or
metal polishes. Do not use oven
cleaner. Avoid automatic car washes
that use acidic solutions or harsh
brushes that may damage the wheels’
protective finish.
Stain Repel Fabric Cleaning
Procedure (for versions/markets,
where provided)
Stain Repel seats may be cleaned in
the following manner:
Remove as much of the stain as possible by blotting with a clean,
dry towel.
Blot any remaining stain with a clean, damp towel. For tough stains, apply a mild soap
solution to a clean, damp cloth and
remove the stain. Use a fresh, damp
towel to remove soap residue.
Do not use any harsh solvents or any other form of protectants on
Stain Repel products.
Interior Care
Interior trim should be cleaned start-
ing with a damp cloth. Do not use
harsh cleaners.
Your leather upholstery can be best
preserved by regular cleaning with a
damp soft cloth. Small particles of
dirt can act as an abrasive and dam-
age the leather upholstery and should
be removed promptly with a damp
cloth. Stubborn soils can be removed
easily with a soft cloth and appropri-
ate products. Care should be taken to
avoid soaking your leather upholstery
with any liquid. Please do not use
polishes, oils, cleaning fluids, sol-
vents, detergents, or ammonia-based
cleaners to clean your leather uphol-
stery. Application of a leather condi-
tioner is not required to maintain the
original condition.WARNING!
Do not use volatile solvents for
cleaning purposes. Many are poten-
tially flammable, and if used in
closed areas they may cause respi-
ratory harm.
Cleaning Headlights
Your vehicle has plastic headlights
that are lighter and less susceptible to
stone breakage than glass headlights.
Plastic is not as scratch resistant as
glass and therefore different lens
cleaning procedures must be fol-
lowed.
To minimize the possibility of scratch-
ing the lenses and reducing light out-
put, avoid wiping with a dry cloth. To
remove road dirt, wash with a mild
soap solution followed by rinsing.
Do not use abrasive cleaning compo-
nents, solvents, steel wool or other
aggressive material to clean the
lenses.
288
Page 300 of 332

Cavity Cartridge Fuse Mini-Fuse Description
16 — — Spare
17 — — Spare
18 — — Spare
19 — — Spare
20 — — Spare
21 — — Spare
22 — 20 Amp Yellow Trailer Park Lamp - If Equipped
23 — 10 Amp Red Fuel Door/Diagnostic Port
24 — 15 Amp Blue Radio Screen
25 — 10 Amp Red Tire Pressure Monitor
26 — 25 Amp Natural Transmission
27 — 25 Amp Natural Amplifier
31 — 25 Amp Natural Power Seats
32 — 15 Amp Blue HVAC Module/Cluster/Steering Wheel Lock
33 — 15 Amp Blue Ignition Switch/Wireless Module
34 — 10 Amp Red Steering Column Module/Clock
35 — 10 Amp Red Battery Sensor
36 — 20 Amp Yellow T/Tow Module Lighting - If Equipped
37 — 15 Amp Blue Radio
38 — 20 Amp Yellow Console Power Outlet
40 — — Spare
41 — — Spare
42 30 Amp Pink — Rear Defrost (EBL Feed)
43 — 25 Amp Natural Rear Heated Seats/Heated Steering Wheel
294
Page 301 of 332

Cavity Cartridge Fuse Mini-Fuse Description
44 — 10 Amp Red Park Assist/Blind Spot/Camera
45 — 15 Amp Blue Cluster/Rearview Mirror/Compass/Humidity Sensor
46 — 10 Amp Red Adaptive Cruise Control
47 — 10 Amp Red Adaptive Front Lighting
48 — 20 Amp Yellow Active Suspension — If Equipped
49 — — Spare
50 — — Spare
51 — 20 Amp Yellow Front Heated Seats
52 — 10 Amp Red Heated Cupholders/Rear Heated Seat
53 — 10 Amp Red HVAC Module/In Car Temperature Sensor
54 — — Spare
55 — — Spare
56 — — Spare
57 — — Spare
58 — 10 Amp Red Airbag Module
59 — — Spare
60 — — Spare
61 — 20 Amp Yellow Trailer Tow (Europe) - If Equipped
62 — — Spare
63 — — Spare
64 — 25 Amp Natural Rear Windows
65 — 10 Amp Red Airbag Module
66 — — Spare
67 — 15 Amp Blue Frt Door Illum/Run Sense295
Page 308 of 332

ARRANGEMENTS FOR
DEALING WITH THE
VEHICLE AT THE END OF
ITS LIFE
LANCIA has been committed for
many years to safeguarding the envi-
ronment through the constant im-
provement of its production processes
and manufacturing products that are
increasingly “eco-compatible”.
To give customers the best possible
service in terms of respecting environ-
mental laws and in response to Euro-
pean Directive 2000/53/EC govern-
ing vehicles at the end of their life,
LANCIA is offering its customers the
opportunity of handing over their ve-
hicle* at the end of its life without
incurring any additional costs.
The European Directive sets out that
when the vehicle is handed over the
last keeper or owner should not incur
any expenses as a result of it having a
zero or negative market value.In all European Union countries, until
1st January 2007, only vehicles regis-
tered after 1st July 2002 were col-
lected free of charge, while since 2007
collection has been free of charge irre-
spective of the year of registration as
long as the vehicle contains its basic
components (in particular, the engine
and bodywork) and has no additional
waste.
To hand your vehicle over at the end
of its life without extra cost, go to one
of our Dealerships or LANCIA-
authorized collection and scrapping
centres.
These centres have been carefully
chosen to offer high quality service for
the collection, treatment and recy-
cling of unused vehicles with respect
to the environment.
You can find further information on
these collection and scrapping centres
either from a LANCIA or LANCIA
Commercial Vehicle Dealership or by
calling the freephone number
00800 526242 00 or by going on the
LANCIA website.
(*) Vehicle for transporting passen-
gers with a maximum of nine seats
and a total permitted weight of 3.5 t
302