engine Lancia Thema 2014 Owner handbook (in English)
[x] Cancel search | Manufacturer: LANCIA, Model Year: 2014, Model line: Thema, Model: Lancia Thema 2014Pages: 332, PDF Size: 3.46 MB
Page 177 of 332

When the shift down indicator (-) is
shown on the display, the GSI is ad-
vising the driver to engage a lower
gear.
The GSI indicator in the EVIC re-
mains illuminated until the driver
changes gear, or the driving condi-
tions return to a situation where
changing gear is not required to im-
prove fuel consumption.
OIL CHANGE DUE
Your vehicle is equipped with an en-
gine oil change indicator system. The
“Oil Change Due” message will flash
in the EVIC display for approxi-
mately 10 seconds after a single chime
has sounded to indicate the next
scheduled oil change interval. The en-
gine oil change indicator system is
duty cycle based, which means the
engine oil change interval may fluctu-
ate dependent upon your personal
driving style.
Unless reset, this message will con-
tinue to display each time you cycle
the ignition to the ON/RUN position.
To turn off the message temporarily,
press and release the BACK button.
To reset the oil change indicator sys-
tem please refer to a Lancia Dealer-
ship.
DIESEL PARTICULATE
FILTER (DPF) MESSAGES
Exhaust System — RegenerationRequired Now. Under conditions of
exclusive short duration and low
speed driving and low speed driv-
ing cycles, the engine and exhaust
after-treatment system may never
reach the conditions required to re-
move the trapped PM. If this occurs
the “Exhaust System Regeneration
Required Now” message will be
displayed on the EVIC. By driving
your vehicle at highway speeds for
as little as 30 minutes, you can rem-
edy the condition in the particulate
filter system by allowing the
trapped PM to be removed to re-
store the system to normal operat-
ing condition.
Exhaust Service Require — See Dealer Now. The engine will be de-
rated to prevent permanent dam-
age to the after-treatment system. If
this condition occurs, it is necessary
to have your vehicle serviced by
your local authorized dealer.
GSI Shift Up (+) Indicator
GSI Shift Down (-) Indicator
171
Page 178 of 332

FUEL ECONOMY
Press and release the UP or DOWN
button until "Fuel Economy" is high-
lighted. Press the SELECT button
and the next screen will display the
following:
Average Fuel Economy
Distance To Empty (DTE)
Instantaneous Liters Per 100km(L/100km)
Average Fuel Economy / ECO Fuel
Saver Mode (for versions/
markets, where provided)
Shows the average fuel economy since
the last reset. When the fuel economy
is reset, the display will read “RE-
SET” or show dashes for two seconds.
Then, the history information will be erased, and the averaging will con-
tinue from the last fuel average read-
ing before the reset.
Press the SELECT button to reset the
Average Fuel Economy. Press the
BACK button to return to the main
menu.
There is an ECO icon in the lower
portion of the EVIC display. This icon
will appear whenever the Multi-
Displacement System (MDS) (for
versions/markets, where provided)
allows the engine to operate on four
cylinders, or if you are driving in a
fuel efficient manner.
This feature allows you to monitor
when you are driving in a fuel efficient
manner, and it can be used to modify
driving habits in order to increase fuel
economy.
Distance To Empty (DTE)
Shows the estimated distance that can
be traveled with the fuel remaining in
the tank. This estimated distance is
determined by a weighted average of
the instantaneous and average fuel
economy, according to the current
fuel tank level. DTE cannot be reset
through the SELECT button.
NOTE: Significant changes in
driving style or vehicle loading
will greatly affect the actual driv-
able distance of the vehicle, re-
gardless of the DTE displayed
value.
When the DTE value is less than
50 km estimated driving distance, the
DTE display will change to a “LOW
FUEL” message. This display will
continue until the vehicle runs out of
fuel. Adding a significant amount of
fuel to the vehicle will turn off the
“LOW FUEL” message and a new
DTE value will display. Press the
BACK button to return to the main
menu.
Liters Per 100km (L/100km)
The Liters Per 100km (L/100km)
feature displays instantaneous fuel
economy in a bar graph below the
DTE, this function cannot be reset.
Press the BACK button to return to
the main menu.
Fuel Economy
172
Page 180 of 332

Resetting A Trip Info Function
To Reset any of the three Trip Info
functions, select the function you
want to reset using the UP or DOWN
buttons. Push the SELECT button
until the feature displays zero.
TIRE BAR
Press and release the UP or DOWN
button until “Tire BAR” is high-
lighted in the EVIC. Press and release
the SELECT button and one of the
following will be displayed:
If tire pressure is OK for all tires avehicle ICON is displayed with tire
pressure values in each corner of
the ICON.
If one or more tires have low pres- sure, "Inflate to XXX" is displayed
with the vehicle ICON and the tire
pressure values in each corner of
the ICON.
If the Tire Pressure system requires service, "Service Tire Pressure Sys-
tem" is displayed. Tire pressure is an information only
function and cannot be reset. Press
and release the BACK button to re-
turn to the main menu.
VEHICLE INFO
(CUSTOMER
INFORMATION FEATURES)
(for versions/markets,
where provided)
Press and release the UP or DOWN
button until "Vehicle Info" is high-
lighted in the EVIC. Press and release
the SELECT button and Coolant
Temp will be displayed. Press the UP
or DOWN button to scroll through the
following information displays.
Coolant Temp
Displays the actual coolant tempera-
ture.
Oil Pressure
Displays the actual oil pressure.
Trans Temperature
Displays the actual transmission
temperature. Engine Hours
Displays the number of hours of en-
gine operation.
MESSAGES #
Select from Main Menu using the UP
or DOWN buttons. This feature shows
the number of stored warning mes-
sages (in the # place holder). Pressing
the SELECT button will allow you to
see what the stored messages are.
Pressing the BACK button takes you
back to the Main Menu.
TURN MENU OFF
Select from Main Menu using the
DOWN button. Pressing the SELECT
button blanks the menu display.
Pressing any one of the four steering
wheel buttons brings the menu back.
Uconnect® SETTINGS
The Uconnect® system uses a combi-
nation of soft and hard keys located
on the center of the instrument panel
that allows you to access and change
the customer programmable features.
174
Page 181 of 332

HARD-KEYS
Hard-Keys are located below the
Uconnect® system in the center of the
instrument panel. In addition, there is
a Scroll/Enter control knob located on
the right side of the Climate Controls
in the center of the instrument panel.
Turn the control knob to scroll
through menus and change settings
(i.e., 30, 60, 90), press the center of
the control knob one or more times to
select or change a setting (i.e., ON,
OFF).
SOFT-KEYS
Soft-Keys are accessible on the
Uconnect® touchscreen.
CUSTOMER
PROGRAMMABLE
FEATURES — Uconnect®
8.4 SETTINGS
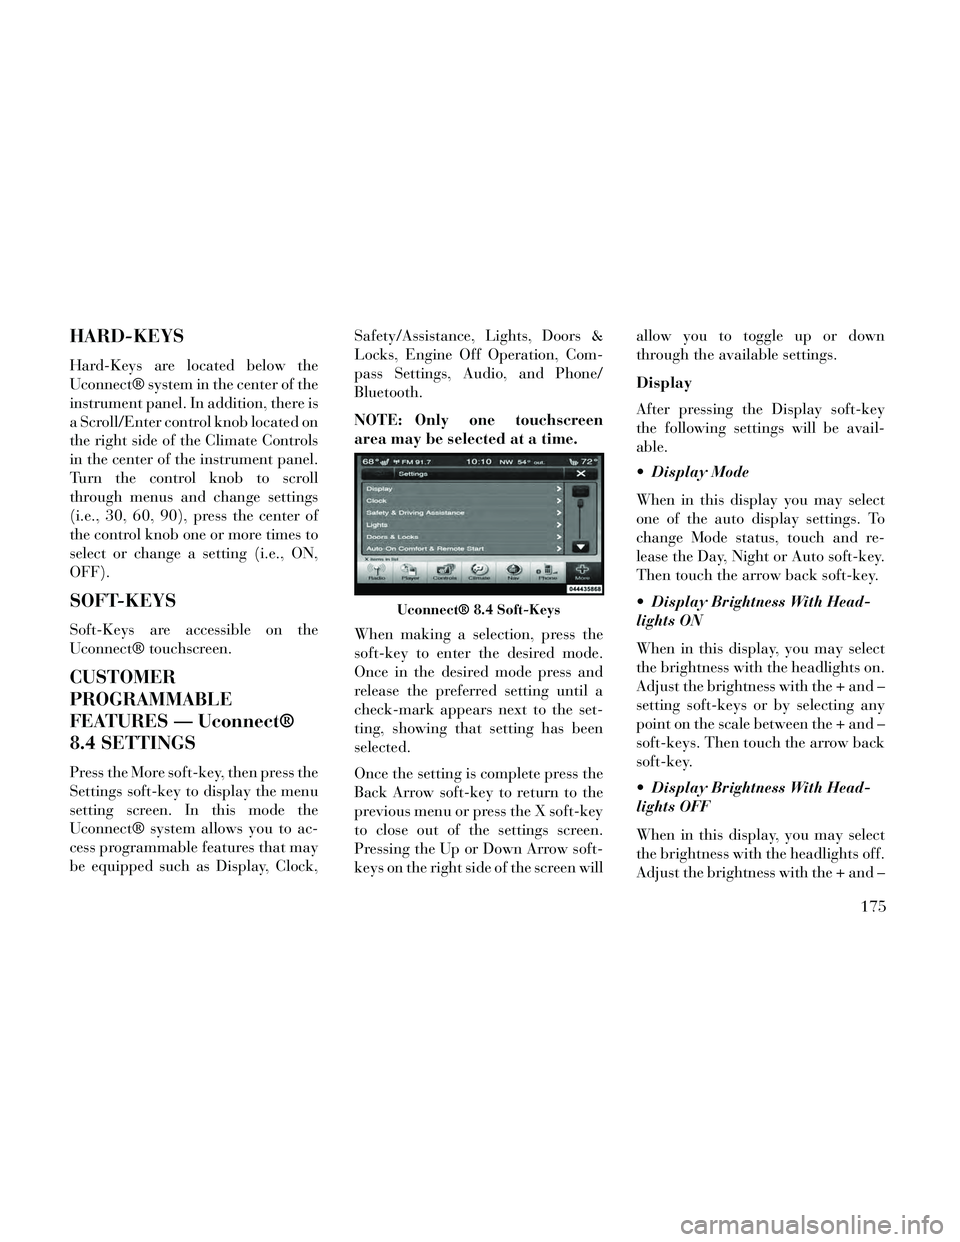
Press the More soft-key, then press the
Settings soft-key to display the menu
setting screen. In this mode the
Uconnect® system allows you to ac-
cess programmable features that may
be equipped such as Display, Clock,Safety/Assistance, Lights, Doors &
Locks, Engine Off Operation, Com-
pass Settings, Audio, and Phone/
Bluetooth.
NOTE: Only one touchscreen
area may be selected at a time.
When making a selection, press the
soft-key to enter the desired mode.
Once in the desired mode press and
release the preferred setting until a
check-mark appears next to the set-
ting, showing that setting has been
selected.
Once the setting is complete press the
Back Arrow soft-key to return to the
previous menu or press the X soft-key
to close out of the settings screen.
Pressing the Up or Down Arrow soft-
keys on the right side of the screen willallow you to toggle up or down
through the available settings.
Display
After pressing the Display soft-key
the following settings will be avail-
able.
Display Mode
When in this display you may select
one of the auto display settings. To
change Mode status, touch and re-
lease the Day, Night or Auto soft-key.
Then touch the arrow back soft-key.
Display Brightness With Head-
lights ON
When in this display, you may select
the brightness with the headlights on.
Adjust the brightness with the + and –
setting soft-keys or by selecting any
point on the scale between the + and –
soft-keys. Then touch the arrow back
soft-key.
Display Brightness With Head-
lights OFF
When in this display, you may select
the brightness with the headlights off.
Adjust the brightness with the + and –
Uconnect® 8.4 Soft-Keys
175
Page 186 of 332

Daytime Running Lights (for
versions/markets, where provided)
When this feature is selected, the
headlights will turn on whenever the
engine is running. To make your se-
lection, touch the Daytime Running
Lights soft-key, until a check-mark
appears next to setting, showing that
setting has been selected. Touch the
back arrow soft-key to return to the
previous menu.
Steering Directed Lights (for
versions/markets, where provided)
When this feature is selected, the
headlights turn relative to a change in
direction of the steering wheel. To
make your selection, touch the Steer-
ing Directed Lights soft-key, until a
check-mark appears next to setting,
showing that setting has been se-
lected. Touch the back arrow soft-key
to return to the previous menu.
Headlight Dipped Beam (Traffic
Changeover) (for versions/markets,
where provided)
Low beam headlights have more con-
trol of upward light and direct most oftheir light downward and either to the
left for right hand drive countries or to
the right for left hand drive countries
to provide safe forward visibility
without excessive glare.
Doors & Locks
After pressing the Doors & Locks soft-
key the following settings will be
available.
Auto Lock
When this feature is selected, all doors
will lock automatically when the ve-
hicle reaches a speed of 24 km/h. To
make your selection, touch the Auto
Lock soft-key, until a check-mark ap-
pears next to setting, showing that
setting has been selected. Touch the
back arrow soft-key to return to the
previous menu.
Auto Unlock On Exit
When this feature is selected, all doors
will unlock when the vehicle is
stopped and the transmission is in the
PARK or NEUTRAL position and the
driver's door is opened. To make your
selection, touch the Auto Unlock On
Exit soft-key, until a check-mark ap-
pears next to setting, showing that
setting has been selected. Touch the
back arrow soft-key to return to the
previous menu.
1st Press Of Key Fob Unlocks
When 1st Press Of Key Fob Unlocks is
selected, only the driver's door will
unlock on the first press of the Remote
Keyless Entry (RKE) transmitter UN-
LOCK button. When 1st Press Of Key
Fob Unlocks is selected, you must
press the RKE transmitter UNLOCK
button twice to unlock the passenger's
doors. When Unlock All Doors On 1st
Press is selected, all of the doors will
unlock on the first press of the RKE
transmitter UNLOCK button.
NOTE: If the vehicle is pro-
grammed 1st Press Of Key Fob Un-
locks, all doors will unlock no
matter which Passive Entry
equipped door handle is grasped.
If 1st Press Of Key Fob Unlocks is
programmed, only the driver’s
door will unlock when the driver’s
door is grasped. With Passive En-
try, if 1st Press Of Key Fob Unlocks
180
Page 187 of 332

is programmed touching the
handle more than once will only
result in the driver’s door opening.
If driver door first is selected, once
the driver door is opened, the inte-
rior door lock/unlock switch can
be used to unlock all doors (or use
RKE transmitter).
Passive Entry
This feature allows you to lock and
unlock the vehicle’s door(s) without
having to press the Remote Keyless
Entry (RKE) transmitter lock or un-
lock buttons. To make your selection,
touch the Passive Entry soft-key, until
a check-mark appears next to setting,
showing that setting has been selected.
Touch the back arrow soft-key to re-
turn to the previous menu. Refer to
“Keyless Enter-N-Go” in “Things To
Know Before Starting Your Vehicle”.
Personal Settings Linked To FOB
(for versions/markets, where pro-
vided)
This feature provides automatic
driver seat positioning to enhance
driver mobility when entering and ex-
iting the vehicle. To make your selec-
tion, touch the Personal SettingsLinked To FOB soft-key, until a
check-mark appears next to setting,
showing that setting has been se-
lected. Touch the back arrow soft-key
to return to the previous menu.
NOTE: The seat will return to the
memorized seat location (if Recall
Memory with Remote Key Unlock
is set to ON) when the Remote Key-
less Entry (RKE) transmitter is
used to unlock the door. Refer to
“Driver Memory Seat” in “Under-
standing The Features Of Your Ve-
hicle” for further information.
Engine Off Options
After pressing the Engine Off Options
soft-key the following settings will be
available.
Easy Exit Seat (for versions/
markets, where provided)
This feature provides automatic
driver seat positioning to enhance
driver mobility when entering and ex-
iting the vehicle. To make your selec-
tion, touch the Easy Exit Seats soft-
key, until a check-mark appears next
to setting, showing that setting has
been selected. Touch the back arrow
soft-key to return to the previous
menu.
Engine Off Power Delay (for
versions/markets, where provided)
When this feature is selected, the
power window switches, radio,
Uconnect® phone system (for
versions/markets, where provided),
DVD video system (for versions/
markets, where provided), power
sunroof (for versions/markets, where
provided), and power outlets will re-
main active for up to 10 minutes after
the ignition is cycled to OFF. Opening
either front door will cancel this fea-
ture. To change the Engine Off Power
Delay status touch the 0 seconds, 45
seconds, 5 minutes or 10 minutes
soft-key. Then touch the arrow back
soft-key.
Headlight Off Delay
When this feature is selected, the
driver can choose to have the head-
lights remain on for 0, 30, 60, or 90
seconds when exiting the vehicle. To
change the Headlight Off Delay status
touch the + or - soft-key to select your
181
Page 197 of 332

Soft-keys are accessible on the
Uconnect® system screen.
Automatic Operation
1. Press the AUTO hard-key or soft-
key button (4) on the Automatic Tem-
perature Control (ATC) Panel.
2. Next, adjust the temperature you
would like the system to maintain by
adjusting the driver and passenger
temperature hard or soft control but-
tons (7, 8, 13, 14). Once the desired
temperature is displayed, the system
will achieve and automatically main-
tain that comfort level.
3. When the system is set up for your
comfort level, it is not necessary to
change the settings. You will experi-
ence the greatest efficiency by simply
allowing the system to function auto-
matically.NOTE:
It is not necessary to move the
temperature settings for cold or
hot vehicles. The system auto-
matically adjusts the tempera-
ture, mode, and blower speed to
provide comfort as quickly as
possible.
The temperature can be dis- played in U.S. or Metric units by
selecting the US/M customer-
programmable feature. Refer to
the “Uconnect® System Set-
tings” in this section of the
manual.
To provide you with maximum com-
fort in the Automatic mode, during
cold start-ups the blower fan will re-
main on low until the engine warms
up. The blower will increase in speed
and transition into Auto mode.
Manual Operation Override
The system allows for manual selec-
tion of blower speed, air distribution
mode, A/C status and recirculation
control. The blower fan speed can be set to any
fixed speed by adjusting the blower
control. The fan will now operate at a
fixed speed until additional speeds are
selected. This allows the front occu-
pants to control the volume of air
circulated in the vehicle and cancel
the Auto mode.
The operator can also select the direc-
tion of the airflow by selecting one of
the available mode settings. A/C op-
eration and Recirculation control can
also be manually selected in Manual
operation.
OPERATING TIPS
NOTE: Refer to the chart at the
end of this section for suggested
control settings for various
weather conditions.
Summer Operation
The engine cooling system in air-
conditioned vehicles must be pro-
tected with a high-quality antifreeze
coolant to provide proper corrosion
protection and to protect against en-
gine overheating. A solution of 50%
glycol antifreeze coolant and 50%
191
Page 199 of 332

5
STARTING AND OPERATING
STARTING PROCEDURES..................197
KEYLESS ENTER-N-GO™ ...............197
NORMAL STARTING — GASOLINE ENGINE . .197
EXTREME COLD WEATHER (BELOW �29°C) ........................198
IF ENGINE FAILS TO START ..............198
AFTERSTARTING......................199
NORMAL STARTING – DIESEL ENGINE .....199
AUTOMATIC TRANSMISSION ...............201
KEY IGNITION PARK INTERLOCK .........202
BRAKE/TRANSMISSION SHIFT INTERLOCK SYSTEM .............................202
EIGHT-SPEED AUTOMATIC TRANSMISSION – 3.6L ENGINE ..........................202
FIVE-SPEED AUTOMATIC TRANSMISSION – 3.0L DIESEL ENGINE ...................207
AUTOSTICK® (for versions/markets, where provided) ...............................211
OPERATION – 3.6L ENGINE ...............211
OPERATION – 3.0L DIESEL ENGINE ........212
ALL-WHEEL DRIVE (AWD) (for versions/markets, where provided) .........................213
193
Page 201 of 332

Run Flat Tires (for versions/markets, whereprovided) .............................227
Spare Tires (for versions/markets, where provided) .............................228
Tire Spinning .........................229
Tread Wear Indicators ...................230
LifeOfTire ...........................230
Replacement Tires ......................230
TIRE CHAINS (TRACTION DEVICES) .........231
TIRE ROTATION RECOMMENDATIONS .......232
TIRE PRESSURE MONITOR SYSTEM (TPMS) . .232 PREMIUM SYSTEM .....................234
FUEL REQUIREMENTS — GASOLINE ENGINES ...............................236
3.6L ENGINE ..........................236
FUEL REQUIREMENTS — DIESEL ENGINES . . .238
BIODIESEL FUEL REQUIREMENTS ..........239
ADDING FUEL ..........................239
EMERGENCY FUEL FILLER DOOR RELEASE .............................240
TRAILER TOWING .......................240
COMMON TOWING DEFINITIONS ..........240
BREAKAWAY CABLE ATTACHMENT ........242
TRAILER TOWING WEIGHTS (MAXIMUM TRAILER WEIGHT RATINGS) .............243
TRAILER AND TONGUE WEIGHT ..........244
TOWING REQUIREMENTS ...............244
195
Page 203 of 332

STARTING
PROCEDURES
Before starting your vehicle, adjust
your seat, adjust the inside and out-
side mirrors, fasten your seat belt, and
if present, instruct all other occupants
to buckle their seat belts.
WARNING!
When leaving the vehicle, alwaysremove the key fob and lock your
vehicle.
Never leave children alone in a vehicle, or with access to an un-
locked vehicle. Allowing children
to be in a vehicle unattended is
dangerous for a number of rea-
sons. A child or others could be
seriously or fatally injured. Chil-
dren should be warned not to
touch the parking brake, brake
pedal or the shift lever.
(Continued)
WARNING!(Continued)
Do not leave the key fob in or nearthe vehicle, or in a location acces-
sible to children, and do not leave
the ignition of a vehicle equipped
with Keyless Enter-N-Go™ in the
ACC or ON/RUN mode. A child
could operate power windows,
other controls, or move the ve-
hicle.
KEYLESS ENTER-N-GO™
This feature allows
the driver to oper-
ate the ignition
switch with the
push of a button,
as long as the Re-
mote Keyless Entry
(RKE) transmitter is in the passenger
compartment.
NORMAL STARTING —
GASOLINE ENGINE
Using The ENGINE START/STOP
Button
1. The transmission must be in PARK
or NEUTRAL.
2. Press and hold the brake pedal
while pressing the ENGINE START/
STOP button once.
3. The system takes over and at-
tempts to start the vehicle. If the ve-
hicle fails to start, the starter will dis-
engage automatically after
10 seconds.
4. If you wish to stop the cranking of
the engine prior to the engine starting,
press the button again.
NOTE: Normal starting of either a
cold or a warm engine is obtained
without pumping or pressing the
accelerator pedal.
197