turn signal Lancia Thema 2014 Owner handbook (in English)
[x] Cancel search | Manufacturer: LANCIA, Model Year: 2014, Model line: Thema, Model: Lancia Thema 2014Pages: 332, PDF Size: 3.46 MB
Page 21 of 332

countries, which apply Directive
1999/5/EC: Austria, Belgium, Czech
Republic, Denmark, Finland, France,
Germany, Greece, Hungary, Ireland,
Italy, Luxembourg, Netherlands, Nor-
way, Poland, Portugal, Romania,
Russian Federation, Slovenia, Croa-
tia, Spain, Sweden, Switzerland, and
United Kingdom.
Operation is subject to the following
conditions:
This device may not cause harmfulinterference.
This device must accept any inter- ference that may be received, in-
cluding interference that may cause
undesired operation.
VEHICLE SECURITY
ALARM
The Vehicle Security Alarm monitors
the vehicle doors, hood and trunk for
unauthorized entry and the Keyless
Enter-N-Go™ Start/Stop button for
unauthorized operation. While the
Vehicle Security Alarm is armed, inte-
rior switches for door locks and deck-
lid release are disabled. If something triggers the alarm, the Vehicle Secu-
rity Alarm will provide the following
audible and visible signals: the horn
will pulse, the park lamps and/or turn
signals will flash, and the Vehicle Se-
curity Light in the instrument cluster
will flash.
REARMING OF THE
SYSTEM
If something triggers the alarm, and
no action is taken to disarm it, the
Vehicle Security Alarm will turn off
the horn after 29 seconds, and turn off
all of the visual signals after an addi-
tional 31 seconds, then the Vehicle
Security Alarm will rearm itself.
TO ARM THE SYSTEM
Follow these steps to arm the Vehicle
Security Alarm:
1. Make sure the vehicle ignition sys-
tem is "OFF". (refer to "Starting Pro-
cedures" in "Starting And Operating"
for further information).
2. Perform one of the following
methods to lock the vehicle:
LOCK on the interior power
door lock switch with the driver
and/or passenger door open.
the LOCK button on the exte-
rior Passive Entry Door Handle with a
valid Key Fob available in the same
exterior zone (refer to "Keyless Enter-
N-Go™" in "Things To Know Before
Starting Your Vehicle" for further in-
formation).
Press the LOCK button on the Re-
mote Keyless Entry (RKE) transmit-
ter.
3. If any doors are open, close them.
TO DISARM THE SYSTEM
The Vehicle Security Alarm can be
disarmed using any of the following
methods:
Press the UNLOCK button on the
Remote Keyless Entry (RKE)
transmitter.
Grasp the Passive Entry Unlock Door Handle (refer to "Keyless
Enter-N-Go™" in "Things To
15
Page 22 of 332

Know Before Starting Your Ve-
hicle" for further information).
Cycle the vehicle ignition system out of the OFF position by pressing
the Keyless Enter-N-Go™ Start/
Stop button (requires at least one
valid Key Fob in the vehicle).
NOTE:
The driver's door key cylinder and the trunk button on the RKE
transmitter cannot arm or dis-
arm the Vehicle Security Alarm.
When the Vehicle Security Alarm is armed, the interior
power door lock switches will
not unlock the doors.
The Vehicle Security Alarm is de-
signed to protect your vehicle; how-
ever, you can create conditions where
the system will give you a false alarm.
If one of the previously described
arming sequences has occurred, the
Vehicle Security Alarm will arm re-
gardless of whether you are in the
vehicle or not. If you remain in the
vehicle and open a door, the alarm
will sound. If this occurs, disarm the
Vehicle Security Alarm. If the Vehicle Security Alarm is armed
and the battery becomes discon-
nected, the Vehicle Security Alarm
will remain armed when the battery is
reconnected; the exterior lights will
flash, the horn will sound. If this oc-
curs, disarm the Vehicle Security
Alarm.
PREMIUM SECURITY
SYSTEM (for
versions/markets, where
provided)
The Premium Security system moni-
tors the doors, hood latch, and trunk
for unauthorized entry and the igni-
tion switch for unauthorized opera-
tion. The system also includes a dual
function intrusion sensor and vehicle
tilt sensor. The intrusion sensor moni-
tors the vehicle interior for motion.
The vehicle tilt sensor monitors the
vehicle for any tilting actions (tow
away, tire removal, ferry transport,
etc).
In the event that something triggers
the security system, the headlights
will turn on, the alarm will sound and
the turn signal and side repeater lights
will flash for 29 seconds, and then the
lights will continue to flash for an
additional 5 seconds. The system will
repeat this sequence for up to 8 secu-
rity violations in any mode (door ajar,
motion, hood ajar, etc.) before having
to rearm the system. At the end of any
particular trigger event, the lights will
continue to flash for 26 seconds.
TO ARM THE SYSTEM
Follow these steps to arm the theft
alarm:
1. Make sure the vehicle ignition sys-
tem is "OFF". (refer to "Starting Pro-
cedures" in "Starting And Driving"
for further information).
2. Perform one of the following
methods to lock the vehicle:
Press LOCK on the interior power
door lock switch with the driver
and/or passenger door open.
Press the LOCK button on the exte-
rior Passive Entry Door Handle with a
valid Key Fob available in the same
exterior zone (refer to "Keyless Enter-
N-Go™" in "Knowing Your Vehicle"
for further information).
16
Page 24 of 332

SECURITY SYSTEM
MANUAL OVERRIDE
The system will not arm if you lock
the doors using the manual door lock
plunger.
ILLUMINATED ENTRY
(for versions/markets,
where provided)
The courtesy lights will turn on when
you use the Remote Keyless Entry
(RKE) transmitter to unlock the
doors or open any door.
This feature also turns on the ap-
proach lighting in the outside mirrors
(for versions/markets, where pro-
vided). Refer to “Mirrors” in “Under-
standing The Features Of Your Ve-
hicle” for further information.
The lights will fade to off after ap-
proximately 30 seconds or they will
immediately fade to off once the igni-
tion is cycled to the ON/RUN position
from the OFF position.NOTE:
The front courtesy overhead
console and door courtesy lights
will turn on if the dimmer con-
trol is in the "Dome ON" position
(extreme top position).
The Illuminated Entry system will not operate if the dimmer
control is in the “Dome defeat”
position (extreme bottom posi-
tion).
REMOTE KEYLESS
ENTRY (RKE)
The RKE system allows you to lock or
unlock the doors or open the trunk
from distances up to approximately
20 m using a hand-held Key Fob with
RKE transmitter. The RKE transmit-
ter does not need to be pointed at the
vehicle to activate the system.
NOTE: Driving at speeds 8 km/h
and above disables the system
from responding to all RKE trans-
mitter buttons for all RKE trans-
mitters.
TO UNLOCK THE DOORS
Press and release the UNLOCK but-
ton on the RKE transmitter once to
unlock the driver's door or twice
within five seconds to unlock all
doors. The turn signal lights will flash
to acknowledge the unlock signal.
The illuminated entry system will also
turn on.
If the vehicle is equipped with Passive
Entry, refer to “Keyless Enter-N-
Go™” under “Things To Know Before
Starting Your Vehicle” for further in-
formation.
1st Press Of Key Fob Unlocks
This feature lets you program the sys-
tem to unlock either the driver's door
or all doors on the first press of the
Key Fob With RKE Transmitter
18
Page 25 of 332

UNLOCK button on the RKE trans-
mitter. To change the current setting,
refer to “Uconnect® Settings” in
“Understanding Your Instrument
Panel” for further information.
Flash Headlights With Lock
This feature will cause the turn signal
lights to flash when the doors are
locked or unlocked with the RKE
transmitter. This feature can be
turned on or turned off. To change the
current setting, refer to “Uconnect®
Settings” in “Understanding Your In-
strument Panel” for further informa-
tion.
Headlight Illumination On
Approach
This feature activates the headlights
for up to 90 seconds when the doors
are unlocked with the RKE transmit-
ter. The time for this feature is pro-
grammable on vehicles equipped
through Uconnect®. To change the
current setting, refer to “Uconnect®
Settings” in “Understanding Your In-
strument Panel” for further informa-
tion.TO LOCK THE DOORS
Press and release the LOCK button on
the RKE transmitter to lock all doors.
The turn signal lights will flash to
acknowledge the signal.
If the vehicle is equipped with Passive
Entry, refer to “Keyless Enter-N-Go”
under “Things To Know Before Start-
ing Your Vehicle” for further informa-
tion.
TO UNLATCH THE TRUNK
Press the TRUNK button on the RKE
transmitter two times within five sec-
onds to unlatch the trunk.
If the vehicle is equipped with Passive
Entry, refer to “Keyless Enter-N-Go”
under “Things To Know Before Start-
ing Your Vehicle” for further informa-
tion.
TRANSMITTER BATTERY
REPLACEMENT
The recommended replacement bat-
tery is one CR2032 battery.NOTE:
Perchlorate Material — special
handling may apply. Batteries
could contain dangerous mate-
rials. Please dispose of them ac-
cording to respect for environ-
ment and local laws.
Do not touch the battery termi- nals that are on the back hous-
ing or the printed circuit board.
1. Remove the emergency key by
sliding the mechanical latch on the
back of the RKE transmitter sideways
with your thumb and then pull the
key out with your other hand.Emergency Key Removal
19
Page 67 of 332

position and interfere with the pedals
or impair safe operation of your ve-
hicle in other ways.
WARNING!
Pedals that cannot move freely can
cause loss of vehicle control and
increase the risk of serious personal
injury.
Always make sure that floor matsare properly attached to the floor
mat fasteners.
Never place or install floor mats or other floor coverings in the ve-
hicle that cannot be properly se-
cured to prevent them from mov-
ing and interfering with the
pedals or the ability to control the
vehicle.
Never put floor mats or other floor coverings on top of already
installed floor mats. Additional
floor mats and other coverings
will reduce the size of the pedal
area and interfere with the ped-
als.
(Continued)
WARNING!(Continued)
Check mounting of mats on aregular basis. Always properly re-
install and secure floor mats that
have been removed for cleaning.
Always make sure that objects cannot fall into the driver foot-
well while the vehicle is moving.
Objects can become trapped un-
der the brake pedal and accelera-
tor pedal causing a loss of vehicle
control.
If required, mounting posts must be properly installed, if not
equipped from the factory. Fail-
ure to properly follow floor mat in-
stallation or mounting can cause
interference with the brake pedal
and accelerator pedal operation
causing loss of control of the ve-
hicle.
PERIODIC SAFETY
CHECKS YOU SHOULD
MAKE OUTSIDE THE
VEHICLE
Tires
Examine tires for excessive tread wear
and uneven wear patterns. Check for
stones, nails, glass, or other objects
lodged in the tread or sidewall. In-
spect the tread for cuts and cracks.
Inspect sidewalls for cuts, cracks and
bulges. Check the wheel nuts for
tightness. Check the tires (including
spare) for proper cold inflation pres-
sure.
Lights
Have someone observe the operation
of brake lights and exterior lights
while you work the controls. Check
turn signal and high beam indicator
lights on the instrument panel.
Door Latches
Check for positive closing, latching,
and locking.
61
Page 69 of 332

3
UNDERSTANDING THE FEATURES OF YOUR
VEHICLE
MIRRORS...............................70
AUTOMATIC DIMMING MIRROR ...........70
OUTSIDE MIRRORS .....................70
OUTSIDE MIRRORS FOLDING FEATURE .....70
DRIVER'S AUTOMATIC DIMMING MIRROR . . .70
OUTSIDE MIRRORS WITH TURN SIGNAL AND APPROACH LIGHTING (for versions/markets,
where provided) .........................70
TILT MIRRORS IN REVERSE (for versions/ markets, where provided) ..................71
POWER MIRRORS ......................71
POWER FOLDING OUTSIDE MIRRORS .......72
HEATED MIRRORS ......................72
ILLUMINATED VANITY MIRRORS ..........72
“SLIDE-ON-ROD” AND EXTENDER FEATURES OFSUNVISOR..........................72
BLIND SPOT MONITORING (BSM) (for versions/markets, where provided) .............73
REAR CROSS PATH (for versions/markets, where provided) .........................75
MODES OF OPERATION ..................76
63
Page 71 of 332

LINKING AND UNLINKING THE REMOTEKEYLESS ENTRY TRANSMITTER TO
MEMORY .............................110
MEMORY POSITION RECALL .............110
EASY ENTRY/EXIT SEAT (Available With Memory Seat Only) .....................111
TO OPEN AND CLOSE THE HOOD ............111
LIGHTS ................................112
HEADLIGHT SWITCH ...................112
AUTOMATIC HEADLIGHTS ..............112
HEADLIGHTS ON WITH WIPERS (Available With Automatic Headlights Only) ...........113
HEADLIGHT TIME DELAY ...............113
AUTOMATIC HIGH BEAM (for versions/ markets, where provided) ................113
DAYTIME RUNNING LIGHTS (for versions/ markets, where provided) .................114
ADAPTIVE BI-XENON HIGH INTENSITY DISCHARGE HEADLIGHTS ...............114
LIGHTS-ON REMINDER .................114
FOG LIGHTS ..........................115
MULTIFUNCTION LEVER ................115
TURN SIGNALS ........................115
LANE CHANGE ASSIST ..................115
HIGH/LOW BEAM SWITCH ..............116
FLASH-TO-PASS.......................116
COURTESY LIGHTS ....................116
FRONT MAP/READING LIGHTS ...........116
65
Page 76 of 332

MIRRORS
AUTOMATIC DIMMING
MIRROR
This mirror automatically adjusts for
headlight glare from vehicles behind
you.
NOTE: This feature is disabled
when the vehicle is moving in re-
verse.
CAUTION!
To avoid damage to the mirror dur-
ing cleaning, never spray any
cleaning solution directly onto the
mirror. Apply the solution onto a
clean cloth and wipe the mirror
clean.
OUTSIDE MIRRORS
To receive maximum benefit, adjust
the outside mirror(s) to center on the
adjacent lane of traffic and a slight
overlap of the view obtained from the
inside mirror.
NOTE: The passenger side con-
vex outside mirror will give a
much wider view to the rear, and
especially of the lane next to your
vehicle.
WARNING!
Vehicles and other objects seen in
the passenger side convex mirror
will look smaller and farther away
than they really are. Relying too
much on your passenger side con-
vex mirror could cause you to col-
lide with another vehicle or other
object. Use your inside mirror when
judging the size or distance of a
vehicle seen in the passenger side
convex mirror.
OUTSIDE MIRRORS
FOLDING FEATURE
Vehicles are equipped with mirrors
that are hinged. The hinge allows the
mirror to pivot forward and rearward
to resist damage. The hinge has three
detent positions: full forward, full
rearward and normal.
DRIVER'S AUTOMATIC
DIMMING MIRROR
This feature is controlled by the inside
automatic dimming mirror and will
automatically adjust for headlight
glare when the inside mirror adjusts.
NOTE: This feature is also avail-
able on the passenger's side when
equipped with turn signal and ap-
proach lighting.
OUTSIDE MIRRORS WITH
TURN SIGNAL AND
APPROACH LIGHTING (for
versions/markets, where
provided)
Driver and passenger outside mirrors
with turn signals located within the
Automatic Dimming Mirror
70
Page 77 of 332

mirror housing and approach lighting
located within mirror glass contain
five LEDs.
Three of the LEDs are turn signal
indicators, which flash with the corre-
sponding turn signal lights in the
front and rear of the vehicle. Turning
on the Hazard Warning flashers will
also activate these LEDs.
The other two LEDs supply illumi-
nated entry lighting, which turns on
in both mirrors when you use the Re-
mote Keyless Entry (RKE) transmit-
ter or open any door. These LEDs
shine outward to illuminate the front
and rear door handles. They also
shine downward to illuminate the
area in front of the doors.
The Illuminated Entry lighting fades
to off after about 30 seconds or it will
fade to off immediately once the igni-
tion is placed into the RUN position.
NOTE: The approach lighting
will not function when the shift
lever is moved out of the PARK
position.TILT MIRRORS IN
REVERSE (for
versions/markets, where
provided)
Tilt Mirrors in Reverse provides auto-
matic outside mirror positioning
which will aid the driver’s view of the
ground rearward of the front doors.
The outside mirrors will move slightly
downward from the present position
when the vehicle is shifted into RE-
VERSE. The outside mirrors will then
return to the original position when
the vehicle is shifted out of the RE-
VERSE position. Each stored
memory setting will have an associ-
ated Tilt Mirrors in Reverse position.
NOTE:
The Tilt Mirrors in Reverse fea-ture is not turned on when deliv-
ered from the factory. The Tilt
Mirrors in Reverse feature can
be turned on and off using the
Uconnect® System. Refer to “Uconnect® Settings” in
“Understanding Your Instru-
ment Panel” for further
information.POWER MIRRORS
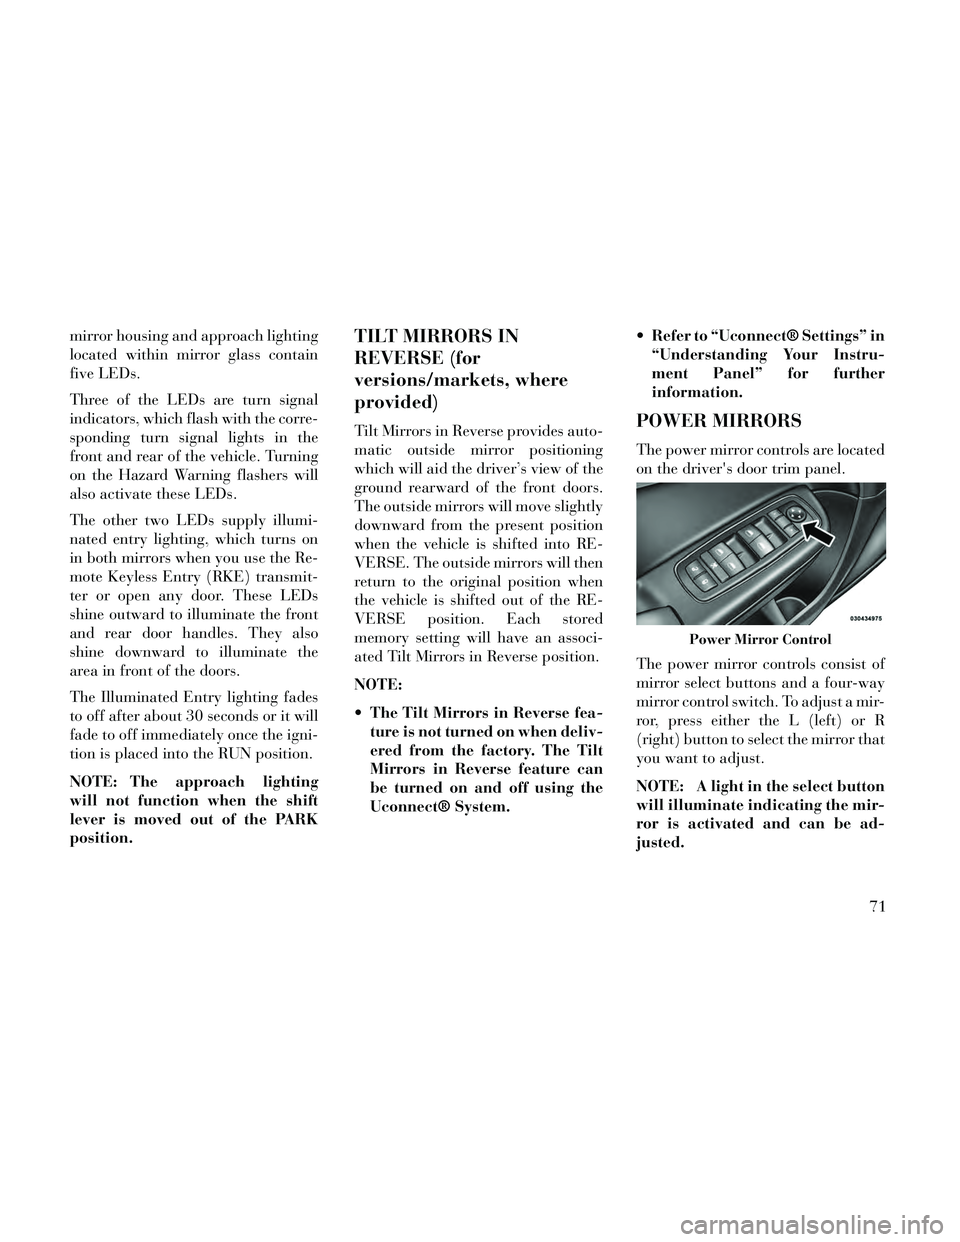
The power mirror controls are located
on the driver's door trim panel.
The power mirror controls consist of
mirror select buttons and a four-way
mirror control switch. To adjust a mir-
ror, press either the L (left) or R
(right) button to select the mirror that
you want to adjust.
NOTE: A light in the select button
will illuminate indicating the mir-
ror is activated and can be ad-
justed.
Power Mirror Control
71
Page 81 of 332

The BSM system will not alert you of
objects that are traveling in the oppo-
site direction of the vehicle in adjacent
lanes.WARNING!
The Blind Spot Monitoring system
is only an aid to help detect objects
in the blind spot zones. The BSM
system is not designed to detect pe-
destrians, bicyclists, or animals.
Even if your vehicle is equipped
with the BSM system, always check
your vehicle's mirrors, glance over
your shoulder, and use your turn
signal before changing lanes. Fail-
ure to do so can result in serious
injury or death.
REAR CROSS PATH (for
versions/markets, where
provided)
The Rear Cross Path (RCP) feature is
intended to aid the drivers whenbacking out of parking spaces where
their vision of oncoming vehicles may
be blocked. Proceed slowly and cau-
tiously out of the parking space until
the rear end of the vehicle is exposed.
The RCP system will then have a clear
view of the cross traffic and if an
oncoming vehicle is detected, alert the
driver.
RCP monitors the rear detection
zones on both sides of the vehicle, for
objects that are moving toward the
side of the vehicle with a minimum
speed of approximately 5 km/h, to
objects moving a maximum of ap-
proximately 32 km/h, such as in
parking lot situations.
Overtaking/Passing
Stationary Objects
Opposing Traffic
RCP Detection Zones
75