radio Lancia Voyager 2014 Owner handbook (in English)
[x] Cancel search | Manufacturer: LANCIA, Model Year: 2014, Model line: Voyager, Model: Lancia Voyager 2014Pages: 364, PDF Size: 3.49 MB
Page 28 of 364
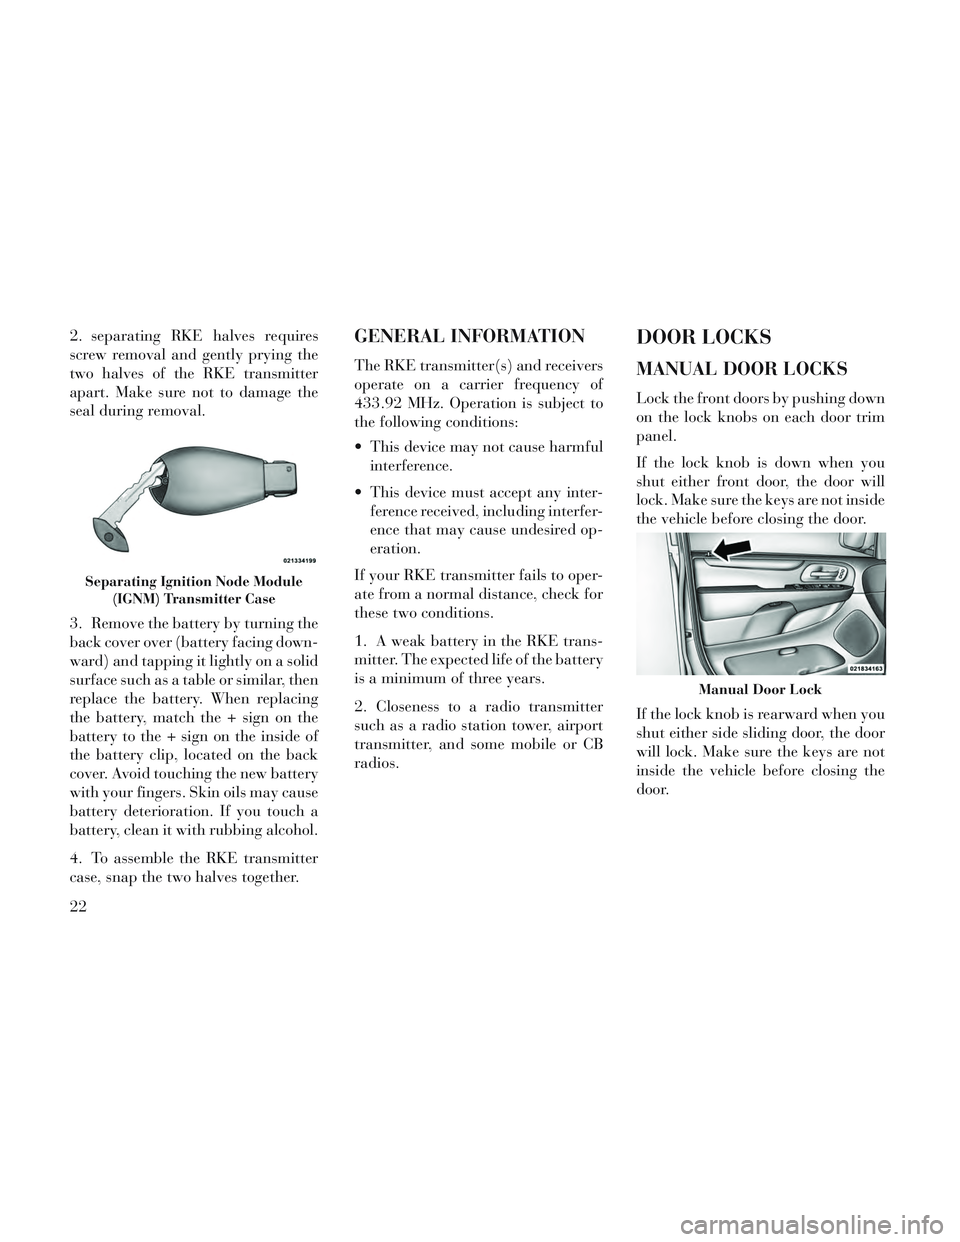
2. separating RKE halves requires
screw removal and gently prying the
two halves of the RKE transmitter
apart. Make sure not to damage the
seal during removal.
3. Remove the battery by turning the
back cover over (battery facing down-
ward) and tapping it lightly on a solid
surface such as a table or similar, then
replace the battery. When replacing
the battery, match the + sign on the
battery to the + sign on the inside of
the battery clip, located on the back
cover. Avoid touching the new battery
with your fingers. Skin oils may cause
battery deterioration. If you touch a
battery, clean it with rubbing alcohol.
4. To assemble the RKE transmitter
case, snap the two halves together.GENERAL INFORMATION
The RKE transmitter(s) and receivers
operate on a carrier frequency of
433.92 MHz. Operation is subject to
the following conditions:
This device may not cause harmfulinterference.
This device must accept any inter- ference received, including interfer-
ence that may cause undesired op-
eration.
If your RKE transmitter fails to oper-
ate from a normal distance, check for
these two conditions.
1. A weak battery in the RKE trans-
mitter. The expected life of the battery
is a minimum of three years.
2. Closeness to a radio transmitter
such as a radio station tower, airport
transmitter, and some mobile or CB
radios.
DOOR LOCKS
MANUAL DOOR LOCKS
Lock the front doors by pushing down
on the lock knobs on each door trim
panel.
If the lock knob is down when you
shut either front door, the door will
lock. Make sure the keys are not inside
the vehicle before closing the door.
If the lock knob is rearward when you
shut either side sliding door, the door
will lock. Make sure the keys are not
inside the vehicle before closing the
door.
Separating Ignition Node Module (IGNM) Transmitter Case
Manual Door Lock
22
Page 84 of 364
RAIN SENSING WIPERS (for versions/markets,where provided) ....................... .134
TILT/TELESCOPING STEERING COLUMN .....135
ADJUSTABLE PEDALS (for versions/markets, where provided) .............................. .135
ELECTRONIC SPEED CONTROL ............136
TO ACTIVATE ......................... .137
TO SET A DESIRED SPEED ...............137
TO DEACTIVATE ...................... .137
TO RESUME SPEED .................... .137
TO VARY THE SPEED SETTING ...........137
TO ACCELERATE FOR PASSING ...........138
PARKSENSE® REAR PARK ASSIST (for versions/markets, where provided) ...........138
PARK ASSIST SENSORS .................138
PARKSENSE® WARNING DISPLAY .........138
PARKSENSE® DISPLAY .................139
ENABLING/DISABLING PARKSENSE® ......140
SERVICE THE PARKSENSE® REAR PARK ASSIST SYSTEM ...................... .140
CLEANING THE PARK ASSIST SYSTEM .....141
PARKSENSE® SYSTEM USAGE PRECAUTIONS ........................ .141
PARKVIEW® REAR BACK UP CAMERA (for versions/markets, where provided) ...........143
TURNING PARKVIEW® ON OR OFF — WITH NAVIGATION/MULTIMEDIA RADIO .........144
78
Page 85 of 364
TURNING PARKVIEW® ON OR OFF — WITHOUTNAVIGATION/MULTIMEDIA RADIO .........144
OVERHEAD CONSOLES ...................144
FRONT OVERHEAD CONSOLE ............144
COURTESY/INTERIOR LIGHTING .........145
SUNGLASS STORAGE (NON-SUNROOF ONLY) .............................. .145
REAR COURTESY/READING LIGHTS (for versions/markets, where provided) ..........146
REAR OVERHEAD CONSOLES (for versions/ markets, where provided) .................146
POWER SUNROOF (for versions/markets, where provided) .............................. .147
OPENING SUNROOF — EXPRESS ..........147
OPENING THE SUNROOF — MANUAL MODE . .147
CLOSING SUNROOF — EXPRESS ..........148
CLOSING SUNROOF — MANUAL MODE .....148
PINCH PROTECT FEATURE ...............148
VENTING SUNROOF — EXPRESS ..........148
SUNSHADE OPERATION .................148
WIND BUFFETING .................... .148
SUNROOF MAINTENANCE ................148
IGNITION OFF OPERATION ...............148
ELECTRICAL POWER OUTLETS ............149
SMOKERS PACKAGE KIT ..................150
POWER INVERTER (for versions/markets, where provided) .............................. .151
79
Page 91 of 364
When the vehicle is started, the BSM
warning light will momentarily illu-
minate in both outside rear view mir-
rors to let the driver know that the
system is operational. The BSM sys-
tem sensors operate when the vehicle
is in any forward gear or REVERSE
and enters stand-by mode when the
vehicle is in PARK.
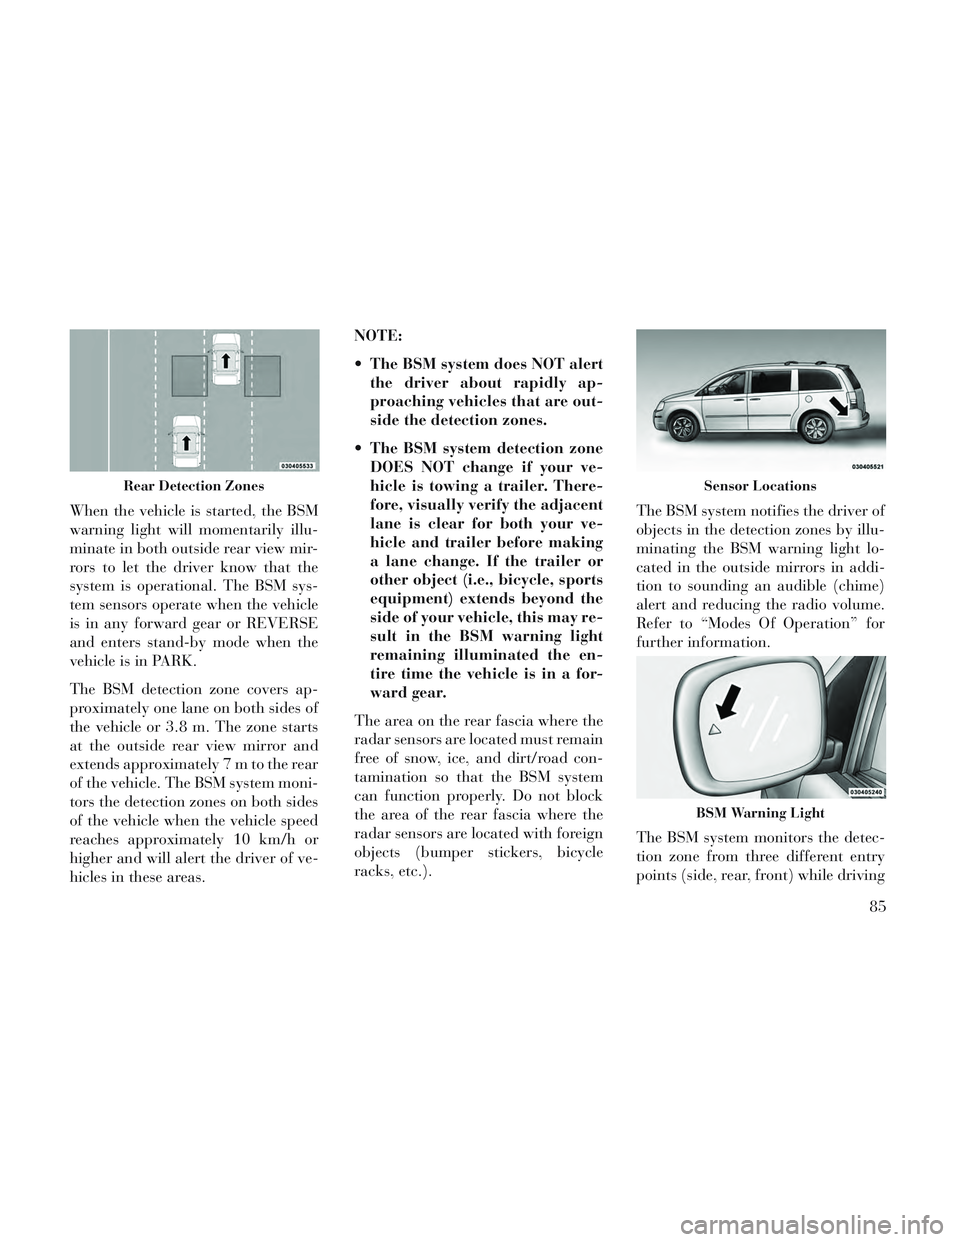
The BSM detection zone covers ap-
proximately one lane on both sides of
the vehicle or 3.8 m. The zone starts
at the outside rear view mirror and
extends approximately 7 m to the rear
of the vehicle. The BSM system moni-
tors the detection zones on both sides
of the vehicle when the vehicle speed
reaches approximately 10 km/h or
higher and will alert the driver of ve-
hicles in these areas.NOTE:
The BSM system does NOT alert
the driver about rapidly ap-
proaching vehicles that are out-
side the detection zones.
The BSM system detection zone DOES NOT change if your ve-
hicle is towing a trailer. There-
fore, visually verify the adjacent
lane is clear for both your ve-
hicle and trailer before making
a lane change. If the trailer or
other object (i.e., bicycle, sports
equipment) extends beyond the
side of your vehicle, this may re-
sult in the BSM warning light
remaining illuminated the en-
tire time the vehicle is in a for-
ward gear.
The area on the rear fascia where the
radar sensors are located must remain
free of snow, ice, and dirt/road con-
tamination so that the BSM system
can function properly. Do not block
the area of the rear fascia where the
radar sensors are located with foreign
objects (bumper stickers, bicycle
racks, etc.). The BSM system notifies the driver of
objects in the detection zones by illu-
minating the BSM warning light lo-
cated in the outside mirrors in addi-
tion to sounding an audible (chime)
alert and reducing the radio volume.
Refer to “Modes Of Operation” for
further information.
The BSM system monitors the detec-
tion zone from three different entry
points (side, rear, front) while driving
Rear Detection ZonesSensor Locations
BSM Warning Light
85
Page 93 of 364
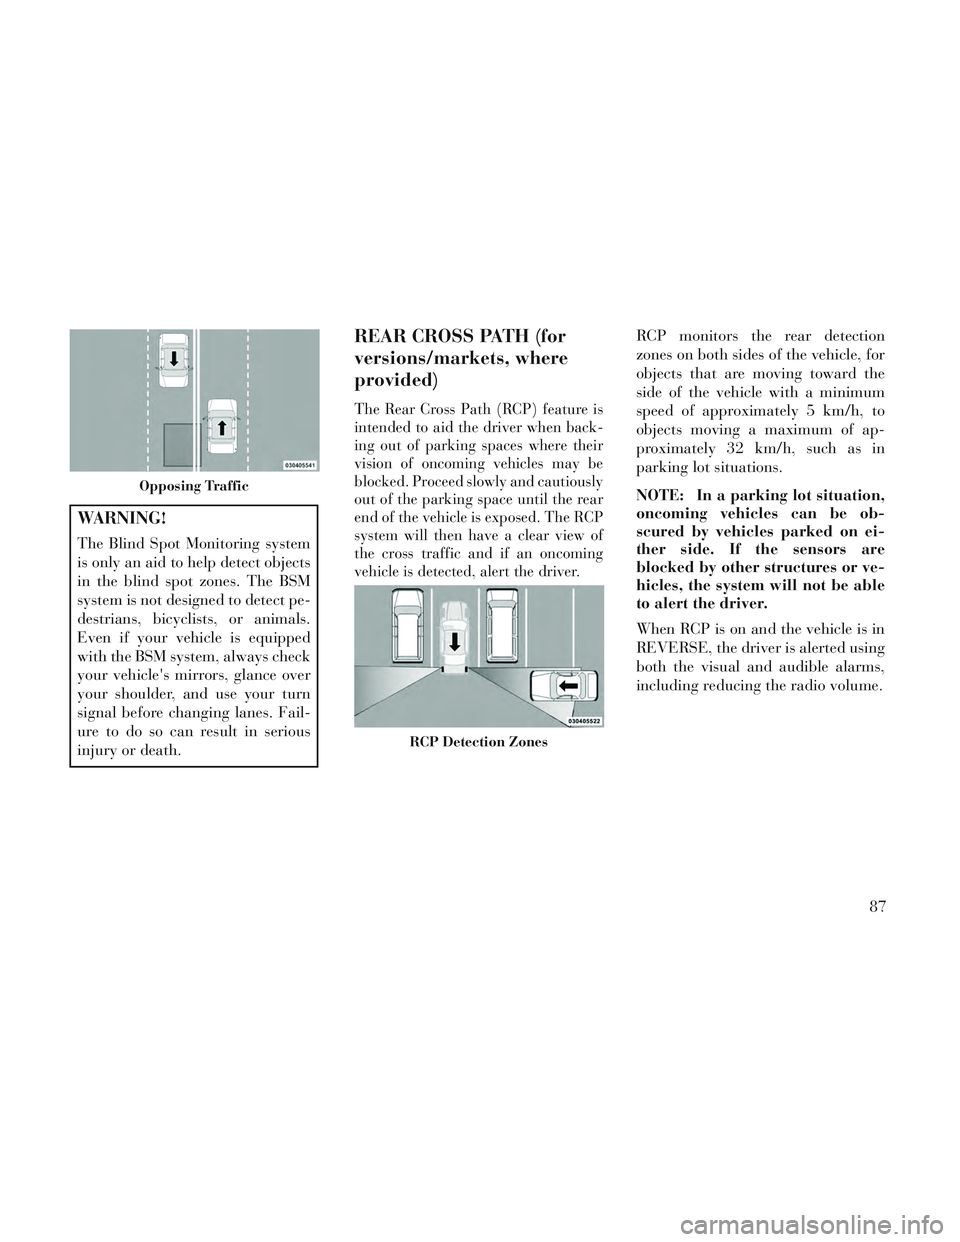
WARNING!
The Blind Spot Monitoring system
is only an aid to help detect objects
in the blind spot zones. The BSM
system is not designed to detect pe-
destrians, bicyclists, or animals.
Even if your vehicle is equipped
with the BSM system, always check
your vehicle's mirrors, glance over
your shoulder, and use your turn
signal before changing lanes. Fail-
ure to do so can result in serious
injury or death.
REAR CROSS PATH (for
versions/markets, where
provided)
The Rear Cross Path (RCP) feature is
intended to aid the driver when back-
ing out of parking spaces where their
vision of oncoming vehicles may be
blocked. Proceed slowly and cautiously
out of the parking space until the rear
end of the vehicle is exposed. The RCP
system will then have a clear view of
the cross traffic and if an oncoming
vehicle is detected, alert the driver.
RCP monitors the rear detection
zones on both sides of the vehicle, for
objects that are moving toward the
side of the vehicle with a minimum
speed of approximately 5 km/h, to
objects moving a maximum of ap-
proximately 32 km/h, such as in
parking lot situations.
NOTE: In a parking lot situation,
oncoming vehicles can be ob-
scured by vehicles parked on ei-
ther side. If the sensors are
blocked by other structures or ve-
hicles, the system will not be able
to alert the driver.
When RCP is on and the vehicle is in
REVERSE, the driver is alerted using
both the visual and audible alarms,
including reducing the radio volume.
Opposing Traffic
RCP Detection Zones
87
Page 94 of 364
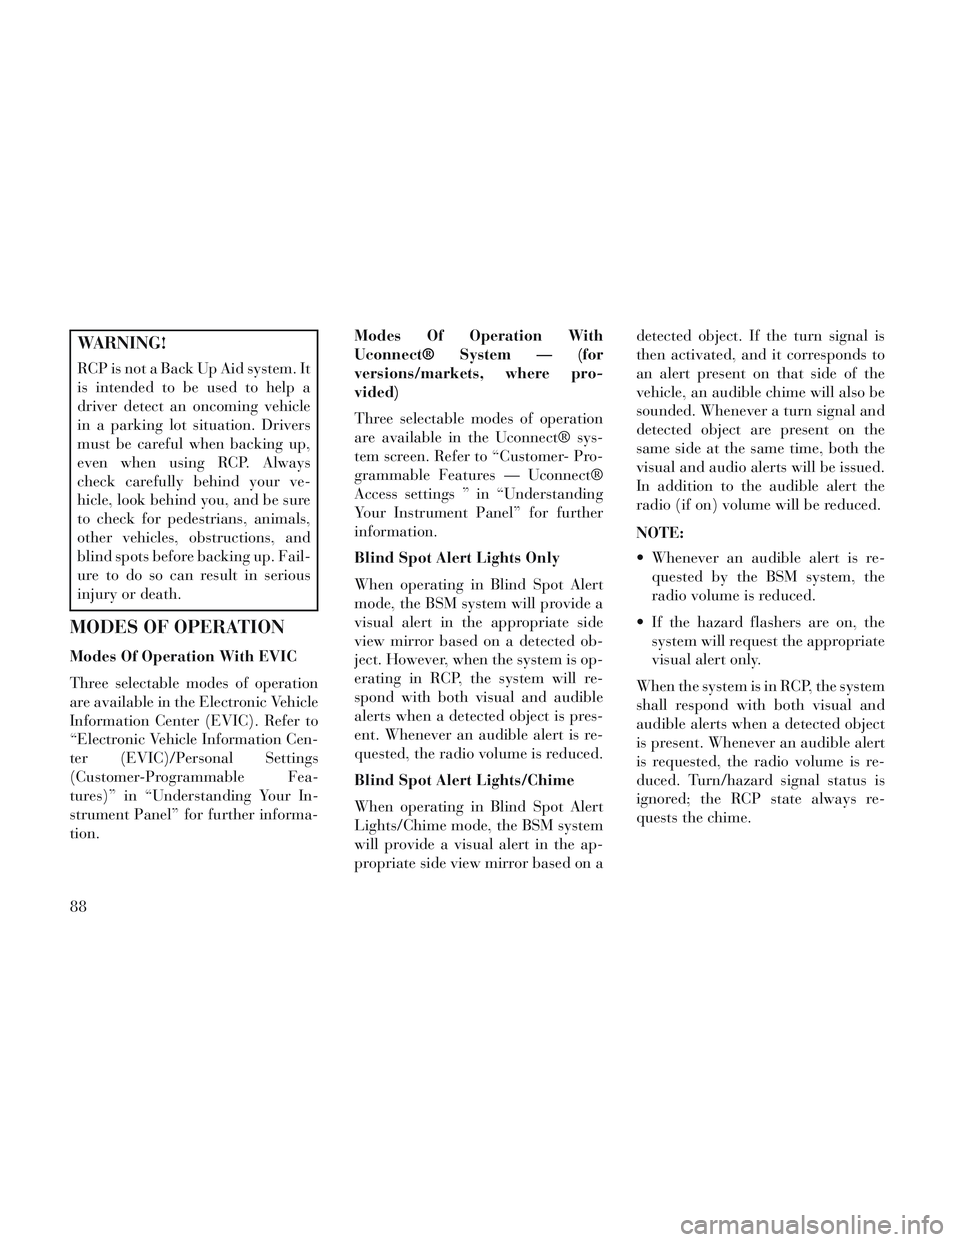
WARNING!
RCP is not a Back Up Aid system. It
is intended to be used to help a
driver detect an oncoming vehicle
in a parking lot situation. Drivers
must be careful when backing up,
even when using RCP. Always
check carefully behind your ve-
hicle, look behind you, and be sure
to check for pedestrians, animals,
other vehicles, obstructions, and
blind spots before backing up. Fail-
ure to do so can result in serious
injury or death.
MODES OF OPERATION
Modes Of Operation With EVIC
Three selectable modes of operation
are available in the Electronic Vehicle
Information Center (EVIC). Refer to
“Electronic Vehicle Information Cen-
ter (EVIC)/Personal Settings
(Customer-Programmable Fea-
tures)” in “Understanding Your In-
strument Panel” for further informa-
tion.Modes Of Operation With
Uconnect® System — (for
versions/markets, where pro-
vided)
Three selectable modes of operation
are available in the Uconnect® sys-
tem screen. Refer to “Customer- Pro-
grammable Features — Uconnect®
Access settings ” in “Understanding
Your Instrument Panel” for further
information.
Blind Spot Alert Lights Only
When operating in Blind Spot Alert
mode, the BSM system will provide a
visual alert in the appropriate side
view mirror based on a detected ob-
ject. However, when the system is op-
erating in RCP, the system will re-
spond with both visual and audible
alerts when a detected object is pres-
ent. Whenever an audible alert is re-
quested, the radio volume is reduced.
Blind Spot Alert Lights/Chime
When operating in Blind Spot Alert
Lights/Chime mode, the BSM system
will provide a visual alert in the ap-
propriate side view mirror based on adetected object. If the turn signal is
then activated, and it corresponds to
an alert present on that side of the
vehicle, an audible chime will also be
sounded. Whenever a turn signal and
detected object are present on the
same side at the same time, both the
visual and audio alerts will be issued.
In addition to the audible alert the
radio (if on) volume will be reduced.
NOTE:
Whenever an audible alert is re-
quested by the BSM system, the
radio volume is reduced.
If the hazard flashers are on, the system will request the appropriate
visual alert only.
When the system is in RCP, the system
shall respond with both visual and
audible alerts when a detected object
is present. Whenever an audible alert
is requested, the radio volume is re-
duced. Turn/hazard signal status is
ignored; the RCP state always re-
quests the chime.
88
Page 95 of 364
Blind Spot Alert Off
When the BSM system is turned off
there will be no visual or audible
alerts from either the BSM or RCP
systems.
NOTE: The BSM system will store
the current operating mode when
the vehicle is shut off. Each time
the vehicle is started the previ-
ously stored mode will be recalled
and used
Uconnect® PHONE
NOTE: For Uconnect® Phone
with Navigation or Multimedia ra-
dio, refer to the Navigation or Mul-
timedia radio's User's Manual
(separate booklet) Uconnect®
Phone section.
Uconnect® Phone is a voice-
activated, hands-free, in-vehicle com-
munications system. Uconnect®
Phone allows you to dial a phone
number with your mobile phone* us-
ing simple voice commands (e.g.,
“Call”…“Jim”… “Work” or
“Dial”…“151-1234 -5555”). Your
mobile phone's audio is transmittedthrough your vehicle's audio system;
the system will automatically mute
your radio when using the Uconnect®
Phone.
Uconnect® Phone allows you to
transfer calls between the Uconnect®
Phone and your mobile phone as you
enter or exit your vehicle and enables
you to mute the Uconnect® Phone's
microphone for private conversation.
The Uconnect® Phone is driven
through your Bluetooth® “Hands-
Free profile” mobile phone.
Uconnect® Phone features
Bluetooth® technology - the global
standard that enables different elec-
tronic devices to connect to each other
without wires or a docking station, so
Uconnect® Phone works no matter
where you stow your mobile phone
(be it your purse, pocket, or brief-
case), as long as your phone is turned
on and has been paired to the vehicle's
Uconnect® Phone. The Uconnect®
Phone allows up to seven mobile
phones to be linked to the system.
Only one linked (or paired) mobile
phone can be used with the
Uconnect® Phone at a time. The
Uconnect® Phone is available in Eng-
lish, Dutch, French, German, Italian
or Spanish languages (as equipped).
WARNING!
Any voice commanded system
should be used only in safe driving
conditions following all applicable
laws, including laws regarding
phone use. Your attention should be
focused on safely operating the ve-
hicle. Failure to do so may result in
a collision causing serious injury or
death.
Uconnect® Phone Button The radio or steering wheel
controls will contain the
two control buttons
(Uconnect® Phone
but-
ton and Voice Command
button)
that will enable you to access the sys-
tem. When you press the button you
will hear the word Uconnect® fol-
lowed by a BEEP. The beep is your
signal to give a command.
89
Page 96 of 364
Voice Command Button
Actual button location may
vary with radio. The indi-
vidual buttons are described
in the “Operation” section.
The Uconnect® Phone can be used
with Hands-Free Profile certified
Bluetooth® mobile phones. Some
phones may not support all the
Uconnect® Phone features. Refer to
your mobile service provider or the
phone manufacturer for details.
The Uconnect® Phone is fully inte-
grated with the vehicle's audio sys-
tem. The volume of the Uconnect®
Phone can be adjusted either from the
radio volume control knob or from the
steering wheel radio control, if so
equipped.
The radio display will be used for
visual prompts from the Uconnect®
Phone such as CELL or caller ID on
certain radios.
COMPATIBLE PHONES
* The Uconnect® Phone requires a
mobile phone equipped with the
Bluetooth® “Hands-Free Profile”,
version 1.0 or higher.
See Uconnect® website for supported
phones.
www.UconnectPhone.com
To find the list of compatible phones
navigate through the following
menus:
Select model year for the vehicle
Select type of the vehicle
In the getting started tab, selectcompatible phones
OPERATION
Voice commands can be used to oper-
ate the Uconnect® Phone and to navi-
gate through the Uconnect® Phone
menu structure. Voice commands are
required after most Uconnect® Phone
prompts. You will be prompted for a
specific command and then guided
through the available options. Prior to giving a voice command,
one must wait for the beep, which
follows the “Ready” prompt or an-
other prompt.
For certain operations, compound commands can be used. For ex-
ample, instead of saying “Setup”
and then “Phone Pairing”, the fol-
lowing compound command can be
said: “Setup Phone Pairing”.
For each feature explanation in this section, only the compound form of
the voice command is given. You
can also break the commands into
parts and say each part of the com-
mand when you are asked for it.
For example, you can use the com-
pound form voice command
“Phonebook New Entry”, or you
can break the compound form
command into two voice com-
mands: “Phonebook” and “New
Entry”. Please remember, the
Uconnect® Phone works best when
you talk in a normal conversational
tone, as if speaking to someone sit-
ting a few meters away from you.
90
Page 97 of 364
Voice Command Tree
Refer to “Voice Tree” in this section.
Cancel Command
At any prompt, after the beep, you
can say “Cancel” and you will be re-
turned to the main menu. However, in
a few instances the system will take
you back to the previous menu.
Help Command
If you need assistance at any prompt,
or if you want to know your options at
any prompt, say “Help” following the
beep. The Uconnect® Phone will play
all the options at any prompt if you
ask for help.
To activate the Uconnect® Phone
from idle, simply press the
button
and follow the audible prompts for
directions. All Uconnect® Phone ses-
sions begin with a press of the
but-
ton on the radio control head.
Pair (Link) Uconnect® Phone To
A Mobile Phone
To begin using your Uconnect®
Phone, you must pair your compat-
ible Bluetooth® enabled mobile phone (refer to “Compatible Phones”
section to learn about the phone
type).
To complete the pairing process, you
will need to reference your mobile
phone owner's manual. The
Uconnect® website may also provide
detailed instructions for pairing.
The following are general phone to
Uconnect® Phone pairing instruc-
tions:
Press the
button to begin.
After the “Ready” prompt and the following beep, say “Setup Phone
Pairing”.
When prompted, after the beep, say “Pair a Phone” and follow the au-
dible prompts.
You will be asked to say a four-digit Personal Identification Number
(PIN), which you will later need to
enter into your mobile phone. You
can enter any four-digit PIN. You
will not need to remember this PIN
after the initial pairing process. For identification purposes, you
will be prompted to give the
Uconnect® Phone a name for your
mobile phone. Each mobile phone
that is paired should be given a
unique phone name.
You will then be asked to give your mobile phone a priority level be-
tween 1 and 7, with 1 being the
highest priority. You can pair up to
seven mobile phones to your
Uconnect® Phone. However, at any
given time, only one mobile phone
can be in use, connected to your
Uconnect® System. The priority
allows the Uconnect® Phone to
know which mobile phone to use if
multiple mobile phones are in the
vehicle at the same time. For ex-
ample, if priority 3 and priority 5
phones are present in the vehicle,
the Uconnect® Phone will use the
priority 3 mobile phone when you
make a call. You can select to use a
lower priority mobile phone at any
time (refer to “Advanced Phone
Connectivity”).
91
Page 98 of 364
Dial By Saying A Number
Press the
button to begin.
After the “Ready” prompt and the following beep, say “Dial.”
The system will prompt you to say the number you want to call.
For example, you can say “151-1234-5555.”
The Uconnect® Phone will confirm the phone number and then dial.
The number will appear in the dis-
play of certain radios.
Call By Saying A Name
Press the
button to begin.
After the “Ready” prompt and the following beep, say “Call.”
The system will prompt you to say the name of the person you want to
call.
After the “Ready” prompt and the following beep, say the name of the
person you want to call. For ex-
ample, you can say “John Doe”,
where John Doe is a previously stored name entry in the
Uconnect® Phonebook or down-
loaded phonebook. To learn how to
store a name in the phonebook ,
refer to “Add Names to Your
Uconnect® Phonebook”.
The Uconnect® Phone will confirm the name and then dial the corre-
sponding phone number, which
may appear in the display of certain
radios.
Add Names To Your Uconnect®
Phonebook
NOTE: Adding names to the
Uconnect® Phonebook is recom-
mended when the vehicle is not in
motion.
Press the
button to begin.
After the “Ready” prompt and the following beep, say “Phonebook
New Entry”.
When prompted, say the name of the new entry. Use of long names
helps the Voice Command and it is recommended. For example, say
“Robert Smith” or “Robert” in-
stead of “Bob”.
When prompted, enter the number designation (e.g., “Home”,
“Work”, “Mobile”, or “Other”).
This will allow you to store multiple
numbers for each phonebook entry,
if desired.
When prompted, recite the phone number for the phonebook entry
that you are adding.
After you are finished adding an entry
into the phonebook, you will be given
the opportunity to add more phone
numbers to the current entry or to
return to the main menu.
The Uconnect® Phone will allow you
to enter up to 32 names in the phone-
book with each name having up to
four associated phone numbers and
designations. Each language has a
separate 32-name phonebook acces-
sible only in that language. In addi-
tion, for versions/markets, where pro-
vided, and supported by your phone,
92