brake light Lancia Ypsilon 2002 Owner handbook (in English)
[x] Cancel search | Manufacturer: LANCIA, Model Year: 2002, Model line: Ypsilon, Model: Lancia Ypsilon 2002Pages: 191, PDF Size: 2.45 MB
Page 74 of 191
71
G
HANDBRAKE
The handbrake lever is situated be-
tween the two front seats.
To put the handbrake on, pull it up-
wards until the vehicle is blocked;
normally four or five clicks are suffi-
cient on flat ground, whereas seven or
eight might be necessary when park-
ing on steep slopes with the vehicle
laden.
IMPORTANTIf this is not the case,
take the car to a LANCIA Dealer-
shipto have the handbrake adjusted.
When the ignition key is turned to
MARand the handbrake pulled up,
the warning lamp xwill light up on
the instrument panel.To release the handbrake:
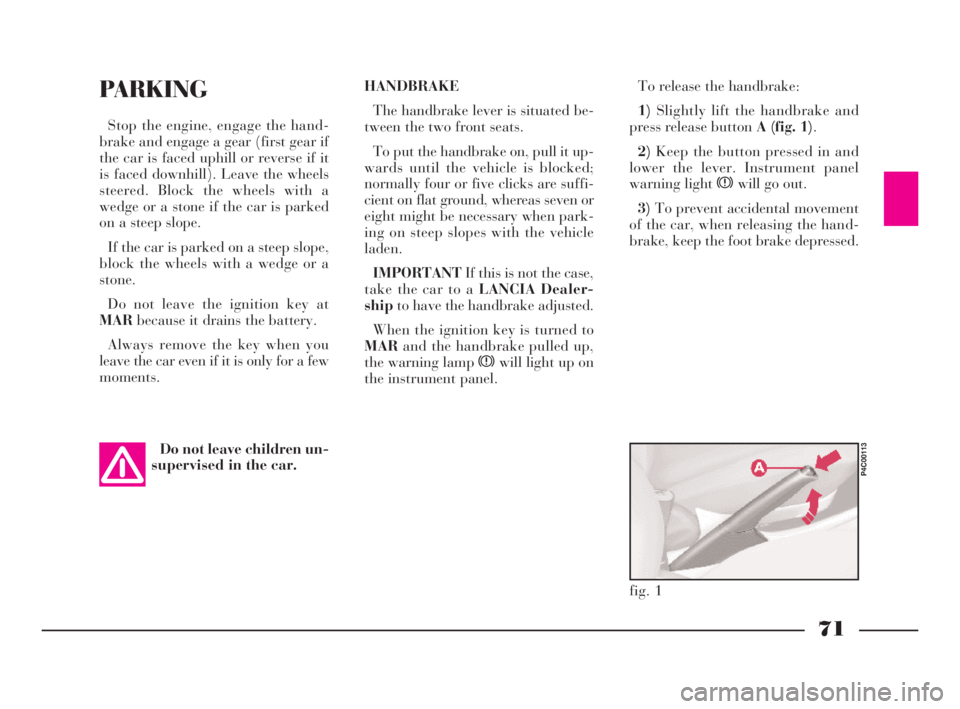
1)Slightly lift the handbrake and
press release button A (fig. 1).
2)Keep the button pressed in and
lower the lever. Instrument panel
warning light xwill go out.
3)To prevent accidental movement
of the car, when releasing the hand-
brake, keep the foot brake depressed.PARKING
Stop the engine, engage the hand-
brake and engage a gear (first gear if
the car is faced uphill or reverse if it
is faced downhill). Leave the wheels
steered. Block the wheels with a
wedge or a stone if the car is parked
on a steep slope.
If the car is parked on a steep slope,
block the wheels with a wedge or a
stone.
Do not leave the ignition key at
MARbecause it drains the battery.
Always remove the key when you
leave the car even if it is only for a few
moments.
Do not leave children un-
supervised in the car.
fig. 1
P4C00113
4C068-089 ING 11-03-2008 11:59 Pagina 71
Page 77 of 191
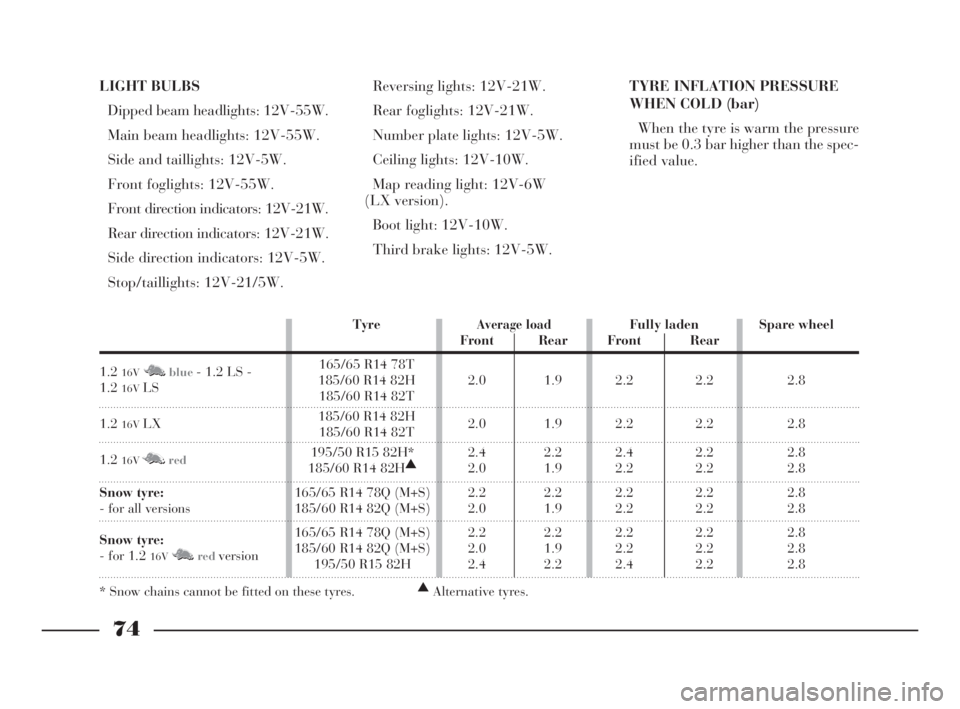
LIGHT BULBS
Dipped beam headlights: 12V-55W.
Main beam headlights: 12V-55W.
Side and taillights: 12V-5W.
Front foglights: 12V-55W.
Front direction indicators: 12V-21W.
Rear direction indicators: 12V-21W.
Side direction indicators: 12V-5W.
Stop/taillights: 12V-21/5W.Reversing lights: 12V-21W.
Rear foglights: 12V-21W.
Number plate lights: 12V-5W.
Ceiling lights: 12V-10W.
Map reading light: 12V-6W
(LX version).
Boot light: 12V-10W.
Third brake lights: 12V-5W.TYRE INFLATION PRESSURE
WHEN COLD (bar)
When the tyre is warm the pressure
must be 0.3 bar higher than the spec-
ified value.
74
G
TyreAverage loadFully laden Spare wheel
Front Rear Front Rear
1.2
16VM Nblue- 1.2 LS - 165/65 R14 78T
1.2
16VLS185/60 R14 82H 2.0 1.9 2.2 2.2 2.8185/60 R14 82T
1.2
16VLX185/60 R14 82H
2.0 1.9 2.2 2.2 2.8185/60 R14 82T
1.2
16VM Nred195/50 R15 82H* 2.4 2.2 2.4 2.2 2.8
185/60 R14 82H▲
2.0 1.9 2.2 2.2 2.8
Snow tyre:165/65 R14 78Q (M+S) 2.2 2.2 2.2 2.2 2.8
- for all versions 185/60 R14 82Q (M+S) 2.0 1.9 2.2 2.2 2.8
Snow tyre:165/65 R14 78Q (M+S) 2.2 2.2 2.2 2.2 2.8
- for 1.2
16VM Nredversion185/60 R14 82Q (M+S) 2.0 1.9 2.2 2.2 2.8195/50 R15 82H 2.4 2.2 2.4 2.2 2.8
* Snow chains cannot be fitted on these tyres.▲
Alternative tyres.
4C068-089 ING 11-03-2008 11:59 Pagina 74
Page 78 of 191
75
G
SAFE DRIVING
In designing the Lancia Y, we made
every effort to come up with a car
able to provide driver and passengers
with top-class levels of safety. Never-
theless it is always the behaviour of
the person at the wheel that deter-
mines road safety.
Below you will find some simple tips
to help you travel in safety under dif-
ferent conditions. You will no doubt
be familiar with many of them al-
ready but it will be useful to read
them all carefully.BEFORE GETTING BEHIND
THE WHEEL
– Make sure all lights including the
headlights are working properly.
– Adjust the position of the seats,
steering wheel, driving and door mir-
rors properly for the best driving po-
sition.
– On long journeys, it is a good idea
to slightly alter the lumber support
and/or seat inclination to vary the
weight on the spine and therefore re-
duce tiredness and strain.
– Carefully adjust the head restraints
so the back of the head and not the
nape of the neck is supported.
– Carefully adjust the height of the
seat belts to suit the wearer’s stature
(see the instructions given in the sec-
tion “Getting to know your car - seat
belts”).
– Make sure that nothing (mats etc.)
get in the way of the pedals.– Make sure that any child restraint
systems (child seats, carriers, etc.) are
properly fixed to the rear seat. Follow
the indications given in “Transport-
ing children safely” in the section
“Getting to know your car”.
– Make sure that objects are care-
fully arranged in the boot so they will
not fly forward if you have to brake
sharply.
– Avord placing light-coloured arti-
cles or papers on the object tray which
may be reflected on the windscreen.
– Do not eat a heavy meal before
travelling. Light eating will help keep
your reflexes prompt. Above all, do
not have anything alcoholic to drink.
The use of some drugs may affect
your driving, read the relevant in-
structions sheet carefully.
Remember to periodically check
what is specified in the “Repeated
checks and checks before long trips”
paragraph given in this section.
4C068-089 ING 11-03-2008 11:59 Pagina 75
Page 80 of 191
77
G
– Only use main-beam headlights
when you are driving outside town
and when you are sure they do not
annoy other drivers.
– Dip your headlights (if on) as soon
as you see cars coming in the other di-
rection and pass them with the head-
lights dipped.
– Keep all lights clean.
– Be careful of animals crossing the
road when driving in the country.
DRIVING IN THE RAIN
Rain and wet road surfaces spell
danger.
All manoeuvres are more difficult on
a wet road because the grip of the
wheels on the tarmac is greatly re-
duced. This is why braking distances
are much longer and roadholding is
lower. DRIVING AT NIGHT
If you are driving at night these are
the main rules to follow:
– Drive especially carefully: it is
harder to drive at night.
– Slow down especially if the road is
not lit.
– At the first signs of sleepiness, stop:
continuing would be a risk for your-
self and everybody else. Only start
driving again when you have had
enough rest.
– Keep a greater safety distance
from the cars in front of you than
during daylight hours: it is hard to
judge how fast other cars are going
when all you can see are their lights.
– Make sure the headlight beams are
properly positioned: if they are too
low, they reduce visibility and strain
your eyes. If they are too high they
can dazzle other drivers. – Do not drive too many hours at a
time but stop at intervals to stretch
your legs and recover your energies.
– Make sure the air in the car is be-
ing changed continuously.
– Never coast downhill (i.e. with the
engine off): if you do, you lose the aid
of engine brake, power brakes and
power steering so that braking and
steering require greater effort.
– Never coast downhill (i.e. with the
engine off): if you do, you lose the aid
of engine braking and power.
4C068-089 ING 11-03-2008 11:59 Pagina 77
Page 83 of 191

80
G
DRIVING WITH ABS
The car can be fitted with a wheel
anti-locking system (ABS) and with
electronic brake correction (EBD) sys-
tem.
ABS is a braking system that essen-
tially offers two advantages:
1)It prevents wheel locking and
consequent skidding in emergency
stops, particularly when the road does
not offer much grip.
2)It makes it possible to brake and
steer at the same time so you can
avoid unexpected obstacles and direct
the car where you want while brak-
ing. The extent to which this can be
done will depend on the physical lim-
its of the tyre’s total grip.To get the most out of ABS:
– During emergency stops or when
grip conditions are poor, you will feel
a slight pulsation on the brake pedal.
This is the sign that the ABS is work-
ing. Do not release the brake pedal
but continue to press so as not to in-
terrupt the braking action.
– ABS prevents the wheels from
locking, but it does not increase ac-
tual grip conditions between tyre and
road. Therefore, even if your car is fit-
ted with ABS, respect the safety dis-
tance from the car in front of you and
keep your speed down when driving
into bends.
ABS serves to increase the controlla-
bility of the car, not to enable you to
go faster.If warning light >
switches on when the en-
gine is running, this usu-
ally indicates an ABS fault. In such
cases the braking system is still ef-
ficient, although the anti-locking
device does not function. The EBD
system may also be less efficient.
Go to a LANCIA Dealership imme-
diately, taking care not to brake
suddenly, and have the system
checked.
The car is fitted with an
electronic brake corrector
(EBD). If warning lights >
andxlight up simultaneously
when the engine is running, this
indicates an EBD fault. This
means that violent braking could
cause early locking of the rear
wheels causing the car to skid.
Drive the car extremely carefully
to the nearest LANCIA Dealership
to have the system checked.
4C068-089 ING 11-03-2008 11:59 Pagina 80
Page 91 of 191
88
G
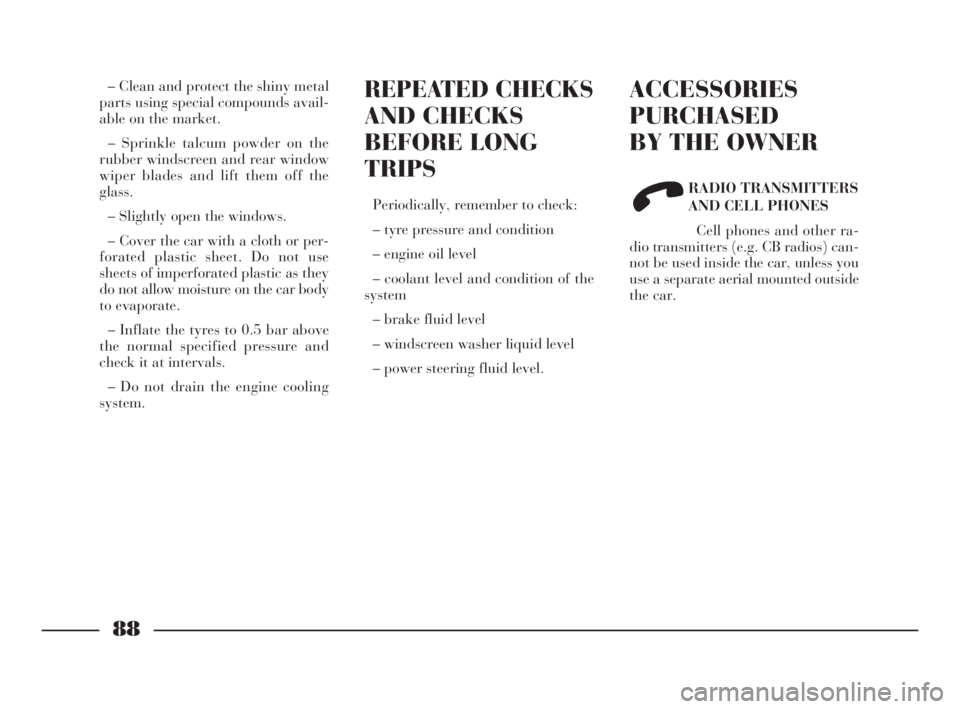
REPEATED CHECKS
AND CHECKS
BEFORE LONG
TRIPS
Periodically, remember to check:
– tyre pressure and condition
– engine oil level
– coolant level and condition of the
system
– brake fluid level
– windscreen washer liquid level
– power steering fluid level.
ACCESSORIES
PURCHASED
BY THE OWNER
RADIO TRANSMITTERS
AND CELL PHONES
Cell phones and other ra-
dio transmitters (e.g. CB radios) can-
not be used inside the car, unless you
use a separate aerial mounted outside
the car.
– Clean and protect the shiny metal
parts using special compounds avail-
able on the market.
– Sprinkle talcum powder on the
rubber windscreen and rear window
wiper blades and lift them off the
glass.
– Slightly open the windows.
– Cover the car with a cloth or per-
forated plastic sheet. Do not use
sheets of imperforated plastic as they
do not allow moisture on the car body
to evaporate.
– Inflate the tyres to 0.5 bar above
the normal specified pressure and
check it at intervals.
– Do not drain the engine cooling
system.
4C068-089 ING 11-03-2008 11:59 Pagina 88
Page 100 of 191

97
G
1. STOP THE CAR
– Stop the car so it is not a danger
for on-coming traffic and in such a
position that the tyre can be changed
in safety. The ground must be flat and
adequately firm. During the night,
chose a lit area, if possible.
– Turn engine off and engage the
handbrake.
– Engage first or reverse gear.
– Signal that the car is stopped ac-
cording to traffic regulations: hazard
lights, warning triangle, etc.
Any passengers must leave the car
and watch out for traffic while the
tyre is being changed.
If the ground is sloping or bumpy,
place wedges or other suitable mate-
rial for stopping the car under the
wheels.2. TAKE OUT THE TOOLS,
JACK AND SPARE WHEEL
(space-saver wheel)
They are in the boot.
– Lift the carpeting.
– Unscrew the fastener A (fig. 2)
and take out the tool holder.
The tool holder contains:
B- vehicle tow ring;
C- jack handle;
D- wheel bolt wrench;
E- screwdriver;F- extension for screwing wheel
bolts and inflation valve cap;
G- jack.
fig. 4
P4C00402
fig. 5
P4C00045
4C090-119 ING 11-03-2008 12:00 Pagina 97
Page 104 of 191

101
fG
C Tubular bulbs
Release these bulbs from rela-
tive contacts to remove them.
D Halogen bulbs
Release the securing spring
from its seat to remove the
bulb.BULB Fig. 9 TYPE POWER
Main beam headlights
Dipped beam headlights
Front side lights
Front direction indicators
Side direction indicators
Rear direction indicators
Foglights
Reverse lights
Rear brake and side lights
Rear side lights
Rear fog lights
Third brake light
Number plate
Ceiling light (1.2 16VM Nblue- LS versions)
Ceiling light:
– with courtesy light
– with map light
BootD H3 12V-55W
D H7 12V-55W
A W5W 12V-5W
B PY21W 12V-21W
A W5W 12V-5W
B PY21W 12V-21W
D H1 12V-55W
B P21W 12V-21W
B R5W 12V-21/5W
B R5W 12V-21W
B P21W 12V-21W
A W5W 12V-5W
C C5W 12V-5W
C – 12V-10W
C – 12V-10W
A – 12V-6W
C C5W 12V-5W
4C090-119 ING 13-03-2008 12:51 Pagina 101
Page 108 of 191

105
fG
E- 12V-21/5W (type R5W) for the
brake and taillights.
F- 12V-5W (type R5W) for the tail-
lights.
G- 12V-21W (type P21W) for the
rear foglights.
5)Refit the lighting cluster, and
tighten screw A (fig. 19), without
forcing it.THIRD BRAKE LIGHT
To change one or more 12V-5W
(type W5W) bulbs:
1)Unscrew the two screws A (fig. 21)
and remove trim B.
2)Loosen the two screws C (fig. 22),
disconnect the connector Dand sep-
arate the lens from the cover B.
3)Loosen the tab E (fig. 23)and
separate the bulbs from the lens.4)Replace the burnt-out bulb F
(fig. 23).
5)Refit the unit by reversing the
various operations.
fig. 20
P4C00039
fig. 21
P4C00407
fig. 22
P4C00408
fig. 23
P4C00409
4C090-119 ING 13-03-2008 12:51 Pagina 105
Page 113 of 191
110
fG
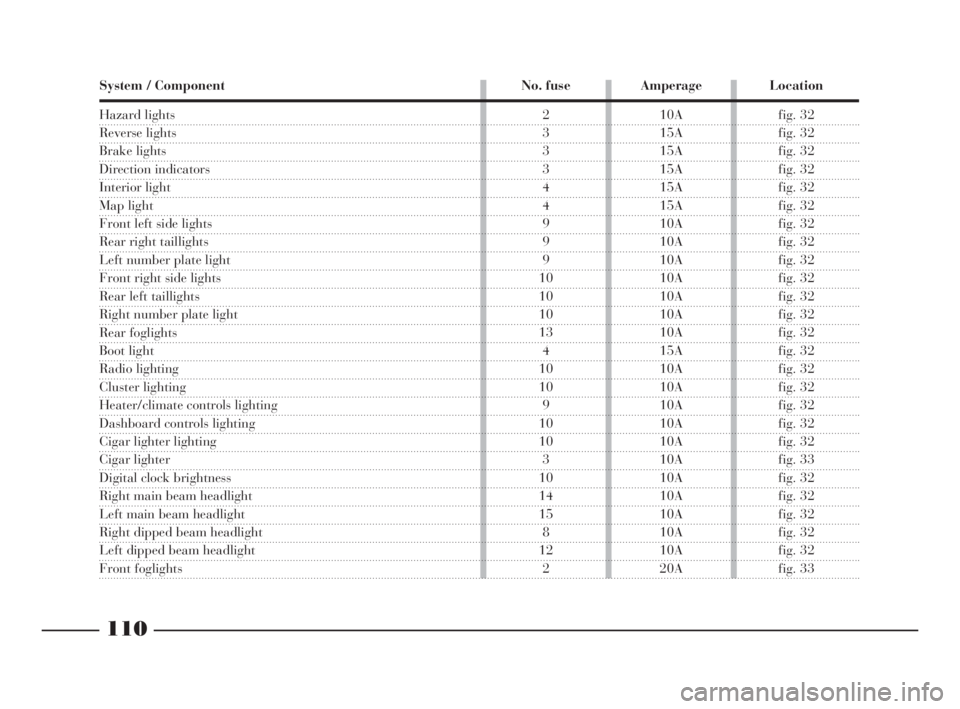
System / Component No. fuse Amperage Location
Hazard lights
Reverse lights
Brake lights
Direction indicators
Interior light
Map light
Front left side lights
Rear right taillights
Left number plate light
Front right side lights
Rear left taillights
Right number plate light
Rear foglights
Boot light
Radio lighting
Cluster lighting
Heater/climate controls lighting
Dashboard controls lighting
Cigar lighter lighting
Cigar lighter
Digital clock brightness
Right main beam headlight
Left main beam headlight
Right dipped beam headlight
Left dipped beam headlight
Front foglights
2 10A fig. 32
3 15A fig. 32
3 15A fig. 32
3 15A fig. 32
4 15A fig. 32
4 15A fig. 32
9 10A fig. 32
9 10A fig. 32
9 10A fig. 32
10 10A fig. 32
10 10A fig. 32
10 10A fig. 32
13 10A fig. 32
4 15A fig. 32
10 10A fig. 32
10 10A fig. 32
9 10A fig. 32
10 10A fig. 32
10 10A fig. 32
3 10A fig. 33
10 10A fig. 32
14 10A fig. 32
15 10A fig. 32
8 10A fig. 32
12 10A fig. 32
2 20A fig. 33
4C090-119 ING 13-03-2008 12:51 Pagina 110