headlights Lancia Ypsilon 2016 Owner handbook (in English)
[x] Cancel search | Manufacturer: LANCIA, Model Year: 2016, Model line: Ypsilon, Model: Lancia Ypsilon 2016Pages: 200, PDF Size: 4.53 MB
Page 19 of 200
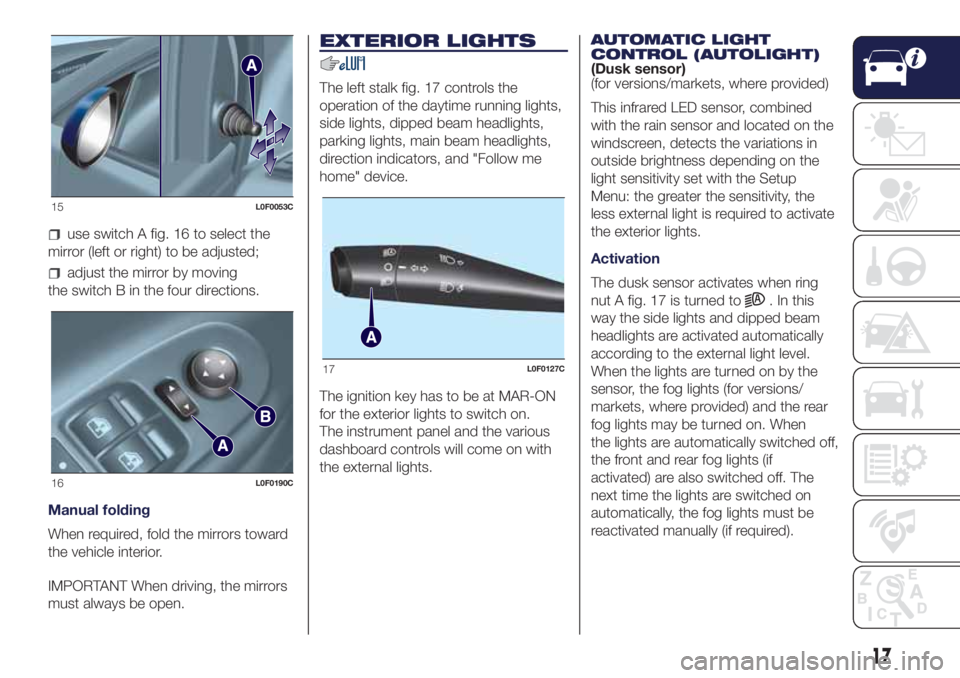
use switch A fig. 16 to select the
mirror (left or right) to be adjusted;
adjust the mirror by moving
the switch B in the four directions.
Manual folding
When required, fold the mirrors toward
the vehicle interior.
IMPORTANT When driving, the mirrors
must always be open.
EXTERIOR LIGHTS
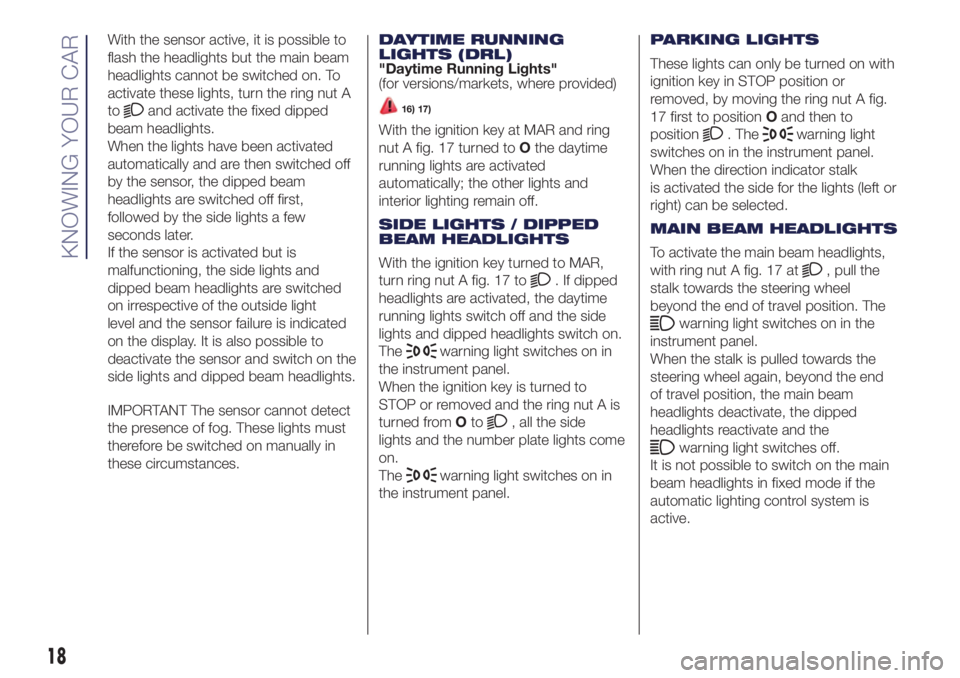
The left stalk fig. 17 controls the
operation of the daytime running lights,
side lights, dipped beam headlights,
parking lights, main beam headlights,
direction indicators, and "Follow me
home" device.
The ignition key has to be at MAR-ON
for the exterior lights to switch on.
The instrument panel and the various
dashboard controls will come on with
the external lights.AUTOMATIC LIGHT
CONTROL (AUTOLIGHT)
(Dusk sensor)
(for versions/markets, where provided)
This infrared LED sensor, combined
with the rain sensor and located on the
windscreen, detects the variations in
outside brightness depending on the
light sensitivity set with the Setup
Menu: the greater the sensitivity, the
less external light is required to activate
the exterior lights.
Activation
The dusk sensor activates when ring
nut A fig. 17 is turned to
. In this
way the side lights and dipped beam
headlights are activated automatically
according to the external light level.
When the lights are turned on by the
sensor, the fog lights (for versions/
markets, where provided) and the rear
fog lights may be turned on. When
the lights are automatically switched off,
the front and rear fog lights (if
activated) are also switched off. The
next time the lights are switched on
automatically, the fog lights must be
reactivated manually (if required).
15L0F0053C
16L0F0190C
17L0F0127C
17
Page 20 of 200
With the sensor active, it is possible to
flash the headlights but the main beam
headlights cannot be switched on. To
activate these lights, turn the ring nut A
to
and activate the fixed dipped
beam headlights.
When the lights have been activated
automatically and are then switched off
by the sensor, the dipped beam
headlights are switched off first,
followed by the side lights a few
seconds later.
If the sensor is activated but is
malfunctioning, the side lights and
dipped beam headlights are switched
on irrespective of the outside light
level and the sensor failure is indicated
on the display. It is also possible to
deactivate the sensor and switch on the
side lights and dipped beam headlights.
IMPORTANT The sensor cannot detect
the presence of fog. These lights must
therefore be switched on manually in
these circumstances.DAYTIME RUNNING
LIGHTS (DRL)
"Daytime Running Lights"
(for versions/markets, where provided)16) 17)
With the ignition key at MAR and ring
nut A fig. 17 turned toOthe daytime
running lights are activated
automatically; the other lights and
interior lighting remain off.
SIDE LIGHTS / DIPPED
BEAM HEADLIGHTS
With the ignition key turned to MAR,
turn ring nut A fig. 17 to
. If dipped
headlights are activated, the daytime
running lights switch off and the side
lights and dipped headlights switch on.
The
warning light switches on in
the instrument panel.
When the ignition key is turned to
STOP or removed and the ring nut A is
turned fromOto
, all the side
lights and the number plate lights come
on.
The
warning light switches on in
the instrument panel.PARKING LIGHTS
These lights can only be turned on with
ignition key in STOP position or
removed, by moving the ring nut A fig.
17 first to positionOand then to
position
. Thewarning light
switches on in the instrument panel.
When the direction indicator stalk
is activated the side for the lights (left or
right) can be selected.
MAIN BEAM HEADLIGHTS
To activate the main beam headlights,
with ring nut A fig. 17 at
, pull the
stalk towards the steering wheel
beyond the end of travel position. The
warning light switches on in the
instrument panel.
When the stalk is pulled towards the
steering wheel again, beyond the end
of travel position, the main beam
headlights deactivate, the dipped
headlights reactivate and the
warning light switches off.
It is not possible to switch on the main
beam headlights in fixed mode if the
automatic lighting control system is
active.
18
KNOWING YOUR CAR
Page 21 of 200
FLASHING
To do this, pull the stalk fig. 17 towards
the steering wheel (unstable position)
regardless of the position of ring nut A.
The
warning light switches on in
the instrument panel.
DIRECTION INDICATORS
Bring the stalk fig. 17 to the (stable)
position:
upwards:activates the right direction
indicator;
downwards:activates the left direction
indicator.
Warning light
orwill blink on the
instrument panel.
The direction indicators switch off
automatically when the steering wheel
is straightened.
"Lane Change" function
If you wish to signal a lane change,
place the left stalk in the unstable
position for less than half a second.
The direction indicator on the side
selected will flash five times and then
switch off automatically."FOLLOW ME HOME"
DEVICE
This allows the space in front of the
vehicle to be lit for a set time.
Activation
The "Follow Me Home" device is
activated by pulling the stalk fig. 17
towards the steering wheel, in addition
to the stroke end click.
It is possible to enable this function
within 2 minutes after turning off the
engine. This function allows turning on
lights and low beams.
It is possible to set the headlights
turning on time by pulling the left lever
towards the steering wheel (unstable
position) one or more times. In this case
it is possible to choose between 0, 30,
60, 90 up to a maximum of 210
seconds.
Each time the stalk is operated, the
warning light
on the instrument
panel switches on. The display shows a
message and the time set for the
function. The
warning light comes
on when the stalk is first moved and
stays on until the function is
automatically deactivated.Off
This function is deactivated turning on
again the headlights, sidelights or
pulling the left lever towards the
steering wheel (unstable position) for
more than 2 seconds, or switching the
starter to MAR.
"Follow me home" function with
Uconnect™ system interaction
IfUconnect™ is installed, the function
management remains the same, but
it takes place through interaction with
theUconnect™ menu.
FOG LIGHTS / REAR FOG
LIGHTS
(for versions/markets, where provided)
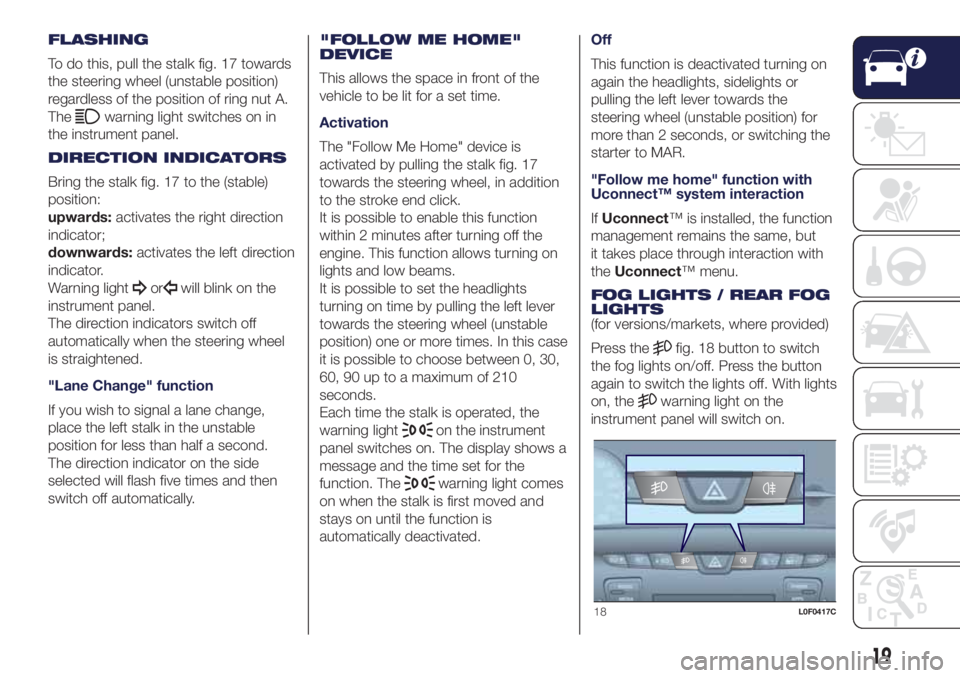
Press the
fig. 18 button to switch
the fog lights on/off. Press the button
again to switch the lights off. With lights
on, the
warning light on the
instrument panel will switch on.
18L0F0417C
19
Page 22 of 200
Rear fog lights
Press the
fig. 18 button to switch
the light on/off.
The rear fog light switches on only
when the dipped headlights or
fog lights are switched on. Press the
button again to switch the light off,
or switch off the dipped headlights or
the front fog lights (for versions/
markets, where provided).
WARNING
16)The daytime running lights are an
alternative to the dipped headlights for
driving during the daytime in countries
where it is compulsory to have lights on
during the day; where it is not compulsory,
the use of daytime running lights is
permitted.
17)Daytime running lights cannot replace
dipped beam headlights when driving at
night or through tunnels. The use of
daytime running lights is governed by the
highway code of the country in which
you are driving. Comply with legal
requirements.
INTERIOR LIGHTS
FRONT CEILING LIGHT
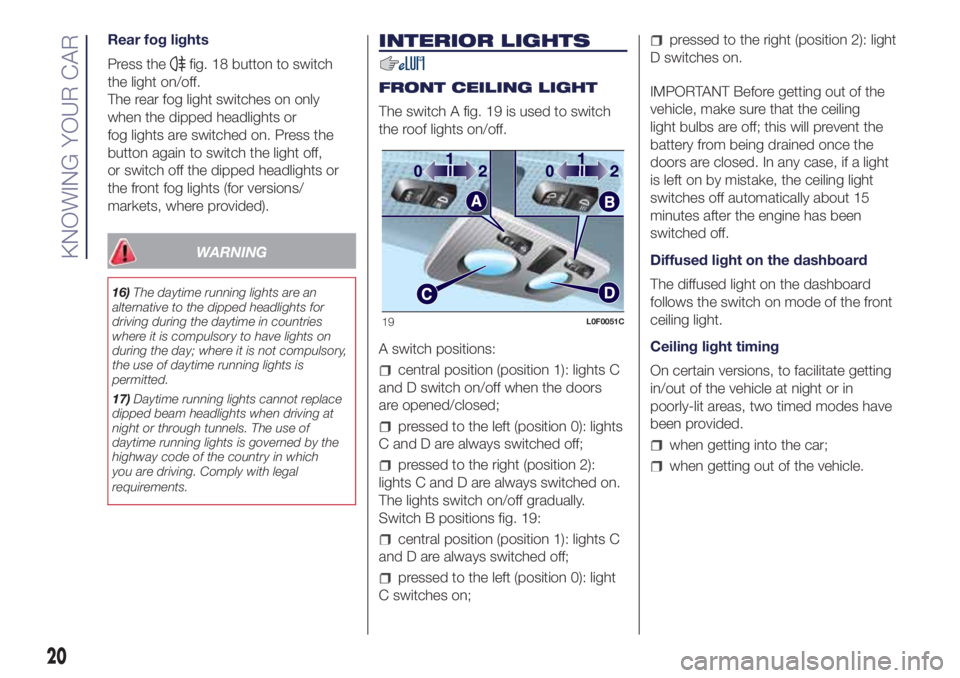
The switch A fig. 19 is used to switch
the roof lights on/off.
A switch positions:
central position (position 1): lights C
and D switch on/off when the doors
are opened/closed;
pressed to the left (position 0): lights
C and D are always switched off;
pressed to the right (position 2):
lights C and D are always switched on.
The lights switch on/off gradually.
Switch B positions fig. 19:
central position (position 1): lights C
and D are always switched off;
pressed to the left (position 0): light
C switches on;
pressed to the right (position 2): light
D switches on.
IMPORTANT Before getting out of the
vehicle, make sure that the ceiling
light bulbs are off; this will prevent the
battery from being drained once the
doors are closed. In any case, if a light
is left on by mistake, the ceiling light
switches off automatically about 15
minutes after the engine has been
switched off.
Diffused light on the dashboard
The diffused light on the dashboard
follows the switch on mode of the front
ceiling light.
Ceiling light timing
On certain versions, to facilitate getting
in/out of the vehicle at night or in
poorly-lit areas, two timed modes have
been provided.
when getting into the car;
when getting out of the vehicle.
19L0F0051C
20
KNOWING YOUR CAR
Page 43 of 200
DISPLAY
Multifunctional display
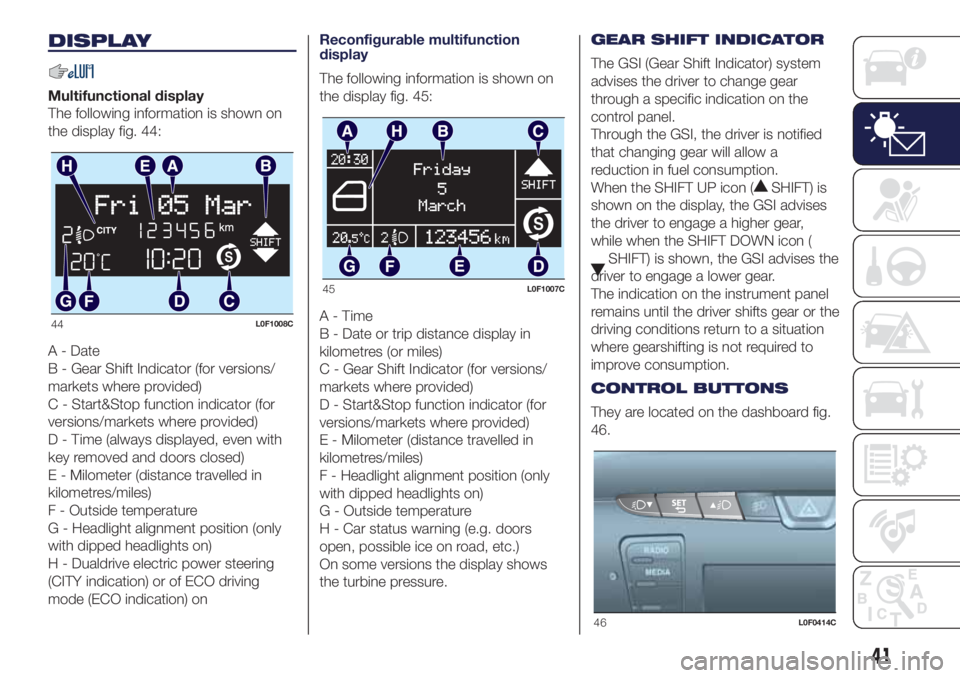
The following information is shown on
the display fig. 44:
A - Date
B - Gear Shift Indicator (for versions/
markets where provided)
C - Start&Stop function indicator (for
versions/markets where provided)
D - Time (always displayed, even with
key removed and doors closed)
E - Milometer (distance travelled in
kilometres/miles)
F - Outside temperature
G - Headlight alignment position (only
with dipped headlights on)
H - Dualdrive electric power steering
(CITY indication) or of ECO driving
mode (ECO indication) onReconfigurable multifunction
display
The following information is shown on
the display fig. 45:
A-Time
B - Date or trip distance display in
kilometres (or miles)
C - Gear Shift Indicator (for versions/
markets where provided)
D - Start&Stop function indicator (for
versions/markets where provided)
E - Milometer (distance travelled in
kilometres/miles)
F - Headlight alignment position (only
with dipped headlights on)
G - Outside temperature
H - Car status warning (e.g. doors
open, possible ice on road, etc.)
On some versions the display shows
the turbine pressure.GEAR SHIFT INDICATOR
The GSI (Gear Shift Indicator) system
advises the driver to change gear
through a specific indication on the
control panel.
Through the GSI, the driver is notified
that changing gear will allow a
reduction in fuel consumption.
When the SHIFT UP icon (
SHIFT) is
shown on the display, the GSI advises
the driver to engage a higher gear,
while when the SHIFT DOWN icon (
SHIFT) is shown, the GSI advises the
driver to engage a lower gear.
The indication on the instrument panel
remains until the driver shifts gear or the
driving conditions return to a situation
where gearshifting is not required to
improve consumption.
CONTROL BUTTONS
They are located on the dashboard fig.
46.
44L0F1008C
45L0F1007C
46L0F0414C
41
Page 63 of 200

Green warning lights / symbols
Warning light What it means
FOG LIGHTS
The warning light comes on when the front fog lights are turned on. The LED over the button
will also
light up.
SIDE LIGHTS AND DIPPED BEAM HEADLIGHTS/FOLLOW ME HOME
Side lights and dipped beam headlights
The warning light switches on when the side lights or dipped headlights are turned on.
Follow Me Home
The warning light comes on, on some versions along with a dedicated message on the display, when the
"Follow me home" device is used.
LEFT DIRECTION INDICATOR
The warning light turns on when the direction indicator control lever is moved downwards or, together with
the right indicator, when the hazard warning light button is pressed.
RIGHT DIRECTION INDICATOR
The warning light turns on when the direction indicator control lever is moved upwards or, together with the
left indicator, when the hazard warning light button is pressed.
61
Page 64 of 200
Warning light What it means
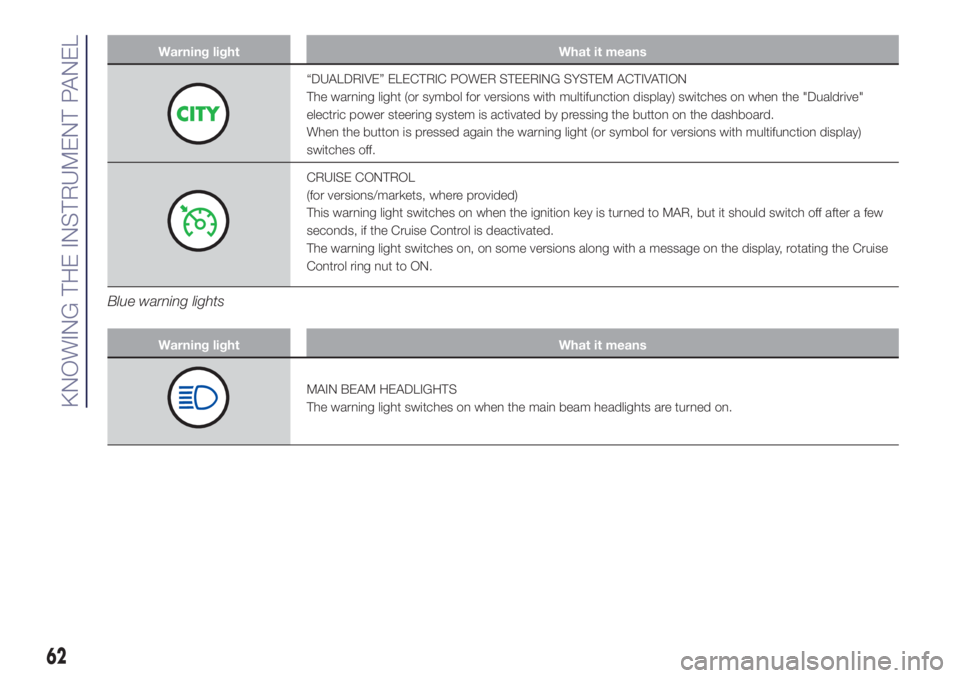
“DUALDRIVE” ELECTRIC POWER STEERING SYSTEM ACTIVATION
The warning light (or symbol for versions with multifunction display) switches on when the "Dualdrive"
electric power steering system is activated by pressing the button on the dashboard.
When the button is pressed again the warning light (or symbol for versions with multifunction display)
switches off.
CRUISE CONTROL
(for versions/markets, where provided)
This warning light switches on when the ignition key is turned to MAR, but it should switch off after a few
seconds, if the Cruise Control is deactivated.
The warning light switches on, on some versions along with a message on the display, rotating the Cruise
Control ring nut to ON.
Blue warning lights
Warning light What it means
MAIN BEAM HEADLIGHTS
The warning light switches on when the main beam headlights are turned on.
62
KNOWING THE INSTRUMENT PANEL
Page 109 of 200
HAZARD WARNING
LIGHTS
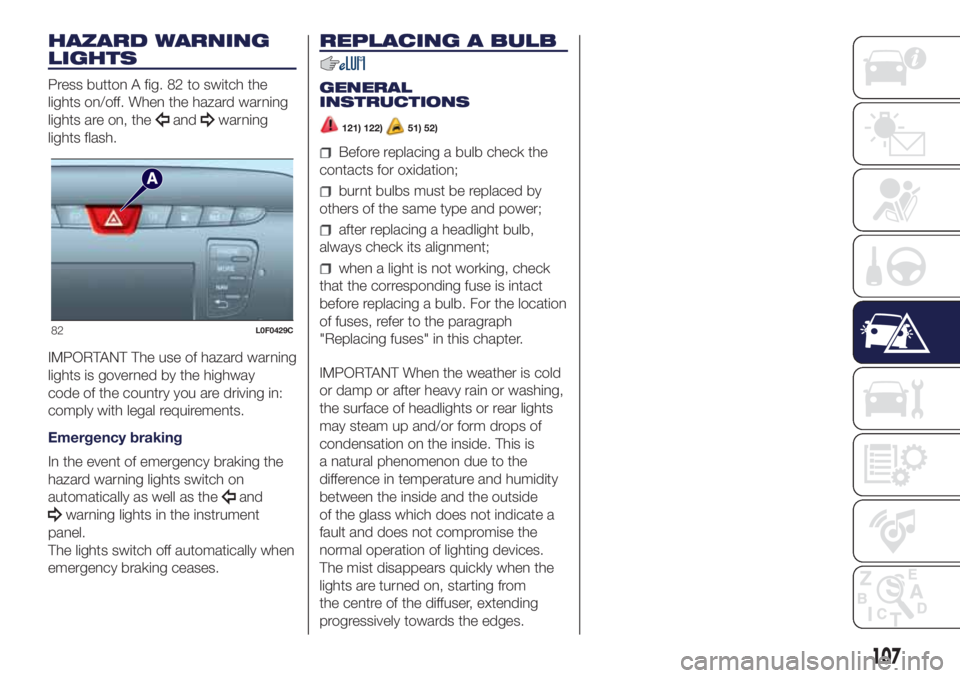
Press button A fig. 82 to switch the
lights on/off. When the hazard warning
lights are on, the
andwarning
lights flash.
IMPORTANT The use of hazard warning
lights is governed by the highway
code of the country you are driving in:
comply with legal requirements.
Emergency braking
In the event of emergency braking the
hazard warning lights switch on
automatically as well as the
and
warning lights in the instrument
panel.
The lights switch off automatically when
emergency braking ceases.
REPLACING A BULB
GENERAL
INSTRUCTIONS
121) 122)51) 52)
Before replacing a bulb check the
contacts for oxidation;
burnt bulbs must be replaced by
others of the same type and power;
after replacing a headlight bulb,
always check its alignment;
when a light is not working, check
that the corresponding fuse is intact
before replacing a bulb. For the location
of fuses, refer to the paragraph
"Replacing fuses" in this chapter.
IMPORTANT When the weather is cold
or damp or after heavy rain or washing,
the surface of headlights or rear lights
may steam up and/or form drops of
condensation on the inside. This is
a natural phenomenon due to the
difference in temperature and humidity
between the inside and the outside
of the glass which does not indicate a
fault and does not compromise the
normal operation of lighting devices.
The mist disappears quickly when the
lights are turned on, starting from
the centre of the diffuser, extending
progressively towards the edges.
82L0F0429C
107
Page 110 of 200

Light bulbs
Use Type Power Ref. Figure
Dipped/main beam headlights H4 55 W D
Front side lights W5W 5 W TO
Daytime running lights (DRL) W21W 21 W B
Rear side lights LED - -
Front direction indicators PY24W 24W B
Side direction indicators W5W 5 W TO
Rear direction indicators PY21W 21 W B
Stop W16W 16 W B
Third brake light LED - -
Fog lights H3 55 W E
Reversing light P21W 21 W B
Rear fog light P21W 21 W B
Number plate W5W 5 W C
Front courtesy light C5W 5 W C
Luggage compartment light W5W 5 W TO
Glove compartment light C5W 5 W C
108
IN AN EMERGENCY
Page 111 of 200

REPLACING AN
EXTERNAL BULB
FRONT LIGHT CLUSTERS
These contain the bulbs for the daytime
running lights (DRL), side lights,
dipped/main beam headlights and
direction indicators.
The bulbs are arranged as follows fig.
83:
Daytime running lights (DRL)
Dipped/main beam headlights and
side lights
Direction indicators
Daytime running lights (DRL)
To replace the bulb, proceed as follows:
remove cover A fig. 83;
turn the snap-fitted bulb holder unit
B fig. 84 anticlockwise, remove bulb
C and replace it;
refit the new bulb then reinsert the
bulb holder B fig. 84 in its housing;
then refit the cover A fig. 83.
Side lights
To replace the bulb, proceed as follows:
remove cover B fig. 83;
remove snap-fitted bulb holder C fig.
85, remove the bulb D and replace it;
refit the new bulb then reinsert
the bulb holder unit C fig. 85 in
its housing;
then refit the cover B fig. 83.
Dipped/main beam headlights
To replace the bulb, proceed as follows:
remove the cover B fig. 83 and
then the snap-fitted bulb holder C fig.
86;
remove bulb D from the connector E
and replace it;
refit the new bulb on the connector
making sure that it is locked correctly,
then reinsert bulb holder C in its
housing;
then refit the cover B fig. 83.
Front direction indicators
To replace the bulb, proceed as follows:
turn the cover C fig. 83
anticlockwise, extract the bulb D fig. 87
from its housing and replace it;
83L0F0033C
84L0F0070C
85L0F0069C
86L0F0068C
109