ECO mode Lancia Ypsilon 2021 Owner handbook (in English)
[x] Cancel search | Manufacturer: LANCIA, Model Year: 2021, Model line: Ypsilon, Model: Lancia Ypsilon 2021Pages: 200, PDF Size: 4.53 MB
Page 3 of 200

Dear Customer,
We would like to congratulate and thank you for choosing a Lancia Ypsilon.
We have written this handbook to help you get to know all the features of your car and use it in the best possible way.
Here you will find information, advice and important warnings regarding use of your vehicle and how to achieve the best performance
from the technical features of your Lancia Ypsilon.
You are advised to read it right through before taking to the road for the first time, to become familiar with the controls and above all
with those concerning brakes, steering and transmission; at the same time, you can understand the car behaviour on different road
surfaces.
This document also provides a description of special features and tips, as well as essential information for the safe driving, care and
maintenance of your Lancia Ypsilon over time.
After reading it, you are advised to keep the handbook inside the car, for an easy reference and for making sure it remains on board
the car should it be sold.
In the attached Warranty Booklet you will also find a description of the Services that Lancia offers to its customers, the Warranty
Certificate and the detail of the terms and conditions for maintaining its validity.
We are sure that these will help you to get in touch with and appreciate your new vehicle and the service provided by the people at
Lancia.
Enjoy reading. Happy motoring!
WARNING
This Owner Handbook describes all versions of the Lancia Ypsilon; please consider only the information relevant to your
car’s trim level, engine and version. All data contained in this publication are purely indicative. FCA Italy S.p.A. can modify
the specifications of the vehicle model described in this publication at any time, for technical or marketing purposes.
For further information, contact a Lancia Dealership.
Page 20 of 200
With the sensor active, it is possible to
flash the headlights but the main beam
headlights cannot be switched on. To
activate these lights, turn the ring nut A
to
and activate the fixed dipped
beam headlights.
When the lights have been activated
automatically and are then switched off
by the sensor, the dipped beam
headlights are switched off first,
followed by the side lights a few
seconds later.
If the sensor is activated but is
malfunctioning, the side lights and
dipped beam headlights are switched
on irrespective of the outside light
level and the sensor failure is indicated
on the display. It is also possible to
deactivate the sensor and switch on the
side lights and dipped beam headlights.
IMPORTANT The sensor cannot detect
the presence of fog. These lights must
therefore be switched on manually in
these circumstances.DAYTIME RUNNING
LIGHTS (DRL)
"Daytime Running Lights"
(for versions/markets, where provided)16) 17)
With the ignition key at MAR and ring
nut A fig. 17 turned toOthe daytime
running lights are activated
automatically; the other lights and
interior lighting remain off.
SIDE LIGHTS / DIPPED
BEAM HEADLIGHTS
With the ignition key turned to MAR,
turn ring nut A fig. 17 to
. If dipped
headlights are activated, the daytime
running lights switch off and the side
lights and dipped headlights switch on.
The
warning light switches on in
the instrument panel.
When the ignition key is turned to
STOP or removed and the ring nut A is
turned fromOto
, all the side
lights and the number plate lights come
on.
The
warning light switches on in
the instrument panel.PARKING LIGHTS
These lights can only be turned on with
ignition key in STOP position or
removed, by moving the ring nut A fig.
17 first to positionOand then to
position
. Thewarning light
switches on in the instrument panel.
When the direction indicator stalk
is activated the side for the lights (left or
right) can be selected.
MAIN BEAM HEADLIGHTS
To activate the main beam headlights,
with ring nut A fig. 17 at
, pull the
stalk towards the steering wheel
beyond the end of travel position. The
warning light switches on in the
instrument panel.
When the stalk is pulled towards the
steering wheel again, beyond the end
of travel position, the main beam
headlights deactivate, the dipped
headlights reactivate and the
warning light switches off.
It is not possible to switch on the main
beam headlights in fixed mode if the
automatic lighting control system is
active.
18
KNOWING YOUR CAR
Page 43 of 200
DISPLAY
Multifunctional display
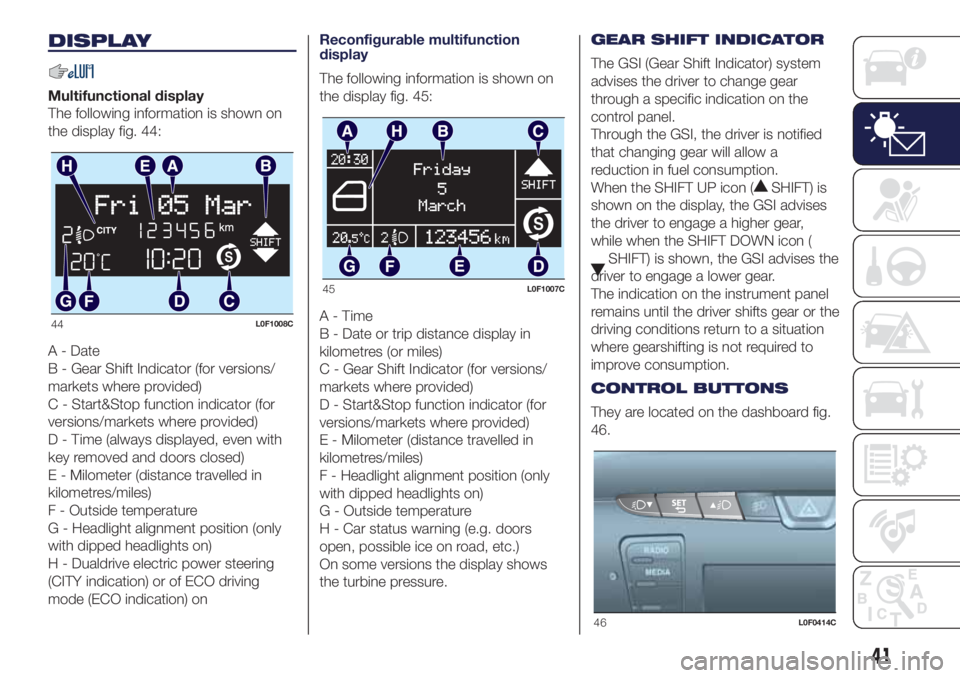
The following information is shown on
the display fig. 44:
A - Date
B - Gear Shift Indicator (for versions/
markets where provided)
C - Start&Stop function indicator (for
versions/markets where provided)
D - Time (always displayed, even with
key removed and doors closed)
E - Milometer (distance travelled in
kilometres/miles)
F - Outside temperature
G - Headlight alignment position (only
with dipped headlights on)
H - Dualdrive electric power steering
(CITY indication) or of ECO driving
mode (ECO indication) onReconfigurable multifunction
display
The following information is shown on
the display fig. 45:
A-Time
B - Date or trip distance display in
kilometres (or miles)
C - Gear Shift Indicator (for versions/
markets where provided)
D - Start&Stop function indicator (for
versions/markets where provided)
E - Milometer (distance travelled in
kilometres/miles)
F - Headlight alignment position (only
with dipped headlights on)
G - Outside temperature
H - Car status warning (e.g. doors
open, possible ice on road, etc.)
On some versions the display shows
the turbine pressure.GEAR SHIFT INDICATOR
The GSI (Gear Shift Indicator) system
advises the driver to change gear
through a specific indication on the
control panel.
Through the GSI, the driver is notified
that changing gear will allow a
reduction in fuel consumption.
When the SHIFT UP icon (
SHIFT) is
shown on the display, the GSI advises
the driver to engage a higher gear,
while when the SHIFT DOWN icon (
SHIFT) is shown, the GSI advises the
driver to engage a lower gear.
The indication on the instrument panel
remains until the driver shifts gear or the
driving conditions return to a situation
where gearshifting is not required to
improve consumption.
CONTROL BUTTONS
They are located on the dashboard fig.
46.
44L0F1008C
45L0F1007C
46L0F0414C
41
Page 51 of 200
Warning light What it means
Degraded engine oil(only Diesel versions with DPF)
The warning light switches on flashing and, for versions/markets where provided, a dedicated message is
shown on the display. Depending on the versions, the warning light can flash in the following modes: for 1
minute every two hours or for 3-minute cycles with the warning light off for 5 seconds until the oil is
changed. After the initial warning, each time the engine is started up, the warning light will continue to flash
in the same mode, until the oil is changed. On some versions, the display shows a dedicated message
together with the warning light. The flashing of the warning light should not be considered as a fault, it
simply informs the customer that the oil needs to be changed following normal car use. Remember that the
deterioration of the engine oil is accelerated by:
mainly town use of the vehicle which makes the DPF regeneration process more frequent;
use of the vehicle for short drives, in which the engine does not have time to reach its regular operating
temperature;
repeated interruptions to the regeneration process signalled by the DPF warning light coming on.
38)29)
WARNING
38)If the warning light switches on, the degraded engine oil must be changed as soon as possible, and never more than 500 km from the
first time that the warning light switches on. Failure to observe the above may result in severe damage to the engine and invalidate the
warranty. The activation of this warning light is not related to the amount of oil in the engine. Therefore, never top up with oil when the warning
light starts flashing.
49
Page 66 of 200

Symbols and Messages What it means
START&STOP SYSTEM FAILUREThe Start&Stop system failure is indicated by a message on the display and by the
warning light (or symbol)on the instrument panel that switches on.
In the event of a Start&Stop system failure, contact a Lancia Dealership.
ECO FUNCTION ACTIVATION/DEACTIVATION
(0.9 TwinAir 85 HP versions)The ECO function activation/deactivation, by pressing the button on the dashboard, is
indicated by a dedicated message on the display.
SERVICE (SCHEDULED SERVICING) EXPIREDWhen the scheduled servicing is nearly due ("scheduled service deadline"), the display will
show the symbol followed by the number of kilometres/miles until the car must be
serviced. This is displayed automatically, with ignition key at MAR-ON, 2000 km (or
equivalent value in miles) before servicing or, where provided, 30 days before servicing. It is
also displayed each time the key is turned to MAR-ON or, for versions/markets, where
provided, every 200 km (or equivalent value in miles).
Contact a Lancia Dealership where the operations of the "Scheduled Servicing Plan" will
be performed and the message will be reset.
DUAL FUNCTION SYSTEM GEARBOX
MESSAGESFor versions equipped with "Dual Function System" gearbox, the following messages can
be displayed:
Reduce gear changes message
Manual mode not available message
Automatic mode not available message
Clutch overheating message
Press the brake pedal message
Press the brake pedal - delayed start-up message
Press brake and repeat manoeuvre message
Gear not available message
Manoeuvre not permitted message
Place gear lever in N (neutral) message
64
KNOWING THE INSTRUMENT PANEL
Page 99 of 200
DUAL FUNCTION
SYSTEM GEARBOX
(for versions/markets, where provided)
The car may be equipped with an
electronically controlled manual
transmission known as "Dual FuNction
System" which allows two operating
logics: MANUAL and AUTO.
GEAR LEVER
41)
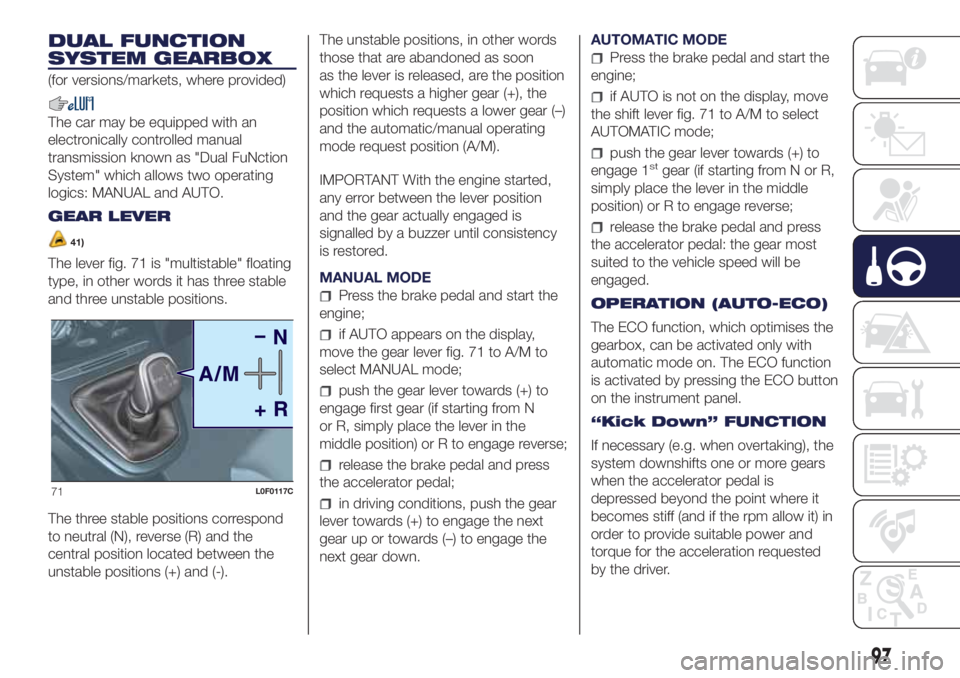
The lever fig. 71 is "multistable" floating
type, in other words it has three stable
and three unstable positions.
The three stable positions correspond
to neutral (N), reverse (R) and the
central position located between the
unstable positions (+) and (-).The unstable positions, in other words
those that are abandoned as soon
as the lever is released, are the position
which requests a higher gear (+), the
position which requests a lower gear (–)
and the automatic/manual operating
mode request position (A/M).
IMPORTANT With the engine started,
any error between the lever position
and the gear actually engaged is
signalled by a buzzer until consistency
is restored.
MANUAL MODE
Press the brake pedal and start the
engine;
if AUTO appears on the display,
move the gear lever fig. 71 to A/M to
select MANUAL mode;
push the gear lever towards (+) to
engage first gear (if starting from N
or R, simply place the lever in the
middle position) or R to engage reverse;
release the brake pedal and press
the accelerator pedal;
in driving conditions, push the gear
lever towards (+) to engage the next
gear up or towards (–) to engage the
next gear down.AUTOMATIC MODE
Press the brake pedal and start the
engine;
if AUTO is not on the display, move
the shift lever fig. 71 to A/M to select
AUTOMATIC mode;
push the gear lever towards (+) to
engage 1stgear (if starting from N or R,
simply place the lever in the middle
position) or R to engage reverse;
release the brake pedal and press
the accelerator pedal: the gear most
suited to the vehicle speed will be
engaged.
OPERATION (AUTO-ECO)
The ECO function, which optimises the
gearbox, can be activated only with
automatic mode on. The ECO function
is activated by pressing the ECO button
on the instrument panel.
“Kick Down” FUNCTION
If necessary (e.g. when overtaking), the
system downshifts one or more gears
when the accelerator pedal is
depressed beyond the point where it
becomes stiff (and if the rpm allow it) in
order to provide suitable power and
torque for the acceleration requested
by the driver.
71L0F0117C
97
Page 100 of 200

IMPORTANT The use of the “Kick
Down” function is recommended only
when overtaking or accelerating quickly,
in order not to increase fuel
consumption.
STEERING WHEEL CONTROLS
(for versions/markets, where provided)
42)
On some versions, the gearbox can be
managed sequentially using the
steering wheel controls fig. 72.
To use the controls on the steering
wheel, the gear lever must be in the
central position between + and – :
operating the + lever: engage
a higher gear;
operating the – lever: engage a
lower gear.
The engagement of a lower (or higher)
gear is only permitted if the engine
rpm allow it.
WARNING
41)Avoid keeping your hand placed on this
lever in between gear changes or
Auto/Manual mode.
42)Using the paddles incorrectly (paddles
pushed towards the dashboard) could
break them.
STOP/START
SYSTEM
(for versions/markets, where provided)
114) 115)43)
The Stop/Start system automatically
stops the engine each time the vehicle
is stationary and starts it again when
the driver wants to move off. In this
way, the vehicle efficiency is increased,
by reducing consumption, dangerous
gas emissions and sound pollution.
OPERATING MODES
Stopping the engine
With manual gearbox: with the car
stationary, the engine stops with the
gearbox in neutral and the clutch pedal
released.
With Dual FuNction System gearbox:
the engine stops if the vehicle is at
a standstill and the brake pedal is
pressed. This condition can be
maintained even if the brake pedal is
not depressed, if the gear lever is
in position N (Neutral).
NOTE The engine can only be stopped
automatically after exceeding a speed
of about 10 km/h, to prevent the engine
from being repeatedly stopped when
driving at walking pace.
72L0F0431C
98
STARTING AND DRIVING
Page 122 of 200
132)The vehicle's driving characteristics
will be modified with the space-saver wheel
fitted. Avoid violent acceleration and
braking, abrupt steering and fast cornering.
The overall duration of the space-saver
wheel is of about 3000 km, after which the
relevant tyre must be replaced with another
one of the same type. Never install a
standard tyre on a rim that is designed for
use with a space-saver wheel. Have the
wheel repaired and refitted as soon as
possible. Using two or more space-saver
wheels at the same time is forbidden.
Do not apply grease to the bolt threads
before fitting: they could come unscrewed.
133)The jack shall only be used for raising
the car model it has been supplied with.
Never use the jack for other purposes,
such as raising other car models. Never
use the jack for repair operations under the
vehicle. Incorrect positioning of the jack
may cause the vehicle to fall. Do not use
the jack for loads higher than the one
shown on its label. The space-saver wheel
cannot be fitted with snow chains. If a
front (drive) tyre is punctured and chains
are needed, use a standard wheel from the
rear axle and install the space-saver wheel
on the rear axle. In this way, with two
normal drive wheels at the front axle, it is
possible to use snow chains.
134)If the hub cap is not fitted correctly, it
may come off when the car is travelling.
Never tamper with the inflation valve. Never
introduce tools of any kind between rim
and tyre. Check tyre and space-saver
wheel pressures regularly, complying with
the values given in the "Technical
specifications" chapter.135)Be very careful when removing/
refitting the hub cap due to the proximity of
the brake disc. We recommend using
heat protection gloves.
WARNING
54)When turning the jack handle make
sure that it can turn freely without scraping
your hand against the ground. The moving
components of the jack ("worm screw"
and joints) can also cause injuries: avoid
touching them. If you come into contact
with lubricating grease, clean yourself
thoroughly.
55)Contact a Lancia Dealership as soon
as possible to have the correct tightening
of the wheel bolts checked.
"Fix&Go Automatic"
KIT
136) 137) 138) 139) 140)
56)3)
DESCRIPTION
It is located in a special container in the
luggage compartment. The container
also includes a screwdriver and the tow
hook.
The kit fig. 111 also contains:
a spray bottle A with the sealant,
equipped with filling pipe B;
sticker C bearing the notice “max.
80 km/h”, to be placed in a position
visible to the driver (on the instrument
panel) after fixing the tyre;
a compressor D including a pressure
gauge and connections, found in the
compartment;
instruction brochure, to be used for
prompt and correct use of the quick
tyre repair kit and then to be handed to
the personnel charged with handling
the treated tyre;
a pair of protective gloves located in
the side compartment of the
compressor;
adapters for inflating different
elements.
120
IN AN EMERGENCY
Page 175 of 200
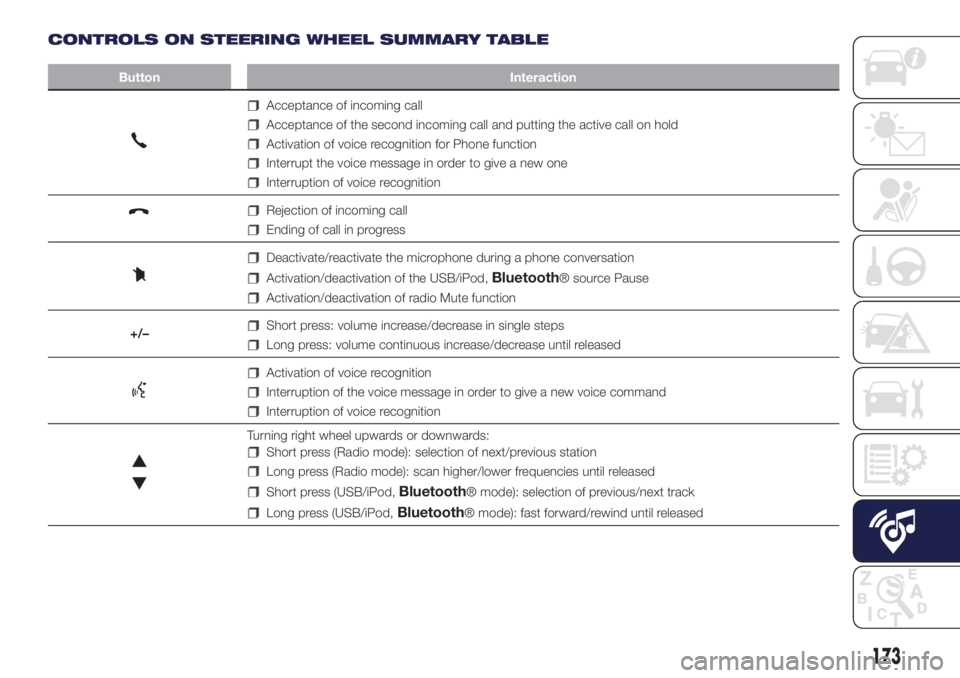
CONTROLS ON STEERING WHEEL SUMMARY TABLE
Button Interaction
Acceptance of incoming call
Acceptance of the second incoming call and putting the active call on hold
Activation of voice recognition for Phone function
Interrupt the voice message in order to give a new one
Interruption of voice recognition
Rejection of incoming call
Ending of call in progress
Deactivate/reactivate the microphone during a phone conversation
Activation/deactivation of the USB/iPod,Bluetooth® source Pause
Activation/deactivation of radio Mute function
+/–
Short press: volume increase/decrease in single steps
Long press: volume continuous increase/decrease until released
Activation of voice recognition
Interruption of the voice message in order to give a new voice command
Interruption of voice recognition
Turning right wheel upwards or downwards:
Short press (Radio mode): selection of next/previous station
Long press (Radio mode): scan higher/lower frequencies until released
Short press (USB/iPod,Bluetooth® mode): selection of previous/next track
Long press (USB/iPod,Bluetooth® mode): fast forward/rewind until released
173
Page 176 of 200
SWITCHING THE SYSTEM
ON/OFF
The system is switched on/off by
pressing the
(ON/OFF) button/knob.
Turn the button/knob clockwise to
increase the radio volume or
anticlockwise to decrease it.
The system is equipped with the
following tuners: AM, FM and DAB (for
versions/markets, where provided).
RADIO MODE
Press the RADIO button on the front
panel to activate radio mode.
After the desired radio station is
selected, the following information is
shown on the display:
At the top: the list of radio stations
stored (preset) is displayed; the station
currently playing is highlighted.
In the middle: display of the name of
the current radio station and the
buttons for selecting the previous or
next radio station.
At the bottom: display of the following
buttons:
"Browse": list of the radio stations
available;
"AM/FM", "AM/DAB", "FM/DAB":
selection of the desired frequency band
(button reconfigurable according to
the band selected: AM, FM or DAB);
"Tune" : manual radio station tuning
(not available for DAB radios);
"Info": additional information on the
source being listened to;
"Audio": access to the "Audio
settings" screen.
Radio station selection
To search for the desired radio station
press buttons
oron the display
or use the steering wheel controls.
Previous/next radio station search
Briefly press buttons
oron
the display: when the button is released
the previous or the next radio station
is displayed.
Previous/next radio station fast
search
Hold down buttons
oron the
display to start fast search: when the
button is released, the first tunable
radio station can be heard.
Audio menu
To access the "Audio" menu press the
Audio" button located at the bottom
of the display.
The following adjustments can be
carried out using the "Audio" menu:
"Equaliser" (for versions/markets,
where provided);
"Balance/Fader" (left/right and
front/rear audio balance adjustment);
"Speed/Volume" (speed-dependent
automatic volume control);
"Loudness" (for versions/markets,
where provided);
"Auto-On Radio";
"Radio Off Delay".
To exit the "Audio" menu, press the
/Done button.
MEDIA MODE
Audio source selection
Press the "Source" button to select the
desired audio source among those
available: AUX, USB, iPod or
Bluetooth®.
NOTE Applications used on portable
devices may be not compatible with the
Uconnect™system
Track change
Briefly press the
button or turn the
BROWSE ENTER button/knob
clockwise to play the next track or
briefly press the
button or turn the
BROWSE ENTER button/knob
anticlockwise to return to the beginning
of the selected track or to the beginning
of the previous track if it has been
played for less than 3 seconds.
174
MULTIMEDIA