fuse Lancia Ypsilon 2021 Owner handbook (in English)
[x] Cancel search | Manufacturer: LANCIA, Model Year: 2021, Model line: Ypsilon, Model: Lancia Ypsilon 2021Pages: 200, PDF Size: 4.53 MB
Page 10 of 200
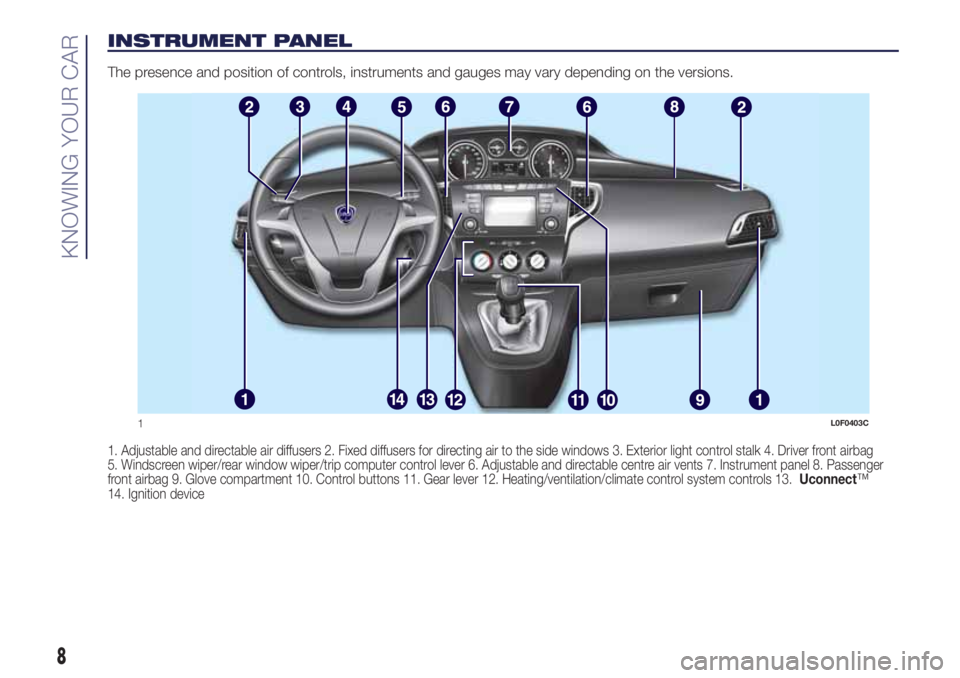
INSTRUMENT PANEL
The presence and position of controls, instruments and gauges may vary depending on the versions.
1. Adjustable and directable air diffusers 2. Fixed diffusers for directing air to the side windows 3. Exterior light control stalk 4. Driver front airbag
5. Windscreen wiper/rear window wiper/trip computer control lever 6. Adjustable and directable centre air vents 7. Instrument panel 8. Passenger
front airbag 9. Glove compartment 10. Control buttons 11. Gear lever 12. Heating/ventilation/climate control system controls 13.Uconnect™
14. Ignition device
1L0F0403C
8
KNOWING YOUR CAR
Page 13 of 200
THE LANCIA CODE
SYSTEM
This is an electronic engine locking
system which increases protection
against attempted thefts of the vehicle.
It is automatically activated when the
ignition key is removed.
Each key contains an electronic device
which modulates the signal emitted
during ignition by an antenna built into
the ignition device. The signal is the
"password", different every time the
vehicle is started, through which the
control unit recognises the key and
enables starting.
OPERATION
Each time the car is started by turning
the ignition key to MAR, the Lancia
CODE system control unit sends an
acknowledgement code to the
Powertrain Control Module to
deactivate the immobiliser. The code is
sent only if the control unit of the Lancia
CODE system has acknowledged the
code received from the key.Each time the ignition key is turned to
STOP, the Lancia CODE system
deactivates the functions of the
management engine control unit. If,
during starting, the code is not correctly
recognised, the
warning light
switches on in the instrument panel. In
this case, turn the key to STOP and
then to MAR-ON; if it is still locked, try
again with the other keys that come
with the car. Contact a Lancia
Dealership if you still cannot start the
engine.
If the
warning light switches on, this
means that the system is running a
self-diagnosis (for example due to
a voltage drop). If the problem persists,
contact a Lancia Dealership.
DOORS
LOCKING/UNLOCKING
DOORS FROM THE
INSIDE
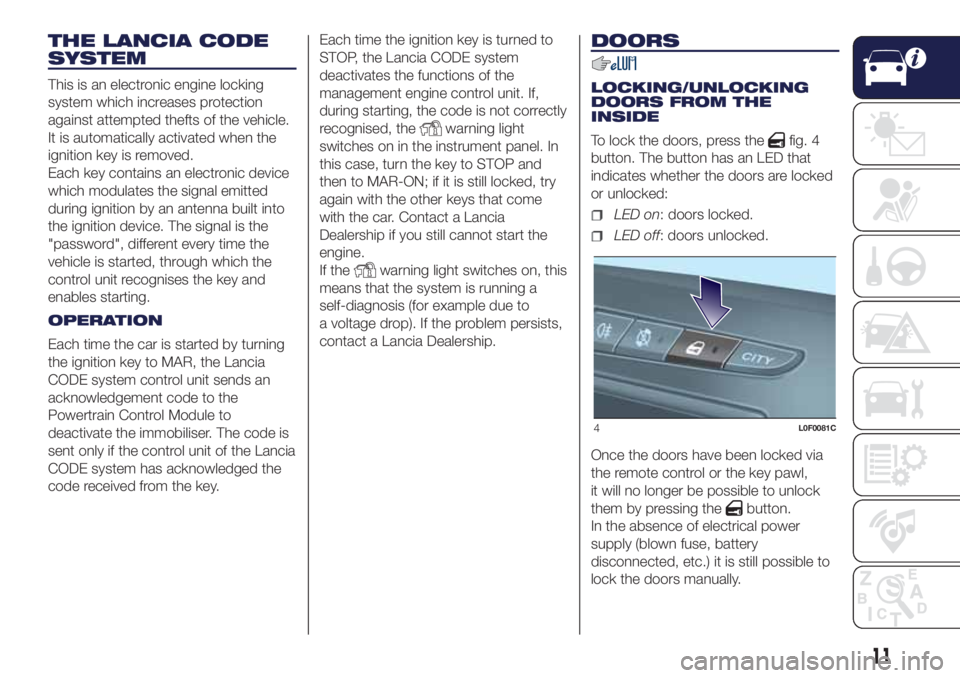
To lock the doors, press the
fig. 4
button. The button has an LED that
indicates whether the doors are locked
or unlocked:
LED on: doors locked.
LED off: doors unlocked.
Once the doors have been locked via
the remote control or the key pawl,
it will no longer be possible to unlock
them by pressing the
button.
In the absence of electrical power
supply (blown fuse, battery
disconnected, etc.) it is still possible to
lock the doors manually.
4L0F0081C
11
Page 22 of 200
Rear fog lights
Press the
fig. 18 button to switch
the light on/off.
The rear fog light switches on only
when the dipped headlights or
fog lights are switched on. Press the
button again to switch the light off,
or switch off the dipped headlights or
the front fog lights (for versions/
markets, where provided).
WARNING
16)The daytime running lights are an
alternative to the dipped headlights for
driving during the daytime in countries
where it is compulsory to have lights on
during the day; where it is not compulsory,
the use of daytime running lights is
permitted.
17)Daytime running lights cannot replace
dipped beam headlights when driving at
night or through tunnels. The use of
daytime running lights is governed by the
highway code of the country in which
you are driving. Comply with legal
requirements.
INTERIOR LIGHTS
FRONT CEILING LIGHT
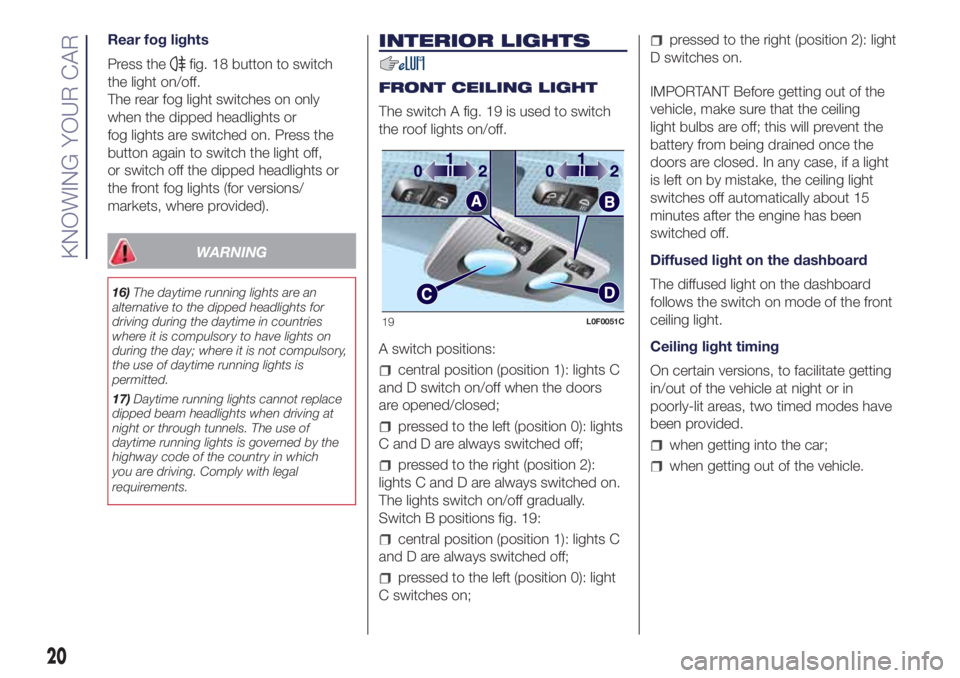
The switch A fig. 19 is used to switch
the roof lights on/off.
A switch positions:
central position (position 1): lights C
and D switch on/off when the doors
are opened/closed;
pressed to the left (position 0): lights
C and D are always switched off;
pressed to the right (position 2):
lights C and D are always switched on.
The lights switch on/off gradually.
Switch B positions fig. 19:
central position (position 1): lights C
and D are always switched off;
pressed to the left (position 0): light
C switches on;
pressed to the right (position 2): light
D switches on.
IMPORTANT Before getting out of the
vehicle, make sure that the ceiling
light bulbs are off; this will prevent the
battery from being drained once the
doors are closed. In any case, if a light
is left on by mistake, the ceiling light
switches off automatically about 15
minutes after the engine has been
switched off.
Diffused light on the dashboard
The diffused light on the dashboard
follows the switch on mode of the front
ceiling light.
Ceiling light timing
On certain versions, to facilitate getting
in/out of the vehicle at night or in
poorly-lit areas, two timed modes have
been provided.
when getting into the car;
when getting out of the vehicle.
19L0F0051C
20
KNOWING YOUR CAR
Page 27 of 200
AUTOMATIC CLIMATE CONTROL SYSTEM
(for versions/markets, where provided)
Controls
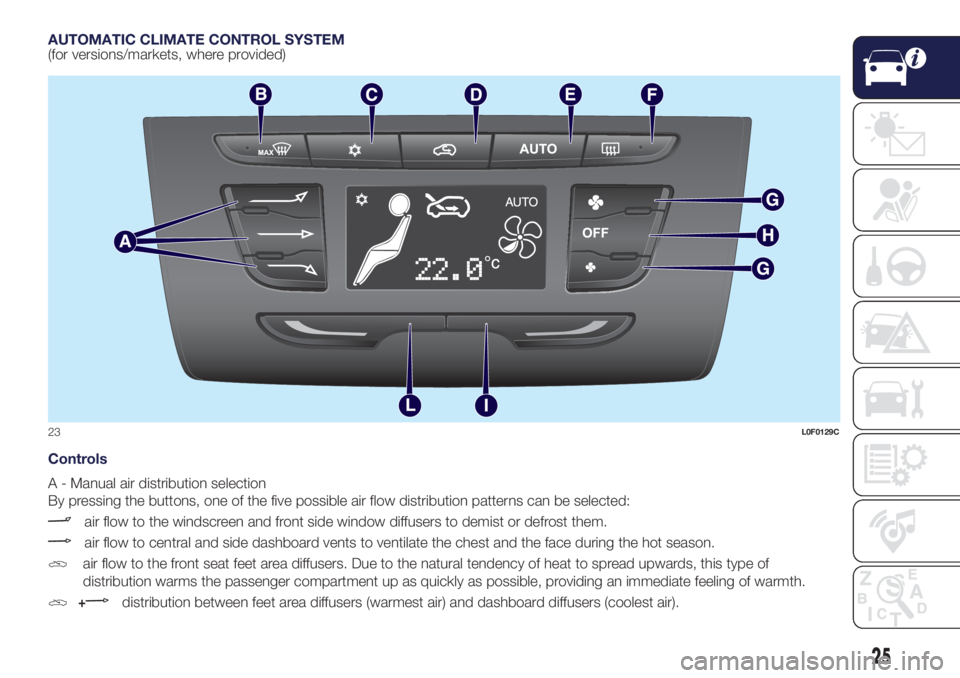
A - Manual air distribution selection
By pressing the buttons, one of the five possible air flow distribution patterns can be selected:
air flow to the windscreen and front side window diffusers to demist or defrost them.
air flow to central and side dashboard vents to ventilate the chest and the face during the hot season.
air flow to the front seat feet area diffusers. Due to the natural tendency of heat to spread upwards, this type of
distribution warms the passenger compartment up as quickly as possible, providing an immediate feeling of warmth.
+distribution between feet area diffusers (warmest air) and dashboard diffusers (coolest air).
23L0F0129C
25
Page 28 of 200
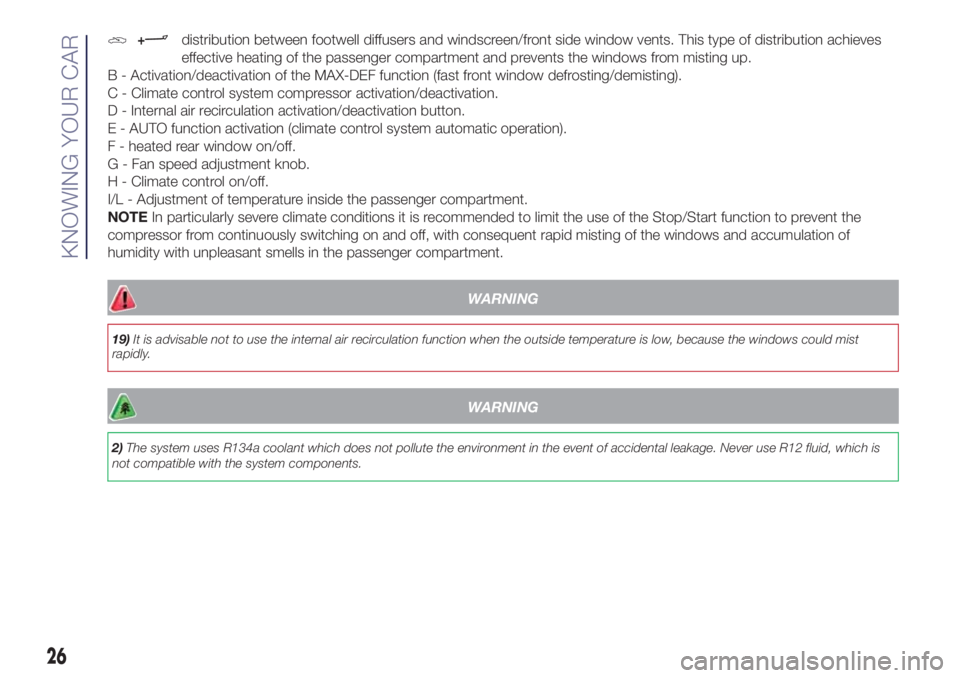
+distribution between footwell diffusers and windscreen/front side window vents. This type of distribution achieves
effective heating of the passenger compartment and prevents the windows from misting up.
B - Activation/deactivation of the MAX-DEF function (fast front window defrosting/demisting).
C - Climate control system compressor activation/deactivation.
D - Internal air recirculation activation/deactivation button.
E - AUTO function activation (climate control system automatic operation).
F - heated rear window on/off.
G - Fan speed adjustment knob.
H - Climate control on/off.
I/L - Adjustment of temperature inside the passenger compartment.
NOTEIn particularly severe climate conditions it is recommended to limit the use of the Stop/Start function to prevent the
compressor from continuously switching on and off, with consequent rapid misting of the windows and accumulation of
humidity with unpleasant smells in the passenger compartment.
WARNING
19)It is advisable not to use the internal air recirculation function when the outside temperature is low, because the windows could mist
rapidly.
WARNING
2)The system uses R134a coolant which does not pollute the environment in the event of accidental leakage. Never use R12 fluid, which is
not compatible with the system components.
26
KNOWING YOUR CAR
Page 32 of 200
When the CITY function is on, the
steering wheel effort is lighter, making
parking easier: therefore, this function is
particularly useful for driving in city
centres.
To deactivate the function press the
button again.
IMPORTANT During parking
manoeuvres requiring a lot of steering,
the steering may become harder: this is
normal and is due to the intervention
of the system to protect the electric
steering motor from overheating, so no
repair is required. When the car is
used again later on, the power steering
will work normally.
ECO FUNCTION
(for versions/markets, where provided)
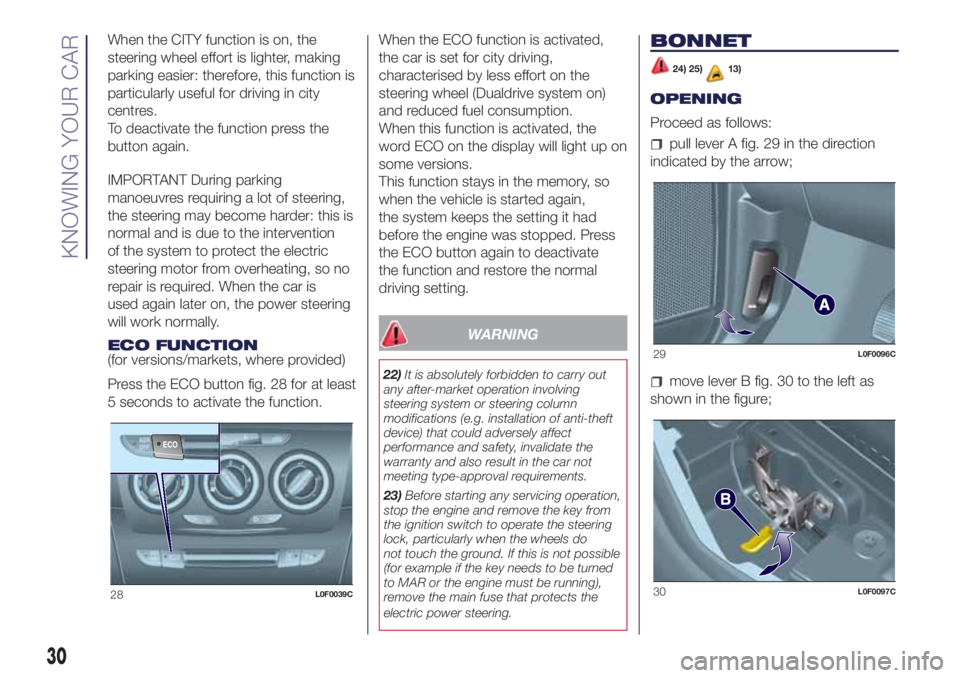
Press the ECO button fig. 28 for at least
5 seconds to activate the function.When the ECO function is activated,
the car is set for city driving,
characterised by less effort on the
steering wheel (Dualdrive system on)
and reduced fuel consumption.
When this function is activated, the
word ECO on the display will light up on
some versions.
This function stays in the memory, so
when the vehicle is started again,
the system keeps the setting it had
before the engine was stopped. Press
the ECO button again to deactivate
the function and restore the normal
driving setting.
WARNING
22)It is absolutely forbidden to carry out
any after-market operation involving
steering system or steering column
modifications (e.g. installation of anti-theft
device) that could adversely affect
performance and safety, invalidate the
warranty and also result in the car not
meeting type-approval requirements.
23)Before starting any servicing operation,
stop the engine and remove the key from
the ignition switch to operate the steering
lock, particularly when the wheels do
not touch the ground. If this is not possible
(for example if the key needs to be turned
to MAR or the engine must be running),
remove the main fuse that protects the
electric power steering.
BONNET
24) 25)13)
OPENING
Proceed as follows:
pull lever A fig. 29 in the direction
indicated by the arrow;
move lever B fig. 30 to the left as
shown in the figure;
28L0F0039C
29L0F0096C
30L0F0097C
30
KNOWING YOUR CAR
Page 34 of 200
BOOT
26) 27)
The luggage compartment unlocking is
electrically operated and is deactivated
when the car is in motion.
OPENING
26)
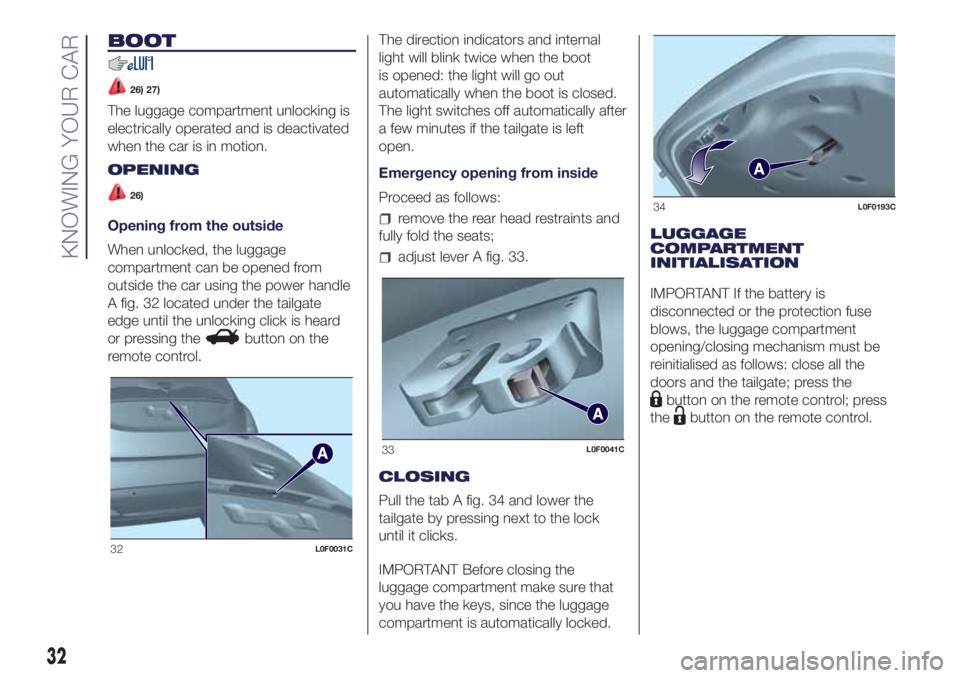
Opening from the outside
When unlocked, the luggage
compartment can be opened from
outside the car using the power handle
A fig. 32 located under the tailgate
edge until the unlocking click is heard
or pressing the
button on the
remote control.The direction indicators and internal
light will blink twice when the boot
is opened: the light will go out
automatically when the boot is closed.
The light switches off automatically after
a few minutes if the tailgate is left
open.
Emergency opening from inside
Proceed as follows:
remove the rear head restraints and
fully fold the seats;
adjust lever A fig. 33.
CLOSING
Pull the tab A fig. 34 and lower the
tailgate by pressing next to the lock
until it clicks.
IMPORTANT Before closing the
luggage compartment make sure that
you have the keys, since the luggage
compartment is automatically locked.LUGGAGE
COMPARTMENT
INITIALISATION
IMPORTANT If the battery is
disconnected or the protection fuse
blows, the luggage compartment
opening/closing mechanism must be
reinitialised as follows: close all the
doors and the tailgate; press the
button on the remote control; press
the
button on the remote control.
32L0F0031C
33L0F0041C
34L0F0193C
32
KNOWING YOUR CAR
Page 62 of 200
Warning light What it means
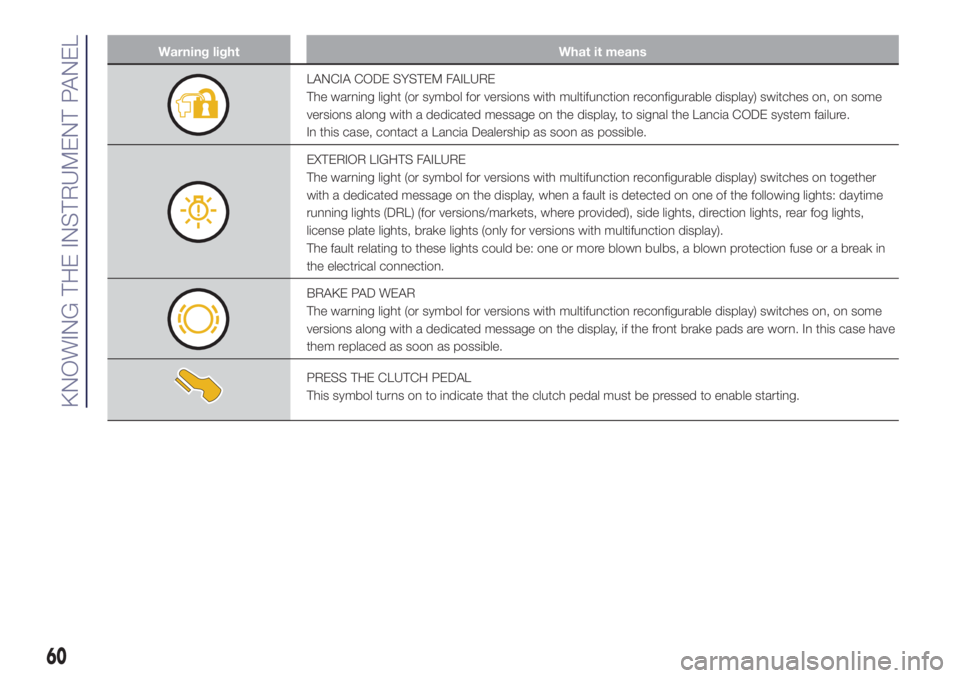
LANCIA CODE SYSTEM FAILURE
The warning light (or symbol for versions with multifunction reconfigurable display) switches on, on some
versions along with a dedicated message on the display, to signal the Lancia CODE system failure.
In this case, contact a Lancia Dealership as soon as possible.
EXTERIOR LIGHTS FAILURE
The warning light (or symbol for versions with multifunction reconfigurable display) switches on together
with a dedicated message on the display, when a fault is detected on one of the following lights: daytime
running lights (DRL) (for versions/markets, where provided), side lights, direction lights, rear fog lights,
license plate lights, brake lights (only for versions with multifunction display).
The fault relating to these lights could be: one or more blown bulbs, a blown protection fuse or a break in
the electrical connection.
BRAKE PAD WEAR
The warning light (or symbol for versions with multifunction reconfigurable display) switches on, on some
versions along with a dedicated message on the display, if the front brake pads are worn. In this case have
them replaced as soon as possible.
PRESS THE CLUTCH PEDAL
This symbol turns on to indicate that the clutch pedal must be pressed to enable starting.
60
KNOWING THE INSTRUMENT PANEL
Page 108 of 200
IN AN EMERGENCY
A punctured tyre or a burnt-out bulb?
At times, a problem may interfere
with our journey.
The pages on emergencies can help
you to deal with critical situations
independently and with calm.
In an emergency we recommend that
you call the freephone number found in
the Warranty Booklet.
It is also possible to call the national or
international universal freephone
number to search for the nearest
Dealership.HAZARD WARNING LIGHTS...........107
REPLACING A BULB ......................107
REPLACING FUSES........................112
REPLACING A WHEEL ...................117
"FIX&GO AUTOMATIC" KIT .............120
EMERGENCY STARTING ................122
FUEL CUT-OFF SYSTEM ................124
TOWING THE VEHICLE ..................124
106
IN AN EMERGENCY
Page 109 of 200
HAZARD WARNING
LIGHTS
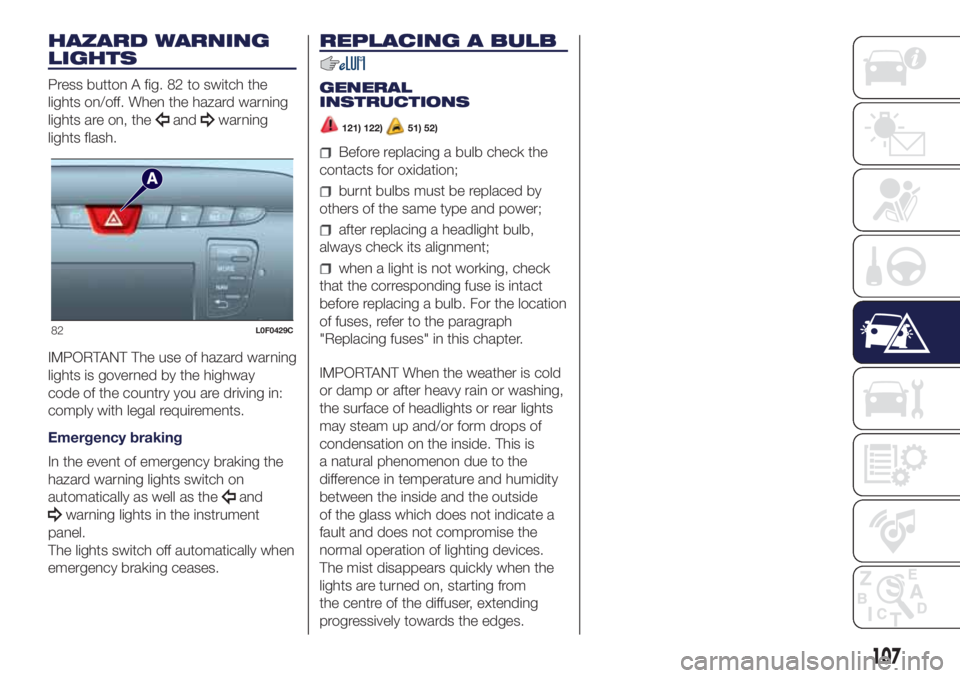
Press button A fig. 82 to switch the
lights on/off. When the hazard warning
lights are on, the
andwarning
lights flash.
IMPORTANT The use of hazard warning
lights is governed by the highway
code of the country you are driving in:
comply with legal requirements.
Emergency braking
In the event of emergency braking the
hazard warning lights switch on
automatically as well as the
and
warning lights in the instrument
panel.
The lights switch off automatically when
emergency braking ceases.
REPLACING A BULB
GENERAL
INSTRUCTIONS
121) 122)51) 52)
Before replacing a bulb check the
contacts for oxidation;
burnt bulbs must be replaced by
others of the same type and power;
after replacing a headlight bulb,
always check its alignment;
when a light is not working, check
that the corresponding fuse is intact
before replacing a bulb. For the location
of fuses, refer to the paragraph
"Replacing fuses" in this chapter.
IMPORTANT When the weather is cold
or damp or after heavy rain or washing,
the surface of headlights or rear lights
may steam up and/or form drops of
condensation on the inside. This is
a natural phenomenon due to the
difference in temperature and humidity
between the inside and the outside
of the glass which does not indicate a
fault and does not compromise the
normal operation of lighting devices.
The mist disappears quickly when the
lights are turned on, starting from
the centre of the diffuser, extending
progressively towards the edges.
82L0F0429C
107