dimensions LAND ROVER DISCOVERY 1995 Workshop Manual
[x] Cancel search | Manufacturer: LAND ROVER, Model Year: 1995, Model line: DISCOVERY, Model: LAND ROVER DISCOVERY 1995Pages: 873, PDF Size: 12.89 MB
Page 3 of 873

INTRODUCTION
1
INFORMATION INTRODUCTION
This workshop manual covers vehicles from 1995
model year onwards. Amendments and additional
pages will be issued to ensure that the manual
covers latest models. Amendments and additions
will be identified by the addition of a dated footer
at the bottom of the page.
This Workshop Manual is designed to assist skilled
technicians in the efficient repair and maintenance of
Land Rover vehicles.
Individuals who undertake their own repairs
should have some skill and training, and limit
repairs to components which could not affect the
safety of the vehicle or its passengers. Any
repairs required to safety critical items such as
steering, brakes, suspension or supplementary
restraint system should be carried out by a Land
Rover Dealer. Repairs to such items should
NEVER be attempted by untrained individuals.
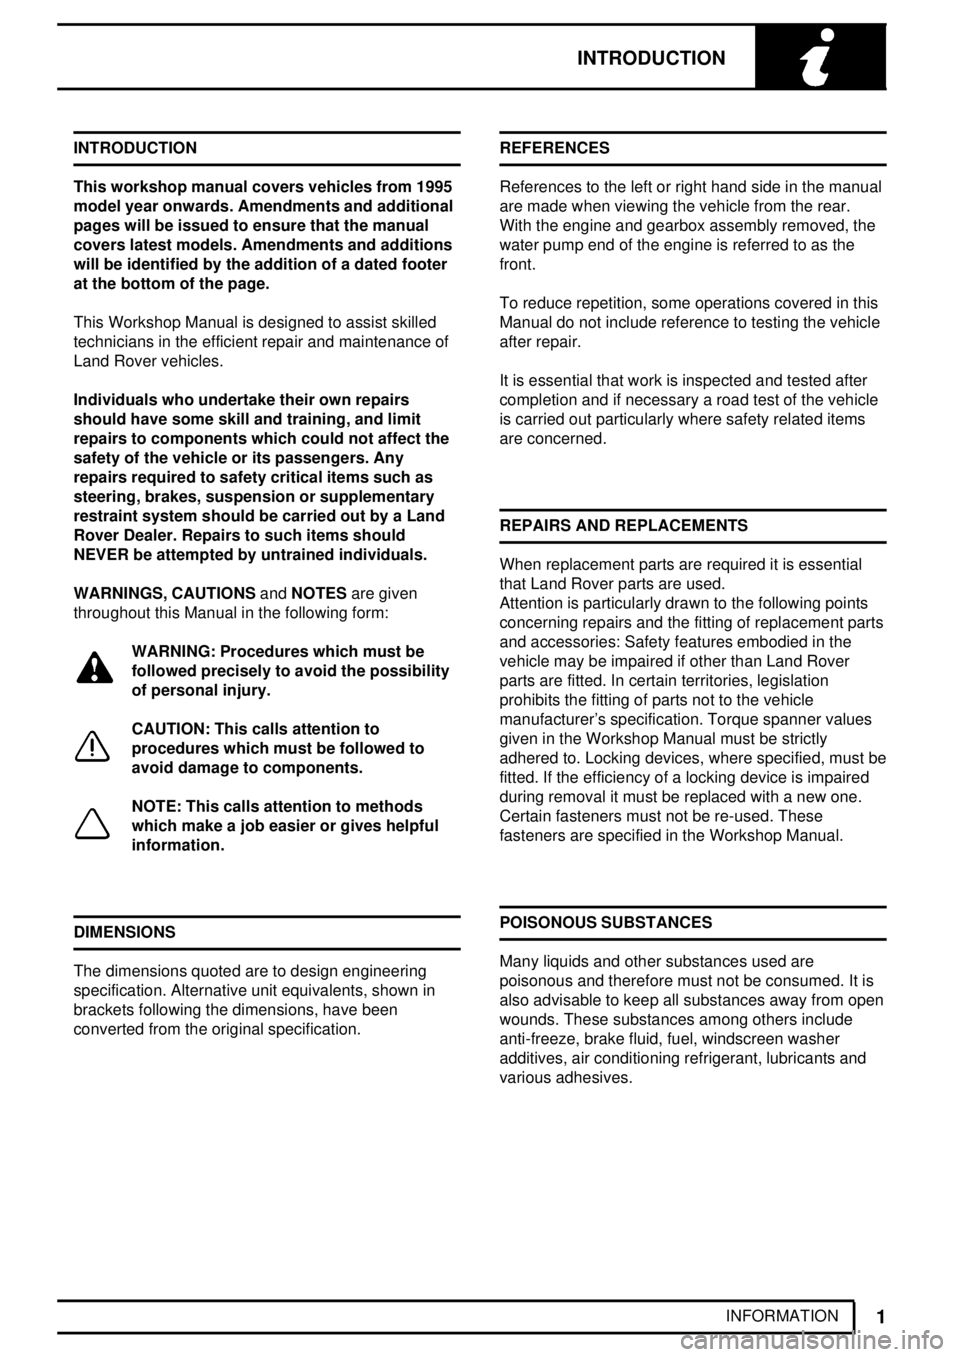
WARNINGS, CAUTIONSandNOTESare given
throughout this Manual in the following form:
WARNING: Procedures which must be
followed precisely to avoid the possibility
of personal injury.
CAUTION: This calls attention to
procedures which must be followed to
avoid damage to components.
NOTE: This calls attention to methods
which make a job easier or gives helpful
information.
DIMENSIONS
The dimensions quoted are to design engineering
specification. Alternative unit equivalents, shown in
brackets following the dimensions, have been
converted from the original specification.REFERENCES
References to the left or right hand side in the manual
are made when viewing the vehicle from the rear.
With the engine and gearbox assembly removed, the
water pump end of the engine is referred to as the
front.
To reduce repetition, some operations covered in this
Manual do not include reference to testing the vehicle
after repair.
It is essential that work is inspected and tested after
completion and if necessary a road test of the vehicle
is carried out particularly where safety related items
are concerned.
REPAIRS AND REPLACEMENTS
When replacement parts are required it is essential
that Land Rover parts are used.
Attention is particularly drawn to the following points
concerning repairs and the fitting of replacement parts
and accessories: Safety features embodied in the
vehicle may be impaired if other than Land Rover
parts are fitted. In certain territories, legislation
prohibits the fitting of parts not to the vehicle
manufacturer's specification. Torque spanner values
given in the Workshop Manual must be strictly
adhered to. Locking devices, where specified, must be
fitted. If the efficiency of a locking device is impaired
during removal it must be replaced with a new one.
Certain fasteners must not be re-used. These
fasteners are specified in the Workshop Manual.
POISONOUS SUBSTANCES
Many liquids and other substances used are
poisonous and therefore must not be consumed. It is
also advisable to keep all substances away from open
wounds. These substances among others include
anti-freeze, brake fluid, fuel, windscreen washer
additives, air conditioning refrigerant, lubricants and
various adhesives.
Page 36 of 873

04GENERAL SPECIFICATION DATA
18
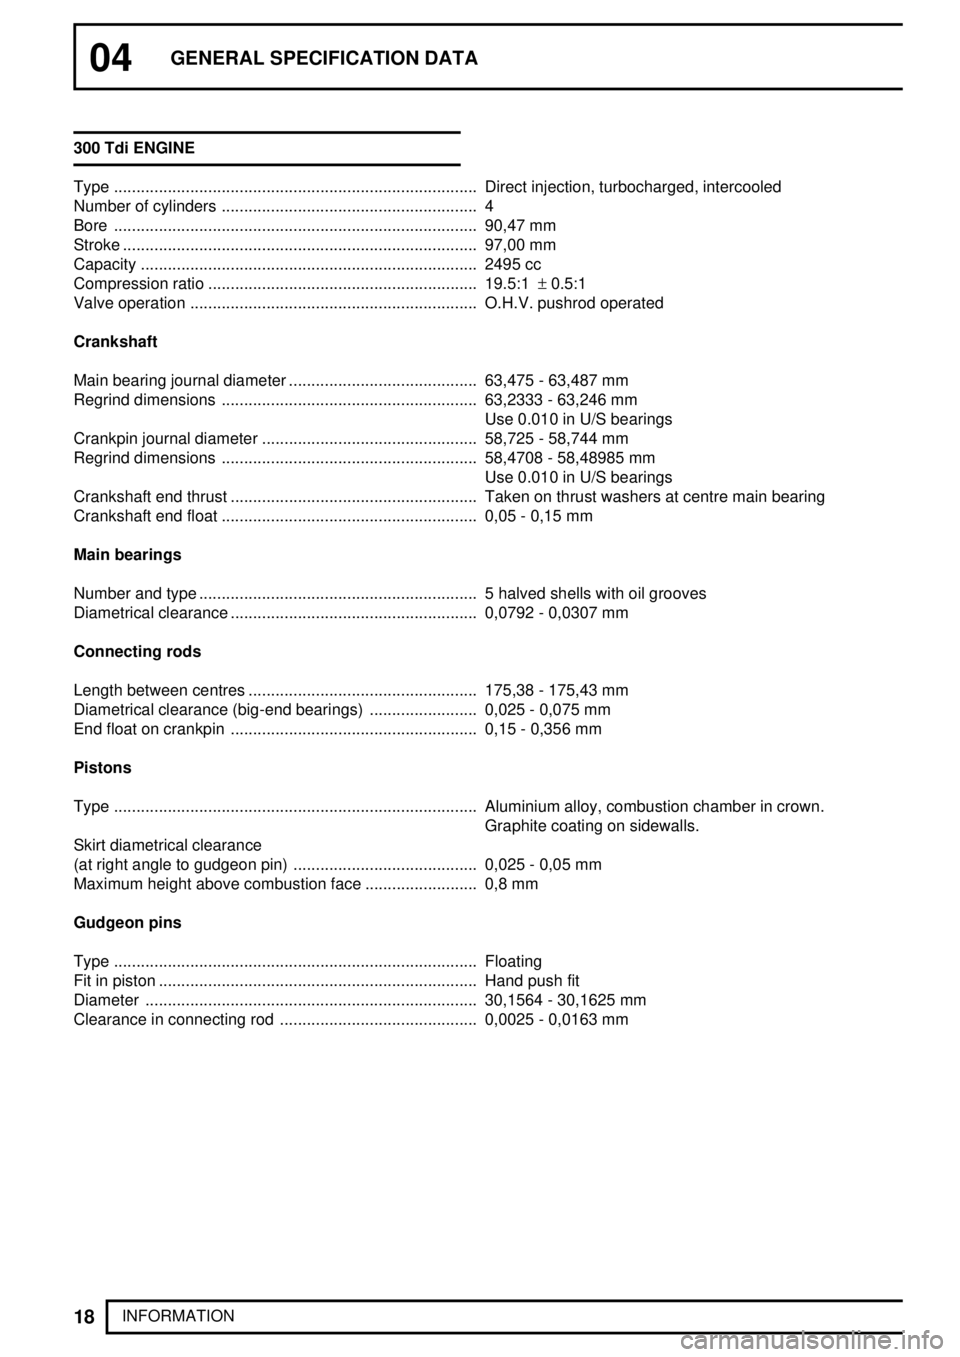
INFORMATION 300 Tdi ENGINE
Type Direct injection, turbocharged, intercooled.................................................................................
Number of cylinders 4.........................................................
Bore 90,47 mm.................................................................................
Stroke 97,00 mm...............................................................................
Capacity 2495 cc...........................................................................
Compression ratio 19.5:1±0.5:1 ............................................................
Valve operation O.H.V. pushrod operated................................................................
Crankshaft
Main bearing journal diameter 63,475 - 63,487 mm..........................................
Regrind dimensions 63,2333 - 63,246 mm.........................................................
Use 0.010 in U/S bearings
Crankpin journal diameter 58,725 - 58,744 mm................................................
Regrind dimensions 58,4708 - 58,48985 mm.........................................................
Use 0.010 in U/S bearings
Crankshaft end thrust Taken on thrust washers at centre main bearing.......................................................
Crankshaft end float 0,05 - 0,15 mm.........................................................
Main bearings
Number and type 5 halved shells with oil grooves..............................................................
Diametrical clearance 0,0792 - 0,0307 mm.......................................................
Connecting rods
Length between centres 175,38 - 175,43 mm...................................................
Diametrical clearance (big-end bearings) 0,025 - 0,075 mm........................
End float on crankpin 0,15 - 0,356 mm.......................................................
Pistons
Type Aluminium alloy, combustion chamber in crown..................................................................................
Graphite coating on sidewalls.
Skirt diametrical clearance
(at right angle to gudgeon pin) 0,025 - 0,05 mm.........................................
Maximum height above combustion face 0,8 mm.........................
Gudgeon pins
Type Floating.................................................................................
Fit in piston Hand push fit.......................................................................
Diameter 30,1564 - 30,1625 mm..........................................................................
Clearance in connecting rod 0,0025 - 0,0163 mm............................................
Page 43 of 873

GENERAL SPECIFICATION DATA
25
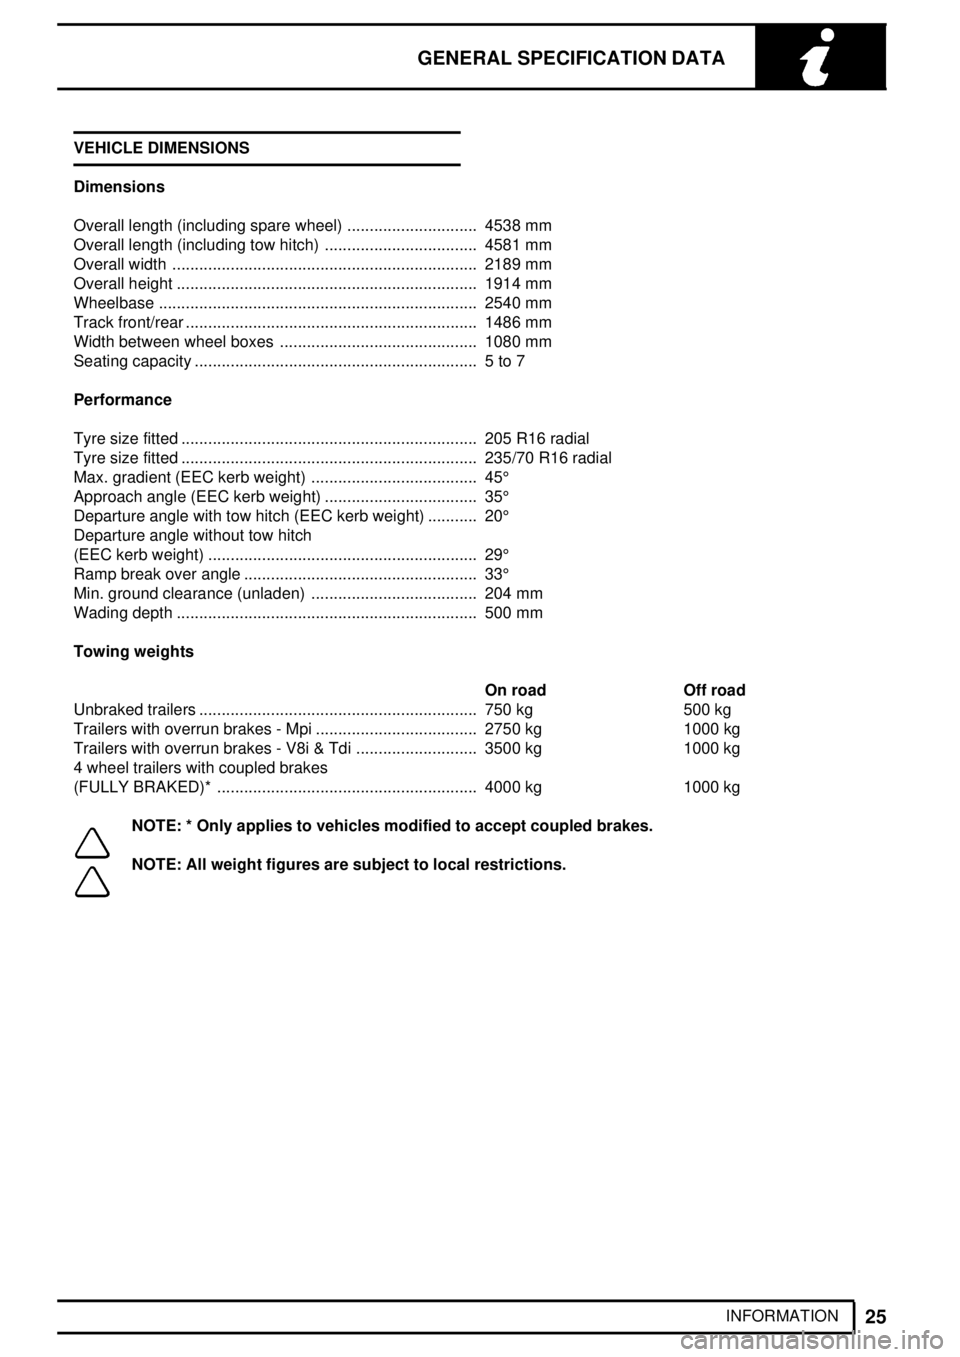
INFORMATION VEHICLE DIMENSIONS
Dimensions
Overall length (including spare wheel) 4538 mm.............................
Overall length (including tow hitch) 4581 mm..................................
Overall width 2189 mm....................................................................
Overall height 1914 mm...................................................................
Wheelbase 2540 mm.......................................................................
Track front/rear 1486 mm.................................................................
Width between wheel boxes 1080 mm............................................
Seating capacity 5 to 7...............................................................
Performance
Tyre size fitted 205 R16 radial..................................................................
Tyre size fitted 235/70 R16 radial..................................................................
Max. gradient (EEC kerb weight) 45° .....................................
Approach angle (EEC kerb weight) 35° ..................................
Departure angle with tow hitch (EEC kerb weight) 20° ...........
Departure angle without tow hitch
(EEC kerb weight) 29° ............................................................
Ramp break over angle 33° ....................................................
Min. ground clearance (unladen) 204 mm.....................................
Wading depth 500 mm...................................................................
Towing weights
On road Off road
Unbraked trailers 750 kg.............................................................. 500 kg
Trailers with overrun brakes - Mpi 2750 kg.................................... 1000 kg
Trailers with overrun brakes - V8i & Tdi 3500 kg........................... 1000 kg
4 wheel trailers with coupled brakes
(FULLY BRAKED)* 4000 kg.......................................................... 1000 kg
NOTE: * Only applies to vehicles modified to accept coupled brakes.
NOTE: All weight figures are subject to local restrictions.
Page 51 of 873

07GENERAL FITTING REMINDERS
2
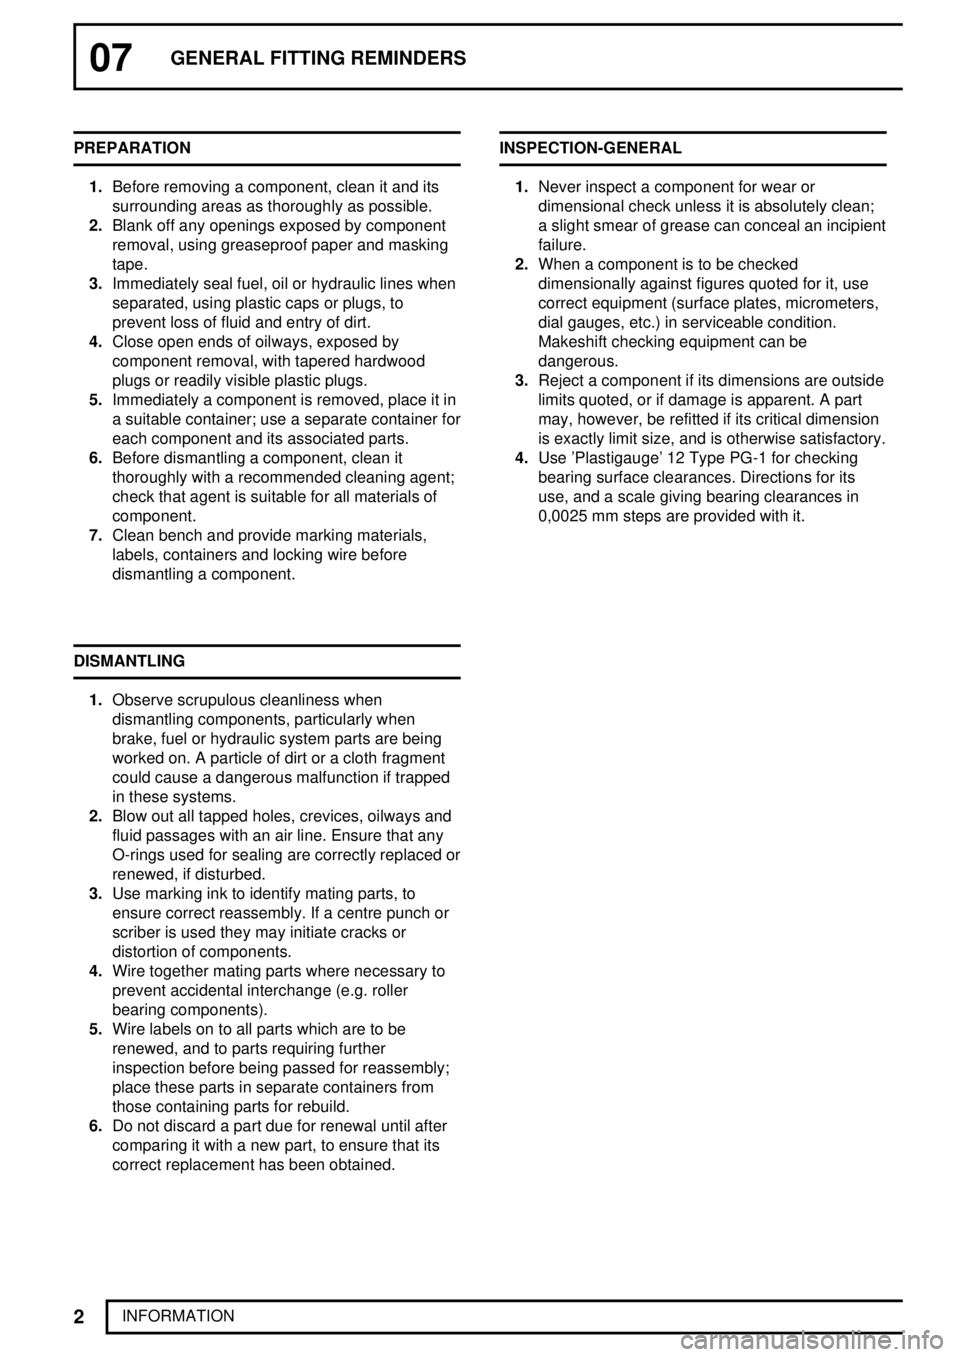
INFORMATION PREPARATION
1.Before removing a component, clean it and its
surrounding areas as thoroughly as possible.
2.Blank off any openings exposed by component
removal, using greaseproof paper and masking
tape.
3.Immediately seal fuel, oil or hydraulic lines when
separated, using plastic caps or plugs, to
prevent loss of fluid and entry of dirt.
4.Close open ends of oilways, exposed by
component removal, with tapered hardwood
plugs or readily visible plastic plugs.
5.Immediately a component is removed, place it in
a suitable container; use a separate container for
each component and its associated parts.
6.Before dismantling a component, clean it
thoroughly with a recommended cleaning agent;
check that agent is suitable for all materials of
component.
7.Clean bench and provide marking materials,
labels, containers and locking wire before
dismantling a component.
DISMANTLING
1.Observe scrupulous cleanliness when
dismantling components, particularly when
brake, fuel or hydraulic system parts are being
worked on. A particle of dirt or a cloth fragment
could cause a dangerous malfunction if trapped
in these systems.
2.Blow out all tapped holes, crevices, oilways and
fluid passages with an air line. Ensure that any
O-rings used for sealing are correctly replaced or
renewed, if disturbed.
3.Use marking ink to identify mating parts, to
ensure correct reassembly. If a centre punch or
scriber is used they may initiate cracks or
distortion of components.
4.Wire together mating parts where necessary to
prevent accidental interchange (e.g. roller
bearing components).
5.Wire labels on to all parts which are to be
renewed, and to parts requiring further
inspection before being passed for reassembly;
place these parts in separate containers from
those containing parts for rebuild.
6.Do not discard a part due for renewal until after
comparing it with a new part, to ensure that its
correct replacement has been obtained.INSPECTION-GENERAL
1.Never inspect a component for wear or
dimensional check unless it is absolutely clean;
a slight smear of grease can conceal an incipient
failure.
2.When a component is to be checked
dimensionally against figures quoted for it, use
correct equipment (surface plates, micrometers,
dial gauges, etc.) in serviceable condition.
Makeshift checking equipment can be
dangerous.
3.Reject a component if its dimensions are outside
limits quoted, or if damage is apparent. A part
may, however, be refitted if its critical dimension
is exactly limit size, and is otherwise satisfactory.
4.Use 'Plastigauge' 12 Type PG-1 for checking
bearing surface clearances. Directions for its
use, and a scale giving bearing clearances in
0,0025 mm steps are provided with it.
Page 131 of 873

V8i
13
REPAIR
NOTE: Release bolts securing compressor
mounting bracket to engine and remove
bracket to enable temporary lifting eye
ETC 5964 to be fitted. Secure lifting eye to
mounting bracket fixing points with suitable bolts
of equivalent size, pitch and thread. Leave lifting
eye attached until engine is reinstalled in vehicle.
15.Place drain tray underneath vehicle.
16.Disconnect hose from reservoir to power
steering pump. Secure hose end above level of
fluid reservoir to avoid unnecessary loss of fluid.
17.Disconnect power steering pump to power
steering box hose. Seal hose and pump
openings with masking tape to prevent ingress of
dirt. Wipe away any fluid spillage from chassis or
steering box.
18.Disconnect fuel temperature and coolant
temperature sensor multi-plugs.
19.Disconnect leads from coil.
20.Identify each injector multi-plug for re-assembly
and disconnect plugs from injectors.
21.Manoeuvre harness from behind fuel rails and
place to one side clear of engine assembly.
22.Remove two clamps securing gearbox oil cooler
pipes to engine block.
23.Remove engine mounting fixings on both sides
of cylinder block.
24.Fit lifting chains to engine lifting eyes as shown
in illustration RR1780E.
1. L/H Front chain 356mm total overall length.
2. R/H Front chain 330mm total overall length.
3. R/H Rear chain 457mm total overall length.
NOTE: All chain dimensions are measured
from end of lifting hook to end of last link
in chain.
25.Fit chain lifting eye to a suitable engine hoist.
Raise hoist high enough to enable engine
mountings to be removed, and withdraw rubber
mountings.
26.Lower hoist until engine rests securely on engine
mounting brackets. Remove lifting chains and
hoist.
27.Disconnect two heater hoses located on top of
right hand rocker cover.
28.Remove ground strap from rear of left hand
cylinder head. DO NOT remove from retaining
clip.
29.Remove all electrical harnesses from retaining
clips at rear of engine.
30.Remove transmission breather pipes from
retaining clip on rear lifting eye.
31.Remove top two bolts securing bell housing to
cylinder block.
32.Raise front of vehicle, lower vehicle on to axle
stands.
33.Remove bell housing bottom cover. Remove
gasket from bell housing face.
34.Remove nuts securing exhaust downpipes to
manifolds, remove heat shield from right hand
side downpipe.
35.Remove electrical leads from starter motor
solenoid. Disconnect multi-plug from oil level
sensor on side of sump, if fitted.
NOTE: Instructions 37, 38 and 39 refer to
automatic vehicles only.
36.With assistance rotate engine at crankshaft
pulley until two access holes in drive plate/ring
gear assembly are visible.
37.Remove two bolts visible through access holes.
Mark one access hole and one bolt hole to
ensure unit is reassembled in its original position
38.Rotate crankshaft 180Ê until two remaining
access holes are visible, remove two bolts.
Page 404 of 873

37MANUAL GEARBOX
2
REPAIR 25.Remove nuts and bolts securing transmission
cross-member to chassis.
26.Remove nuts and bolts securing cross-member
mountings to transmission.
27.Remove cross-member.
28.Manufacture an adapter plate to dimensions
given in service tool section and attach it to a
transmission hoist. To achieve balance of the
transmission unit when mounted to hoist, it is
essential that pointA,is situated over lifting hoist
ram. Drill holesBto suit hoist table. Secure the
transmission unit cradle at pointCusing the
lower bolts retaining transfer gearbox rear cover.
Raise hoist just enough to take weight of
transmission.
29.Lower hoist sufficiently to allow transfer gearbox
selector lever to clear transmission tunnel
aperture.
30.Disconnect differential lock switch connectors.
31.Disconnect reverse lamp switch connectors.
32.Remove clips securing gearbox breather pipes
to harness.
33.Support engine under sump with a jack.
CAUTION: Use a wooden block to protect
sump.
34.Remove bell housing nuts.
35.Withdraw transmission whilst ensuring all
connections to engine and chassis are released.36.Remove transmission assembly from hoist
cradle and position safely on a bench.
37.Remove breather pipes. Discard pipe union
sealing washers.
38.Remove 'Nyloc' nut, and remove bolt, securing
lever to high/low shaft.
39.Collect spacer washer.
40.Remove 2 clips and remove differential lock
lever link.
41.Remove lower locknut from high/low operating
rod.
42.Place a sling round transfer box and attach to
hoist.
43.Remove nut and 5 bolts securing transfer
gearbox to extension housing.
44.Withdraw transfer gearbox.
Page 542 of 873

STEERING
3
ADJUSTMENT FRONT WHEEL ALIGNMENT
Service repair no - 57.65.01
Checking Toe-out dimensions
NOTE: No Adjustment is provided for
castor, camber or swivel pin inclinations.
1.Set vehicle on level ground with road wheels
positioned straight ahead.
2.Push vehicle back and forwards to settle linkage.
3.Measure toe-out at horizontal centre-line of
wheels.
4.Check tightness of clamp bolt fixings. Tighten to
14 Nm.
Adjust
5.Loosen adjuster sleeve clamp.
6.Rotate adjuster to lengthen or shorten track rod.
7.Check toe-out setting as instructions 1 to 4.
When toe-out is correct, tap steering linkage ball
joint, in directions of arrows shown, to maximum
of their travel. This ensures full unrestricted
working travel.
8.Tighten clamp bolts to
14 Nm.
POWER STEERING PUMP DRIVE BELT
Service repair no - 57.20.01
Adjust
NOTE: For details of drive belt adjust
procedure
See ENGINE, Repair, Drive
Belt
Page 611 of 873

BRAKES
9
REPAIR SERVO ASSEMBLY
Service repair no - 70.50.01
Remove
Before starting repair refer to general brake service
practice.
See General Brake Service Practice
NOTE: The filter, non-return valve and
grommet, are the only serviceable
components, in event of failure or damage
fit a new unit.
1.Disconnect battery negative lead.
2.Disconnect electrical plug to low fluid level
switch.
3.Thoroughly clean immediate area around all
master cylinder outlet ports. Remove each brake
pipe, sealing each pipe and outlet port to prevent
ingress of foreign matter.
4.Disconnect vacuum supply hose to servo.
5.Remove lower dash panel to gain access to
servo push rod to brake pedal.
6.Remove clevis pin securing servo push rod to
brake pedal.
7.Remove two nuts and plain washers securing
servo.
8.Remove servo and master cylinder assembly.
9.Drain brake fluid into a suitable container. (If
master cylinder is kept horizontal it is not
necessary to drain fluid).10.Detach spacer from pedal box mounting face of
servo.
NOTE: Retain spacer for reassembly. The
spacer ensures stringent pedal to servo
operating dimensions are maintained.
11.Remove master cylinder from existing servo and
refit to new servo, if fitting new unit.
Refit
12.Fit spacer to servo.
13.Fit servo to pedal box.
14.Lightly grease brake pedal around area servo
push rod pivots.
15.Fit push rod to lower hole of brake pedal. Fit
clevis pin and clip.
16.Secure servo with two nuts and plain washers.
Tighten nuts to
26 Nm.
17.Refit lower dash panel.
18.Fit master cylinder to servo, refit nuts, plain and
spring washers. Tighten nuts to
26 Nm.
19.Remove all sealing plugs. Refit brake pipes to
respective ports. Tighten brake pipes to
15 Nm.
20.Refit vacuum supply hose.
21.Fill master cylinder to correct level using correct
grade of brake fluid.
See LUBRICANTS,
FLUIDS AND CAPACITIES, Information,
Recommended Lubricants and Fluids
22.Bleed brake system.See Brake System Bleed