ignition LAND ROVER DISCOVERY 1999 User Guide
[x] Cancel search | Manufacturer: LAND ROVER, Model Year: 1999, Model line: DISCOVERY, Model: LAND ROVER DISCOVERY 1999Pages: 1529, PDF Size: 34.8 MB
Page 116 of 1529

LIFTING AND TOWING
08-3
Remove the propeller shaft fixings, remove the shaft
from the vehicle.
If the front axle is to be trailed turn ignition key to
position '1' to release steering lock.
The steering wheel and/or linkage must be
secured in a straight ahead position. DO NOT use
the steering lock mechanism for this purpose.
Towing eyes
The towing eyes at the front and rear of the vehicle
are designed for vehicle recovery purposes only and
must NOT be used to tow a trailer or caravan.
Front:A single towing eye, set behind a removable
panel in the front spoiler. DO NOT use the front
lashing rings for towing.Rear: A pair of towing eyes at the rear of the vehicle
can be used as lashing rings and for towing another
light vehicle.
Page 128 of 1529
MAINTENANCE
PROCEDURES 10-5
Lamps, horns and warning indicators
Check
1.Switch on side, head and tail lamps and check
operation.
2.Check headlamp levelling operation.
3.Check turn signals and hazard warning lamps
for correct operation.
4.Press brake pedal and check operation of
brake lamps.
5.Check all exterior lamp lenses for clarity and
condition. Pay particular attention to headlamp
lenses for signs of stone chips or damage.
6.Check horn for loud, clear sound.
7.Switch on headlamps (with ignition switch at 'O'
position) and check light reminder warning
operates when door is opened.
8.Check operation of interior courtesy lights.
9.Check operation of all instrument pack warning
and indicator lights.
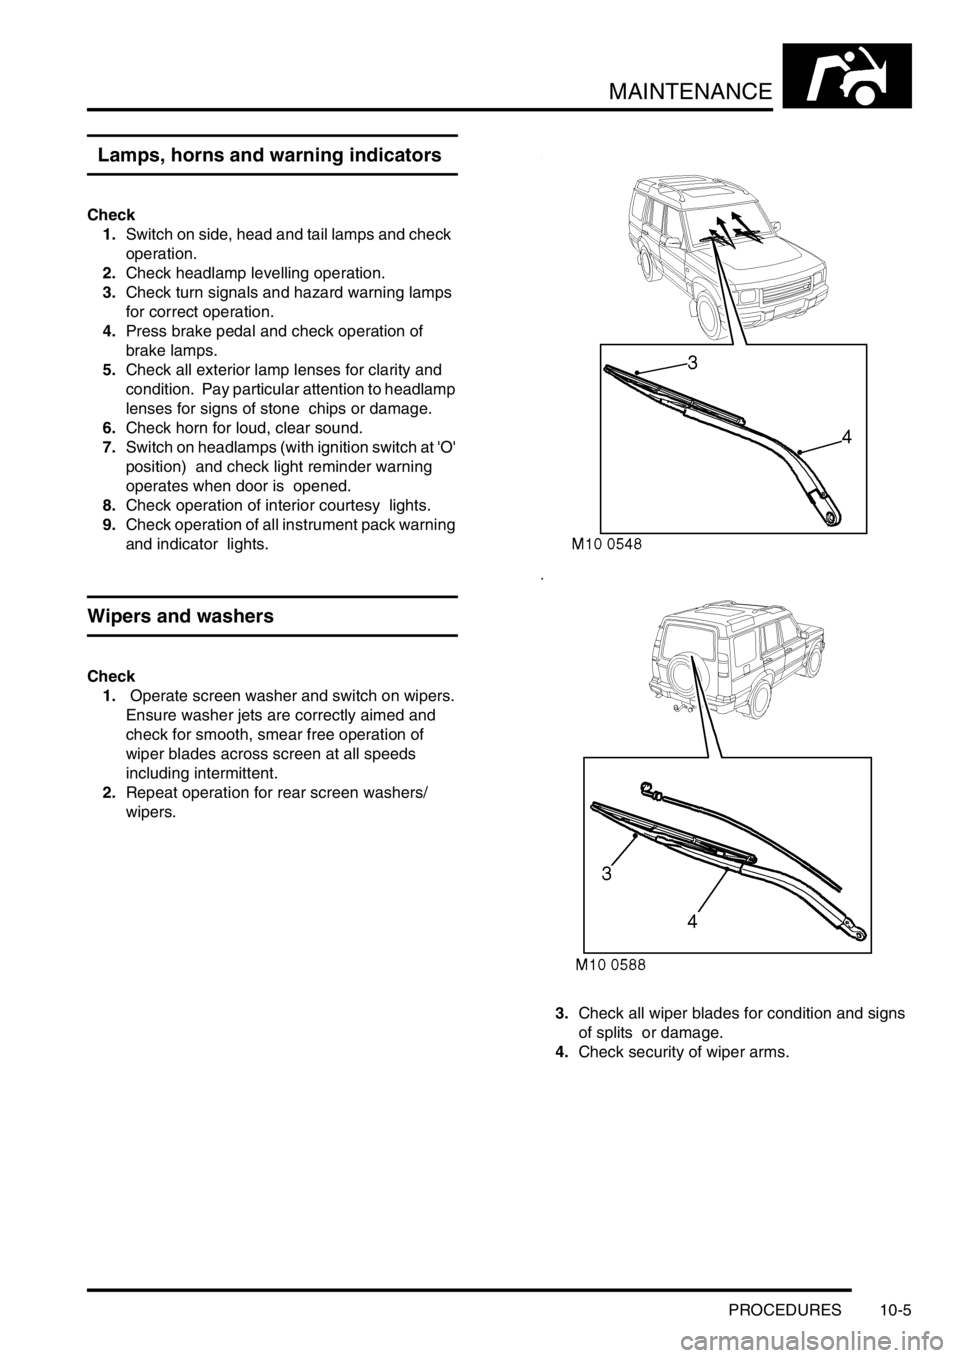
Wipers and washers
Check
1. Operate screen washer and switch on wipers.
Ensure washer jets are correctly aimed and
check for smooth, smear free operation of
wiper blades across screen at all speeds
including intermittent.
2.Repeat operation for rear screen washers/
wipers.
3.Check all wiper blades for condition and signs
of splits or damage.
4.Check security of wiper arms.
Page 154 of 1529
MAINTENANCE
PROCEDURES 10-31
Road/roller test
WARNING: Roller test must be restricted to 3
mph (5 km/h). If 2 wheel rolling road is to be used,
disconnect propeller shaft from the transfer box
output shaft driving the axle which is NOT on the
rolling road.
Testing
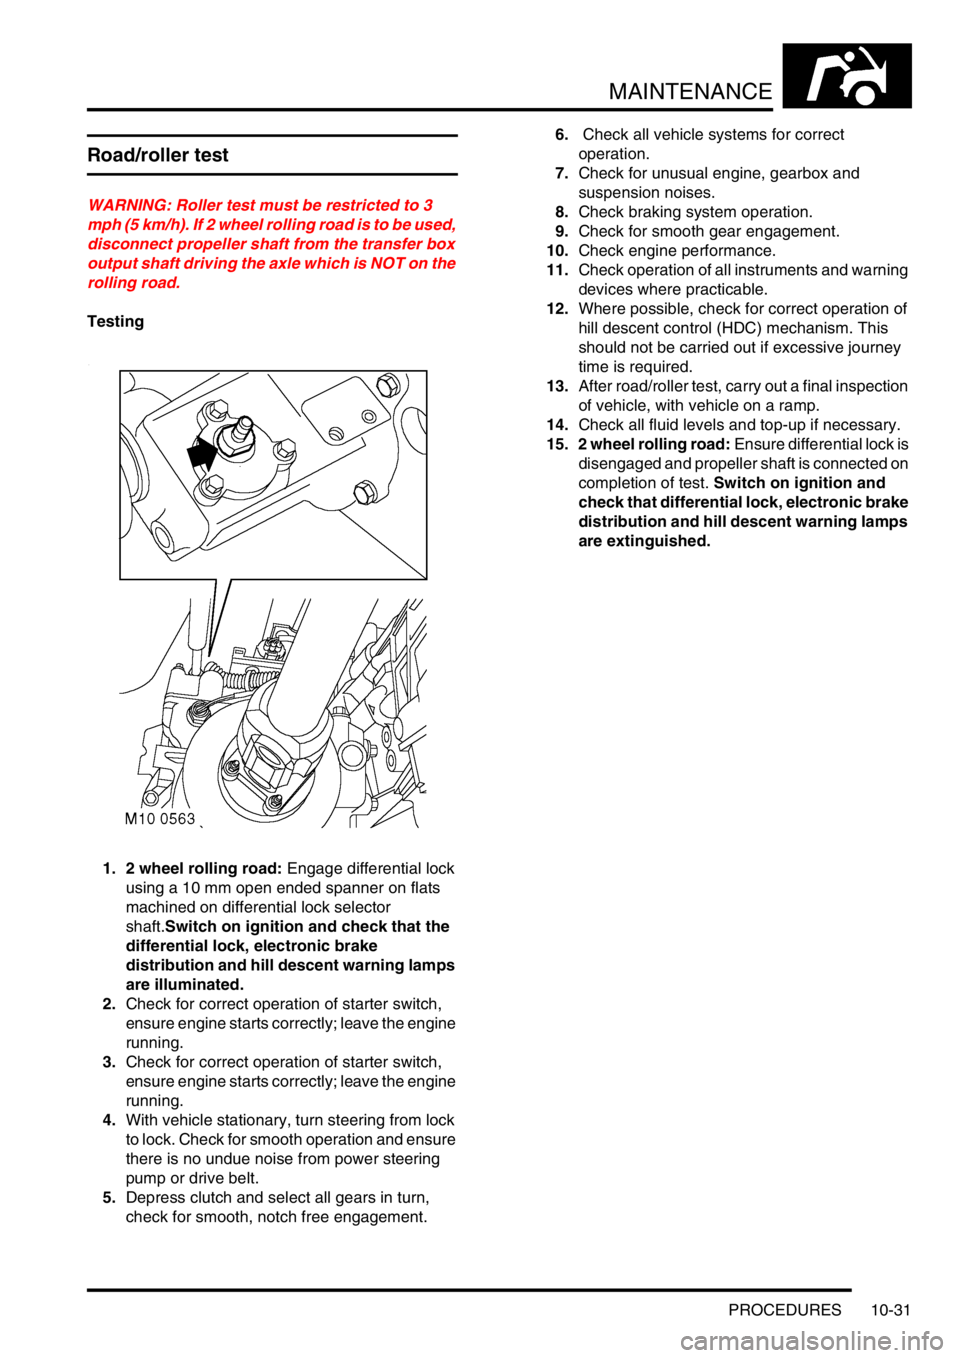
1. 2 wheel rolling road: Engage differential lock
using a 10 mm open ended spanner on flats
machined on differential lock selector
shaft.Switch on ignition and check that the
differential lock, electronic brake
distribution and hill descent warning lamps
are illuminated.
2.Check for correct operation of starter switch,
ensure engine starts correctly; leave the engine
running.
3.Check for correct operation of starter switch,
ensure engine starts correctly; leave the engine
running.
4.With vehicle stationary, turn steering from lock
to lock. Check for smooth operation and ensure
there is no undue noise from power steering
pump or drive belt.
5.Depress clutch and select all gears in turn,
check for smooth, notch free engagement.6. Check all vehicle systems for correct
operation.
7.Check for unusual engine, gearbox and
suspension noises.
8.Check braking system operation.
9.Check for smooth gear engagement.
10.Check engine performance.
11.Check operation of all instruments and warning
devices where practicable.
12.Where possible, check for correct operation of
hill descent control (HDC) mechanism. This
should not be carried out if excessive journey
time is required.
13.After road/roller test, carry out a final inspection
of vehicle, with vehicle on a ramp.
14.Check all fluid levels and top-up if necessary.
15. 2 wheel rolling road: Ensure differential lock is
disengaged and propeller shaft is connected on
completion of test. Switch on ignition and
check that differential lock, electronic brake
distribution and hill descent warning lamps
are extinguished.
Page 164 of 1529

ENGINE - V8
DESCRIPTION AND OPERATION 12-2-9
Oil is drawn from the sump through a strainer and into the oil pump via the oil pick-up pipe. Pressurised oil from the
pump passes through the oil cooler (if fitted) mounted in front of the radiator and returns to the full flow oil filter
element. Oil from the filter passes into the main oil gallery and through internal drillings to the crankshaft where it is
directed to each main bearing and to the big-end bearings via numbers 1, 3 and 5 main bearings. An internal drilling
in the cylinder block directs oil to the camshaft where it passes through further internal drillings to the hydraulic
tappets, camshaft bearing journals and rocker shafts. Lubrication to the pistons, small ends and cylinder bores is by
oil grooves machined in the connecting rods and by splash.
Oil pressure switch
The oil pressure warning light switch registers low oil pressure in the main oil gallery on the outflow side of the filter.
Whilst the engine is running and oil pressure is correct, the switch is open. When the ignition is switched on or if oil
pressure drops below the pressure setting of the switch, the switch closes and the low oil pressure warning lamp
located in the instrument pack will illuminate.
Hydraulic tappets
1Clip
2Pushrod seat
3Inner sleeve
4Upper chamber5Non-return ball valve
6Spring
7Outer sleeve
8Lower chamber
The hydraulic tappet provides maintenance free, quiet operation of the valves. This is achieved by utilizing engine oil
pressure to eliminate the clearance between the rocker arms and valve stems. When the valve is closed, engine oil
pressure present in the upper chamber, passes through the non-return ball valve and into the lower chamber. When
the cam begins to lift the outer sleeve, the resistance of the valve spring, felt through the push rod and seat, causes
the tappet inner sleeve to move downwards inside the outer sleeve. This downwards movement closes the non-return
ball valve and increases the pressure in the lower chamber sufficiently to ensure that the valve is fully opened by the
push rod. As the tappet moves off the peak of the cam, the non-return ball valve opens thereby allowing the pressure
in both chambers to equalize. This ensures that the valve will be fully closed when the tappet is on the back of the
cam.
Crankcase ventilation
A positive crankcase ventilation system is used to vent crankcase gases to the air induction system. Gases are drawn
from the left hand rocker cover to a tapping in the throttle body. An oil separator is incorporated in the hose connection
stub pipe in the right hand rocker cover, gases from this connection are drawn to a tapping in the inlet manifold.
+ EMISSION CONTROL - V8, DESCRIPTION AND OPERATION, Crankcase Emission Control System.
Page 166 of 1529
ENGINE - V8
ADJUSTMENTS 12-2-11
ADJUST ME NTS
Engine oil pressure check
$% 12.90.09.01
Check
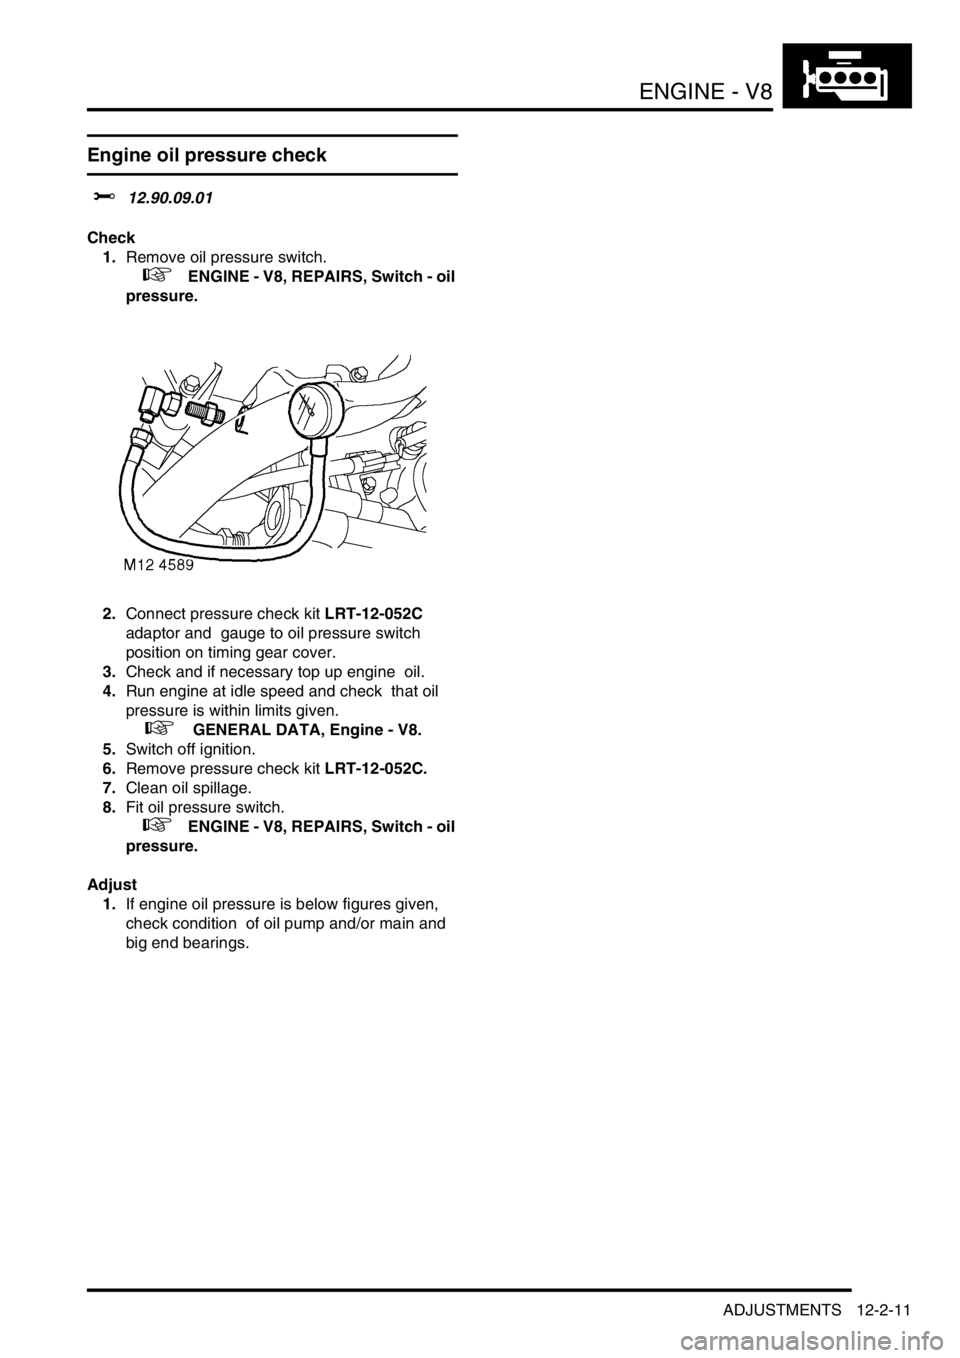
1.Remove oil pressure switch.
+ ENGINE - V8, REPAIRS, Switch - oil
pressure.
2.Connect pressure check kit LRT-12-052C
adaptor and gauge to oil pressure switch
position on timing gear cover.
3.Check and if necessary top up engine oil.
4.Run engine at idle speed and check that oil
pressure is within limits given.
+ GENERAL DATA, Engine - V8.
5.Switch off ignition.
6.Remove pressure check kit LRT-12-052C.
7.Clean oil spillage.
8.Fit oil pressure switch.
+ ENGINE - V8, REPAIRS, Switch - oil
pressure.
Adjust
1.If engine oil pressure is below figures given,
check condition of oil pump and/or main and
big end bearings.
Page 181 of 1529

ENGINE - V8
12-2-26 REPAIRS
Engine assembly
$% 12.41.01.99
Remove
1.Drain engine oil and remove oil filter.
2.Remove radiator.
+ COOLING SYSTEM - V8, REPAIRS,
Radiator.
3.Remove upper inlet manifold.
+ MANIFOLDS AND EXHAUST
SYSTEMS - V8, REPAIRS, Gasket - inlet
manifold - upper - Without Secondary Air
Injection.
4.Remove ignition coil assemblies.
5.Position absorbent material to catch spillage
and disconnect fuel pipe from fuel rail.
CAUTION: Always fit plugs to open
connections to prevent contamination.
6.Release 2 hose clips and remove top hose.
7.Using a 15 mm spanner, release auxiliary drive
belt tension and remove drive belt. 8.Remove 3 bolts securing ACE pump, release
pump and tie aside.
9.Disconnect multiplug from A/C compressor.
10.Remove 4 bolts securing A/C compressor,
release compressor and tie aside.
Page 185 of 1529

ENGINE - V8
12-2-30 REPAIRS
Refit
1.Clean mating faces of engine and gearbox,
dowel and dowel holes.
2.Lubricate splines and bearing surface on first
motion shaft with grease.
3.With assistance position engine in engine bay,
align to gearbox and locate on dowels.
4.Position support brackets, fit bell housing bolts
and tighten to 50 Nm (37 lbf.ft).
5.Position engine mountings, fit nuts and tighten
to 85 Nm (63 lbf.ft).
6.Lower lifting equipment and remove from
engine.
7. Models with automatic gearbox: Align torque
converter to drive plate, fit bolts and tighten to
50 Nm (37 lbf.ft). Fit access plug.
8.Fit exhaust front pipe.
+ MANIFOLDS AND EXHAUST
SYSTEMS - V8, REPAIRS, Front pipe.
9.Position oil cooling pipe saddle clamps and
tighten bolts.
10.Position engine harness into foot well.
11.Connect 5 multiplugs to ECM.
12.Fit toe board and secure with trim fixings.
13.Connect engine harness earth to body and
secure with nut.
14.Connect engine harness to main harness
multiplug.
15.Connect multiplug to EVAP purge valve.
16.Connect engine harness multiplugs to fuse
box.
17.Connect starter lead to fuse box and secure
with nut.
18.Connect engine harness positive lead to
battery and tighten nut.
19.Fit fuse box cover.
20.Position engine earth lead and secure with
bolt.
21.Position coolant rail and secure with bolt.
22.Connect harness clips to coolant rail.
23.Connect hose to coolant rail and coolant pump
and secure with clips.
24.Connect PAS pump high and low pressure
pipes and secure with clips.
25.Position oil cooling pipe saddle clamp to PAS
pump housing and secure with bolt.
26.Clean A/C compressor and housing mating
faces, dowels and dowel holes.
27.Position A/C compressor, fit bolts and tighten
to 22 Nm (16 lbf.ft).
28.Connect multiplug to A/C compressor.
29.Clean ACE pump and housing mating faces,
dowels and dowel holes.
30.Position ACE pump, fit bolts and tighten to 22
Nm (16 lbf.ft). 31.Clean all pulley 'V's, fit auxiliary drive belt,
using a 15mm spanner, release belt tensioner
secure belt and re-tension drive belt .
32.Ensure auxiliary drive belt is correctly located
on all pulleys.
33.Fit radiator.
+ COOLING SYSTEM - V8, REPAIRS,
Radiator.
34.Fit top hose and secure with clips.
35.Connect fuel pipe to fuel rail.
36.Position ignition coils and connect ht leads.
37.Fit upper inlet manifold.
+ MANIFOLDS AND EXHAUST
SYSTEMS - V8, REPAIRS, Gasket - inlet
manifold - upper - Without Secondary Air
Injection.
38.Fit new oil filter and refill engine with oil.
+ ENGINE - V8, REPAIRS, Filter - oil.
+ MAINTENANCE, PROCEDURES,
Engine oil - V8 engine.
39.Top up gearbox oil.
+ MAINTENANCE, PROCEDURES,
Automatic gearbox.
Page 242 of 1529
EMISSION CONTROL - V8
DESCRIPTION AND OPERATION 17-2-9
Emission Control Systems
Engine design has evolved in order to minimise the emission of harmful by-products. Emission control systems are
fitted to Land Rover vehicles which are designed to maintain the emission levels within the legal limits pertaining for
the specified market.
Despite the utilisation of specialised emission control equipment, it is still necessary to ensure that the engine is
correctly maintained and is in good mechanical order so that it operates at its optimal condition. In particular, ignition
timing has an effect on the production of HC and NO
x emissions, with the harmful emissions rising as the ignition
timing is advanced.
CAUTION: In many countries it is against the law for a vehicle owner or an unauthorised dealer to modify or
tamper with emission control equipment. In some cases, the vehicle owner and/or the dealer may even be
liable for prosecution.
The engine management ECM is fundamental for controlling the emission control systems. In addition to controlling
normal operation, the system complies with On Board Diagnostic (OBD) system strategies. The system monitors and
reports on faults detected with ignition, fuelling and exhaust systems which cause an excessive increase in tailpipe
emissions. This includes component failures, engine misfire, catalyst damage, catalyst efficiency, fuel evaporative
loss and exhaust leaks.
When an emission relevant fault is determined, the fault condition is stored in the ECM memory. For NAS vehicles,
the MIL warning light on the instrument pack will be illuminated when the fault is confirmed. Confirmation of a fault
condition occurs if the fault is still found to be present during the driving cycle subsequent to the one when the fault
was first detected.
+ ENGINE MANAGEMENT SYSTEM - V8, DESCRIPTION AND OPERATION, Description - engine
management.
The following types of supplementary control system are used to reduce harmful emissions released into the
atmosphere from the vehicle:
1Crankcase emission control – also known as blow-by gas emissions from the engine crankcase.
2Exhaust emission control – to limit the undesirable by-products of combustion.
3Fuel vapour evaporative loss control – to restrict the emission of fuel through evaporation from the fuel
system.
4Fuel leak detection system (NAS only) – there are two types of system which may be used to check the
evaporative emission system for the presence of leaks from the fuel tank to purge valve.
aVacuum leak detection test – checks for leaks down to 1 mm (0.04 in.) in diameter.
bPositive pressure leak detection test – utilises a leak detection pump to check for leaks down to 0.5 mm (0.02
in.) in diameter.
5Secondary air injection system (Where fitted) – to reduce emissions experienced during cold starting.
Page 244 of 1529
EMISSION CONTROL - V8
DESCRIPTION AND OPERATION 17-2-11
Exhaust Emission Control System
The fuel injection system provides accurately metered quantities of fuel to the combustion chambers to ensure the
most efficient air to fuel ratio under all operating conditions. A further improvement to combustion is made by
measuring the oxygen content of the exhaust gases to enable the quantity of fuel injected to be varied in accordance
with the prevailing engine operation and ambient conditions; any unsatisfactory composition of the exhaust gas is
then corrected by adjustments made to the fuelling by the ECM.
The main components of the exhaust emission system are two catalytic converters which are an integral part of the
front exhaust pipe assembly. The catalytic converters are included in the system to reduce the emission to
atmosphere of carbon monoxide (CO), oxides of nitrogen (NO
x) and hydrocarbons (HC). The active constituents of
the catalytic converters are platinum (Pt), palladium (PD) and rhodium (Rh). Catalytic converters for NAS low
emission vehicles (LEVs) from 2000MY have active constituents of palladium and rhodium only. The correct
functioning of the converters is dependent upon close control of the oxygen concentration in the exhaust gas entering
the catalyst.
The two catalytic converters are shaped differently to allow sufficient clearance between the body and transmission,
but they remain functionally identical since they have the same volume and use the same active constituents.
The basic control loop comprises the engine (controlled system), the heated oxygen sensors (measuring elements),
the engine management ECM (control) and the injectors and ignition (actuators). Other factors also influence the
calculations of the ECM, such as air flow, air intake temperature and throttle position. Additionally, special driving
conditions are compensated for, such as starting, acceleration, deceleration, overrun and full load.
The reliability of the ignition system is critical for efficient catalytic converter operation, since misfiring will lead to
irreparable damage of the catalytic converter due to the overheating that occurs when unburned combustion gases
are burnt inside it.
CAUTION: If the engine is misfiring, it should be shut down immediately and the cause rectified. Failure to do
so will result in irreparable damage to the catalytic converter.
CAUTION: Ensure the exhaust system is free from leaks. Exhaust gas leaks upstream of the catalytic
converter could cause internal damage to the catalytic converter.
CAUTION: Serious damage to the engine may occur if a lower octane number fuel than recommended is used.
Serious damage to the catalytic converter and oxygen sensors will occur if leaded fuel is used.
Air : Fuel Ratio
The theoretical ideal air:fuel ratio to ensure complete combustion and minimise emissions in a spark-ignition engine
is 14.7:1 and is referred to as the stoichiometric ratio.
The excess air factor is denoted by the Lambda symbol λ, and is used to indicate how far the air:fuel mixture ratio
deviates from the theoretical optimum during any particular operating condition.
lWhen λ = 1, the air to fuel ratio corresponds to the theoretical optimum of 14.7:1 and is the desired condition for
minimising emissions.
lWhen λ > 1, (i.e. λ = 1.05 to λ = 1.3) there is excess air available (lean mixture) and lower fuel consumption can
be attained at the cost of reduced performance. For mixtures above λ = 1.3, the mixture ceases to be ignitable.
lWhen λ < 1, (i.e. λ = 0.85 to λ = 0.95) there is an air deficiency (rich mixture) and maximum output is available,
but fuel economy is impaired.
The engine management system used with V8 engines operates in a narrower control range about the stoichiometric
ideal between λ = 0.97 to 1.03 using closed-loop control techniques. When the engine is warmed up and operating
under normal conditions, it is essential to maintain λ close to the ideal (λ = 1) to ensure the effective treatment of
exhaust gases by the three-way catalytic converters installed in the downpipes from each exhaust manifold.
Changes in the oxygen content has subsequent effects on the levels of exhaust emissions experienced. The levels
of hydrocarbons and carbon monoxide produced around the stoichiometric ideal control range are minimised, but
peak emission of oxides of nitrogen are experienced around the same range.
Page 245 of 1529

EMISSION CONTROL - V8
17-2-12 DESCRIPTION AND OPERATION
Fuel metering
For a satisfactory combustion process, precise fuel injection quantity, timing and dispersion must be ensured. If the
air:fuel mixture in the combustion chamber is not thoroughly atomized and dispersed during the combustion stroke,
some of the fuel may remain unburnt which will lead to high HC emissions.
Ignition timing
The ignition timing can be changed to minimise exhaust emissions and fuel consumption in response to changes due
to the excess air factor. As the excess air factor increases, the optimum ignition angle is advanced to compensate for
delays in flame propagation.
Exhaust Emission Control Components
The exhaust emission control components are described below:
Catalytic converter
1Exhaust gas from manifold
2Cleaned exhaust gas to tail pipe
3Catalytic converter outer case41st ceramic brick
52nd ceramic brick
6Honeycomb structure
The catalytic converters are located in each of the front pipes from the exhaust manifolds.
The catalytic converter's housings are fabricated from stainless steel and are fully welded at all joints. Each catalytic
converter contains two elements comprising of an extruded ceramic substrate which is formed into a honeycomb of
small cells with a density of 62 cells / cm
2. The ceramic element is coated with a special surface treatment called
'washcoat' which increases the surface area of the catalyst element by approximately 7000 times. A coating is applied
to the washcoat which contains the precious elements Platinum, Palladium and Rhodium in the following relative
concentrations: 1 Pt : 21.6 PD : 1 Rh