reset Lexus CT200h 2013 (in English) User Guide
[x] Cancel search | Manufacturer: LEXUS, Model Year: 2013, Model line: CT200h, Model: Lexus CT200h 2013Pages: 688
Page 124 of 688

1242. Instrument cluster
CT200h_OM_OM76102E_(EE)
Updating the past record data
Vehicles with a navigation system
Update the average fuel consumption by selecting “Update” to measure the cur-
rent fuel consumption again.
Vehicles with a Lexus Display Audio system
Update the average fuel consumption by moving the controller to the left and
select “Update” to measure the current fuel consumption again.
Resetting the data
Vehicles with a navigation system
The fuel consumption data can be deleted by selecting “Clear”.
Vehicles with a Lexus Display Audio system
The fuel consumption data can be deleted by moving the controller to the left and
select “Clear”.
Cruising range
Displays the estimated maximum distance that can be driven with the quantity of
fuel remaining.
This distance is computed based on your average fuel consumption.
As a result, the actual distance that can be driven may differ from that displayed.
Page 163 of 688

163
3 3-3. Adjusting the seats
Operation of each component
CT200h_OM_OM76102E_(EE)
Driving position memory
Your preferred driving position (the position of the driver’s seat and out-
side rear view mirrors) can be recorded and recalled by pressing a button.
Three different driving positions can be recorded into memory.
Recording procedure
Turn the power switch to ON mode.
Check that the shift position is in P.
Adjust the driver’s seat and outside rear view mirrors to the desired
positions.
While pressing the “SET” but-
ton, or within 3 seconds after
the “SET” button is pressed,
press button “1”, “2” or “3”
until the buzzer sounds.
If the selected button has already
been preset, the previously
recorded position will be over-
written.
: If equipped
This feature automatically adjusts the driver’s seat and outside rear view
mirrors to suit your preferences.
Driving position memory
1
2
3
4
Page 230 of 688
2304-5. Using the driving support systems
CT200h_OM_OM76102E_(EE)
Cruise control can be set when
The shift position is in D.
Vehicle speed is above approximately 40 km/h (25 mph).
Accelerating after setting the vehicle speed
The vehicle can be accelerated normally. After acceleration, the set speed
resumes.
Even without canceling the cruise control, the set speed can be increased by
first accelerating the vehicle to the desired speed and then pushing the lever
down to set the new speed.
Automatic cruise control cancelation
Cruise control will stop maintaining the vehicle speed in any of the following sit-
uations.
Actual vehicle speed falls more than approximately 16 km/h (10 mph) below
the preset vehicle speed.
At this time, the memorized set speed is not retained.
Actual vehicle speed is below approximately 40km/h (25 mph).
VSC is activated.
If the warning message for the cruise control is shown on the multi-information
display
Press the “ON-OFF” button once to deactivate the system, and then press the
button again to reactivate the system.
If the cruise control speed cannot be set or if the cruise control cancels immedi-
ately after being activated, there may be a malfunction in the cruise control sys-
tem. Have the vehicle inspected by any authorized Lexus dealer or repairer, or
another duly qualified and equipped professional.
WA R N I N G
To avoid operating the cruise control by mistake
Switch the cruise control off using the “ON-OFF” button when not in use.
Situations unsuitable for cruise control
Do not use cruise control in any of the following situations.
Doing so may result in loss of control and could cause an accident resulting in
death or serious injury.
In heavy traffic
On roads with sharp bends
On winding roads
On slippery roads, such as those covered with rain, ice or snow
On steep hills
Vehicle speed may exceed the set speed when driving down a steep hill.
During emergency towing
Page 300 of 688
297
5 5-3. Using the radio
Audio system
CT200h_OM_OM76102E_(EE)
Radio operation
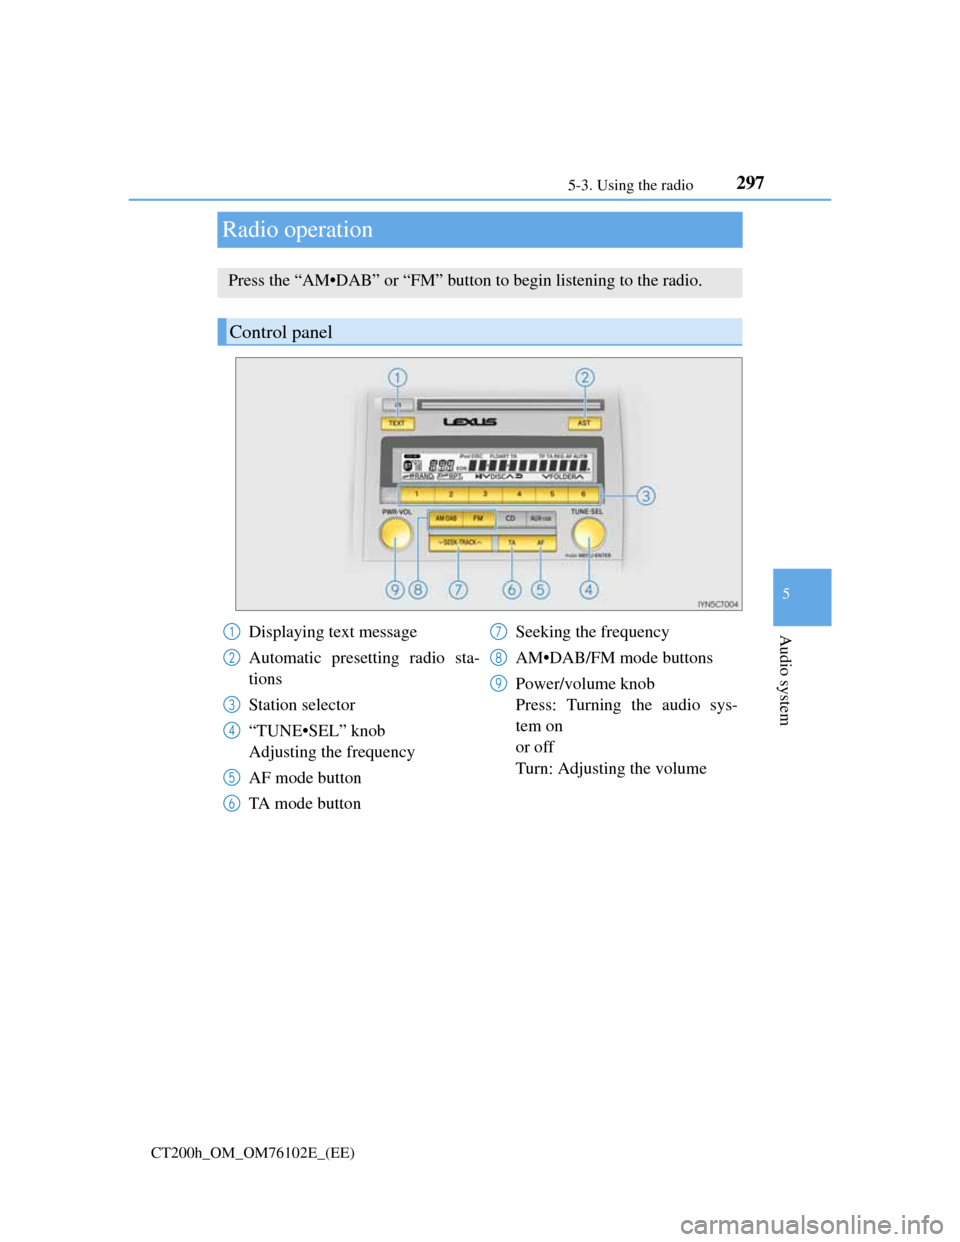
Press the “AM•DAB” or “FM” button to begin listening to the radio.
Control panel
Displaying text message
Automatic presetting radio sta-
tions
Station selector
“TUNE•SEL” knob
Adjusting the frequency
AF mode button
TA mode buttonSeeking the frequency
AM•DAB/FM mode buttons
Power/volume knob
Press: Turning the audio sys-
tem on
or off
Turn: Adjusting the volume1
2
3
4
5
6
7
8
9
Page 301 of 688
2985-3. Using the radio
CT200h_OM_OM76102E_(EE)
Manually operation
Search for the desired stations by turning the “TUNE•SEL” knob or
pressing “”or “” on the “SEEK•TRACK” button.
Press and hold the button (from the “1” button to the “6” button) the
station is to be set to until you hear a beep.
Automatically operation
Press and hold the “AST” button until you hear a beep.
Up to 6 stations are set in order of reception quality. When the set-
ting is complete, 2 beeps will be heard.
This feature allows your radio to receive station and program information
(classical, news, etc.) from radio stations which broadcast this informa-
tion.
Listening to stations of the same network
Press the “AF” button.
“AF-ON”, “REG-OFF” modes:
A station among those of the same network with strong reception is
selected.
“AF-ON”, “REG-ON” modes:
A station among those of the same network with strong reception and
broadcasting the same program is selected.
Each time the “AF” button is pressed, the mode changes in the following
order:
“AF-ON”, “REG-OFF” “AF-ON”, “REG-ON” “AF-OFF”, “REG-
OFF”.
Setting station presets
RDS (Radio Data System)
1
2
Page 303 of 688

3005-3. Using the radio
CT200h_OM_OM76102E_(EE)
EON (Enhanced Other Network) system (for traffic announcement function)
If the RDS station (with EON data) you are listening to is not broadcasting a traf-
fic information program and the audio system is in the TA (traffic announce-
ment) mode, the radio will be switched automatically to a station broadcasting a
traffic information program in the EON AF list when traffic information begins.
When the 12-volt battery is disconnected
All preset stations are erased.
Reception sensitivity
Maintaining perfect radio reception at all times is difficult due to the continu-
ally changing position of the antenna, differences in signal strength and sur-
rounding objects, such as trains, transmitters, etc.
When the “AST” button is used, automatic station selection may not be possi-
ble.
The radio antenna is mounted inside the rear window. To maintain clear radio
reception, do not attach metallic window tinting or other metallic objects to the
antenna wire mounted inside the rear window.
Digital Audio Broadcast (DAB) radio
The optional radio antenna and tuner are necessary for the use of Digital Audio
Broadcast (DAB) radio.
Page 315 of 688

3125-5. Using an external device
CT200h_OM_OM76102E_(EE)
Portable audio device holder (if equipped)
P. 291
About iPod
Apple is not responsible for the operation of this device or its compliance with
safety and regulatory standards.
iPod is a trademark of Apple, Inc., registered in the U.S. and other countries.
iPod functions
When an iPod is connected and the audio source is changed to iPod mode, the
iPod will resume play from the same point in which it was last used.
Depending on the iPod that is connected to the system, certain functions may
not be available. Disconnecting the device and reconnecting it once again may
resolve some malfunctions.
iPod problems
To resolve most problems encountered when using your iPod, disconnect your
iPod from the vehicle iPod connection and reset it.
For instructions on how to reset your iPod, refer to your iPod Owner’s Manual.
Display
P. 304
Error messages
“ERROR”:
This indicates a problem in the iPod or its connection.
“NO MUSIC”:
This indicates that there is no music data in the iPod.
“EMPTY”:
This indicates that an empty playlist is selected.
“UPDATE”:
This indicates that the version of the iPod is not compatible. Upgrade your iPod
software to the latest version.
Page 344 of 688
3415-7. Setup menu
5
Audio system
CT200h_OM_OM76102E_(EE)
Select “Speed Dial” using the “TUNE•SEL” knob
Select the desired data using the knob.
Select the desired preset button, and register the data into speed dial by
either of the following methods:
a. Press the desired preset button, and select “Confirm” using the knob.
b. Press and hold the desired preset button.
Select “Delete Entry” using the “TUNE•SEL” knob
Select the desired data to be deleted using the knob.
Select “Del Spd Dial” using the “TUNE•SEL” knob.
Press the preset button to which the desired speed dial is registered
after the beep.
The name to be deleted will be heard.
Select “Confirm” using the knob.
Adding an entry to the phonebook
Up to 20 names can be stored.
Limitation of number of digits
A phone number that exceeds 24 digits cannot be registered.
Setting speed dials
Deleting the registered data
Deleting speed dials
1
2
3
1
2
1
2
3
Page 347 of 688
3445-9. Bluetooth® Phone
CT200h_OM_OM76102E_(EE)
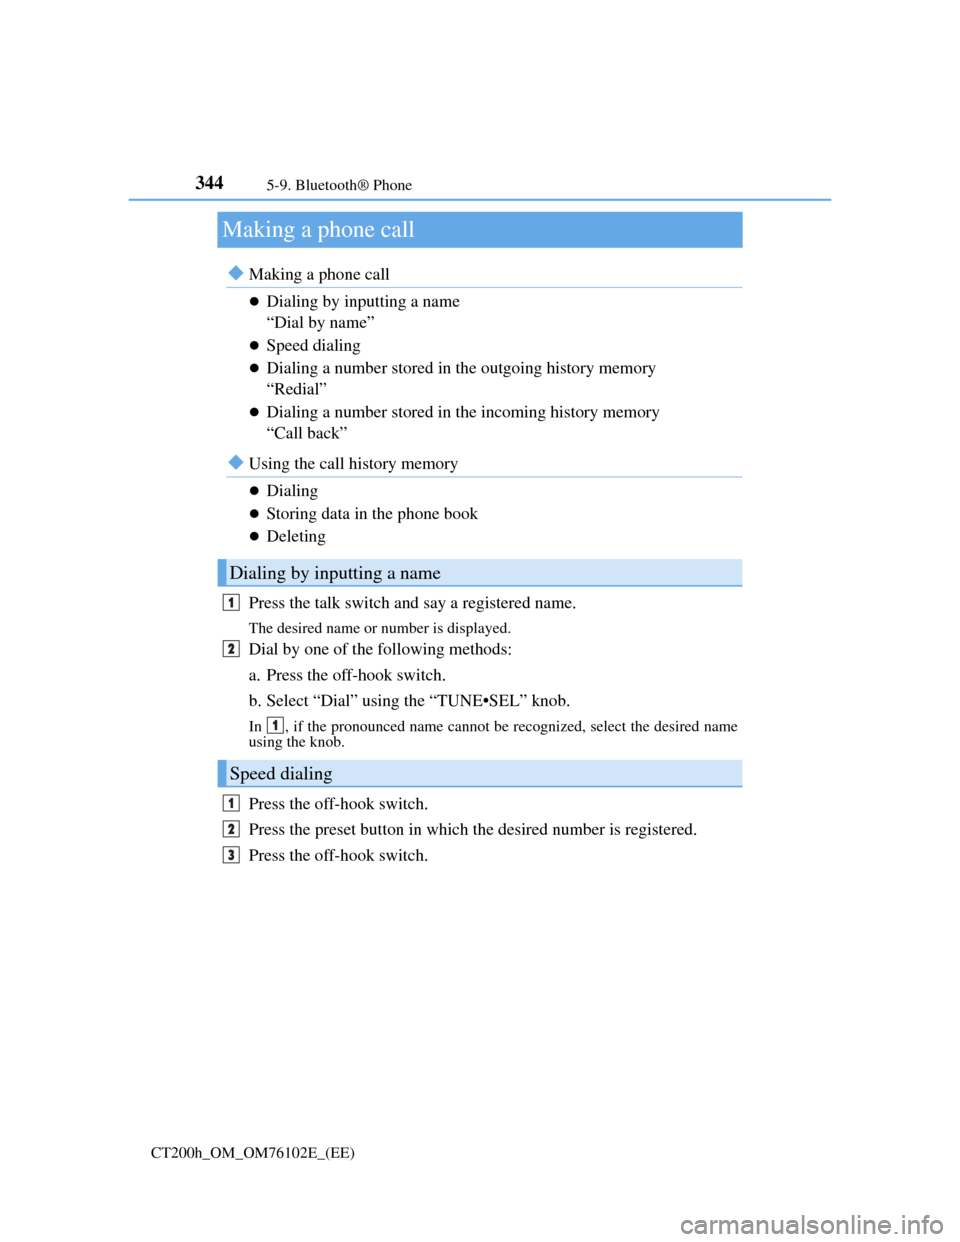
Making a phone call
Making a phone call
Dialing by inputting a name
“Dial by name”
Speed dialing
Dialing a number stored in the outgoing history memory
“Redial”
Dialing a number stored in the incoming history memory
“Call back”
Using the call history memory
Dialing
Storing data in the phone book
Deleting
Press the talk switch and say a registered name.
The desired name or number is displayed.
Dial by one of the following methods:
a. Press the off-hook switch.
b. Select “Dial” using the “TUNE•SEL” knob.
In , if the pronounced name cannot be recognized, select the desired name
using the knob.
Press the off-hook switch.
Press the preset button in which the desired number is registered.
Press the off-hook switch.
Dialing by inputting a name
Speed dialing
1
2
1
1
2
3
Page 370 of 688
3665-12. Setup (Lexus Display Audio System)
CT200h_OM_OM76102E_(EE)
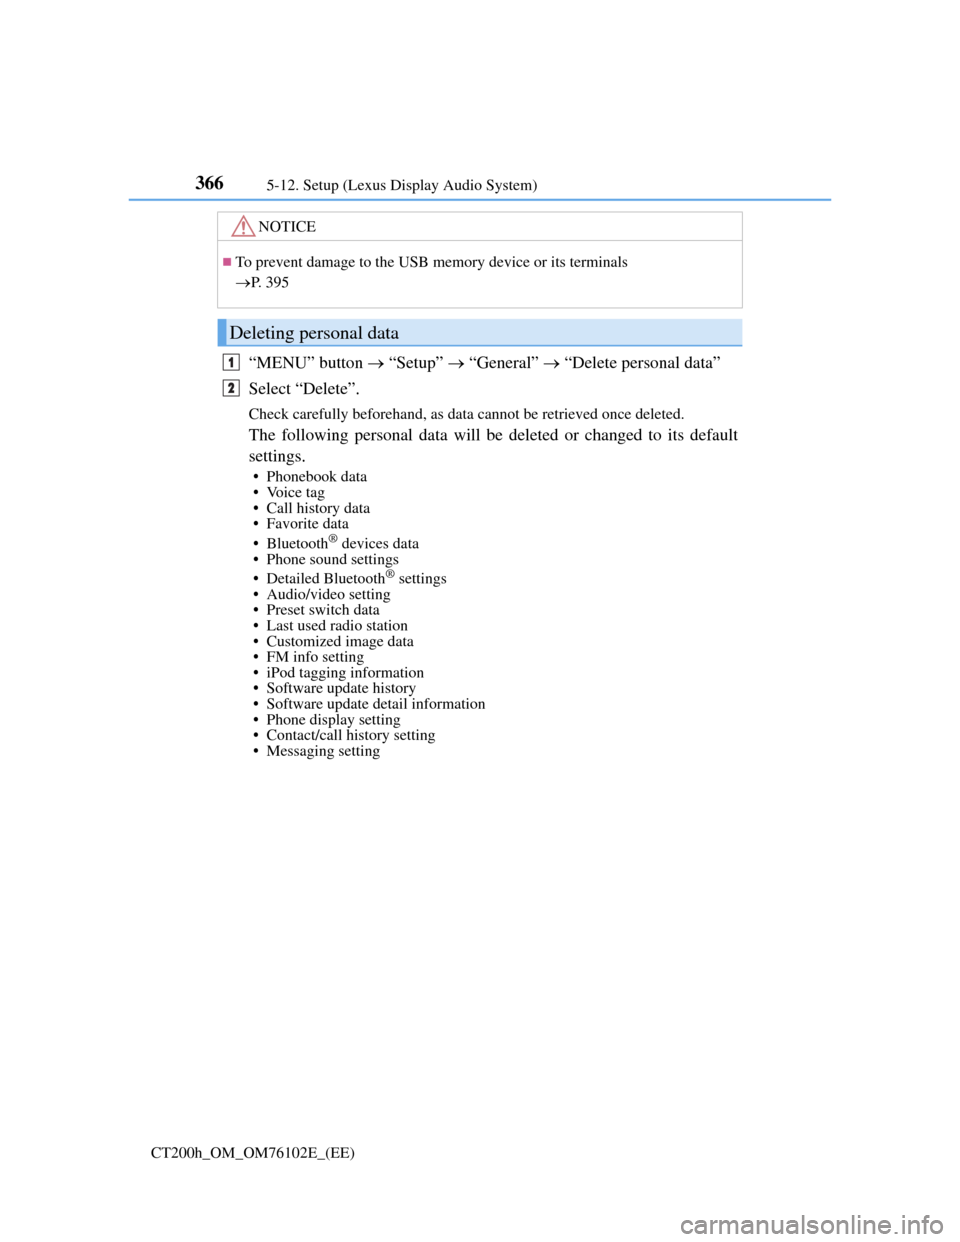
“MENU” button “Setup” “General” “Delete personal data”
Select “Delete”.
Check carefully beforehand, as data cannot be retrieved once deleted.
The following personal data will be deleted or changed to its default
settings.
• Phonebook data
• Voice tag
• Call history data
• Favorite data
•Bluetooth
® devices data
• Phone sound settings
• Detailed Bluetooth
® settings
• Audio/video setting
• Preset switch data
• Last used radio station
• Customized image data
• FM info setting
• iPod tagging information
• Software update history
• Software update detail information
• Phone display setting
• Contact/call history setting
• Messaging setting
NOTICE
To prevent damage to the USB memory device or its terminals
P. 3 9 5
Deleting personal data
1
2