turn signal Lexus CT200h 2013 (in English) User Guide
[x] Cancel search | Manufacturer: LEXUS, Model Year: 2013, Model line: CT200h, Model: Lexus CT200h 2013Pages: 688
Page 384 of 688
3805-14. Using the radio (Lexus Display Audio System)
CT200h_OM_OM76102E_(EE)
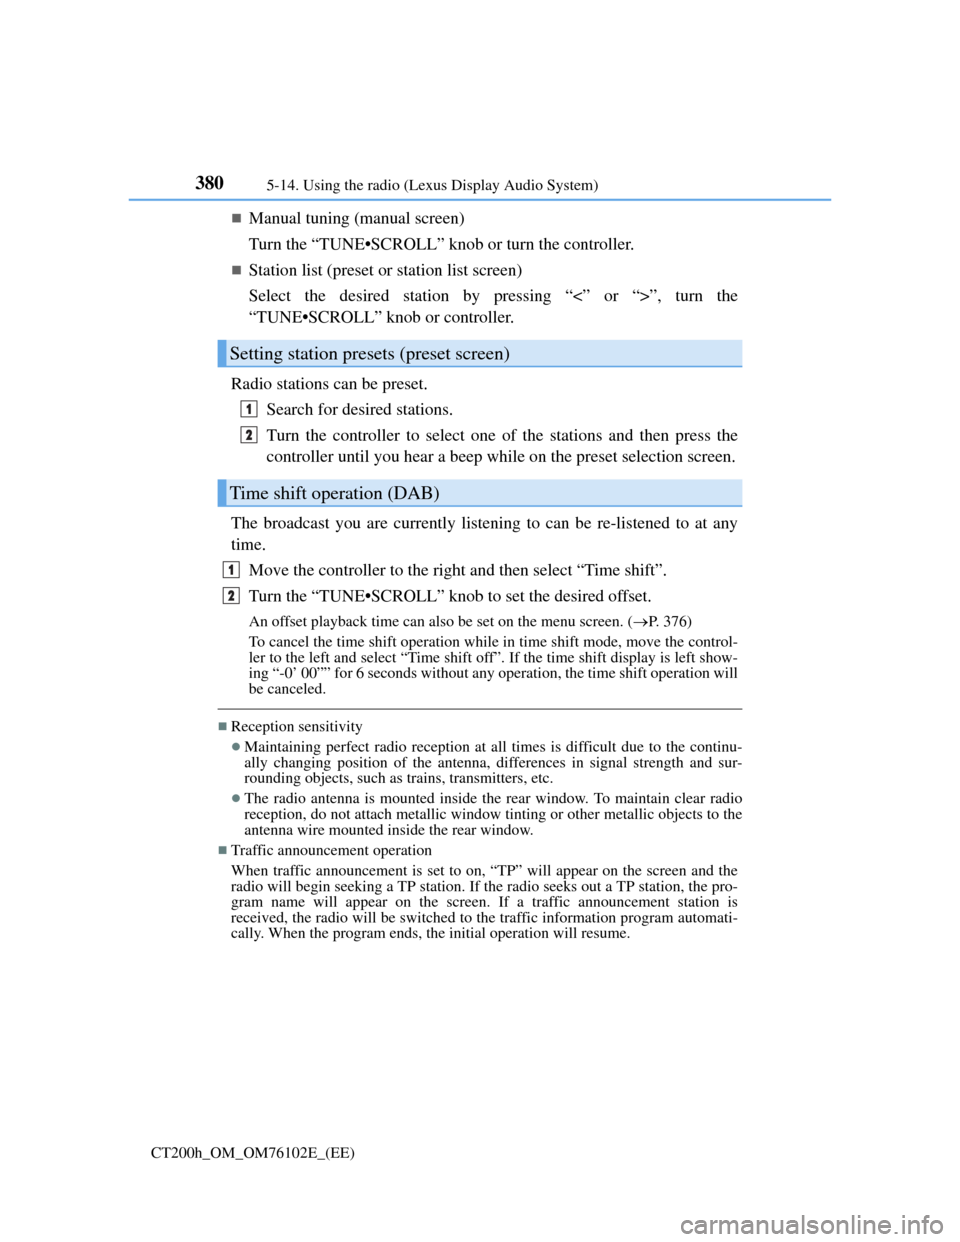
Manual tuning (manual screen)
Turn the “TUNE•SCROLL” knob or turn the controller.
Station list (preset or station list screen)
Select the desired station by pressing “<” or “>”, turn the
“TUNE•SCROLL” knob or controller.
Radio stations can be preset.
Search for desired stations.
Turn the controller to select one of the stations and then press the
controller until you hear a beep while on the preset selection screen.
The broadcast you are currently listening to can be re-listened to at any
time.
Move the controller to the right and then select “Time shift”.
Turn the “TUNE•SCROLL” knob to set the desired offset.
An offset playback time can also be set on the menu screen. (P. 3 7 6 )
To cancel the time shift operation while in time shift mode, move the control-
ler to the left and select “Time shift off”. If the time shift display is left show-
ing “-0’ 00”” for 6 seconds without any operation, the time shift operation will
be canceled.
Reception sensitivity
Maintaining perfect radio reception at all times is difficult due to the continu-
ally changing position of the antenna, differences in signal strength and sur-
rounding objects, such as trains, transmitters, etc.
The radio antenna is mounted inside the rear window. To maintain clear radio
reception, do not attach metallic window tinting or other metallic objects to the
antenna wire mounted inside the rear window.
Traffic announcement operation
When traffic announcement is set to on, “TP” will appear on the screen and the
radio will begin seeking a TP station. If the radio seeks out a TP station, the pro-
gram name will appear on the screen. If a traffic announcement station is
received, the radio will be switched to the traffic information program automati-
cally. When the program ends, the initial operation will resume.
Setting station presets (preset screen)
Time shift operation (DAB)
1
2
1
2
Page 406 of 688
4025-17. Connecting Bluetooth® (Lexus Display Audio System)
CT200h_OM_OM76102E_(EE)
Connecting a Bluetooth® phone
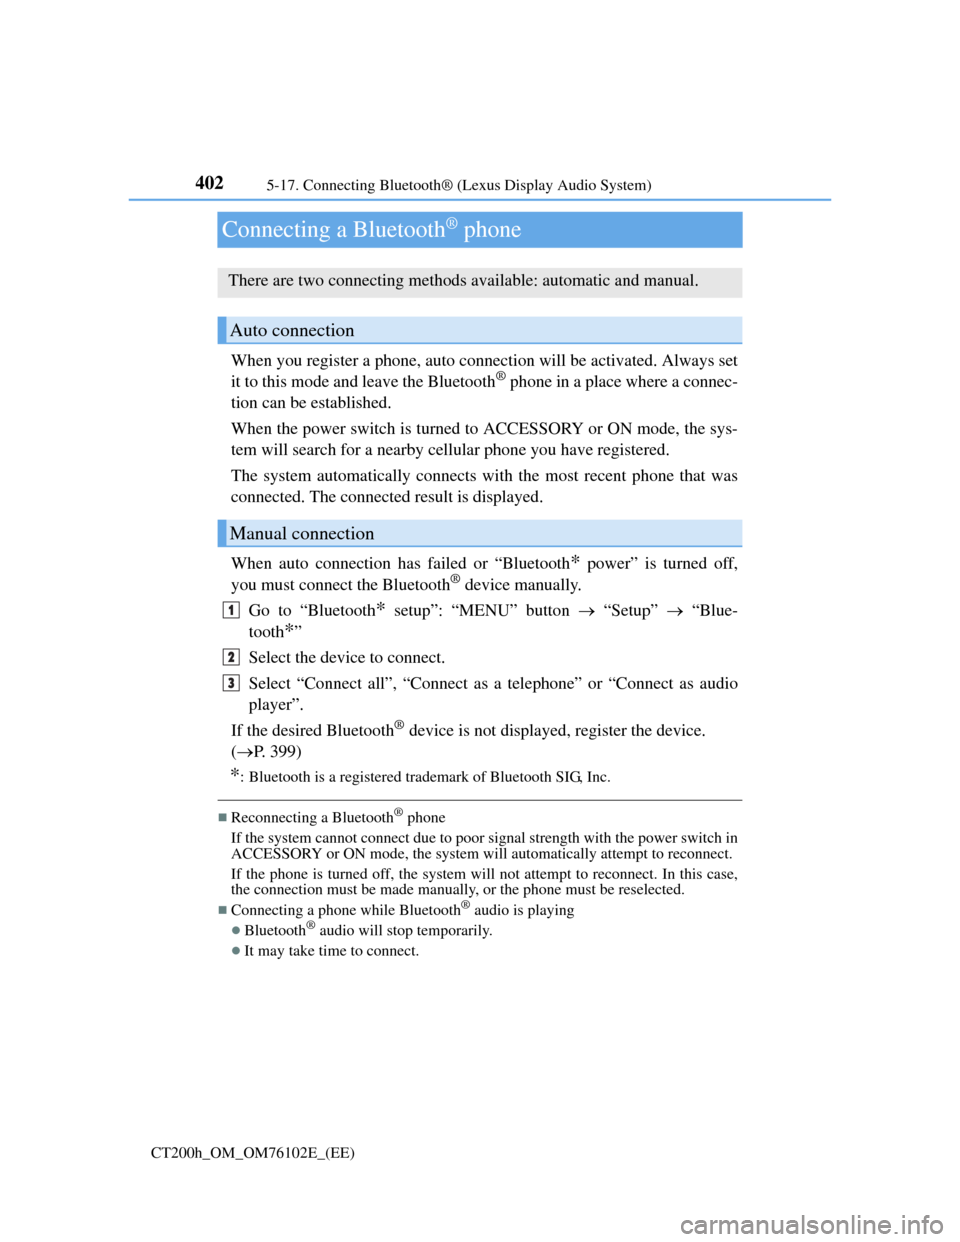
When you register a phone, auto connection will be activated. Always set
it to this mode and leave the Bluetooth® phone in a place where a connec-
tion can be established.
When the power switch is turned to ACCESSORY or ON mode, the sys-
tem will search for a nearby cellular phone you have registered.
The system automatically connects with the most recent phone that was
connected. The connected result is displayed.
When auto connection has failed or “Bluetooth
* power” is turned off,
you must connect the Bluetooth® device manually.
Go to “Bluetooth
* setup”: “MENU” button “Setup” “Blue-
tooth
*”
Select the device to connect.
Select “Connect all”, “Connect as a telephone” or “Connect as audio
player”.
If the desired Bluetooth
® device is not displayed, register the device.
(P. 399)
*: Bluetooth is a registered trademark of Bluetooth SIG, Inc.
Reconnecting a Bluetooth® phone
If the system cannot connect due to poor signal strength with the power switch in
ACCESSORY or ON mode, the system will automatically attempt to reconnect.
If the phone is turned off, the system will not attempt to reconnect. In this case,
the connection must be made manually, or the phone must be reselected.
Connecting a phone while Bluetooth® audio is playing
Bluetooth® audio will stop temporarily.
It may take time to connect.
There are two connecting methods available: automatic and manual.
Auto connection
Manual connection
1
2
3
Page 542 of 688
5387-3. Do-it-yourself maintenance
CT200h_OM_OM76102E_(EE)
Light bulbs
Check the wattage of the light bulb to be replaced. (P. 647)
P. 4 9 6
Front
Vehicles with halogen headlights
You may replace the following bulbs by yourself. The difficulty level of
replacement varies depending on the bulb. As there is a danger that com-
ponents may be damaged, we recommend that replacement is carried out
by any authorized Lexus dealer or repairer, or another duly qualified and
equipped professional.
Preparing for light bulb replacement
Removing the engine compartment cover
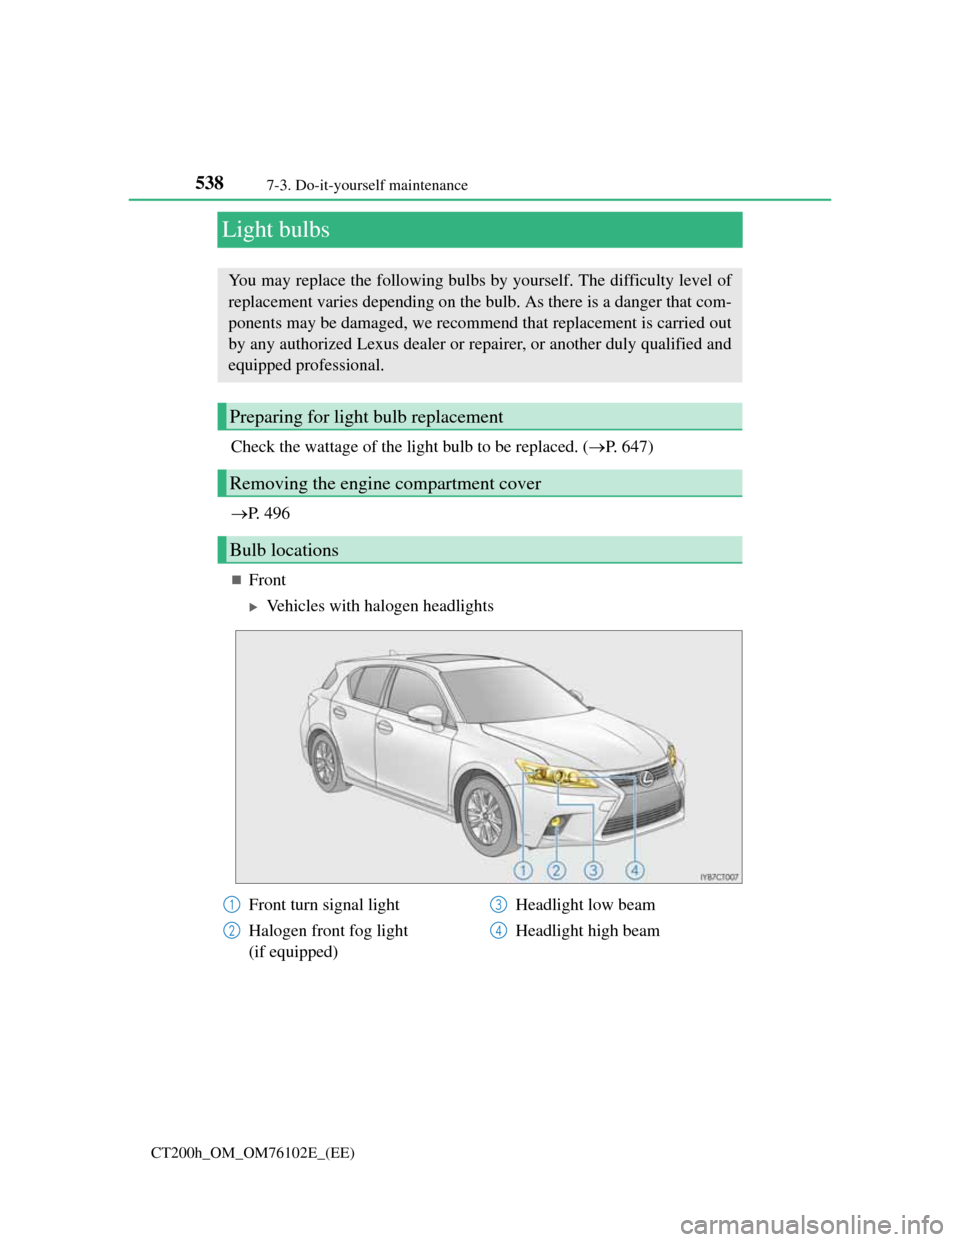
Bulb locations
Front turn signal light
Halogen front fog light
(if equipped)Headlight low beam
Headlight high beam1
2
3
4
Page 543 of 688
5397-3. Do-it-yourself maintenance
CT200h_OM_OM76102E_(EE)
7
Maintenance and care
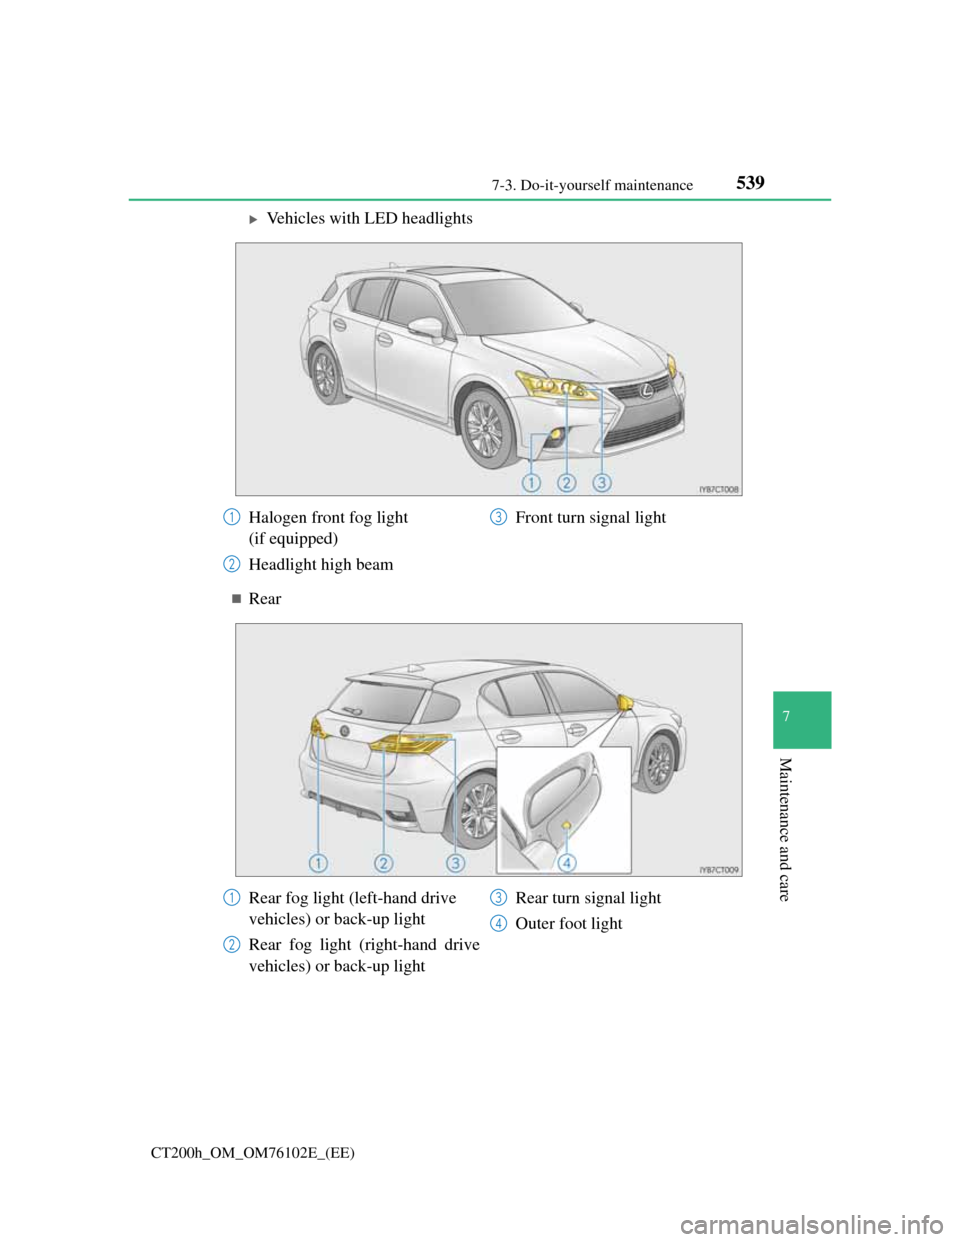
Vehicles with LED headlights
Rear
Halogen front fog light
(if equipped)
Headlight high beamFront turn signal light1
2
3
Rear fog light (left-hand drive
vehicles) or back-up light
Rear fog light (right-hand drive
vehicles) or back-up lightRear turn signal light
Outer foot light1
2
3
4
Page 551 of 688

5477-3. Do-it-yourself maintenance
CT200h_OM_OM76102E_(EE)
7
Maintenance and care
Front turn signal lights (halogen headlights)
Turn the bulb base counter-
clockwise.
Remove the light bulb.
When installing, reverse the steps listed.
1
2
3
Page 552 of 688

5487-3. Do-it-yourself maintenance
CT200h_OM_OM76102E_(EE)
Front turn signal lights (LED headlights)
Left side
Remove the power control unit
cover.
Turn the bulb base counter-
clockwise.
Remove the light bulb.
When installing, reverse the steps listed.
1
2
3
4
Page 554 of 688
5507-3. Do-it-yourself maintenance
CT200h_OM_OM76102E_(EE)
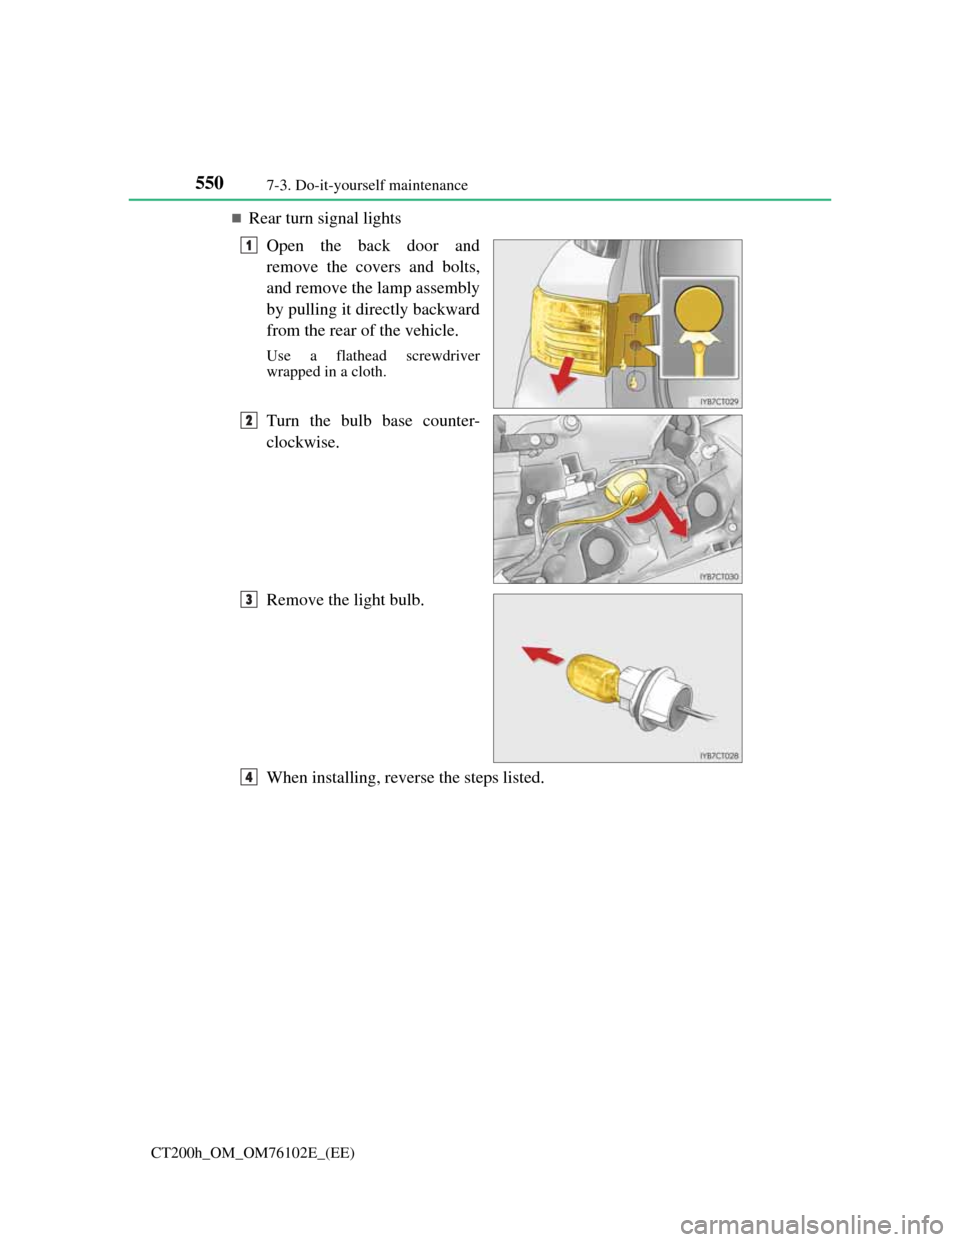
Rear turn signal lights
Open the back door and
remove the covers and bolts,
and remove the lamp assembly
by pulling it directly backward
from the rear of the vehicle.
Use a flathead screwdriver
wrapped in a cloth.
Turn the bulb base counter-
clockwise.
Remove the light bulb.
When installing, reverse the steps listed.
1
2
3
4
Page 558 of 688
5547-3. Do-it-yourself maintenance
CT200h_OM_OM76102E_(EE)
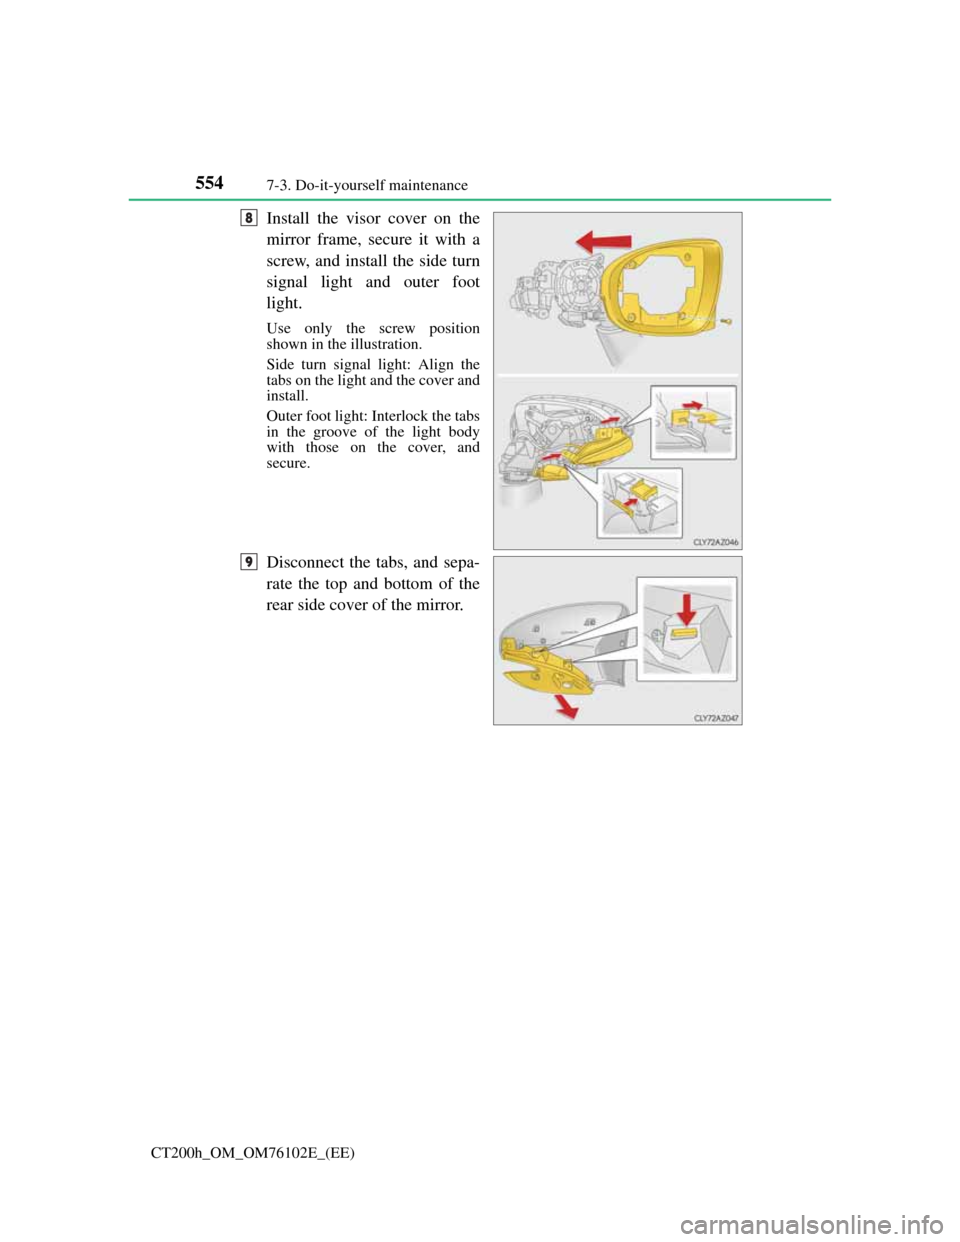
Install the visor cover on the
mirror frame, secure it with a
screw, and install the side turn
signal light and outer foot
light.
Use only the screw position
shown in the illustration.
Side turn signal light: Align the
tabs on the light and the cover and
install.
Outer foot light: Interlock the tabs
in the groove of the light body
with those on the cover, and
secure.
Disconnect the tabs, and sepa-
rate the top and bottom of the
rear side cover of the mirror.
8
9
Page 560 of 688
5567-3. Do-it-yourself maintenance
CT200h_OM_OM76102E_(EE)
Replacing the following bulbs
If any of the lights listed below has burnt out, have it replaced by any
authorized Lexus dealer or repairer, or another duly qualified and
equipped professional.
Headlight low beams (LED type)
Daytime running lights and front position lights
LED front fog lights (if equipped)
Side turn signal lights
Stop/tail lights
High mounted stoplight
License plate lights
After replacing the bulbs
LED lights
The headlight low beams (LED type), front position lights, daytime running
lights, LED front fog lights (if equipped), side turn signal lights, stop/tail lights,
high mounted stoplight and license plate lights consist of a number of LEDs. If
any of the LEDs burn out, take your vehicle to any authorized Lexus dealer or
repairer, or another duly qualified and equipped professional to have the light
replaced.
Condensation build-up on the inside of the lens
Temporary condensation build-up on the inside of the headlight lens does not
indicate a malfunction. Contact any authorized Lexus dealer or repairer, or
another duly qualified and equipped professional for more information in the fol-
lowing situations:
Large drops of water have built up on the inside of the lens.
Water has built up inside the headlight.
When replacing light bulbs
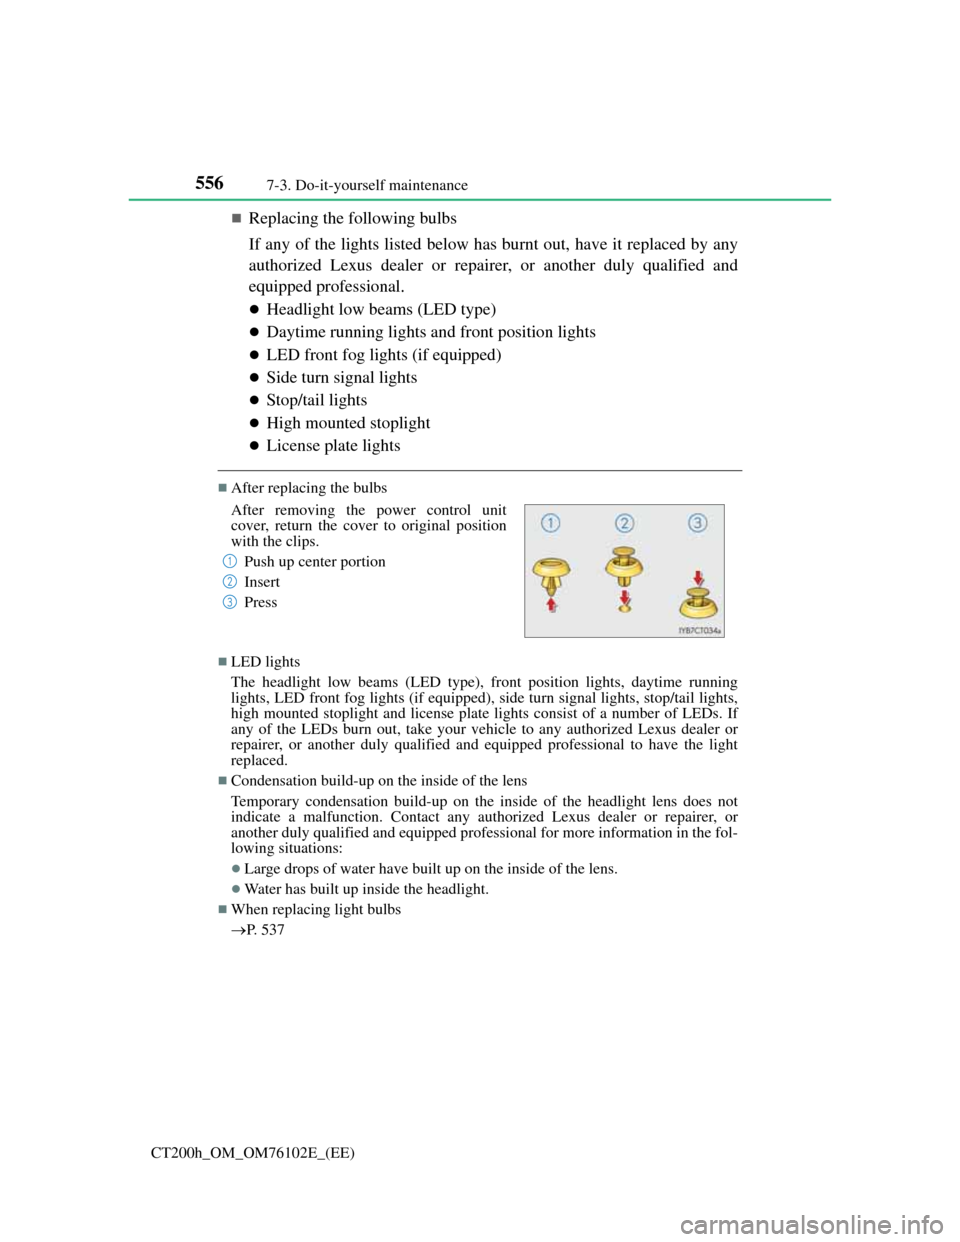
P. 537 After removing the power control unit
cover, return the cover to original position
with the clips.
Push up center portion
Insert
Press
1
2
3
Page 564 of 688
5608-1. Essential information
CT200h_OM_OM76102E_(EE)
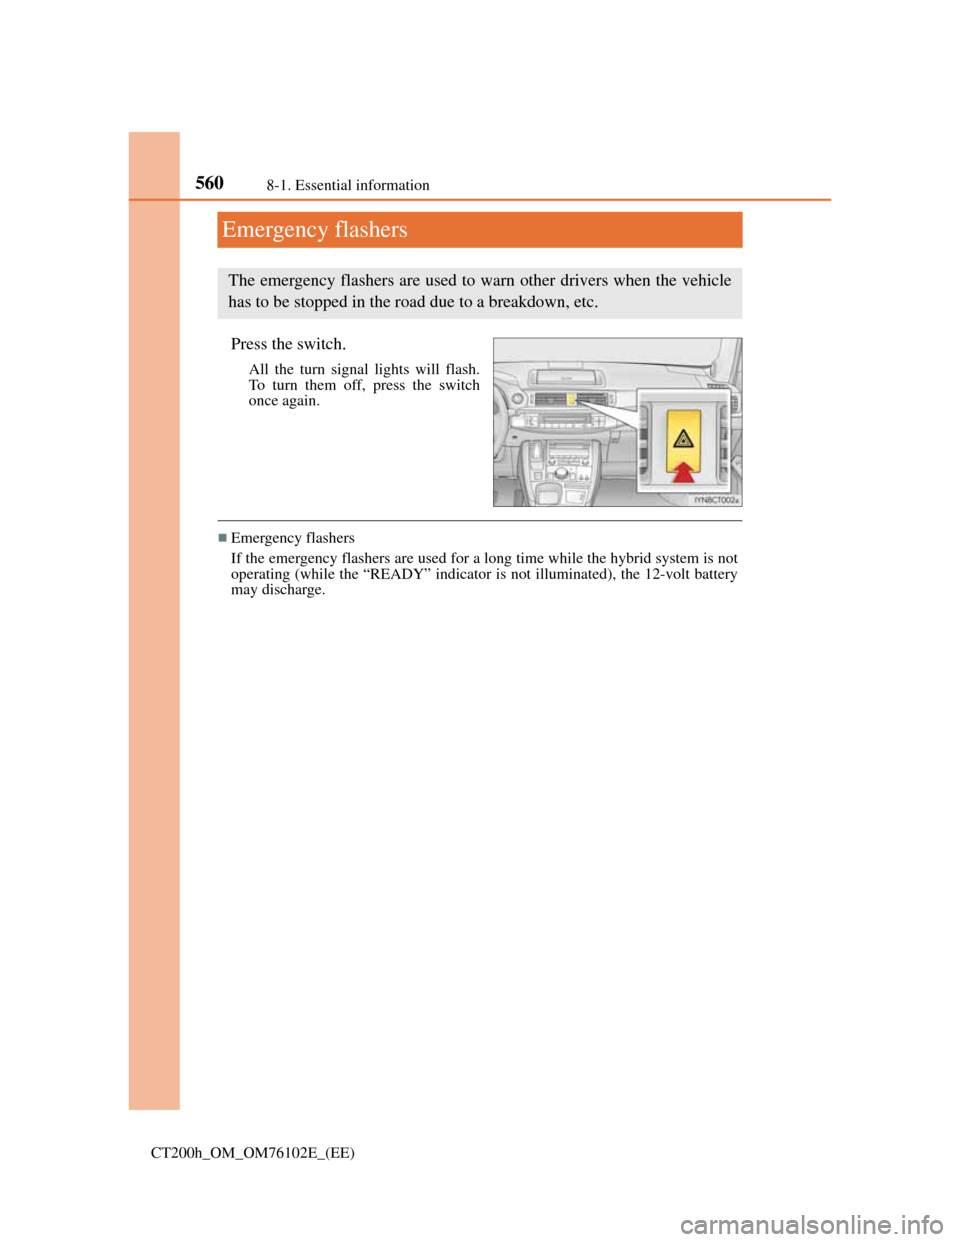
Emergency flashers
Press the switch.
All the turn signal lights will flash.
To turn them off, press the switch
once again.
Emergency flashers
If the emergency flashers are used for a long time while the hybrid system is not
operating (while the “READY” indicator is not illuminated), the 12-volt battery
may discharge.
The emergency flashers are used to warn other drivers when the vehicle
has to be stopped in the road due to a breakdown, etc.