Lexus ES300h 2015 Specifications / Owner's Manual (OM33B99U)
Manufacturer: LEXUS, Model Year: 2015,
Model line: ES300h,
Model: Lexus ES300h 2015
Pages: 784, PDF Size: 9.63 MB
Lexus ES300h 2015 Specifications / Owner's Manual (OM33B99U)
ES300h 2015
Lexus
Lexus
https://www.carmanualsonline.info/img/36/12881/w960_12881-0.png
Lexus ES300h 2015 Specifications / Owner's Manual (OM33B99U)
Trending: height adjustment, wiring, driver seat adjustment, change language, ad blue, width, brake fluid
Page 601 of 784
ES350_300h_OM_OM33B99U_(U)
6017-3. Do-it-yourself maintenance
7
Maintenance and care
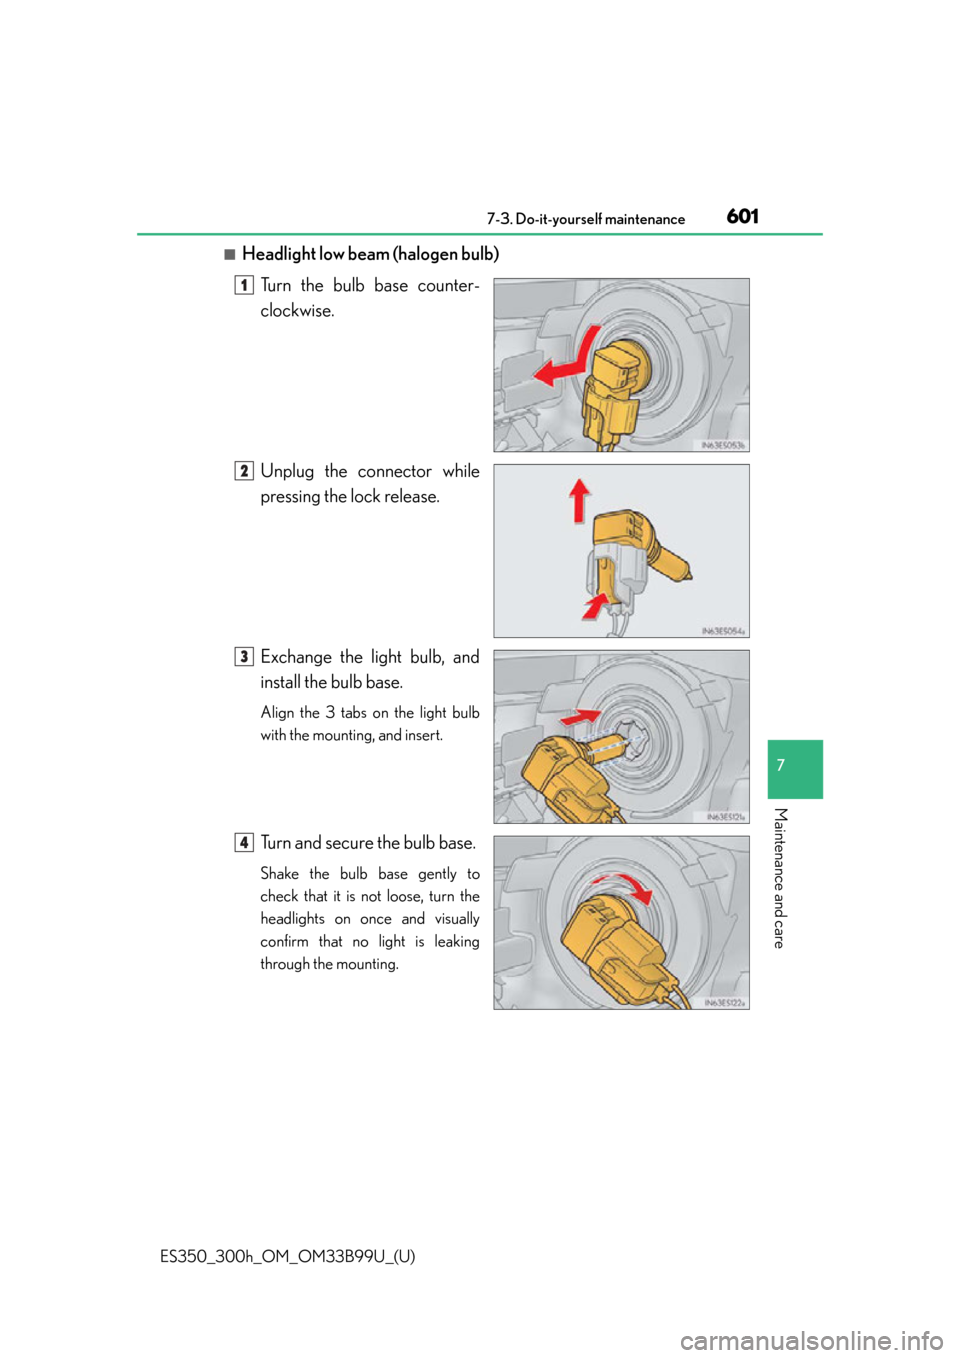
■Headlight low beam (halogen bulb)Turn the bulb base counter-
clockwise.
Unplug the connector while
pressing the lock release.
Exchange the light bulb, and
install the bulb base.
Align the 3 tabs on the light bulb
with the mounting, and insert.
Turn and secure the bulb base.
Shake the bulb base gently to
check that it is not loose, turn the
headlights on once and visually
confirm that no light is leaking
through the mounting.
1
2
3
4
Page 602 of 784
602
ES350_300h_OM_OM33B99U_(U)
7-3. Do-it-yourself maintenance
■Halogen fog lights (if equipped)Remove the bolt and partly
remove the under cover, and
unplug the connector while
pushing the lock release.
Turn the bulb base counter-
clockwise.
Set the new light bulb.
Align the 3 tabs on the light bulb
with the mounting, and insert. Turn
it clockwise to set.
1
2
3
Page 603 of 784
ES350_300h_OM_OM33B99U_(U)
6037-3. Do-it-yourself maintenance
7
Maintenance and care
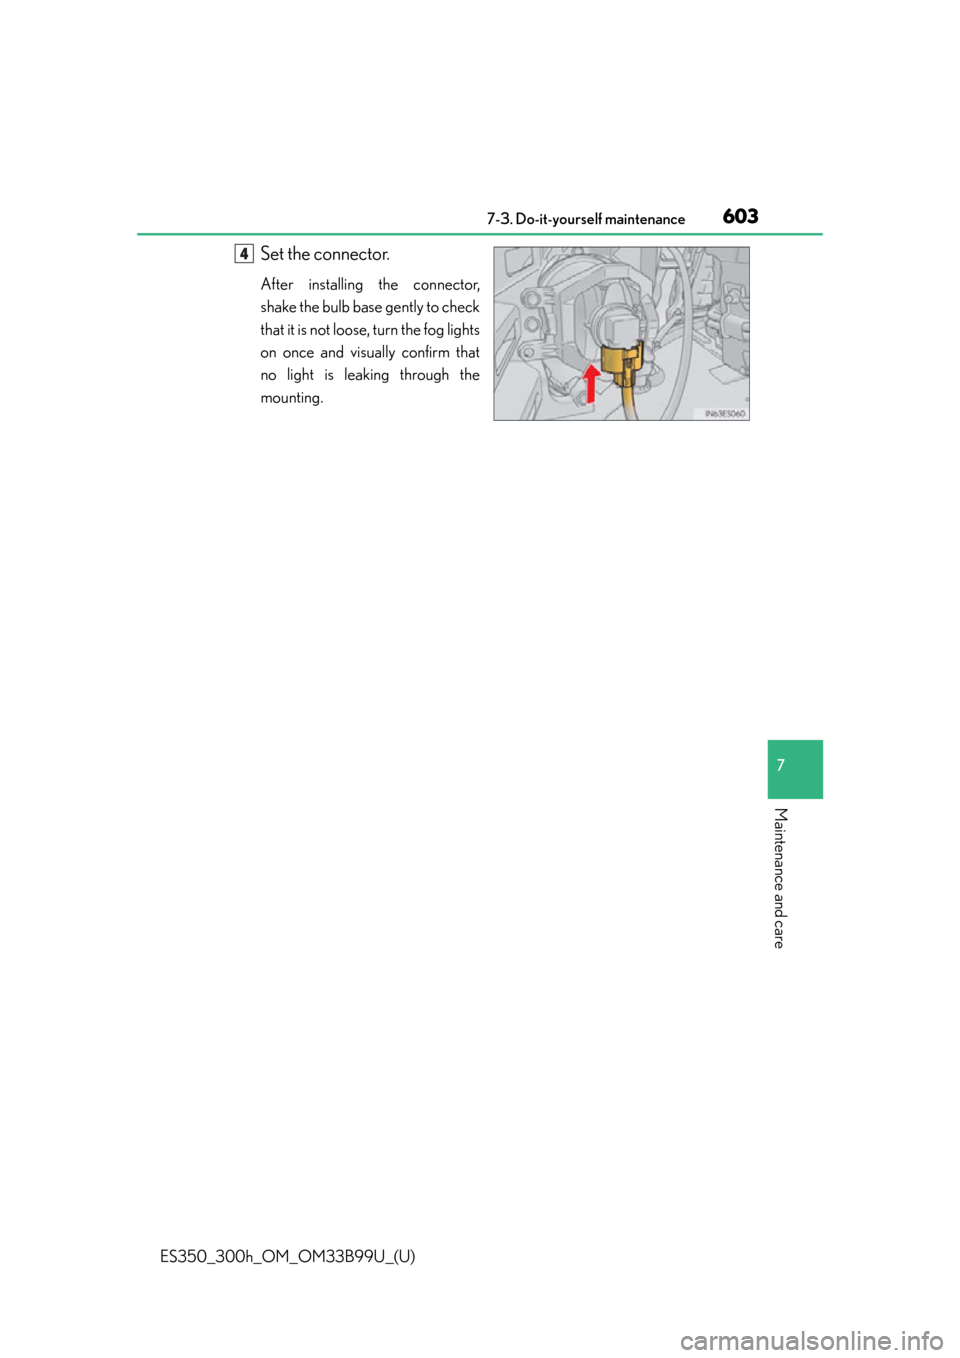
Set the connector.
After installing the connector,
shake the bulb base gently to check
that it is not loose, turn the fog lights
on once and visually confirm that
no light is leaking through the
mounting.
4
Page 604 of 784
604
ES350_300h_OM_OM33B99U_(U)
7-3. Do-it-yourself maintenance
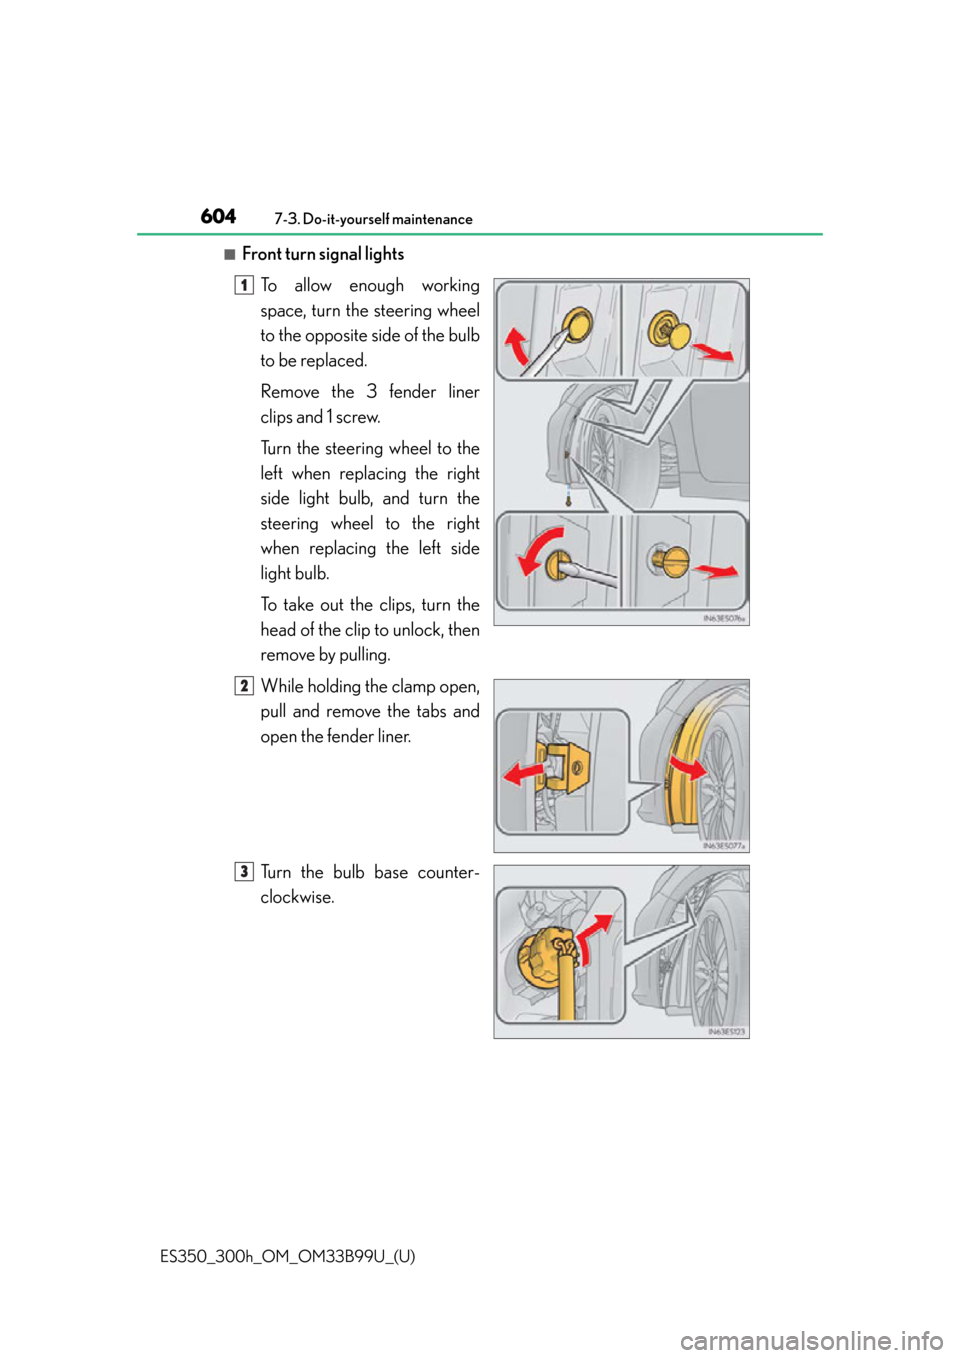
■Front turn signal lightsTo allow enough working
space, turn the steering wheel
to the opposite side of the bulb
to be replaced.
Remove the 3 fender liner
clips and 1 screw.
Turn the steering wheel to the
left when replacing the right
side light bulb, and turn the
steering wheel to the right
when replacing the left side
light bulb.
To take out the clips, turn the
head of the clip to unlock, then
remove by pulling.
While holding the clamp open,
pull and remove the tabs and
open the fender liner.
Turn the bulb base counter-
clockwise.
1
2
3
Page 605 of 784
ES350_300h_OM_OM33B99U_(U)
6057-3. Do-it-yourself maintenance
7
Maintenance and care
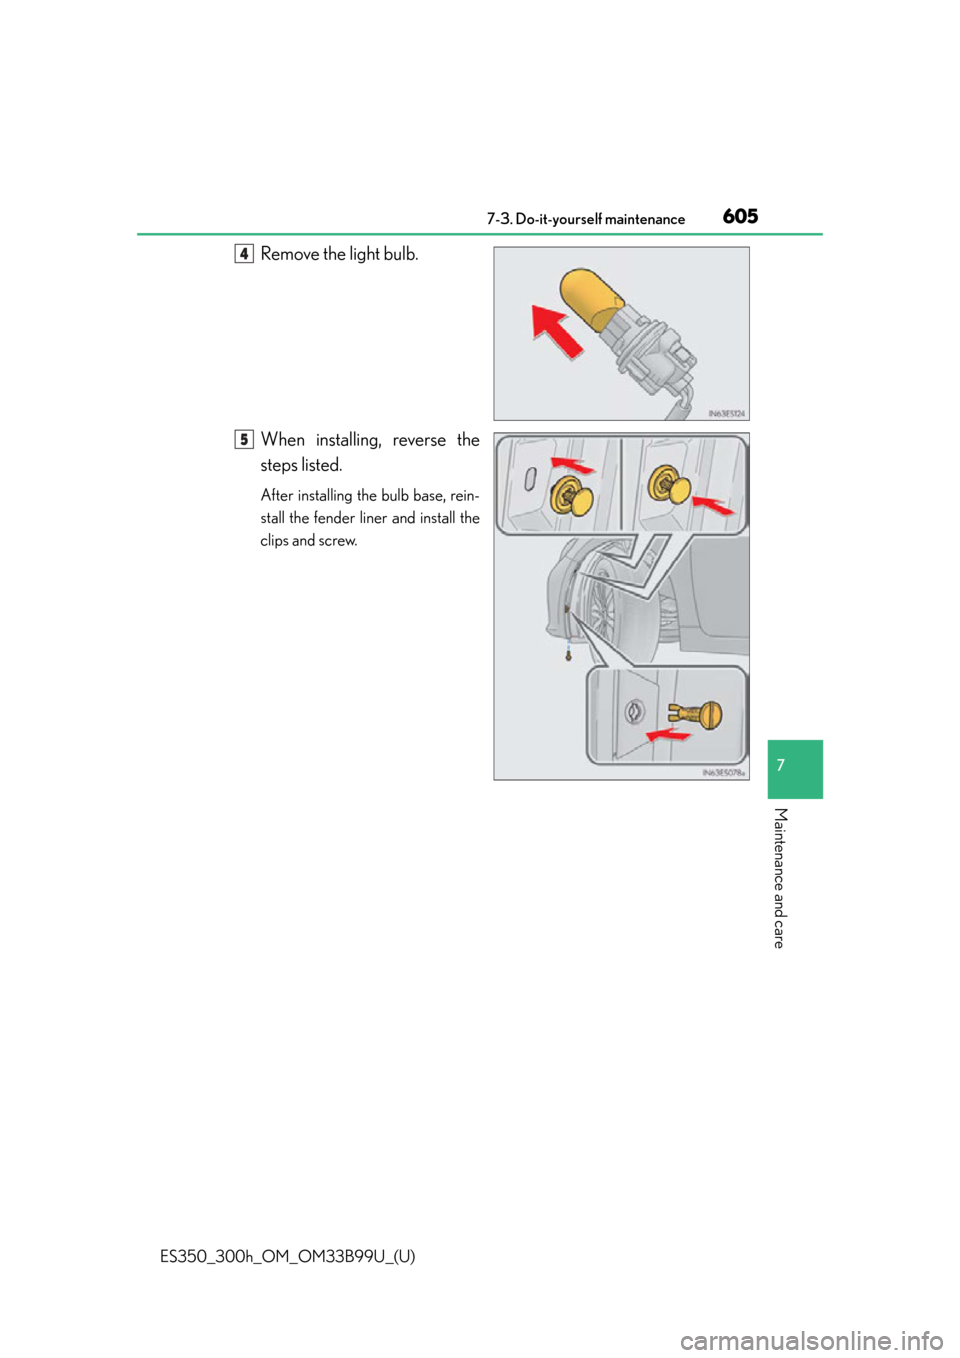
Remove the light bulb.
When installing, reverse the
steps listed.
After installing the bulb base, rein-
stall the fender liner and install the
clips and screw.
4
5
Page 606 of 784
606
ES350_300h_OM_OM33B99U_(U)
7-3. Do-it-yourself maintenance
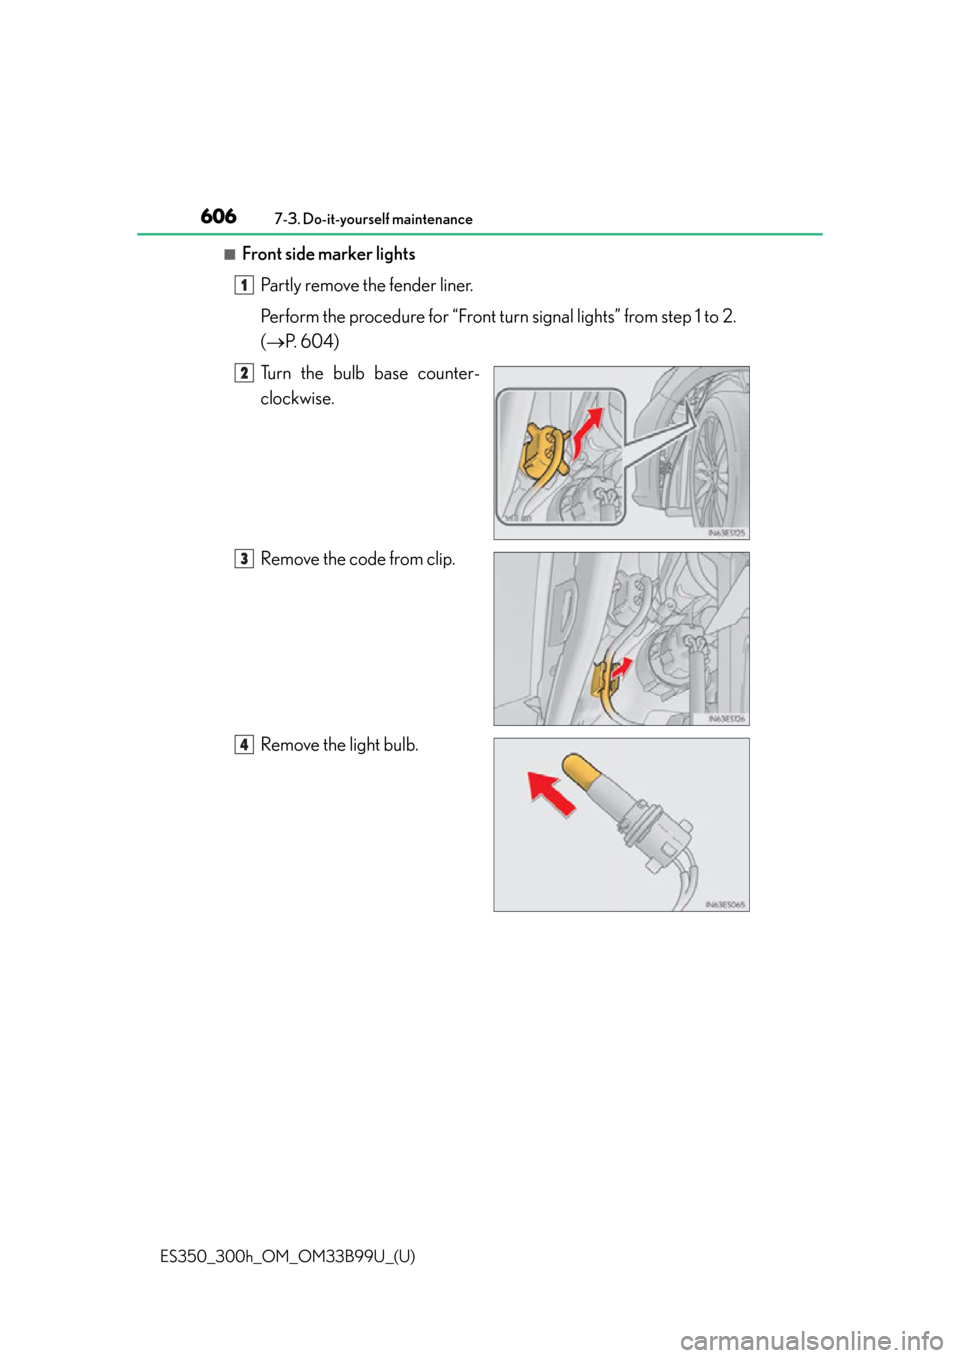
■Front side marker lightsPartly remove the fender liner.
Perform the procedure for “Front turn signal lights” from step 1 to 2.
( P. 6 0 4 )
Turn the bulb base counter-
clockwise.
Remove the code from clip.
Remove the light bulb.
1
2
3
4
Page 607 of 784
ES350_300h_OM_OM33B99U_(U)
6077-3. Do-it-yourself maintenance
7
Maintenance and care
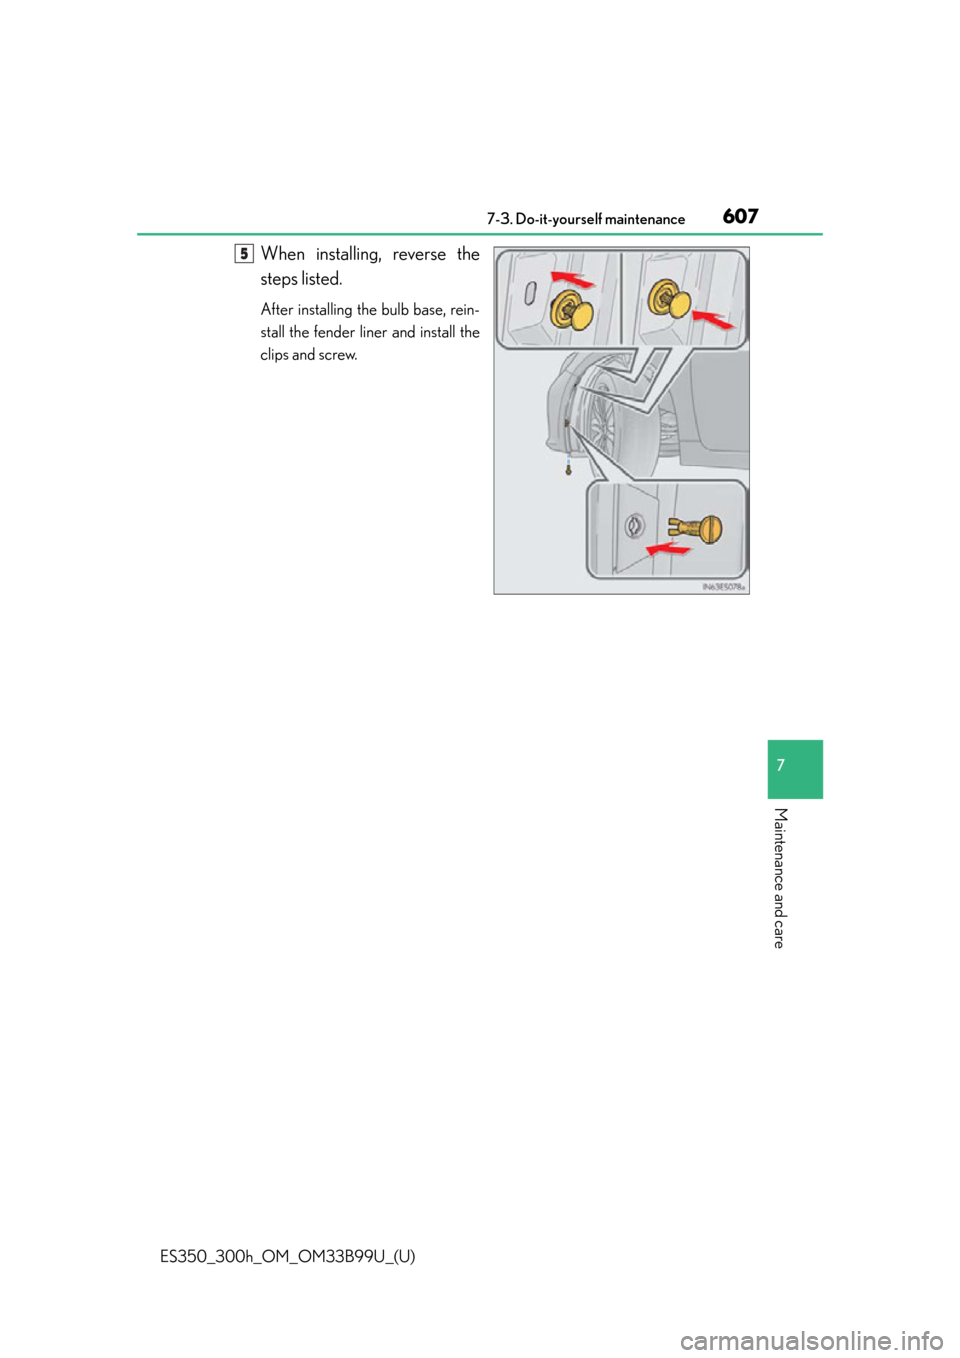
When installing, reverse the
steps listed.
After installing the bulb base, rein-
stall the fender liner and install the
clips and screw.
5
Page 608 of 784
608
ES350_300h_OM_OM33B99U_(U)
7-3. Do-it-yourself maintenance
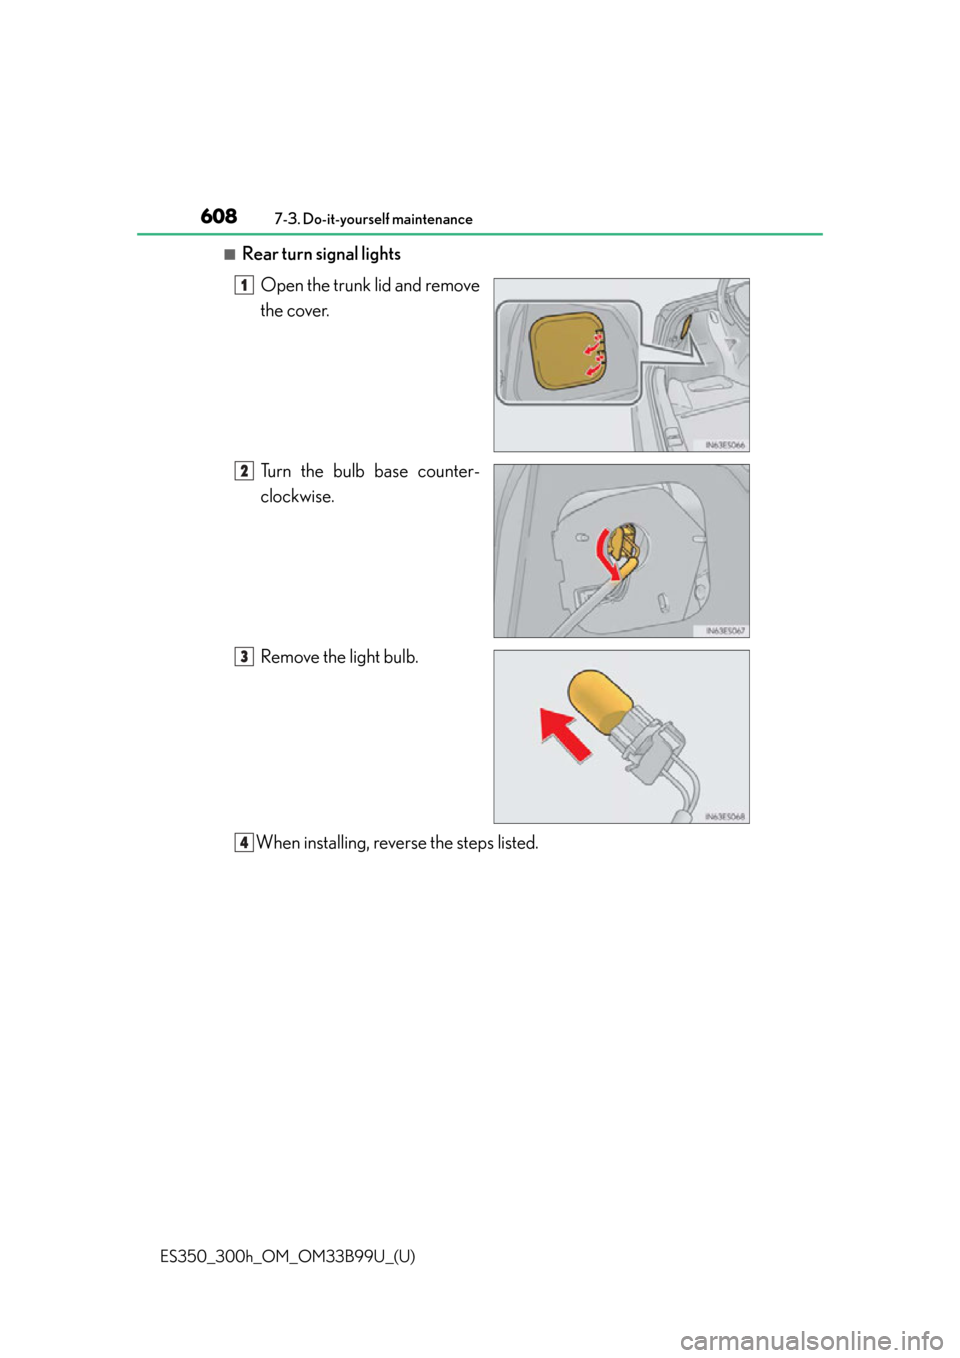
■Rear turn signal lightsOpen the trunk lid and remove
the cover.
Turn the bulb base counter-
clockwise.
Remove the light bulb.
When installing, reverse the steps listed.
1
2
3
4
Page 609 of 784
ES350_300h_OM_OM33B99U_(U)
6097-3. Do-it-yourself maintenance
7
Maintenance and care
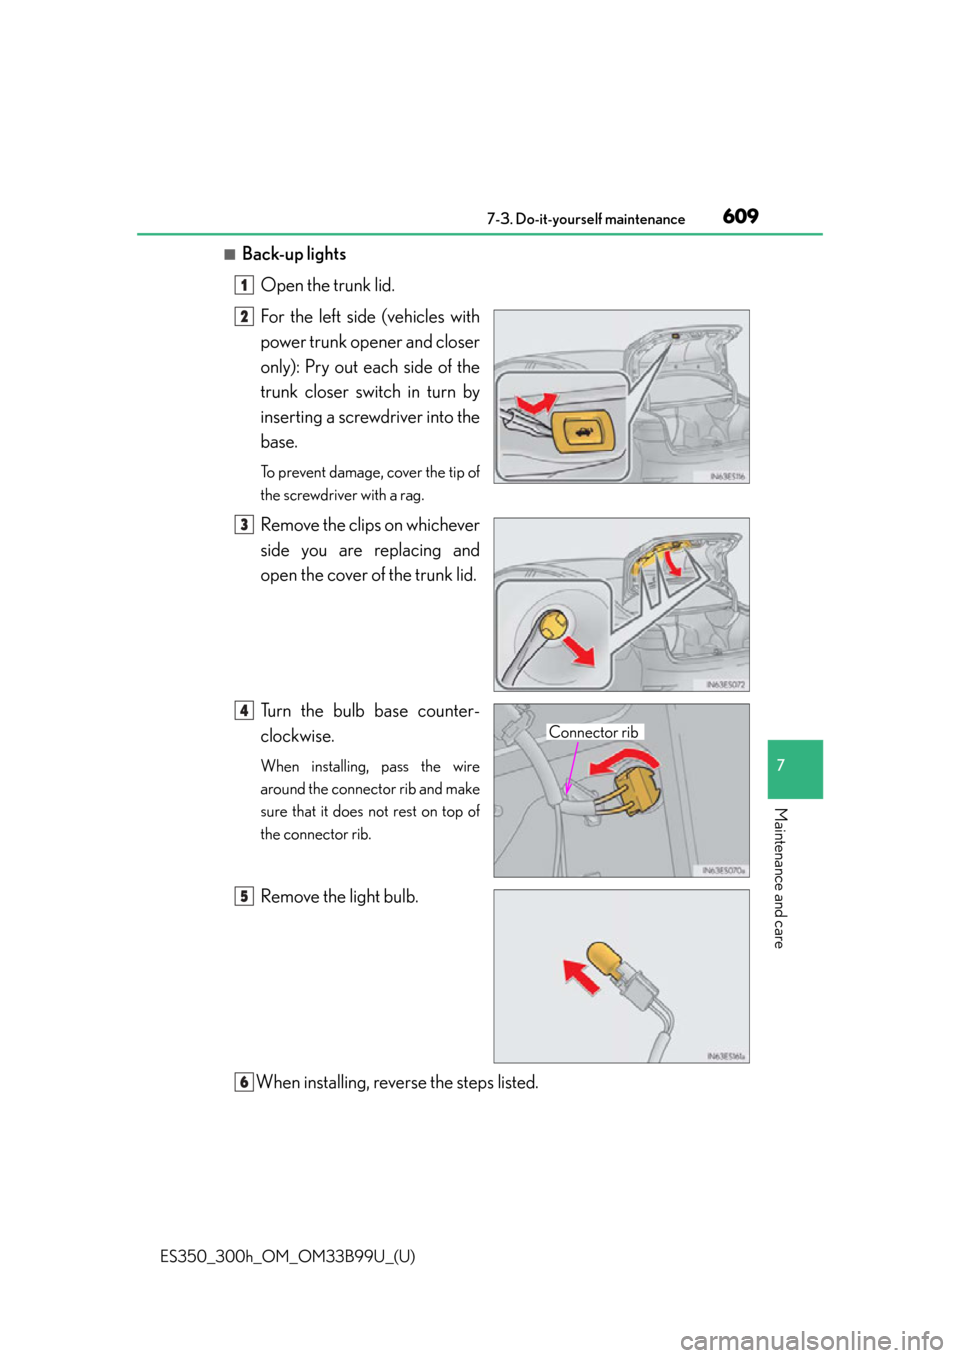
■Back-up lightsOpen the trunk lid.
For the left side (vehicles with
power trunk opener and closer
only): Pry out each side of the
trunk closer switch in turn by
inserting a screwdriver into the
base.
To prevent damage, cover the tip of
the screwdriver with a rag.
Remove the clips on whichever
side you are replacing and
open the cover of the trunk lid.
Turn the bulb base counter-
clockwise.
When installing, pass the wire
around the connector rib and make
sure that it does not rest on top of
the connector rib.
Remove the light bulb.
When installing, reverse the steps listed.
1
2
3
Connector rib
4
5
6
Page 610 of 784

610
ES350_300h_OM_OM33B99U_(U)
7-3. Do-it-yourself maintenance
■Replacing the following bulbs
If any of the lights listed below has burnt out, have it replaced by your
Lexus dealer.
●Headlight low beams (discharge bulbs)
●Parking lights/daytime running lights
●Side turn signal lights
●LED fog lights (if equipped)
●Stop/tail lights
●Tail lights
●Rear side marker lights
●High mounted stoplight
●License plate lights
●Outer foot lights
■Discharge headlights (if equipped)
If voltage to the discharge bulbs is insufficient, the bulbs may not come on, or may go
out temporarily. The discharge bulbs will come on when normal power is restored.
■LED lights
The parking lights/daytime runni ng lights, side turn signal lights, LED fog lights (if
equipped), stop/tail lights, tail lights, rear side marker lights, high mounted stoplight,
license plate lights and outer foot lights co nsist of a number of LEDs. If any of the
LEDs burn out, take your vehicle to your Lexus dealer to have the light replaced.
■Condensation build-up on the inside of the lens
Temporary condensation build-up on the insi de of the headlight lens does not indi-
cate a malfunction. Contact your Lexus dealer for more information in the following
situations:
●Large drops of water have built up on the inside of the lens.
●Water has built up inside the headlight.
■When replacing light bulbs
P. 5 9 7
Trending: width, battery, navigation, fuse box, brake rotor, run flat, keyless
