check engine Lexus ES350 2020 Owner's Manuals / LEXUS 2020 ES350 THROUGH SEPT. 2019 PROD. OWNER'S MANUAL (OM06174U)
[x] Cancel search | Manufacturer: LEXUS, Model Year: 2020, Model line: ES350, Model: Lexus ES350 2020Pages: 448, PDF Size: 9.77 MB
Page 4 of 448
4TABLE OF CONTENTS
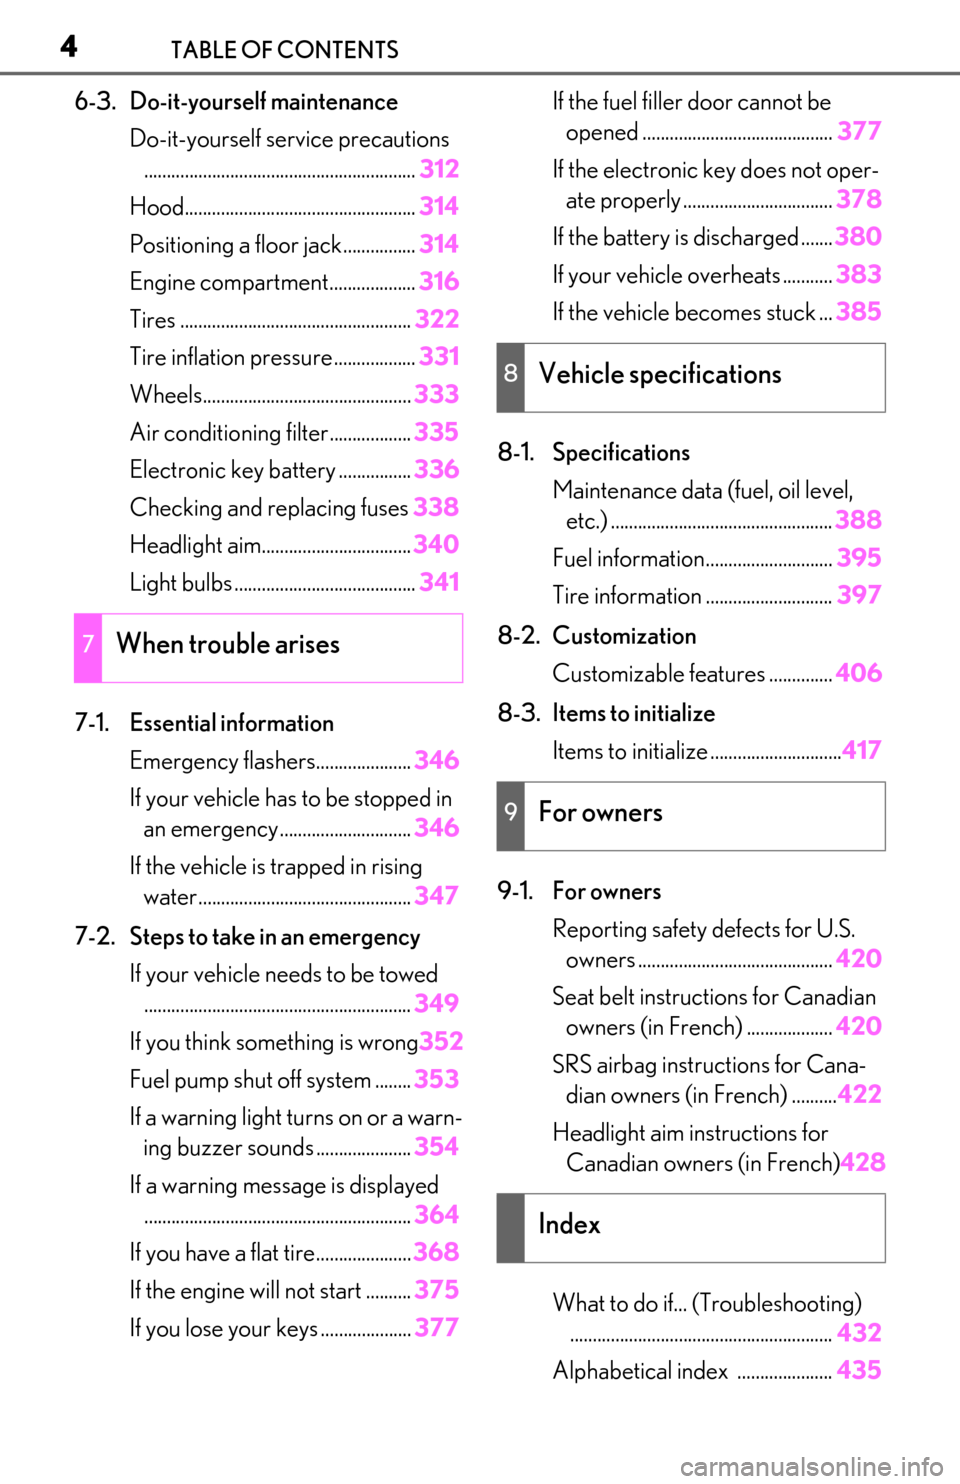
6-3. Do-it-yourself maintenanceDo-it-yourself service precautions............................................................ 312
Hood................................................... 314
Positioning a floor jack................ 314
Engine compartment................... 316
Tires ................................................... 322
Tire inflation pressure .................. 331
Wheels.............................................. 333
Air conditioning filter..................335
Electronic key battery ................ 336
Checking and replacing fuses 338
Headlight aim................................. 340
Light bulbs ........................................ 341
7-1. Essential information Emergency flashers..................... 346
If your vehicle has to be stopped in an emergency ............................. 346
If the vehicle is trapped in rising water............................................... 347
7-2. Steps to take in an emergency If your vehicle needs to be towed........................................................... 349
If you think something is wrong 352
Fuel pump shut off system ........ 353
If a warning light turns on or a warn- ing buzzer sounds ..................... 354
If a warning message is displayed ........................................................... 364
If you have a flat tire..................... 368
If the engine wi ll not start .......... 375
If you lose your keys .................... 377If the fuel filler door cannot be
opened .......................................... 377
If the electronic key does not oper- ate properly ................................. 378
If the battery is discharged ....... 380
If your vehicle overheats ........... 383
If the vehicle becomes stuck ... 385
8-1. Specifications Maintenance data (fuel, oil level, etc.) ................................................. 388
Fuel information............................ 395
Tire information ............................ 397
8-2. Customization Customizable features .............. 406
8-3. Items to initialize Items to initialize ............................. 417
9-1. For owners Reporting safety defects for U.S. owners ........................................... 420
Seat belt instructions for Canadian owners (in French) ................... 420
SRS airbag instructions for Cana- dian owners (in French) .......... 422
Headlight aim instructions for Canadian owners (in French) 428
What to do if... (Troubleshooting) .......................................................... 432
Alphabetical index ..................... 435
7When trouble arises
8Vehicle specifications
9For owners
Index
Page 6 of 448
6
Please note that this manual applies to
all models and explains all equipment,
including options. Therefore, you may
find some explanations for equipment
not installed on your vehicle.
All specifications provided in this man-
ual are current at the time of printing.
However, because of the Lexus policy
of continual product improvement, we
reserve the right to make changes at
any time without notice.
Depending on specifications, the vehi-
cle shown in the illustrations may differ
from your vehicle in terms of color and
equipment.
Approximately five hours after the
engine is turned off, you may hear
sound coming from under the vehicle
for several minutes. This is the sound of
a fuel evaporation leakage check and,
it does not indicate a malfunction.
A wide variety of non-genuine spare
parts and accessories for Lexus vehi-
cles are currently available in the mar-
ket. You should know that Toyota does
not warrant these products and is not
responsible for their performance, repair, or replacement, or for any dam-
age they may cause to, or adverse
effect they may have on, your Lexus
vehicle.
This vehicle should not be modified
with non-genuine Lexus products.
Modification with non-genuine Lexus
products could affect its performance,
safety or durability, and may even vio-
late governmental regulations. In addi-
tion, damage or performance
problems resulting from the modifica-
tion may not be covered under war-
ranty.
The installation of a mobile two-way
radio system in your vehicle could
affect electronic systems such as:
Multiport fuel injection sys-
tem/sequential multiport fuel injec-
tion system
Lexus Safety System + 2.0
Anti-lock brake system
SRS airbag system
Seat belt pretensioner system
Be sure to check with your Lexus
dealer for precautionary measures or
special instructions regarding installa-
tion of a mobile two-way radio system.
The vehicle is equipped with sophisti-
cated computers that will record cer-
tain data, such as:
For your information
Main Owner’s Manual
Noise from under vehicle after
turning off the engine
Accessories, spare parts and
modification of your Lexus
Installation of a mobile two-way
radio system
Vehicle data recording
Page 13 of 448
13Pictorial index
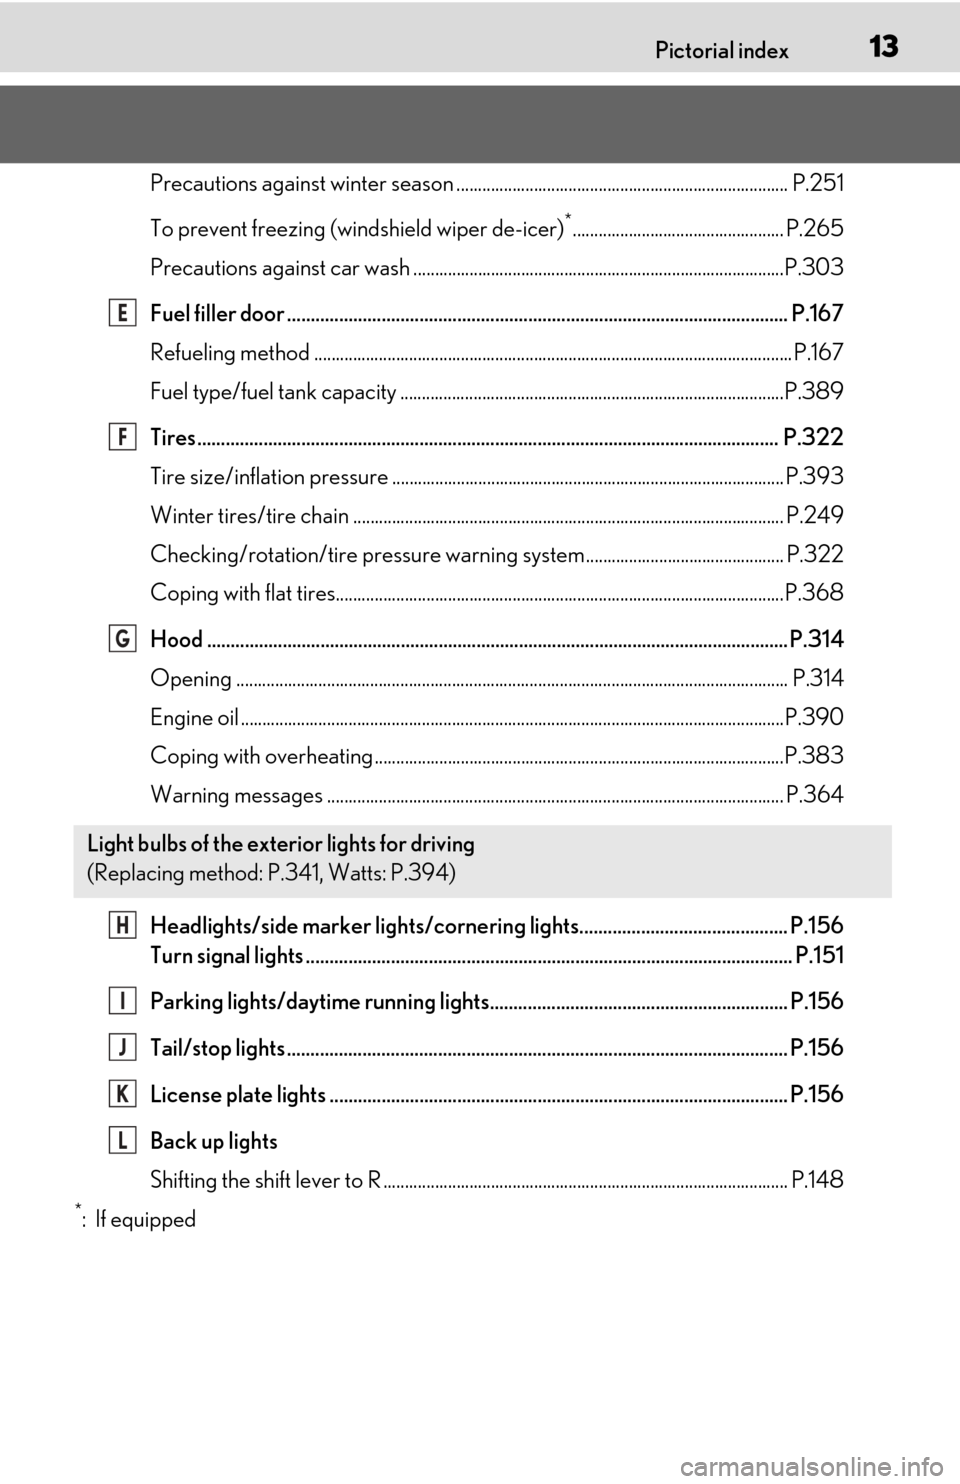
Precautions against winter season ............................................................................. P.251
To prevent freezing (windshield wiper de-icer)
*................................................. P.265
Precautions against car wash ......................................................................................P.303
Fuel filler door .......................................................................................................... P.167
Refueling method ............................................................................................................... P.167
Fuel type/fuel tank capacity ...... ...................................................................................P.389
Tires.......................................................................................................................... .P.322
Tire size/inflation pressure ........................................................................................... P.393
Winter tires/tire chain .................................................................................................... P.24 9
Checking/rotation/tire pressure warning system.............................................. P.322
Coping with flat tires........................................................................................................P .368
Hood ........................................................................................................................... P.314
Opening ........................................................................................................................ ........ P.314
Engine oil ..................................................................................................................... .........P.390
Coping with overheating ...............................................................................................P.383
Warning messages .......................................................................................................... P.364
Headlights/side marker lights/cornering lights............................................ P.156
Turn signal lights ....................................................................................................... P.151
Parking lights/daytime running lights............................................................... P.156
Tail/stop lights .......................................................................................................... P.156
License plate lights ................................................................................................. P.156
Back up lights
Shifting the shift lever to R .............................................................................................. P.14 8
*:If equipped
Light bulbs of the exterior lights for driving
(Replacing method: P.341, Watts: P.394)
E
F
G
H
I
J
K
L
Page 22 of 448
221-1. For safe use
1-1.For safe use
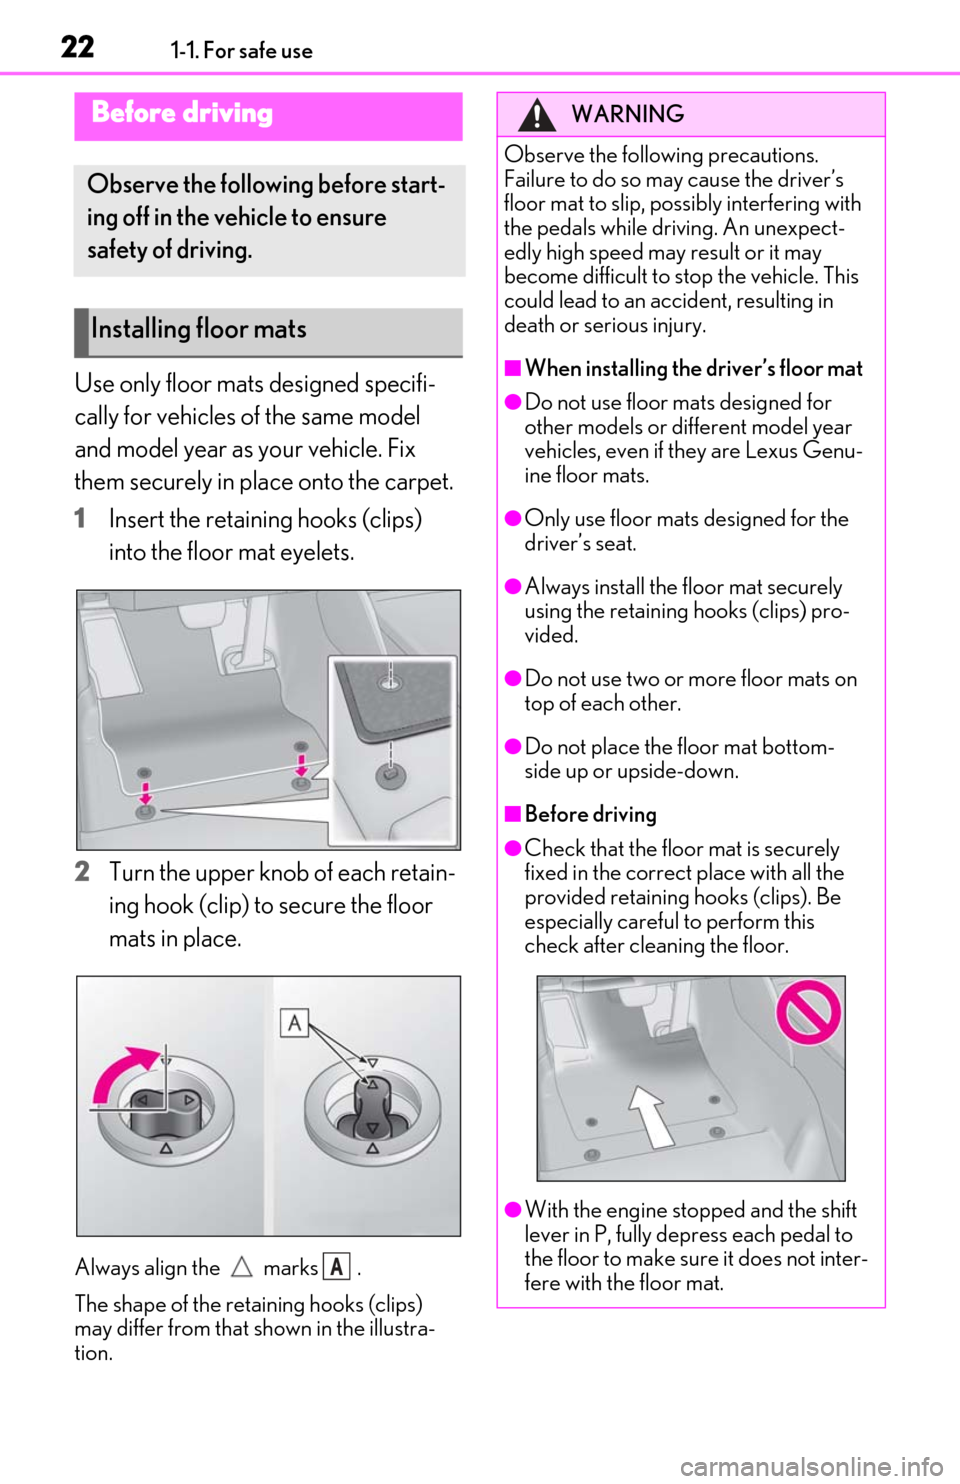
Use only floor mats designed specifi-
cally for vehicles of the same model
and model year as your vehicle. Fix
them securely in place onto the carpet.
1
Insert the retaining hooks (clips)
into the floor mat eyelets.
2
Turn the upper knob of each retain-
ing hook (clip) to secure the floor
mats in place.
Always align the marks .
The shape of the reta ining hooks (clips)
may differ from that shown in the illustra-
tion.
Before driving
Observe the following before start-
ing off in the vehicle to ensure
safety of driving.
Installing floor mats
A
WARNING
Observe the following precautions.
Failure to do so may cause the driver’s
floor mat to slip, poss ibly interfering with
the pedals while driving. An unexpect-
edly high speed may result or it may
become difficult to stop the vehicle. This
could lead to an accident, resulting in
death or serious injury.
■When installing the driver’s floor mat
●Do not use floor mats designed for
other models or different model year
vehicles, even if they are Lexus Genu-
ine floor mats.
●Only use floor mats designed for the
driver’s seat.
●Always install the floor mat securely
using the retaining hooks (clips) pro-
vided.
●Do not use two or more floor mats on
top of each other.
●Do not place the floor mat bottom-
side up or upside-down.
■Before driving
●Check that the floor mat is securely
fixed in the correct place with all the
provided retaining hooks (clips). Be
especially careful to perform this
check after cleaning the floor.
●With the engine stopped and the shift
lever in P, fully depress each pedal to
the floor to make sure it does not inter-
fere with the floor mat.
Page 41 of 448
411-1. For safe use
1
For safety and security
Exhaust gas precautions
Harmful substance to the human
body is included in exhaust gases if
inhaled.
WARNING
Exhaust gases include harmful carbon
monoxide (CO), which is colorless and
odorless. Observe the following precau-
tions.
Failure to do so may cause exhaust gases
enter the vehicle and may lead to an
accident caused by light-headedness, or
may lead to death or a serious health
hazard.
■Important points while driving
●Keep the trunk lid closed.
●If you smell exhaust gases in the vehi-
cle even when the trunk lid is closed,
open the windows and have the vehi-
cle inspected at your Lexus dealer as
soon as possible.
■When parking
●If the vehicle is in a poorly ventilated
area or a closed area, such as a
garage, stop the engine.
●Do not leave the vehicle with the
engine running for a long time.
If such a situation cannot be avoided,
park the vehicle in an open space and
ensure that exhaust fumes do not enter
the vehicle interior.
●Do not leave the engine running in an
area with snow build-up, or where it is
snowing. If snowbanks build up around
the vehicle while the engine is running,
exhaust gases may collect and enter
the vehicle.
■Exhaust pipe
The exhaust system needs to be checked
periodically. If there is a hole or crack
caused by corrosion, damage to a joint
or abnormal exhaust noise, be sure to
have the vehicle inspected and repaired
by your Lexus dealer.
Page 62 of 448
621-4. Theft deterrent system
■Items to check before locking the
vehicle
To prevent unexpected triggering of
the alarm and vehicle theft, make sure
of the following:
Nobody is in the vehicle.
The windows and moon roof (if
equipped) or panoramic moon roof
(if equipped) are closed before the
alarm is set.
No valuables or other personal
items are left in the vehicle.
■Setting
Close the doors, trunk and hood, and
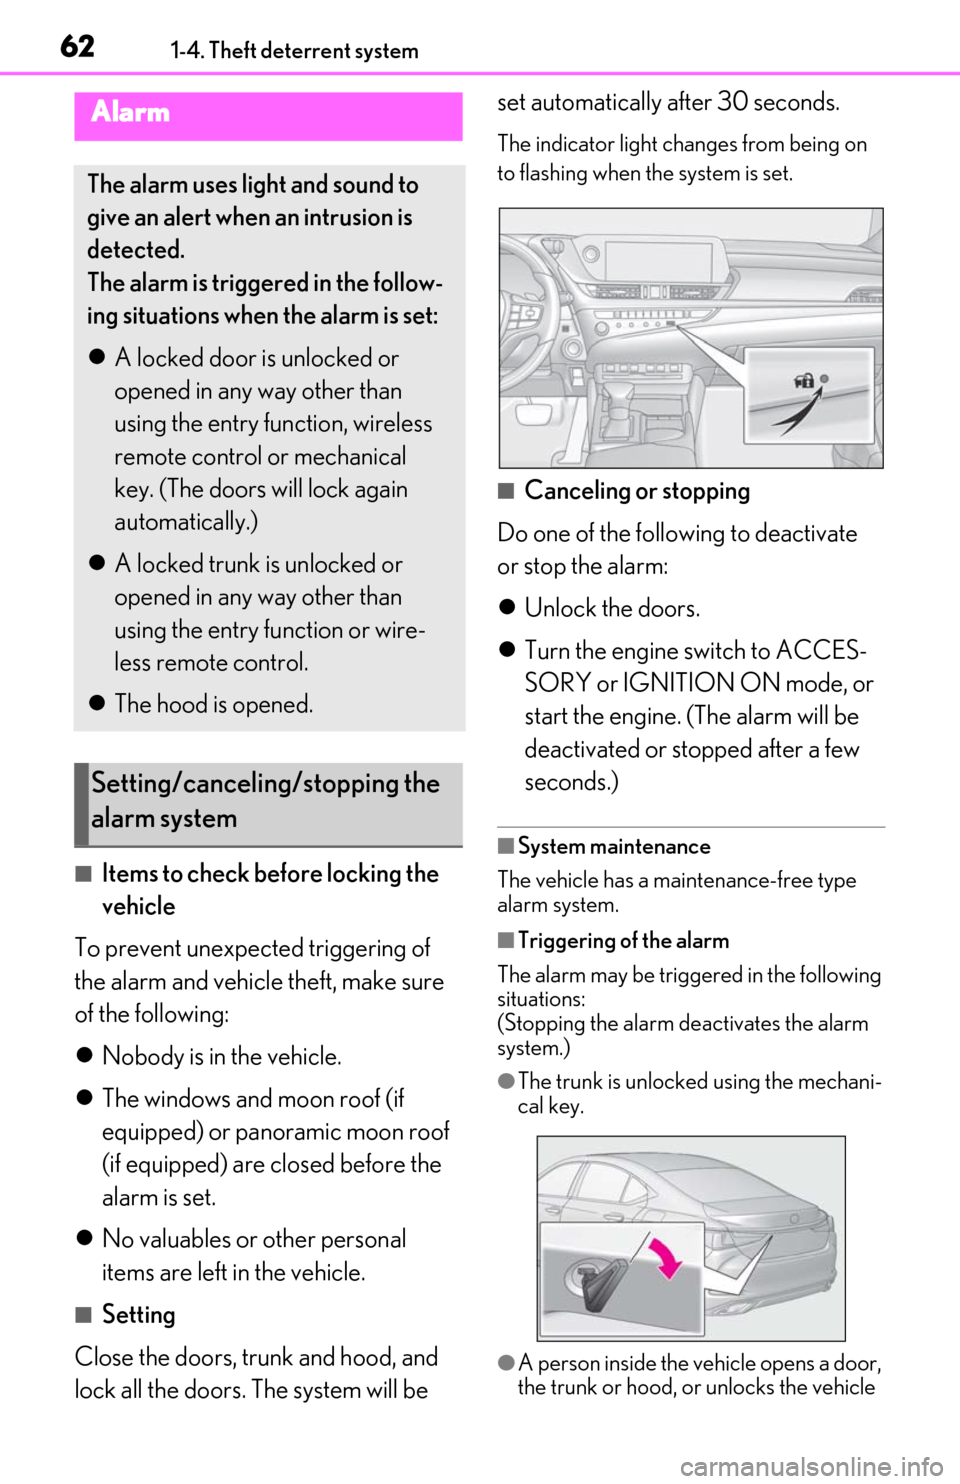
lock all the doors. The system will be set automatically after 30 seconds.
The indicator light changes from being on
to flashing when the system is set.
■Canceling or stopping
Do one of the following to deactivate
or stop the alarm:
Unlock the doors.
Turn the engine switch to ACCES-
SORY or IGNITION ON mode, or
start the engine. (The alarm will be
deactivated or stopped after a few
seconds.)
■System maintenance
The vehicle has a maintenance-free type
alarm system.
■Triggering of the alarm
The alarm may be triggered in the following
situations:
(Stopping the alarm deactivates the alarm
system.)
●The trunk is unlocked using the mechani-
cal key.
●A person inside the vehicle opens a door,
the trunk or hood, or unlocks the vehicle
Alarm
The alarm uses light and sound to
give an alert when an intrusion is
detected.
The alarm is triggered in the follow-
ing situations when the alarm is set:
A locked door is unlocked or
opened in any way other than
using the entry function, wireless
remote control or mechanical
key. (The doors will lock again
automatically.)
A locked trunk is unlocked or
opened in any way other than
using the entry function or wire-
less remote control.
The hood is opened.
Setting/canceling/stopping the
alarm system
Page 68 of 448
682-1. Instrument cluster
*1: These lights come on when the engine switch is turned to IGNITION ON
mode to indicate that a system check is
being performed. They will go off after
the engine is on, or after a few seconds.
There may be a malfunction in a system
if the lights do not come on, or go off.
Have the vehicle inspected by your
Lexus dealer.
*2: This light illuminates on the multi-infor- mation display.
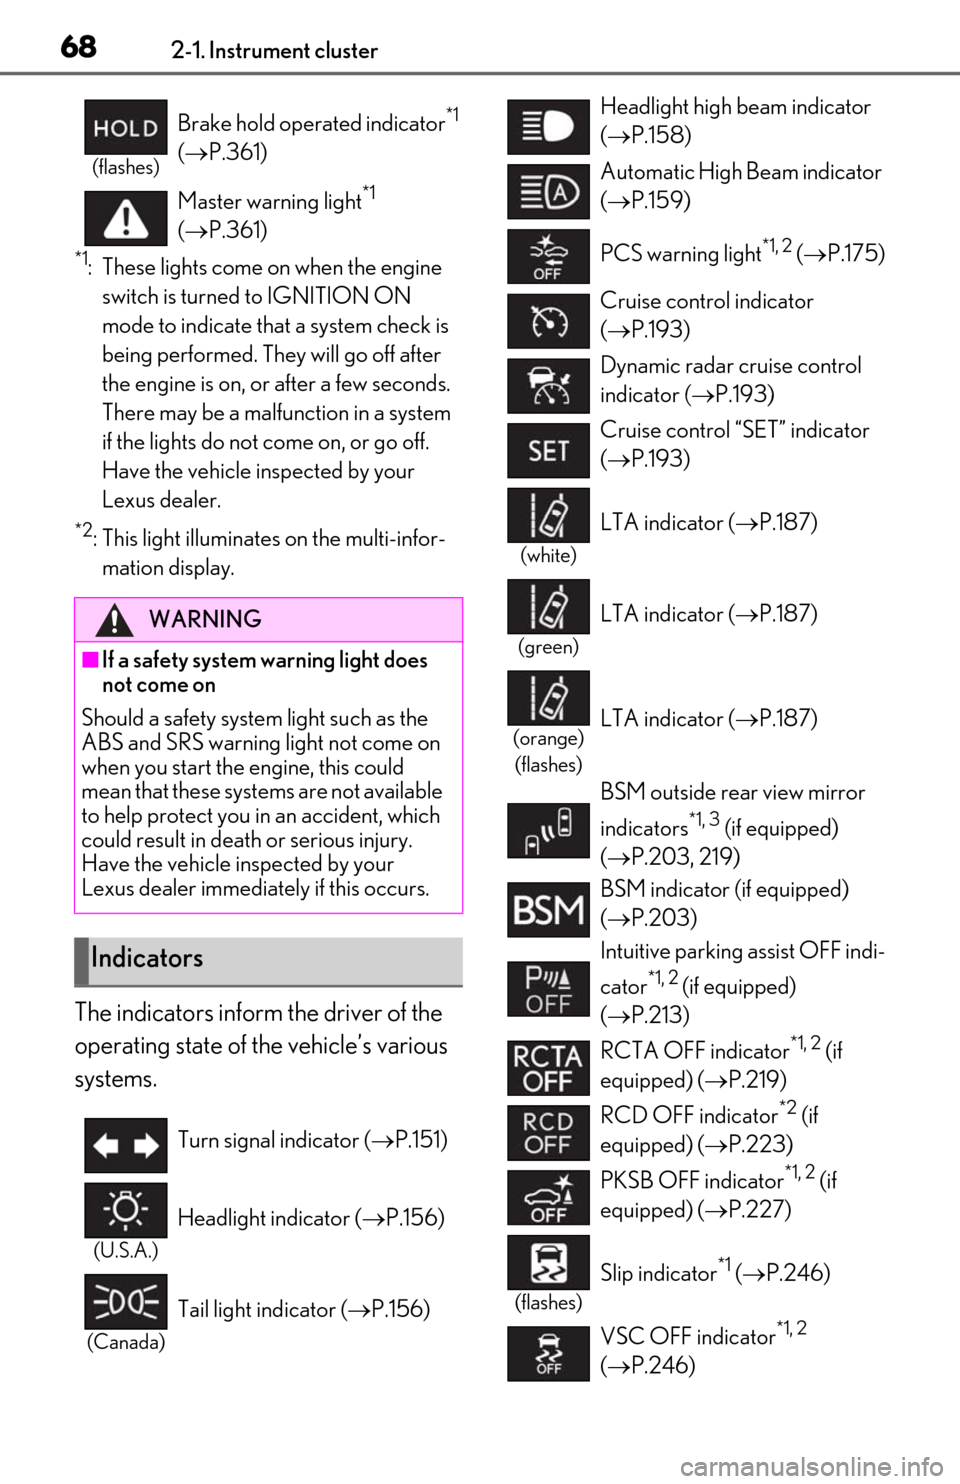
The indicators inform the driver of the
operating state of the vehicle’s various
systems.
(flashes)
Brake hold operated indicator*1
( P.361)
Master warning light
*1
( P.361)
WARNING
■If a safety system warning light does
not come on
Should a safety system light such as the
ABS and SRS warning light not come on
when you start the engine, this could
mean that these systems are not available
to help protect you in an accident, which
could result in death or serious injury.
Have the vehicle inspected by your
Lexus dealer immediately if this occurs.
Indicators
Turn signal indicator ( P.151)
(U.S.A.)
Headlight indicator ( P.156)
(Canada)
Tail light indicator ( P.156)
Headlight high beam indicator
( P.158)
Automatic High Beam indicator
( P.159)
PCS warning light
*1, 2 ( P.175)
Cruise control indicator
( P.193)
Dynamic radar cruise control
indicator ( P.193)
Cruise control “SET” indicator
( P.193)
(white)
LTA indicator ( P.187)
(green)
LTA indicator (P.187)
(orange)
(flashes)LTA indicator ( P.187)
BSM outside rear view mirror
indicators
*1, 3 (if equipped)
( P.203, 219)
BSM indicator (if equipped)
( P.203)
Intuitive parking assist OFF indi-
cator
*1, 2 (if equipped)
( P.213)
RCTA OFF indicator
*1, 2 (if
equipped) ( P.219)
RCD OFF indicator
*2 (if
equipped) ( P.223)
PKSB OFF indicator
*1, 2 (if
equipped) ( P.227)
(flashes)
Slip indicator*1 ( P.246)
VSC OFF indicator
*1, 2
( P.246)
Page 69 of 448
692-1. Instrument cluster
2
Vehicle status information and indicators
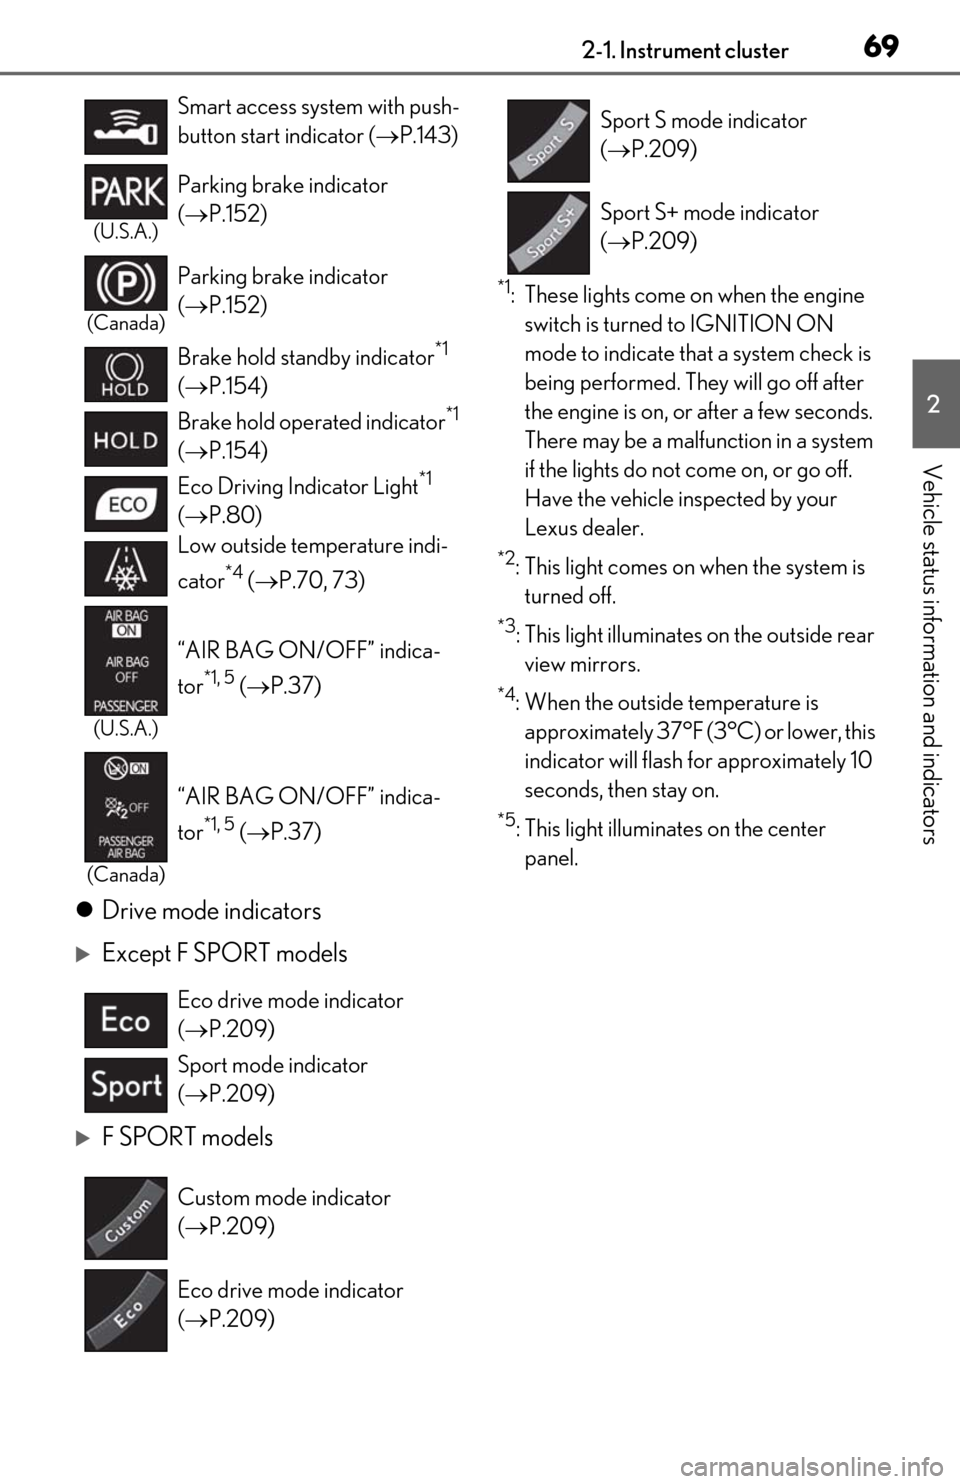
Drive mode indicators
Except F SPORT models
F SPORT models
*1: These lights come on when the engine
switch is turned to IGNITION ON
mode to indicate that a system check is
being performed. They will go off after
the engine is on, or after a few seconds.
There may be a malfunction in a system
if the lights do not come on, or go off.
Have the vehicle inspected by your
Lexus dealer.
*2: This light comes on when the system is turned off.
*3: This light illuminates on the outside rear view mirrors.
*4: When the outside temperature is approximately 37°F (3°C) or lower, this
indicator will flash for approximately 10
seconds, then stay on.
*5: This light illuminates on the center panel.
Smart access system with push-
button start indicator (
P.143)
(U.S.A.)
Parking brake indicator
( P.152)
(Canada)
Parking brake indicator
( P.152)
Brake hold standby indicator
*1
( P.154)
Brake hold operated indicator
*1
( P.154)
Eco Driving Indicator Light
*1
( P.80)
Low outside temperature indi-
cator
*4 ( P.70, 73)
(U.S.A.)
“AIR BAG ON/OFF” indica-
tor
*1, 5 ( P.37)
(Canada)
“AIR BAG ON/OFF” indica-
tor
*1, 5 ( P.37)
Eco drive mode indicator
( P.209)
Sport mode indicator
( P.209)
Custom mode indicator
( P.209)
Eco drive mode indicator
( P.209)
Sport S mode indicator
( P.209)
Sport S+ mode indicator
( P.209)
Page 71 of 448
712-1. Instrument cluster
2
Vehicle status information and indicators
Shift position and shift range (P.147)
Odometer and trip meter display ( P.71)
■Outside temperature display
●In the following situations, the correct
outside temperature may not be dis-
played, or the display may take longer
than normal to change:
• When stopped, or driving at low speeds (less than 12 mph [20 km/h])
• When the outside temperature has changed suddenly (at the entrance/exit of
a garage, tunnel, etc.)
●When “--” or “E” is displayed, the system
may be malfunctioning. Take your vehicle
to your Lexus dealer.
■Liquid crystal display
P.78
■Customization
The gauges and meters can be customized
on of the multi-information display.
( P.82)
■Display items
Odometer
Displays the total distance the vehicle has
been driven.
Trip meter A/trip meter B
Displays the distance the vehicle has been
driven since the meter was last reset. Trip
meters A and B can be used to record and
display different distances independently.
Distance until next engine oil
change
Displays the distance the vehicle can be
driven until an oil change is necessary.
■Changing the display
Each time the “ODO TRIP” switch is
pressed, the displayed item will be
changed. When the trip meter is dis-
played, pressing and holding the switch
will reset the trip meter.
H
I
WARNING
■The information display at low tem-
peratures
Allow the interior of the vehicle to warm
up before using the liquid crystal infor-
mation display. At extremely low tem-
peratures, the information display
monitor may respond slowly, and display
changes may be delayed.
For example, there is a lag between the
driver’s shifting and the new gear number
appearing on the display. This lag could
cause the driver to downshift again,
causing rapid and excessive engine brak-
ing and possibly an accident resulting in
death or injury.
NOTICE
■To prevent damage to the engine and
its components
●Do not let the indicator needle of the
tachometer enter the red zone, which
indicates the maximum engine speed.
●The engine may be overheating if the
engine coolant temperature gauge is
in the red zone (H). In this case, imme-
diately stop the vehicle in a safe place,
and check the engine after it has
cooled completely. ( P.383)
Odometer and trip meter dis-
play
Page 76 of 448
762-1. Instrument cluster
■Display items
Odometer
Displays the total distance the vehicle has
been driven.
Trip meter A/trip meter B
Displays the distance the vehicle has been
driven since the meter was last reset. Trip
meters A and B can be used to record and
display different distances independently.
Distance until next engine oil change
Displays the distance the vehicle can be
driven until an oil change is necessary.
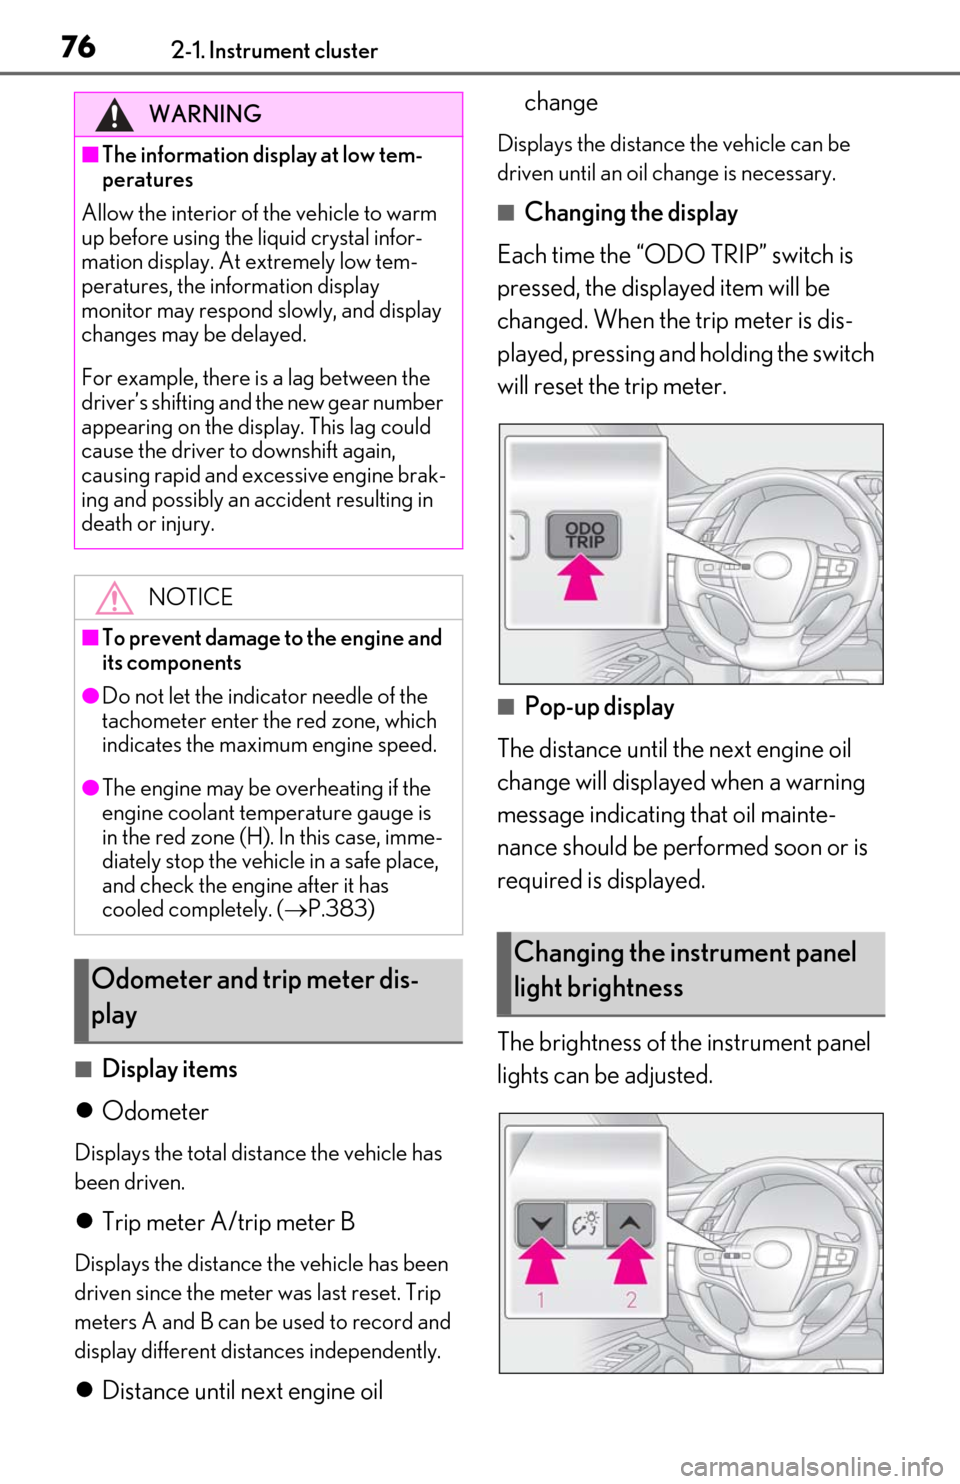
■Changing the display
Each time the “ODO TRIP” switch is
pressed, the displayed item will be
changed. When the trip meter is dis-
played, pressing and holding the switch
will reset the trip meter.
■Pop-up display
The distance until the next engine oil
change will displayed when a warning
message indicating that oil mainte-
nance should be performed soon or is
required is displayed.
The brightness of the instrument panel
lights can be adjusted.
WARNING
■The information display at low tem-
peratures
Allow the interior of the vehicle to warm
up before using the liquid crystal infor-
mation display. At extremely low tem-
peratures, the information display
monitor may respond slowly, and display
changes may be delayed.
For example, there is a lag between the
driver’s shifting and the new gear number
appearing on the display. This lag could
cause the driver to downshift again,
causing rapid and excessive engine brak-
ing and possibly an accident resulting in
death or injury.
NOTICE
■To prevent damage to the engine and
its components
●Do not let the indicator needle of the
tachometer enter the red zone, which
indicates the maximum engine speed.
●The engine may be overheating if the
engine coolant temperature gauge is
in the red zone (H). In this case, imme-
diately stop the vehicle in a safe place,
and check the engine after it has
cooled completely. ( P.383)
Odometer and trip meter dis-
play
Changing the instrument panel
light brightness