LEXUS ES350 2022 Owners Manual
Manufacturer: LEXUS, Model Year: 2022, Model line: ES350, Model: LEXUS ES350 2022Pages: 468, PDF Size: 26.96 MB
Page 291 of 468

2895-6. Using the other interior features
5
Interior features
■HomeLink® programming procedure
The programming procedures can also be
found at the following URL.
Website: www.homelink.com/lexus
For support, contact customer support at
the following.
Help Line: 1-800-355-3515
The HomeLink® wireless control sys-
tem in your vehicle has 3 buttons
which can be programmed to operate
3 different devices. Refer to the pro-
gramming methods on the following
pages to determine the method which
is appropriate for the device. HomeLink
® indicator light
Garage door operation indicators
HomeLink
® icon
Illuminates while HomeLink® is operating.
Buttons
■Codes stored in the HomeLink® mem-
ory
●The registered codes are not erased
even if the battery cable is disconnected.
●If learning failed wh en registering a dif-
ferent code to a HomeLink® button that
already has a code registered to it, the
already registered code will not be
erased.
Garage door opener
The garage door opener can be
programmed using the
HomeLink
® to operate garage
doors, gates, entry doors, door
locks, home lighting systems, secu-
rity systems, and other devices.
System components
WARNING
■When programming a garage door
or other remote control device
The garage door or other device may
operate, so ensure people and objects
are out of danger to prevent potential
harm.
A
B
C
D
Page 292 of 468

2905-6. Using the other interior features
■Before programming HomeLink®
During programming, it is possible
that garage doors, gates, or other
devices may operate. For this rea-
son, make sure that people and
objects are clear of the garage door
or other devices to prevent injury or
other potential harm.
It is recommended that a new bat-
tery be placed in the remote control
transmitter for more accurate pro-
gramming.
Garage door opener motors manu-
factured after 1995 may be
equipped with rolling code protec-
tion. If this is the case, you may need
a stepladder or other sturdy, safe
device to reach the “Learn” or
“Smart” button on the garage door
opener motor.
■Programming HomeLink®
Steps 1 through 3 must be performed
within 60 seconds, otherwise the indi-
cator light will stop flashing and pro-
gramming will not be able to be
completed.
1 Press and release the HomeLink
®
button you want to program and
check that the HomeLink
® indica-
tor light flashes (orange).
2 Point the remote control transmit-
ter for the device at the rear view
mirror, 1 to 3 in. (25 to 75 mm)
from the HomeLink
® buttons.
Keep the HomeLink® indicator light in
view while programming.
3 Program a device.
Programming a device other than
an entry gate (for U.S.A. owners)
Press and hold the remote control
transmitter button until the
WARNING
■Conforming to federal safety stan-
dards
Do not use the HomeLink
® compatible
transceiver with any garage door opener
or device that lacks safety stop and
reverse features as required by federal
safety standards.
This includes any garage door that can-
not detect an interf ering object. A door
or device without these features
increases the risk of death or serious
injury.
■When operating or programming
HomeLink®
Never allow a child to operate or play
with the HomeLink® buttons.
Programming the HomeLink®
Page 293 of 468

2915-6. Using the other interior features
5
Interior features
HomeLink® indicator light changes
from slowly flashing orange to rapidly
flashing green (rolling code) or contin-
uously lit green (fixed code), then
release the button.
Programming an entry gate (for
U.S.A. owners)/Programming a
device in the Canadian market
Press and release the remote control
transmitter button at 2 second inter-
vals, repeatedly, until the HomeLink
®
indicator light changes from slowly
flashing (orange) to rapidly flashing
(green) (rolling code) or continuously
lit (green) (fixed code).
4 Test the HomeLink
® operation by
pressing the newly programmed
button and observing the indicator
light:
Indicator light illuminates: Program-
ming of a fixed code device has
completed. The garage door or
other device should operate when a
HomeLink
® button is pressed and
released.
Indicator light flashes rapidly: The
garage door opener motor or other
device is equipped with a rolling
code. To complete programming,
firmly press and hold the
HomeLink
® button for 2 seconds
then release it.
If the garage door or other device
does not operate, proceed to “Pro-
gramming a rolling code system”. 5
Repeat the steps above to program
another device for any of the
remaining HomeLink
® buttons.
■Programming a rolling code sys-
tem
2 or more people may be necessary to
complete rolling code programming.
1 Locate the “Learn” or “Smart” but-
ton on the garage door opener
motor in the garage.
This button can usually be found where the
hanging antenna wire is attached to the
unit. The name and color of the button may
vary by manufacturer. Refer to the owner’s
manual supplied with the garage door
opener motor for details.
2Press and release the “Learn” or
“Smart” button.
Perform 3 within 30 seconds after per-
forming 2.
3 Press and hold the desired
HomeLink
® button (inside the
vehicle) for 2 seconds and release
Page 294 of 468
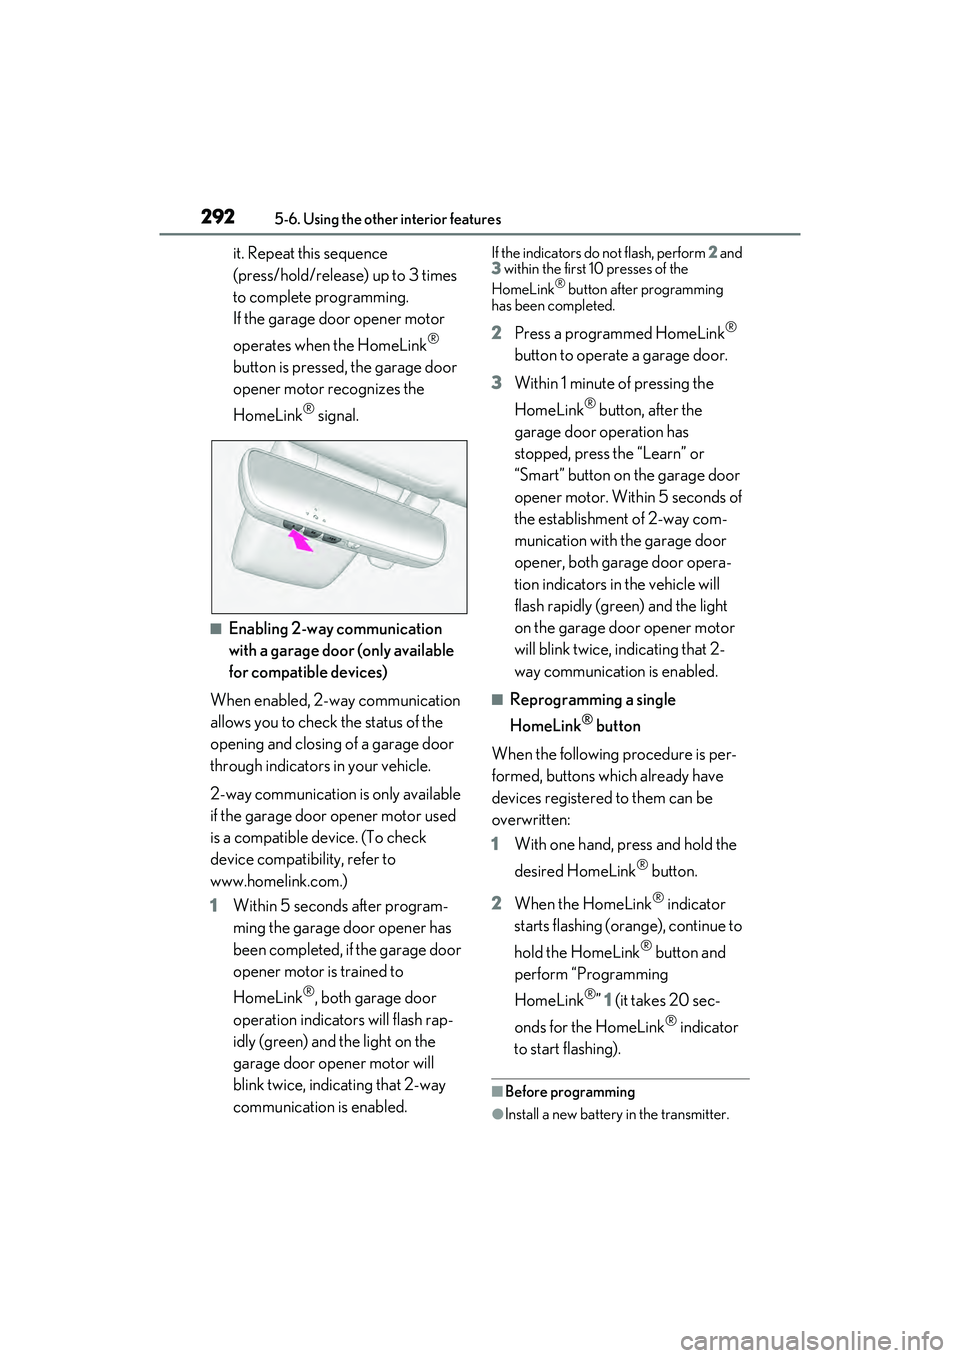
2925-6. Using the other interior features
it. Repeat this sequence
(press/hold/release) up to 3 times
to complete programming.
If the garage door opener motor
operates when the HomeLink
®
button is pressed, the garage door
opener motor recognizes the
HomeLink
® signal.
■Enabling 2-way communication
with a garage door (only available
for compatible devices)
When enabled, 2-way communication
allows you to check the status of the
opening and closing of a garage door
through indicators in your vehicle.
2-way communication is only available
if the garage door opener motor used
is a compatible device. (To check
device compatibility, refer to
www.homelink.com.)
1 Within 5 seconds after program-
ming the garage door opener has
been completed, if the garage door
opener motor is trained to
HomeLink
®, both garage door
operation indicators will flash rap-
idly (green) and the light on the
garage door opener motor will
blink twice, indicating that 2-way
communication is enabled.
If the indicators do not flash, perform 2 and
3 within the first 10 presses of the
HomeLink
® button after programming
has been completed.
2 Press a programmed HomeLink®
button to operate a garage door.
3 Within 1 minute of pressing the
HomeLink
® button, after the
garage door operation has
stopped, press the “Learn” or
“Smart” button on the garage door
opener motor. Within 5 seconds of
the establishment of 2-way com-
munication with the garage door
opener, both garage door opera-
tion indicators in the vehicle will
flash rapidly (green) and the light
on the garage door opener motor
will blink twice, indicating that 2-
way communication is enabled.
■Reprogramming a single
HomeLink
® button
When the following procedure is per-
formed, buttons which already have
devices registered to them can be
overwritten:
1 With one hand, press and hold the
desired HomeLink
® button.
2 When the HomeLink
® indicator
starts flashing (orange), continue to
hold the HomeLink
® button and
perform “Programming
HomeLink
®” 1 (it takes 20 sec-
onds for the HomeLink
® indicator
to start flashing).
■Before programming
●Install a new battery in the transmitter.
Page 295 of 468
2935-6. Using the other interior features
5
Interior features
●The battery side of the transmitter must
be pointed away from the HomeLink®.
Press the appropriate HomeLink®
button. The HomeLink
® indicator light
should turn on.
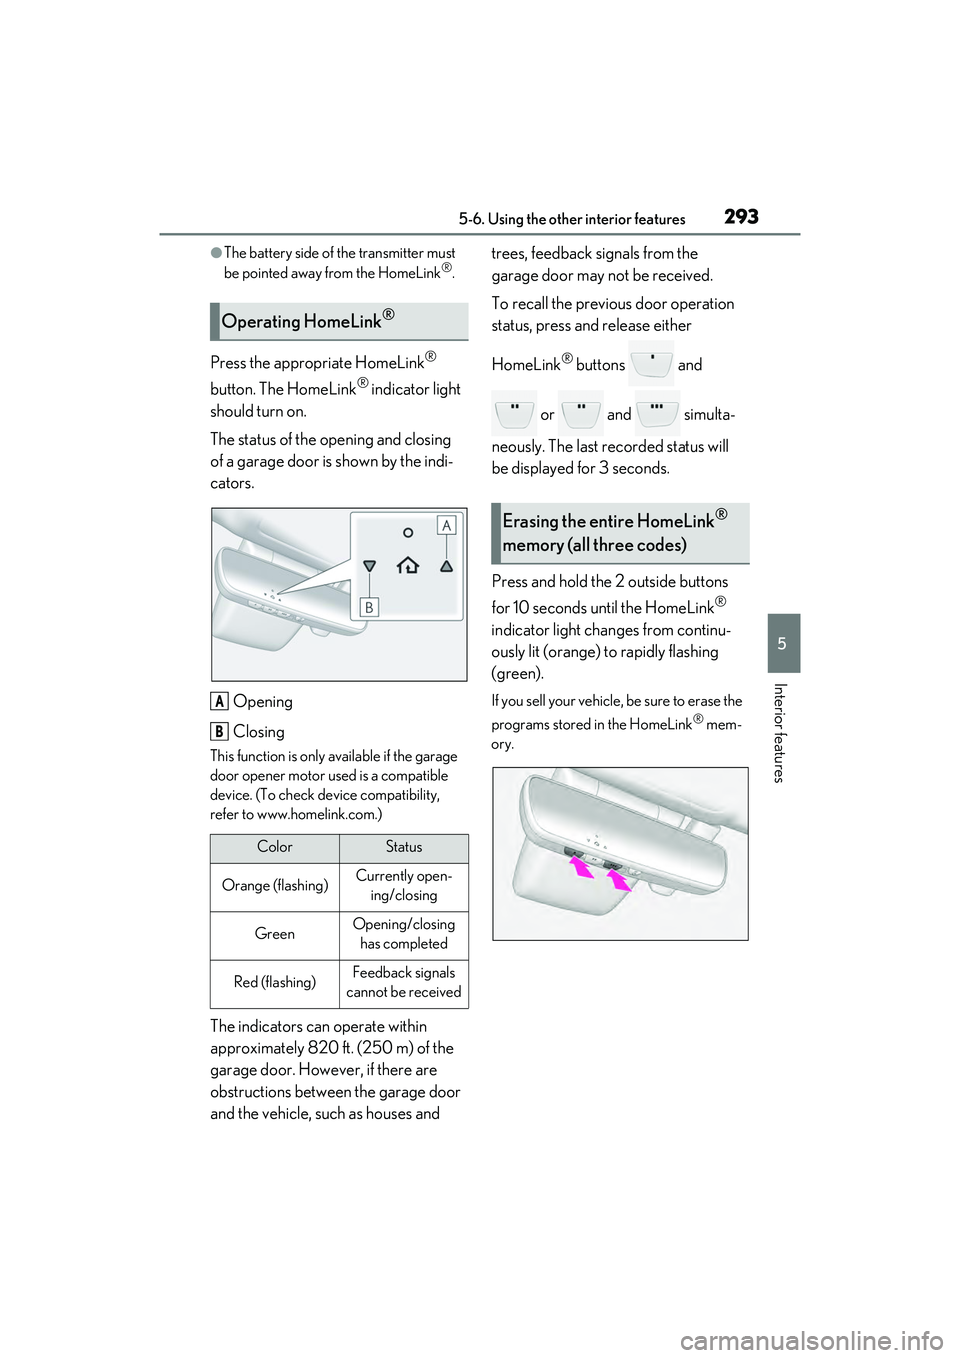
The status of the opening and closing
of a garage door is shown by the indi-
cators.
Opening
Closing
This function is only available if the garage
door opener motor used is a compatible
device. (To check device compatibility,
refer to www.homelink.com.)
The indicators can operate within
approximately 820 ft. (250 m) of the
garage door. However, if there are
obstructions between the garage door
and the vehicle, such as houses and trees, feedback signals from the
garage door may not be received.
To recall the previous door operation
status, press and release either
HomeLink
® buttons and
or and simulta-
neously. The last recorded status will
be displayed for 3 seconds.
Press and hold the 2 outside buttons
for 10 seconds until the HomeLink
®
indicator light changes from continu-
ously lit (orange) to rapidly flashing
(green).
If you sell your vehicle, be sure to erase the
programs stored in the HomeLink
® mem-
ory.
Operating HomeLink®
ColorStatus
Orange (flashing)Currently open- ing/closing
GreenOpening/closing has completed
Red (flashing)Feedback signals
cannot be received
A
B
Erasing the entire HomeLink®
memory (all three codes)
Page 296 of 468
2945-6. Using the other interior features
*: If equipped
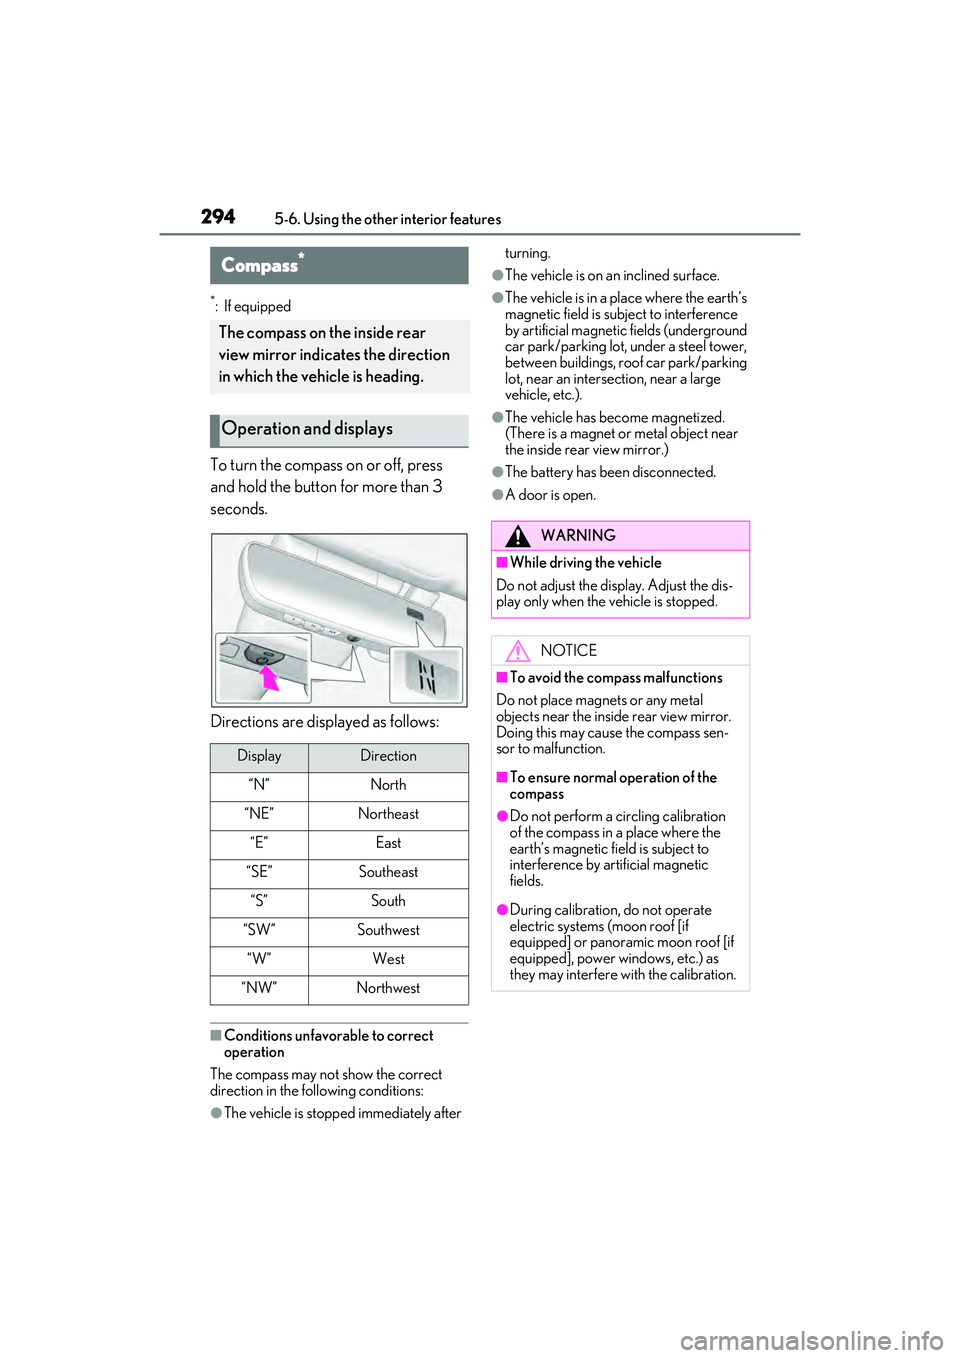
To turn the compass on or off, press
and hold the button for more than 3
seconds.
Directions are displayed as follows:
■Conditions unfavorable to correct
operation
The compass may not show the correct
direction in the following conditions:
●The vehicle is stopped immediately after turning.
●The vehicle is on an inclined surface.
●The vehicle is in a place where the earth’s
magnetic field is subject to interference
by artificial magnetic fields (underground
car park/parking lot, under a steel tower,
between buildings, roof car park/parking
lot, near an intersection, near a large
vehicle, etc.).
●The vehicle has become magnetized.
(There is a magnet or metal object near
the inside rear view mirror.)
●The battery has been disconnected.
●A door is open.
Compass*
The compass on the inside rear
view mirror indicates the direction
in which the vehicle is heading.
Operation and displays
DisplayDirection
“N”North
“NE”Northeast
“E”East
“SE”Southeast
“S”South
“SW”Southwest
“W”West
“NW”Northwest
WARNING
■While driving the vehicle
Do not adjust the display. Adjust the dis-
play only when the vehicle is stopped.
NOTICE
■To avoid the compass malfunctions
Do not place magnets or any metal
objects near the inside rear view mirror.
Doing this may cause the compass sen-
sor to malfunction.
■To ensure normal operation of the
compass
●Do not perform a circling calibration
of the compass in a place where the
earth’s magnetic field is subject to
interference by artificial magnetic
fields.
●During calibration, do not operate
electric systems (moon roof [if
equipped] or panoramic moon roof [if
equipped], power windows, etc.) as
they may interfere with the calibration.
Page 297 of 468
2955-6. Using the other interior features
5
Interior features
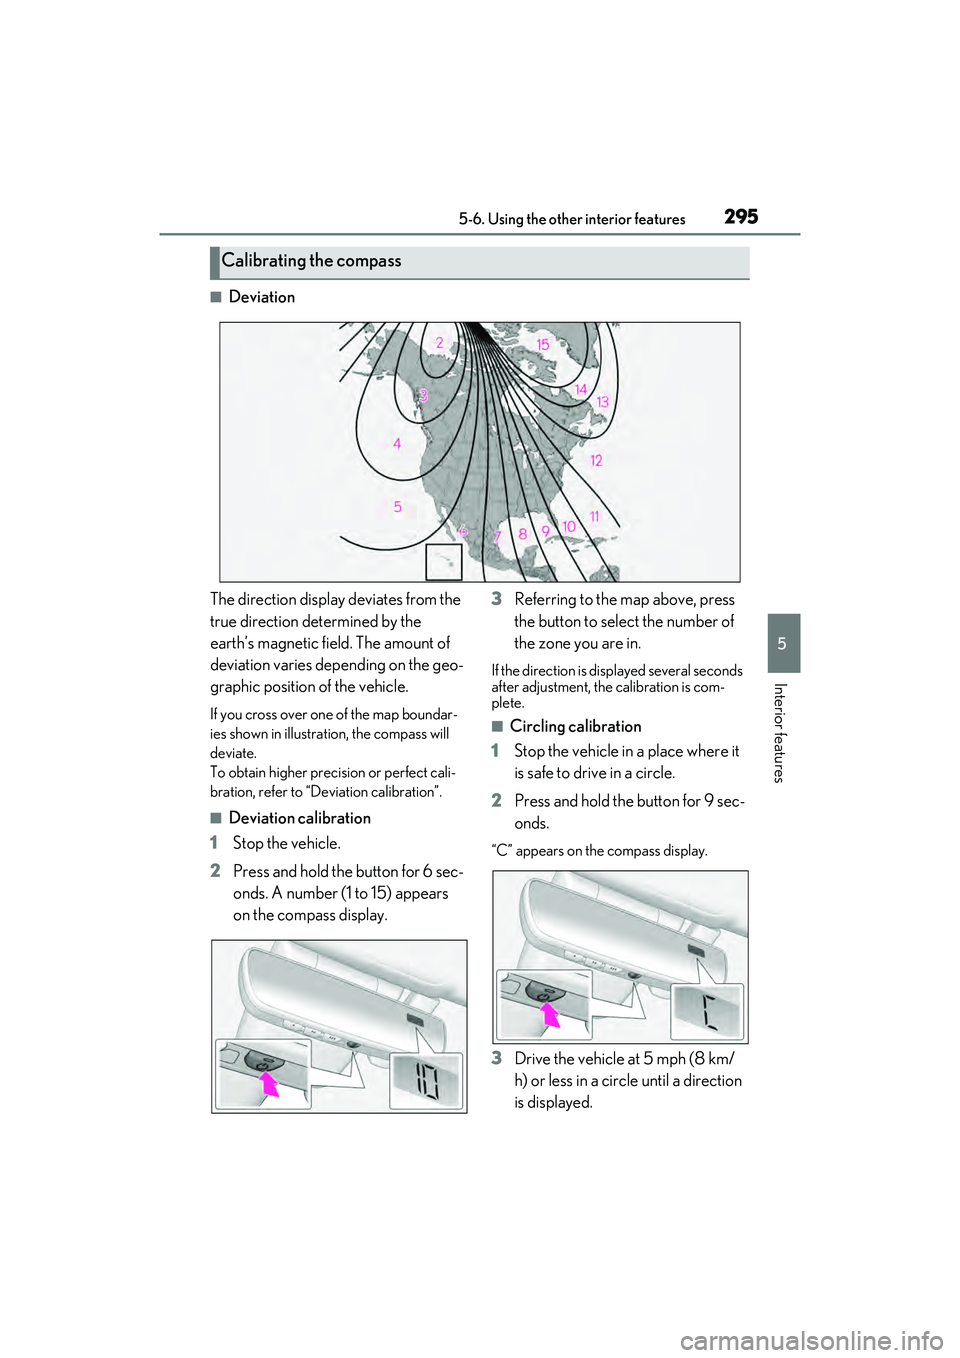
■Deviation
The direction display deviates from the
true direction determined by the
earth’s magnetic field. The amount of
deviation varies depending on the geo-
graphic position of the vehicle.
If you cross over one of the map boundar-
ies shown in illustration, the compass will
deviate.
To obtain higher precision or perfect cali-
bration, refer to “Deviation calibration”.
■Deviation calibration
1 Stop the vehicle.
2 Press and hold the button for 6 sec-
onds. A number (1 to 15) appears
on the compass display. 3
Referring to the map above, press
the button to select the number of
the zone you are in.
If the direction is displayed several seconds
after adjustment, the calibration is com-
plete.
■Circling calibration
1 Stop the vehicle in a place where it
is safe to drive in a circle.
2 Press and hold the button for 9 sec-
onds.
“C” appears on the compass display.
3Drive the vehicle at 5 mph (8 km/
h) or less in a circle until a direction
is displayed.
Calibrating the compass
Page 298 of 468
2965-6. Using the other interior features
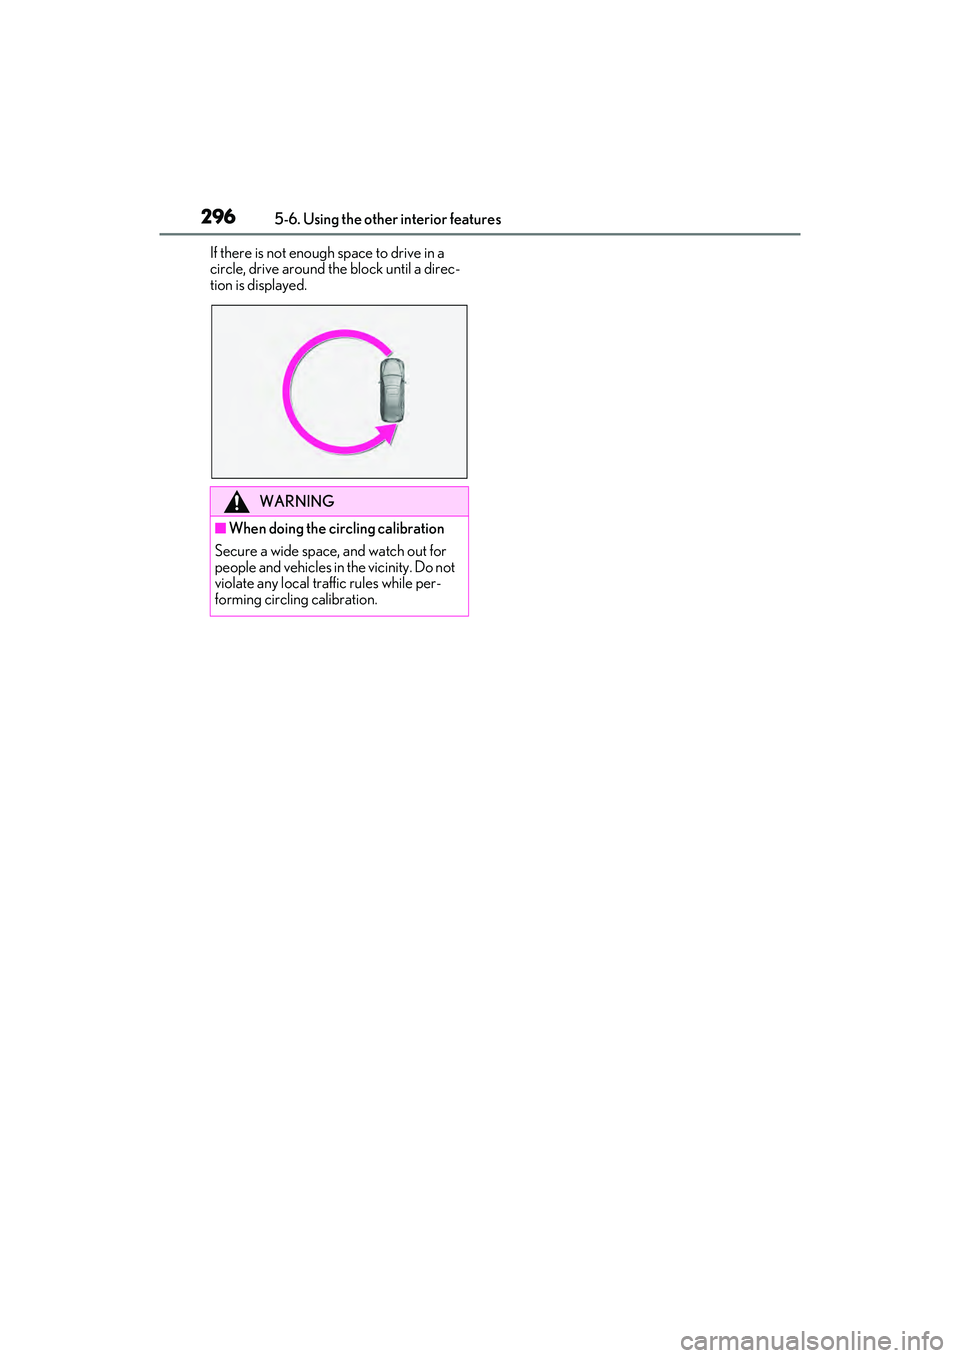
If there is not enough space to drive in a
circle, drive around the block until a direc-
tion is displayed.
WARNING
■When doing the circling calibration
Secure a wide space, and watch out for
people and vehicles in the vicinity. Do not
violate any local traffic rules while per-
forming circling calibration.
Page 299 of 468

297
6
6
Maintenance and care
Maintenance and care
6-1. Maintenance and careCleaning and protecting the vehi-cle exterior ................................ 298
Cleaning and protecting the vehi- cle interior .................................. 301
6-2. Maintenance Maintenance requirements .. 303
General maintenance ............. 304
Emission inspection and mainte- nance (I/M) programs ......... 307
6-3. Do-it-yourself maintenance Do-it-yourself service precautions ............................... 308
Hood................................................ 310
Positioning a floor jack ............. 310
Engine compartment................ 312
Tires ................................................ 320
Tire inflation pressure .............. 328
Wheels........................................... 330
Air conditioning filter................ 331
Electronic key battery ............. 333
Checking and replacing fuses ........................................................ 335
Headlight aim.............................. 337
Light bulbs .................................... 338
Page 300 of 468

2986-1. Maintenance and care
6-1.Maintenance and care
Working from top to bottom, liber-
ally apply water to the vehicle body,
wheel wells and underside of the
vehicle to remove any dirt and dust.
Wash the vehicle body using a
sponge or soft cloth, such as a
chamois.
For hard-to-remove marks, use car
wash soap and rinse thoroughly with
water.
Wipe away any water.
Wax the vehicle when the water-
proof coating deteriorates.
If water does not bead on a clean surface,
apply wax when the vehicle body is cool.
■Self-restoring coat
The vehicle body has a self-restoring coat-
ing that is resistant to small surface
scratches caused in a car wash etc.
●The coating lasts for 5 to 8 years from
when the vehicle is delivered from the
plant.
●The restoration time differs depending on
the depth of the scratch and outside tem-
perature.
The restoration time may become
shorter when the coating is warmed by
applying warm water.
●Deep scratches caused by keys, coins,
etc. cannot be restored.
●Do not use wax that contain abrasives.
■Automatic car washes
●Before washing the vehicle:
• Fold the mirrors
• Turn off the power trunk lid (if equipped)
Start washing from the front of the vehicle.
Make sure to extend the mirrors before
driving.
●Brushes used in automatic car washes
may scratch the vehicle surface, parts
(wheel, etc.) and harm your vehicle’s
paint.
●Rear spoiler (if equipped) may not be
washable in some automatic car washes.
There may also be an increased risk of
damage to vehicle.
■High pressure car washes
As water may enter the cabin, do not bring
the nozzle tip near the gaps around the
doors or perimeter of windows, or spray
these areas continuously.
■Notes for the smart access system with
push-button start
If the door handle becomes wet while the
electronic key is within the effective range,
the door may lock and unlock repeatedly. In
that case, follow the following correction
procedures to wash the vehicle:
●Place the key in a position 6 ft. (2 m) or
more separate from the vehicle while the
vehicle is being washed. (Take care to
ensure that the key is not stolen.)
●Set the electronic key to battery-saving
mode to disable the smart access system
with push-button start. ( P.109)
■Wheels and wheel ornaments
●Remove any dirt immediately by using a
neutral detergent.
●Wash detergent off with water immedi-
ately after use.
●To protect the paint from damage, make
sure to observe the following precau-
tions.
• Do not use acidic, alkaline or abrasive detergent
• Do not use hard brushes
• Do not use detergent on the wheels when they are hot, such as after driving or
Cleaning and protecting the
vehicle exterior
Perform cleaning in a manner
appropriate to each component
and its material.
Cleaning instructions