LEXUS ES350 2022 Manual PDF
Manufacturer: LEXUS, Model Year: 2022, Model line: ES350, Model: LEXUS ES350 2022Pages: 468, PDF Size: 26.96 MB
Page 71 of 468
692-1. Instrument cluster
2
Vehicle status information and indicators
In the following situations, the actual quantity of fuel remaining in the tank may not be dis-
played correctly. Refer to P.69 if the actual quantity of fuel remaining in the tank is not dis-
played correctly.
• A small amount of fuel is added.
• Fuel is added with the fuel gauge near or at “F”.
• The vehicle is stopped on an uneven surface, such as a slope.
• The vehicle is driven on a slope or around a curve.
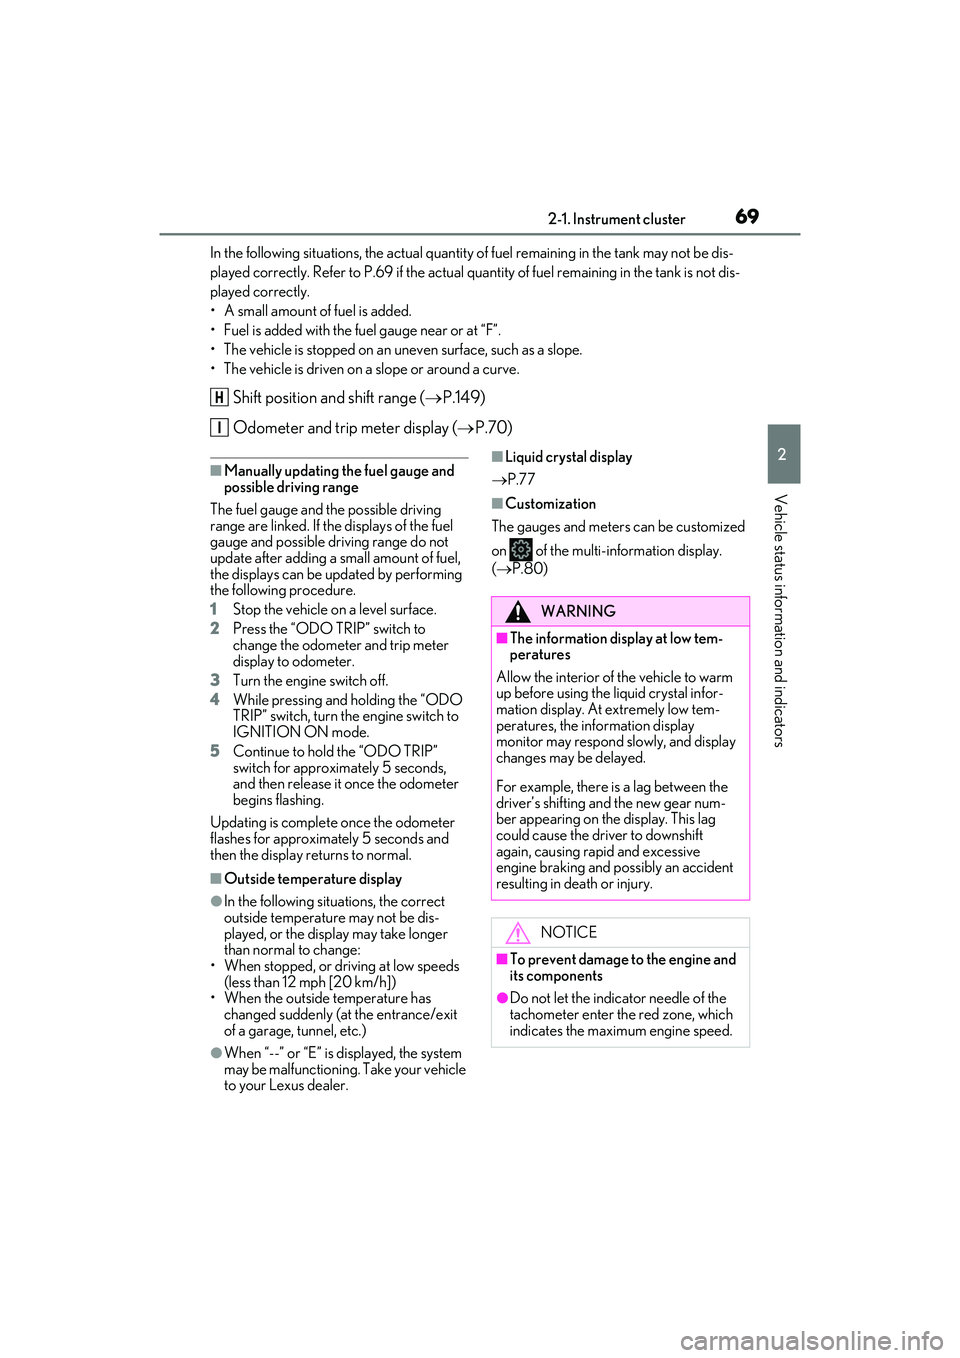
Shift position and shift range (P.149)
Odometer and trip meter display ( P.70)
■Manually updating the fuel gauge and
possible driving range
The fuel gauge and the possible driving
range are linked. If the displays of the fuel
gauge and possible driving range do not
update after adding a small amount of fuel,
the displays can be updated by performing
the following procedure.
1 Stop the vehicle on a level surface.
2 Press the “ODO TRIP” switch to
change the odometer and trip meter
display to odometer.
3 Turn the engine switch off.
4 While pressing and holding the “ODO
TRIP” switch, turn the engine switch to
IGNITION ON mode.
5 Continue to hold the “ODO TRIP”
switch for approximately 5 seconds,
and then release it once the odometer
begins flashing.
Updating is complete once the odometer
flashes for approximately 5 seconds and
then the display returns to normal.
■Outside temperature display
●In the following situations, the correct
outside temperature may not be dis-
played, or the display may take longer
than normal to change:
• When stopped, or driving at low speeds (less than 12 mph [20 km/h])
• When the outside temperature has
changed suddenly (at the entrance/exit
of a garage, tunnel, etc.)
●When “--” or “E” is displayed, the system
may be malfunctioning. Take your vehicle
to your Lexus dealer.
■Liquid crystal display
P.77
■Customization
The gauges and meters can be customized
on of the multi-information display.
( P.80)
H
I
WARNING
■The information display at low tem-
peratures
Allow the interior of the vehicle to warm
up before using the liquid crystal infor-
mation display. At extremely low tem-
peratures, the information display
monitor may respond slowly, and display
changes may be delayed.
For example, there is a lag between the
driver’s shifting and the new gear num-
ber appearing on the display. This lag
could cause the driver to downshift
again, causing rapid and excessive
engine braking and possibly an accident
resulting in death or injury.
NOTICE
■To prevent damage to the engine and
its components
●Do not let the indicator needle of the
tachometer enter the red zone, which
indicates the maximum engine speed.
Page 72 of 468
702-1. Instrument cluster
■Display items
Odometer
Displays the total distance the vehicle has
been driven.
Trip meter A/trip meter B
Displays the distance the vehicle has been
driven since the meter was last reset. Trip
meters A and B can be used to record and
display different distances independently.
Distance until next engine oil
change
Displays the distance the vehicle can be
driven until an oil change is necessary.
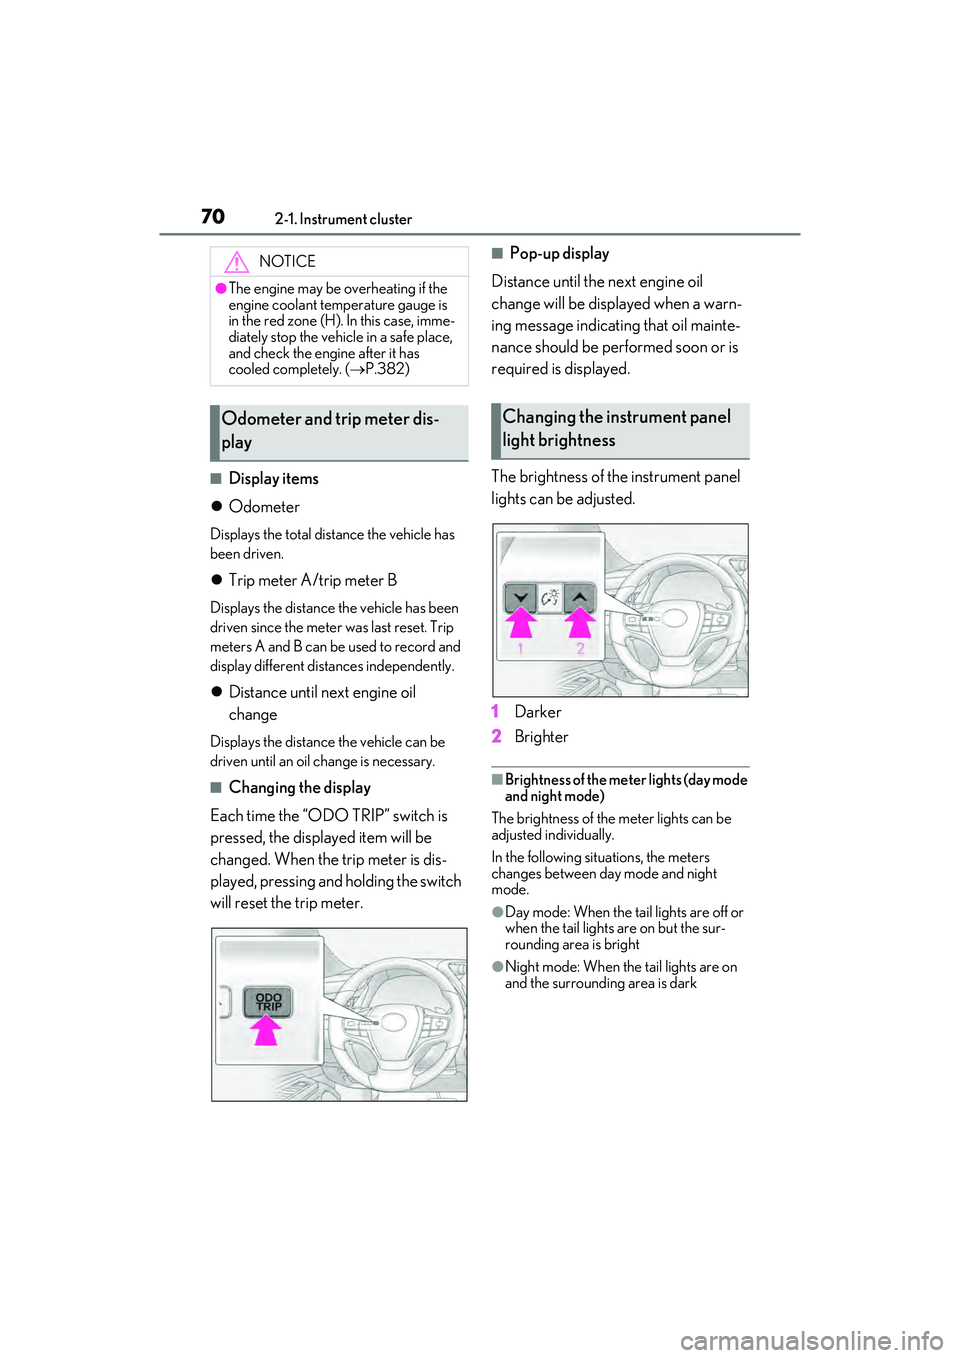
■Changing the display
Each time the “ODO TRIP” switch is
pressed, the displayed item will be
changed. When the trip meter is dis-
played, pressing and holding the switch
will reset the trip meter.
■Pop-up display
Distance until the next engine oil
change will be displayed when a warn-
ing message indicating that oil mainte-
nance should be performed soon or is
required is displayed.
The brightness of the instrument panel
lights can be adjusted.
1 Darker
2 Brighter
■Brightness of the meter lights (day mode
and night mode)
The brightness of the meter lights can be
adjusted individually.
In the following situations, the meters
changes between day mode and night
mode.
●Day mode: When the tail lights are off or
when the tail lights are on but the sur-
rounding area is bright
●Night mode: When the tail lights are on
and the surrounding area is dark
NOTICE
●The engine may be overheating if the
engine coolant temperature gauge is
in the red zone (H). In this case, imme-
diately stop the vehicle in a safe place,
and check the engine after it has
cooled completely. ( P.382)
Odometer and trip meter dis-
playChanging the instrument panel
light brightness
Page 73 of 468
712-1. Instrument cluster
2
Vehicle status information and indicators
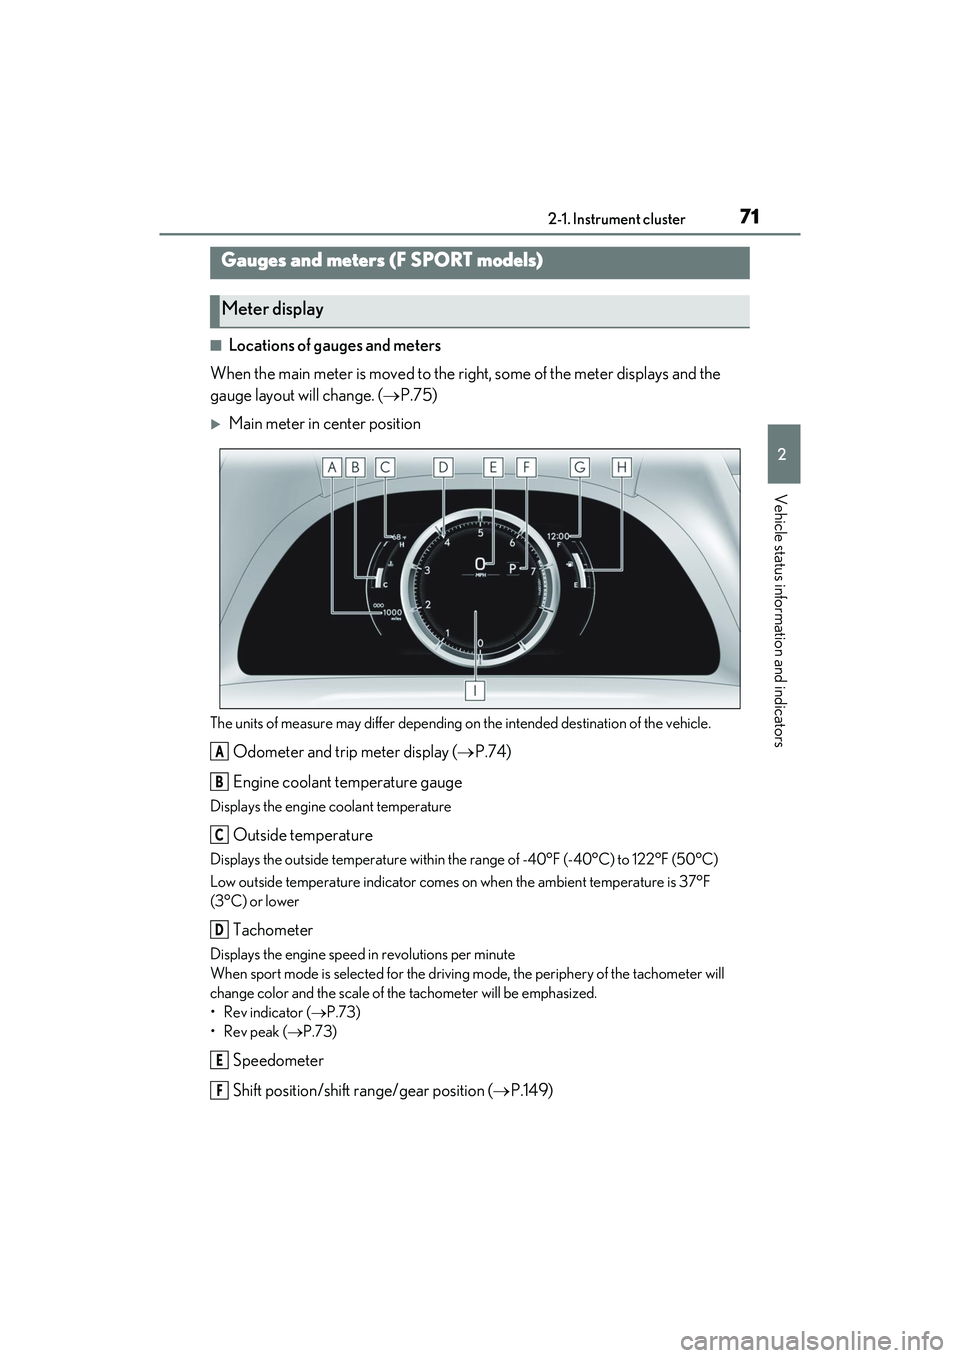
■Locations of gauges and meters
When the main meter is moved to the righ t, some of the meter displays and the
gauge layout will change. ( P.75)
Main meter in center position
The units of measure may differ depending on the intended destination of the vehicle.
Odometer and trip meter display ( P.74)
Engine coolant temperature gauge
Displays the engine coolant temperature
Outside temperature
Displays the outside temperature within the range of -40°F (-40°C) to 122°F (50°C)
Low outside temperature indicator comes on when the ambient temperature is 37°F
(3°C) or lower
Tachometer
Displays the engine speed in revolutions per minute
When sport mode is selected for the drivin g mode, the periphery of the tachometer will
change color and the scale of the tachometer will be emphasized.
• Rev indicator ( P.73)
•Rev peak ( P.73)
Speedometer
Shift position/shift range/gear position ( P.149)
Gauges and meters (F SPORT models)
Meter display
A
B
C
D
E
F
Page 74 of 468
722-1. Instrument cluster
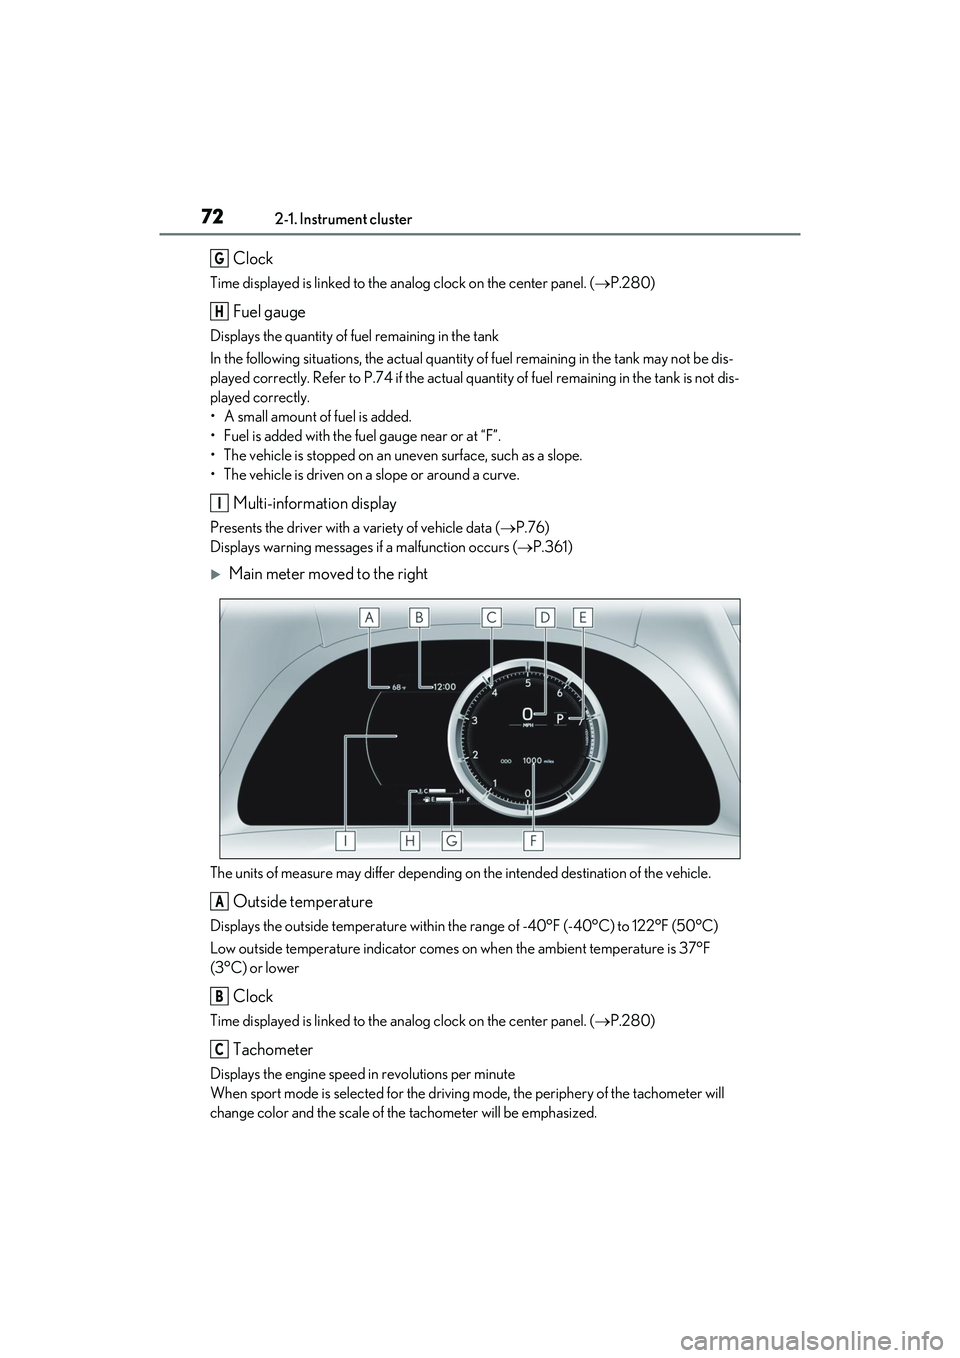
Clock
Time displayed is linked to the analog clock on the center panel. (P.280)
Fuel gauge
Displays the quantity of fuel remaining in the tank
In the following situations, the actual quantity of fuel remaining in the tank may not be dis-
played correctly. Refer to P.74 if the actual quantity of fuel remaining in the tank is not dis-
played correctly.
• A small amount of fuel is added.
• Fuel is added with the fuel gauge near or at “F”.
• The vehicle is stopped on an uneven surface, such as a slope.
• The vehicle is driven on a slope or around a curve.
Multi-information display
Presents the driver with a variety of vehicle data ( P.76)
Displays warning messages if a malfunction occurs (P.361)
Main meter moved to the right
The units of measure may differ depending on the intended destination of the vehicle.
Outside temperature
Displays the outside temperature within the range of -40°F (-40°C) to 122°F (50°C)
Low outside temperature indicator comes on when the ambient temperature is 37°F
(3°C) or lower
Clock
Time displayed is linked to the analog clock on the center panel. ( P.280)
Tachometer
Displays the engine speed in revolutions per minute
When sport mode is selected for the drivin g mode, the periphery of the tachometer will
change color and the scale of the tachometer will be emphasized.
G
H
I
A
B
C
Page 75 of 468
732-1. Instrument cluster
2
Vehicle status information and indicators
• Rev indicator (P.73)
•Rev peak ( P.73)
Speedometer
Shift position and shift range ( P.149)
Odometer and trip meter display ( P.74)
Fuel gauge
Displays the quantity of fuel remaining in the tank
In the following situations, the actual quantity of fuel remaining in the tank may not be dis-
played correctly. Refer to P.74 if the actual quantity of fuel remaining in the tank is not dis-
played correctly.
• A small amount of fuel is added.
• Fuel is added with the fuel gauge near or at “F”.
• The vehicle is stopped on an uneven surface, such as a slope.
• The vehicle is driven on a slope or around a curve.
Engine coolant temperature gauge
Displays the engine coolant temperature
Multi-information display
Presents the driver with a variety of vehicle data ( P.76)
Displays warning messages if a malfunction occurs (P.361)
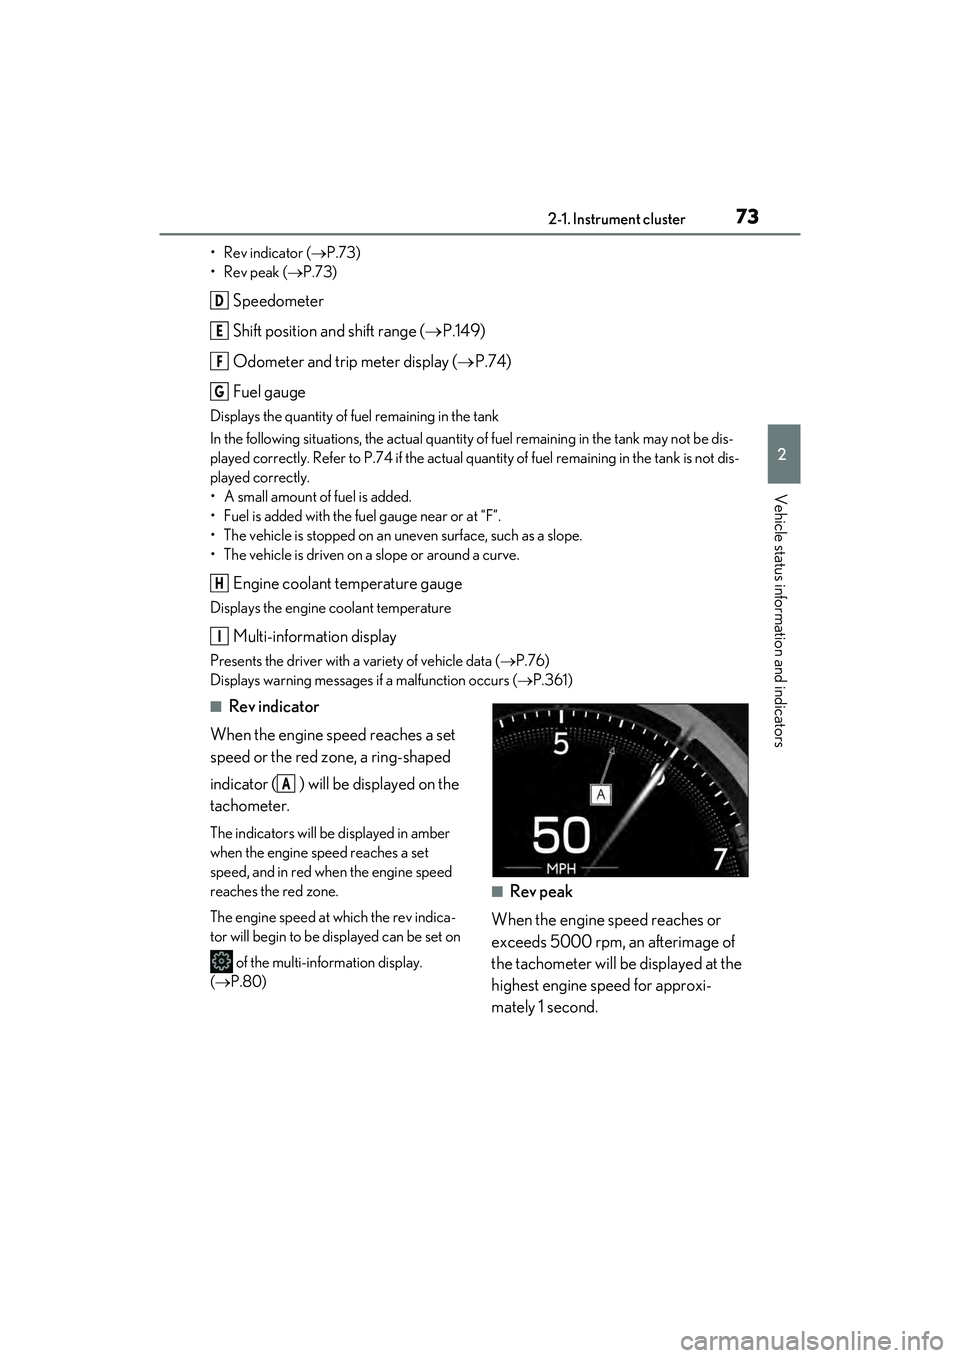
■Rev indicator
When the engine speed reaches a set
speed or the red zone, a ring-shaped
indicator ( ) will be displayed on the
tachometer.
The indicators will be displayed in amber
when the engine speed reaches a set
speed, and in red when the engine speed
reaches the red zone.
The engine speed at which the rev indica-
tor will begin to be displayed can be set on
of the multi-information display.
( P.80)
■Rev peak
When the engine speed reaches or
exceeds 5000 rpm, an afterimage of
the tachometer will be displayed at the
highest engine speed for approxi-
mately 1 second.
D
E
F
G
H
I
A
Page 76 of 468
742-1. Instrument cluster
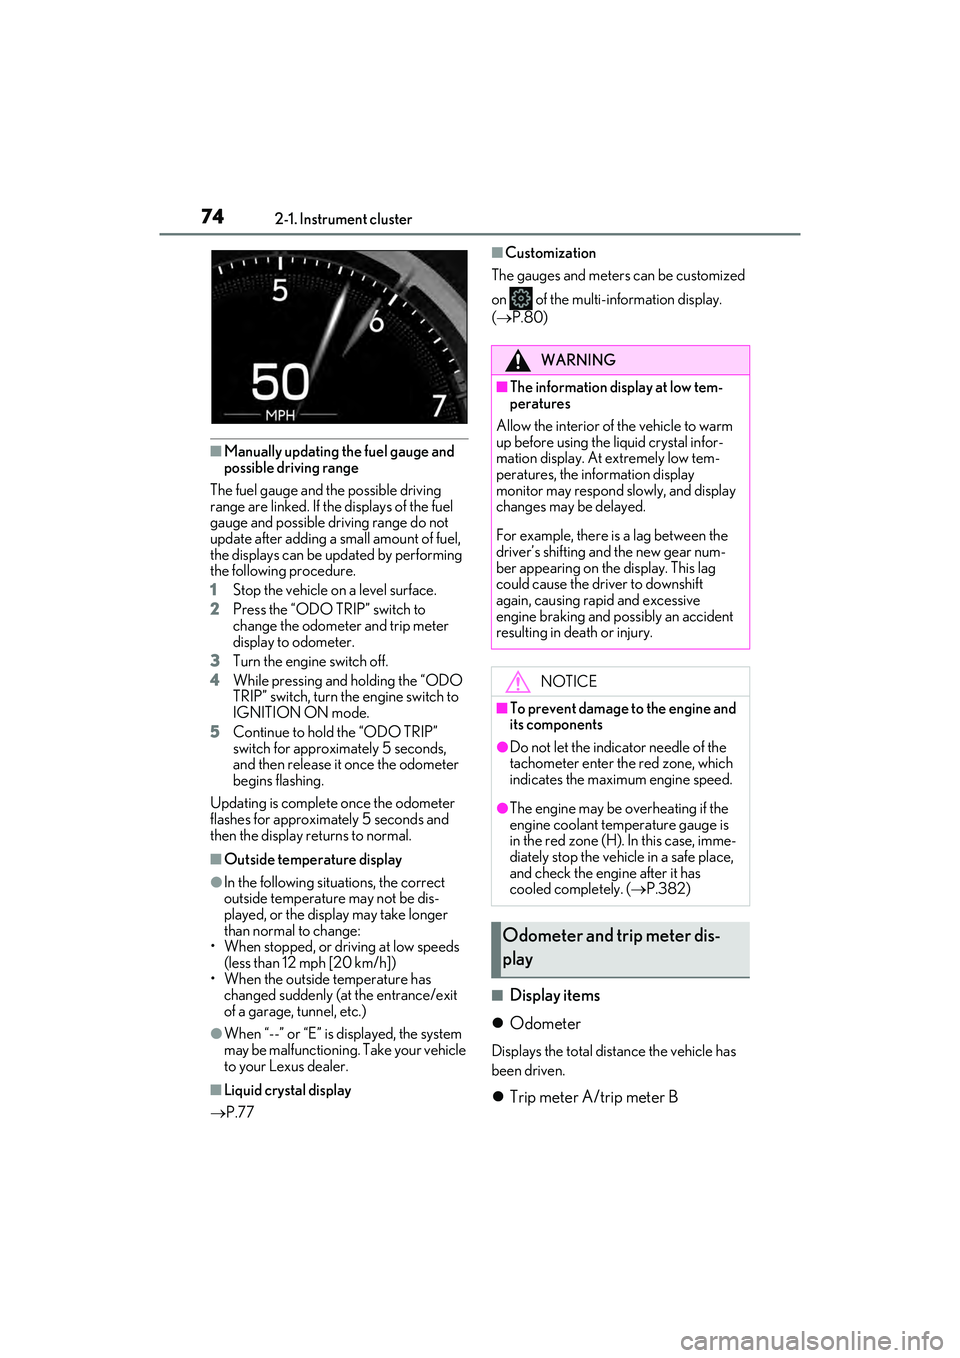
■Manually updating the fuel gauge and
possible driving range
The fuel gauge and the possible driving
range are linked. If the displays of the fuel
gauge and possible driving range do not
update after adding a small amount of fuel,
the displays can be updated by performing
the following procedure.
1 Stop the vehicle on a level surface.
2 Press the “ODO TRIP” switch to
change the odometer and trip meter
display to odometer.
3 Turn the engine switch off.
4 While pressing and holding the “ODO
TRIP” switch, turn the engine switch to
IGNITION ON mode.
5 Continue to hold the “ODO TRIP”
switch for approximately 5 seconds,
and then release it once the odometer
begins flashing.
Updating is complete once the odometer
flashes for approximately 5 seconds and
then the display returns to normal.
■Outside temperature display
●In the following situations, the correct
outside temperature may not be dis-
played, or the display may take longer
than normal to change:
• When stopped, or driving at low speeds (less than 12 mph [20 km/h])
• When the outside temperature has changed suddenly (at the entrance/exit
of a garage, tunnel, etc.)
●When “--” or “E” is displayed, the system
may be malfunctioning. Take your vehicle
to your Lexus dealer.
■Liquid crystal display
P.77
■Customization
The gauges and meters can be customized
on of the multi-information display.
( P.80)
■Display items
Odometer
Displays the total distance the vehicle has
been driven.
Trip meter A/trip meter B
WARNING
■The information display at low tem-
peratures
Allow the interior of the vehicle to warm
up before using the liquid crystal infor-
mation display. At extremely low tem-
peratures, the information display
monitor may respond slowly, and display
changes may be delayed.
For example, there is a lag between the
driver’s shifting and the new gear num-
ber appearing on the display. This lag
could cause the driver to downshift
again, causing rapid and excessive
engine braking and possibly an accident
resulting in death or injury.
NOTICE
■To prevent damage to the engine and
its components
●Do not let the indicator needle of the
tachometer enter the red zone, which
indicates the maximum engine speed.
●The engine may be overheating if the
engine coolant temperature gauge is
in the red zone (H). In this case, imme-
diately stop the vehicle in a safe place,
and check the engine after it has
cooled completely. ( P.382)
Odometer and trip meter dis-
play
Page 77 of 468
752-1. Instrument cluster
2
Vehicle status information and indicators
Displays the distance the vehicle has been
driven since the meter was last reset. Trip
meters A and B can be used to record and
display different distances independently.
Distance until next engine oil
change
Displays the distance the vehicle can be
driven until an oil change is necessary.
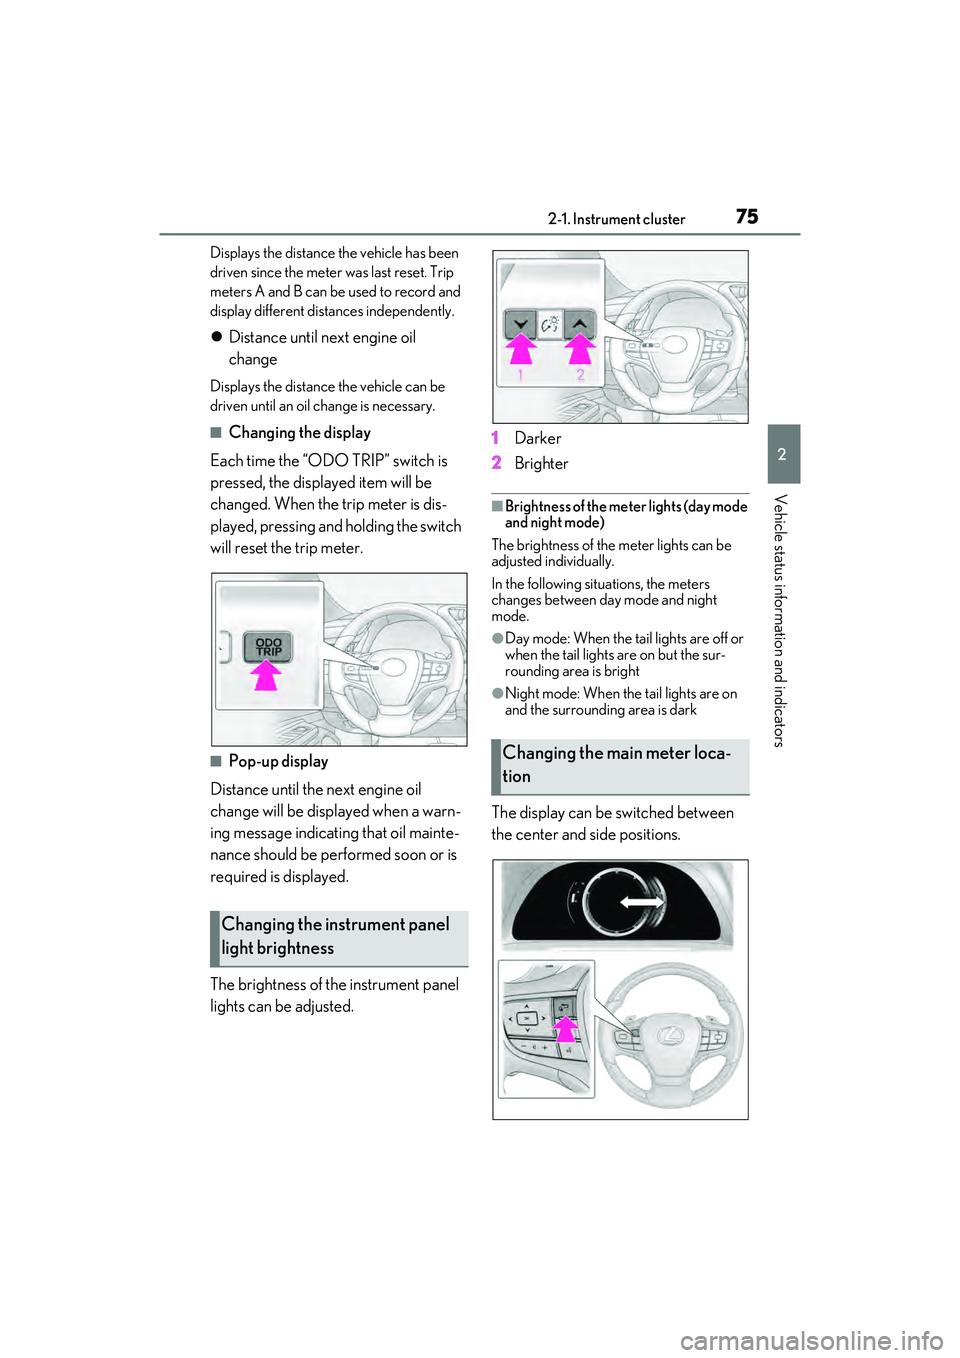
■Changing the display
Each time the “ODO TRIP” switch is
pressed, the displayed item will be
changed. When the trip meter is dis-
played, pressing and holding the switch
will reset the trip meter.
■Pop-up display
Distance until the next engine oil
change will be displayed when a warn-
ing message indicating that oil mainte-
nance should be performed soon or is
required is displayed.
The brightness of the instrument panel
lights can be adjusted. 1
Darker
2 Brighter
■Brightness of the meter lights (day mode
and night mode)
The brightness of the meter lights can be
adjusted individually.
In the following situations, the meters
changes between day mode and night
mode.
●Day mode: When the tail lights are off or
when the tail lights are on but the sur-
rounding area is bright
●Night mode: When the tail lights are on
and the surrounding area is dark
The display can be switched between
the center and side positions.
Changing the instrument panel
light brightness
Changing the main meter loca-
tion
Page 78 of 468
762-1. Instrument cluster
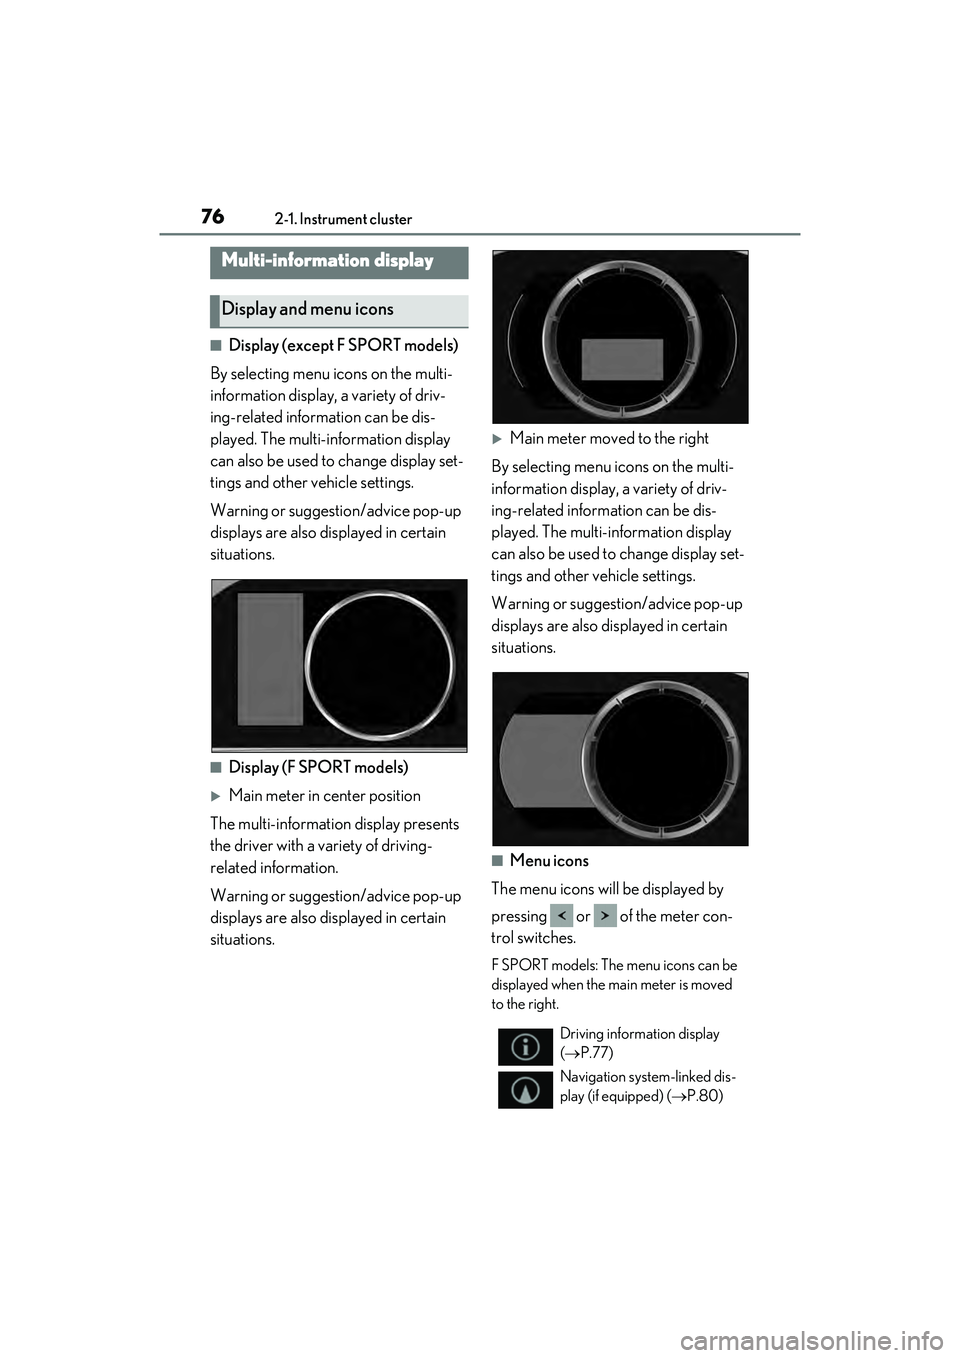
■Display (except F SPORT models)
By selecting menu icons on the multi-
information display, a variety of driv-
ing-related information can be dis-
played. The multi-information display
can also be used to change display set-
tings and other vehicle settings.
Warning or suggestion/advice pop-up
displays are also displayed in certain
situations.
■Display (F SPORT models)
Main meter in center position
The multi-information display presents
the driver with a variety of driving-
related information.
Warning or suggestion/advice pop-up
displays are also displayed in certain
situations.
Main meter moved to the right
By selecting menu icons on the multi-
information display, a variety of driv-
ing-related information can be dis-
played. The multi-information display
can also be used to change display set-
tings and other vehicle settings.
Warning or suggesti on/advice pop-up
displays are also displayed in certain
situations.
■Menu icons
The menu icons will be displayed by
pressing or of the meter con-
trol switches.
F SPORT models: The menu icons can be
displayed when the main meter is moved
to the right.
Multi-information display
Display and menu icons
Driving information display
( P.77)
Navigation system-linked dis-
play (if equipped) ( P.80)
Page 79 of 468
772-1. Instrument cluster
2
Vehicle status information and indicators
■Liquid crystal display
Small spots or light spots may appear on the
display. This phenomenon is characteristic
of liquid crystal displays, and there is no
problem continuing to use the display.
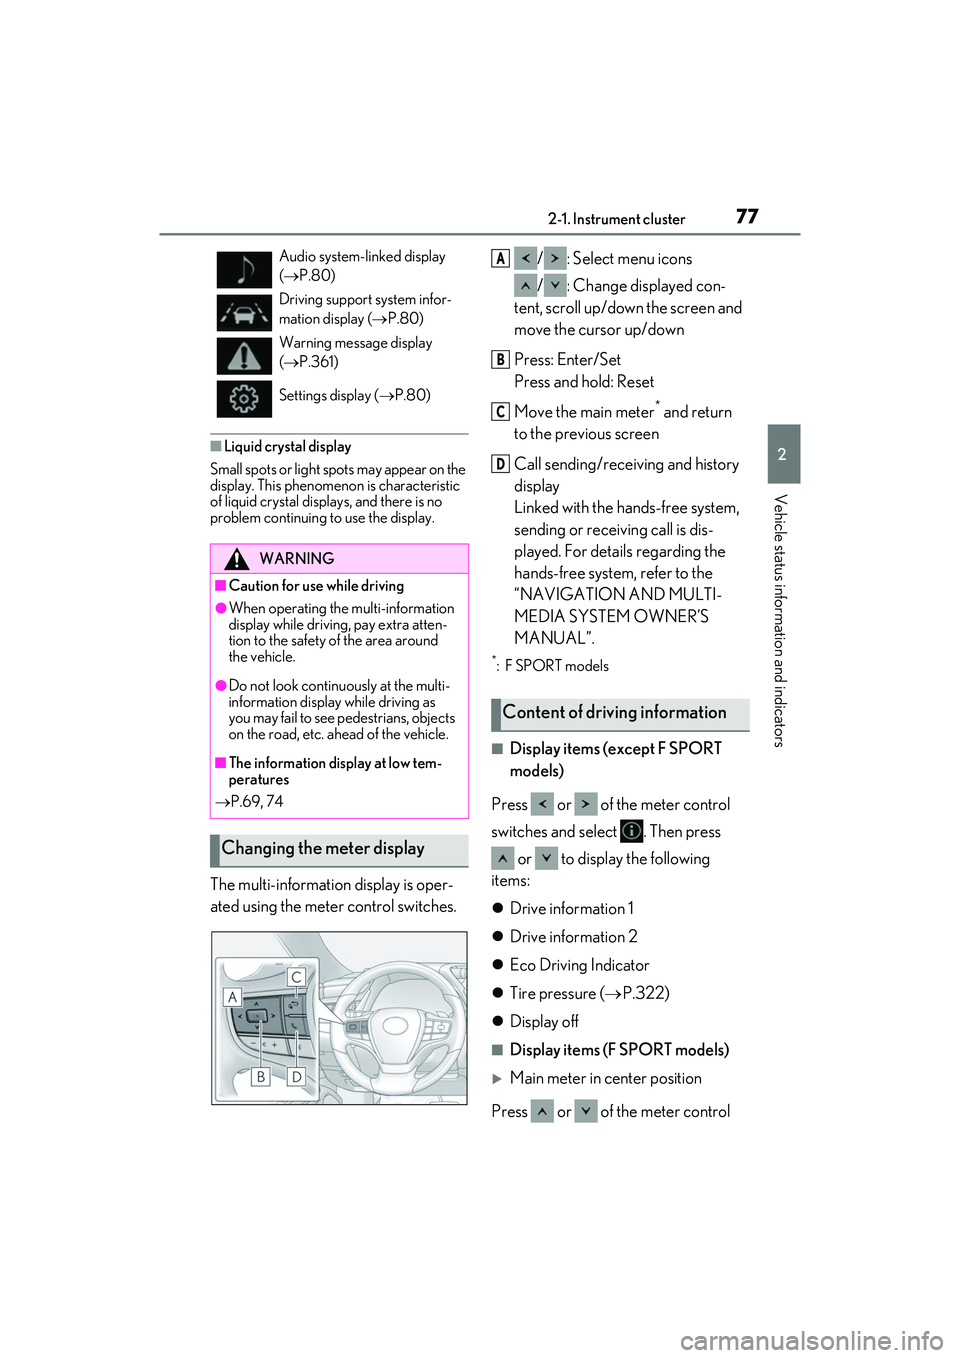
The multi-information display is oper-
ated using the meter control switches. / : Select menu icons
/ : Change displayed con-
tent, scroll up/down the screen and
move the cursor up/down
Press: Enter/Set
Press and hold: Reset
Move the main meter
* and return
to the previous screen
Call sending/receiving and history
display
Linked with the hands-free system,
sending or receiving call is dis-
played. For details regarding the
hands-free system, refer to the
“NAVIGATION AND MULTI-
MEDIA SYSTEM OWNER’S
MANUAL”.
*:F SPORT models
■Display items (except F SPORT
models)
Press or of the meter control
switches and select . Then press or to display the following
items:
Drive information 1
Drive information 2
Eco Driving Indicator
Tire pressure ( P.322)
Display off
■Display items (F SPORT models)
Main meter in center position
Press or of the meter control
Audio system-linked display
( P.80)
Driving support system infor-
mation display ( P.80)
Warning message display
( P.361)
Settings display ( P.80)
WARNING
■Caution for use while driving
●When operating the multi-information
display while driving, pay extra atten-
tion to the safety of the area around
the vehicle.
●Do not look continuously at the multi-
information display while driving as
you may fail to see pedestrians, objects
on the road, etc. ahead of the vehicle.
■The information display at low tem-
peratures
P.69, 74
Changing the meter display
Content of driving information
A
B
C
D
Page 80 of 468
782-1. Instrument cluster
switches to display the following items:
Drive information 1
Drive information 2
Gear position
Tire pressure ( P.322)
Units
Display off
Main meter moved to the right
Press or of the meter control
switches and select . Then press or to display the following
items:
Drive information 1
Drive information 2
Eco Driving Indicator
G-force
Gear Position
Tire pressure ( P.322)
Display off
■Drive information 1/Drive informa-
tion 2
Displays drive information such as the
following:
Use the displayed values as a reference
only.
Drive information 1
• Current fuel consumption
• Average fuel economy (after reset)
Drive information 2
• Distance (driving range)
• Average vehicle speed (after reset)
Displayed items (listed below) can be changed on . (
P.80)
Current fuel consumption
Bar type: Displays instantaneous current
fuel consumption
Average fuel economy
After reset: Displays average fuel con-
sumption since the display was reset
*1
After start: Displays average fuel con-
sumption since engine start
After refuel: Displays average fuel con-
sumption since refuel
Average vehicle speed
After reset: Displays average vehicle
speed since the display was reset
*1
After start: Displays average vehicle speed
since engine start
Elapsed time
After reset: Displays elapsed time since the
display was reset
*1
After start: Displays elapsed time since
engine start
Distance
Driving range: Displays driving range with
remaining fuel
*2, 3
After start: Displays the distance driven
since engine start
Other
Blank: No item
*1: To reset, display the desired item and
press and hold “OK” of the meter con-
trol switches.
*2: This distance is computed based on your average fuel consumption. As a
result, the actual distance that can be
driven may differ from that displayed.
*3: When only a small amount of fuel is