sensor LEXUS ES350 2022 Owners Manual
[x] Cancel search | Manufacturer: LEXUS, Model Year: 2022, Model line: ES350, Model: LEXUS ES350 2022Pages: 468, PDF Size: 26.96 MB
Page 29 of 468
271-1. For safe use
1
For safety and security
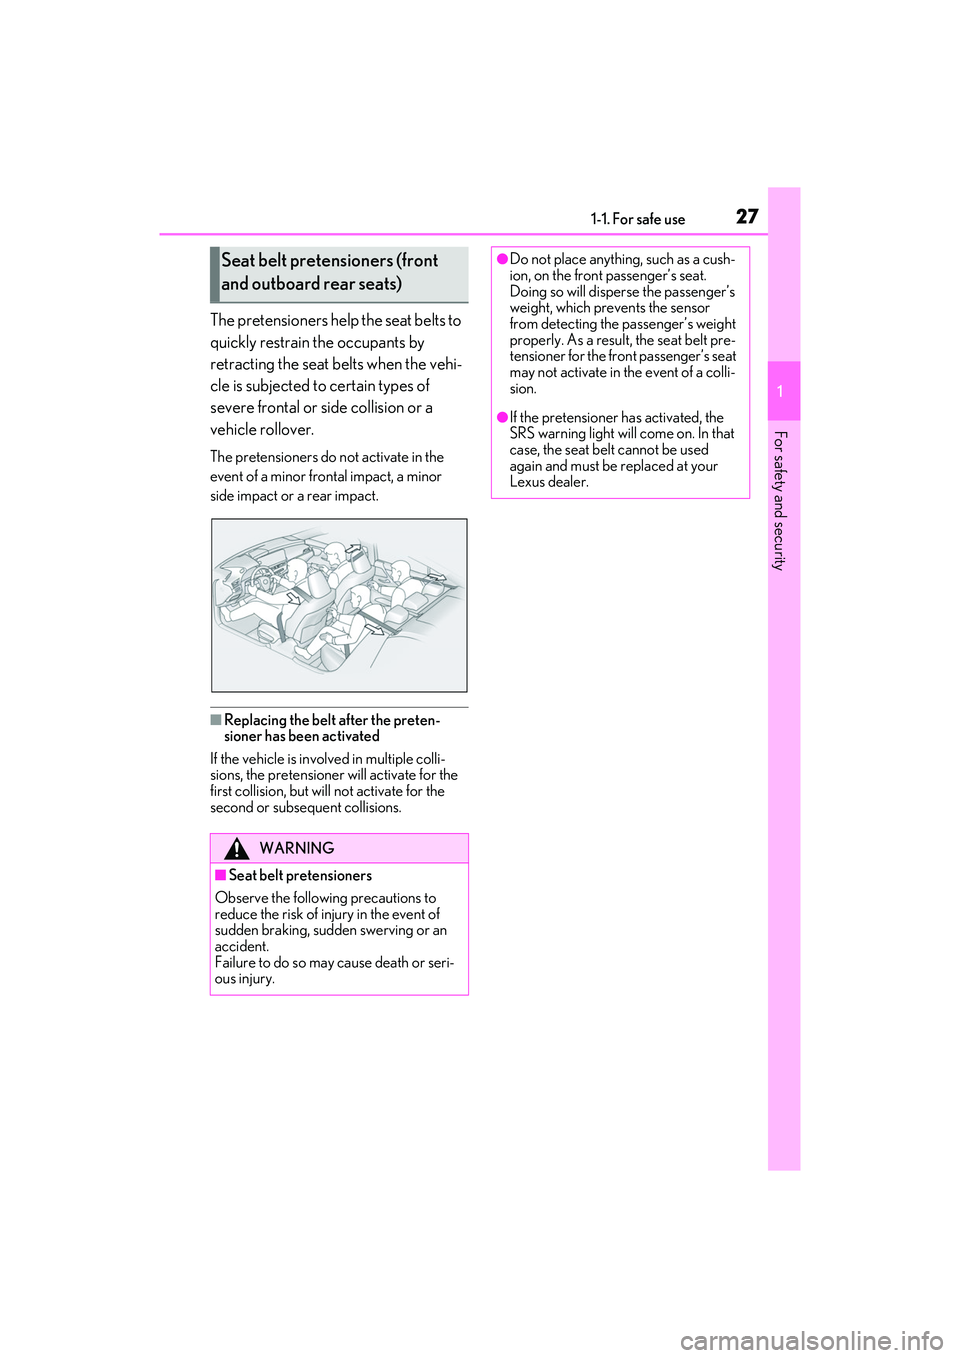
The pretensioners help the seat belts to
quickly restrain the occupants by
retracting the seat belts when the vehi-
cle is subjected to certain types of
severe frontal or side collision or a
vehicle rollover.
The pretensioners do not activate in the
event of a minor frontal impact, a minor
side impact or a rear impact.
■Replacing the belt after the preten-
sioner has been activated
If the vehicle is involved in multiple colli-
sions, the pretensioner will activate for the
first collision, but will not activate for the
second or subsequent collisions.
Seat belt pretensioners (front
and outboard rear seats)
WARNING
■Seat belt pretensioners
Observe the following precautions to
reduce the risk of in jury in the event of
sudden braking, sudd en swerving or an
accident.
Failure to do so may cause death or seri-
ous injury.
●Do not place anything, such as a cush-
ion, on the front passenger’s seat.
Doing so will disperse the passenger’s
weight, which prevents the sensor
from detecting the passenger’s weight
properly. As a result, the seat belt pre-
tensioner for the front passenger’s seat
may not activate in the event of a colli-
sion.
●If the pretensioner has activated, the
SRS warning light will come on. In that
case, the seat belt cannot be used
again and must be replaced at your
Lexus dealer.
Page 31 of 468
291-1. For safe use
1
For safety and security
SRS curtain shield airbags
• Can help protect primarily the head of occupants in the outer seats
• Can help prevent the occupants from being thrown from the vehicle in the event of vehi- cle rollover
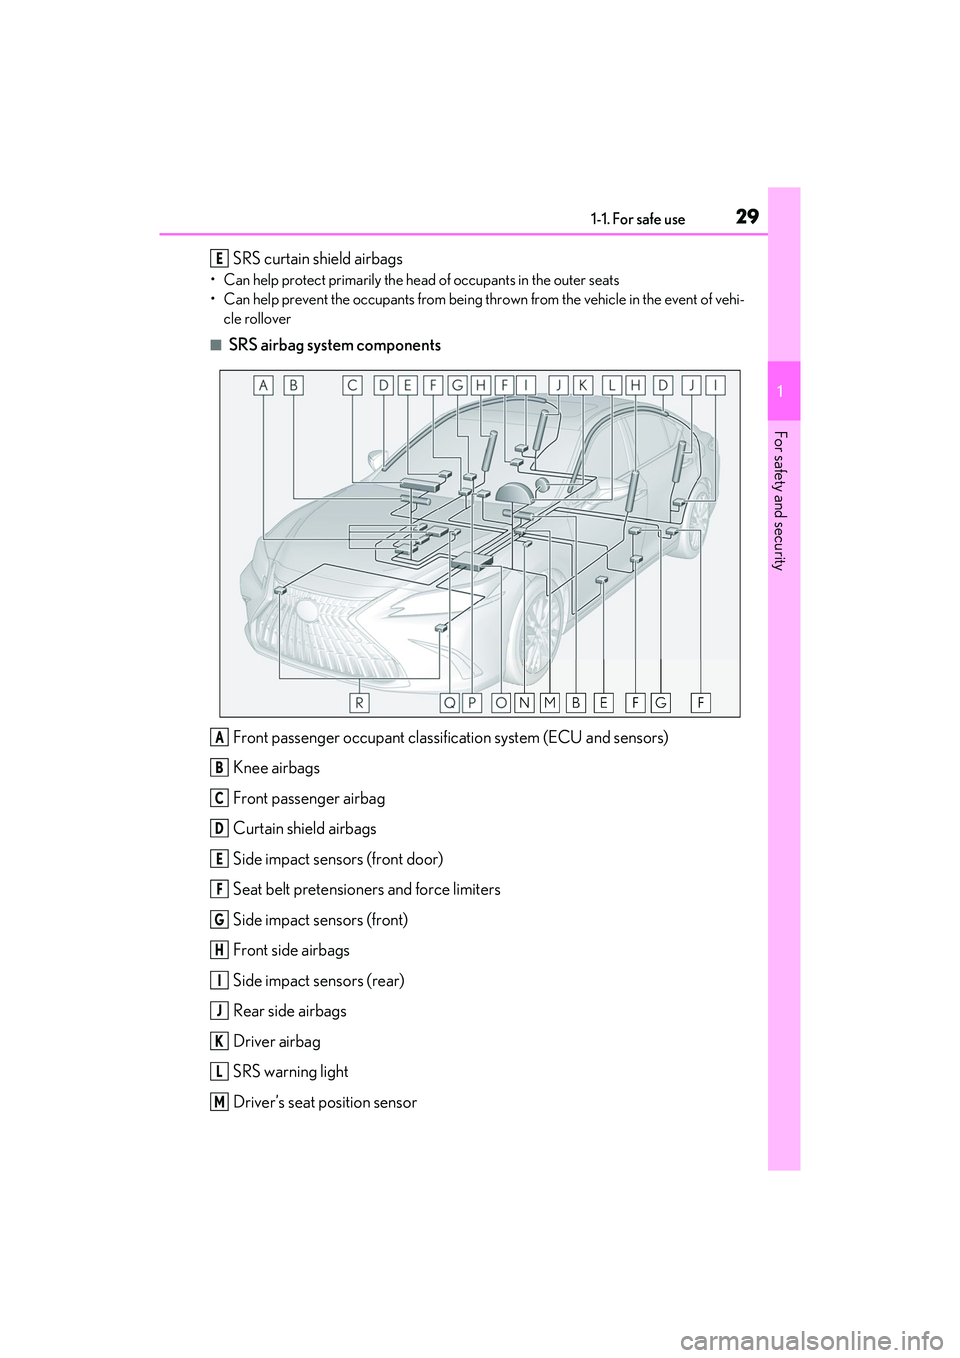
■SRS airbag system components
Front passenger occupant classification system (ECU and sensors)
Knee airbags
Front passenger airbag
Curtain shield airbags
Side impact sensors (front door)
Seat belt pretensioners and force limiters
Side impact sensors (front)
Front side airbags
Side impact sensors (rear)
Rear side airbags
Driver airbag
SRS warning light
Driver’s seat position sensor
E
A
B
C
D
E
F
G
H
I
J
K
L
M
Page 32 of 468
301-1. For safe use
Driver’s seat belt buckle switch
Airbag sensor assembly
“PASSENGER AIR BAG” indicator lights
Front passenger’s seat belt buckle switch
Front impact sensors
Your vehicle is equipped with ADVANCED AIRBAGS designed based on the
US motor vehicle safety standards (FMVSS208). The airbag sensor assembly
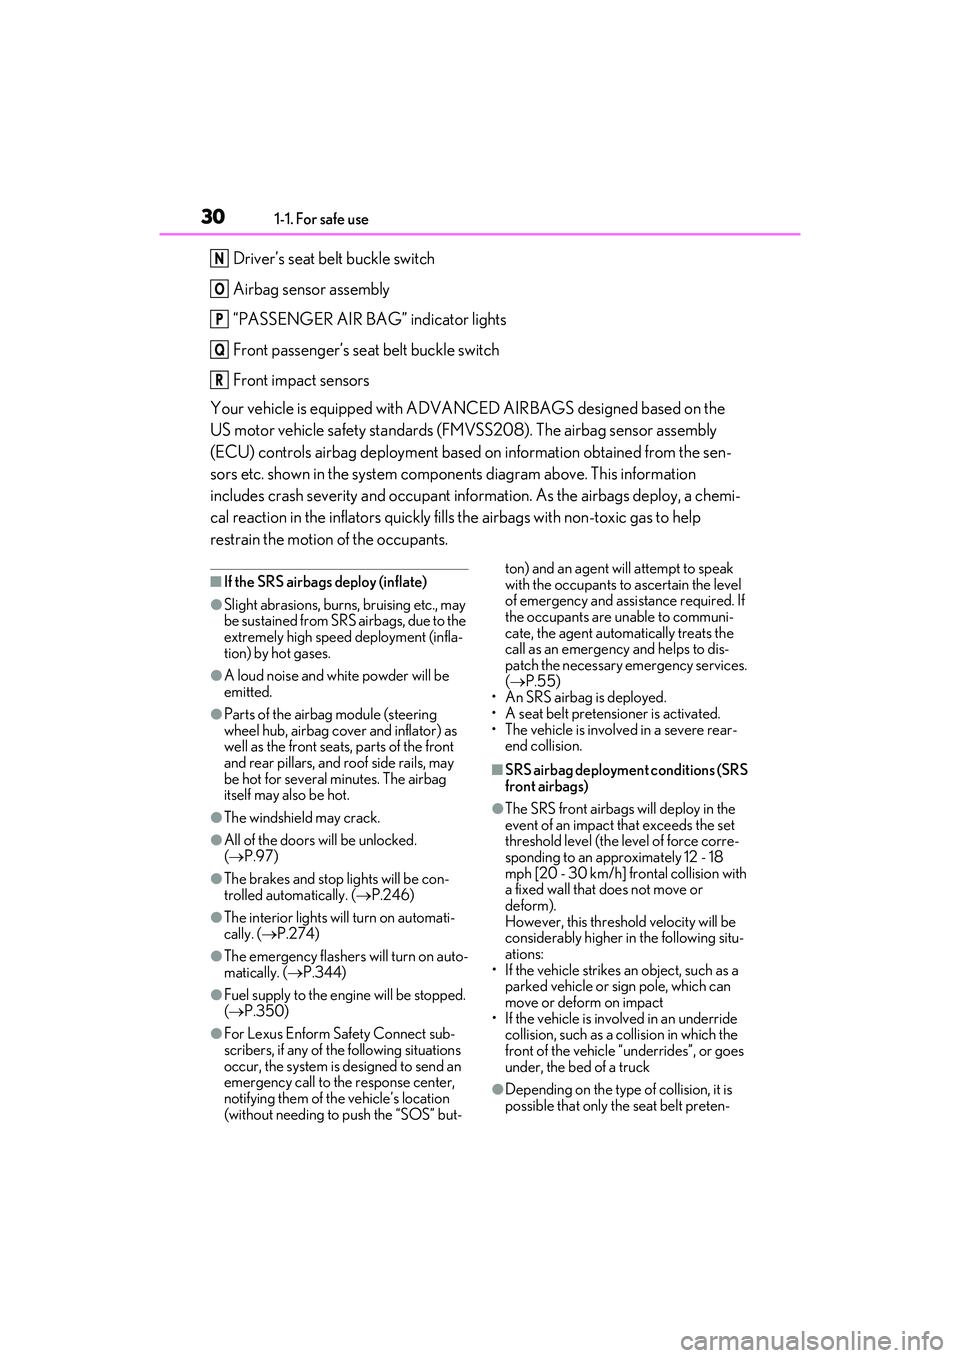
(ECU) controls airbag deployment based on information obtained from the sen-
sors etc. shown in the system components diagram above. This information
includes crash severity and occupant information. As the airbags deploy, a chemi-
cal reaction in the inflators quickly fills the airbags with non-toxic gas to help
restrain the motion of the occupants.
■If the SRS airbags deploy (inflate)
●Slight abrasions, burns, bruising etc., may
be sustained from SRS airbags, due to the
extremely high speed deployment (infla-
tion) by hot gases.
●A loud noise and white powder will be
emitted.
●Parts of the airbag module (steering
wheel hub, airbag cover and inflator) as
well as the front seats, parts of the front
and rear pillars, and roof side rails, may
be hot for several minutes. The airbag
itself may also be hot.
●The windshield may crack.
●All of the doors will be unlocked.
( P.97)
●The brakes and stop lights will be con-
trolled automatically. ( P.246)
●The interior lights will turn on automati-
cally. ( P.274)
●The emergency flashers will turn on auto-
matically. ( P.344)
●Fuel supply to the engine will be stopped.
( P.350)
●For Lexus Enform Safety Connect sub-
scribers, if any of the following situations
occur, the system is designed to send an
emergency call to the response center,
notifying them of the vehicle’s location
(without needing to push the “SOS” but- ton) and an agent will attempt to speak
with the occupants to ascertain the level
of emergency and assistance required. If
the occupants are unable to communi-
cate, the agent automatically treats the
call as an emergency and helps to dis-
patch the necessary emergency services.
(
P.55)
•An SRS airbag is deployed.
• A seat belt pretensioner is activated.
• The vehicle is involved in a severe rear- end collision.
■SRS airbag deployment conditions (SRS
front airbags)
●The SRS front airbags will deploy in the
event of an impact that exceeds the set
threshold level (the level of force corre-
sponding to an approximately 12 - 18
mph [20 - 30 km/h] frontal collision with
a fixed wall that does not move or
deform).
However, this threshold velocity will be
considerably higher in the following situ-
ations:
• If the vehicle strikes an object, such as a parked vehicle or sign pole, which can
move or deform on impact
• If the vehicle is involved in an underride collision, such as a collision in which the
front of the vehicle “underrides”, or goes
under, the bed of a truck
●Depending on the type of collision, it is
possible that only the seat belt preten-
N
O
P
Q
R
Page 37 of 468
351-1. For safe use
1
For safety and security
WARNING
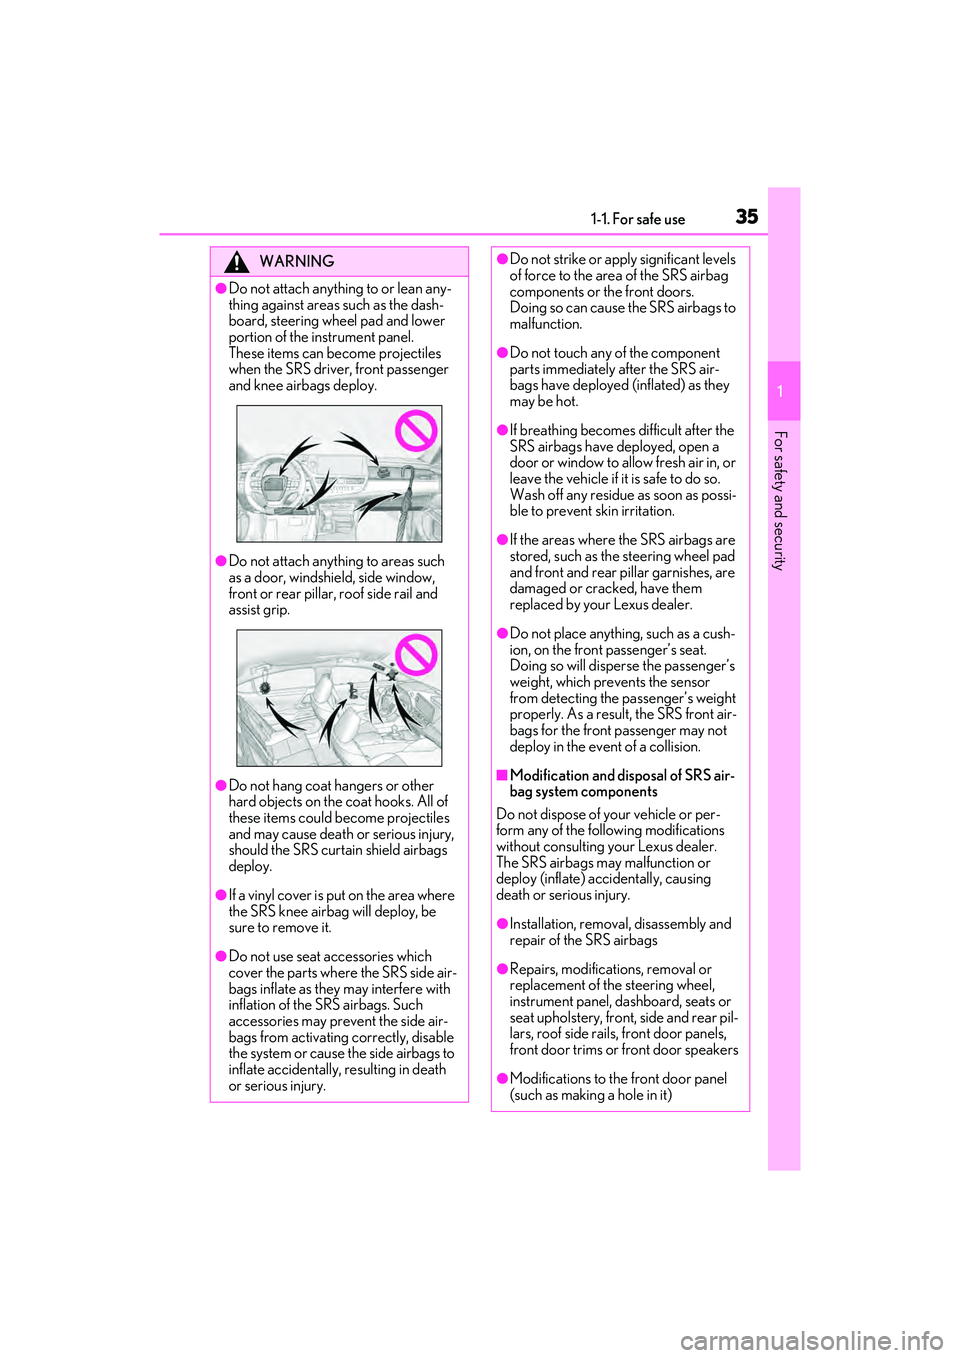
●Do not attach anything to or lean any-
thing against areas such as the dash-
board, steering wheel pad and lower
portion of the instrument panel.
These items can become projectiles
when the SRS driver, front passenger
and knee airbags deploy.
●Do not attach anything to areas such
as a door, windshield, side window,
front or rear pillar, roof side rail and
assist grip.
●Do not hang coat hangers or other
hard objects on the coat hooks. All of
these items could become projectiles
and may cause death or serious injury,
should the SRS curtain shield airbags
deploy.
●If a vinyl cover is put on the area where
the SRS knee airbag will deploy, be
sure to remove it.
●Do not use seat accessories which
cover the parts where the SRS side air-
bags inflate as they may interfere with
inflation of the SRS airbags. Such
accessories may prevent the side air-
bags from activating correctly, disable
the system or cause the side airbags to
inflate accidentally, resulting in death
or serious injury.
●Do not strike or apply significant levels
of force to the area of the SRS airbag
components or the front doors.
Doing so can cause the SRS airbags to
malfunction.
●Do not touch any of the component
parts immediately after the SRS air-
bags have deployed (inflated) as they
may be hot.
●If breathing becomes difficult after the
SRS airbags have deployed, open a
door or window to allow fresh air in, or
leave the vehicle if it is safe to do so.
Wash off any residue as soon as possi-
ble to prevent skin irritation.
●If the areas where the SRS airbags are
stored, such as the steering wheel pad
and front and rear pillar garnishes, are
damaged or cracked, have them
replaced by your Lexus dealer.
●Do not place anything, such as a cush-
ion, on the front passenger’s seat.
Doing so will disperse the passenger’s
weight, which prevents the sensor
from detecting the passenger’s weight
properly. As a result, the SRS front air-
bags for the front passenger may not
deploy in the event of a collision.
■Modification and disposal of SRS air-
bag system components
Do not dispose of your vehicle or per-
form any of the following modifications
without consulting your Lexus dealer.
The SRS airbags may malfunction or
deploy (inflate) accidentally, causing
death or serious injury.
●Installation, removal, disassembly and
repair of the SRS airbags
●Repairs, modifications, removal or
replacement of the steering wheel,
instrument panel, dashboard, seats or
seat upholstery, front, side and rear pil-
lars, roof side rails, front door panels,
front door trims or front door speakers
●Modifications to the front door panel
(such as making a hole in it)
Page 98 of 468

963-2. Opening, closing and locking the doors and trunk
3-2.Op ening, clo sing and locking the do ors and trunk
■Smart access system with push-
button start
Carry the electronic key to enable this
function.
1 Grip the driver’s door handle to
unlock the door. Holding the
driver’s door handle for approxi-
mately 2 seconds unlocks all the
doors. Grip the passenger’s door
handle to unlock all the doors.
*
Make sure to touch the sensor on the back
of the handle.
The doors cannot be unlocked for 3 sec-
onds after the doors are locked.
*: The door unlock settings can be
changed.
2 Touch the lock sensor (the indenta-
tion on the upper part of the door
handle) to lock all the doors.
Check that the door is securely locked.
■Wireless remote control
1 Locks all the doors
Check that the door is securely locked.
2Unlocks all the doors
Pressing the button unlocks the driver’s
door. Pressing the button again within 5
seconds unlocks the other doors.
Press and hold to open the windows and
moon roof (if equipped) or panoramic
moon roof (if equipped).
*
*
: This setting must be customized at your Lexus dealer.
■Switching the door unlock function
It is possible to set which doors the entry
function unlocks using the wireless remote
control.
1 Turn the engine switch off.
2 When the indicator light on the key sur-
face is not on, press and hold ,
or for approximately 5
seconds while pressing and holding
.
The setting changes each time an operation
is performed, as shown below. (When
changing the setting continuously, release
the buttons, wait for at least 5 seconds, and
repeat step 2.)
Doors
Unlocking and locking the doors
from the outside
Page 99 of 468
973-2. Opening, closing and locking the doors and trunk
3
Before driving
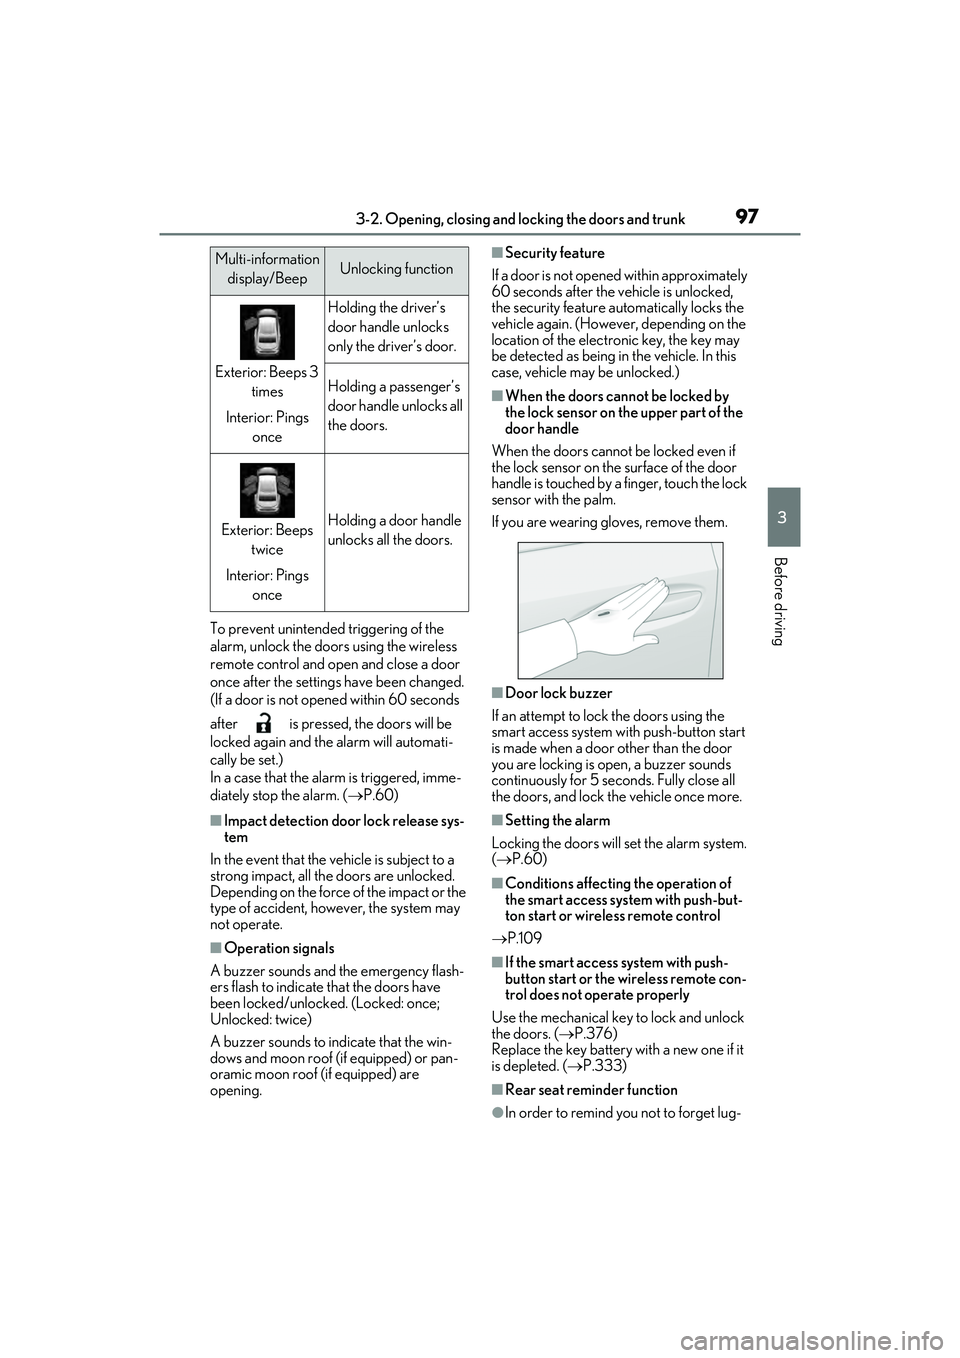
To prevent unintended triggering of the
alarm, unlock the doors using the wireless
remote control and open and close a door
once after the settings have been changed.
(If a door is not opened within 60 seconds
after is pressed, the doors will be
locked again and the alarm will automati-
cally be set.)
In a case that the alarm is triggered, imme-
diately stop the alarm. (P.60)
■Impact detection door lock release sys-
tem
In the event that the vehicle is subject to a
strong impact, all the doors are unlocked.
Depending on the force of the impact or the
type of accident, however, the system may
not operate.
■Operation signals
A buzzer sounds and the emergency flash-
ers flash to indicate that the doors have
been locked/unlocked. (Locked: once;
Unlocked: twice)
A buzzer sounds to indicate that the win-
dows and moon roof (if equipped) or pan-
oramic moon roof (if equipped) are
opening.
■Security feature
If a door is not opened within approximately
60 seconds after the vehicle is unlocked,
the security feature automatically locks the
vehicle again. (However, depending on the
location of the electronic key, the key may
be detected as being in the vehicle. In this
case, vehicle may be unlocked.)
■When the doors cannot be locked by
the lock sensor on the upper part of the
door handle
When the doors cannot be locked even if
the lock sensor on the surface of the door
handle is touched by a finger, touch the lock
sensor with the palm.
If you are wearing gloves, remove them.
■Door lock buzzer
If an attempt to lock the doors using the
smart access system with push-button start
is made when a door other than the door
you are locking is open, a buzzer sounds
continuously for 5 seconds. Fully close all
the doors, and lock the vehicle once more.
■Setting the alarm
Locking the doors will set the alarm system.
( P.60)
■Conditions affectin g the operation of
the smart access system with push-but-
ton start or wirele ss remote control
P.109
■If the smart access system with push-
button start or the wireless remote con-
trol does not operate properly
Use the mechanical key to lock and unlock
the doors. ( P.376)
Replace the key battery with a new one if it
is depleted. ( P.333)
■Rear seat reminder function
●In order to remind you not to forget lug-
Multi-information
display/BeepUnlocking function
Exterior: Beeps 3 times
Interior: Pings once
Holding the driver’s
door handle unlocks
only the driver’s door.
Holding a passenger’s
door handle unlocks all
the doors.
Exterior: Beeps twice
Interior: Pings onceHolding a door handle
unlocks all the doors.
Page 105 of 468

1033-2. Opening, closing and locking the doors and trunk
3
Before driving
■Smart access system with push-
button start
While carrying the electronic key,
press the button.
When all the doors are unlocked using
one of the following methods, the trunk
can be opened without the electronic
key:
Entry function
Wireless remote control
Door lock switches
Automatic door unlocking system
Mechanical key
■Wireless remote control
Press and hold the switch.
A buzzer sounds.
■Hands Free Power Trunk Lid (vehi-
cles with power trunk lid)
1 While carrying an electronic key,
stand within the smart access sys-
tem with push-button start opera-
tion range, approximately 11.8 to
19.7 in. (30 to 50 cm) from the rear
bumper.
Kick sensor
Hands Free Power Trunk Lid oper-
ation detection area
Smart access system with push-
button start operation detection
area ( P.108)
2 Perform a kick operation by mov-
ing your foot to within approxi-
mately 3.9 in. (10 cm) of the rear
bumper and then pulling it back.
• Perform the entire kick operation within 1 second.
• The trunk lid will not start operating
A
B
C
Page 106 of 468

1043-2. Opening, closing and locking the doors and trunk
while a foot is detected under the
rear bumper.
• Operate the Hands Free Power
Trunk Lid without contacting the
rear bumper with your foot.
• If another electronic key is in the cabin or trunk, it may take slightly
longer than normal for the opera-
tion to occur.
Kick sensor
Hands Free Power Trunk Lid oper-
ation detection area
3 When the kick sensor detects that
your foot is pulled back, a buzzer
will sound and the trunk will auto-
matically fully open/close.
If a foot is moved under the rear bumper
while the trunk lid is opening, the trunk lid
will stop moving.
If a foot is moved under the rear bumper
while the trunk lid is closing, the trunk lid
will open.
■Trunk closer switch (vehicles with
power trunk lid)
Press the trunk closer switch.
A buzzer will sound and the trunk lid will
fully close.
Pressing the switch while the trunk lid is
closing opens the trunk lid again.
■Trunk grip
Using the trunk grip, pull down the
trunk lid without applying sideways
force and push the trunk lid down from
the outside to close it.
■Trunk light
The trunk light turns on when the trunk is
opened.
■Trunk easy closer (vehicles with power
trunk lid)
In the event that the trunk lid is left slightly
open, the trunk easy closer will automati-
cally close it to the fully closed position.
●The trunk easy closer will operate
regardless of the engine switch mode.
●If the trunk easy closer does not operate,
open the trunk to the half open position
or more and then close it.
■Function to prevent the trunk being
locked with the electronic key inside
●When all doors are locked, closing the
trunk lid with the electronic key left inside
the trunk will sound an alarm.
In this case, the trunk lid can be opened
by pressing the trunk release button on
A
B
Page 107 of 468
1053-2. Opening, closing and locking the doors and trunk
3
Before driving
the trunk lid.
●If the spare electronic key is put in the
trunk with all the doors locked, the key
confinement prevention function is acti-
vated so the trunk can be opened. In
order to prevent theft, take all electronic
keys with you when leaving the vehicle.
●If the electronic key is put in the trunk
with all the doors locked, the key may not
be detected depending on the location of
the key and the surrounding radio wave
conditions. In this case, the key confine-
ment prevention function cannot be acti-
vated, causing the doors to lock when the
trunk is closed. Make sure to check
where the key is before closing the trunk.
●The key confinement prevention function
cannot be activated if any one of the
doors is unlocked. In this case, open the
trunk using the trunk opener.
■Overload protection function (vehicles
with power trunk lid)
The trunk lid will not operate when exces-
sive load is present on the top of the trunk
lid.
■Fall-down protection function (vehicles
with power trunk lid)
While the trunk lid is opening automatically,
applying excessive force to it will stop the
opening operation to prevent the trunk lid
from rapidly falling down.
■Jam protection function (vehicles with
power trunk lid)
While the trunk lid is closing automatically,
the trunk lid will stop closing and open if
something gets caught.
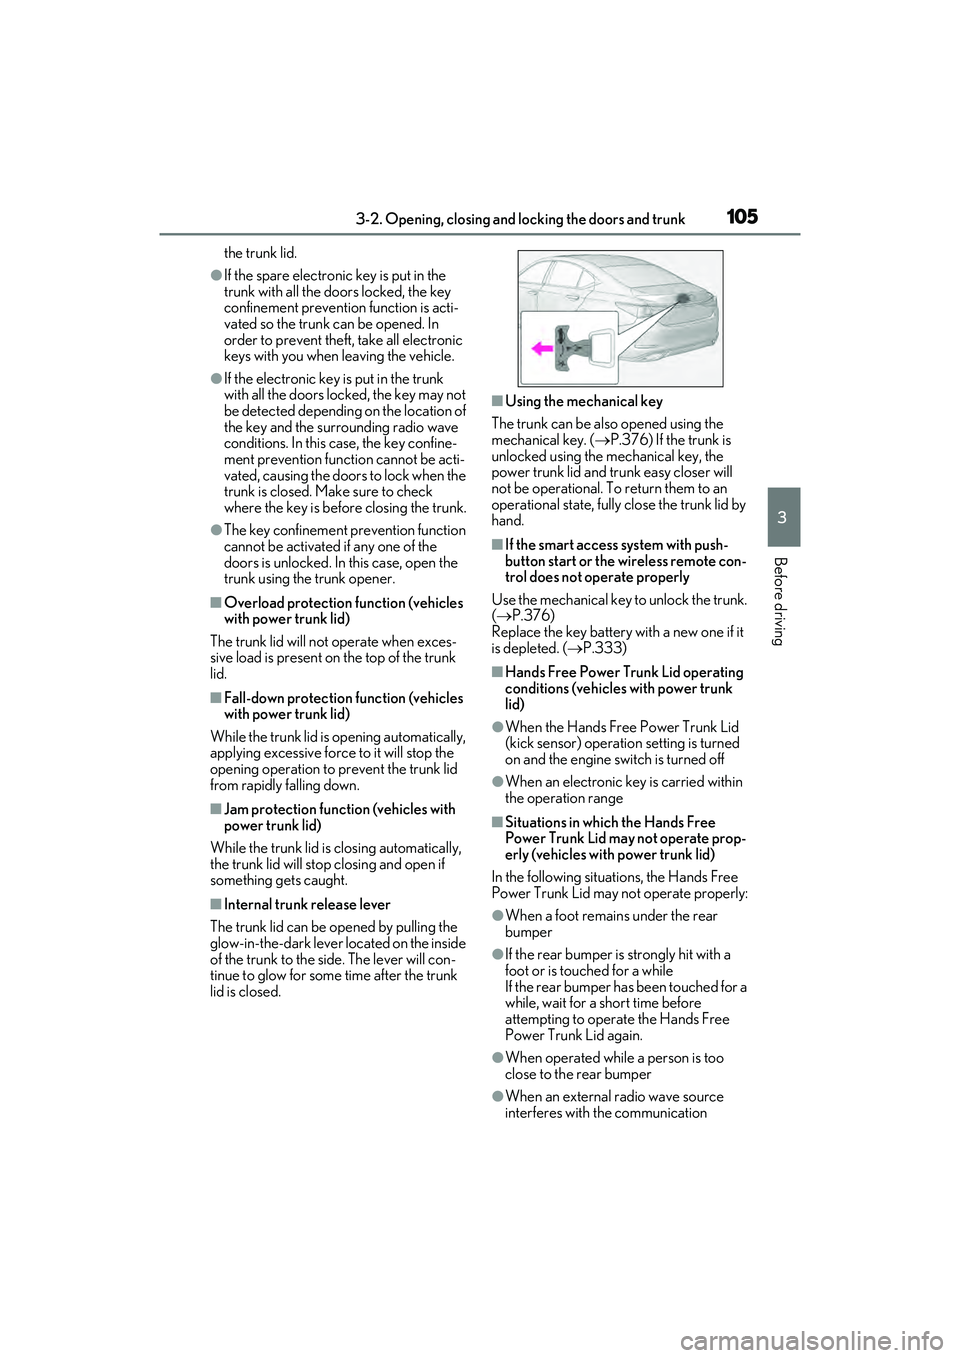
■Internal trunk release lever
The trunk lid can be opened by pulling the
glow-in-the-dark lever located on the inside
of the trunk to the side. The lever will con-
tinue to glow for some time after the trunk
lid is closed.
■Using the mechanical key
The trunk can be also opened using the
mechanical key. ( P.376) If the trunk is
unlocked using the mechanical key, the
power trunk lid and trunk easy closer will
not be operational. To return them to an
operational state, fully close the trunk lid by
hand.
■If the smart access system with push-
button start or the wireless remote con-
trol does not operate properly
Use the mechanical key to unlock the trunk.
( P.376)
Replace the key battery with a new one if it
is depleted. ( P.333)
■Hands Free Power Trunk Lid operating
conditions (vehicles with power trunk
lid)
●When the Hands Free Power Trunk Lid
(kick sensor) operation setting is turned
on and the engine sw itch is turned off
●When an electronic key is carried within
the operation range
■Situations in which the Hands Free
Power Trunk Lid may not operate prop-
erly (vehicles with power trunk lid)
In the following situations, the Hands Free
Power Trunk Lid may not operate properly:
●When a foot remains under the rear
bumper
●If the rear bumper is strongly hit with a
foot or is touched for a while
If the rear bumper has been touched for a
while, wait for a short time before
attempting to operate the Hands Free
Power Trunk Lid again.
●When operated while a person is too
close to the rear bumper
●When an external radio wave source
interferes with the communication
Page 108 of 468

1063-2. Opening, closing and locking the doors and trunk
between the electronic key and the vehi-
cle (P.109)
●When the vehicle is parked near an elec-
trical noise source or metallic object
which affects the sensitivity of the Hands
Free Power Trunk Lid, such as a pay
parking spot, gas station, electrically
heated road, fluorescent light, or above a
steel plate.
●When the vehicle is near a TV tower,
electric power plant, radio station, large
display, airport or ot her facility that gen-
erates strong radio waves or electrical
noise
●When a large amount of water is applied
to the rear bumper, such as when the
vehicle is being washed or in heavy rain
●When mud, snow, ice, etc. is attached to
the rear bumper
●When the vehicle has been parked for a
while near objects that may move and
contact the rear bumper, such as plants
●When an accessory is installed to the rear
bumper
If an accessory has been installed, turn
the Hands Free Power Trunk Lid (kick
sensor) operation setting off.
■Preventing unintentional operation of
the Hands Free Power Trunk Lid (vehi-
cles with power trunk lid)
When an electronic key is in the operation
range, the Hands Free Power Trunk Lid
may operate unintentionally, so be careful
in the following situations.
●When a large amount of water is applied
to the rear bumper, such as when the
vehicle is being washed or in heavy rain
●When dirt is wiped off the rear bumper
●When a small animal or small object, such
as a ball, moves under the rear bumper
●When an object is moved from under the
rear bumper
●If someone is swinging their legs while sit-
ting on the rear bumper
●If the legs or another part of someone’s
body contacts the rear bumper while
passing by the vehicle
●When the vehicle is parked near an elec- trical noise source which affects the sen-
sitivity of the Hands Free Power Trunk
Lid, such as a pay parking spot, gas sta-
tion, electrically heated road, or fluores-
cent light
●When the vehicle is near a TV tower,
electric power plant, radio station, large
display, airport or other facility that gen-
erates strong radio waves or electrical
noise
●When the vehicle is parked in a place
where objects such as plants are near the
rear bumper
●If luggage, etc. is set near the rear
bumper
●If accessories or a vehicle cover is
installed/removed near the rear bumper
●When the vehicle is being towed
To prevent unintentional operation, turn the
Hands Free Power Trunk Lid (kick sensor)
operation setting off.
■Open door warning buzzer
P.99
■Customization
Some functions can be customized. (Cus-
tomizable features: P.408)
The trunk opener switch can be tem-
porarily disabled to protect luggage
stored in the trunk against theft.
Turn the trunk opener main switch in
the glove box off to disable the trunk
opener.
Protecting luggage against theft