lock Lexus GS350 2007 Using the front audio system / LEXUS 2007 GS430/350 (OM30A04U) Service Manual
[x] Cancel search | Manufacturer: LEXUS, Model Year: 2007, Model line: GS350, Model: Lexus GS350 2007Pages: 562, PDF Size: 17.95 MB
Page 74 of 562

54
1-6. Anti-theft system
Alarm
The system sounds the alarm and flashes the vehicle lights when an attempt
to steal the vehicle is detected.
■ Triggering the alarm
The alarm is triggered in the following situations.
●A lock
ed door or trunk is unlocked or opened in any way other
than using the entry function, wire less remote door lock function
or using the mechanical key. (The doors will lock again automati -
cally)
● The hood is opened while the v
ehicle is locked.
■ Setting the alarm sy
stem
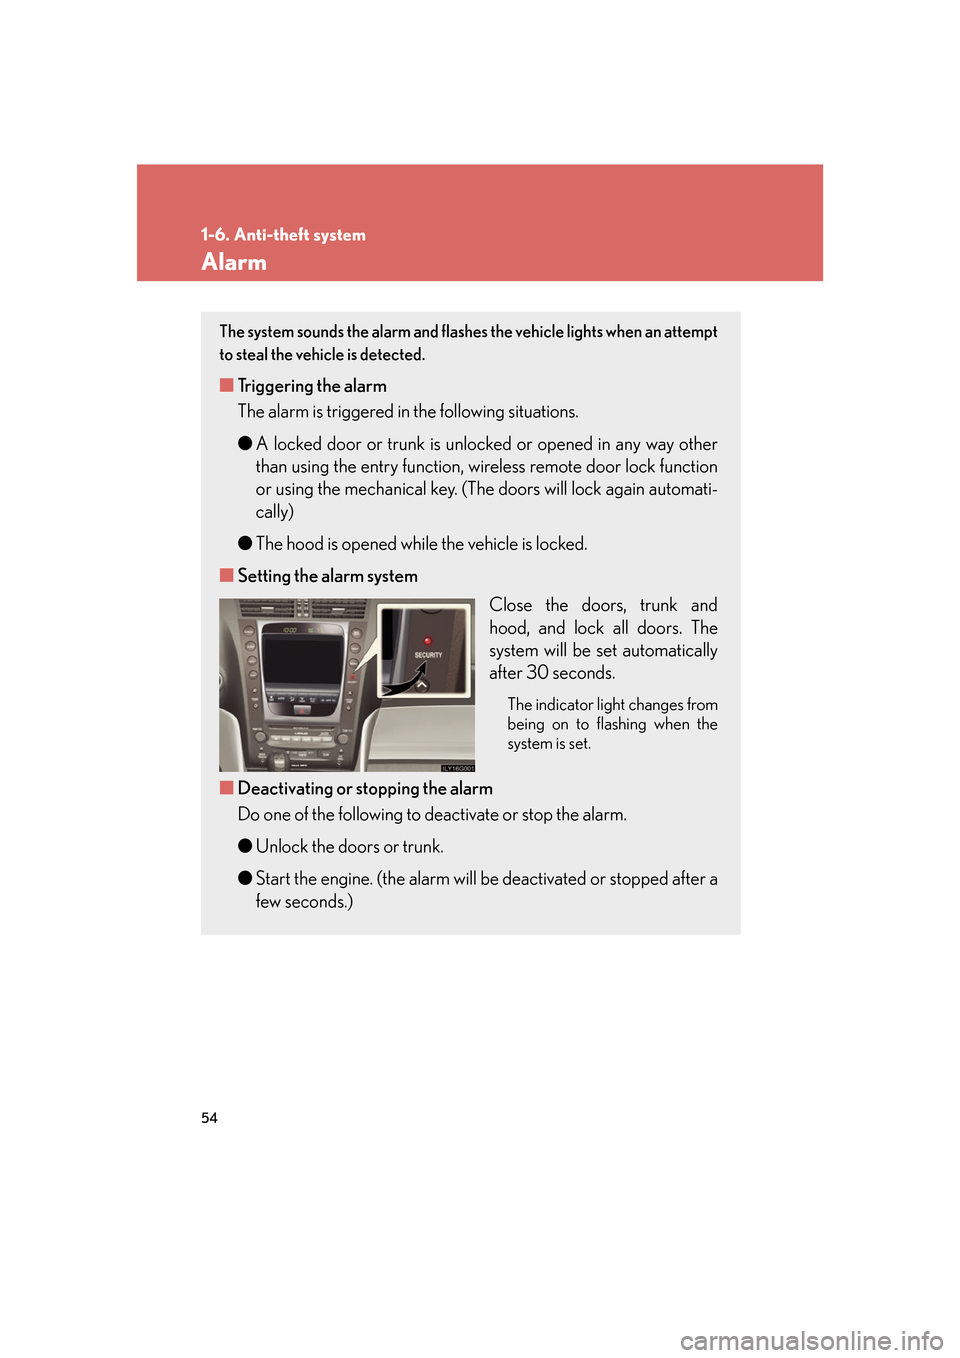
Close the doors, trunk and
hood, and lock all door
s. The
system will be set automatically
after 30 seconds.
The indicator light changes from
being on to flashing when the
system is set.
■ Deactivating or stopping the alarm
Do one of the following to deactivate or stop the alarm.
●Unlock the doors or trunk.
● Star
t the engine. (the alarm will be deactivated or stopped after a
few seconds.)
Page 75 of 562

55
1-6. Anti-theft system
1
Before driving
■Items to check before locking the vehicle
To prevent unexpected triggering of the alarm and vehicle theft, make sure of the
fo
llowing
●Nobody is in the vehicle.
●The windows and moon roof are closed before the alarm is set.
●No valuables or other personal items are left in the vehicle.
■Tr i g g e r i n g o f t h e a l a r m
The alarm may be triggered in the
following situations.
(Stopping the alarm deactivates the alarm system.)
●A person inside the vehicle opens a door, the trunk or hood.
●The battery is recharged or replaced when the vehicle is locked.
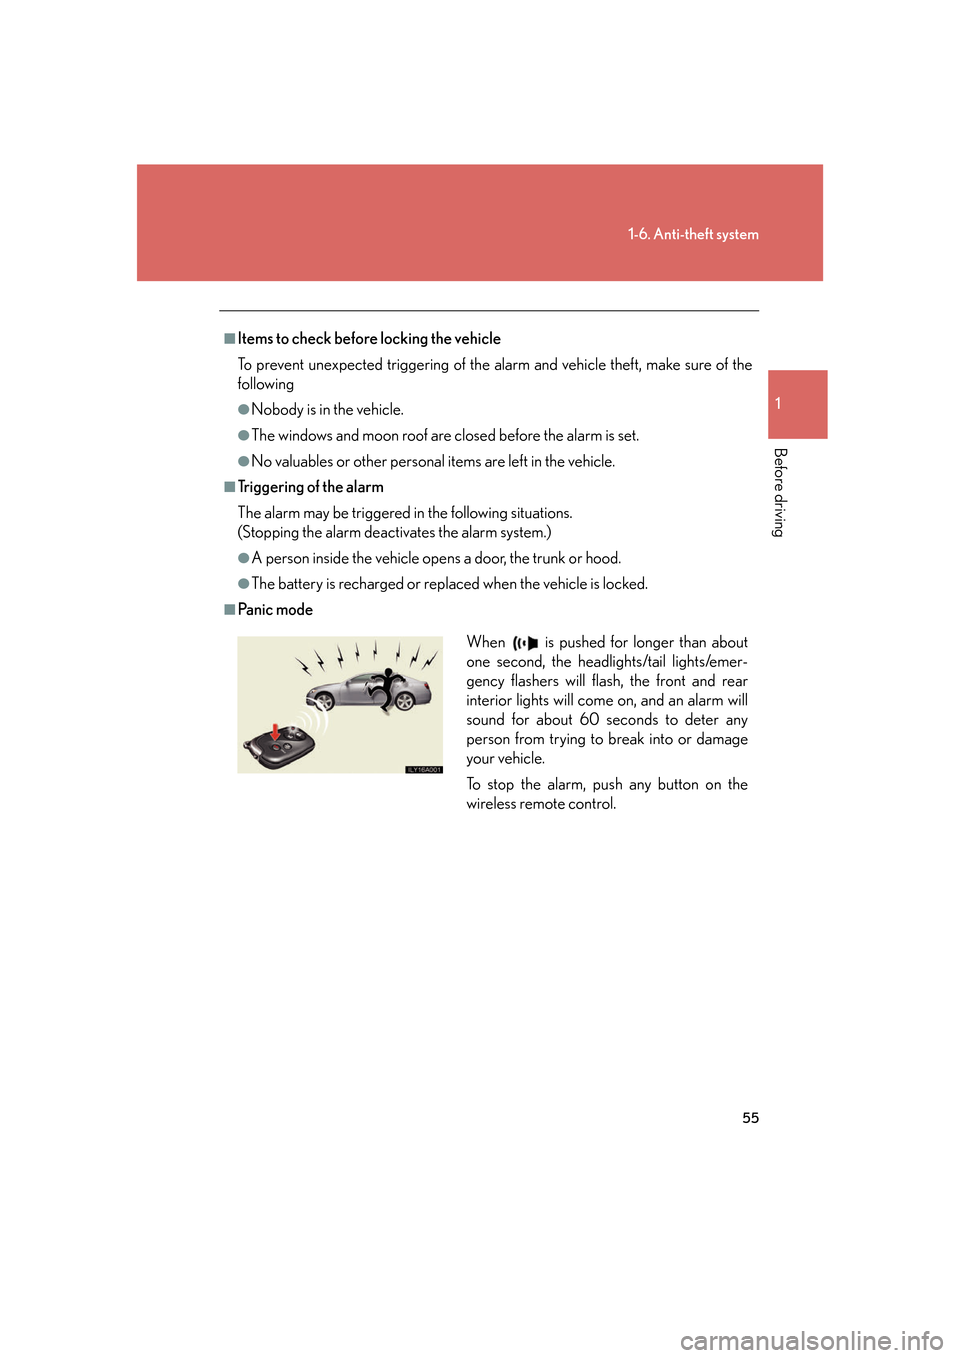
■Pa n i c m o d e
When is pushed for longer than about
one second, the headlights/tail lights/emer-
gency flashers will flash, the front and rear
interior lights will come on, and an alarm will
sound for about 60 seconds to deter any
person from trying to break into or damage
your vehicle.
To stop the alarm, push any button on the
wireless remote control.
Page 77 of 562

57
1
Before driving
1-7. Safety information
Correct driving posture
Drive with a good posture as follows:
Sit upright and well back in
the seat.
Adjust the position of the seat
forward or backward to
ensur
e the pedals can be
reached and easily
depressed to the extent
required. ( P. 2 5 )
Adjust the seatback so that
the controls are easily opera -
ble.
Adjust the tilt and telescopic
positions of the steering
wheel do
wnward so the air -
bag is facing your chest.
( P. 39 )
Lock the head restraint in
place with the center of the
head r
estraint closest to the
top of your ears. ( P. 31 )
Wear the seat belt correctly.
( P. 3 3 )
Page 78 of 562

58
1-7. Safety information
CAUTION
■Caution while driving
●Do not adjust the position of the driver’s seat.
Doing so could cause the driver to lose control of the vehicle.
●Do not place a cushion between the driver or passenger and the seatback.
A cushion may prevent correct posture from being achieved, and reduce the
effectiveness of the seat belt and head re straint, increasing the risk of death or
serious injury to the driver or passenger.
●Do not place anything under the front seats.
Objects placed under the front seats may become jammed in the seat tracks and
stop the seat from locking in place. This may lead to an accident. The adjustment
mechanism may also be damaged.
■Adjusting the seat position
●Do not recline the seat more than necessary when the vehicle is in motion, to
reduce the risk of slid ing under the lap belt.
If the seat is too reclined during an accident, the lap belt may slide past the hips
and apply restraint forces directly to th e abdomen or your neck may contact the
shoulder belt, increasing the ri sk of death or serious injury.
●Take care when adjusting the seat position to ensure that other passengers are
not injured by the moving seat.
●Do not put your hands under the seat or near the moving parts to avoid injury.
Fingers or hands may become jammed in the seat mechanism.
Page 99 of 562

79
1
1-7. Safety information
Before driving
Installing child restraints
Follow the child restraint system manufacturer's instructions. Firmly
secure child restraints to the outboard rear seats using a seat belt or a child
restraint lower anchor belt. Attach the top strap when installing a child
restraint.
Seat belts equipped with a
child restraint locking mecha -
nism (ALR/ELR belts except
driv
er’s seat belt) ( P. 3 5)
Child restraint lower anchor -
ages
Lower anchorages are pro -
vided for the outboard rear
seats. (Bu
ttons displaying the
location of the anchorages are
attached to the seats.)
Anchor bracket
(for top strap)
Anchor brackets are provided
for all rear seats.
Page 100 of 562

80
1-7. Safety information
Installing child restraints using a seat belt (child restraint lock function belt)
■Rear facing child seat Infant/convertible
Place the child seat on the rear
seat facing the r
ear of the vehicle.
Run the seat belt through the infant
seat and inser
t the plate into the
buckle. Make sure that the belt is
not twisted.
Fully extend the shoulder belt and
then allo
w it to retract slightly in
order to activate the ALR lock
mode.
Lock mode allows the seat belt to
retract only.
STEP1
STEP2
STEP3
Page 101 of 562

81
1-7. Safety information
1
Before driving
While pushing the child seat down
into the rear seat, allow the shoul-
der belt to retract until the child
seat is secur
ely in place.
After the shoulder belt has
retracted to a point where there is
no slack in the belt, pull the belt to
check that it cannot be extended.
■Forward facing Convertible child seat
Place the child seat on the seat
facing the fr
ont of the vehicle.
Run the seat belt through the child
seat and inser
t the plate into the
buckle. Make sure that the belt is
not twisted.
Fully extend the shoulder strap and
then allo
w it to retract slightly into
the ALR lock mode.
Lock mode allows the seat belt to
retract only.
STEP4
STEP1
STEP2
STEP3
Page 104 of 562

84
1-7. Safety information
Type BWiden the gap between
the seat cushion and seat-
back slightly.
Latch the buckles onto the
anchorages.
If the child restraint has a top
strap, the top strap should be
latched onto the anchorage.
For owners in Canada:
The symbol on a child restraint sys -
tem indicates the presence of a
lo
wer anchorage system.
Child restraint systems with a top strap
Secure the child restraint using a
seat belt or lower anchors, and
lock the head restraint in place at
the lowest position.
Canada only
STEP1
STEP2
STEP1
Page 105 of 562

85
1-7. Safety information
1
Before driving
Open the anchor bracket cover,
latch the hook onto the anchor
bracket and tighten the top strap.
Make sure the top strap is securely
latched.
STEP2
■Laws and regulations pertaining to anchorages
Anchorages conform to FMVSS225 or CMVSS210.2.
Child restraint systems conf orming
to FMVSS213 or CMVSS213 specifications
can be used.
This vehicle is designed to conform to the SAE J1819.
CAUTION
■When installing a booster seat
Do not fully extend the shoulder belt to prevent the belt from going to ALR lock
mode: ( P. 3 5 )
●ALR mode causes the belt to tighten only which could cause injury or discomfort
to the child.
●Do not allow the child to play with the seat belt or the child could be killed or seri-
ous injured.
Page 106 of 562

86
1-7. Safety information
CAUTION
■When installing a child restraint system
Follow the directions given in the child restraint system installation manual and fix
the child restraint system securely in place.
If the child restraint system is not correctly fixed in place, the child may be injured or
even killed in the event of sudden braking or an accident.
●When a booster seat is installed, always ensure that the shoulder belt is posi-
tioned across the center of the child's sh oulder. The belt should be kept away
from the child's neck, but not so that it could fall off the child's shoulder. Failing to
do so may result in death or serious inju ry in the event of an accident or sudden
braking.
●Ensure the belt and tab are securely locked and that the seat belt is not twisted.
●Push and pull the child seat in different directions to be sure it is secure.
●Follow all installation instructions provid ed by the child restraint system manufac-
turer.
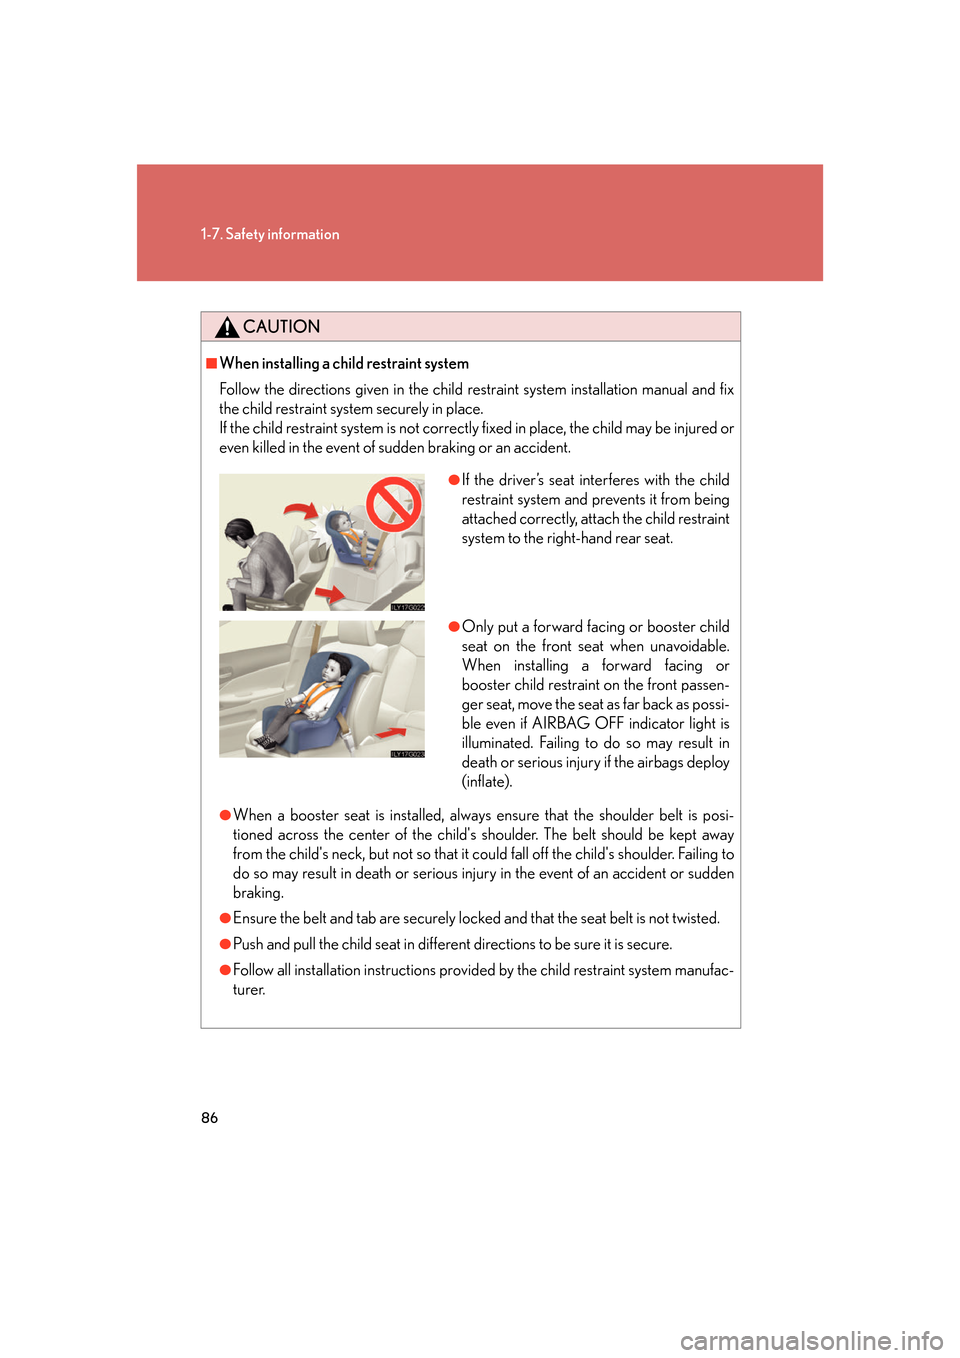
●If the driver’s seat interferes with the child
restraint system and prevents it from being
attached correctly, attach the child restraint
system to the right-hand rear seat.
●Only put a forward facing or booster child
seat on the front seat when unavoidable.
When installing a forward facing or
booster child restraint on the front passen-
ger seat, move the seat as far back as possi-
ble even if AIRBAG OFF indicator light is
illuminated. Failing to do so may result in
death or serious injury if the airbags deploy
(inflate).