lock Lexus GS350 2008 Opening, closing and locking the doors and trunk / LEXUS 2008 GS460/350 (OM30A87U) Service Manual
[x] Cancel search | Manufacturer: LEXUS, Model Year: 2008, Model line: GS350, Model: Lexus GS350 2008Pages: 596, PDF Size: 9.29 MB
Page 58 of 596
58
1-3. Adjustable components (seats, mirrors, steering wheel)
GS_G_U
June 15, 2008 11:26 am
CAUTION
■Seat belt damage and wear
●Do not damage the seat belts by allowing the belt, plate or buckle to be jammed
in the door.
●Inspect the seat belt system periodically. Check for cuts, fraying, and loose parts.
Do not use a damaged seat belt until it is replaced. Damaged seat belts cannot
protect an occupant from injury.
●Ensure that the belt and tab are locked and the belt is not twisted. If the seat belt
does not function correctly, immediately contact your Lexus dealer.
●Replace the seat assembly, including the belt s, if your vehicle has been involved in
a serious accident, even if there is no obvious damage.
●Do not attempt to install, remove, modify , disassemble or dispose of a seat belt.
Have any necessary repairs carried out by your Lexus dealer. Inappropriate han-
dling of the pretensioner may cause it to activate or operate improperly and may
cause death or serious injury.
■Using a seat belt extender
●Do not wear the seat belt extender, if you can fasten the seat belt without the
extender.
●Do not use the seat belt extender when in stalling a child restraint system, because
the belt will not securely hold the child restraint system, increasing the risk of
death or injury in the event of a collision.
●The personalized extender may not be safe on another vehicle, when used by
another person, or at a different seating position other than the one originally
intended.
■Precaution for pre-collision seat belts
Do not rely solely on the pre-collision system to avoid accidents. Always pay atten-
tion to the surrounding conditions, and drive safely and responsibly.
Page 64 of 596
64
GS_G_U
May 13, 2008 5:14 pm
1-4. Opening and closing the windows and moon roof
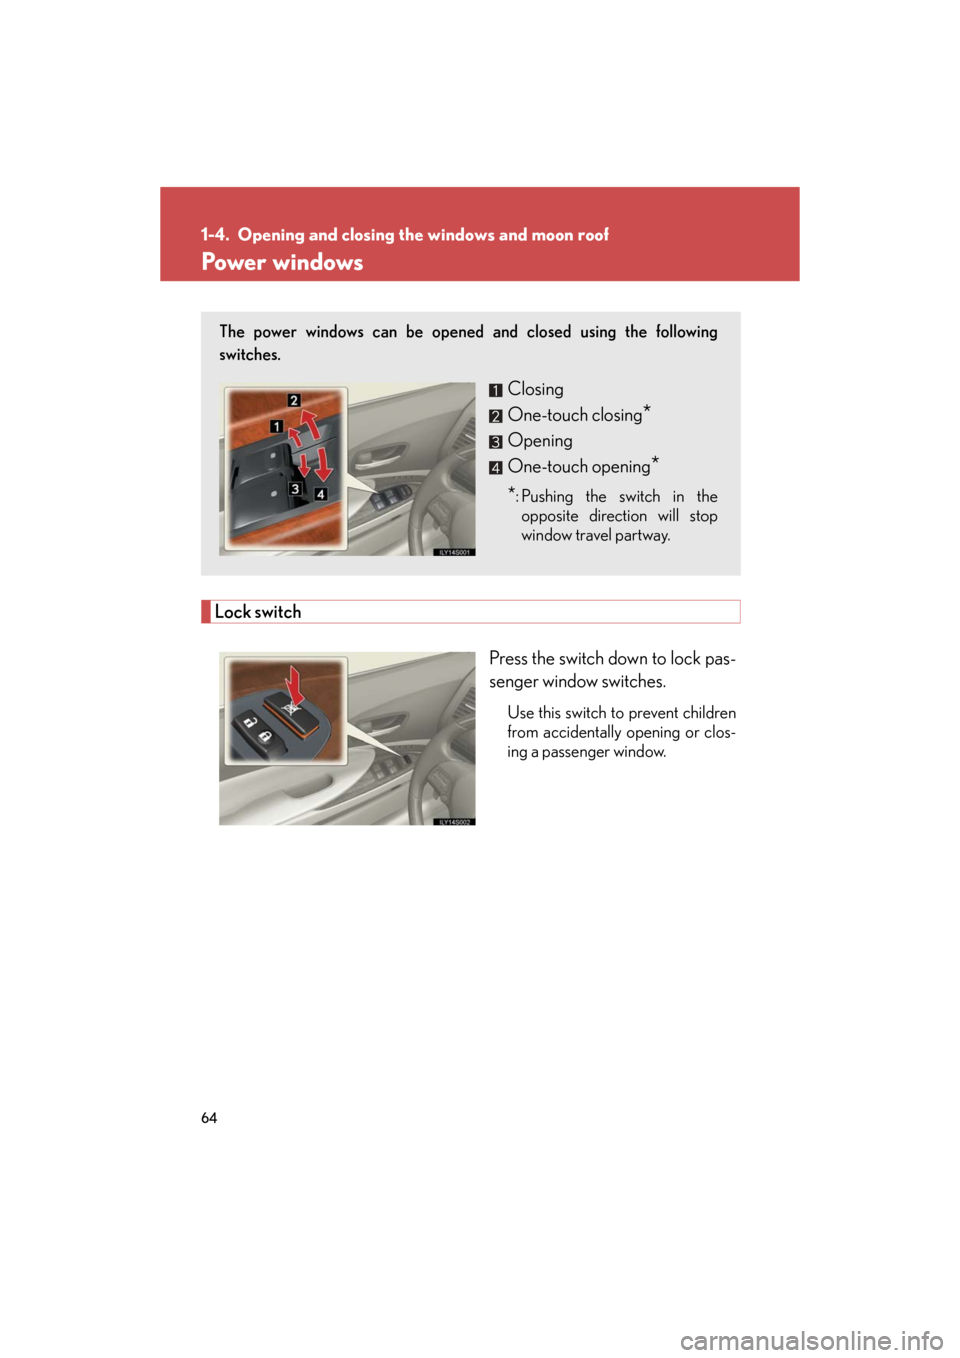
Power windows
Lock switch
Press the switch down to lock pas-
senger window switches.
Use this switch to prevent children
from accidentally opening or clos-
ing a passenger window.
The power windows can be opened and closed using the following
switches.
Closing
One-touch closing
*
Opening
One-touch opening
*
*: Pushing the switch in the opposite direction will stop
window travel partway.
Page 65 of 596
65
1-4. Opening and closing the windows and moon roof
1
Before driving
GS_G_U
May 13, 2008 5:14 pm
■The power windows can be operated when
The “ENGINE START STOP” switch is in IGNITION ON mode.
■Linked door lock window operation
●The power windows can be opened and closed using the mechanical key.
( P. 5 2 6 )
●The power windows can be opened using the wireless remote control.
( P. 3 4 )
●The power windows can be closed using the smart access system with push-
button start. ( P. 2 2 )
■Operating the power windows after turning the “ENGINE START STOP” switch
OFF
The power windows can be operated for ap proximately 45 seconds even after the
“ENGINE START STOP” switch is switched to ACCESSORY mode or turned
OFF. They cannot, however, be operated once the driver’s or front passenger’s door
is opened.
■Jam protection function
If an object becomes caught between th e window and the window frame, window
travel is stopped and the window is opened slightly.
■Customization that can be configured at Lexus dealer
Settings (e.g. linked door lock operation) can be changed.
(Customizable features P. 5 7 1 )
Page 68 of 596
68
1-4. Opening and closing the windows and moon roof
GS_G_U
May 13, 2008 5:14 pm
■The moon roof can be operated when
The “ENGINE START STOP” switch is in IGNITION ON mode.
■Linked door lock moon roof operation
●The moon roof can be opened and closed using the mechanical key. (P. 5 2 6 )
●The moon roof can be opened using the wireless remote control. ( P. 3 4 )
●The moon roof can be closed using the smart access system with push-button
start. ( P. 2 2 )
■Operating the moon roof after turning the “ENGINE START STOP” switch OFF
The moon roof can be operated for ap proximately 45 seconds even after the
“ENGINE START STOP” switch is switched to ACCESSORY mode or turned
OFF. It cannot, however, be operated once the driver’s door is opened.
■Jam protection function
If an object is detected between the moon roof and the frame while closing or tilting
down, travel is stopped and the moon roof opens slightly.
■If the moon roof cannot be closed automatically
Keep the close switch depressed.
■To reduce moon roof wind noise
Drive with the moon roof opened automati cally ( just before fully opened position).
■Sunshade
The sunshade can be opened and closed manually. However, the sunshade will
open automatically when the moon roof is opened.
■Customization that can be configured at Lexus dealer
Settings (e.g. linked door lock operation) can be changed.
(Customizable features P. 5 7 1 )
Page 71 of 596
71
1-5. Refueling
1
Before driving
GS_G_U
May 13, 2008 5:14 pm
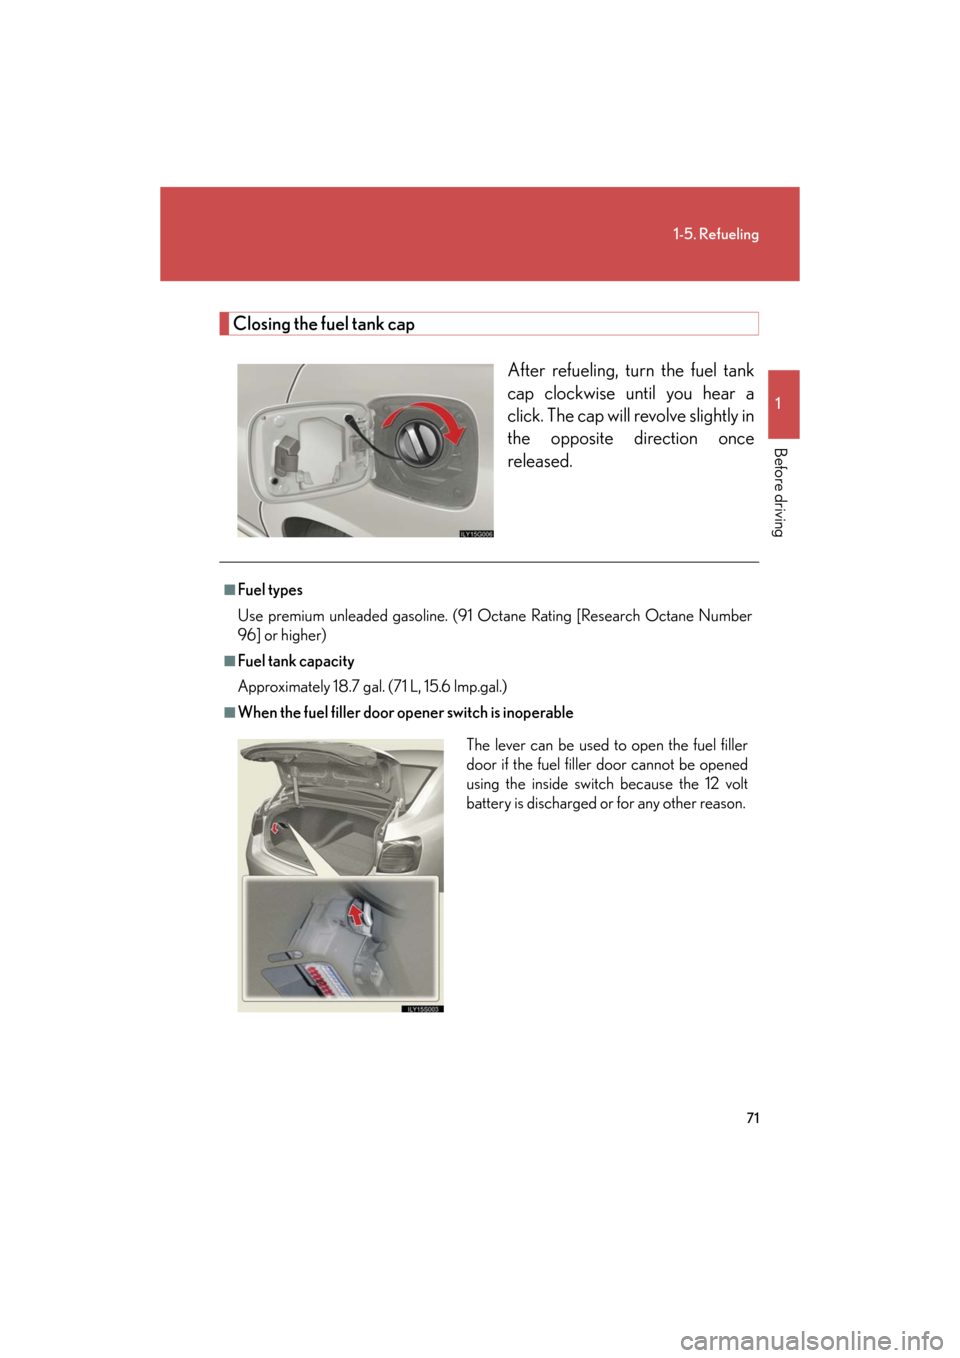
Closing the fuel tank capAfter refueling, turn the fuel tank
cap clockwise until you hear a
click. The cap will revolve slightly in
the opposite direction once
released.
■Fuel types
Use premium unleaded gasoline. (91 Octane Rating [Research Octane Number
96] or higher)
■Fuel tank capacity
Approximately 18.7 gal. (71 L, 15.6 lmp.gal.)
■When the fuel filler door opener switch is inoperable
The lever can be used to open the fuel filler
door if the fuel filler door cannot be opened
using the inside switch because the 12 volt
battery is discharged or for any other reason.
Page 75 of 596
75
1
1-6. Theft deterrent system
Before driving
GS_G_U
May 13, 2008 5:14 pm
Alarm
The system sounds the alarm and flashes lights when forcible entry is
detected.
■Triggering of the alarm
The alarm is triggered in the following situations.
●A locked door or trunk is unlocked or opened in any way other
than using the smart access system with push-button start, wire-
less remote control or mechanical key. (The doors will lock again
automatically.)
● The hood is opened while the vehicle is locked.
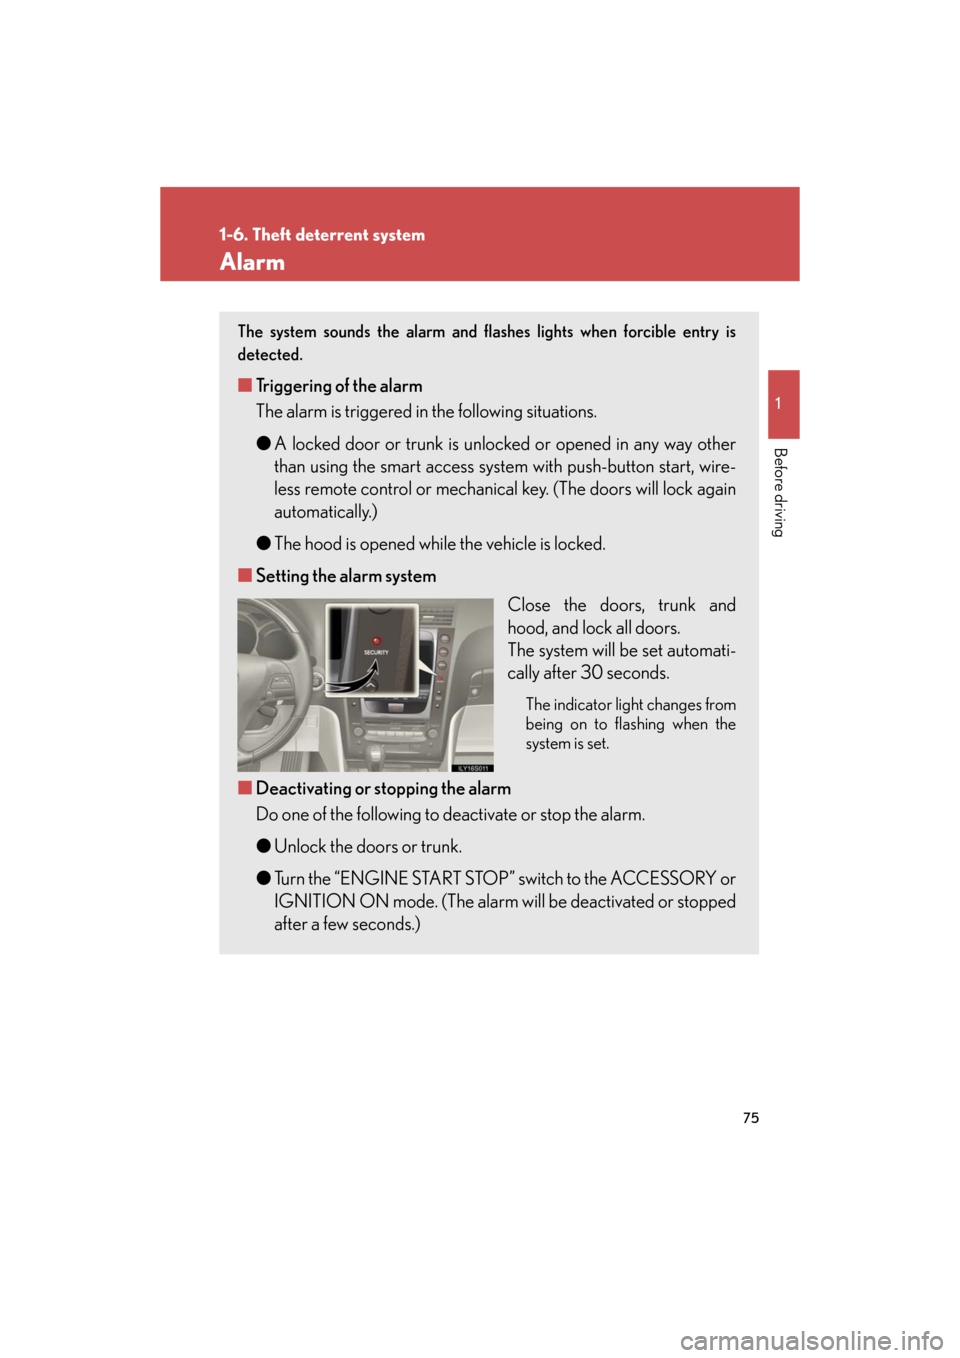
■ Setting the alarm system
Close the doors, trunk and
hood, and lock all doors.
The system will be set automati-
cally after 30 seconds.
The indicator light changes from
being on to flashing when the
system is set.
■Deactivating or stopping the alarm
Do one of the following to deactivate or stop the alarm.
●Unlock the doors or trunk.
● Turn the “ENGINE START STOP” switch to the ACCESSORY or
IGNITION ON mode. (The alarm will be deactivated or stopped
after a few seconds.)
Page 76 of 596
76
1-6. Theft deterrent system
GS_G_U
May 13, 2008 5:14 pm
■Items to check before locking the vehicle
To prevent unintended triggering of the alarm and vehicle theft, make sure of the
following.
●Nobody is in the vehicle.
●The windows and moon roof (if equipped) are closed before the alarm is set.
●No valuables or other personal items are left in the vehicle.
■Tr i g g e r i n g o f t h e a l a r m
The alarm may be triggered in the following situations.
(Stopping the alarm deactivates the alarm system.)
●A person inside the vehicle opens a door, the trunk or hood.
●The 12 volt battery is recharged or replaced when the vehicle is locked.
■When the 12 volt battery is disconnected
Be sure to cancel the alarm system.
If the 12 volt battery is disconnected before canceling the alarm, the system may be
triggered when the battery is reconnected.
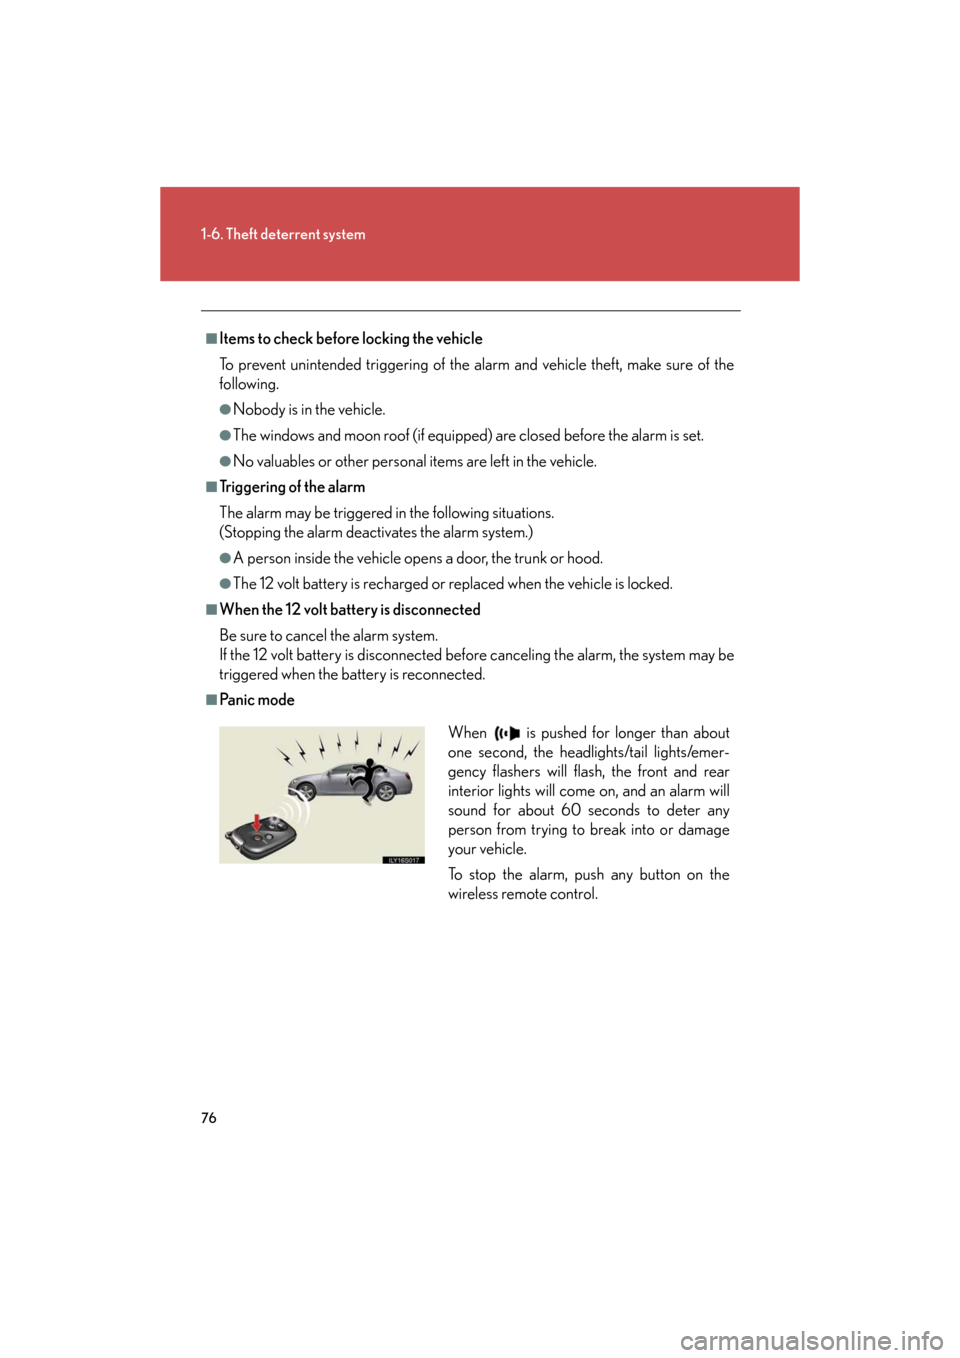
■Pa n i c m o d e
When is pushed for longer than about
one second, the headlights/tail lights/emer-
gency flashers will flash, the front and rear
interior lights will come on, and an alarm will
sound for about 60 seconds to deter any
person from trying to break into or damage
your vehicle.
To stop the alarm, push any button on the
wireless remote control.
Page 78 of 596
78
GS_G_U
May 13, 2008 5:14 pm
1-7. Safety information
Correct driving posture
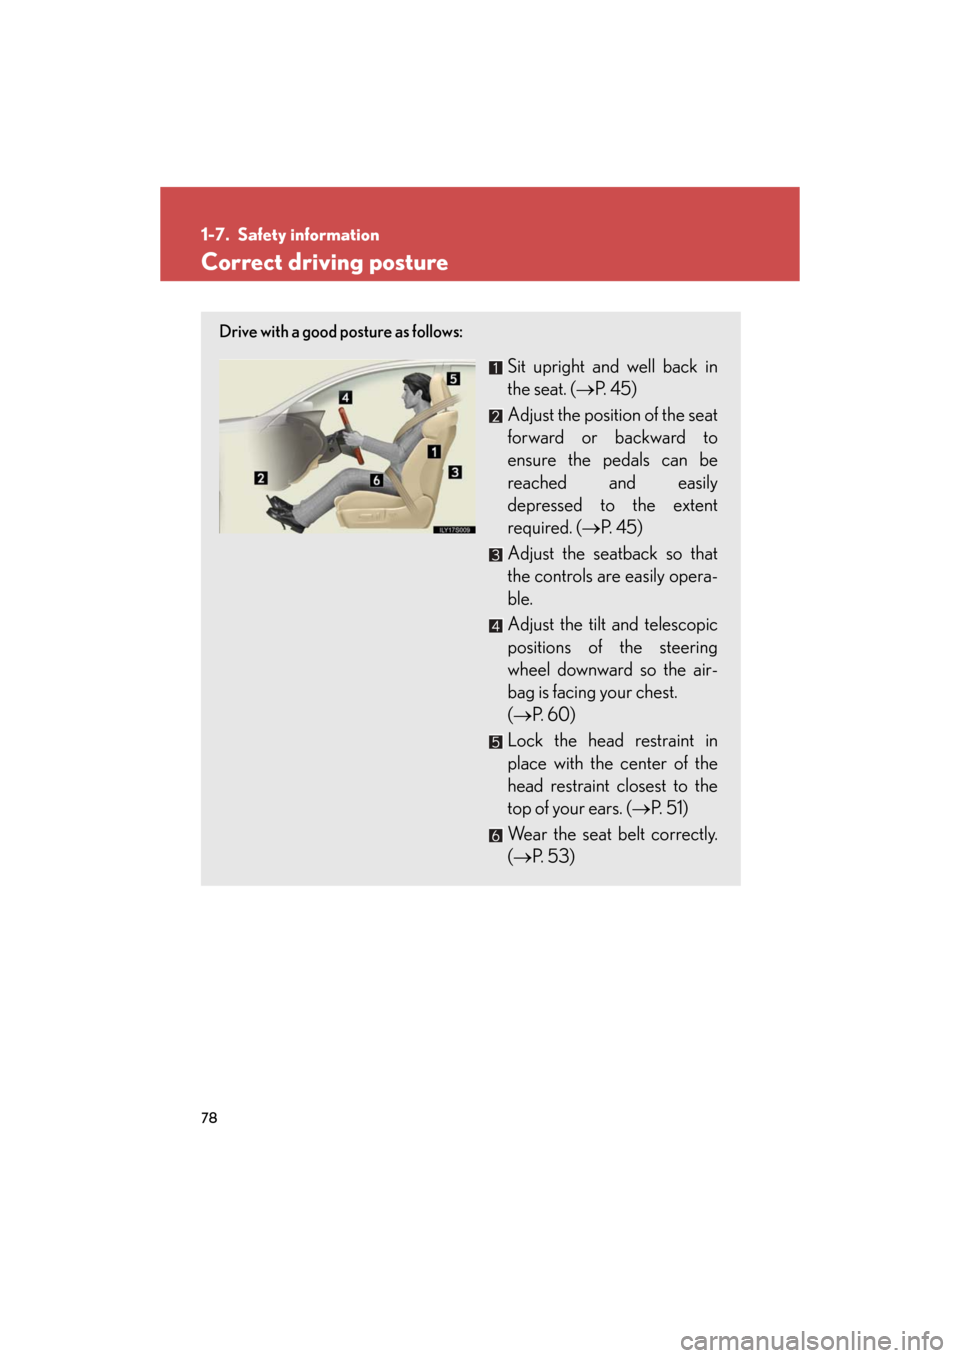
Drive with a good posture as follows:
Sit upright and well back in
the seat. (P. 4 5 )
Adjust the position of the seat
forward or backward to
ensure the pedals can be
reached and easily
depressed to the extent
required. ( P. 4 5 )
Adjust the seatback so that
the controls are easily opera-
ble.
Adjust the tilt and telescopic
positions of the steering
wheel downward so the air-
bag is facing your chest.
( P. 6 0 )
Lock the head restraint in
place with the center of the
head restraint closest to the
top of your ears. ( P. 5 1 )
Wear the seat belt correctly.
( P. 5 3 )
Page 79 of 596
79
1-7. Safety information
1
Before driving
GS_G_U
May 13, 2008 5:14 pm
CAUTION
■While driving
●Do not adjust the position of the driver’s seat.
Doing so could cause the driver to lose control of the vehicle.
●Do not place a cushion between the driver or passenger and the seatback.
A cushion may prevent correct posture from being achieved, and reduce the
effectiveness of the seat belt and head re straint, increasing the risk of death or
serious injury to the driver or passenger.
●Do not place anything under the front seats.
Objects placed under the front seats may become jammed in the seat tracks and
stop the seat from locking in place. This may lead to an accident. The adjustment
mechanism may also be damaged.
■Adjusting the seat position
●Take care when adjusting the seat position to ensure that other passengers are
not injured by the moving seat.
●Do not put your hands under the seat or near the moving parts to avoid injury.
Fingers or hands may become jammed in the seat mechanism.
Page 102 of 596
102
1-7. Safety information
GS_G_U
May 13, 2008 5:14 pm
Installing child restraints
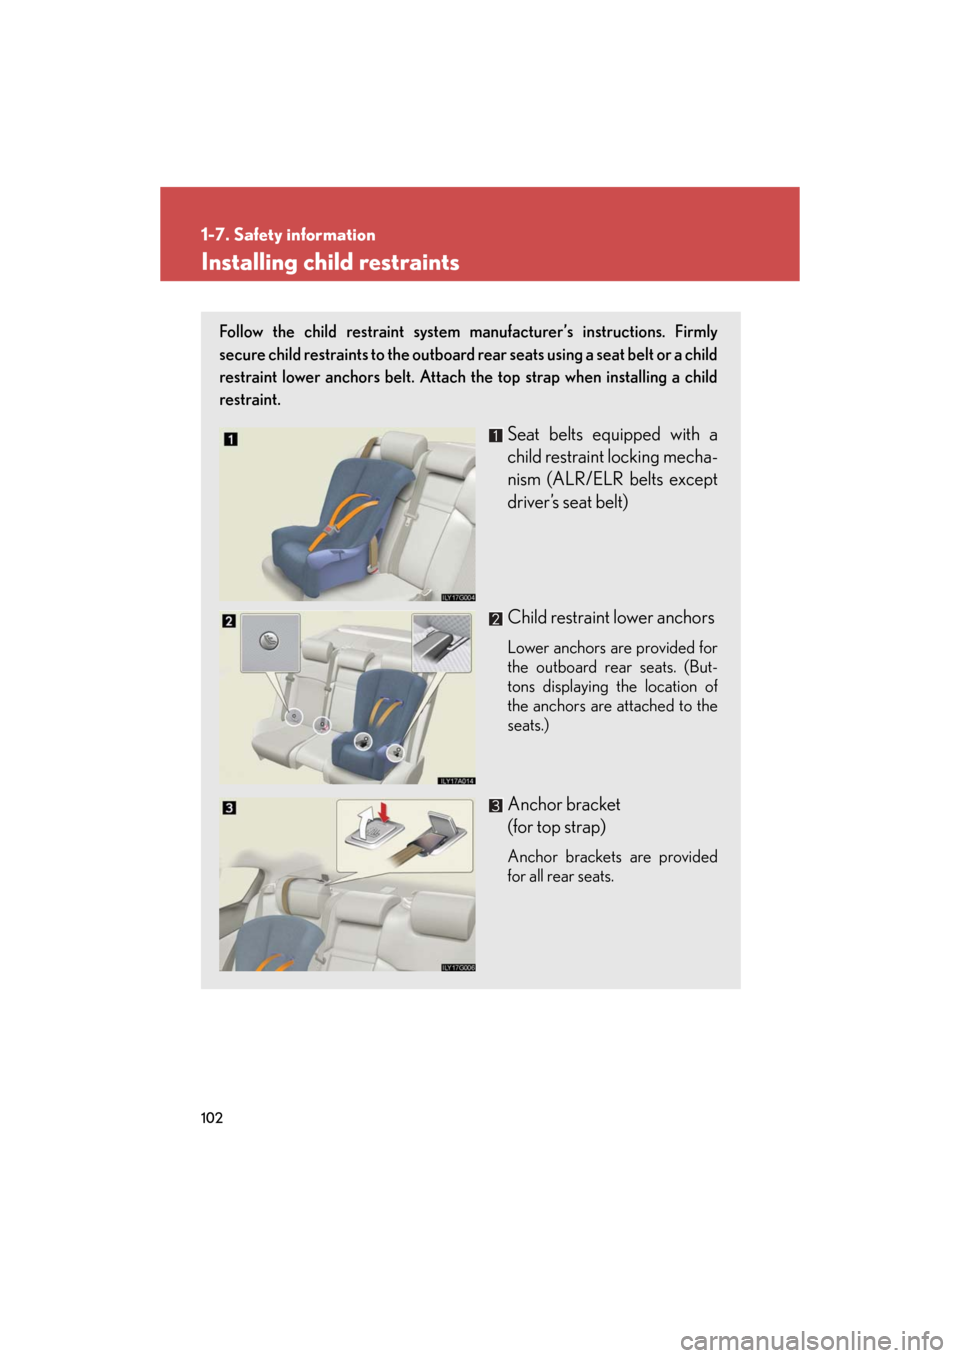
Follow the child restraint system manufacturer’s instructions. Firmly
secure child restraints to the outboard rear seats using a seat belt or a child
restraint lower anchors belt. Attach the top strap when installing a child
restraint.
Seat belts equipped with a
child restraint locking mecha-
nism (ALR/ELR belts except
driver’s seat belt)
Child restraint lower anchors
Lower anchors are provided for
the outboard rear seats. (But-
tons displaying the location of
the anchors are attached to the
seats.)
Anchor bracket
(for top strap)
Anchor brackets are provided
for all rear seats.