lock Lexus GS350 2008 Opening, closing and locking the doors and trunk / LEXUS 2008 GS460/350 (OM30A87U) Workshop Manual
[x] Cancel search | Manufacturer: LEXUS, Model Year: 2008, Model line: GS350, Model: Lexus GS350 2008Pages: 596, PDF Size: 9.29 MB
Page 103 of 596
103
1-7. Safety information
1
Before driving
GS_G_U
May 13, 2008 5:14 pm
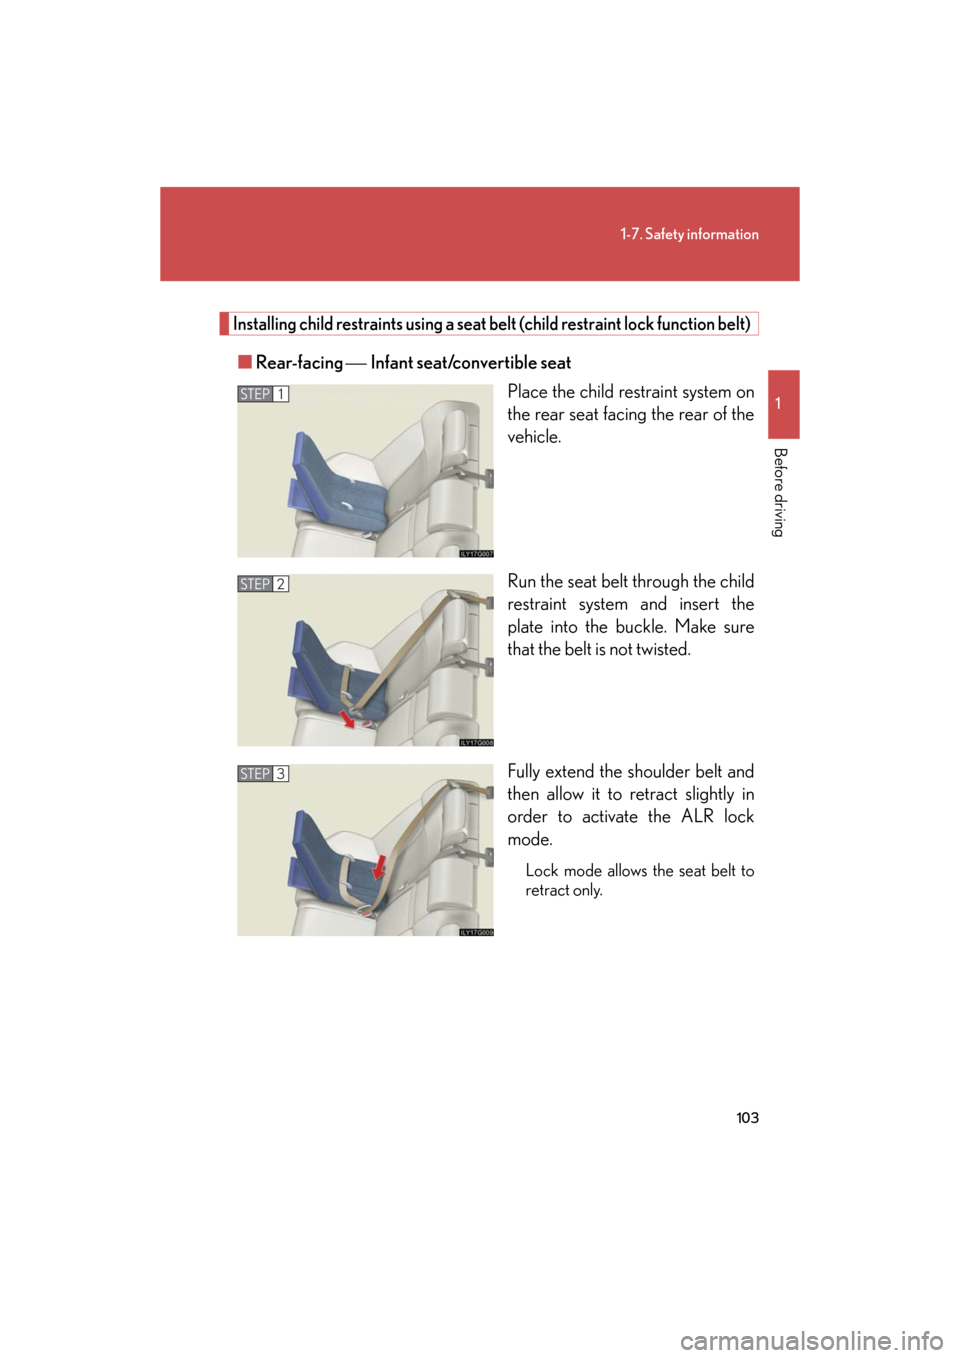
Installing child restraints using a seat belt (child restraint lock function belt)
■Rear-facing Infant seat/convertible seat
Place the child restraint system on
the rear seat facing the rear of the
vehicle.
Run the seat belt through the child
restraint system and insert the
plate into the buckle. Make sure
that the belt is not twisted.
Fully extend the shoulder belt and
then allow it to retract slightly in
order to activate the ALR lock
mode.
Lock mode allows the seat belt to
retract only.
STEP1
STEP2
STEP3
Page 104 of 596
104
1-7. Safety information
GS_G_U
May 13, 2008 5:14 pm
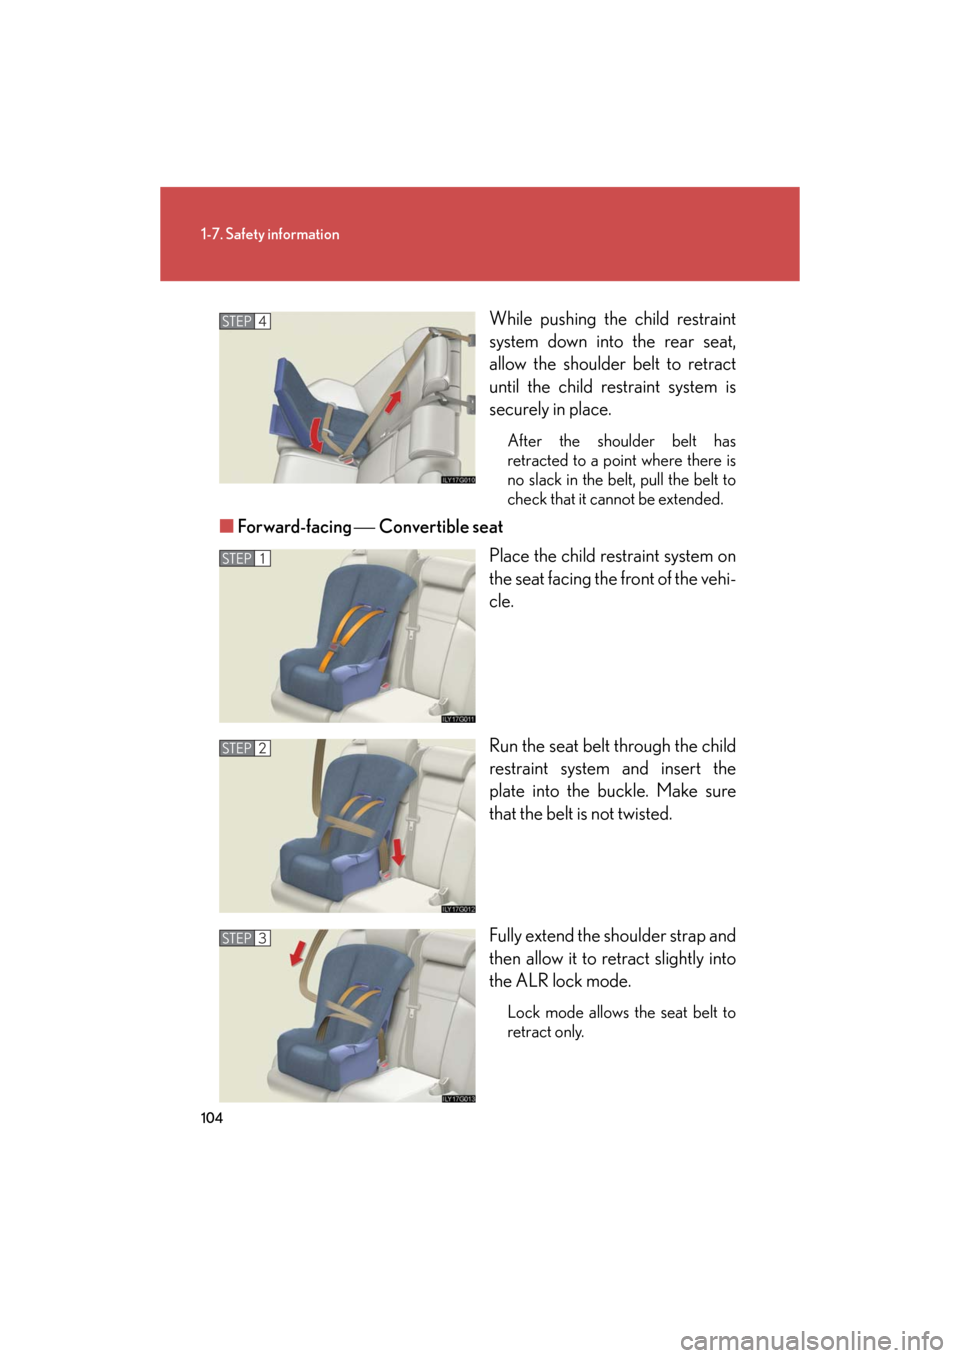
While pushing the child restraint
system down into the rear seat,
allow the shoulder belt to retract
until the child restraint system is
securely in place.
After the shoulder belt has
retracted to a point where there is
no slack in the belt, pull the belt to
check that it cannot be extended.
■Forward-facing Convertible seat
Place the child restraint system on
the seat facing the front of the vehi-
cle.
Run the seat belt through the child
restraint system and insert the
plate into the buckle. Make sure
that the belt is not twisted.
Fully extend the shoulder strap and
then allow it to retract slightly into
the ALR lock mode.
Lock mode allows the seat belt to
retract only.
STEP4
STEP1
STEP2
STEP3
Page 108 of 596
108
1-7. Safety information
GS_G_U
May 13, 2008 5:14 pm
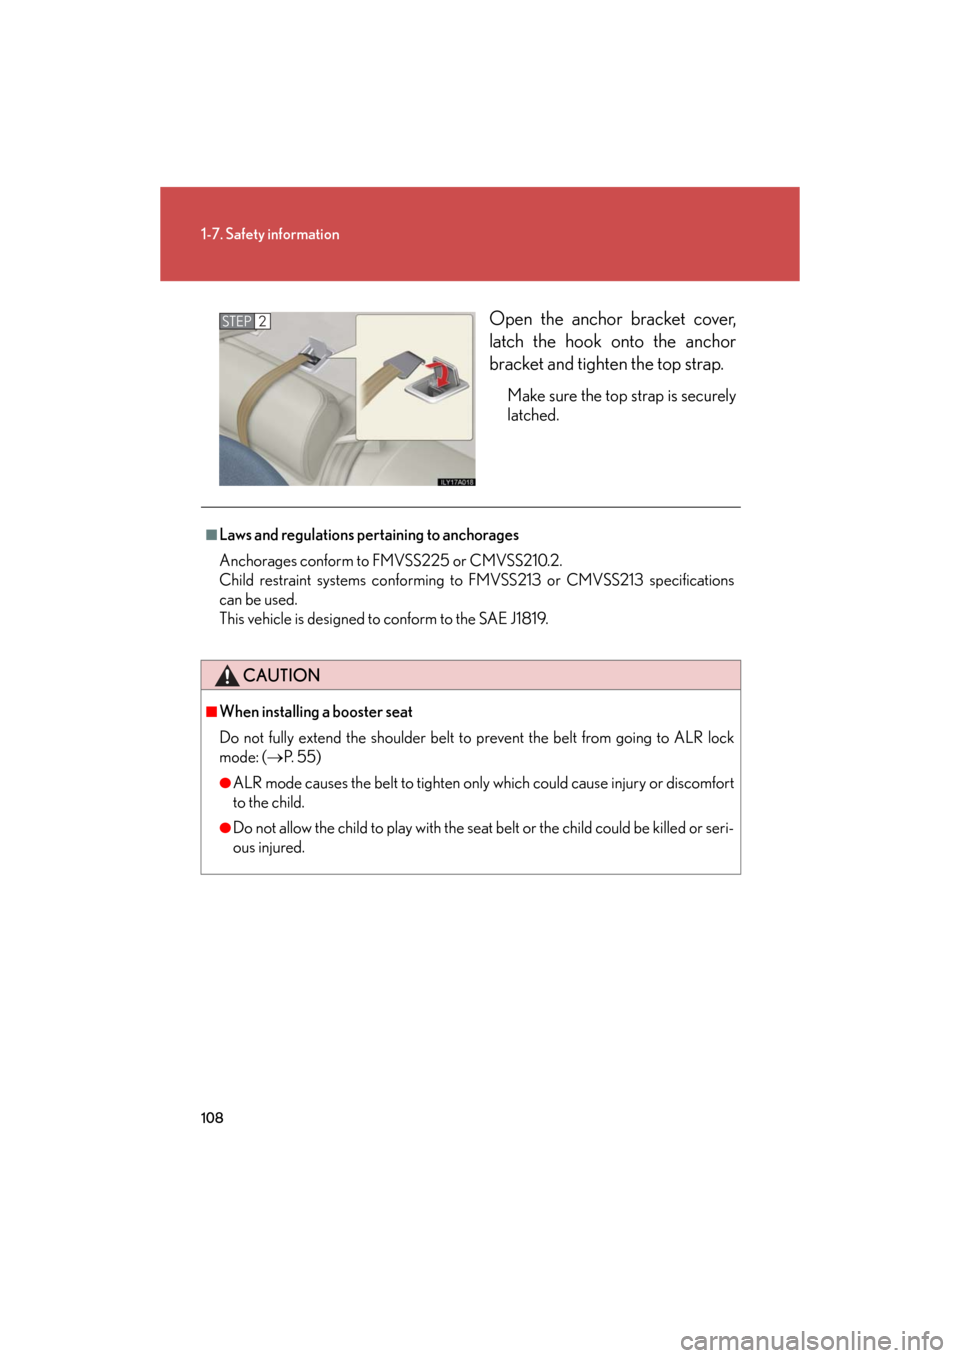
Open the anchor bracket cover,
latch the hook onto the anchor
bracket and tighten the top strap.
Make sure the top strap is securely
latched.
STEP2
■Laws and regulations pertaining to anchorages
Anchorages conform to FMVSS225 or CMVSS210.2.
Child restraint systems conforming to FMVSS213 or CMVSS213 specifications
can be used.
This vehicle is designed to conform to the SAE J1819.
CAUTION
■When installing a booster seat
Do not fully extend the shoulder belt to prevent the belt from going to ALR lock
mode: ( P. 5 5 )
●ALR mode causes the belt to tighten only which could cause injury or discomfort
to the child.
●Do not allow the child to play with the seat belt or the child could be killed or seri-
ous injured.
Page 110 of 596

110
1-7. Safety information
GS_G_U
May 13, 2008 5:14 pm
CAUTION
■When installing a child restraint system
●Ensure the belt and tab are securely locked and that the seat belt is not twisted.
●Push and pull the child restraint system in different directions to be sure it is
secure.
●Follow all installation instructions provid ed by the child restraint system manufac-
turer.
■Do not use a seat belt extender
If a seat belt extender is used when inst alling a child restraint system, the seat belt
will not securely hold the child restraint system, which could cause death or serious
injury to the child or other passengers in the event of a collision.
■To correctly attach a child restraint system to the anchors
When using the lower anchors, be sure that there are no foreign objects around the
anchors and that the seat belt is not caught behind the child restraint system. Make
sure the child restraint system is securely attached, or it may cause death or serious
injury to the child or other passengers in the event of a sudden stop or accident.
Page 112 of 596
112
GS_G_U
May 13, 2008 5:14 pm
2-1. Driving procedures
Driving the vehicle
Starting on a steep inclineFirmly set the parking brake and shift the shift lever to “D”.
Gently depress the accelerator pedal.
Release the parking brake.
The following procedures should be observed to ensure safe driving.
■ Starting the engine ( P. 121)
■ Driving
With the brake pedal depressed, shift the shift lever to “D”.
( P. 125)
Release the parking brake. ( P. 1 3 1 )
Gradually release the brake peda l and gently push the accel-
erator pedal to accelerate the vehicle.
■ Stopping
With the shift lever in “D”, push the brake pedal.
If necessary, set the parking brake.
When the vehicle is stopped for an extended period of time, shift the
shift lever to “P”. (
P. 1 2 5 )
■Parking the vehicle
With the shift lever in “D”, push the brake pedal.
Set the parking brake. ( P. 1 3 1 )
Shift the shift lever to “P”. ( P. 125)
Stop the engine.
Lock the door, making sure that you have the electronic key on
your person.
STEP1
STEP2
STEP3
STEP1
STEP2
STEP1
STEP2
STEP3
STEP4
STEP5
STEP1
STEP2
STEP3
Page 117 of 596
117
2-1. Driving procedures
2
When driving
GS_G_U
May 13, 2008 5:14 pm
CAUTION
■When the vehicle is parked
●Do not leave glasses, cigarette lighters, spray cans, or soft drink cans in the vehi-
cle when it is in the sun.
Failure to do so may result in the following:
• Gas may leak from a cigarette lighter or spray can, and may lead to a fire.
• The temperature inside the vehicle may cause the plastic lenses and plastic material of eye glasses to deform or crack.
• Soft drink cans may fracture, causing the co ntents to spray over the interior of
the vehicle, and may also cause a short circuit in the vehicle’s electrical com-
ponents.
●Always apply the parking brake, shift the shift lever to “P”, stop the engine and
lock the vehicle.
Do not leave the vehicle unattend ed while the engine is running.
●Do not touch the exhaust pipe while the engine is running or immediately after
turning the engine off.
Doing so may cause burns.
●Do not leave the engine running in an area with snow build-up, or where it is
snowing. If snowbanks build up around the vehicle while the engine is running,
exhaust gases may collect and enter the vehi cle. This may lead to death or a seri-
ous health hazard.
■Exhaust gases
Exhaust gases include harmful carbon mono xide (CO) that is colorless and odor-
less. Inhaling exhaust gases may lead to death or a serious health hazard.
●If the vehicle is in a poorly ventilated ar ea, stop the engine. In a closed area, such
as a garage, exhaust gases may collect and enter the vehicle. This may lead to
death or a serious health hazard.
●The exhaust should be checked occasionally. If there is a hole or crack caused by
corrosion, damage to a joint or abnormal exhaust noise, be sure to have the vehi-
cle inspected and repaired by your Lexus dealer. Failure to do so may allow
exhaust gases to enter the vehicle, result ing in death or a serious health hazard.
Page 123 of 596
123
2-1. Driving procedures
2
When driving
GS_G_U
May 13, 2008 5:14 pm
■If the engine does not start
The immobilizer system may not have been deactivated. (P. 7 3 )
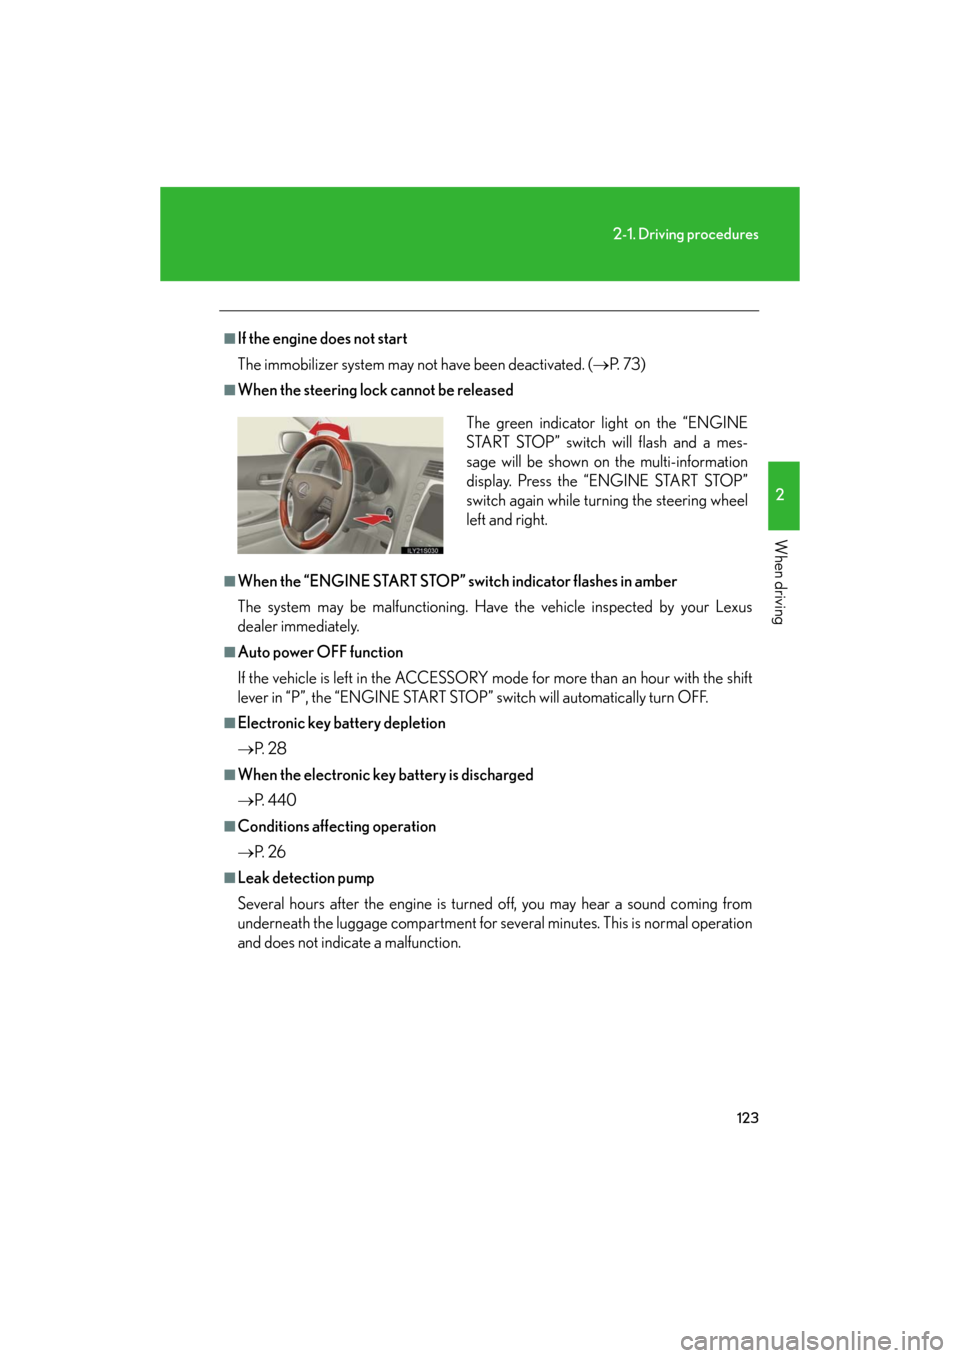
■When the steering lock cannot be released
■When the “ENGINE START STOP” switch indicator flashes in amber
The system may be malfunctioning. Have the vehicle inspected by your Lexus
dealer immediately.
■Auto power OFF function
If the vehicle is left in the ACCESSORY mode for more than an hour with the shift
lever in “P”, the “ENGINE START STOP” switch will automatically turn OFF.
■Electronic key battery depletion
P. 2 8
■When the electronic key battery is discharged
P. 4 4 0
■Conditions affecting operation
P. 2 6
■Leak detection pump
Several hours after the engine is turned off, you may hear a sound coming from
underneath the luggage compartment for several minutes. This is normal operation
and does not indicate a malfunction.
The green indicator light on the “ENGINE
START STOP” switch will flash and a mes-
sage will be shown on the multi-information
display. Press the “ENGINE START STOP”
switch again while turning the steering wheel
left and right.
Page 133 of 596
133
2-2. Instrument cluster
2
When driving
GS_G_U
May 13, 2008 5:14 pm
M
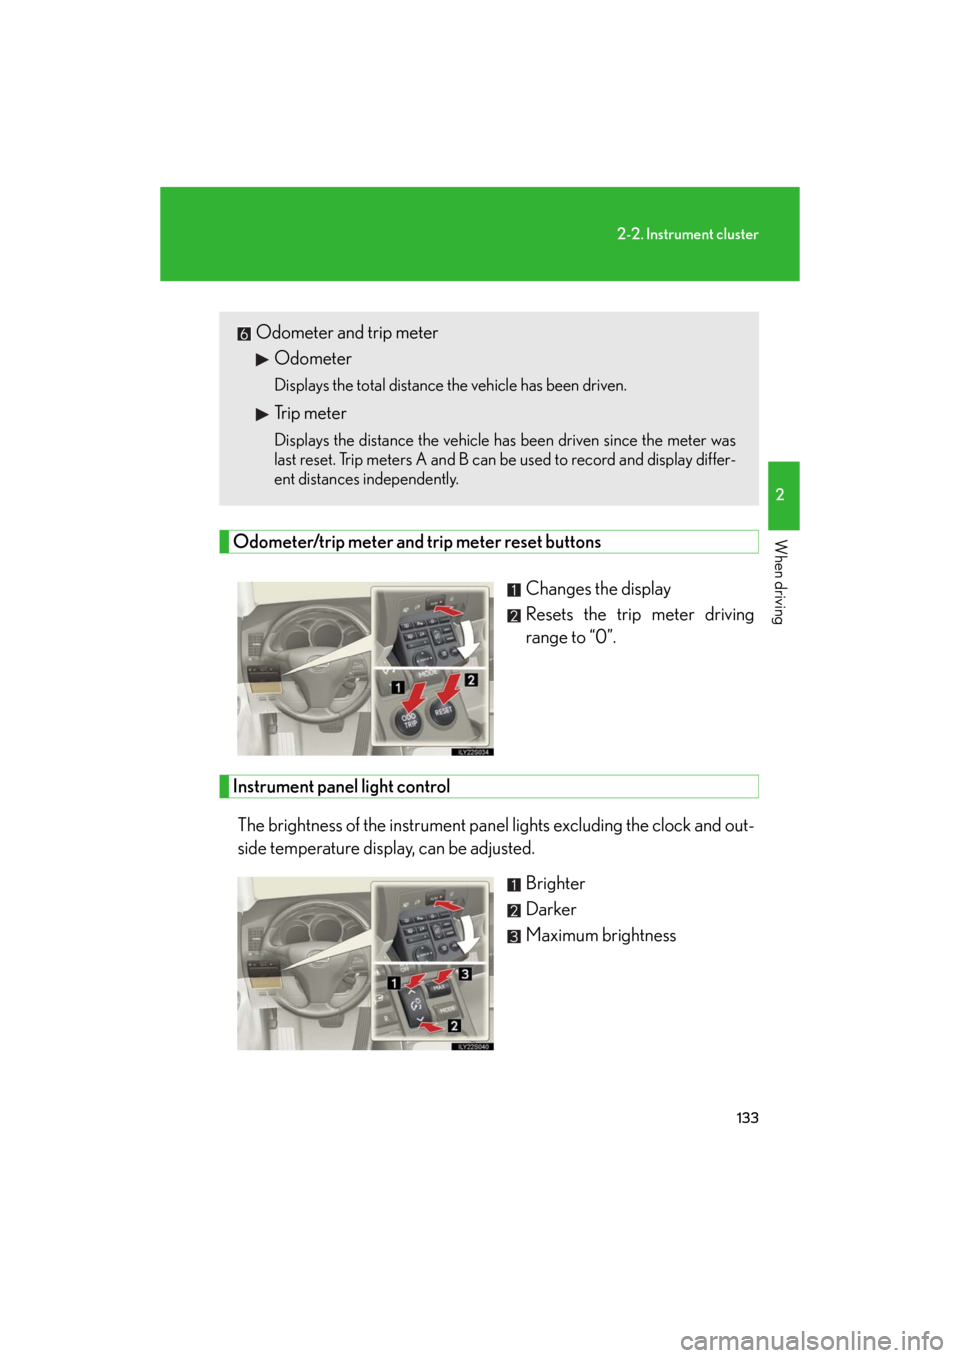
Odometer/trip meter and trip meter reset buttonsChanges the display
Resets the trip meter driving
range to “0”.
Instrument panel light controlThe brightness of the instrument panel lights excluding the clock and out-
side temperature display, can be adjusted. Brighter
Darker
Maximum brightness
Odometer and trip meterOdometer
Displays the total distance the vehicle has been driven.
Trip meter
Displays the distance the vehicle has been driven since the meter was
last reset. Trip meters A and B can be used to record and display differ-
ent distances independently.
Page 143 of 596
143
2-3. Operating the lights and windshield wipers
2
When driving
GS_G_U
June 5, 2008 10:37 am
AFS (Adaptive Front lighting System) (if equipped)
AFS improves visibility at intersectio ns and on curves by automatically
adjusting the level of the headlights according to vehicle speed and the
degree of the tire angle that are controlled by steering input.
Operates at speeds of 6 mph (10 km/h) or higher.
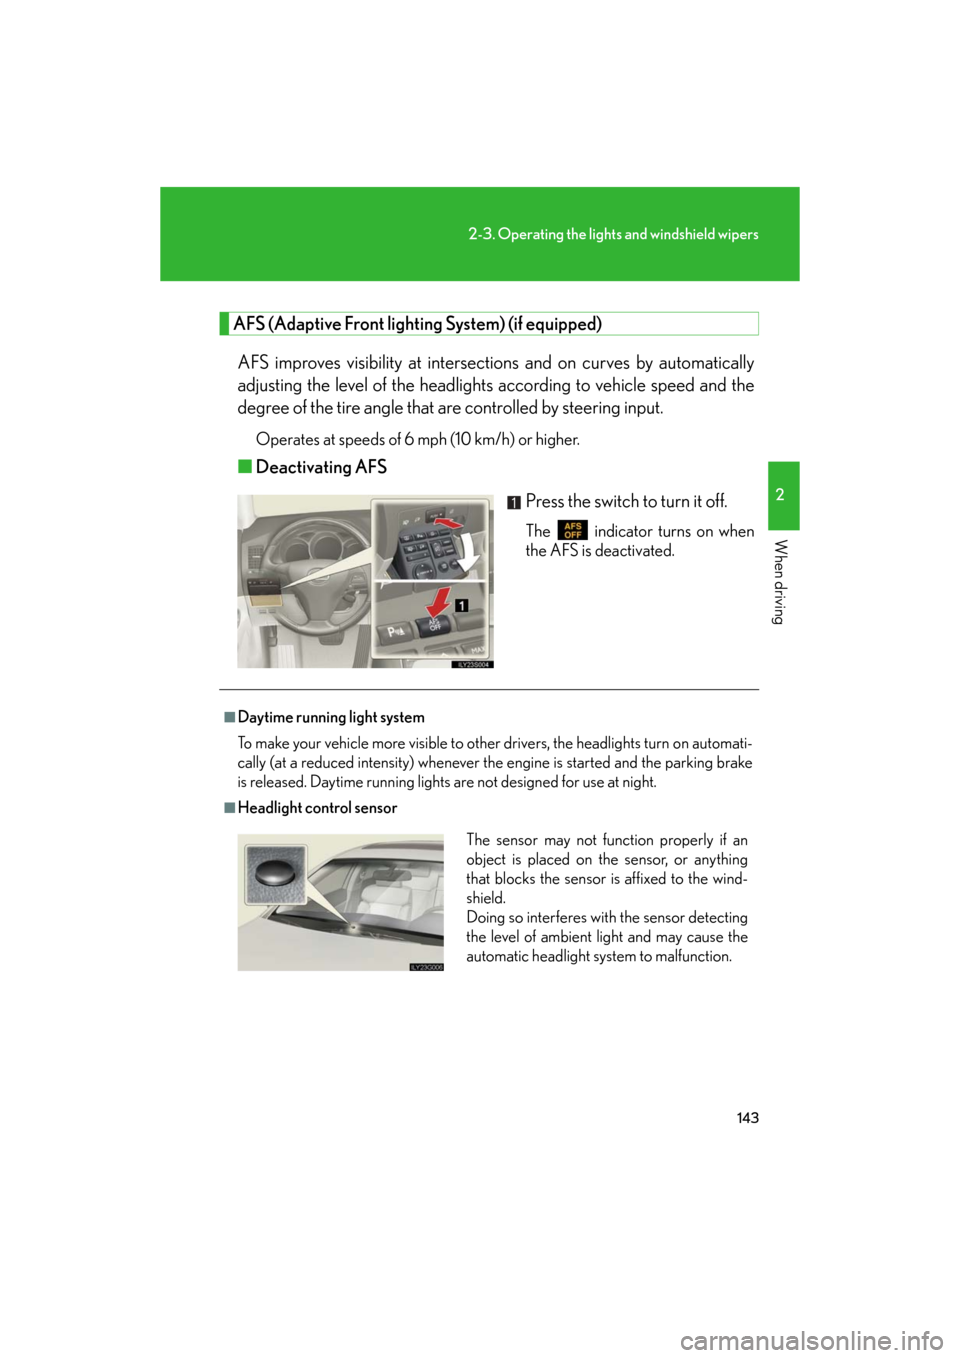
■ Deactivating AFS
Press the switch to turn it off.
The indicator turns on when
the AFS is deactivated.
■Daytime running light system
To make your vehicle more visible to other drivers, the headlights turn on automati-
cally (at a reduced intensity) whenever the engine is started and the parking brake
is released. Daytime running lights are not designed for use at night.
■Headlight control sensor
The sensor may not function properly if an
object is placed on the sensor, or anything
that blocks the sensor is affixed to the wind-
shield.
Doing so interferes with the sensor detecting
the level of ambient light and may cause the
automatic headlight system to malfunction.
Page 144 of 596
144
2-3. Operating the lights and windshield wipers
GS_G_U
June 5, 2008 10:37 am
■Automatic light off system
The headlights and tail lights turn off 30 seconds after all doors are closed if the
“ENGINE START STOP” switch has been switched to ACCESSORY mode or
turned OFF while the headlights are turned on. (The lights turn off immediately if
the button on the key is pressed after all doors are locked.)
To turn the lights on again, switch to IG NITION ON mode, or turn the light switch
off once and then back to the or position.
■Automatic headlight leveling system
The level of the headlights is automatica lly adjusted according to the number of
passengers and the loading condition of the vehicle to ensure that the headlights do
not interfere with other road users.
■If the indicator flashes...
It may indicate a malfunction in the system. Contact your Lexus dealer.
■Customization that can be configured at Lexus dealer
Settings (e.g. light sensor sensitivity) can be changed.
(Customizable features P. 5 7 2 )
NOTICE
■To prevent 12 volt battery discharge
Do not leave the lights on longer than necessary when the engine is off.