reset Lexus GS350 2015 Navigation Manual
[x] Cancel search | Manufacturer: LEXUS, Model Year: 2015, Model line: GS350, Model: Lexus GS350 2015Pages: 383, PDF Size: 46.51 MB
Page 314 of 383
314
1. TELEPHONE OPERATION (HANDS-FREE SYSTEM FOR CELLULAR PHONES)
GS_Navi+MM_OM30F13E_(EE)
15.09.01 14:54
1Display the “Messages” screen.
(→ P.311)
2Select the desired message from the list.
3Select “Quick message” .
4Select the desired message.
5Select “Send” .
“Cancel” : Select to cancel sending the
message.
�z While the message is being sent, a sending
message screen is displayed.
6Check that a confirmation screen is dis-
played when the operation is complete.
�zIf an error message is displayed, follow the
guidance on the screen to try again.
■ EDITING QUICK REPLY MESSAG-
ES
1Select “Quick message” .
2Select corresponding to the de-
sired message to edit.
3Select “OK” when editing is completed.
REPLYING TO A MESSAGE
(QUICK REPLY)
15 messages have already been stored.
INFORMATION
●
To reset the edited quick reply messages,
select “Defaults” .
●“Quick message 1” (“I am driving and
will arrive in approximately [ETA]
minutes.” ):
This message cannot be edited and will
automatically fill in [ETA] with the
navigation calculated estimated time of
arrival on the confirm message screen.
If there are waypoints set, [ETA] to the
next waypoint will be shown.
If there is no route currently set in the
navigation system, “Quick message 1”
cannot be selected.
Page 317 of 383
317
2. SETUP
TELEPHONE
GS_Navi+MM_OM30F13E_(EE)
15.09.01 14:54
7
1Display the “Telephone settings”
screen. (→P.316)
2Select “Sounds” .
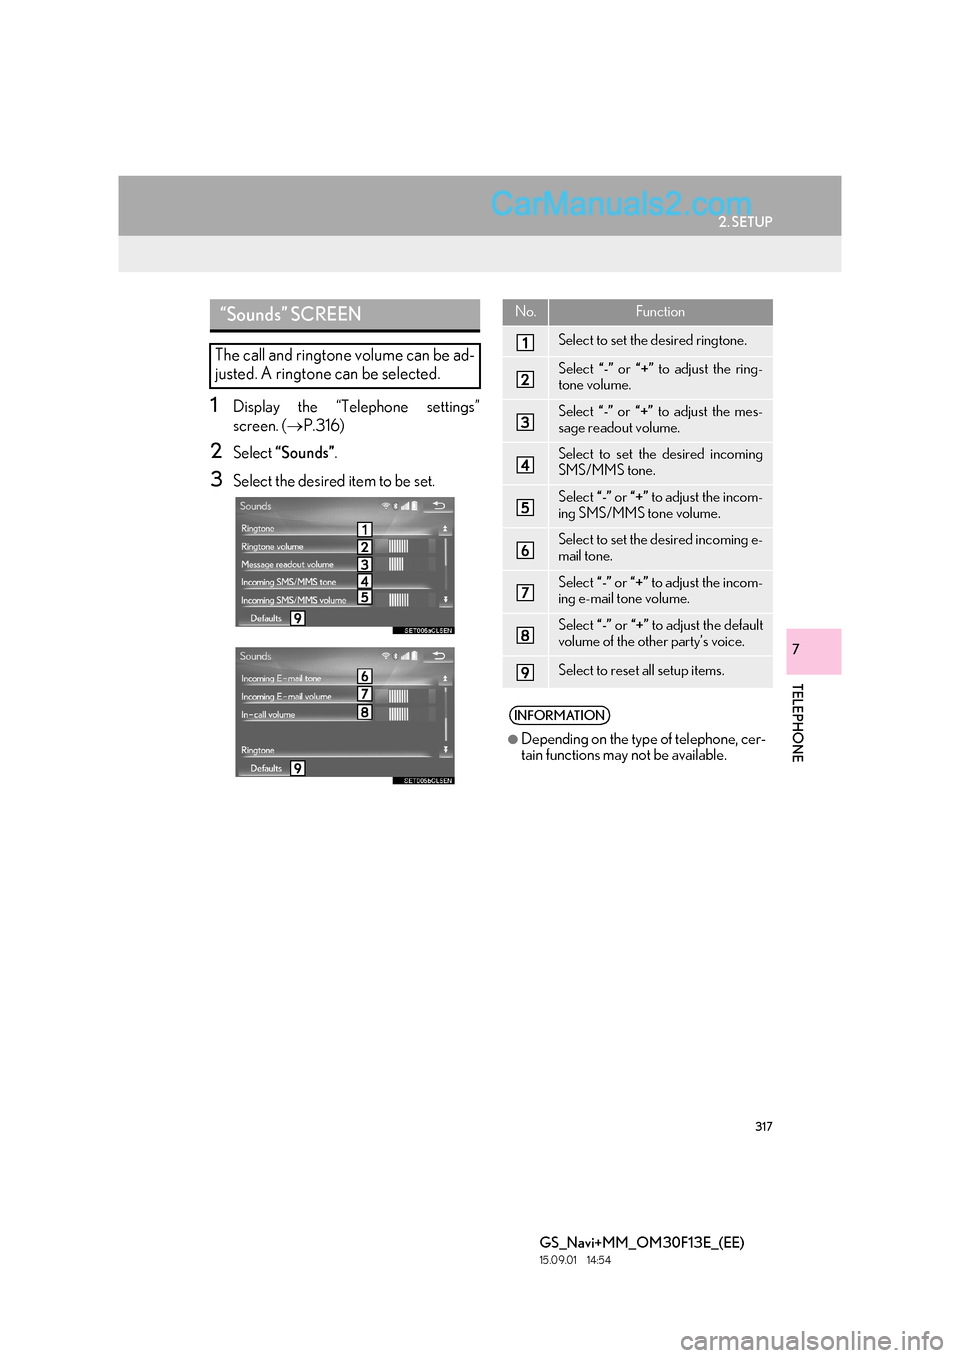
3Select the desired item to be set.
“Sounds” SCREEN
The call and ringtone volume can be ad-
justed. A ringtone can be selected.
No.Function
Select to set the desired ringtone.
Select “-” or “+” to adjust the ring-
tone volume.
Select “-” or “+” to adjust the mes-
sage readout volume.
Select to set the desired incoming
SMS/MMS tone.
Select “-” or “+” to adjust the incom-
ing SMS/MMS tone volume.
Select to set the desired incoming e-
mail tone.
Select “-” or “+” to adjust the incom-
ing e-mail tone volume.
Select “-” or “+” to adjust the default
volume of the other party’s voice.
Select to reset all setup items.
INFORMATION
●
Depending on the type of telephone, cer-
tain functions may not be available.
Page 319 of 383
319
2. SETUP
TELEPHONE
GS_Navi+MM_OM30F13E_(EE)
15.09.01 14:54
7
1Display the “Telephone settings”
screen. (→P.316)
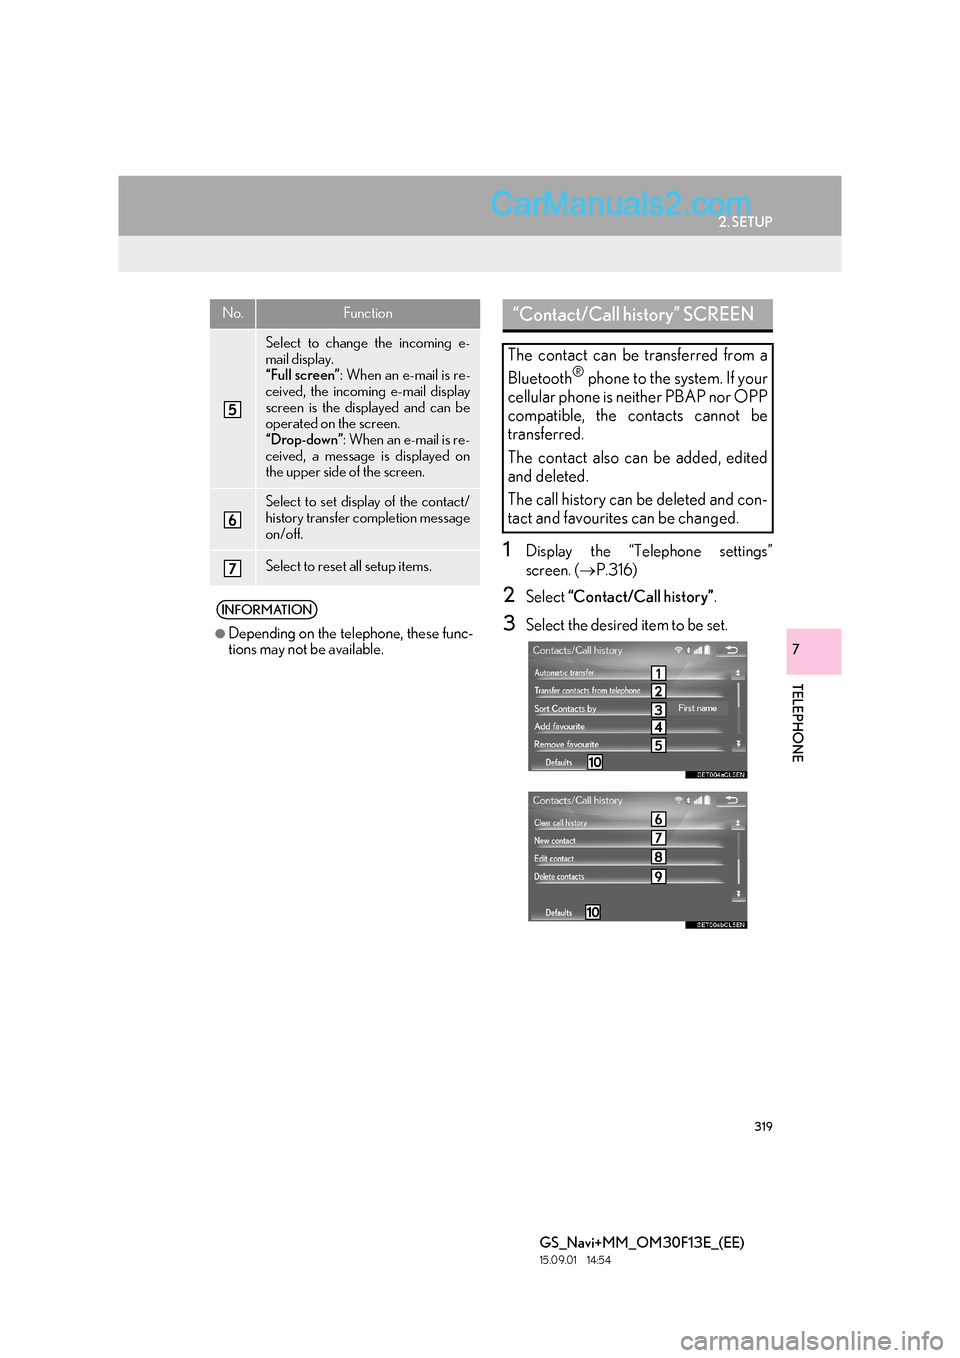
2Select “Contact/Call history” .
3Select the desired item to be set.
Select to change the incoming e-
mail display.
“Full screen”: When an e-mail is re-
ceived, the incoming e-mail display
screen is the displayed and can be
operated on the screen.
“Drop-down” : When an e-mail is re-
ceived, a message is displayed on
the upper side of the screen.
Select to set display of the contact/
history transfer completion message
on/off.
Select to reset all setup items.
INFORMATION
●
Depending on the telephone, these func-
tions may not be available.
No.Function“Contact/Call history” SCREEN
The contact can be transferred from a
Bluetooth
® phone to the system. If your
cellular phone is neither PBAP nor OPP
compatible, the contacts cannot be
transferred.
The contact also can be added, edited
and deleted.
The call history can be deleted and con-
tact and favourites can be changed.
Page 320 of 383
320
2. SETUP
GS_Navi+MM_OM30F13E_(EE)
15.09.01 14:54
No.FunctionPage
For PBAP compatible
Bluetooth® phones: Select
to change the contact/his-
tory transfer settings.321
Select to update contacts
from the connected tele-
phone.322
Select to sort contacts by
the first name or last name
field.
Select to add contacts to
the favourites list. 325
Select to delete contacts
from the favourites list. 326
*Select to clear contacts
from the call history.
*Select to add new contacts
to the contact list.324
*Select to edit contacts in
the contact list.324
*Select to delete contacts
from the contact list.325
Select to reset all setup
items.
*: For PBAP compatible Bluetooth®
phones, this function is available when
“Automatic transfer” is set to off.
( → P.319)
INFORMATION
●
Depending on the type of telephone, cer-
tain functions may not be available.
●Contact data is managed independently
for every registered telephone. When
one telephone is connected, another
telephone’s registered data cannot be
read.
Page 321 of 383
321
2. SETUP
TELEPHONE
GS_Navi+MM_OM30F13E_(EE)
15.09.01 14:54
7
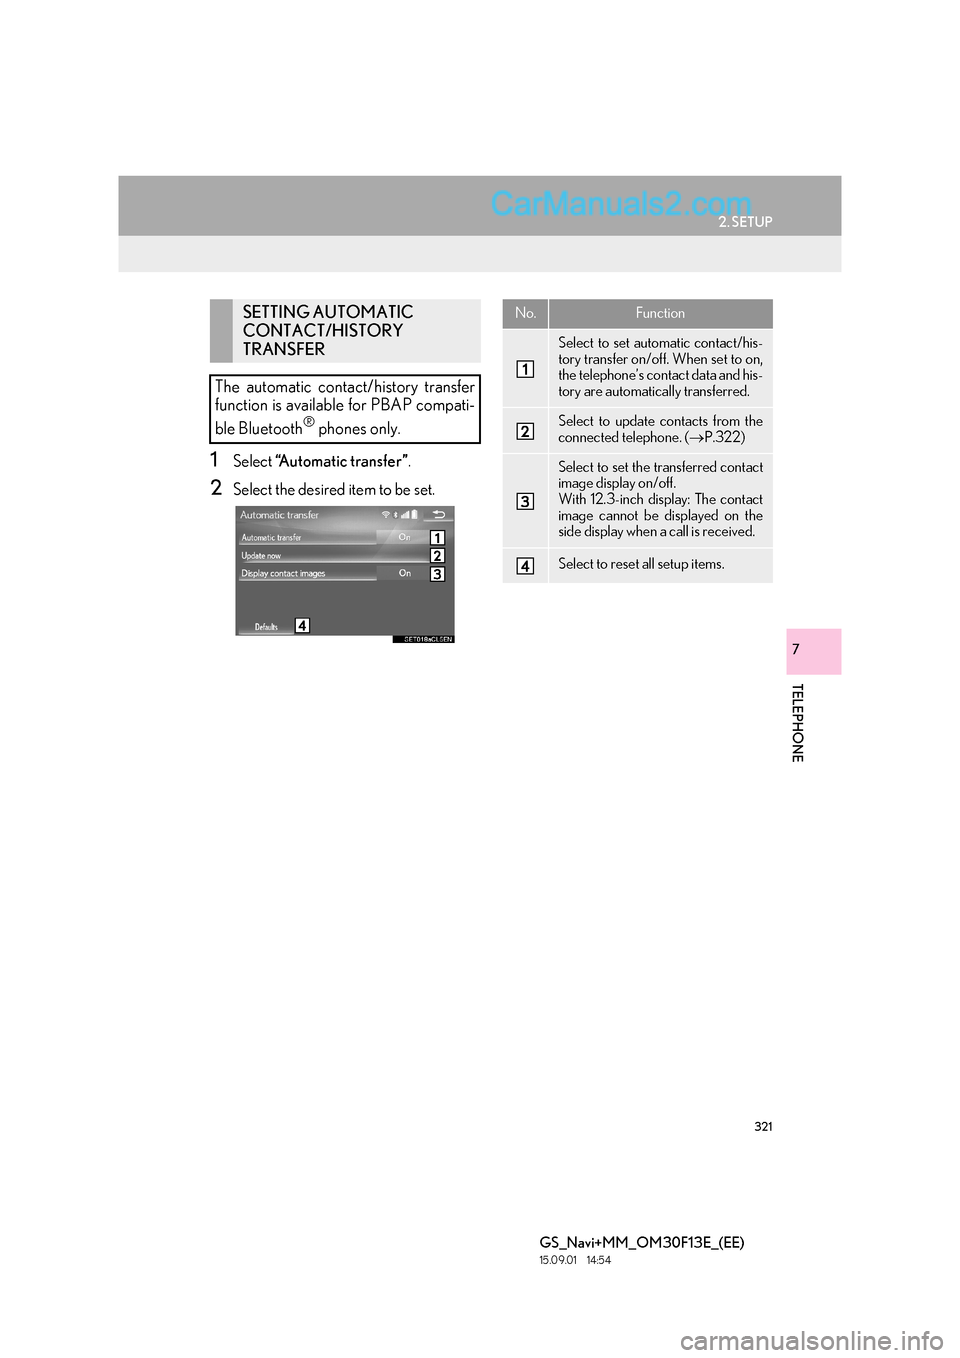
1Select “A u t o m a t i c t r a n s f e r ” .
2Select the desired item to be set.
SETTING AUTOMATIC
CONTACT/HISTORY
TRANSFER
The automatic contact/history transfer
function is available for PBAP compati-
ble Bluetooth
® phones only.
No.Function
Select to set automatic contact/his-
tory transfer on/off. When set to on,
the telephone’s contact data and his-
tory are automatically transferred.
Select to update contacts from the
connected telephone. ( →P.322)
Select to set the transferred contact
image display on/off.
With 12.3-inch display: The contact
image cannot be displayed on the
side display when a call is received.
Select to reset all setup items.
Page 328 of 383
328
2. SETUP
GS_Navi+MM_OM30F13E_(EE)
15.09.01 14:54
1Display the “Telephone settings”
screen. (→P.316)
2Select “Lexus Euro assistance 24 set-
tings” .
3Select the country.
4Check that a confirmation screen is dis-
played when the operation is complete.
1Display the telephone top screen.
(→ P.300)
2Select the “Favourites” tab.
3Select “Lexus Euro assistance 24” .
�X If a country has not been registered
4Select a country.
5Select “Yes” when the confirmation
screen appears.
No.Function
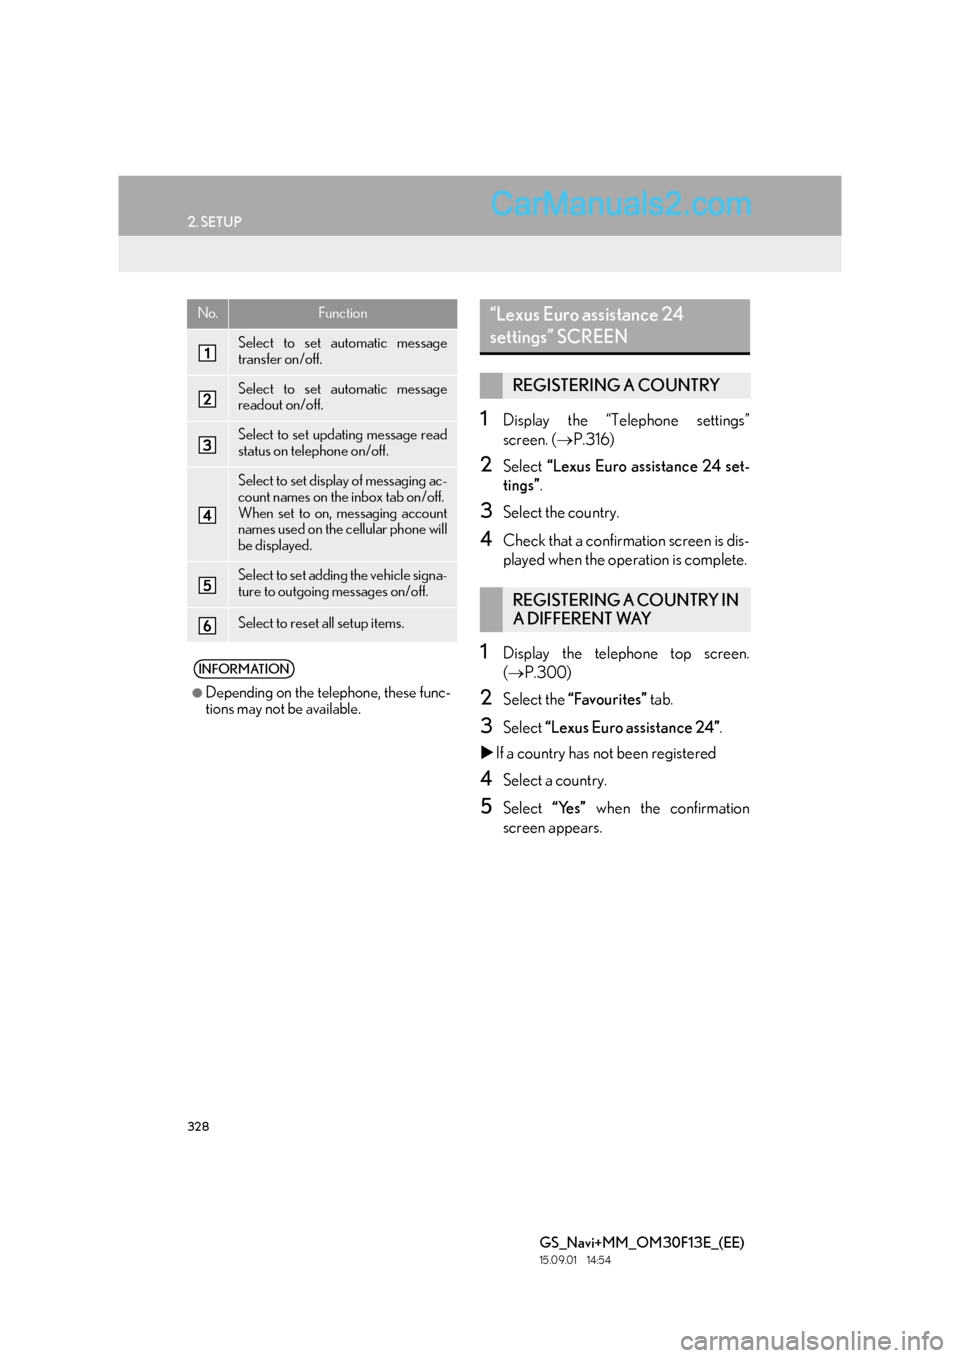
Select to set automatic message
transfer on/off.
Select to set automatic message
readout on/off.
Select to set updating message read
status on telephone on/off.
Select to set display of messaging ac-
count names on the inbox tab on/off.
When set to on, messaging account
names used on the cellular phone will
be displayed.
Select to set adding the vehicle signa-
ture to outgoing messages on/off.
Select to reset all setup items.
INFORMATION
●
Depending on the telephone, these func-
tions may not be available.
“Lexus Euro assistance 24
settings” SCREEN
REGISTERING A COUNTRY
REGISTERING A COUNTRY IN
A DIFFERENT WAY
Page 358 of 383
358
2. SETUP
GS_Navi+MM_OM30F13E_(EE)
15.09.01 14:54
No.Function
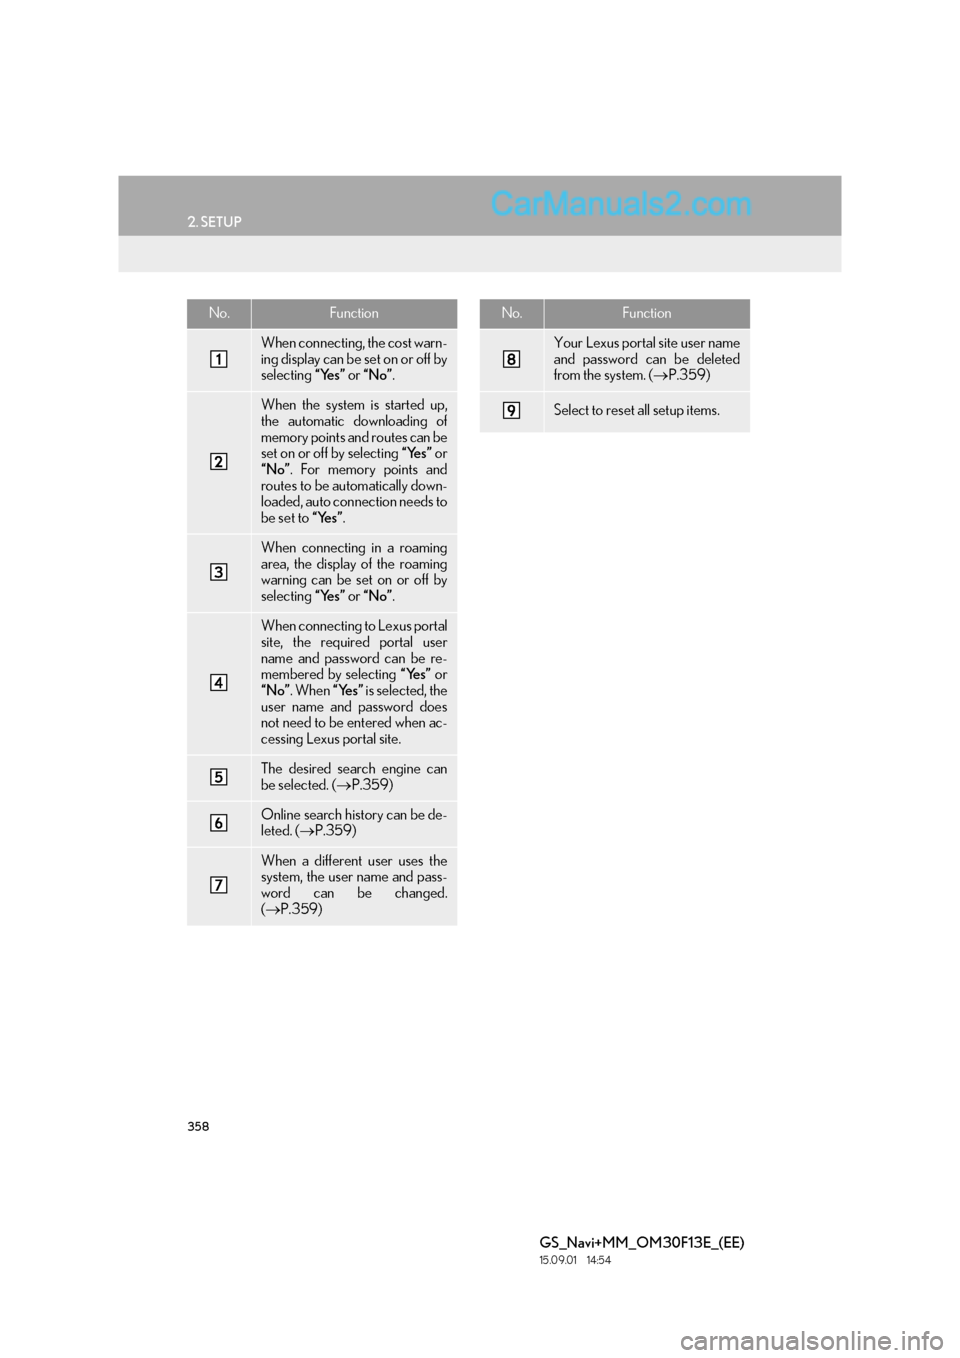
When connecting, the cost warn-
ing display can be set on or off by
selecting “Yes” or “No” .
When the system is started up,
the automatic downloading of
memory points and routes can be
set on or off by selecting “Yes” or
“No” . For memory points and
routes to be automatically down-
loaded, auto connection needs to
be set to “Yes”.
When connecting in a roaming
area, the display of the roaming
warning can be set on or off by
selecting “Yes” or “No” .
When connecting to Lexus portal
site, the required portal user
name and password can be re-
membered by selecting “Yes” or
“No” . When “Yes” is selected, the
user name and password does
not need to be entered when ac-
cessing Lexus portal site.
The desired search engine can
be selected. ( →P.359)
Online search history can be de-
leted. ( →P.359)
When a different user uses the
system, the user name and pass-
word can be changed.
(→ P.359)
Your Lexus portal site user name
and password can be deleted
from the system. ( →P.359)
Select to reset all setup items.
No.Function
Page 366 of 383

366
1. 12.3-INCH DISPLAY OPERATION
GS_Navi+MM_OM30F13E_(EE)
15.09.01 14:54
■SELECTING AN AUDIO SOURCE
1 Select “�V ”.
2Select the desired source.
■ RADIO OPERATION ■
MEDIA OPERATION
AUDIO/VIDEO SYSTEM
On the side display, preset stations can
be selected.
Operations such as selecting a chapter,
file or track are carried out on the
screen.
No.Function
• Select to select a chapter/track/
file.
• Select and hold to rewind.
Select to stop the video screen.
Select to play/pause.
•Select to select a chapter/track/
file.
• During playback: Select and hold
to fast forward.
• During a pause: Select and hold to
slow forward.
INFORMATION
●
Depending on the audio source, some
functions may not be available.
Page 370 of 383

370
ALPHABETICAL INDEX
GS_Navi+MM_OM30F13E_(EE)
15.09.01 14:53
Numerics
12.3-inch display ....................................................... 361
12.3-inch display operation................................. 362
12.3-inch display-overview ................................. 362Full screen display..............................................362
Split-screen display ........................................... 363
A
AM/FM/DAB radio ................................................179Manual tuning .........................................................181
Overview .................................................................179
Presetting a station ...............................................181
RDS (Radio data system) ................................. 182
Time shift operation (DAB)............................. 182
Audio settings ............................................................ 215 Audio settings screen........................................ 215
Audio/visual remote controls ............................209
Audio/visual system.................................................167
AUX ............................................................................. 207 Overview ............................................................... 207
B
Basic function..........................................................12, 31
Basic information before operation ................... 32
Basic operation ................................................ 86, 168
Bluetooth
® audio ..................................................... 201
Connecting a Bluetooth® device ...............206
Listening to Bluetooth® audio......................206
Overview ................................................................ 201
Bluetooth
® phone message function................311
Calling the message sender ........................... 315
Checking messages........................................... 313
Receiving a message ......................................... 312
Replying to a message (Quick reply) ......... 314
C
Calling on the Bluetooth® phone....................300
By call history........................................................ 301
By contacts list .................................................... 302
By dial pad ............................................................ 304
By favourites list................................................... 301
By off hook switch.............................................. 305
SOS ......................................................................... 305
CD.................................................................................. 183
Overview ............................................................... 183
Command list ........................................................... 246
Connected service settings................................ 357
Connected service settings screen ........... 357
Connected services .................................. 339, 340
Connected services overview .......................... 340
Before using connected services................ 342
Connecting to internet via Bluetooth
®
device ........................................................................ 62
Setting internet connection .............................. 62
Connecting to internet via Wi-Fi
®..................... 65
Wi-Fi® function operating hints ..................... 68
Wi-Fi® settings screen....................................... 65
ALPHABETICAL INDEX