light Lexus GX460 2010 Navigation Manual
[x] Cancel search | Manufacturer: LEXUS, Model Year: 2010, Model line: GX460, Model: Lexus GX460 2010Pages: 428, PDF Size: 6.27 MB
Page 23 of 428
22
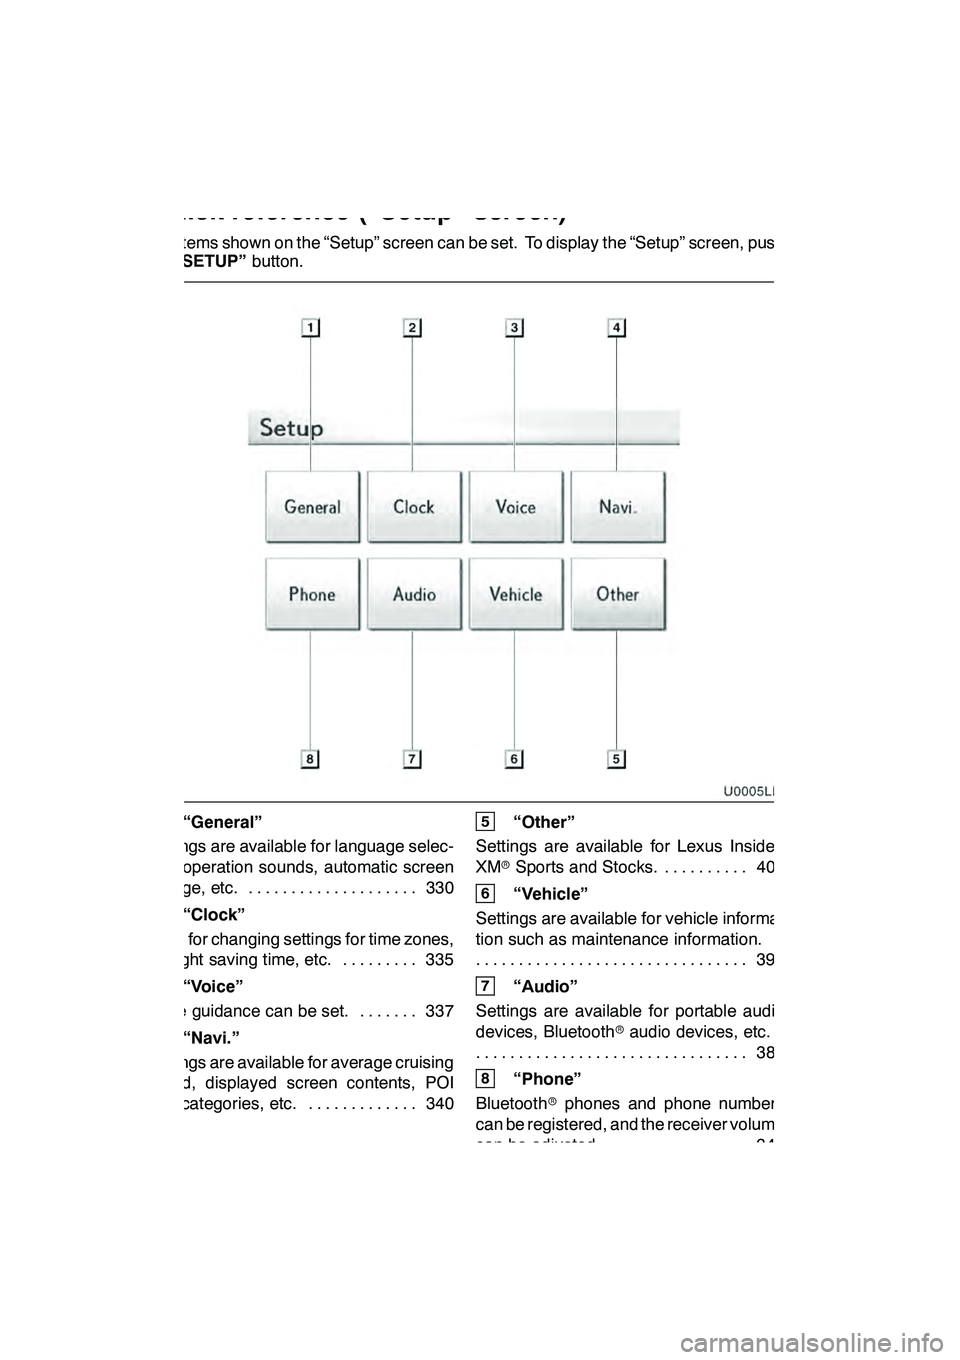
The items shown on the “Setup” screen can be set. To display the “Setup” screen, push
the“SETUP” button.
1“General”
Settings are available for language selec-
tion, operation sounds, automatic screen
change, etc. 330 ....................
2“Clock”
Used for changing settings for time zones,
daylight saving time, etc. 335 .........
3“Voice”
Voice guidance can be set. 337 .......
4“Navi.”
Settings are available for average cruising
speed, displayed screen contents, POI
icon categories, etc. 340 .............
5“Other”
Settings are available for Lexus Insider,
XM rSports and Stocks. 403
..........
6“Vehicle”
Settings are available for vehicle informa-
tion such as maintenance information. 395
................................
7“Audio”
Settings are available for portable audio
devices, Bluetooth raudio devices, etc.
388
................................
8“Phone”
Bluetooth rphones and phone numbers
can be registered, and the receiver volume
can be adjusted. 349 ................
GX460 Navi (U)
OM60E73U
09.09.24
Quickreference (“Setup” screen)
Page 28 of 428
NAVIGATION SYSTEM: BASIC FUNCTIONS
27
D
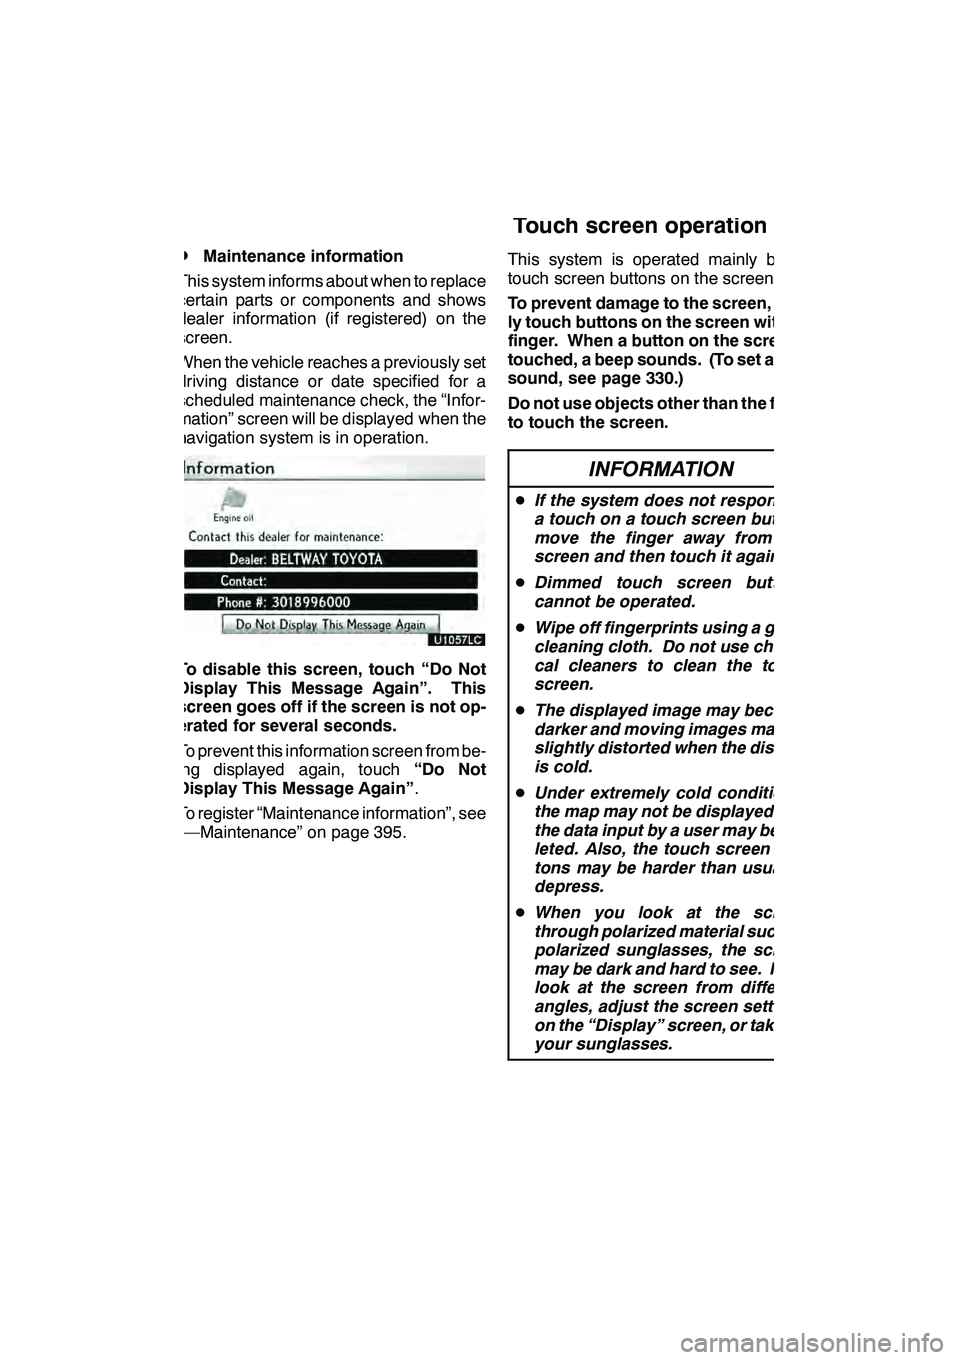
Maintenance information
This system informs about when to replace
certain parts or components and shows
dealer information (if registered) on the
screen.
When the vehicle reaches a previously set
driving distance or date specified for a
scheduled maintenance check, the “Infor-
mation” screen will be displayed when the
navigation system is in operation.
To disable this screen, touch “Do Not
Display This Message Again”. This
screen goes off if the screen is not op-
erated for several seconds.
To prevent this information screen from be-
ing displayed again, touch “Do Not
Display This Message Again” .
To register “Maintenance information”, see
“—Maintenance” on page 395. This system is operated mainly by the
touch screen buttons on the screen.
To prevent damage to the screen, light-
ly touch buttons on the screen with the
finger. When a button on the screen is
touched, a beep sounds. (To set a beep
sound, see page 330.)
Do not use objects other than the finger
to touch the screen.
INFORMATION
D
If the system does not respond to
a touch on a touch screen button,
move the finger away from the
screen and then touch it again.
D Dimmed touch screen buttons
cannot be operated.
D Wipe off fingerprints using a glass
cleaning cloth. Do not use chemi-
cal cleaners to clean the touch
screen.
D The displayed image may become
darker and moving images may be
slightly distorted when the display
is cold.
D Under extremely cold conditions,
the map may not be displayed and
the data input by a user may be de-
leted. Also, the touch screen but-
tons may be harder than usual to
depress.
D When you look at the screen
through polarized material such as
polarized sunglasses, the screen
may be dark and hard to see. If so,
look at the screen from different
angles, adjust the screen settings
on the “Display” screen, or take off
your sunglasses.
GX460 Navi (U)
OM60E73U
Finish
09.09.24
Touch screen operation
1
Page 33 of 428
NAVIGATION SYSTEM: BASIC FUNCTIONS
32
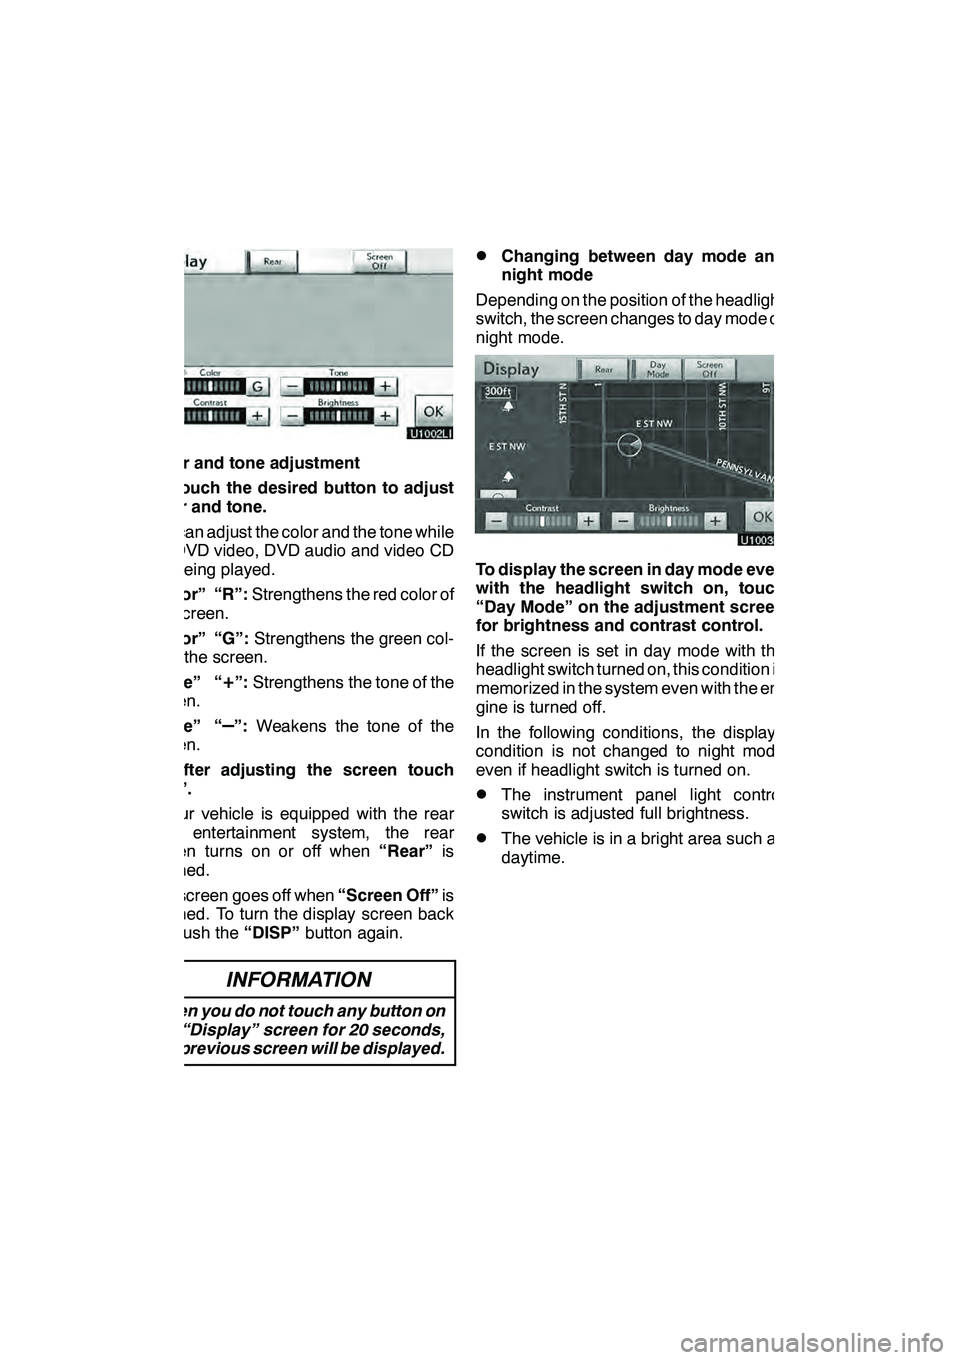
Color and tone adjustment
1. Touch the desired button to adjust
color and tone.
You can adjust the color and the tone while
the DVD video, DVD audio and video CD
are being played.
“Color” “R”:Strengthens the red color of
the screen.
“Color” “G”: Strengthens the green col-
or of the screen.
“Tone” “
+”: Strengthens the tone of the
screen.
“Tone” “
–”: Weakens the tone of the
screen.
2. After adjusting the screen touch
“OK”.
If your vehicle is equipped with the rear
seat entertainment system, the rear
screen turns on or off when “Rear”is
touched.
The screen goes off when “Screen Off”is
touched. To turn the display screen back
on, push the “DISP”button again.
INFORMATION
When you do not touch any button on
the “Display” screen for 20 seconds,
the previous screen will be displayed.
DChanging between day mode and
night mode
Depending on the position of the headlight
switch, the screen changes to day mode or
night mode.
To display the screen in day mode even
with the headlight switch on, touch
“Day Mode” on the adjustment screen
for brightness and contrast control.
If the screen is set in day mode with the
headlight switch turned on, this condition is
memorized in the system even with the en-
gine is turned off.
In the following conditions, the displays
condition is not changed to night mode
even if headlight switch is turned on.
DThe instrument panel light control
switch is adjusted full brightness.
DThe vehicle is in a bright area such as
daytime.
GX460 Navi (U)
OM60E73U
Finish
09.09.24
Page 108 of 428
NAVIGATION SYSTEM: ROUTE GUIDANCE
107
D
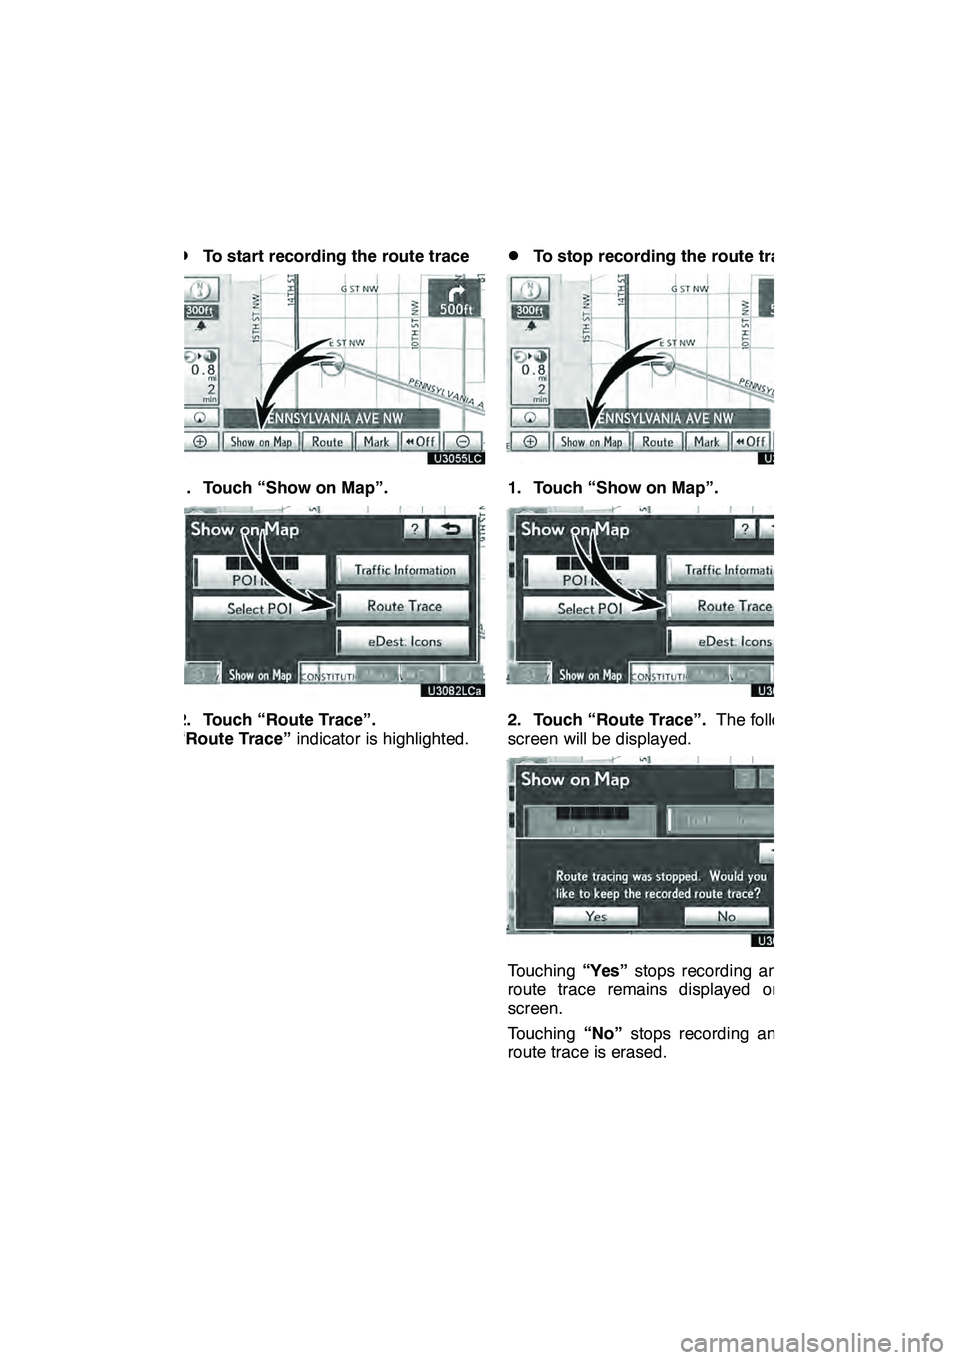
To start recording the route trace
1. Touch “Show on Map”.
2. Touch “Route Trace”.
“Route Trace”
indicator is highlighted.
DTo stop recording the route trace
1. Touch “Show on Map”.
2. Touch “Route Trace”. The following
screen will be displayed.
Touching “Yes”stops recording and the
route trace remains displayed on the
screen.
Touching “No”stops recording and the
route trace is erased.
GX460 Navi (U)
OM60E73U
Finish
09.09.24
3
Page 151 of 428
TELEPHONE AND INFORMATION
150
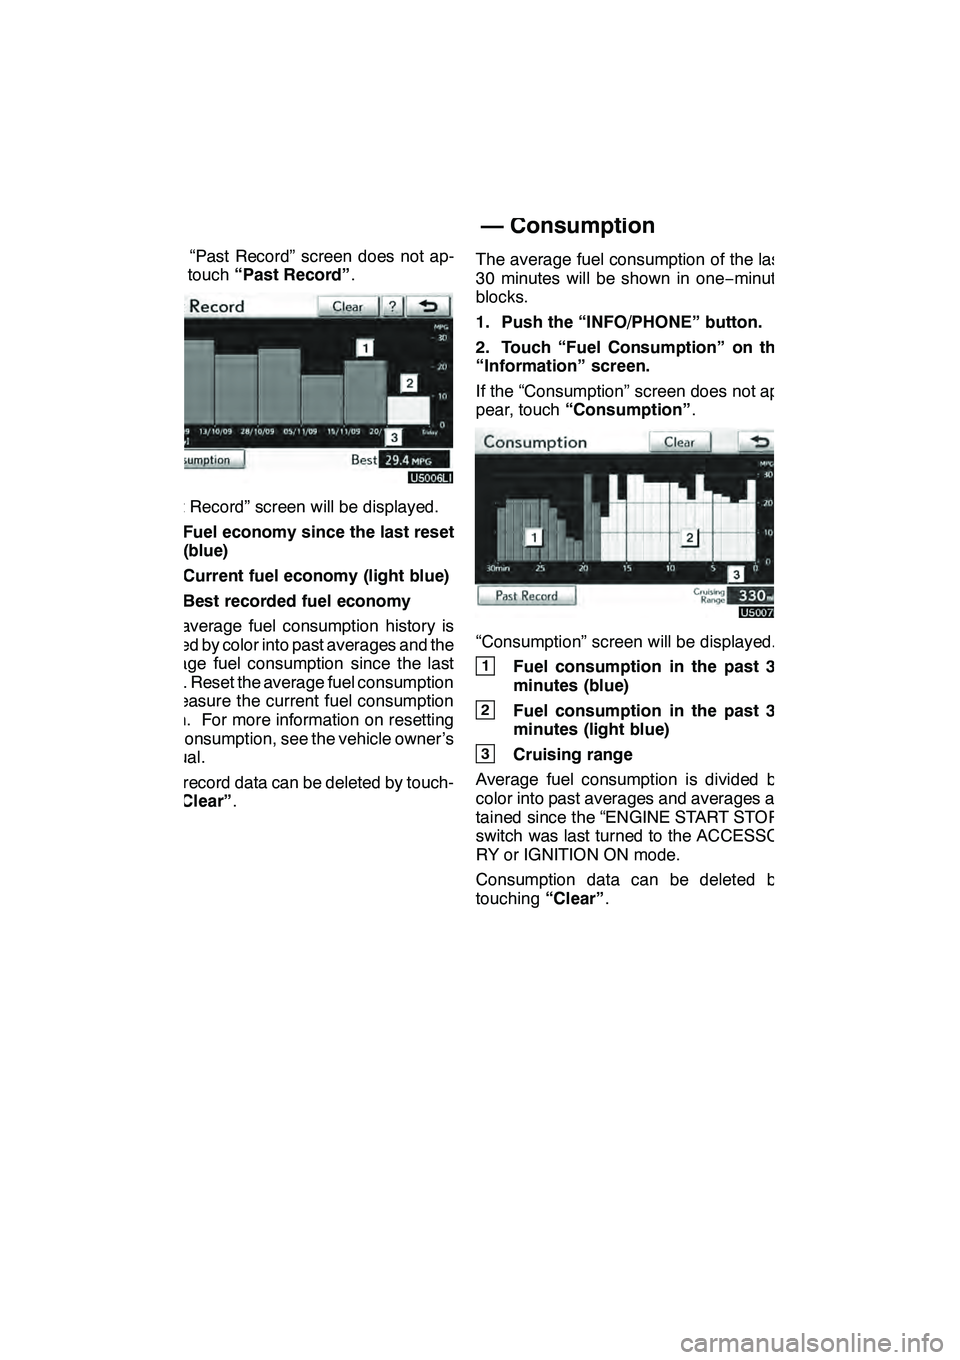
If the “Past Record” screen does not ap-
pear, touch“Past Record” .
“Past Record” screen will be displayed.
1Fuel economy since the last reset
(blue)
2Current fuel economy (light blue)
3Best recorded fuel economy
The average fuel consumption history is
divided by color into past averages and the
average fuel consumption since the last
reset. Reset the average fuel consumption
to measure the current fuel consumption
again. For more information on resetting
fuel consumption, see the vehicle owner’s
manual.
Past record data can be deleted by touch-
ing “Clear” . The average fuel consumption of the last
30 minutes will be shown in one
−minute
blocks.
1. Push the “INFO/PHONE” button.
2. Touch “Fuel Consumption” on the
“Information” screen.
If the “Consumption” screen does not ap-
pear, touch “Consumption” .
“Consumption” screen will be displayed.
1Fuel consumption in the past 30
minutes (blue)
2Fuel consumption in the past 30
minutes (light blue)
3Cruising range
Average fuel consumption is divided by
color into past averages and averages at-
tained since the “ENGINE START STOP”
switch was last turned to the ACCESSO-
RY or IGNITION ON mode.
Consumption data can be deleted by
touching “Clear”.
GX460 Navi (U)
OM60E73U
Finish
09.09.24
— Consumption
Page 163 of 428
LEXUS ENFORM WITH SAFETY CONNECT
162
U12040LS
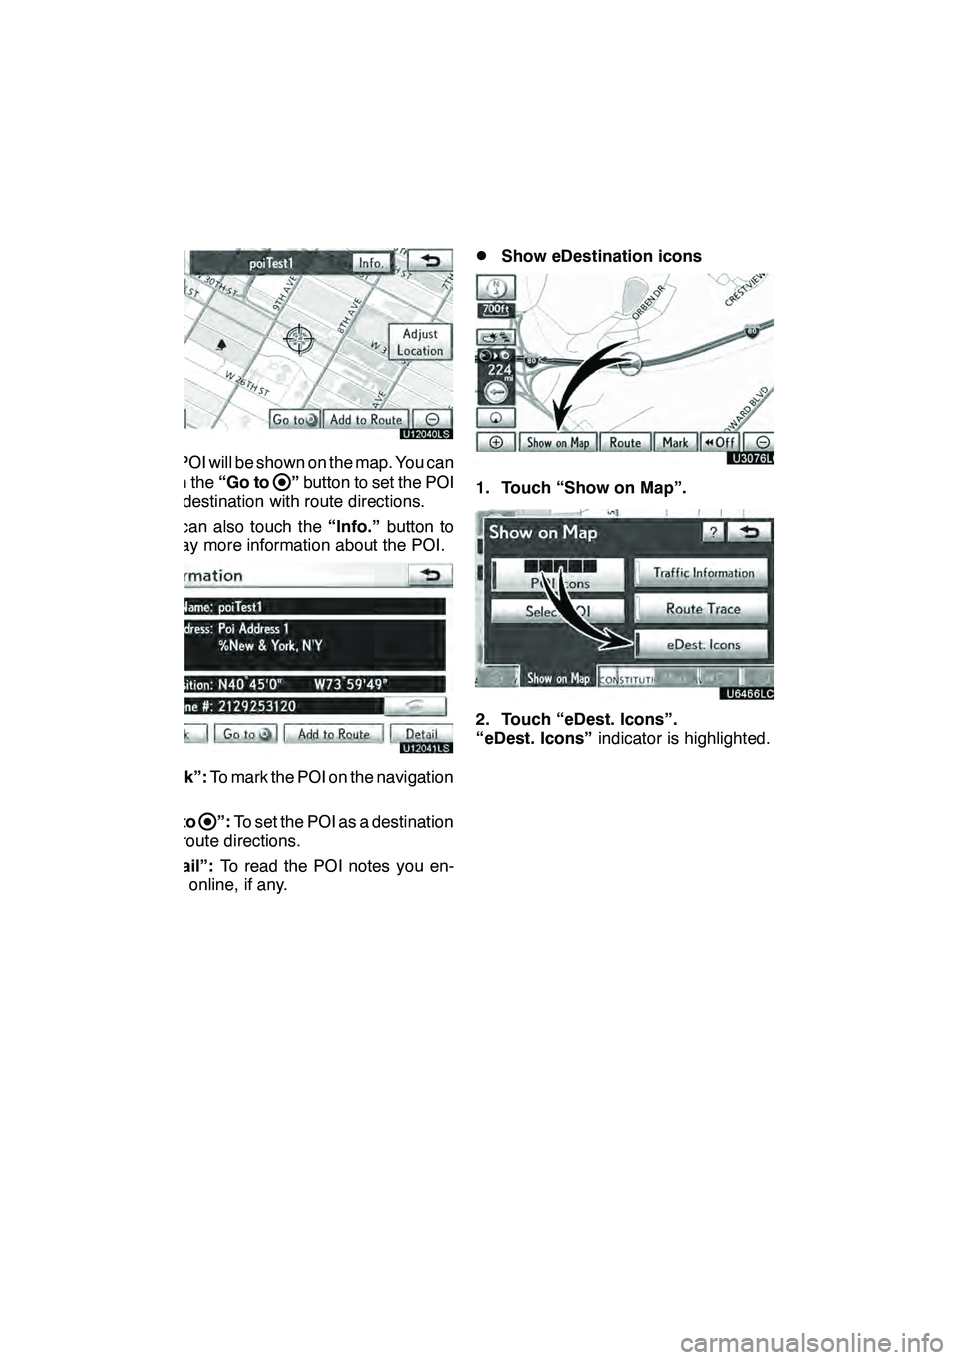
The POI will be shown on the map. You can
touch the“Go to
”button to set the POI
as a destination with route directions.
You can also touch the “Info.”button to
display more information about the POI.
U12041LS
“Mark”: To mark the POI on the navigation
map.
“Go to
”: To set the POI as a destination
with route directions.
“Detail”: To read the POI notes you en-
tered online, if any.
DShow eDestination icons
U3076LC
1. Touch “Show on Map”.
2. Touch “eDest. Icons”.
“eDest. Icons” indicator is highlighted.
GX460 Navi (U)
OM60E73U
Finish
09.09.24
Page 174 of 428
LEXUS ENFORM WITH SAFETY CONNECT
173
The subscription−based XM rNavTraffic
service allows the navigation system to
display traffic information on the map.
See page155 for subscription information.
The following operations can be per-
formed.
DShow XM rNavTraffic Information
Traffic information is displayed on the map.
(See page 173.)
DAuto Avoid Traffic
If any heavy congestion or moderate traffic
has been detected on the guidance route,
it may be possible for you to select another
route offered by the system. (See page
343.)
DTraffic Voice Guidance
Traffic information is provided using voice
guidance. (See page 339.)
DShow Free Flowing Traffic
Freely flowing traffic is shown by the arrow
on the map. (See page 344.)
INFORMATION
D Traffic voice guidance is available
only in English. To select English,
see “
DSelecting a language” on
page 331.
D When the “Traffic Information” in-
dicator is dimmed, “Auto Avoid
Traffic”, “Traffic Voice Guidance”
and “Show Free Flowing Traffic”
will not operate.
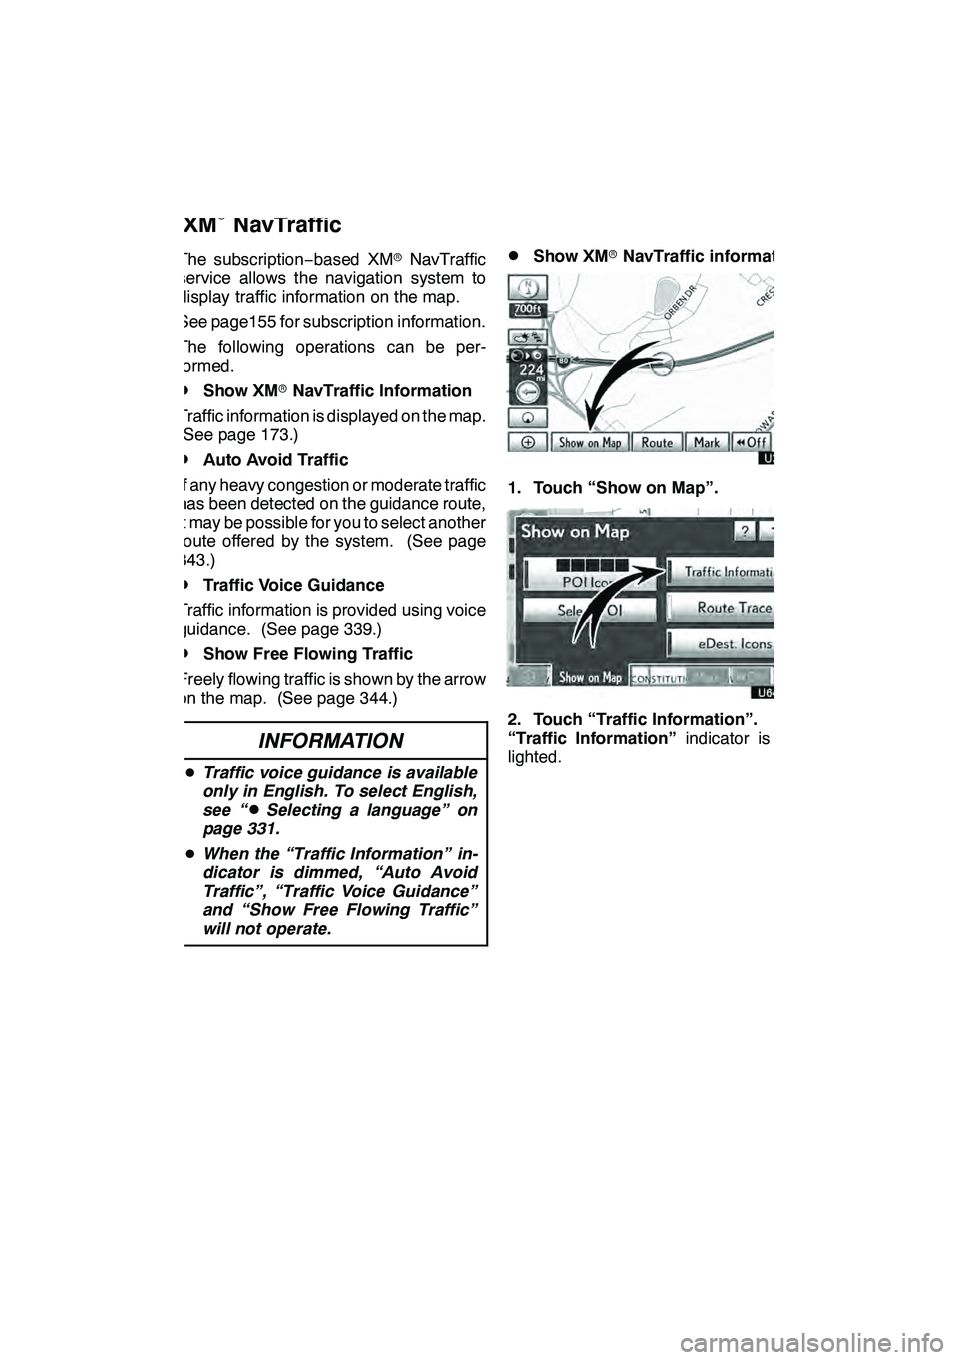
DShow XM rNavTraffic information
U3076LC
1. Touch “Show on Map”.
2. Touch “Traffic Information”.
“Traffic Information” indicator is high-
lighted.
GX460 Navi (U)
OM60E73U
Finish
09.09.24
XM
rNavTraffic
66
Page 198 of 428
AUDIO/VIDEO SYSTEM
197
(b) Presetting a station
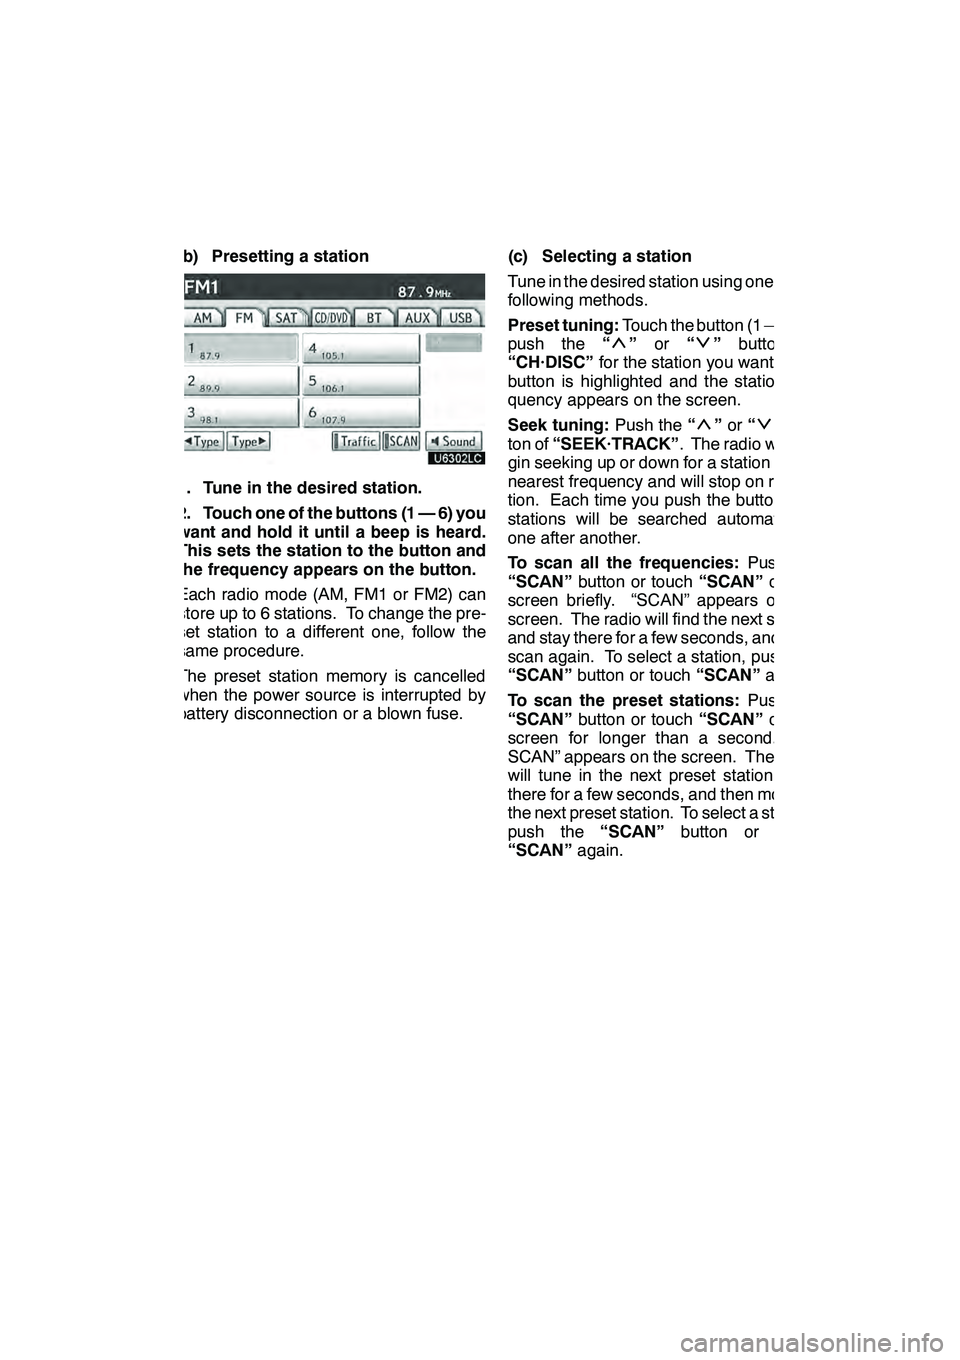
1. Tune in the desired station.
2. Touch one of the buttons (1 — 6) you
want and hold it until a beep is heard.
This sets the station to the button and
the frequency appears on the button.
Each radio mode (AM, FM1 or FM2) can
store up to 6 stations. To change the pre-
set station to a different one, follow the
same procedure.
The preset station memory is cancelled
when the power source is interrupted by
battery disconnection or a blown fuse.(c) Selecting a station
Tune in the desired station using one of the
following methods.
Preset tuning:
Touch the button (1 — 6) or
push the “
”or “”button of
“CH·DISC” for the station you want. The
button is highlighted and the station fre-
quency appears on the screen.
Seek tuning: Push the“
”or “”but-
ton of “SEEK·TRACK” . The radio will be-
gin seeking up or down for a station of the
nearest frequency and will stop on recep-
tion. Each time you push the button, the
stations will be searched automatically
one after another.
To scan all the frequencies: Push the
“SCAN” button or touch “SCAN”on the
screen briefly. “SCAN” appears on the
screen. The radio will find the next station
and stay there for a few seconds, and then
scan again. To select a station, push the
“SCAN” button or touch “SCAN”again.
To scan the preset stations: Push the
“SCAN” button or touch “SCAN”on the
screen for longer than a second. “P.
SCAN” appears on the screen. The radio
will tune in the next preset station, stay
there for a few seconds, and then move to
the next preset station. To select a station,
push the “SCAN”button or touch
“SCAN” again.
GX460 Navi (U)
OM60E73U
Finish
09.09.24
7
Page 204 of 428
AUDIO/VIDEO SYSTEM
203
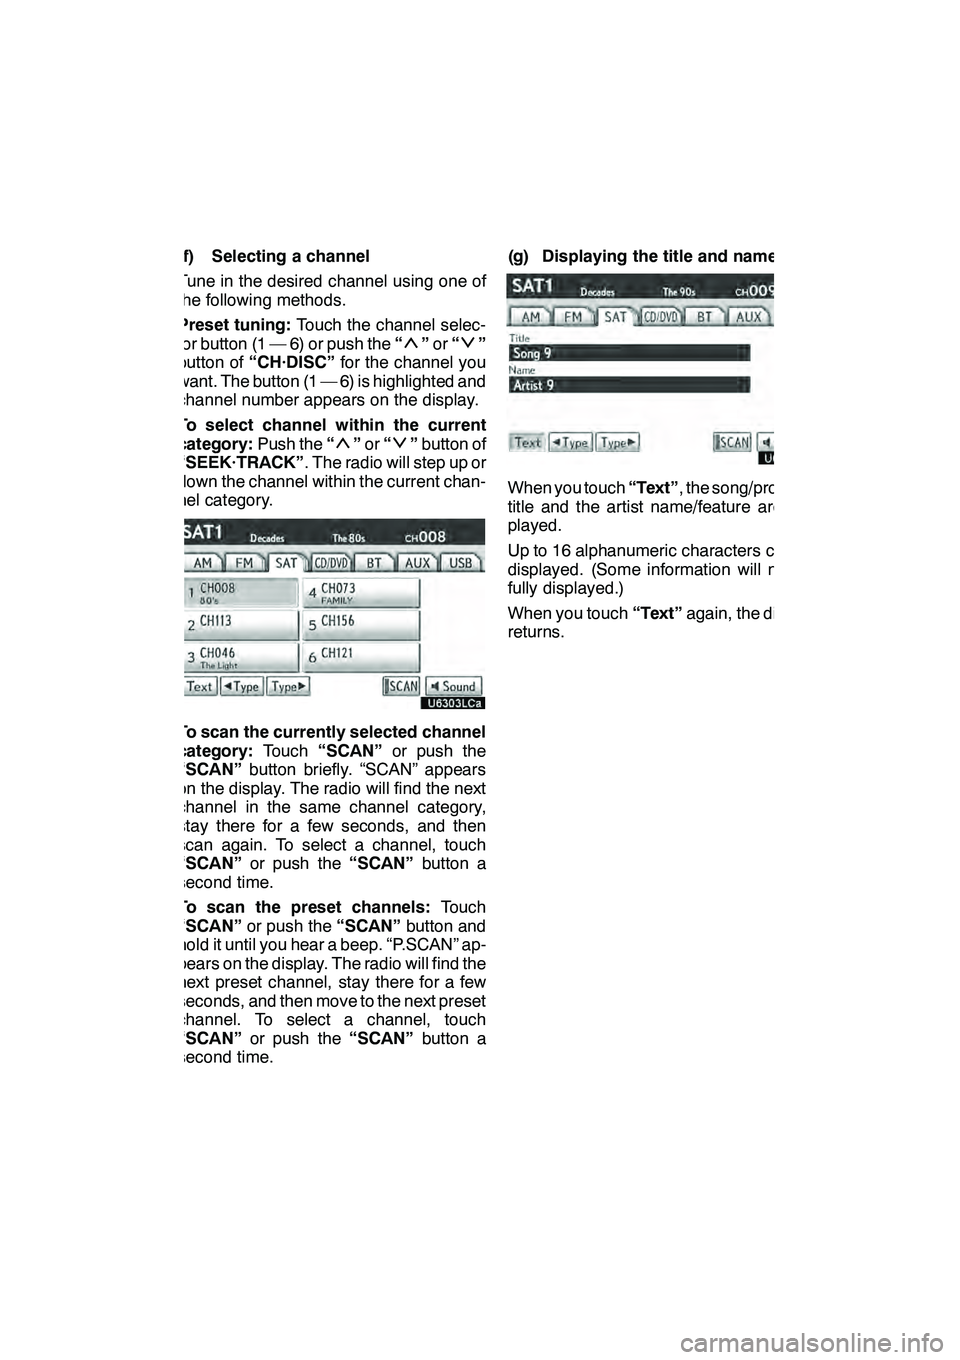
(f) Selecting a channel
Tune in the desired channel using one of
the following methods.
Preset tuning:Touch the channel selec-
tor button (1 — 6) or push the “
”or “”
button of “CH·DISC” for the channel you
want. The button (1 — 6) is highlighted and
channel number appears on the display.
To select channel within the current
category: Push the“
”or “”button of
“SEEK·TRACK” . The radio will step up or
down the channel within the current chan-
nel category.
To scan the currently selected channel
category: Touch“SCAN” or push the
“SCAN” button briefly. “SCAN” appears
on the display. The radio will find the next
channel in the same channel category,
stay there for a few seconds, and then
scan again. To select a channel, touch
“SCAN” or push the “SCAN”button a
second time.
To scan the preset channels: Touch
“SCAN” or push the “SCAN”button and
hold it until you hear a beep. “P.SCAN” ap-
pears on the display. The radio will find the
next preset channel, stay there for a few
seconds, and then move to the next preset
channel. To select a channel, touch
“SCAN” or push the “SCAN”button a
second time. (g) Displaying the title and name
When you touch
“Text”, the song/program
title and the artist name/feature are dis-
played.
Up to 16 alphanumeric characters can be
displayed. (Some information will not be
fully displayed.)
When you touch “Text”again, the display
returns.
GX460 Navi (U)
OM60E73U
Finish
09.09.24
7
Page 209 of 428
AUDIO/VIDEO SYSTEM
208
3. Insert the next disc after the orange
indicators change to green and stay on
and the CD changer door opens.
4. Repeat this procedure until you in-
sert all the discs.
To cancel the operation, push the“LOAD”
button briefly.
If you do not insert the discs within 15 sec-
onds after pushing the “LOAD”button, the
beep will sound and the operation will be
canceled automatically.
NOTICE
Do not insert one disc stacked on top
of another one or feed them in contin-
uously, to prevent discs from getting
stuck in the changer.
INFORMATION
Under extremely cold conditions, the
display may react slowly.
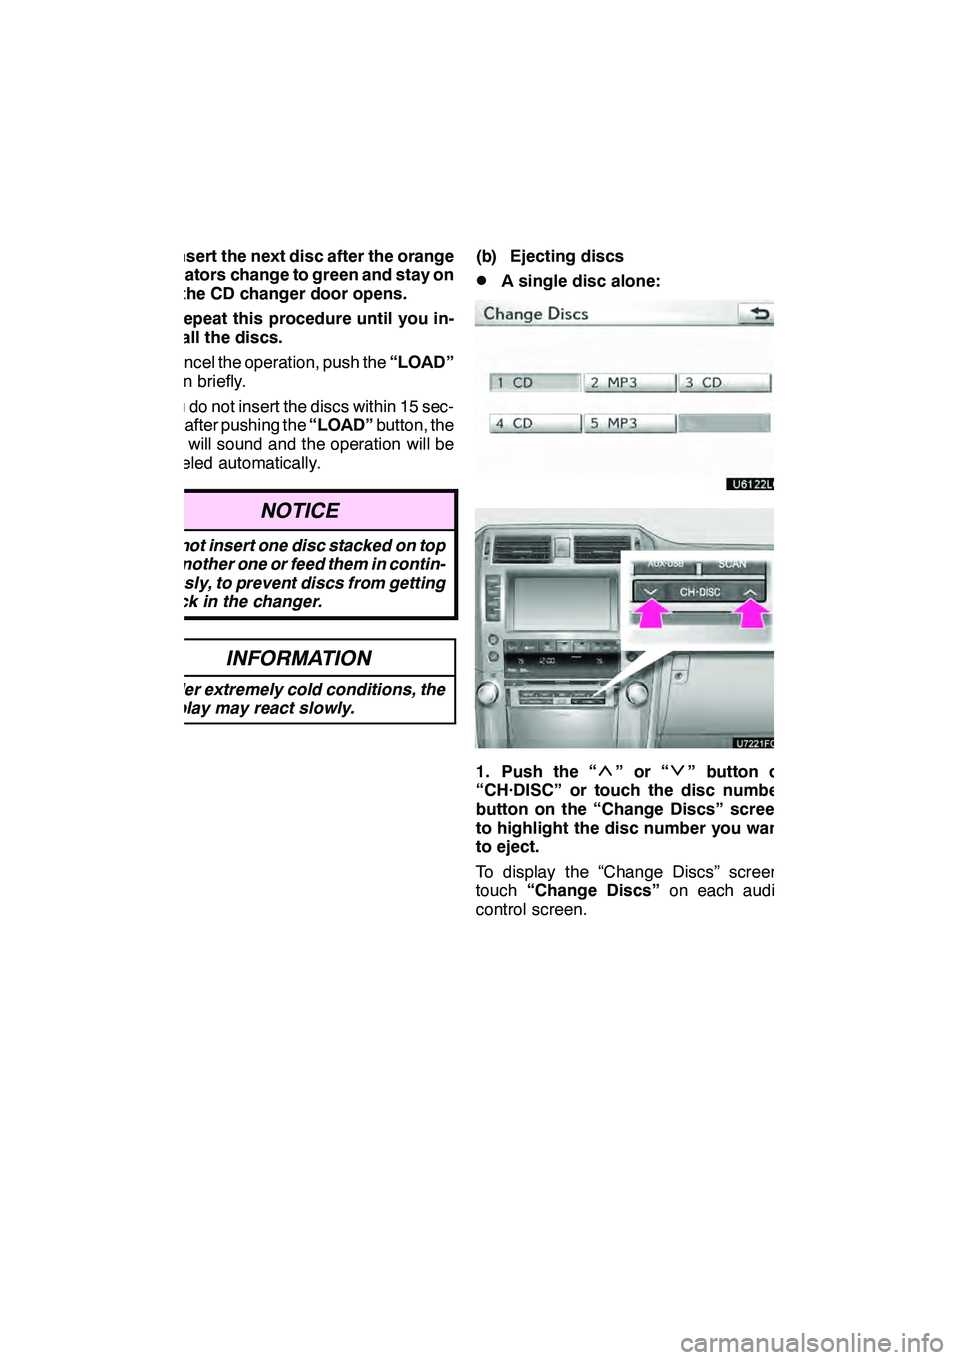
(b) Ejecting discs
DA single disc alone:
1. Push the “”or“” button of
“CH·DISC” or touch the disc number
button on the “Change Discs” screen
to highlight the disc number you want
to eject.
To display the “Change Discs” screen,
touch “Change Discs” on each audio
control screen.
GX460 Navi (U)
OM60E73U
Finish
09.09.24