engine Lexus GX460 2013 Specifications /
[x] Cancel search | Manufacturer: LEXUS, Model Year: 2013, Model line: GX460, Model: Lexus GX460 2013Pages: 94, PDF Size: 2.2 MB
Page 1 of 94
1
GX460_QG_U (OM60J68U)
The Quick Guide is not intended as a substitute for your Owner’s
Manual. We strongly encourage you to review the Owner’s
Manual and supplementary manuals so you will have a better
understanding of your vehicle’s capabilities and limitations.
Audio System (With Navigation System)
Basic operation ................................................................................................................ ............... 52
Radio ...................................................................................................................................................53
DVD player/CD player ........................................................................................................... ....54
Operating an iPod .............................................................................................................. ...........55
Remote control (steering wheel switches)..........................................................................56
Audio System (Without Navigation System)
Basic operation ................................................................................................................ ............... 70
Radio ................................................................................................................................................... 70
CD player...................................................................................................................... ......................71
Operating an iPod .............................................................................................................. ........... 72
Remote control (steering wheel switches).......................................................................... 72
Automatic High Beam ............................................................................................................ ...........36
Crawl Control .................................................................................................................. ..................... 32
Cruise Control ................................................................................................................. ...................... 19
Door Locks ..................................................................................................................... ....................... 85
Dynamic Radar Cruise Control................................................................................................... ... 21
Eco Driving Indicator Light .................................................................................................... ........... 18
Engine (Ignition) Switch....................................................................................................... ............... 14
Four-wheel Drive System........................................................................................................ ........... 31
Front Air Conditioning System (With Navigation System) Using the automatic mode......................................................................................................... 62
Adjusting the temperature...................................................................................................... ... 62
Using the automatic mode.........................................................................................................63
Adjusting the temperature...................................................................................................... ...63
Front Air Conditioning System (Without Navigation System) Using the automatic mode......................................................................................................... 73
Adjusting the temperature...................................................................................................... ... 73
Using the automatic mode......................................................................................................... 75
Adjusting the temperature...................................................................................................... ... 75
Fuel Tank Cap .................................................................................................................. ..................... 88
Hands-free System For Cellular Phone (With Navigation System)
Bluetooth
® phone pairing ......................................................................................................... 46
Phonebook transfer ............................................................................................................. ......... 47
Registering a voice tag ........................................................................................................ ........48
Registering a speed dial ....................................................................................................... ....... 49
Calling by name................................................................................................................ ............. 50
Calling by speed dial .......................................................................................................... ........... 51
Receiving a call ............................................................................................................... ................ 52
Page 3 of 94
3
GX460_QG_U (OM60J68U)
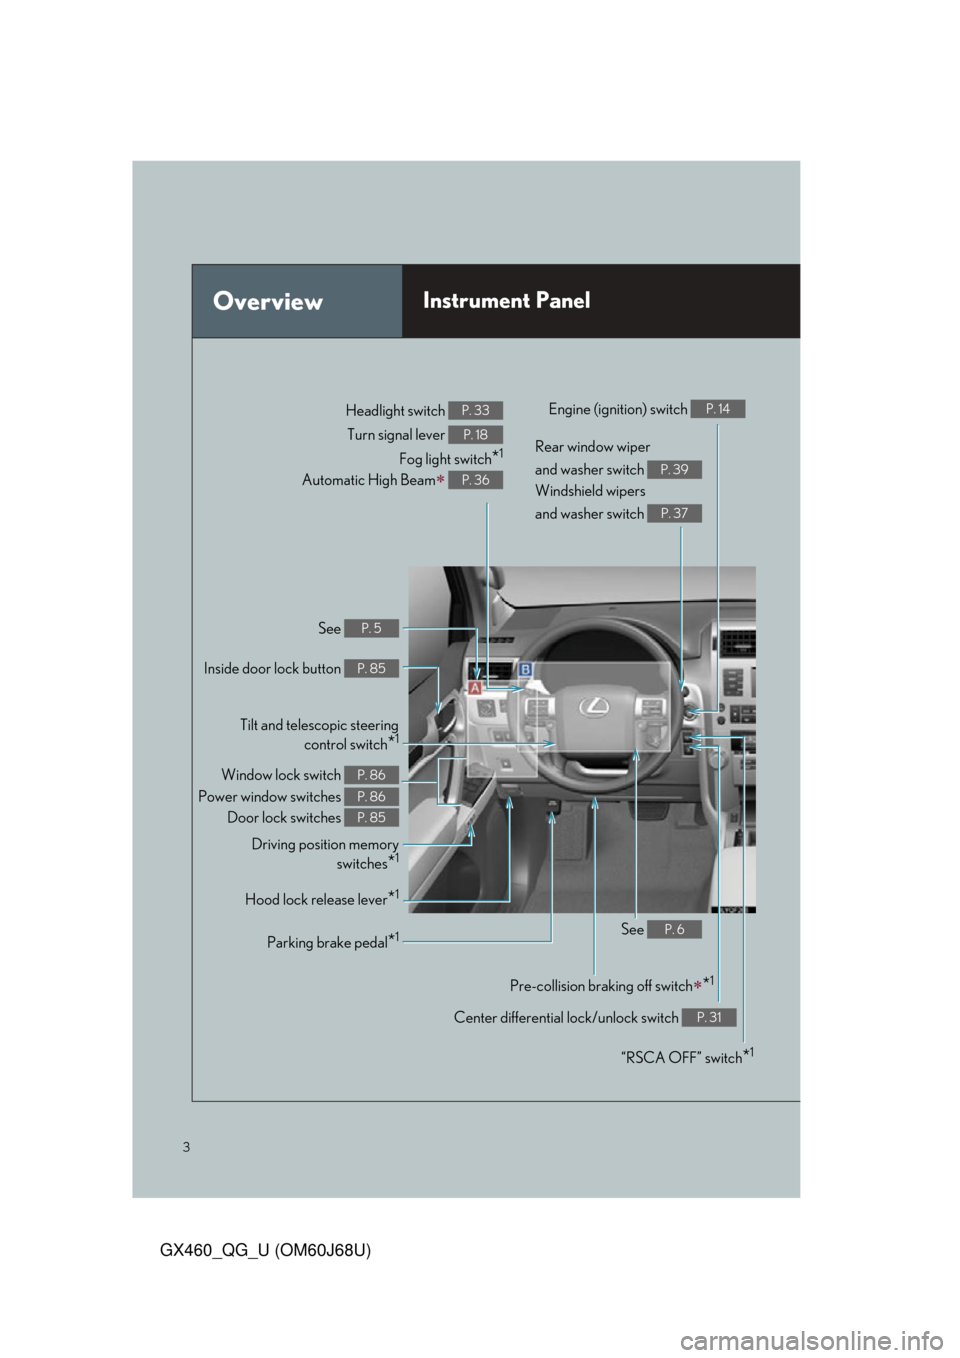
OverviewInstrument Panel
See P. 5
Inside door lock button P. 85
Door lock switches P. 85
Power window switches P. 86
Window lock switch P. 86
Driving position memoryswitches
*1
Hood lock release lever*1
See P. 6
Tilt and telescopic steeringcontrol switch
*1
Parking brake pedal*1
Pre-collision braking off switch*1
Center differential lock/unlock switch P. 31
Fog light switch*1
Automatic High Beam P. 36
Rear window wiper
and washer switch
Windshield wipers
and washer switch
P. 39
P. 37
Engine (ignition) switch P. 14Headlight switch P. 33
Turn signal lever P. 18
“RSCA OFF” switch*1
Page 11 of 94
11
GX460_QG_U (OM60J68U)
Smart Access System with Push-button Start
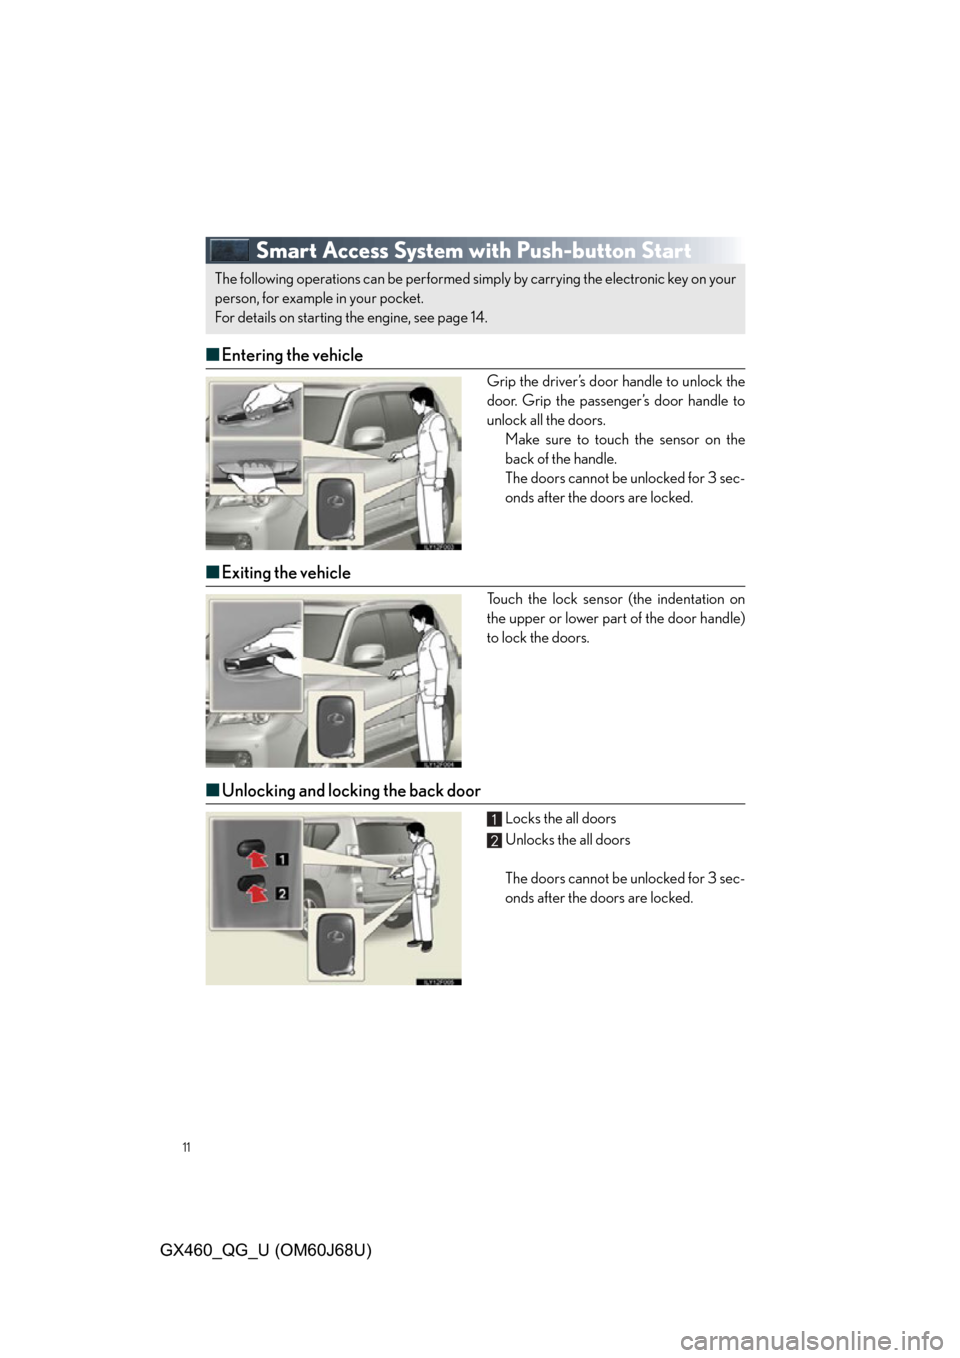
■Entering the vehicle
Grip the driver’s door handle to unlock the
door. Grip the passenger’s door handle to
unlock all the doors.
Make sure to touch the sensor on the
back of the handle.
The doors cannot be unlocked for 3 sec-
onds after the doors are locked.
■Exiting the vehicle
Touch the lock sensor (the indentation on
the upper or lower part of the door handle)
to lock the doors.
■Unlocking and locking the back door
Locks the all doors
Unlocks the all doors
The doors cannot be unlocked for 3 sec-
onds after the doors are locked.
The following operations can be performed simp ly by carrying the electronic key on your
person, for example in your pocket.
For details on starting the engine, see page 14.
Page 12 of 94
12
GX460_QG_U (OM60J68U)
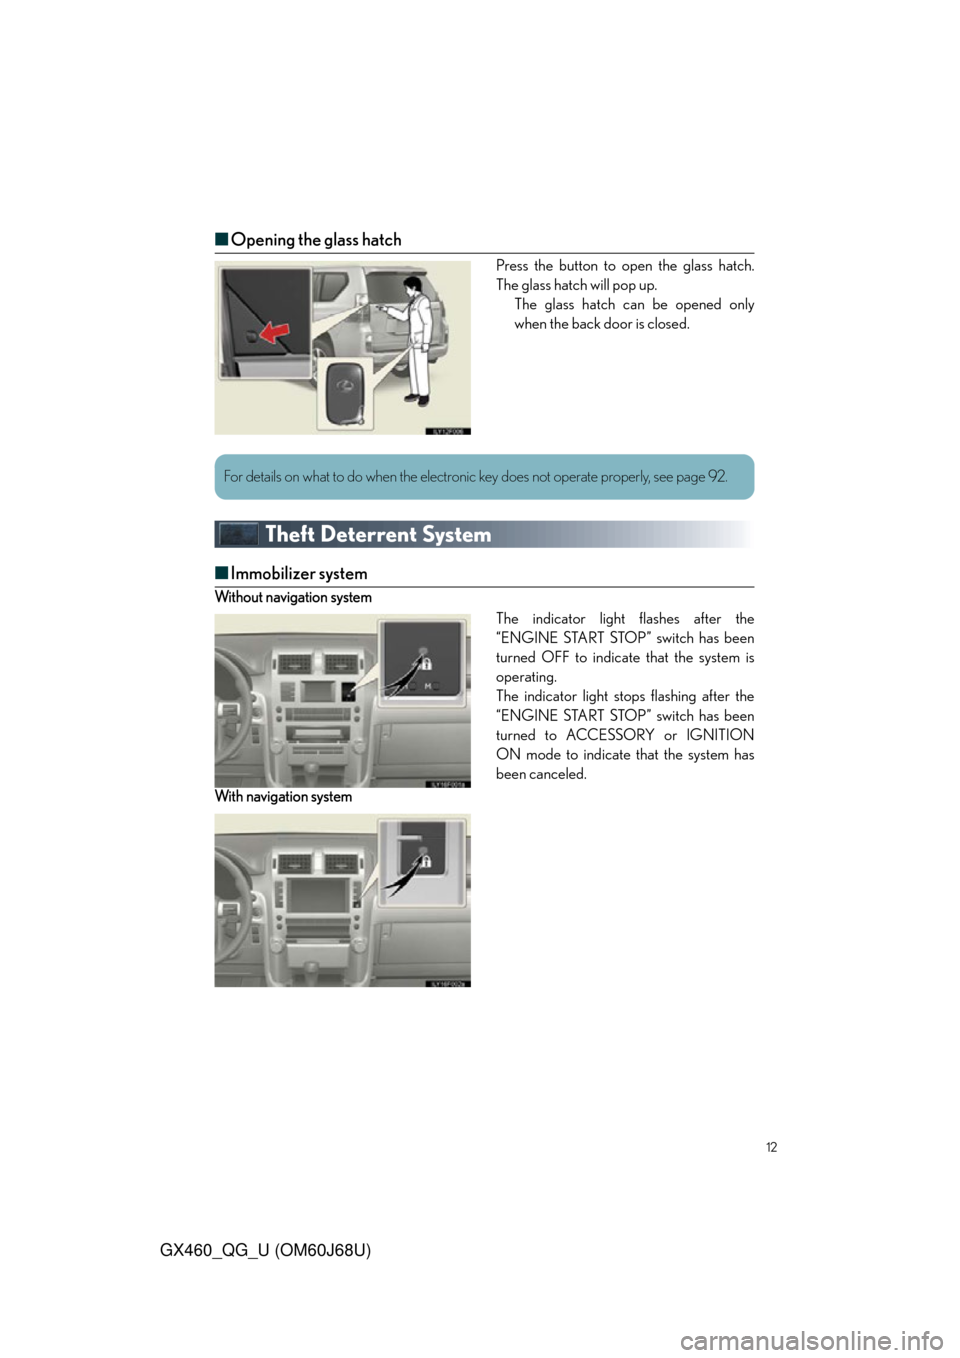
■Opening the glass hatch
Press the button to open the glass hatch.
The glass hatch will pop up.
The glass hatch can be opened only
when the back door is closed.
Theft Deterrent System
■Immobilizer system
Without navigation system
The indicator light flashes after the
“ENGINE START STOP” switch has been
turned OFF to indicate that the system is
operating.
The indicator light stops flashing after the
“ENGINE START STOP” switch has been
turned to ACCESSORY or IGNITION
ON mode to indicate that the system has
been canceled.
With navigatio n system
For details on what to do when the electronic key does not operate properly, see page 92.
Page 13 of 94
13
GX460_QG_U (OM60J68U)
■Alarm
The system sounds the alarm and flashes the lights when forced entry is detected.
To set the alarm: Close the doors, glass hatch and hood , and lock all the doors. The system
will be set automatically after 30 seconds. The indicator light changes from being on to flashing when the system is set.
To deactivate or stop the alarm: Start the engine (The alarm will be deactivated or stopped
after a few seconds), or unlock the doors.
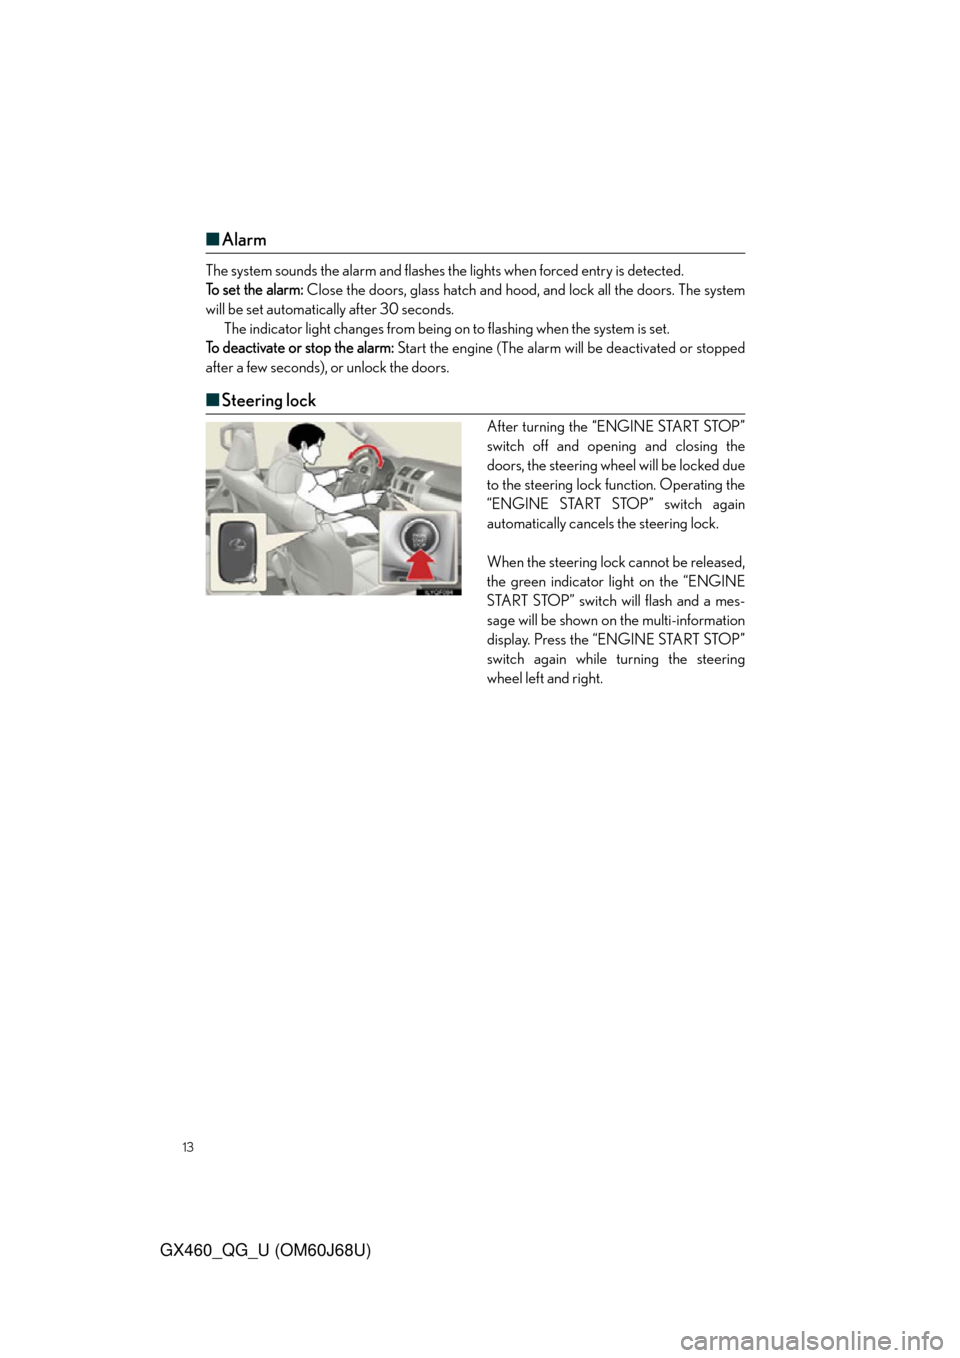
■ Steering lock
After turning the “ENGINE START STOP”
switch off and opening and closing the
doors, the steering wheel will be locked due
to the steering lock function. Operating the
“ENGINE START STOP” switch again
automatically cancels the steering lock.
When the steering lock cannot be released,
the green indicator light on the “ENGINE
START STOP” switch will flash and a mes-
sage will be shown on the multi-information
display. Press the “ENGINE START STOP”
switch again while turning the steering
wheel left and right.
Page 14 of 94
14
GX460_QG_U (OM60J68U)
Engine (Ignition) Switch
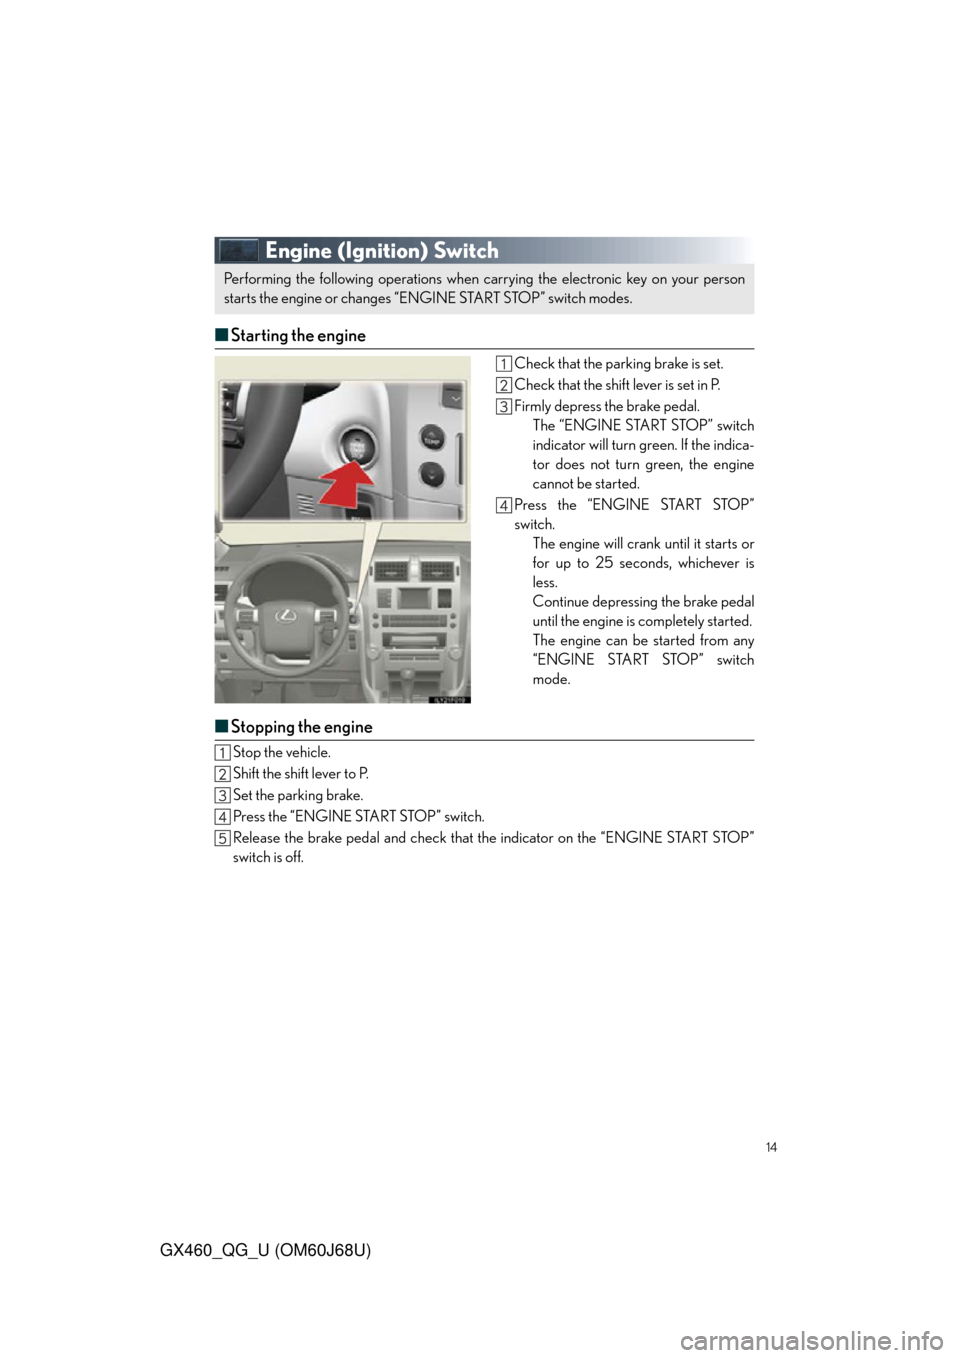
■Starting the engine
Check that the parking brake is set.
Check that the shift lever is set in P.
Firmly depress the brake pedal.
The “ENGINE START STOP” switch
indicator will turn green. If the indica-
tor does not turn green, the engine
cannot be started.
Press the “ENGINE START STOP”
switch. The engine will crank until it starts or
for up to 25 seconds, whichever is
less.
Continue depressing the brake pedal
until the engine is completely started.
The engine can be started from any
“ENGINE START STOP” switch
mode.
■Stopping the engine
Stop the vehicle.
Shift the shift lever to P.
Set the parking brake.
Press the “ENGINE START STOP” switch.
Release the brake pedal and check that the indicator on the “ENGINE START STOP”
switch is off.
Performing the following operations when carrying the electronic key on your person
starts the engine or changes “ENGINE START STOP” switch modes.
Page 15 of 94
15
GX460_QG_U (OM60J68U)
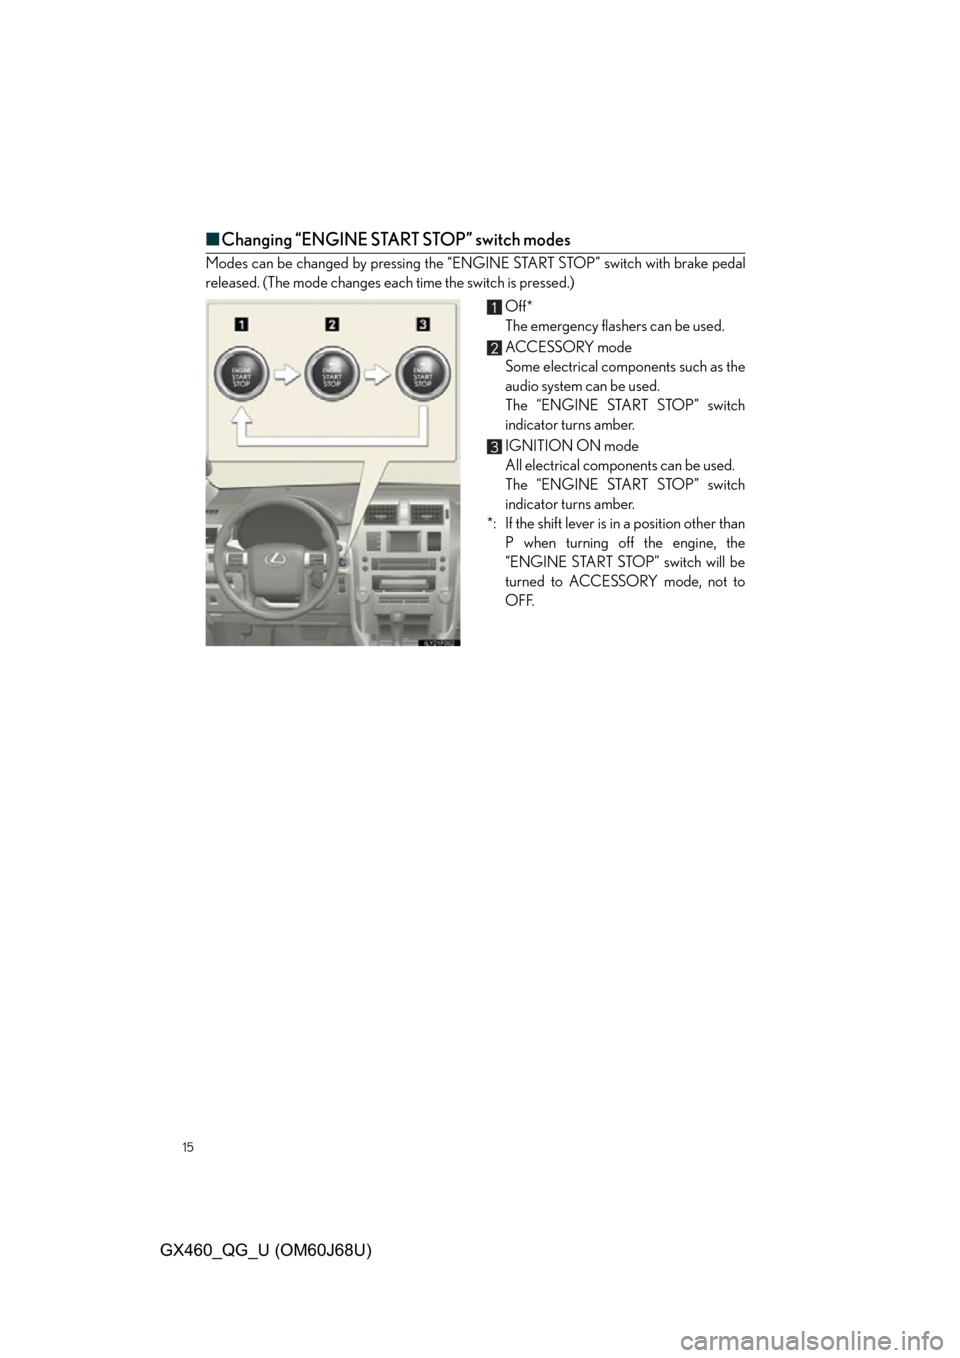
■Changing “ENGINE START STOP” switch modes
Modes can be changed by pressing the “ENGINE START STOP” switch with brake pedal
released. (The mode changes each time the switch is pressed.)
Off*
The emergency flashers can be used.
ACCESSORY mode
Some electrical components such as the
audio system can be used.
The “ENGINE START STOP” switch
indicator turns amber.
IGNITION ON mode
All electrical components can be used.
The “ENGINE START STOP” switch
indicator turns amber.
*: If the shift lever is in a position other than
P when turning off the engine, the
“ENGINE START STOP” switch will be
turned to ACCESSORY mode, not to
OFF.
Page 23 of 94
23
GX460_QG_U (OM60J68U)
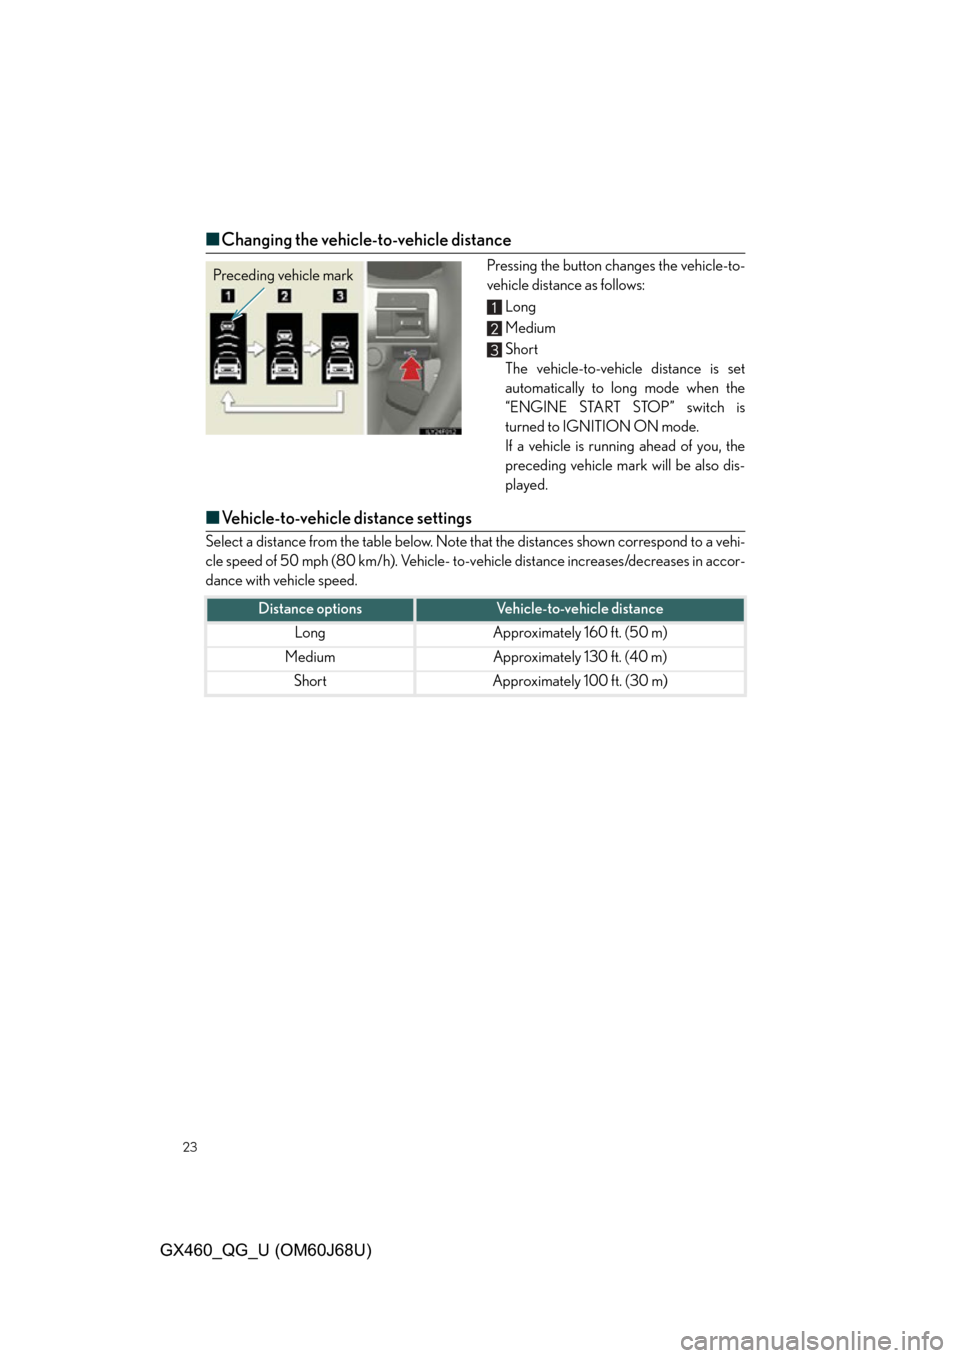
■Changing the vehicle-to-vehicle distance
Pressing the button changes the vehicle-to-
vehicle distance as follows:
Long
Medium
Short
The vehicle-to-vehicle distance is set
automatically to long mode when the
“ENGINE START STOP” switch is
turned to IGNITION ON mode.
If a vehicle is running ahead of you, the
preceding vehicle mark will be also dis-
played.
■Vehicle-to-vehicle distance settings
Select a distance from the table below. Note that the distances shown correspond to a vehi-
cle speed of 50 mph (80 km/h). Vehicle- to-v ehicle distance increases/decreases in accor-
dance with vehicle speed.
Preceding vehicle mark
Distance optionsVehicle-to-vehicle distance
LongApproximately 160 ft. (50 m)
MediumApproximately 130 ft. (40 m)
ShortApproximately 100 ft. (30 m)
Page 33 of 94

33
GX460_QG_U (OM60J68U)
Headlights
Type A
The daytime running lights turn
off.
The headlights, parking lights
and so on turn on and off auto-
matically (when the “ENGINE
START STOP” switch is in
IGNITION ON mode).
The side marker, parking, tail,
license plate and instrument
panel lights turn on.
The headlights and all the lights
listed above turn on.
T
ype B
The daytime running lights turn
off.
The headlights, parking lights
and so on turn on and off auto-
matically (when the “ENGINE
START STOP” switch is in
IGNITION ON mode).
The side marker, parking, tail,
license plate and instrument
panel lights turn on.
The headlights and all the lights
listed above turn on.
Page 34 of 94

34
GX460_QG_U (OM60J68U)
Type C
The daytime running lights turn
on.
The side marker, parking, tail,
license plate and instrument
panel lights turn on.
The headlights and all lights
listed above turn on.
The headlights, parking lights
and so on turn on and off auto-
matically (when the “ENGINE
START STOP” switch is in
IGNITION ON mode).
■Turning on the high beam headlights
With the headlights on, push the lever
away from you to turn on the high
beams.
When the light switch is in “AUTO” posi-
tion, the Automatic High Beam system
will be activated.
Pull the lever toward you to the center
position to turn the high beams off.
Pull the lever toward you and release it
to flash the high beams once.
You can flash the high beams with the
headlights on or off.