height Lexus GX460 2021 / LEXUS 2021 GX460 (OM60T19U) User Guide
[x] Cancel search | Manufacturer: LEXUS, Model Year: 2021, Model line: GX460, Model: Lexus GX460 2021Pages: 628, PDF Size: 12.51 MB
Page 190 of 628
190
GX460_OM_OM60T19U_(U)4-1. Before driving
Stop your vehicle and a trailer
in line and perform the following:
●Connecting a trailer
Set the rear height control air su spension (if equipped) to N mode.
Turn off the engine switch or the re ar height control air suspension (if
equipped).
Connect the trailer.
Turn on the switch that was turned off on step .
●Disconnecting a trailer
Set the rear height control air su spension (if equipped) to N mode.
Turn off the rear height control air suspension (if equipped).
Turn off the engine switch.
Set the supporting leg of the trailer on the ground and raise the hitch by
4 in. (100 mm)
Turn on the engine switch.
Turn on the rear height control air suspension (if equipped).
Wait until vehicle height is stabilized.
Make sure the hitch is disconnected. If the hitch does not disconnect, raise the
hitch higher and repeat steps through .
Connecting and disconnecting a trailer
1
2
3
42
1
2
3
4
5
6
7
27
Page 194 of 628
194
GX460_OM_OM60T19U_(U)4-1. Before driving
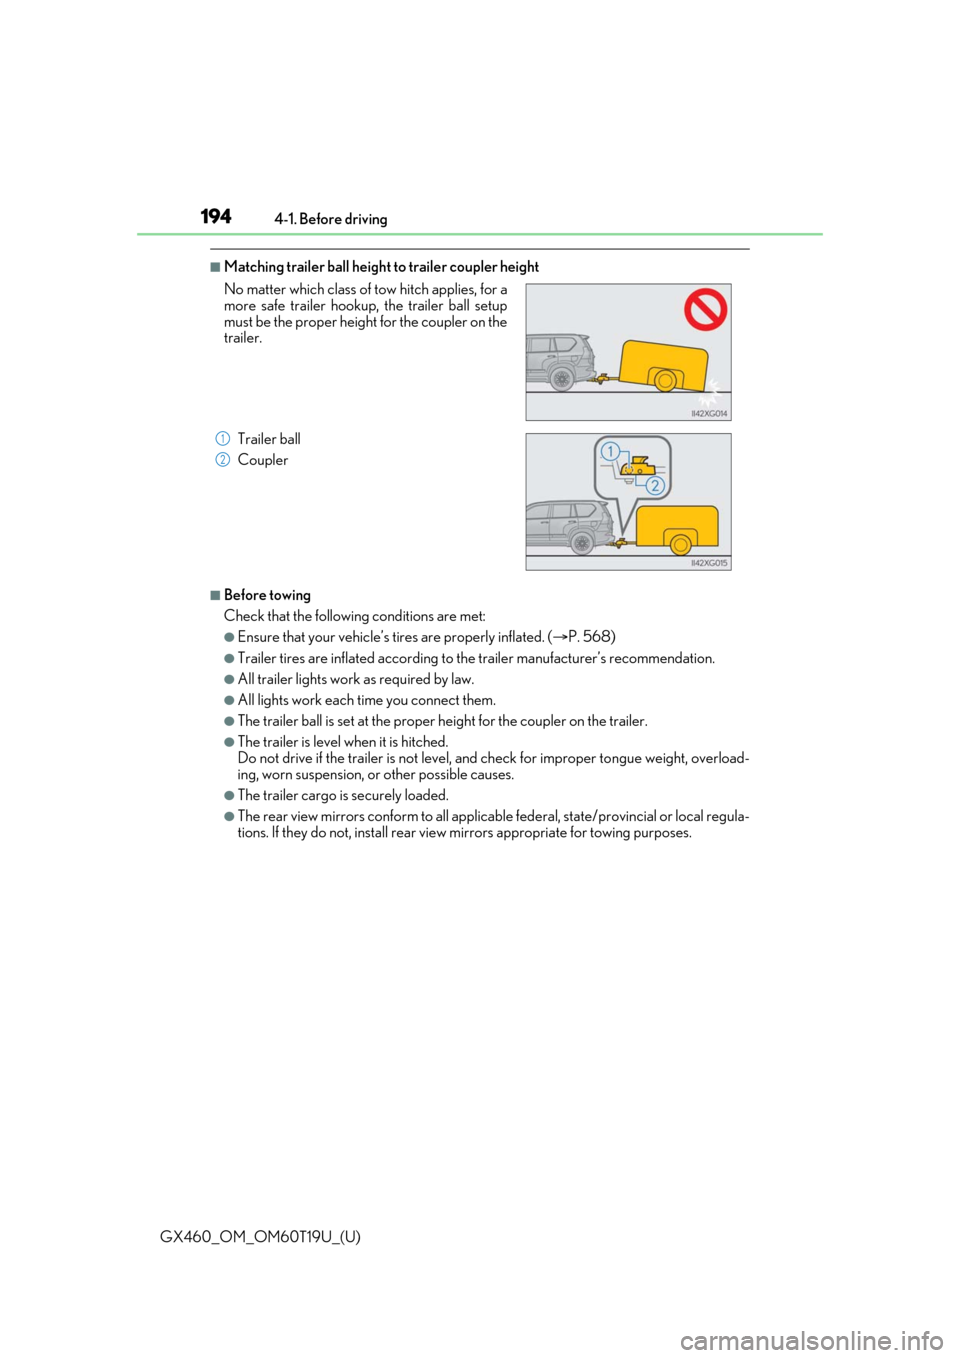
■Matching trailer ball height to trailer coupler height
■Before towing
Check that the followin
g conditions are met:
●Ensure that your vehicle’s tires are properly inflated. ( P. 568)
●Trailer tires are inflated according to the trailer manufacturer’s recommendation.
●All trailer lights work as required by law.
●All lights work each time you connect them.
●The trailer ball is set at the proper height for the coupler on the trailer.
●The trailer is level when it is hitched.
Do not drive if the trailer is not level, and check for improper to ngue weight, overload-
ing, worn suspension, or other possible causes.
●The trailer cargo is securely loaded.
●The rear view mirrors conform to all applicable federal, state/provincial or local regula-
tions. If they do not, install rear view mirrors appropriate for towing purposes.
No matter which class of tow hitch applies, for a
more safe trailer hookup, the trailer ball setup
must be the proper height for the coupler on the
trailer.
Trailer ball
Coupler
1
2
Page 196 of 628

196
GX460_OM_OM60T19U_(U)4-1. Before driving
●After the trailer sw
aying has stopped:
• Stop in a safe place. Get all occupants out of the vehicle.
• Check the tires of the vehicle and the trailer.
• Check the load in the trailer. Make sure the load has not shifted.
Make sure the tongue weight is appropriate, if possible.
• Check the load in the vehicle. Make sure the vehicle is not ov erloaded after occupants get in.
If you cannot find any problems, the speed at which trailer swaying occurred is beyond
the limit of your particular vehicle-trailer combination.
Drive at a lower speed to prevent instability. Remember that swaying of the towing vehi-
cle-trailer increases as speed increases.
WARNING
■Trailer towing precautions
●To tow a trailer safely, use extreme care an d drive the vehicle in accordance with the
trailer’s characteristics and operating condit ions. Failure to do so could cause an acci-
dent resulting in death or serious injury. Vehicle stability and braking performance are
affected by trailer st ability, brake setting and performanc e, and the hitch. Your vehicle
will handle differently when towing a trailer.
●Set the vehicle height to the LO mode and turn off the rear height control air suspen-
sion when you connect a trailer, otherwise the vehicle height may change due to the
automatic leveling function, and you may ca tch part of your body in the vehicle,
resulting in an accident.
Page 328 of 628
328
GX460_OM_OM60T19U_(U)4-5. Using the driving support systems
■Panoramic view display range
●In the panoramic view, the system processe
s and displays images acquired form the 4
cameras under the assumption that the vehicle is on a flat road surface. Therefore, the
display may appear as follows.
• Three-dimensional objects may appear to have fallen over, and be long and thin or bigger than they actually are
• Three-dimensional obje cts at a point higher than the surface of the road may appear
further away than they actually are, or may not appear
• Tall objects may appear to emerge from the image processing seams
●Inconsistencies in th e brightness of images from each camera may occur depending on
lighting conditions.
●The displayed image may not be aligned when the tilt or height of the vehicle changed
due to the number of passengers, cargo we ight or remaining quantity of gasoline.
●The displayed image may not be aligned when the vehicle is in other than “N” (normal)
height mode. (P. 339)
●Images and guide lines may not be properly displayed when the doors are not com-
pletely closed.
●The relative distances between the vehicle ic on and road surface or an obstacle dis-
played in the panoramic view may differ from the actual state.
●If an illuminated license plate is used, it may appear on the screen.
●The black area around the vehicle icon is an area that is not appear in the camera.
Check these areas directly.
■Wide front view display range
●Certain areas at the front of the vehicle ha ve a different sense of distance, and are
masked in black so that they do not appear on the screen.
●There are limits to the range displayed on the screen. Objects at either corner of the
bumper or directly below the bumper are not displayed.
●The perceived distance in images displayed on the screen differs from the actual dis-
tance.
■Images displayed on the screen
Cameras of the Multi-terrain Monitor system use special lenses. The distance of the
image that appears on the screen differs from the actual distance.
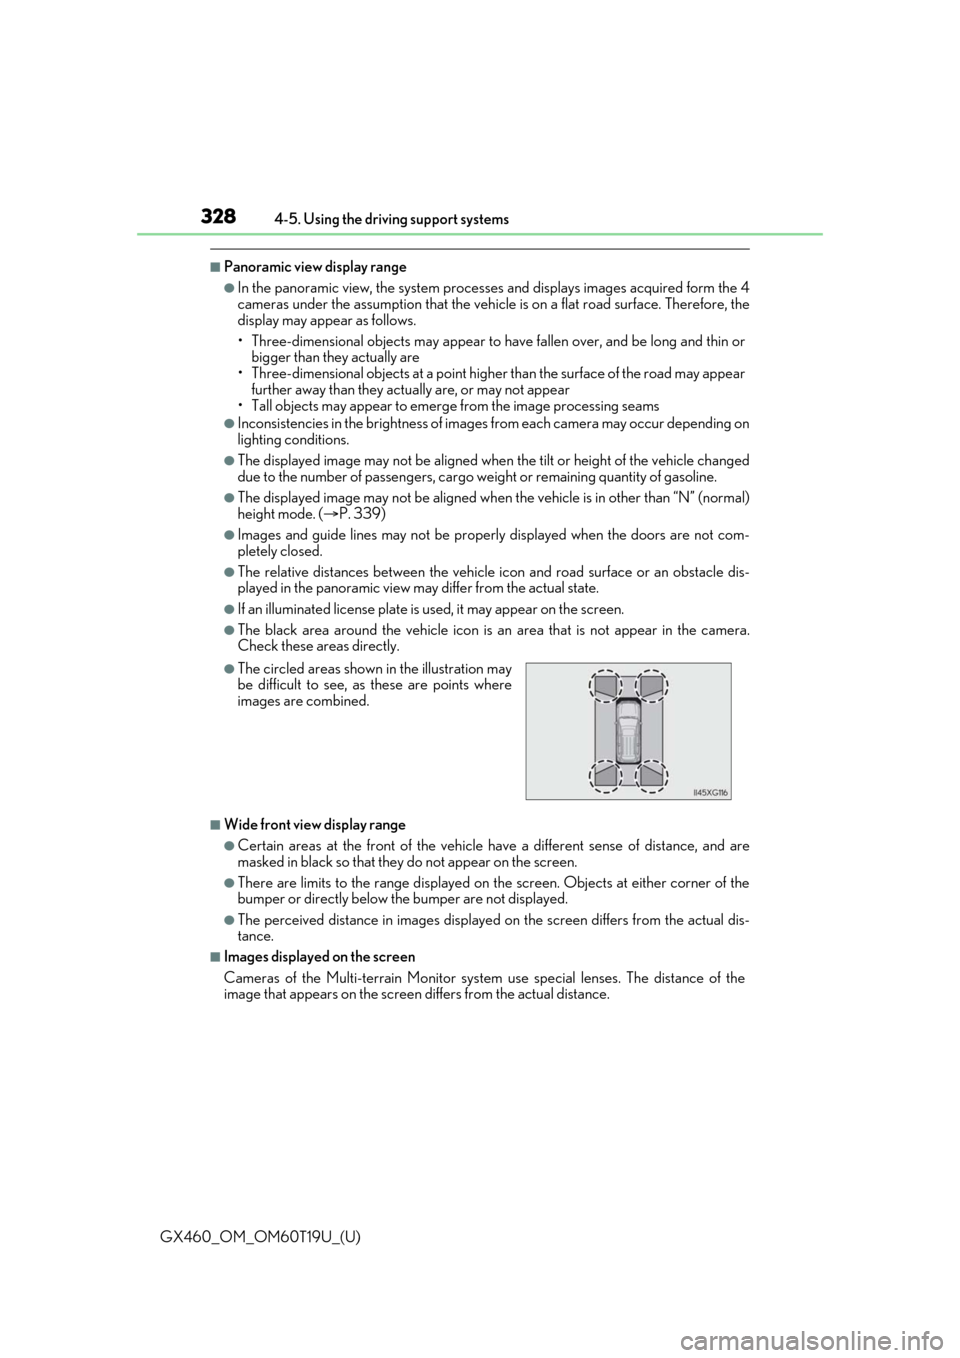
●The circled areas shown in the illustration may
be difficult to see, as these are points where
images are combined.
Page 339 of 628
339
GX460_OM_OM60T19U_(U)4-5. Using the driving support systems
4
Driving
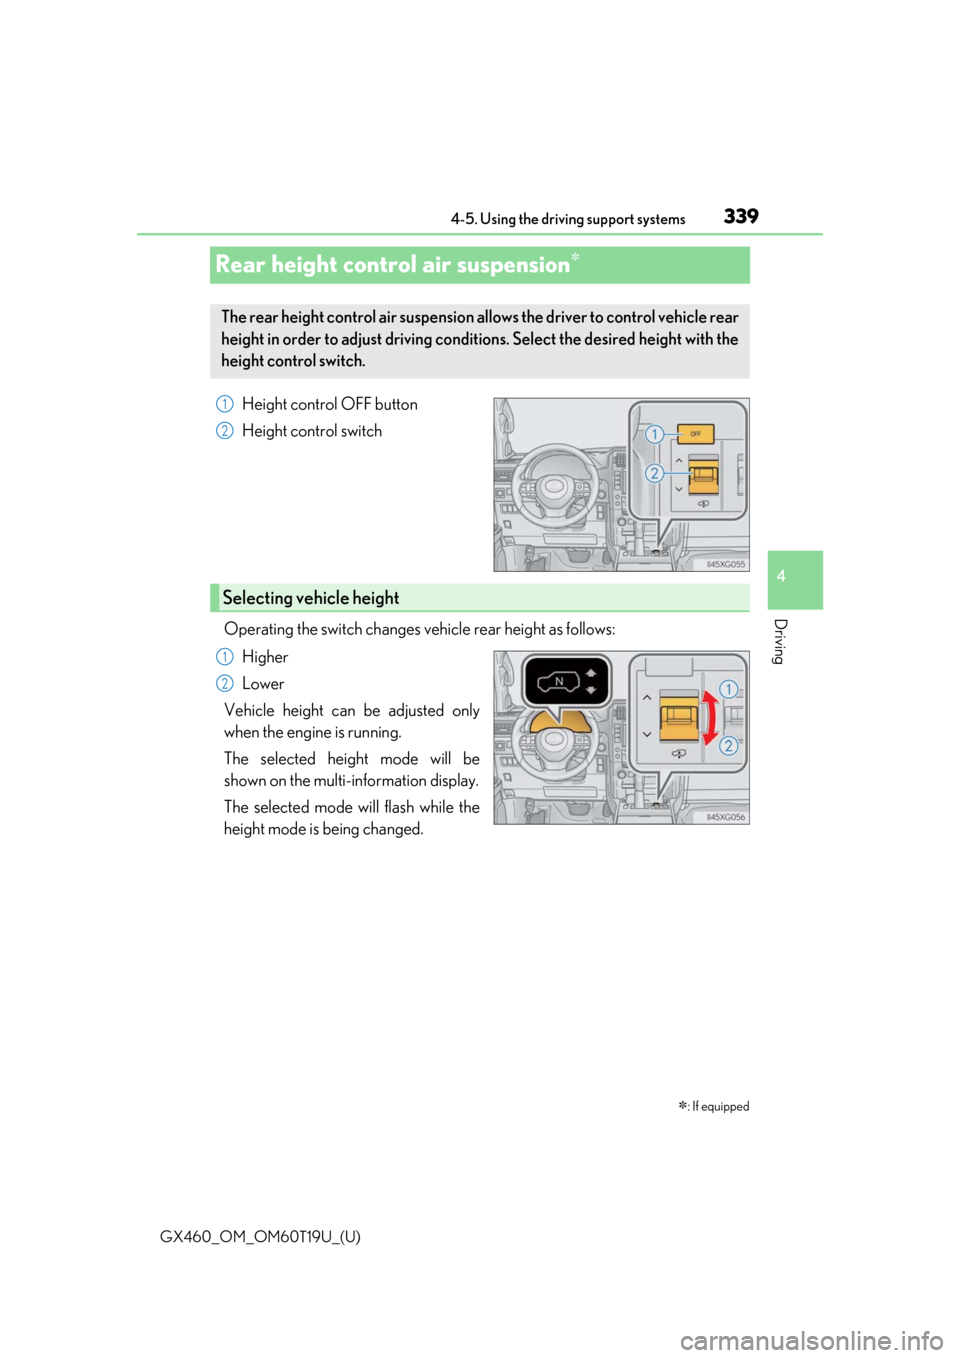
Rear height control air suspension
Height control OFF button
Height control switch
Operating the switch changes ve hicle rear height as follows:
Higher
Lower
Vehicle height can be adjusted only
when the engine is running.
The selected height mode will be
shown on the multi-information display.
The selected mode will flash while the
height mode is being changed.
: If equipped
The rear height control air suspension allows the driver to control vehicle rear
height in order to adjust driving condit ions. Select the desired height with the
height control switch.
1
2
Selecting vehicle height
1
2
Page 340 of 628
340
GX460_OM_OM60T19U_(U)4-5. Using the driving support systems
■Height modes
●N mode (normal mode): For ordinary driving
Normal height
●HI mode (high mode): For driving on bumpy roads
1.6 in. (40 mm) higher than the normal rear height
HI mode cannot be selected when vehicle speed exceeds 18 mph (30
km/h).
●LO mode (low mode): For the ease
of egress/ingress and loading luggage
0.8 in. (20 mm) lower than the normal rear height
LO mode cannot be selected when vehicle speed exceeds 7 mph (12 km/h).
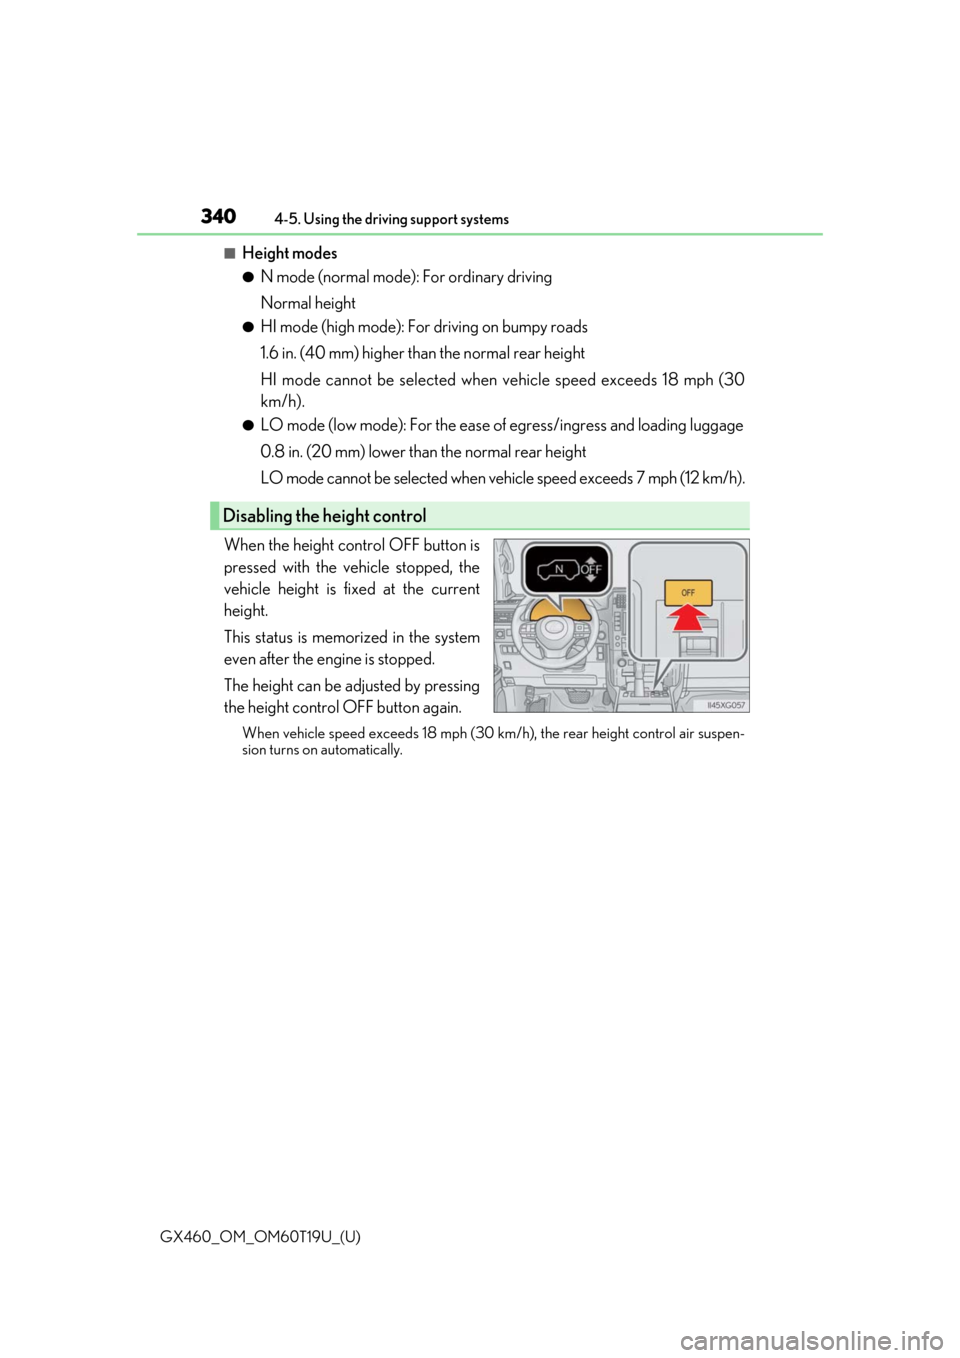
When the height control OFF button is
pressed with the vehicle stopped, the
vehicle height is fixed at the current
height.
This status is memorized in the system
even after the engine is stopped.
The height can be adjusted by pressing
the height control OFF button again.
When vehicle speed exceeds 18 mph (30 km/h), the rear height control air suspen-
sion turns on automatically.
Disabling the height control
Page 341 of 628

GX460_OM_OM60T19U_(U)
3414-5. Using the driving support systems
4
Driving
■When HI mode is selected
The vehicle height will change to N mode when driving at the speeds of 18 mph (30 km/h).
Even if vehicle speed is then reduced to un der 18 mph (30 km/h), height will not return to
HI mode.
■When LO mode is selected
The vehicle height will change to N mode when vehicle speed exceeds 7 mph (12 km/h).
Even if vehicle speed is then reduced to un der 7 mph (12 km/h), height will not return to
LO mode.
■Automatic leveling function
Regardless of the number of occupants and the luggage load, vehicle height in any mode
is always adjusted to a fixed height by the automatic leveling function.
■The rear height control air suspension will not operate in the following cases:
●The underbody of the vehicle is touching the surface of the road.
●The area around the suspension is covered with ice.
■Even if you hear an operating noise
This does not indicate a problem in th e rear height control air suspension.
■Parking and stopping tips
●If you immediately stop the engine after off- road driving, or park the vehicle for a long
time, the vehicle height may gradually lower. When parking, make sure there is nothing
under the vehicle that may come in contact with the underbody. The vehicle will return
to the set height when the engine is started.
●The vehicle height may change as the temperature changes when the engine is
stopped. The vehicle will return to the set height when the engine is started.
■When lowering the vehicle
In order to prevent the vehicle height from rising as occupants leave the vehicle, lowering
control will occur for a short while after the engine has been stopped.
■The rear height control air suspension failure warning
●If a malfunction occurs in the rear height control air suspension, N mode is automati-
cally selected. However, the system may not switch to N mode depending on the loca-
tion of the malfunction.
●The “CHECK AIR SUSPENSION SYSTEM”/“C heck air suspension system” is dis-
played on the multi-information display, and the rear height control air suspension can-
not be activated until the malfunction is corrected.
Stop the engine and start it again. If the warning message turns off, the system is operat-
ing correctly. If the warning message continues to be displayed, have your vehicle
inspected by your Lexus dealer as soon as possible.
Page 342 of 628

342
GX460_OM_OM60T19U_(U)4-5. Using the driving support systems
WARNING
■The rear height control air suspension must be turned off
Be sure to observe the following precautions. Otherwise, the automatic leveling func-
tion may cause vehicle height to change, an
d you may catch part of your body in the
vehicle, resulting in an accident:
●When jacking up the vehicle, installing tire chains or tying the vehicle with chains/
wires for transportation via flatbed truck, tu rn off the rear height control air suspen-
sion and stop the engine.
●When the vehicle must be towed or disconnect ing a trailer, put the vehicle height in N
mode and turn off the rear he ight control air suspension.
●When the vehicle is stuck, turn off the rear height control air suspension.
■Selecting the correct height mode
●HI mode should only be used when drivin g on rough roads, for example when driving
off-road.
Because the vehicle’s center of gravity will become higher when in the mode, the
vehicle may become unstable when turnin g abruptly, resulting in an accident.
●Do not select HI mode when loading cargo on the roof luggage carrier.
Because the vehicle’s center of gravity will become higher when in the mode, the
vehicle may become unstable when turnin g abruptly, resulting in an accident.
●Before lowering vehicle height, check that there is no one under the vehicle.
NOTICE
■Be careful in any place where overhead space is limited
The vehicle height will rise when a higher mode is selected or cargo is unloaded. This
may cause damage to the vehicle.
■Do not select LO mode when driving on bumpy roads
If the underbody of the vehicle touches a rugged road surface, the vehicle may be
damaged.
■Changing vehicle height
Do not change vehicle height frequently.
The compressor may overheat and stop operation.
■When on the extremely uneven roads with rocks
Sometimes the vehicle height is not adjusted because it is judged as uneven road driv-
ing.
Page 358 of 628

358
GX460_OM_OM60T19U_(U)4-5. Using the driving support systems
■Sounds and vibrations caused by the ABS/Mu
lti Terrain ABS, brake assist, VSC, Trailer
Sway Control, TRAC/Active TRAC and hill-start assist control systems
●A sound may be heard from the engine compartment when the brake pedal is
depressed repeatedly, when the engine is started or just after the vehicle begins to
move. This sound does not indicate that a malfunction has occurred in any of these sys-
tems.
●Any of the following conditions may occur when the above systems are operating.
None of these indicates that a malfunction has occurred.
• Vibrations may be felt through the vehicle body and steering.
• A motor sound may be heard also after the vehicle comes to a stop.
• The brake pedal may pulsate slightly afte r the ABS/Multi Terrain ABS is activated.
• The brake pedal may move down slightly after the ABS/Multi Terrain ABS is acti-
vated.
■Automatic reactivation of TRAC/Active TR AC, Trailer Sway Control and VSC systems
After turning the TRAC/Activ e TRAC, Trailer Sway Control and VSC systems off, the
systems will be automatically re-ena bled in the following situations:
●When the engine switch is turned off
●If only the TRAC/Active TRAC system is turned off, the TRAC/Active TRAC will turn
on when vehicle speed increases
If both the TRAC/Active TRAC and VSC syst ems are turned off, automatic re-enabling
will not occur when vehicle speed increases.
■When the brake system operates continuously
The brake actuator may overheat. In this case, the TRAC/Active TRAC and hill-start
assist control systems will stop operating, a buzzer will sound and the “TRAC OFF” indi-
cator will come on. Refrain from using the system until the message goes off. (There is no
problem with continuing normal driving.)
■If the slip indicator comes on...
It may indicate a malfunction in the TRAC /Active TRAC, VSC/Trailer Sway Control or
hill-start assist control system. Consult your Lexus dealer.
■KDSS
Some difference of vehicle height between left and right side can appear. This does not
indicate a malfunction in the KDSS system. For more information, contact your Lexus
dealer.
Page 368 of 628

368
GX460_OM_OM60T19U_(U)4-5. Using the driving support systems
■Conditions under which the Blind Spot Monitor function may not function correctly
●The Blind Spot Monitor function
may not detect vehicles correctly in the following situ-
ations:
• When the sensor is misaligned due to a stro ng impact to the sensor or its surround-
ing area
• When mud, snow, ice, a sticke r, etc. is covering the sensor or surrounding area on
the rear bumper
• When driving on a road surf ace that is wet with standing water during bad weather,
such as heavy rain, snow, or fog
• When multiple vehicles are approaching wi th only a small gap between each vehicle
• When the distance between your vehicle and a following vehicle is short
• When there is a significant difference in speed between your vehicle and the vehicle that enters the detection area
• When the difference in speed between your vehicle and another vehicle is changing
• When a vehicle enters a detection area traveling at about the same speed as your vehicle
• As your vehicle starts from a stop, a vehicle remains in the detection area
• When driving up and down cons ecutive steep inclines, such as hills, dips in the road,
etc.
• When driving on roads with sharp bends, consecutive curves, or uneven surfaces
• When vehicle lanes are wide, or when driving on the edge of a lane, and the vehicle in an adjacent lane is far away from your vehicle
• When your vehicle is towing a trailer (with towing hitch)
• When a bicycle carrier or other accessory is installed to the rear of the vehicle
• When there is a significant difference in height between your vehicle and the vehicle
that enters the detection area
• Immediately after the Blind Spot Monitor function is turned on
●Instances of the Blind Spot Monitor functi on unnecessarily detecting a vehicle and/or
object may increase in the following situations:
• When the sensor is misaligned due to a stro ng impact to the sensor or its surround-
ing area
• When the distance between your vehicle and a guardrail, wall, etc. that enters the
detection area is short
• When driving up and down cons ecutive steep inclines, such as hills, dips in the road,
etc.
• When vehicle lanes are narrow, or when driv ing on the edge of a lane, and a vehicle
traveling in a lane other than the ad jacent lanes enters the detection area
• When driving on roads with sharp bends, consecutive curves, or uneven surfaces
• When the tires are slipping or spinning
• When the distance between your vehicle and a following vehicle is short
• When a bicycle carrier or other accessory is installed to the rear of the vehicle