wheel Lexus GX460 2021 / LEXUS 2021 GX460 (OM60T19U) Workshop Manual
[x] Cancel search | Manufacturer: LEXUS, Model Year: 2021, Model line: GX460, Model: Lexus GX460 2021Pages: 628, PDF Size: 12.51 MB
Page 269 of 628
GX460_OM_OM60T19U_(U)
2694-5. Using the driving support systems
4
Driving
■Conditions under which the vehicle-to-vehicle distance control mode may not function
correctly
In the case of the following conditions, o perate the brake pedal (or accelerator pedal,
depending on the situ ation) as necessary.
As the sensor may not be able to correctly detect vehicles ahead, the system may not
operate properly.
●When the vehicle ahead of you decelerates suddenly
●When driving on a road surrounded by a struct ure, such as in a tunnel or on a bridge
●While the vehicle speed is decreasing to the set speed after the vehicle accelerates by
depressing the accelerator pedal
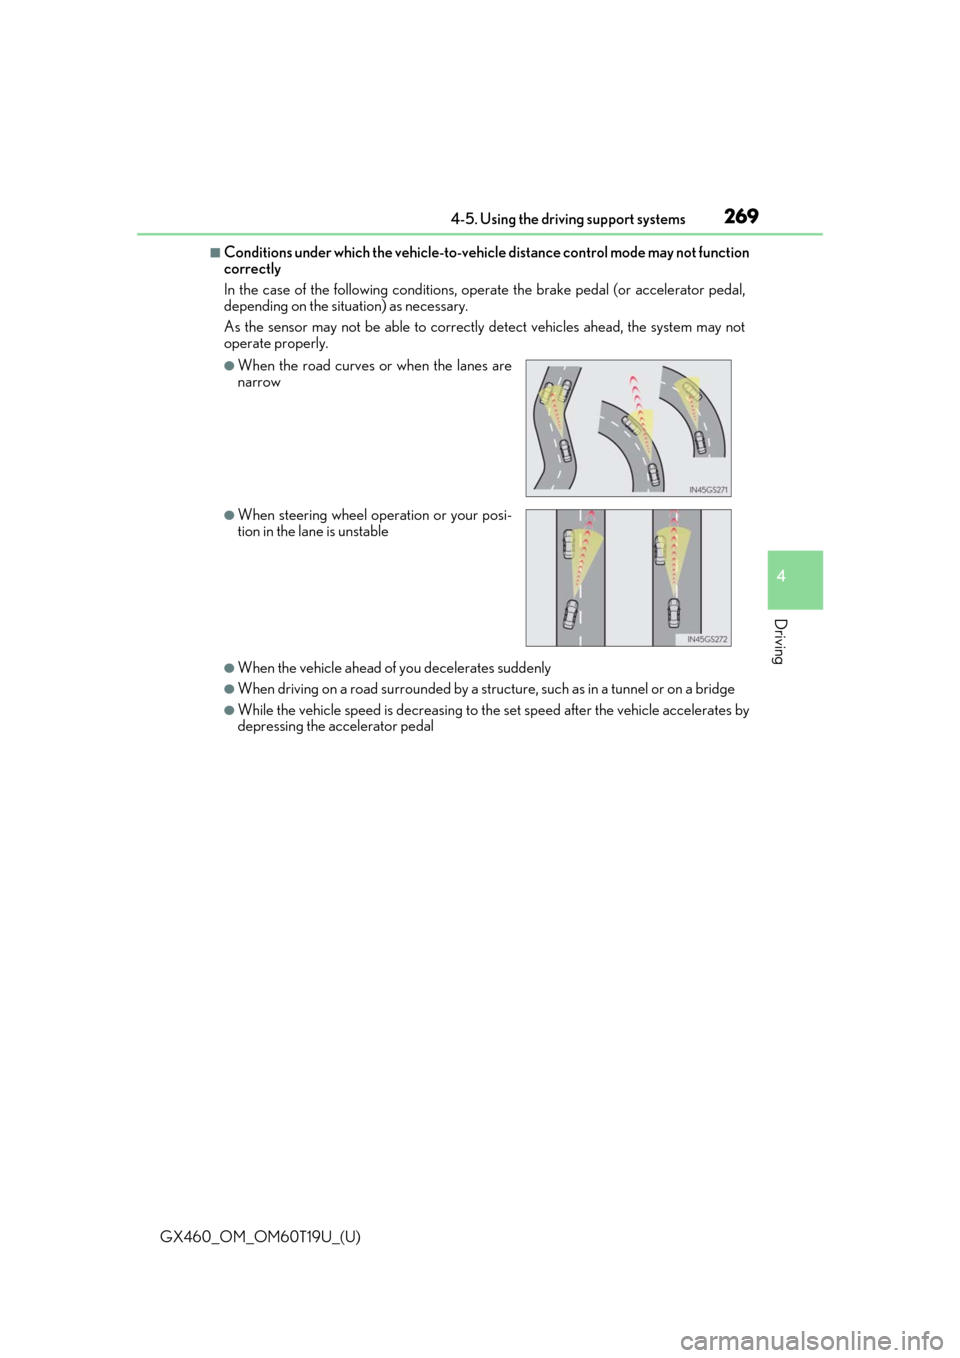
●When the road curves or when the lanes are
narrow
●When steering wheel operation or your posi-
tion in the lane is unstable
Page 286 of 628

286
GX460_OM_OM60T19U_(U)4-5. Using the driving support systems
WARNING
■When using the rear view monitor system
The rear view monitor system
is a supplemental device intended to assist the driver
when backing up. When backin g up, be sure to check visually behind and all around
the vehicle before proceeding.
Observe the following precautions to avoid an accident that could result in death or
serious injuries.
●Never depend on the rear view monitor system entirely when backing up. The image
and the position of the guide lines displaye d on the screen may differ from the actual
state.
Use caution, just as you woul d when backing up any vehicle.
●Be sure to back up slowly, depressing the brake pedal to control vehicle speed.
●The instructions given are only guide lines.
When and how much to turn the steering wheel will vary according to traffic condi-
tions, road surface conditions, vehicle condit ion, etc. when parking. It is necessary to
be fully aware of this before us ing the rear view monitor system.
●When parking, be sure to check that the parking space will accommodate your vehi-
cle before maneuvering into it.
●Do not use the rear view monitor system in the following cases:
• On icy or slick road surfaces, or in snow
• When using tire chains
• When the back door is not closed completely
• On roads that are not flat or stra ight, such as curves or slopes.
●In low temperatures, the screen may darken or the image may become faint. The
image could distort when the vehicle is movi ng, or you may become unable to see the
image on the screen. Be sure to check dire ct visually and with the mirrors all around
the vehicle before proceeding.
●If the tire sizes are changed, the position of the fixed guide lines displayed on the
screen may change.
●The camera uses a special lens. The distances between objects and pedestrians that
appear in the image displayed on the screen will differ from the actual distances.
( P. 281)
Page 290 of 628
290
GX460_OM_OM60T19U_(U)4-5. Using the driving support systems
When all of the following conditions are
satisfied, the Multi-terrain Select indica-
tor will come on, the mode select screen will be displayed on the multi-informa-
tion display, and Multi-terr ain Select control will begin.
●The four-wheel drive control switch is in “L4”.
●Both Active TRAC and VSC are not off.
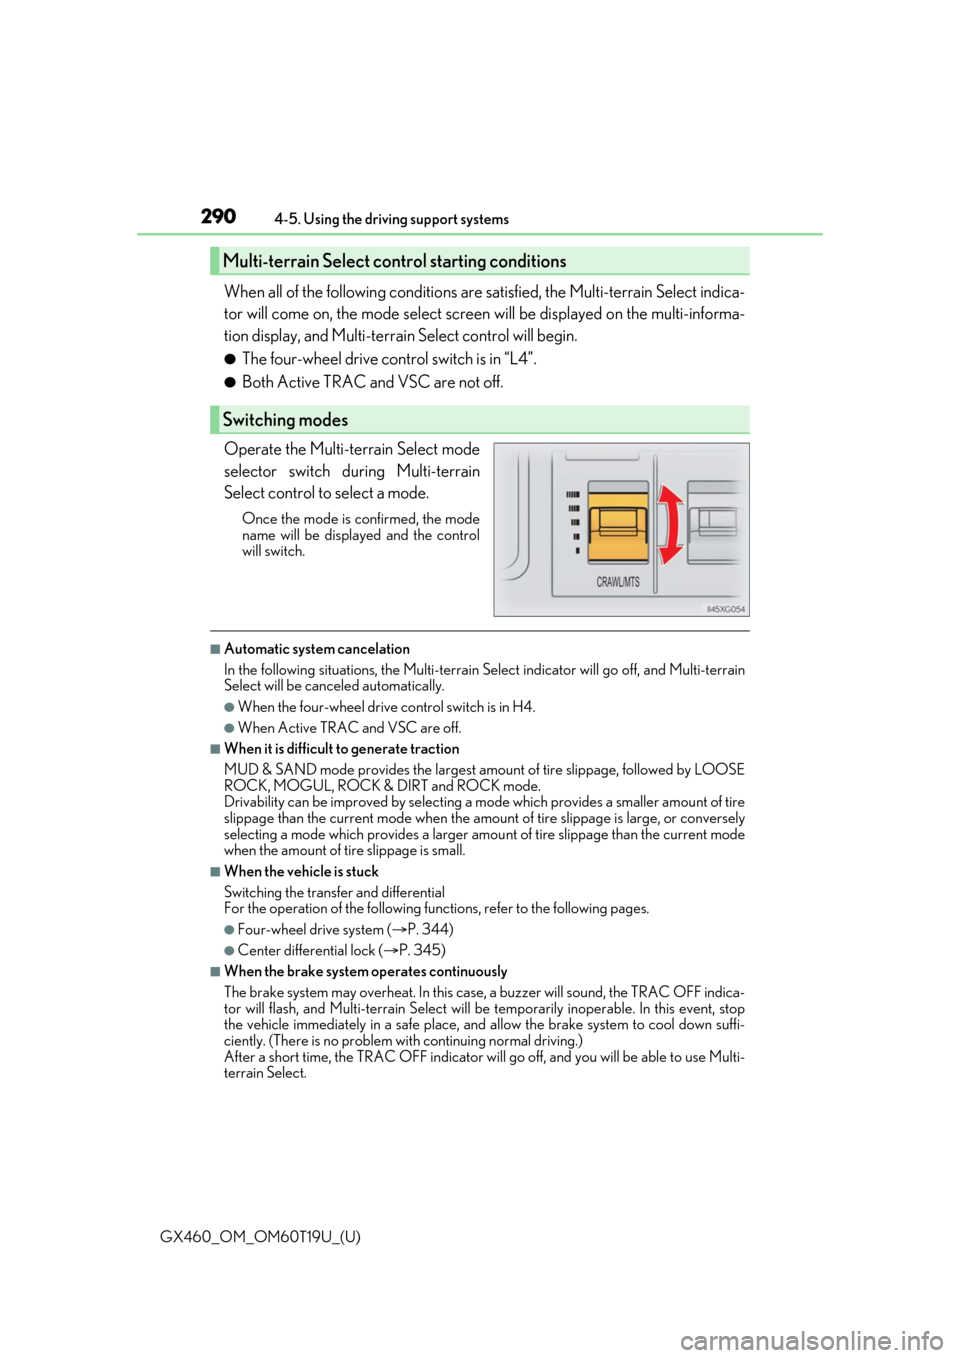
Operate the Multi-terrain Select mode
selector switch du ring Multi-terrain
Select control to select a mode.
Once the mode is confirmed, the mode
name will be displayed and the control
will switch.
■Automatic system cancelation
In the following situations, the Multi-terrain Select indicator will go off, and Multi-terrain
Select will be canceled automatically.
●When the four-wheel drive control switch is in H4.
●When Active TRAC and VSC are off.
■When it is difficult to generate traction
MUD & SAND mode provides the largest amou nt of tire slippage, followed by LOOSE
ROCK, MOGUL, ROCK & DIRT and ROCK mode.
Drivability can be improved by selecting a mo de which provides a smaller amount of tire
slippage than the current mode when the amount of tire slippage is large, or conversely
selecting a mode which provides a larger amou nt of tire slippage than the current mode
when the amount of tire slippage is small.
■When the vehicle is stuck
Switching the transfer and differential
For the operation of the following func tions, refer to the following pages.
●Four-wheel drive system (P. 344)
●Center differential lock ( P. 345)
■When the brake system operates continuously
The brake system may overheat. In this case, a buzzer will sound, the TRAC OFF indica-
tor will flash, and Multi-terrain Select will be temporarily inoperable. In this event, stop
the vehicle immediately in a safe place, and allow the brake system to cool down suffi-
ciently. (There is no problem wi th continuing normal driving.)
After a short time, the TRAC OFF indicator will go off, and you will be able to use Multi-
terrain Select.
Multi-terrain Select control starting conditions
Switching modes
Page 293 of 628
GX460_OM_OM60T19U_(U)
2934-5. Using the driving support systems
4
Driving
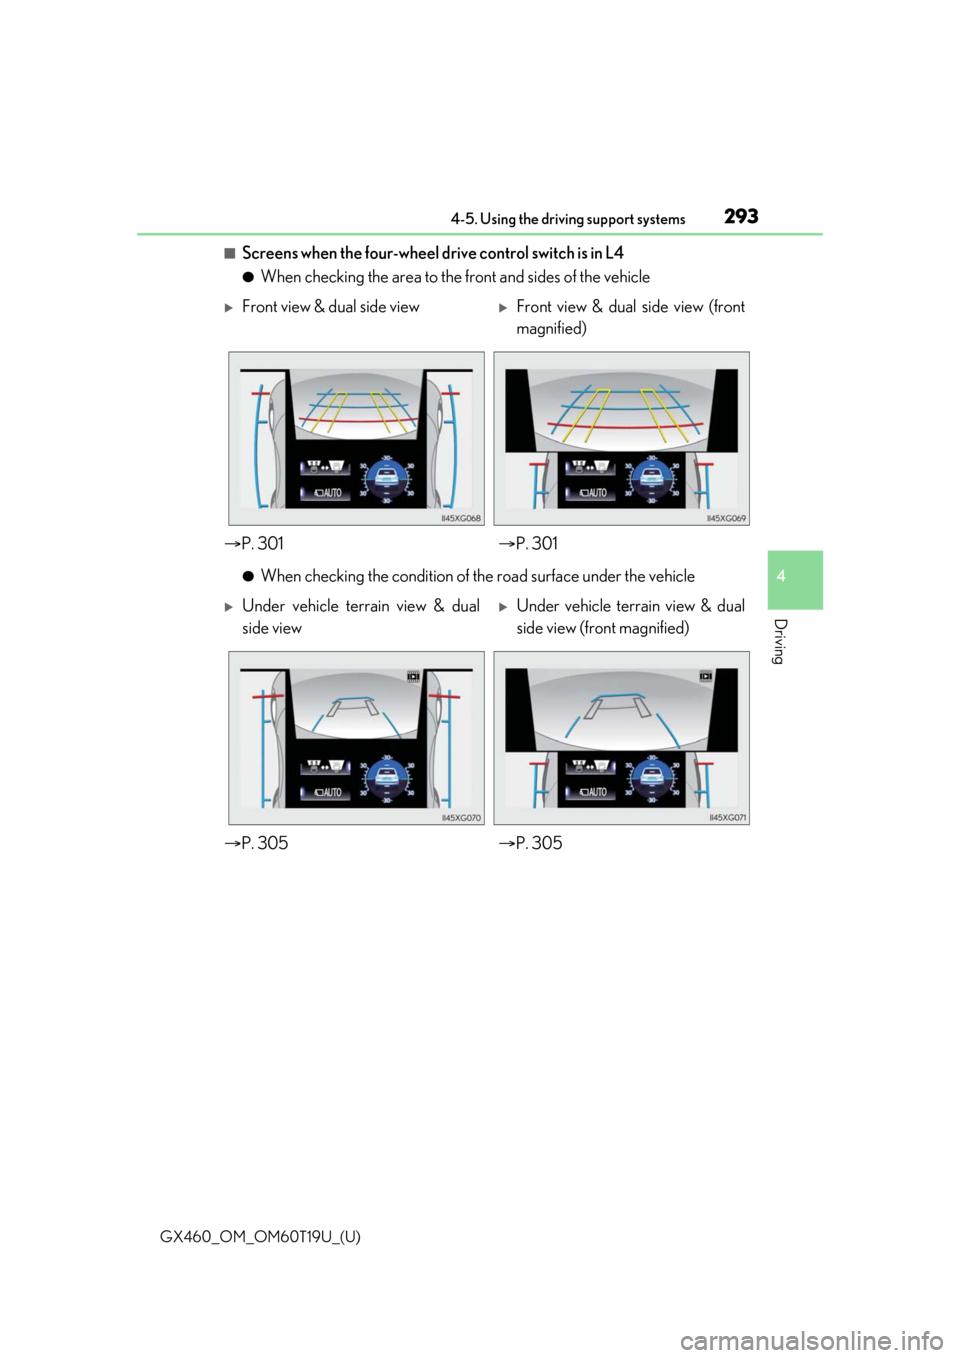
■Screens when the four-wheel drive control switch is in L4
●When checking the area to the front and sides of the vehicle
●When checking the condition of the road surface under the vehicle
Front view & dual side viewFront view & dual side view (front
magnified)
P. 301 P. 301
Under vehicle terrain view & dual
side viewUnder vehicle terrain view & dual
side view (front magnified)
P. 305 P. 305
Page 294 of 628
294
GX460_OM_OM60T19U_(U)4-5. Using the driving support systems
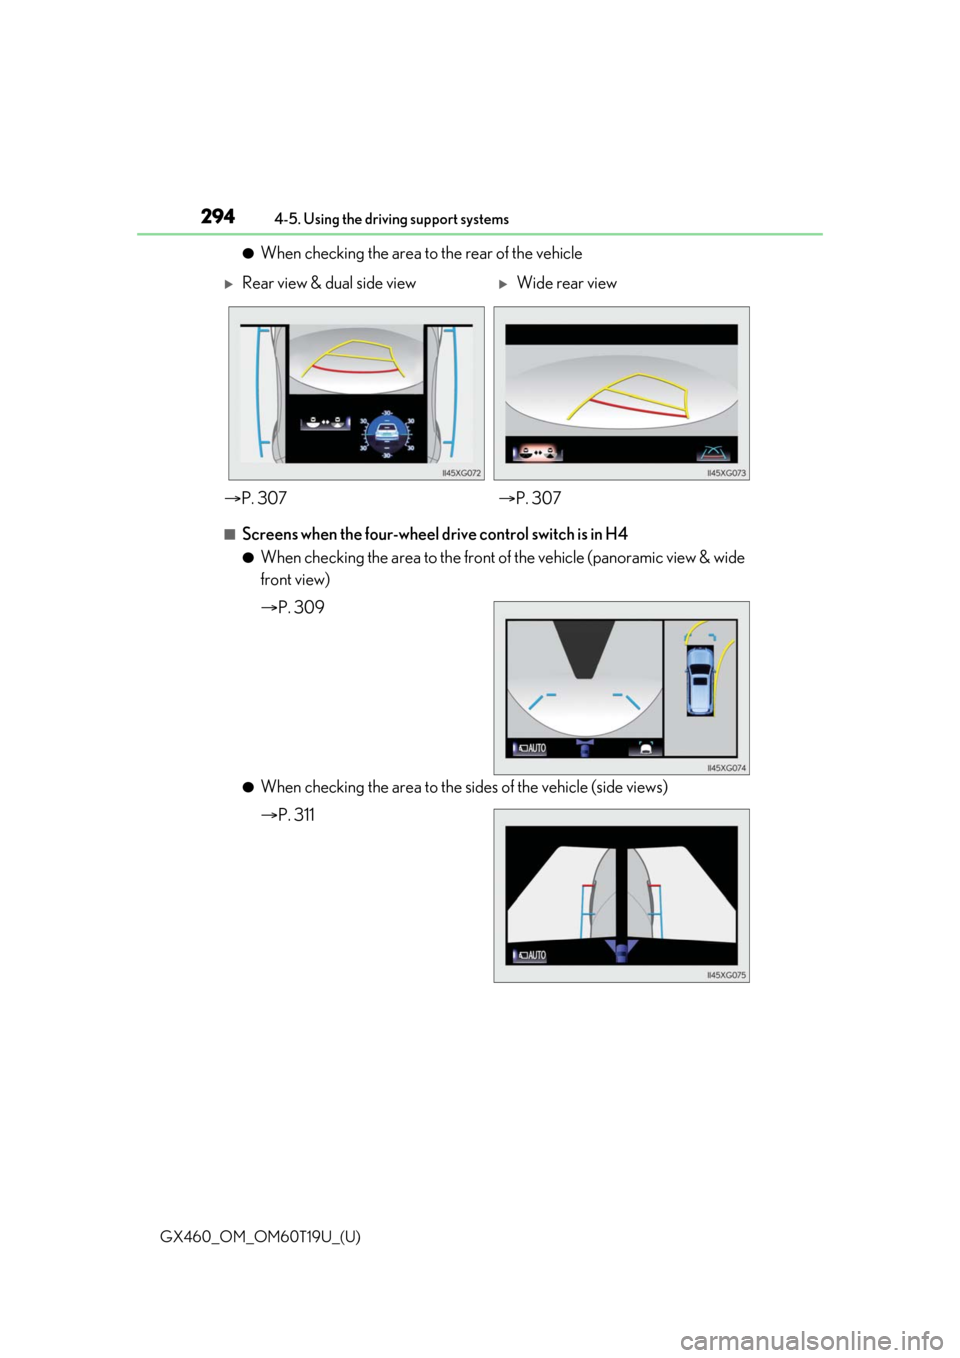
●When checking the area to the rear of the vehicle
■Screens when the four-wheel drive control switch is in H4
●When checking the area to the front of the vehicle (panoramic view & wide
front view)
P. 309
●When checking the area to the sides of the vehicle (side views)
P. 311
Rear view & dual side viewWide rear view
P. 307 P. 307
Page 298 of 628
298
GX460_OM_OM60T19U_(U)4-5. Using the driving support systems
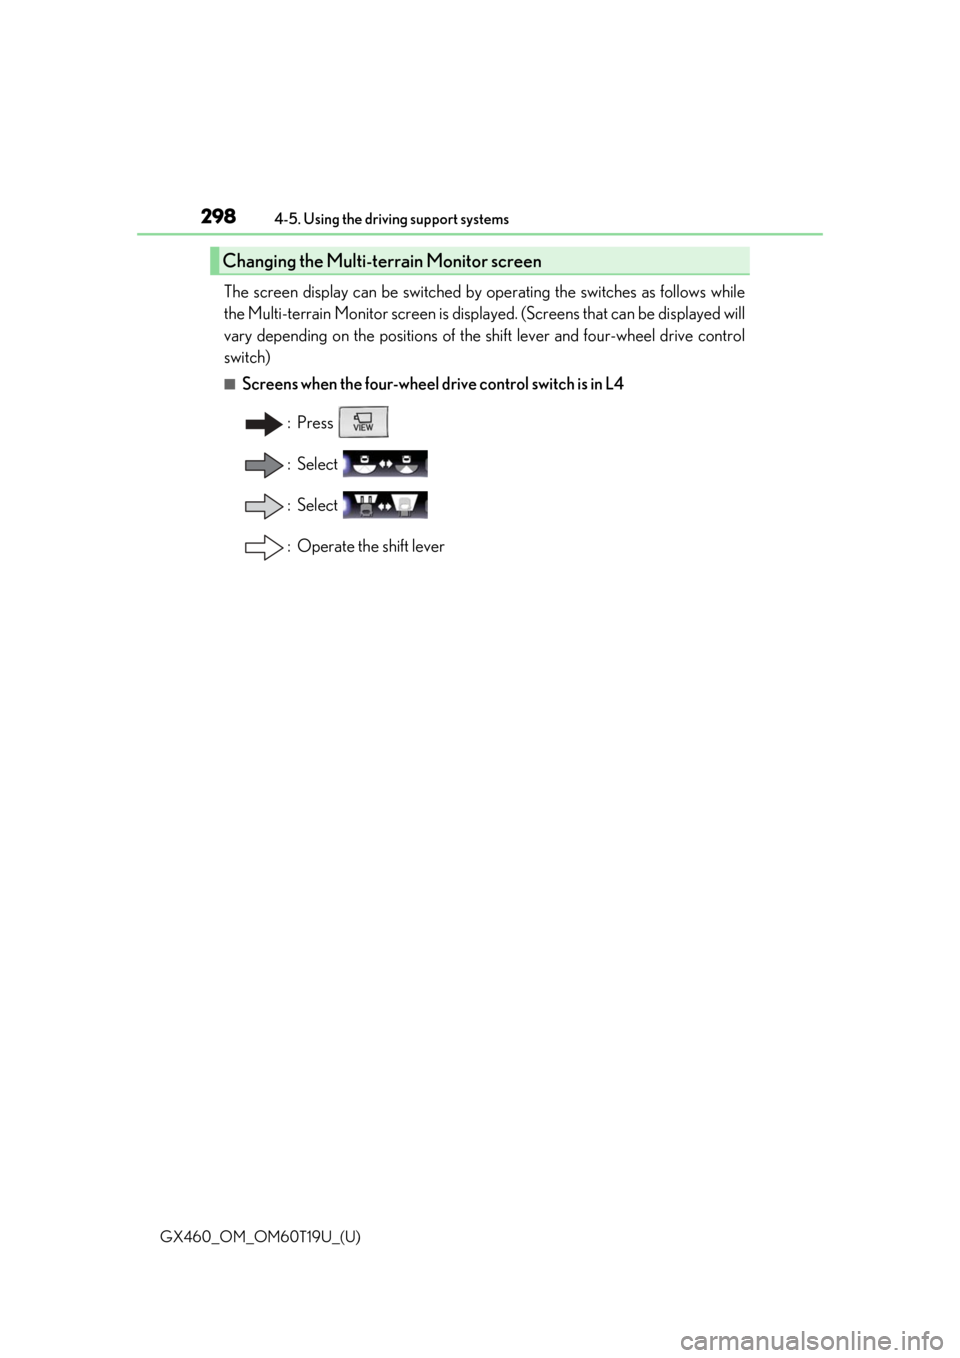
The screen display can be switched by operating the switches as follows while
the Multi-terrain Monitor screen is displa
yed. (Screens that can be displayed will
vary depending on the positions of the shift lever and four-wheel drive control
switch)
■Screens when the four-wheel drive control switch is in L4
: Press
: Select
: Select
: Operate the shift lever
Changing the Multi-terrain Monitor screen
Page 300 of 628
300
GX460_OM_OM60T19U_(U)4-5. Using the driving support systems
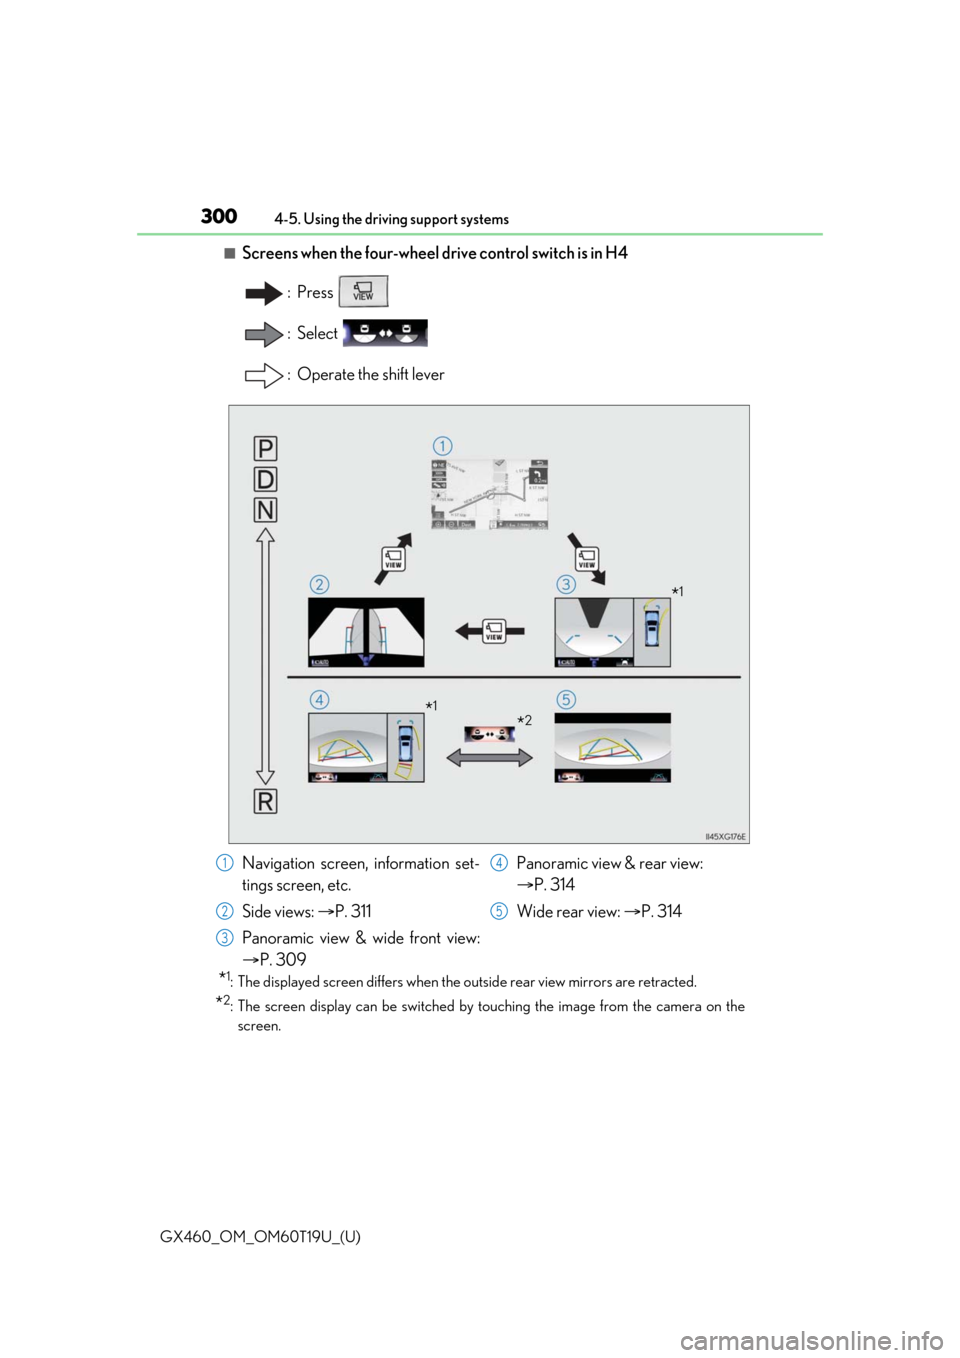
■Screens when the four-wheel drive control switch is in H4
: Press
: Select
: Operate the shift lever
*1: The displayed screen differs when the outside rear view mirrors are retracted.
*2: The screen display can be switched by touching the image from the camera on thescreen.
*1
*2*1
Navigation screen, information set-
tings screen, etc.
Side views: P. 311
Panoramic view & wide front view:
P. 309 Panoramic view & rear view:
P. 314
Wide rear view: P. 3141
2
3
4
5
Page 301 of 628

GX460_OM_OM60T19U_(U)
3014-5. Using the driving support systems
4
Driving
■Multi-terrain Monitor screen display
The amount of time that the Multi-terrain Monitor screen is displayed changes as follows
according to the vehicle speed at the time the VIEW switch was pressed.
The Multi-terrain Monitor screen is displayed if the vehicle speed is approximately 7 mph
(12 km/h) or less when the camera switch is pressed.
If the vehicle speed exceeds approximately 7 mph (12 km/h), the Multi-terrain Monitor
display is canceled.
The various screens of the Multi-terrain Monitor display information to support
several different driving situations, such as when checking for obstacles when
moving forward or in reverse, or when judging road surface conditions during
off-road driving.
■Front view & dual side view
Front view & dual side view can be used to check the area around the front of
the vehicle. • In addition to an image of the front of the vehicle, guide lines are displayed
in a composite view to provide refere nce for when deciding a direction to
move forward in.
• If the VIEW switch is pressed while the screen is displayed, the screen switches from normal to magnified display. (Pressing the switch again
returns the screen to the normal display)
• If the steering wheel is turned 270 or more, guide lines and other features
to support turning are automatically displayed.
Screen display and functions
Page 302 of 628
302
GX460_OM_OM60T19U_(U)4-5. Using the driving support systems
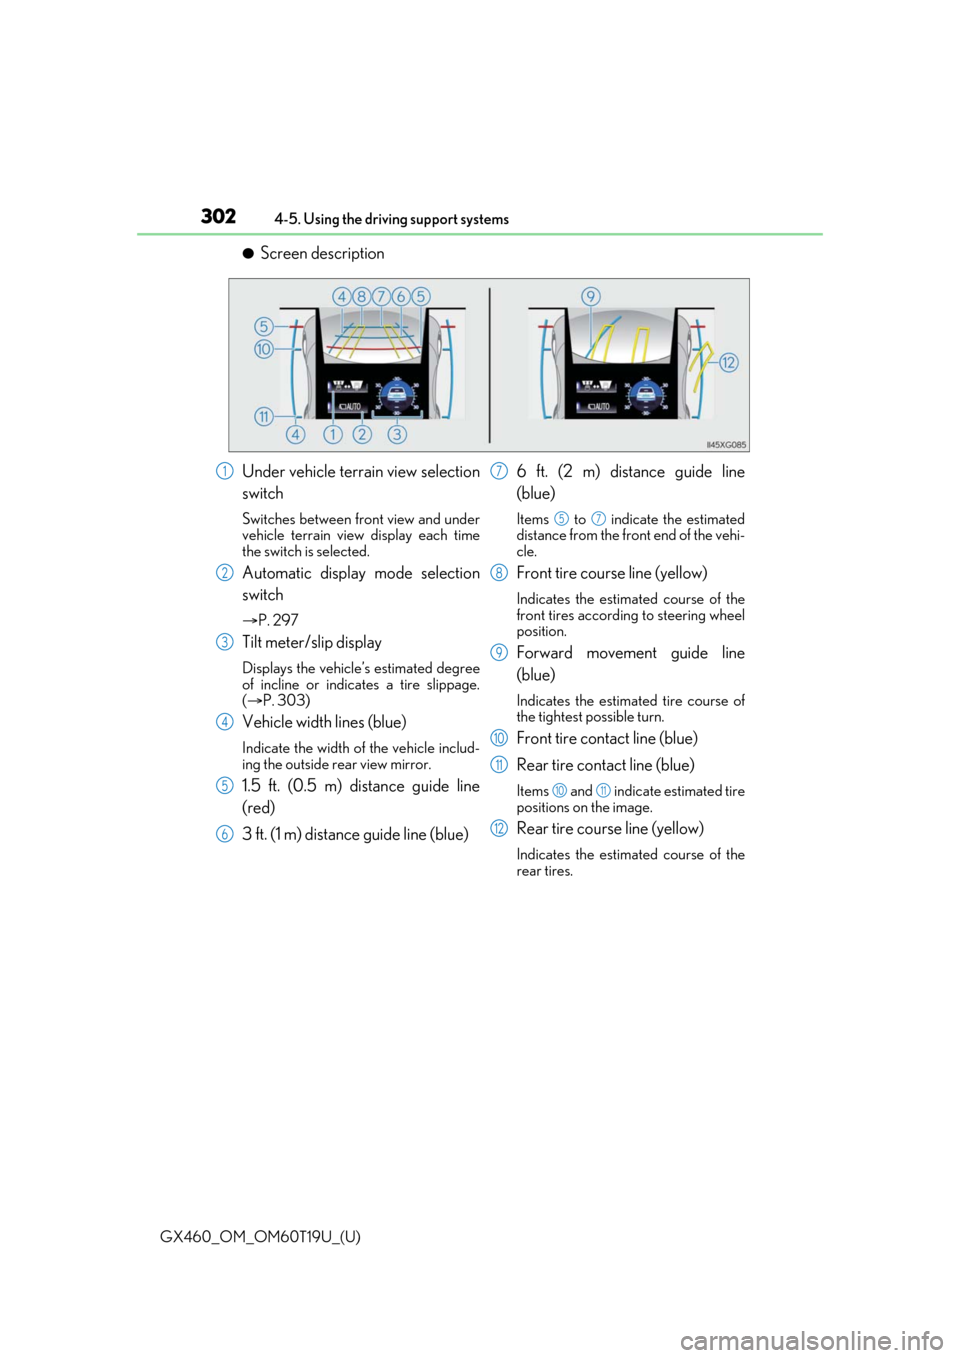
●Screen description
Under vehicle terrain view selection
switch
Switches between front view and under
vehicle terrain view display each time
the switch is selected.
Automatic display mode selection
switch
P. 297
Tilt meter/slip display
Displays the vehicle’s estimated degree
of incline or indicates a tire slippage.
( P. 303)
Vehicle width lines (blue)
Indicate the width of the vehicle includ-
ing the outside rear view mirror.
1.5 ft. (0.5 m) distance guide line
(red)
3 ft. (1 m) distance guide line (blue) 6 ft. (2 m) distance guide line
(blue)
Items to indicate the estimated
distance from the front end of the vehi-
cle.
Front tire course line (yellow)
Indicates the estimated course of the
front tires according to steering wheel
position.
Forward movement guide line
(blue)
Indicates the estimated tire course of
the tightest possible turn.
Front tire contact line (blue)
Rear tire contact line (blue)
Items and indicate estimated tire
positions on the image.
Rear tire course line (yellow)
Indicates the estimated course of the
rear tires.
1
2
3
4
5
6
7
57
8
9
10
11
1011
12
Page 303 of 628
GX460_OM_OM60T19U_(U)
3034-5. Using the driving support systems
4
Driving
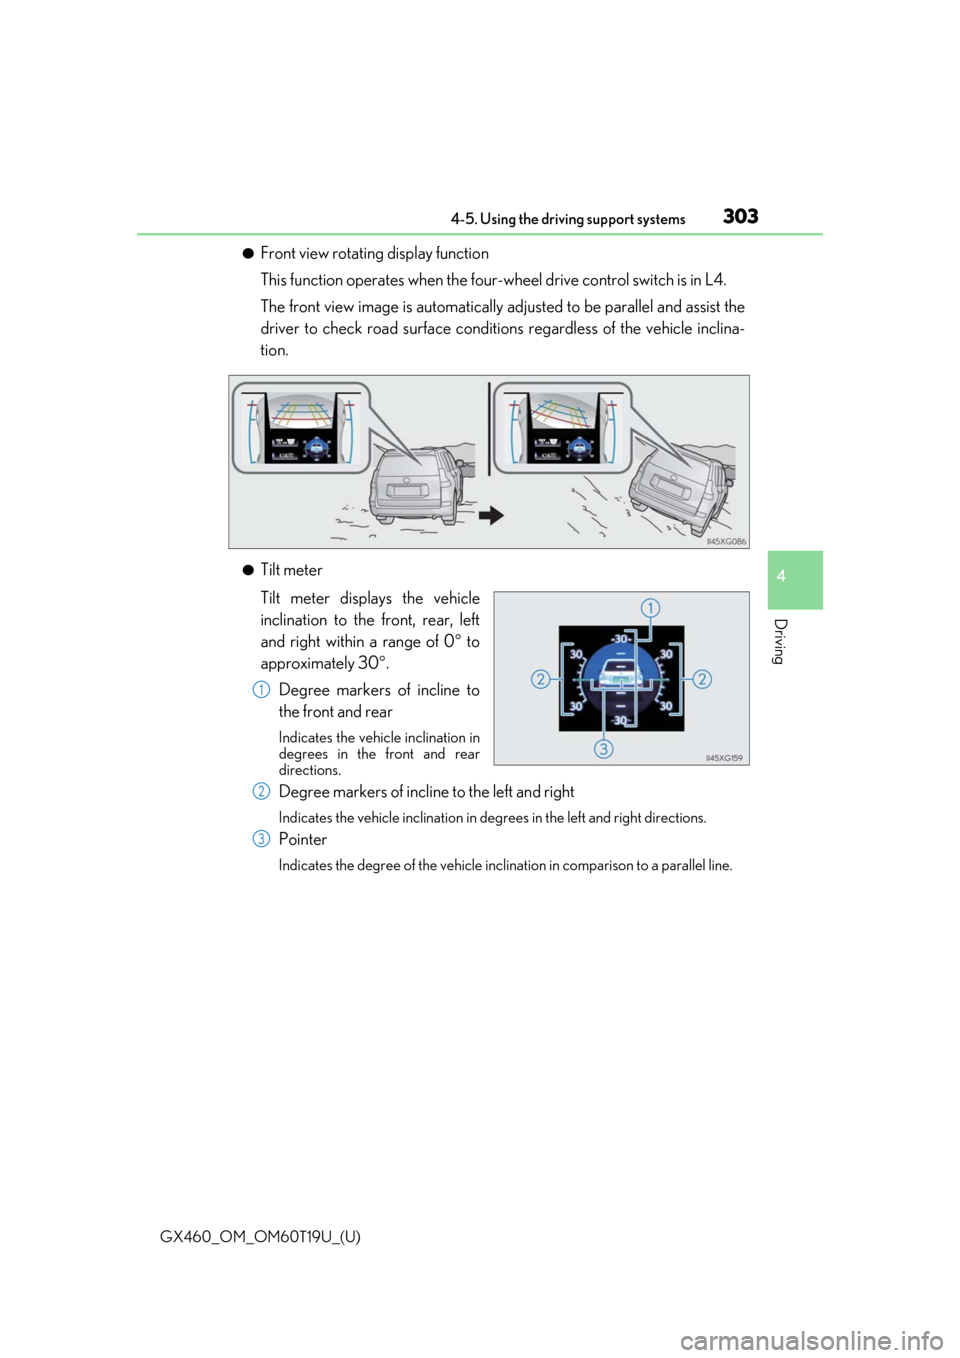
●Front view rotating display function
This function operates when the four-wheel drive control switch is in L4.
The front view image is automatically ad justed to be parallel and assist the
driver to check road surface conditio ns regardless of the vehicle inclina-
tion.
●Tilt meter
Tilt meter displays the vehicle
inclination to the front, rear, left
and right within a range of 0 to
approximately 30 .
Degree markers of incline to
the front and rear
Indicates the vehicle inclination in
degrees in the front and rear
directions.
Degree markers of incline to the left and right
Indicates the vehicle inclination in degr ees in the left and right directions.
Pointer
Indicates the degree of the vehicle inclination in comparison to a parallel line.
1
2
3