Lexus GX470 2007 Instrument cluster / LEXUS 2007 GX470 OWNER'S MANUAL (OM60C64U)
Manufacturer: LEXUS, Model Year: 2007,
Model line: GX470,
Model: Lexus GX470 2007
Pages: 436, PDF Size: 11.52 MB
Lexus GX470 2007 Instrument cluster / LEXUS 2007 GX470 OWNER'S MANUAL (OM60C64U)
GX470 2007
Lexus
Lexus
https://www.carmanualsonline.info/img/36/29598/w960_29598-0.png
Lexus GX470 2007 Instrument cluster / LEXUS 2007 GX470 OWNER'S MANUAL (OM60C64U)
Trending: lumbar support, horn, battery replacement, homelink, check transmission fluid, headlight bulb, brakes
Page 261 of 436
241
3-6. Other interior features
3
Interior features
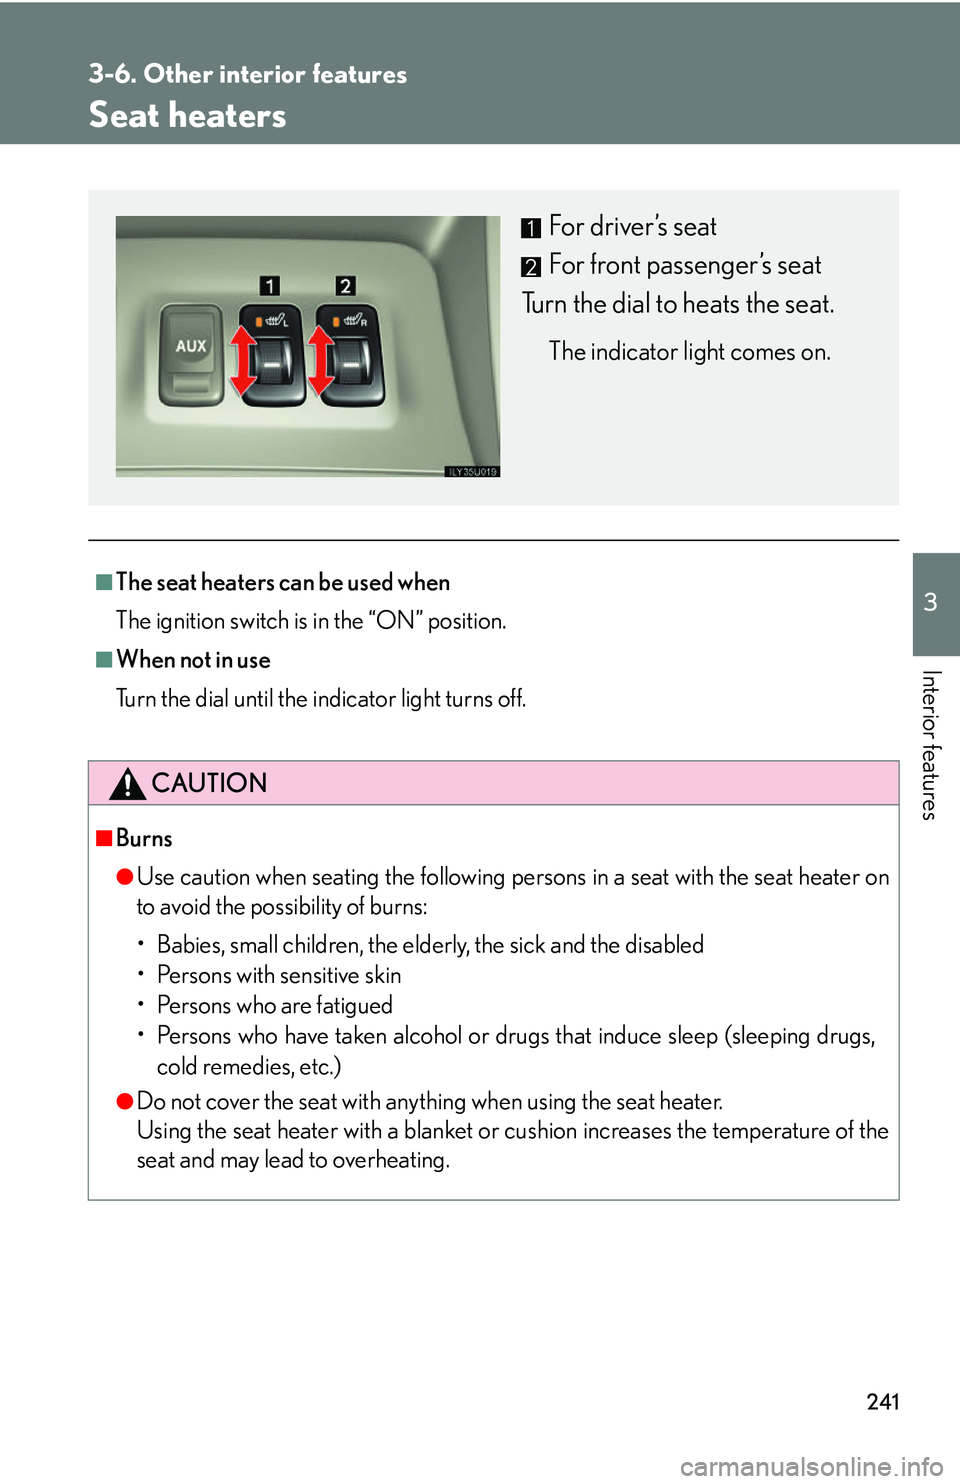
Seat heaters
■The seat heaters can be used when
The ignition switch is in the “ON” position.
■When not in use
Turn the dial until the indicator light turns off.
CAUTION
■Burns
●Use caution when seating the following pers ons in a seat with the seat heater on
to avoid the possibility of burns:
• Babies, small children, the elderly, the sick and the disabled
• Persons with sensitive skin
• Persons who are fatigued
• Persons who have taken alcohol or drugs that induce sleep (sleeping drugs,
cold remedies, etc.)
●Do not cover the seat with anything when using the seat heater.
Using the seat heater with a blanket or cushion increases the temperature of the
seat and may lead to overheating.
For driver’s seat
For front passenger’s seat
Turn the dial to heats the seat.
The indicator light comes on.
Page 262 of 436
242
3-6. Other interior features
NOTICE
■To prevent seat heater damage
Do not put unevenly weighted objects on the seat and do not stick sharp objects
(needles, nails, etc.) into the seat.
■To prevent battery discharge
Turn the dials off when the engine is not running.
Page 263 of 436
243
3-6. Other interior features
3
Interior features
Armrest
NOTICE
■To prevent damage to the armrest
Do not place too much strain on the armrest.
Front seatLower the armrest.
Raise it to the desired angle.
Second seatPull the armrest down for use.
Page 264 of 436
244
3-6. Other interior features
Floor mats
CAUTION
■When inserting the floor mat
Make sure the floor mat is properly placed on the vehicle carpet. If the floor mat
slips and interferes with the movement of the pedals during driving, it may cause an
accident.
Securely place a mat that matches the size of the space on the carpet.
Secure the floor mat using the
hooks provided.
Page 265 of 436
245
3-6. Other interior features
3
Interior features
Luggage compartment features
■Quarter window
To open the quarter windows,
pull the latch handle toward you
and swing the window fully out.
■ Cargo hooks
Cargo hooks are provided for
securing loose items.
■ Cargo net hooks
To hang the cargo net, use the cargo net hooks and cargo hooks.
The cargo net itself is not included as an original equipment.
■Storage compartment
Open the storage compartment
as shown.
Page 266 of 436
246
3-6. Other interior features
First-aid kit storage beltLoosen
Tighten
■ Warning reflector holder
Disengage
Engage
■ Luggage cover
Pull out the luggage cover and
hook it on the anchors.
Page 267 of 436
247
3-6. Other interior features
3
Interior features
Removing luggage coverRetract the cover and release both
ends, then lift it out.
After removing the luggage cover,
place it somewhere other than the
passenger compartment.
■When installing the luggage cover
Keep the “TOP” mark on the luggage cover ends upward.
CAUTION
■When the cargo hooks are not in use
To avoid injury, always return the cargo ho oks to their positions when they are not in
use.
NOTICE
■To prevent cargo hooks damage
Do not use the third seat anch ors instead of the cargo hooks.
Page 268 of 436
248
3-6. Other interior features
Garage door opener
The garage door opener (HomeLink Universal Transceiver) is manufactured
under license from HomeLink.
Programming the HomeLink (for U.S.A. owners)
The HomeLink
compatible transceiver in your vehicle has 3 buttons
which can be programmed to operate 3 different devices. Refer to the
programming method below appropriate for the device.
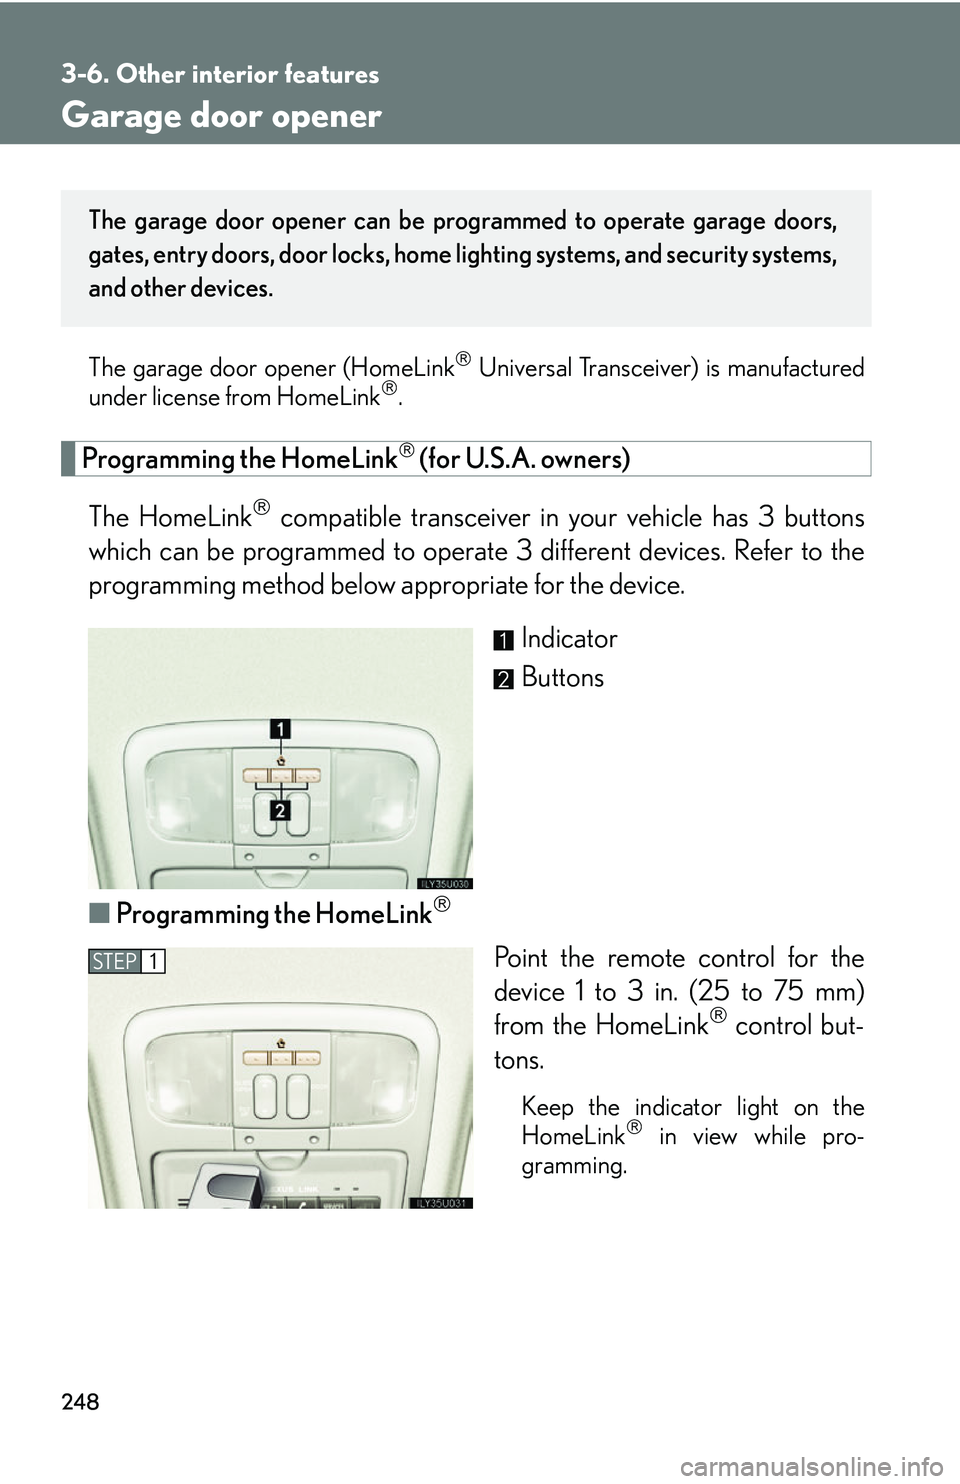
Indicator
Buttons
■ Programming the HomeLink
Point the remote control for the
device 1 to 3 in. (25 to 75 mm)
from the HomeLink
control but-
tons.
Keep the indicator light on the
HomeLink in view while pro-
gramming.
The garage door opener can be pr ogrammed to operate garage doors,
gates, entry doors, door locks, home lighting systems, and security systems,
and other devices.
STEP1
Page 269 of 436
249
3-6. Other interior features
3
Interior features
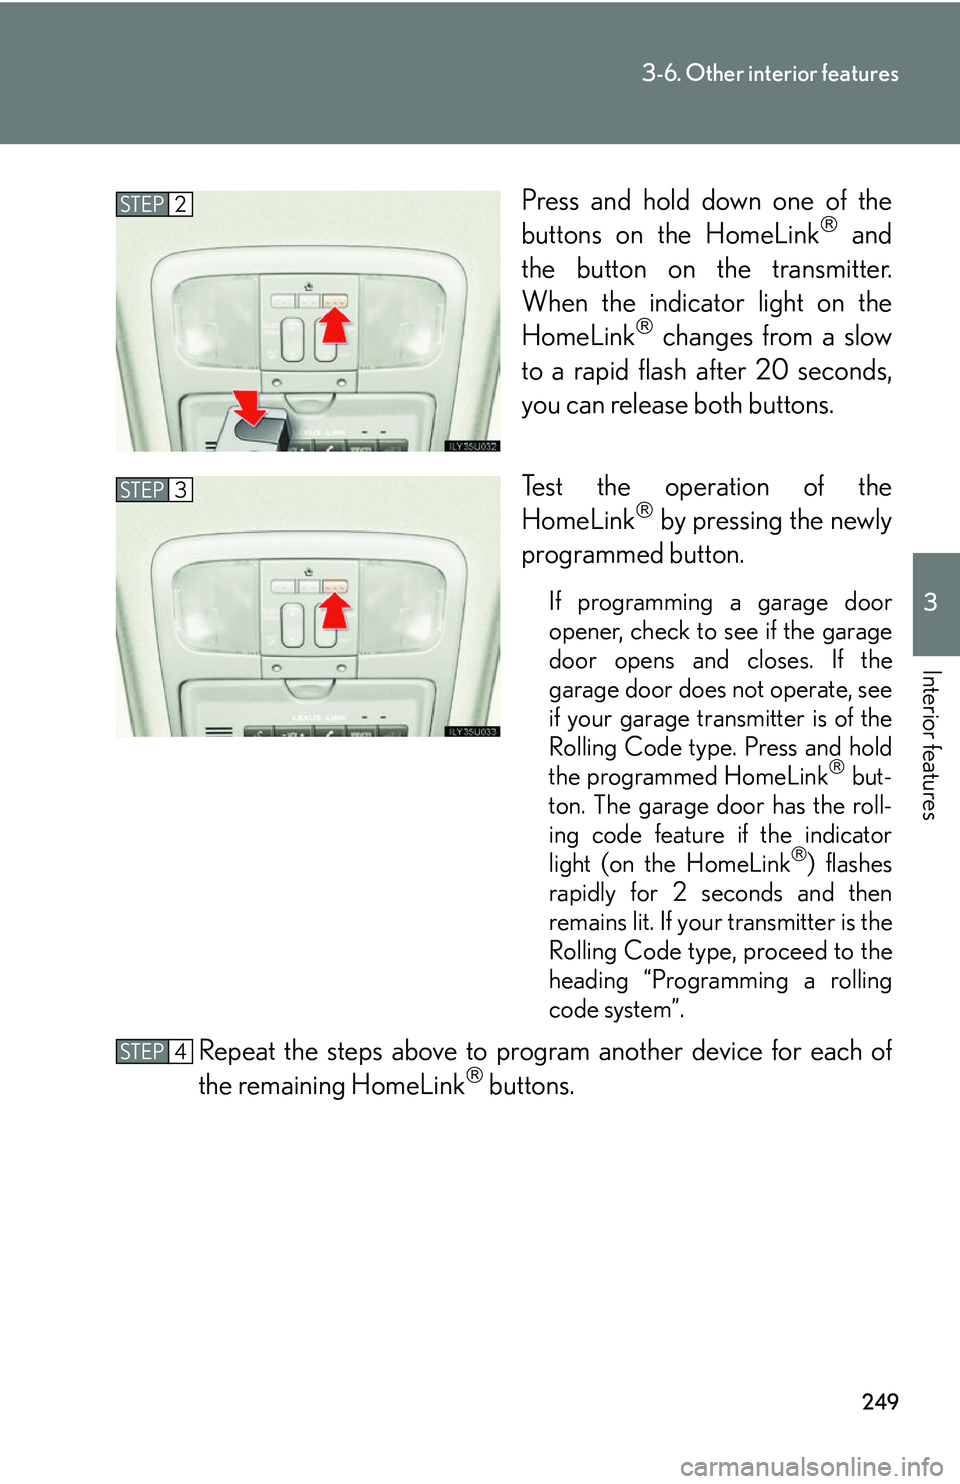
Press and hold down one of the
buttons on the HomeLink and
the button on the transmitter.
When the indicator light on the
HomeLink
changes from a slow
to a rapid flash after 20 seconds,
you can release both buttons.
Test the operation of the
HomeLink
by pressing the newly
programmed button.
If programming a garage door
opener, check to see if the garage
door opens and closes. If the
garage door does not operate, see
if your garage transmitter is of the
Rolling Code type. Press and hold
the programmed HomeLink
but-
ton. The garage door has the roll-
ing code feature if the indicator
light (on the HomeLink
) flashes
rapidly for 2 seconds and then
remains lit. If your transmitter is the
Rolling Code type, proceed to the
heading “Programming a rolling
code system”.
Repeat the steps above to program another device for each of
the remaining HomeLink buttons.
STEP2
STEP3
STEP4
Page 270 of 436

250
3-6. Other interior features
■Programming a Rolling Code system (for U.S.A. owners)
If your device is Rolling Code eq uipped, follow the steps under the
heading “Programming the HomeLink
” before proceeding with the
steps listed below.
Locate the training button on th e ceiling mounted garage door
opener motor. The exact location and color of the button may
vary by brand of garage door opener.
Refer to the operation manual supplied with the garage door opener
for the location of the training button.
Press the training button.
Press and release the vehi cle’s programmed HomeLink
button
twice. The garage door may open.
If the garage door opens, the programming process is complete. If the
door does not open, press and release the button a third time. This third
press and release will complete the programming process by opening
the garage door.
The ceiling mounted garage door op ener motor should now recognize
the HomeLink
transceiver and operate the garage door.
Repeat the steps above to prog ram another rolling code system
for any of the remaining HomeLink buttons.
■ Programming an entry gate (for U .S.A. owners)/Programming all
devices in the Canadian market
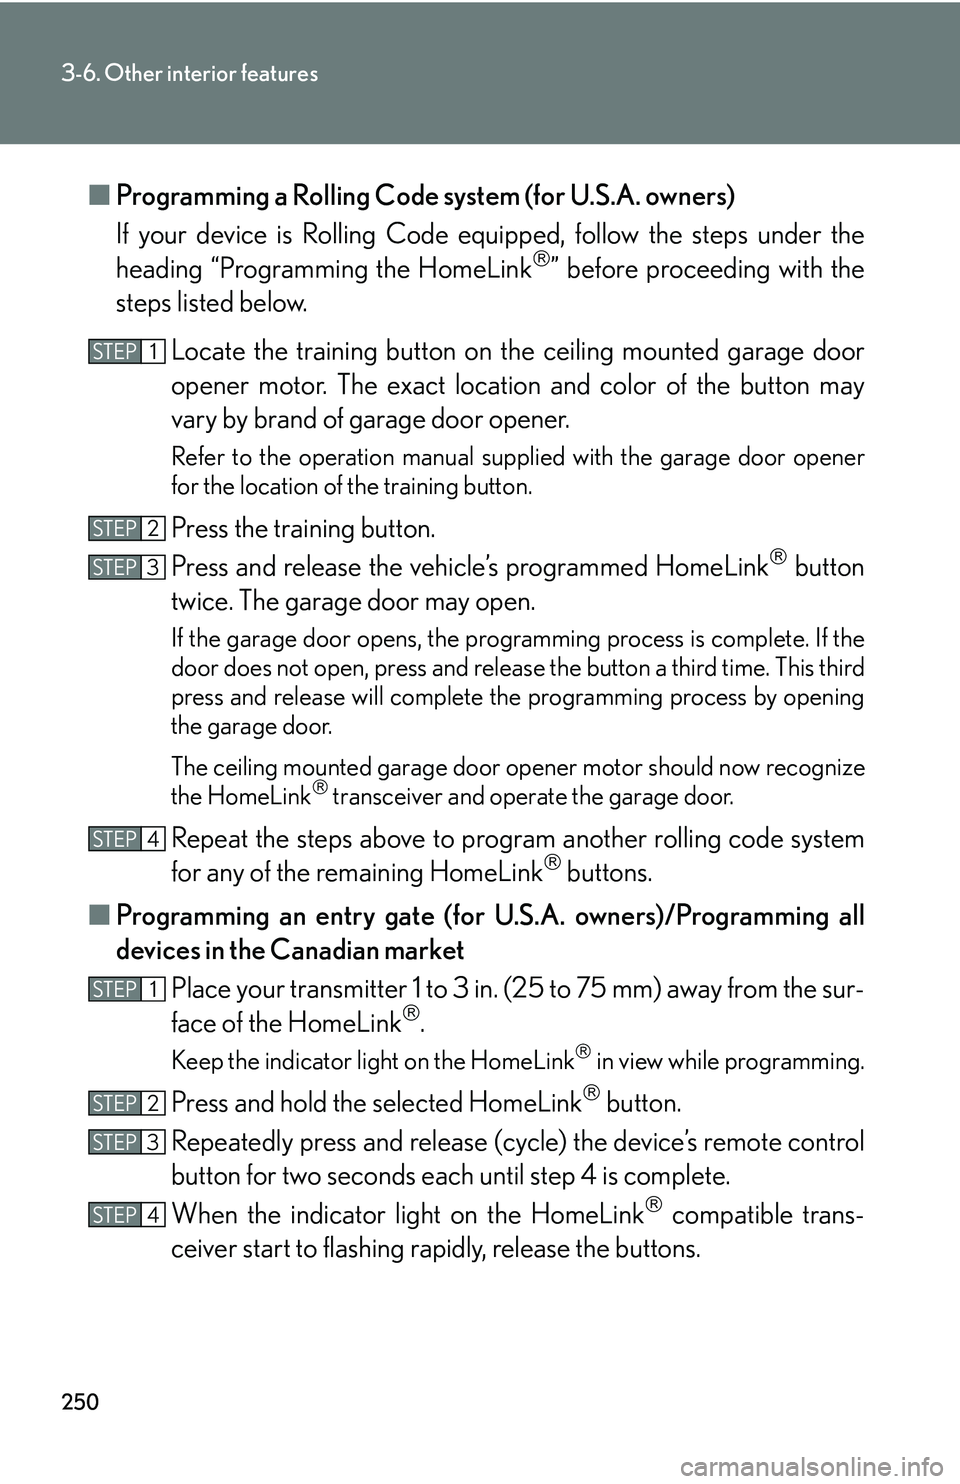
Place your transmitter 1 to 3 in. (25 to 75 mm) away from the sur-
face of the HomeLink
.
Keep the indicator light on the HomeLink in view while programming.
Press and hold the selected HomeLink button.
Repeatedly press and release (cyc le) the device’s remote control
button for two seconds each until step 4 is complete.
When the indicator light on the HomeLink
compatible trans-
ceiver start to flashing rapidly, release the buttons.
STEP1
STEP2
STEP3
STEP4
STEP1
STEP2
STEP3
STEP4
Trending: oil reset, bluetooth, fuse box, spare tire, air filter, change key battery, oil change


