seats Lexus GX470 2007 Using other driving systems / LEXUS 2007 GX470 QUICK REFERENCE MANUAL
[x] Cancel search | Manufacturer: LEXUS, Model Year: 2007, Model line: GX470, Model: Lexus GX470 2007Pages: 58, PDF Size: 3.36 MB
Page 1 of 58
1
When Driving
Topic 3
Overview
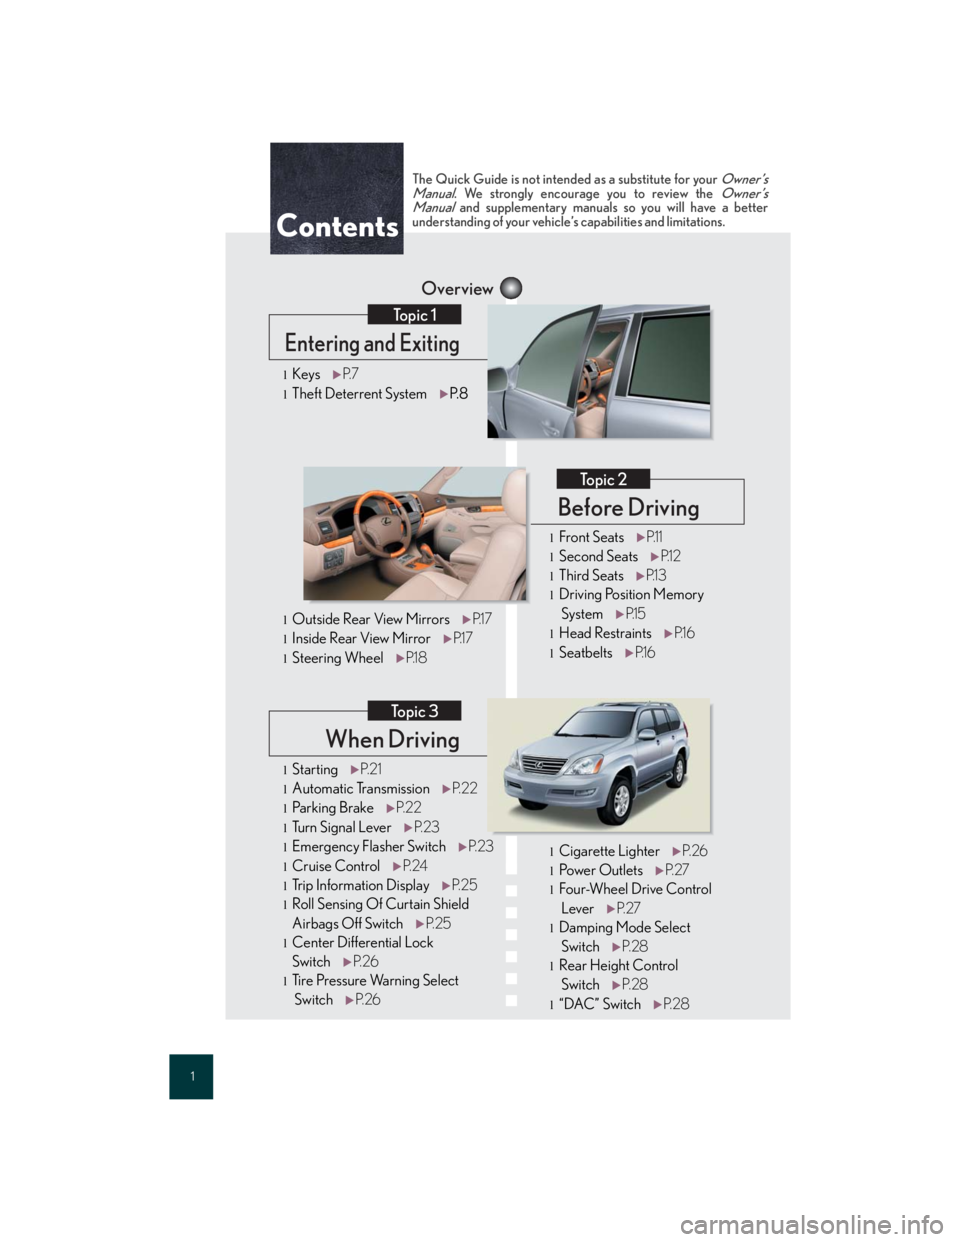
Contents
Entering and Exiting
Topic 1
Before Driving
Topic 2
lStartingP. 2 1
lAutomatic TransmissionP. 2 2
lParking BrakeP. 2 2
lTu r n S i g n a l L e v e rP. 2 3
lEmergency Flasher SwitchP. 2 3
lCruise ControlP. 2 4
lTrip Information DisplayP. 2 5
lRoll Sensing Of Curtain Shield
Airbags Off SwitchP. 2 5
lCenter Differential Lock
SwitchP. 2 6
lTi r e P r e s s u r e Wa r n i n g S e l e c t
SwitchP. 2 6
lKeysP. 7
lTheft Deterrent System P.8
The Quick Guide is not intended as a substitute for your Owner’s
Manual. We strongly encourage you to review the Owner’s
Manual and supplementary manuals so you will have a better
understanding of your vehicle’s capabilities and limitations.
lCigarette LighterP. 2 6
lPow e r O u t l e t sP. 2 7
lFour-Wheel Drive Control
LeverP. 2 7
lDamping Mode Select
SwitchP. 2 8
lRear Height Control
SwitchP. 2 8
l“DAC” SwitchP. 2 8
lFront SeatsP.1 1
lSecond SeatsP.1 2
lThird SeatsP.1 3
lDriving Position Memory
SystemP.1 5
lHead RestraintsP.1 6
lSeatbeltsP.1 6
lOutside Rear View MirrorsP.1 7
lInside Rear View MirrorP.1 7
lSteering WheelP.1 8
Page 10 of 58
Before DrivingTopic 2
Front Seats................................................................ 11
Second Seats .......................................................... 12
Third Seats ............................................................... 13
Driving Position Memory System..................... 15
Head Restraints ..................................................... 16
Seatbelts................................................................... 16
Outside Rear View Mirrors ............................... 17
Inside Rear View Mirror...................................... 17
Steering Wheel ...................................................... 18
Page 11 of 58
Topic 2
Before Driving
11
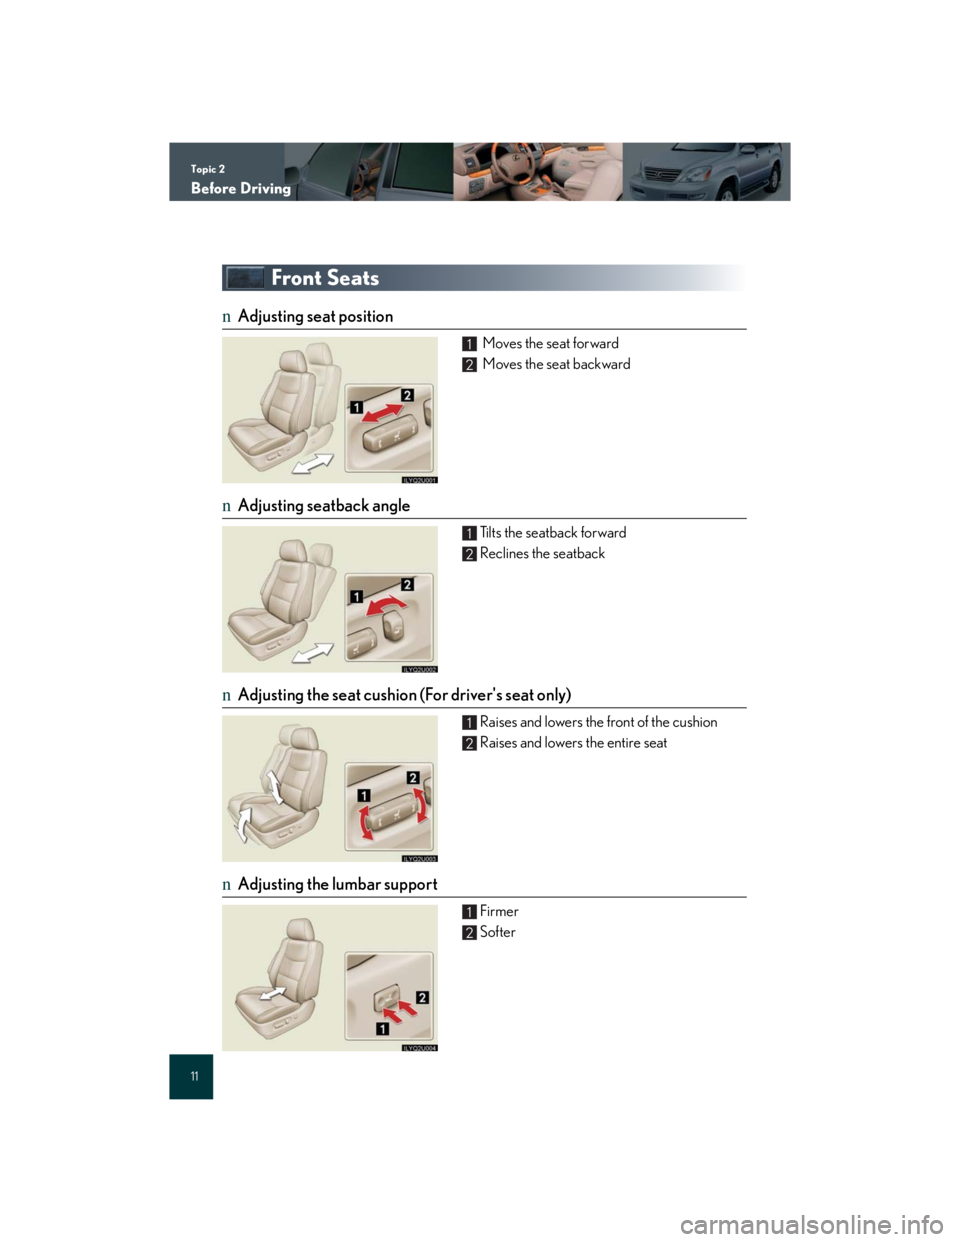
Front Seats
nAdjusting seat position
Moves the seat forward
Moves the seat backward
nAdjusting seatback angle
Tilts the seatback forward
Reclines the seatback
nAdjusting the seat cushion (For driver's seat only)
Raises and lowers the front of the cushion
Raises and lowers the entire seat
nAdjusting the lumbar support
Firmer
Softer
1
2
1
2
1
2
1
2
Page 12 of 58
Topic 2
Before Driving
12
Entering and Exiting
Before Driving
When Driving
Rain and
Night Driving
Driving Comfort
Opening and Closing
What to do if ...
Customizing
Yo u r L e x u s
Second Seats
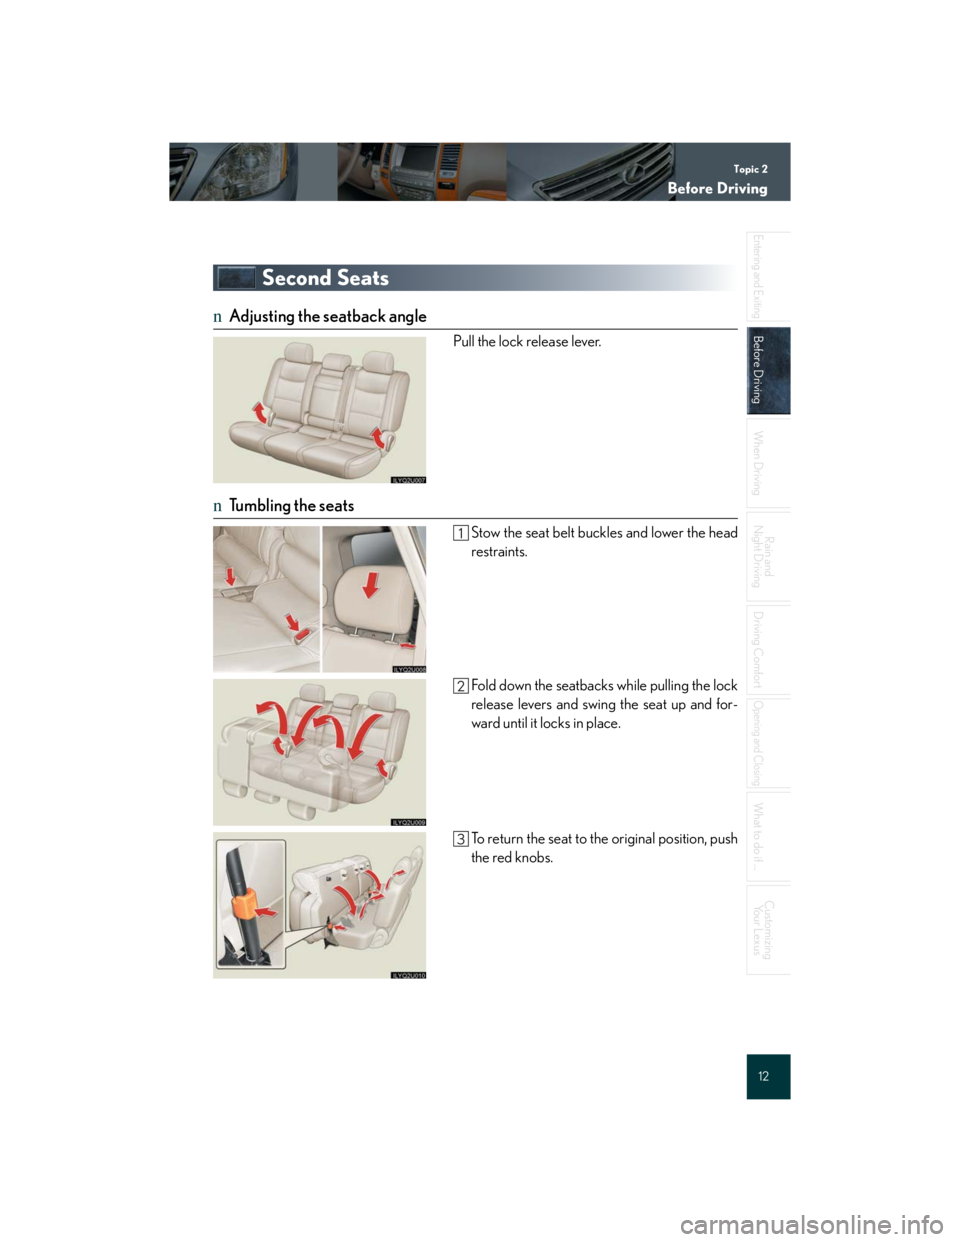
nAdjusting the seatback angle
Pull the lock release lever.
nTumbling the seats
Stow the seat belt buckles and lower the head
restraints.
Fold down the seatbacks while pulling the lock
release levers and swing the seat up and for-
ward until it locks in place.
To return the seat to the original position, push
the red knobs.
Page 13 of 58
Topic 2
Before Driving
13
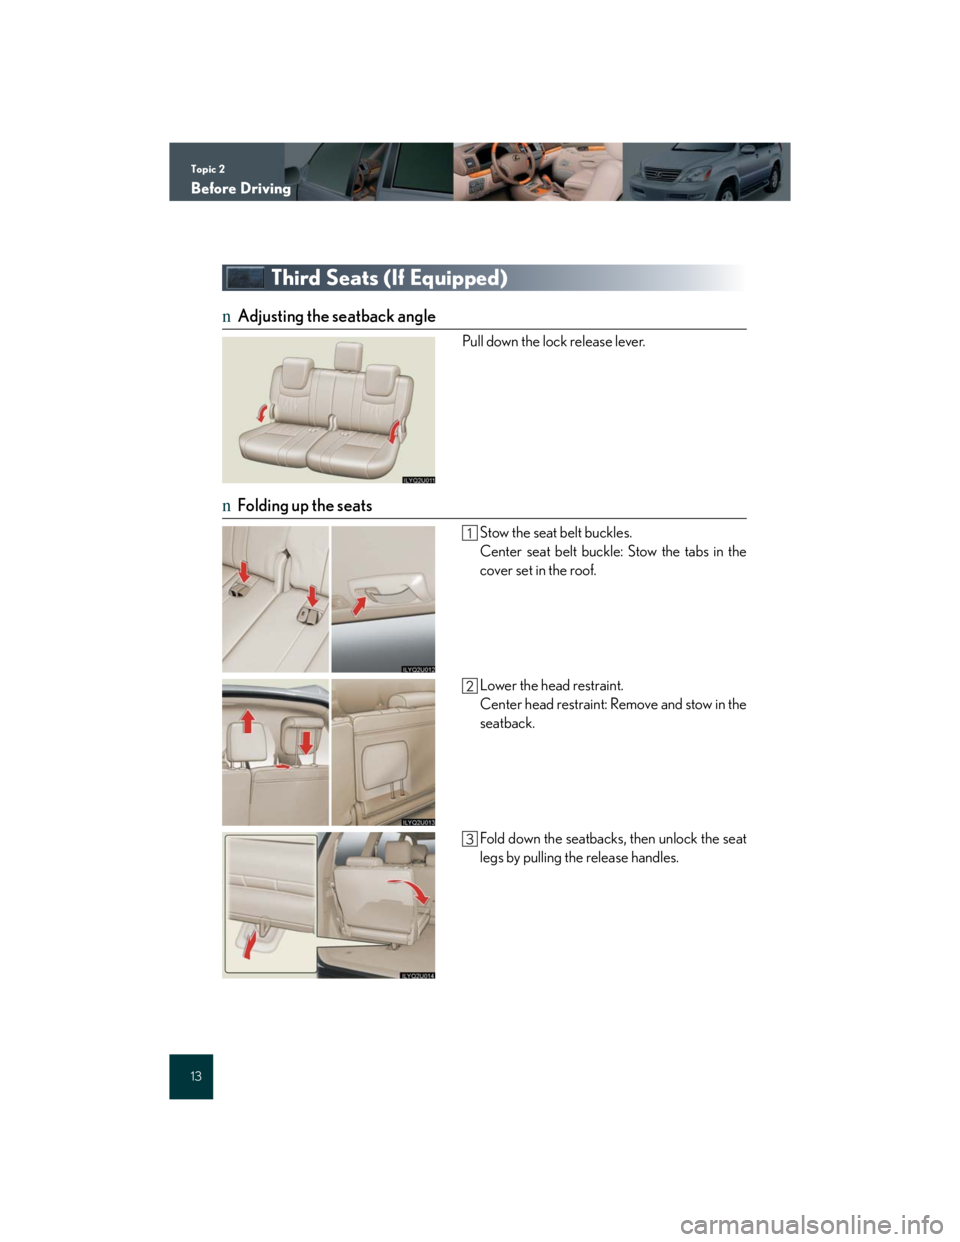
Third Seats (If Equipped)
nAdjusting the seatback angle
Pull down the lock release lever.
nFolding up the seats
Stow the seat belt buckles.
Center seat belt buckle: Stow the tabs in the
cover set in the roof.
Lower the head restraint.
Center head restraint: Remove and stow in the
seatback.
Fold down the seatbacks, then unlock the seat
legs by pulling the release handles.
Page 14 of 58
Topic 2
Before Driving
14
Entering and Exiting
Before Driving
When Driving
Rain and
Night Driving
Driving Comfort
Opening and Closing
What to do if ...
Customizing
Yo u r L e x u s
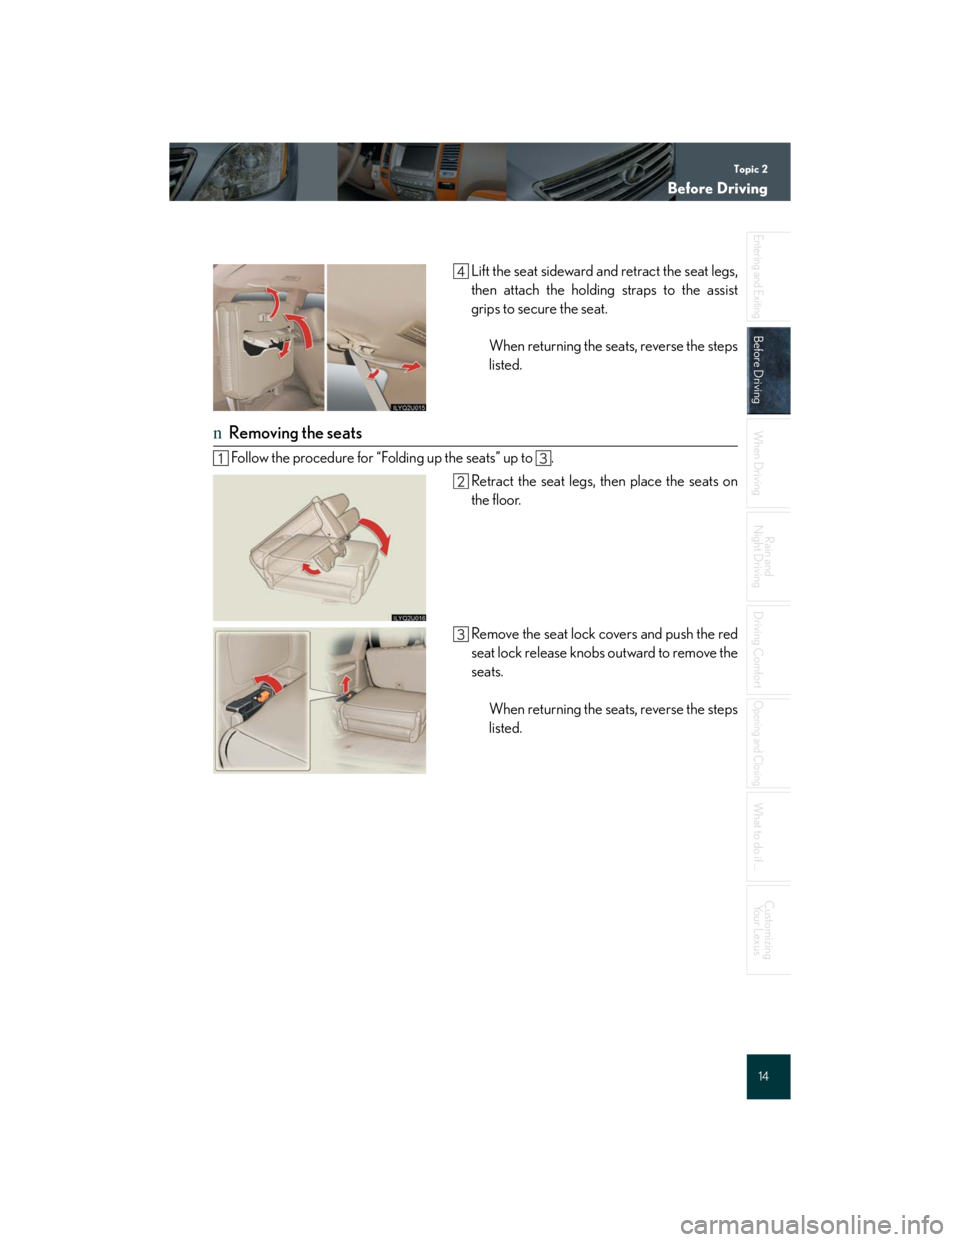
Lift the seat sideward and retract the seat legs,
then attach the holding straps to the assist
grips to secure the seat.
When returning the seats, reverse the steps
listed.
nRemoving the seats
Follow the procedure for “Folding up the seats” up to .
Retract the seat legs, then place the seats on
the floor.
Remove the seat lock covers and push the red
seat lock release knobs outward to remove the
seats.
When returning the seats, reverse the steps
listed.
Page 15 of 58
Topic 2
Before Driving
15
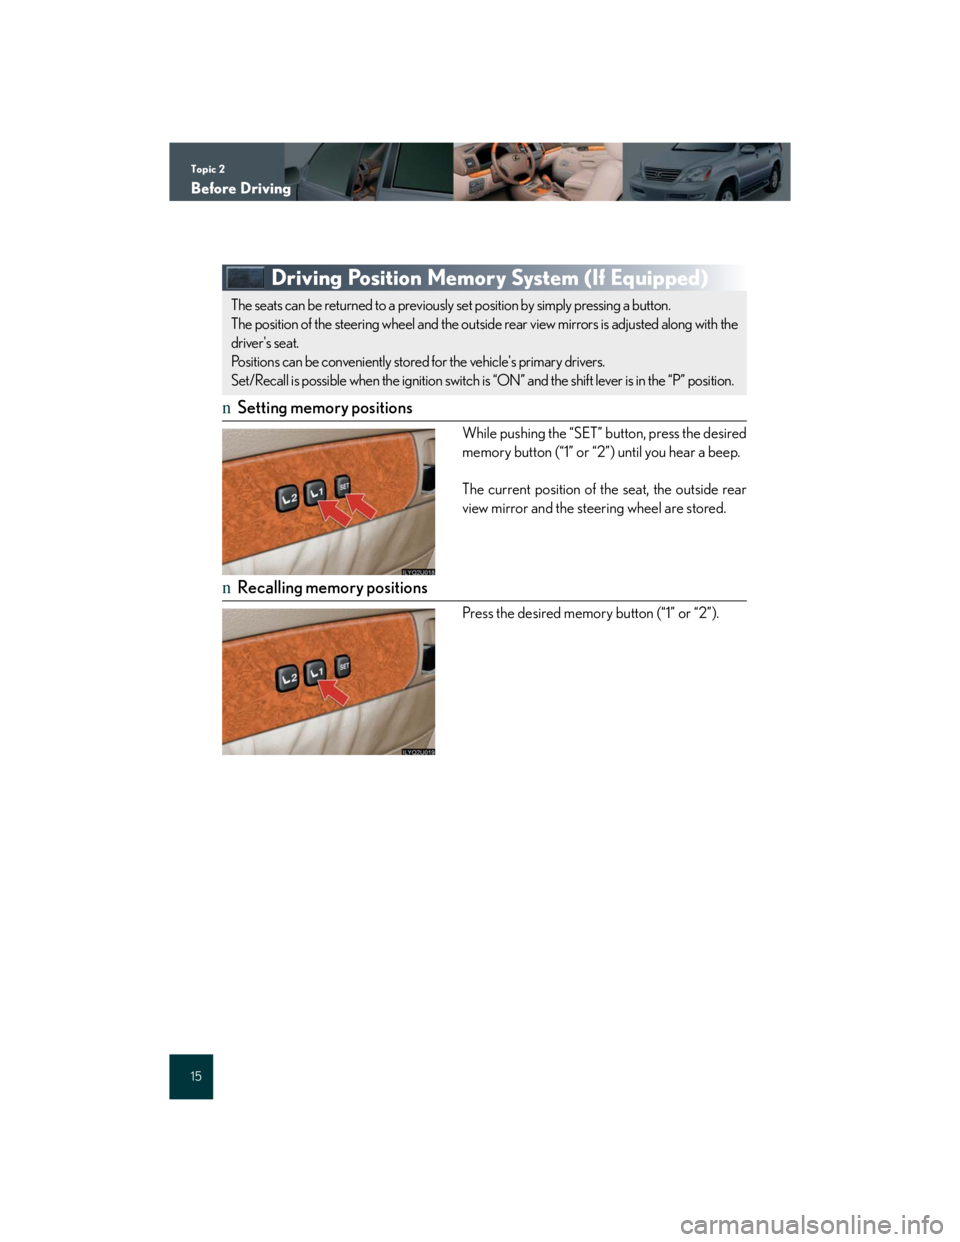
Driving Position Memory System (If Equipped)
nSetting memory positions
While pushing the “SET” button, press the desired
memory button (“1” or “2”) until you hear a beep.
The current position of the seat, the outside rear
view mirror and the steering wheel are stored.
nRecalling memory positions
Press the desired memory button (“1” or “2”).
The seats can be returned to a previously set position by simply pressing a button.
The position of the steering wheel and the outside rear view mirrors is adjusted along with the
driver's seat.
Positions can be conveniently stored for the vehicle's primary drivers.
Set/Recall is possible when the ignition switch is “ON” and the shift lever is in the “P” position.
Page 16 of 58
Topic 2
Before Driving
16
Entering and Exiting
Before Driving
When Driving
Rain and
Night Driving
Driving Comfort
Opening and Closing
What to do if ...
Customizing
Yo u r L e x u s
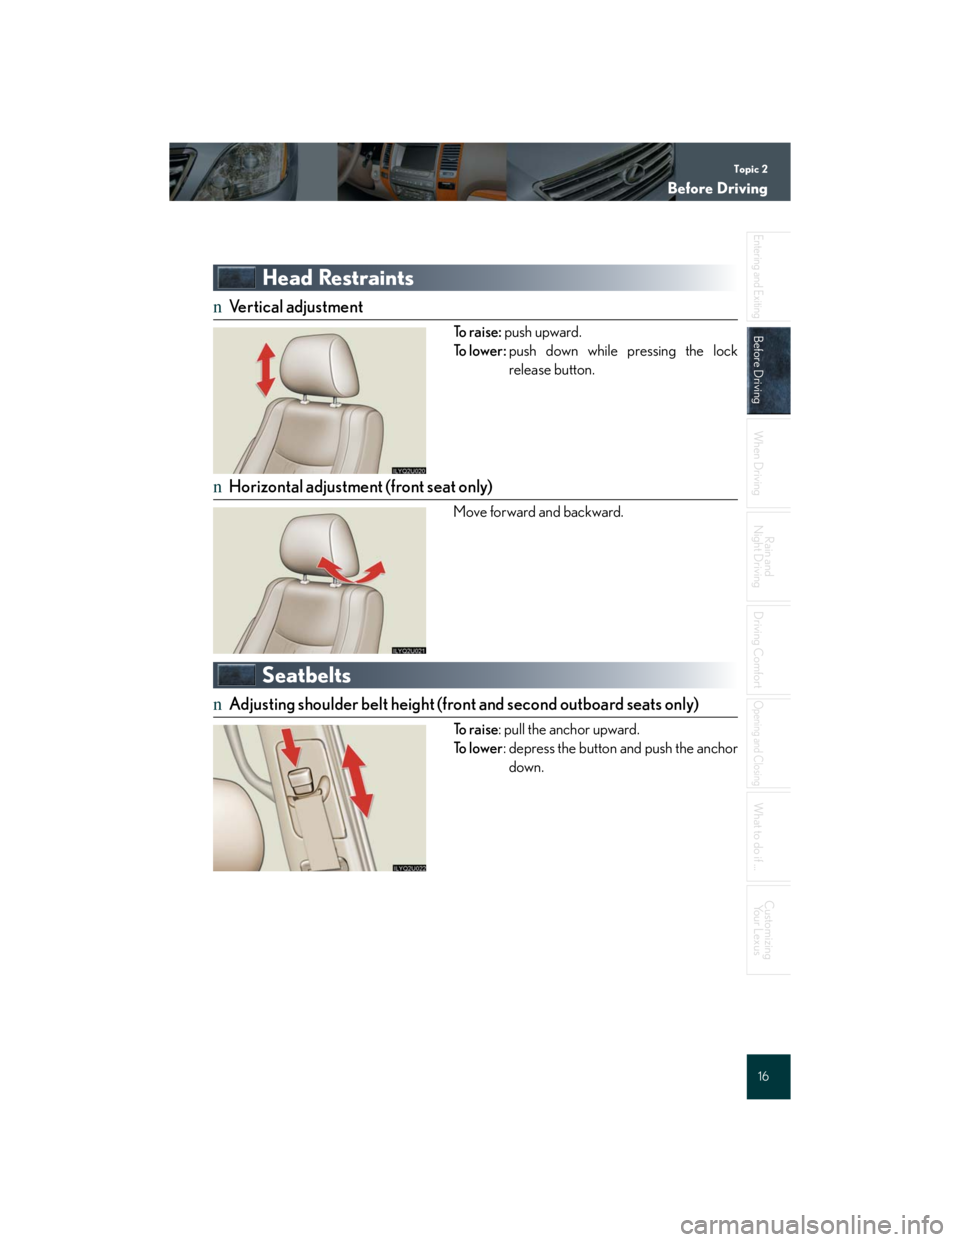
Head Restraints
nVertical adjustment
To r a i s e : push upward.
To l o w e r :push down while pressing the lock
release button.
nHorizontal adjustment (front seat only)
Move forward and backward.
Seatbelts
nAdjusting shoulder belt height (front and second outboard seats only)
To r a i s e: pull the anchor upward.
To l o w e r: depress the button and push the anchor
down.