engine Lexus GX470 2008 Navigation Manual
[x] Cancel search | Manufacturer: LEXUS, Model Year: 2008, Model line: GX470, Model: Lexus GX470 2008Pages: 312, PDF Size: 4.02 MB
Page 23 of 312
BASIC FUNCTIONS
22
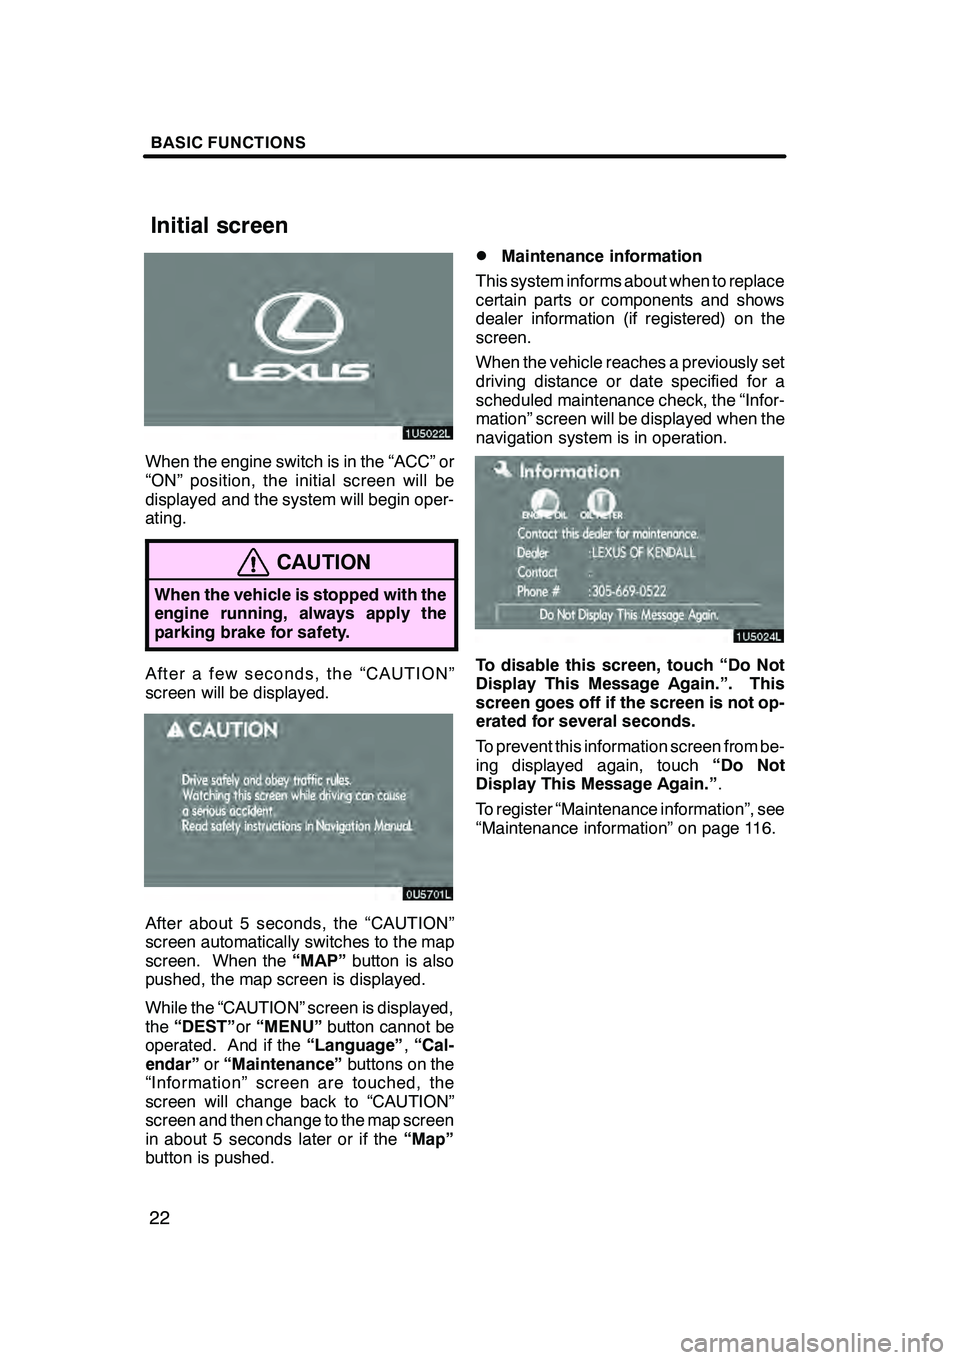
When the engine switch is in the “ACC” or
“ON” position, the initial screen will be
displayed and the system will begin oper-
ating.
CAUTION
When the vehicle is stopped with the
engine running, always apply the
parking brake for safety.
After a few seconds, the “CAUTION”
screen will be displayed.
After about 5 seconds, the “CAUTION”
screen automatically switches to the map
screen. When the“MAP”button is also
pushed, the map screen is displayed.
While the “CAUTION” screen is displayed,
the “DEST” or“MENU” button cannot be
operated. And if the “Language”,“Cal-
endar” or“Maintenance” buttons on the
“Information” screen are touched, the
screen will change back to “CAUTION”
screen and then change to the map screen
in about 5 seconds later or if the “Map”
button is pushed.
DMaintenance information
This system informs about when to replace
certain parts or components and shows
dealer information (if registered) on the
screen.
When the vehicle reaches a previously set
driving distance or date specified for a
scheduled maintenance check, the “Infor-
mation” screen will be displayed when the
navigation system is in operation.
To disable this screen, touch “Do Not
Display This Message Again.”. This
screen goes off if the screen is not op-
erated for several seconds.
To prevent this information screen from be-
ing displayed again, touch “Do Not
Display This Message Again.” .
To register “Maintenance information”, see
“Maintenance information” on page 116.
GX470_Navi_U (OM60D58U) 07/06/16
Initial screen
Page 118 of 312
OTHER FUNCTIONS
11 7
INFORMATION ITEMS
“ENGINE OIL”:Replace engine oil
“OIL FILTER”: Replace engine oil filter
“ROTATION”: Rotate tires
“TIRES”: Replace tires
“BATTERY”: Replace battery
“BRAKE PAD”: Replace brake linings
“WIPERS”: Replace wiper blades
“LLC”: Replace engine coolant
“BRAKE OIL”: Replace brake fluid
“ATF”: Replace ATF (Automatic Trans-
mission Fluid)
“SERVICE”: Scheduled maintenance
“AIR FILTER”: Replace air filter
“PERSONAL”: New information items
can be created separately from provided
ones.
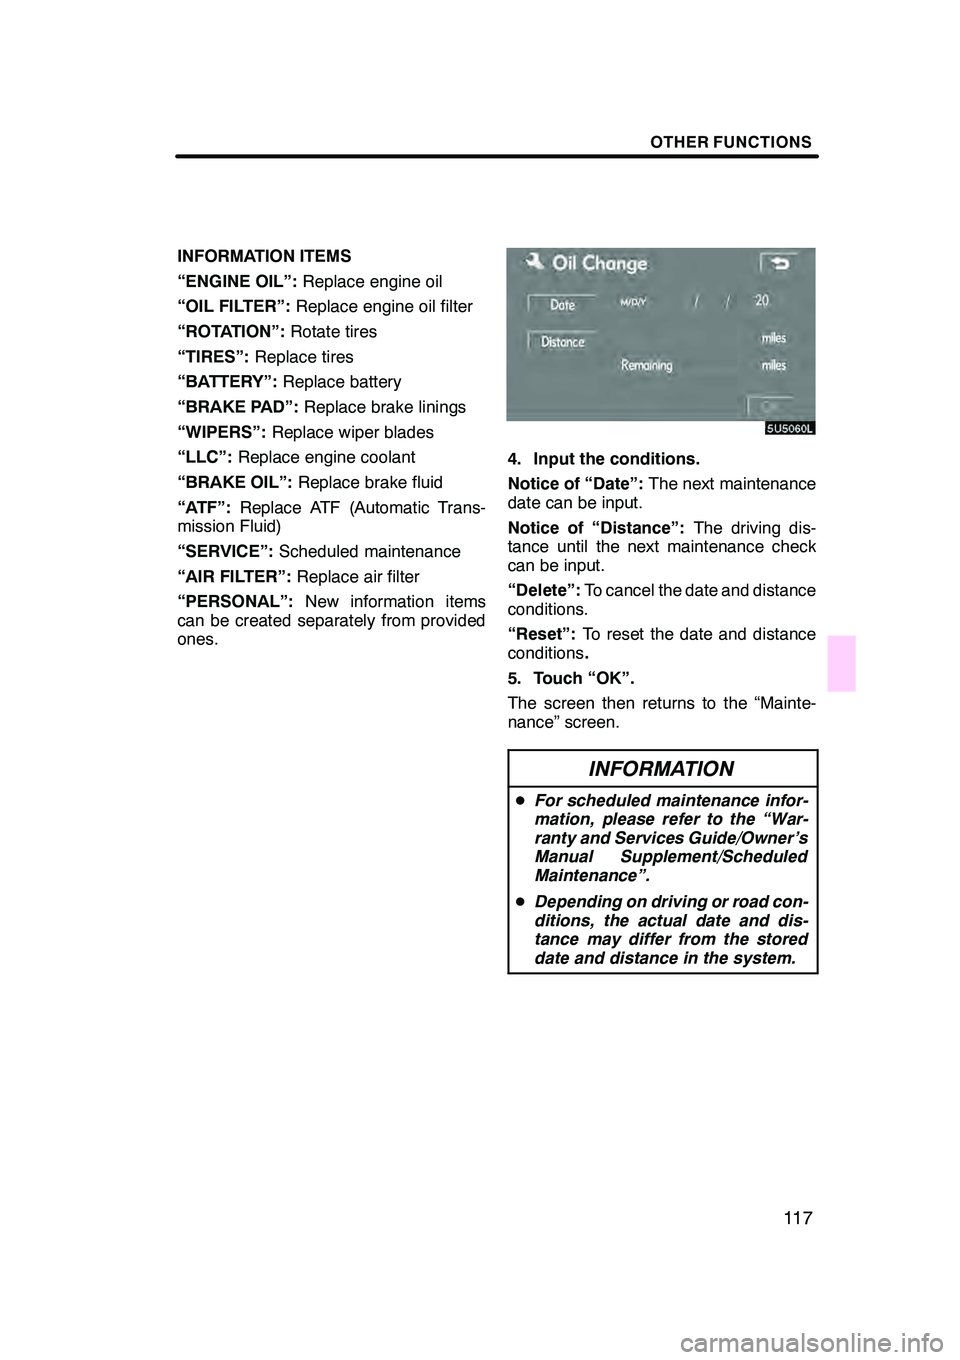
4. Input the conditions.
Notice of “Date”: The next maintenance
date can be input.
Notice of “Distance”: The driving dis-
tance until the next maintenance check
can be input.
“Delete”: To cancel the date and distance
conditions.
“Reset”: To reset the date and distance
conditions .
5. Touch “OK”.
The screen then returns to the “Mainte-
nance” screen.
INFORMATION
D For scheduled maintenance infor-
mation, please refer to the “War-
ranty and Services Guide/Owner’s
Manual Supplement/Scheduled
Maintenance”.
D Depending on driving or road con-
ditions, the actual date and dis-
tance may differ from the stored
date and distance in the system.
GX470_Navi_U (OM60D58U) 07/06/16
Page 132 of 312
OTHER FUNCTIONS
131
D
Connecting a Bluetooth
rphone
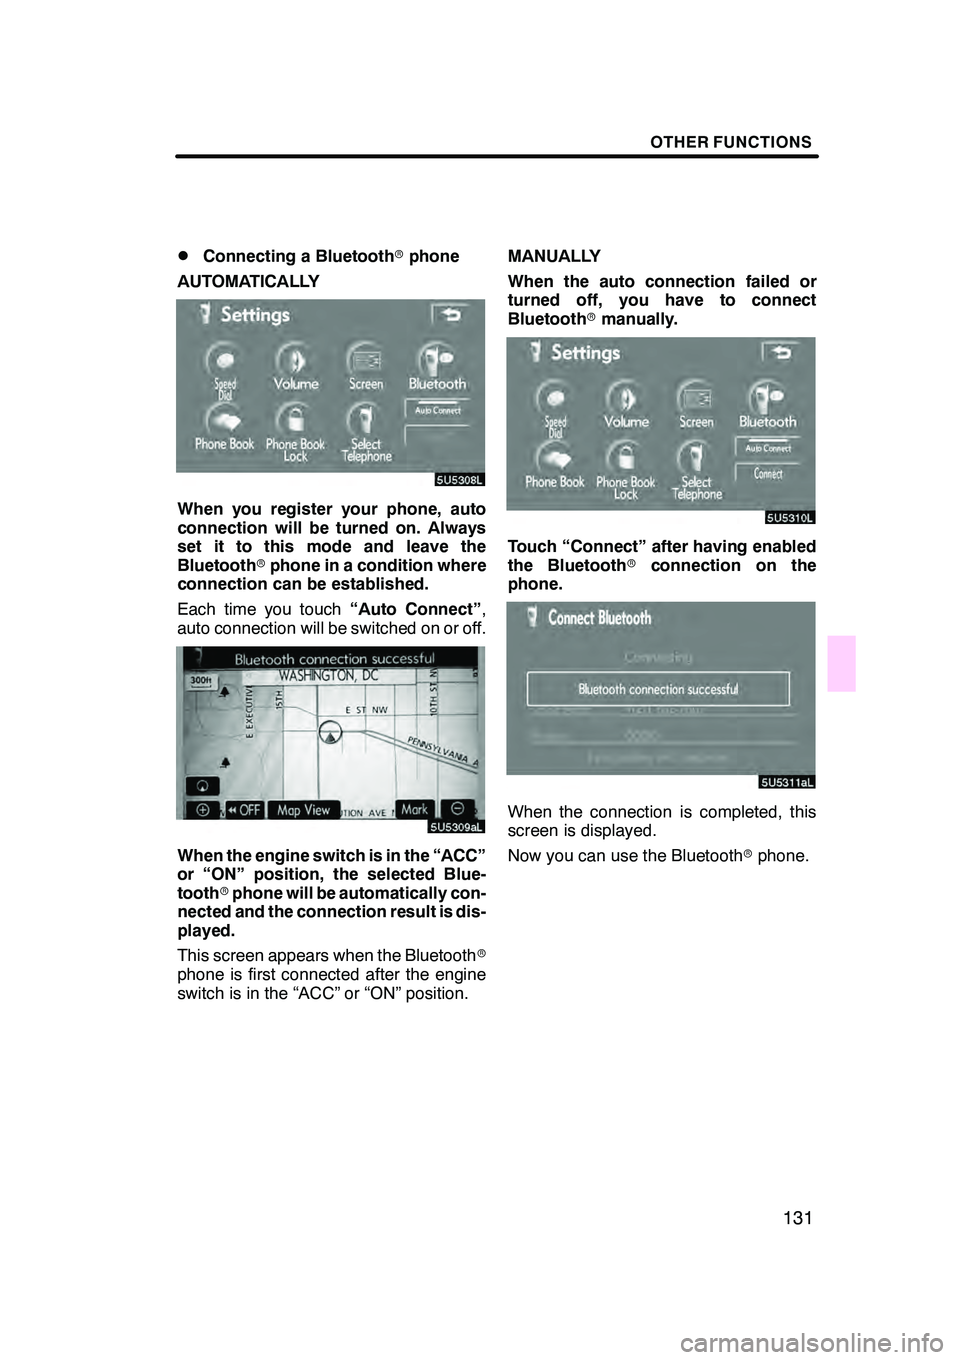
AUTOMATICALLY
When you register your phone, auto
connection will be turned on. Always
set it to this mode and leave the
Bluetooth rphone in a condition where
connection can be established.
Each time you touch “Auto Connect”,
auto connection will be switched on or off.
When the engine switch is in the “ACC”
or “ON” position, the selected Blue-
tooth rphone will be automatically con-
nected and the connection result is dis-
played.
This screen appears when the Bluetooth r
phone is first connected after the engine
switch is in the “ACC” or “ON” position. MANUALLY
When the auto connection failed or
turned off, you have to connect
Bluetooth
rmanually.
Touch “Connect” after having enabled
the Bluetooth rconnection on the
phone.
When the connection is completed, this
screen is displayed.
Now you can use the Bluetooth rphone.
GX470_Navi_U (OM60D58U) 07/06/16
Page 133 of 312
OTHER FUNCTIONS
132
D
Reconnecting the Bluetooth
rphone
If the Bluetooth rphone is discon-
nected with a poor reception from the
Bluetooth rnetwork when the engine
switch is in the “ACC” or “ON” position,
the system automatically reconnects
the Bluetooth rphone. In this case, the
connection result is not displayed.
If the Bluetooth ris disconnected on pur-
pose such as you turned your cellular
phone off, this does not happen. Recon-
nect it by the following methods.
DSelect the Bluetooth rphone again.
DEnter the Bluetooth rphone. After you enter the Bluetooth
rphone,
you can call by using hands− free sys-
tem. You can call using the 7 methods
described below.
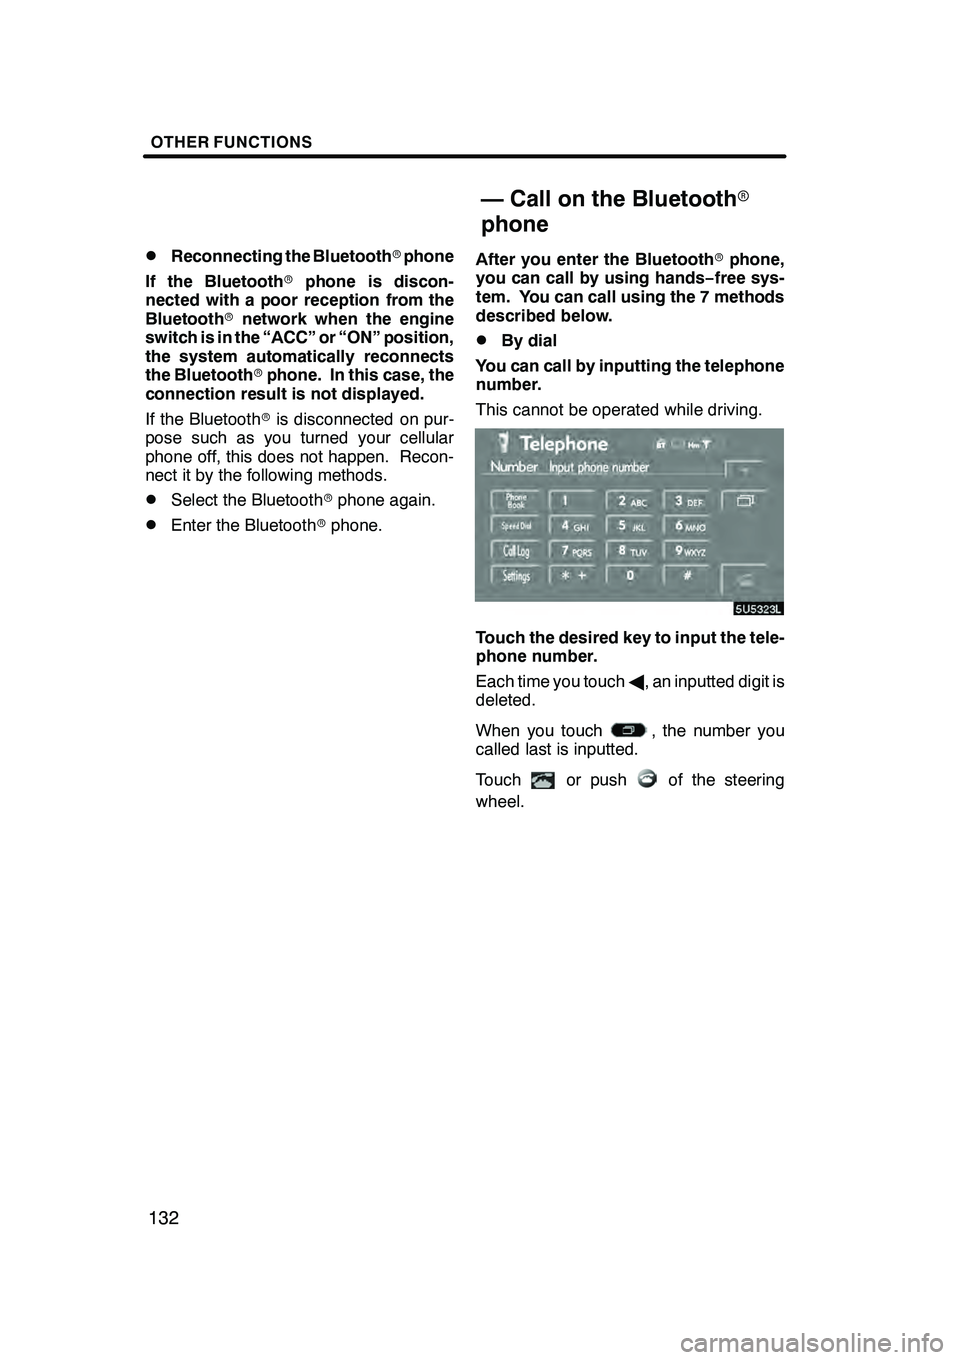
DBy dial
You can call by inputting the telephone
number.
This cannot be operated while driving.
Touch the desired key to input the tele-
phone number.
Each time you touch A, an inputted digit is
deleted.
When you touch
, the number you
called last is inputted.
Touch
or pushof the steering
wheel.
GX470_Navi_U (OM60D58U) 07/06/16
— Call on the Bluetooth r
phone
Page 151 of 312
OTHER FUNCTIONS
150
D
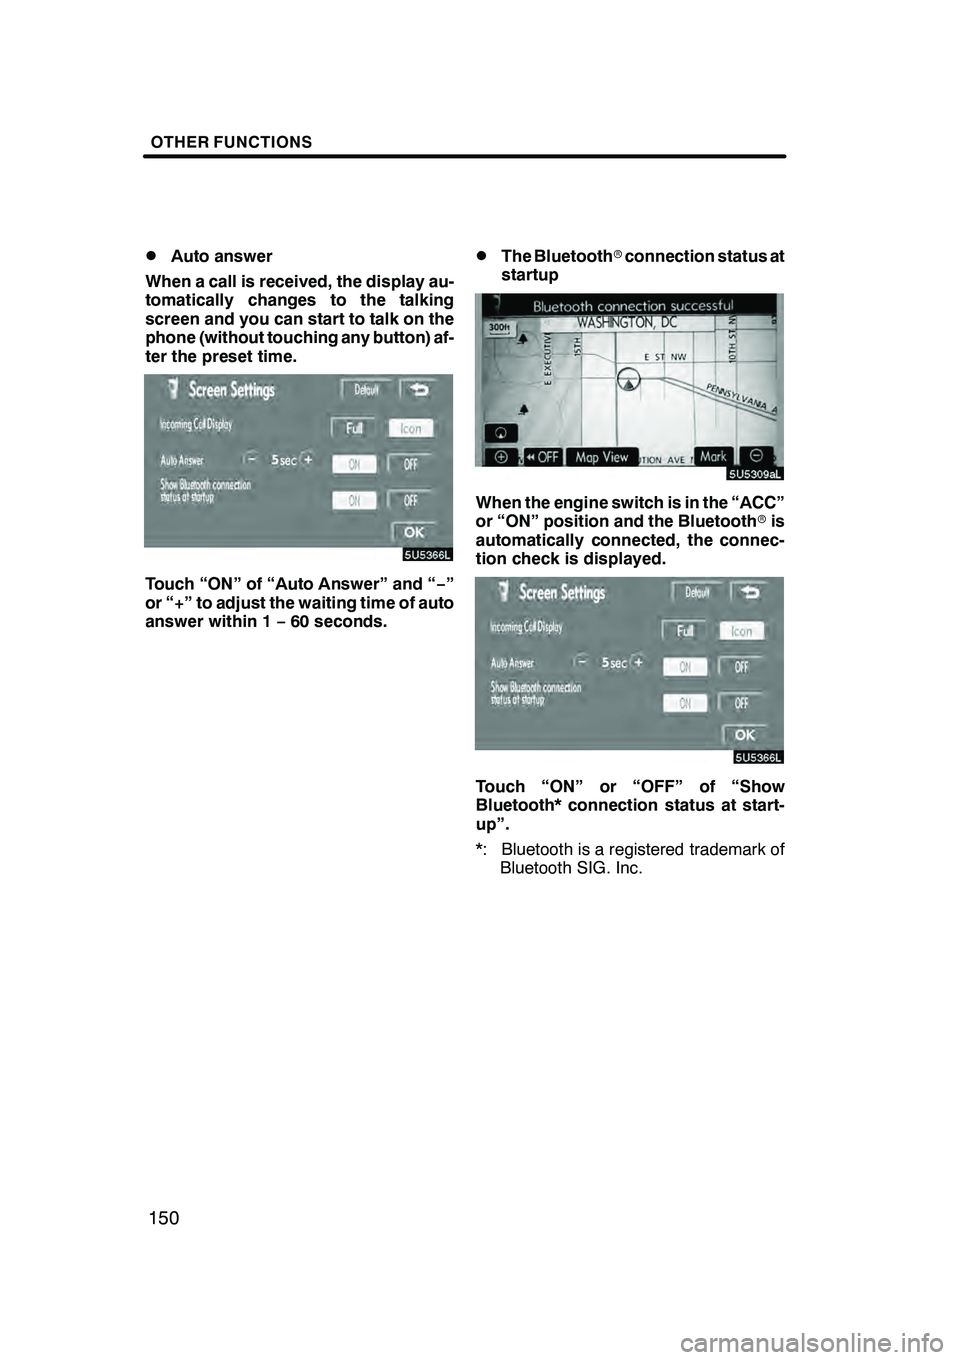
Auto answer
When a call is received, the display au-
tomatically changes to the talking
screen and you can start to talk on the
phone (without touching any button) af-
ter the preset time.
Touch “ON” of “Auto Answer” and “ −”
or “+” to adjust the waiting time of auto
answer within 1 −60 seconds.
DThe Bluetooth rconnection status at
startup
When the engine switch is in the “ACC”
or “ON” position and the Bluetooth ris
automatically connected, the connec-
tion check is displayed.
Touch “ON” or “OFF” of “Show
Bluetooth* connection status at start-
up”.
*: Bluetooth is a registered trademark of Bluetooth SIG. Inc.
GX470_Navi_U (OM60D58U) 07/06/16
Page 153 of 312
OTHER FUNCTIONS
152
D
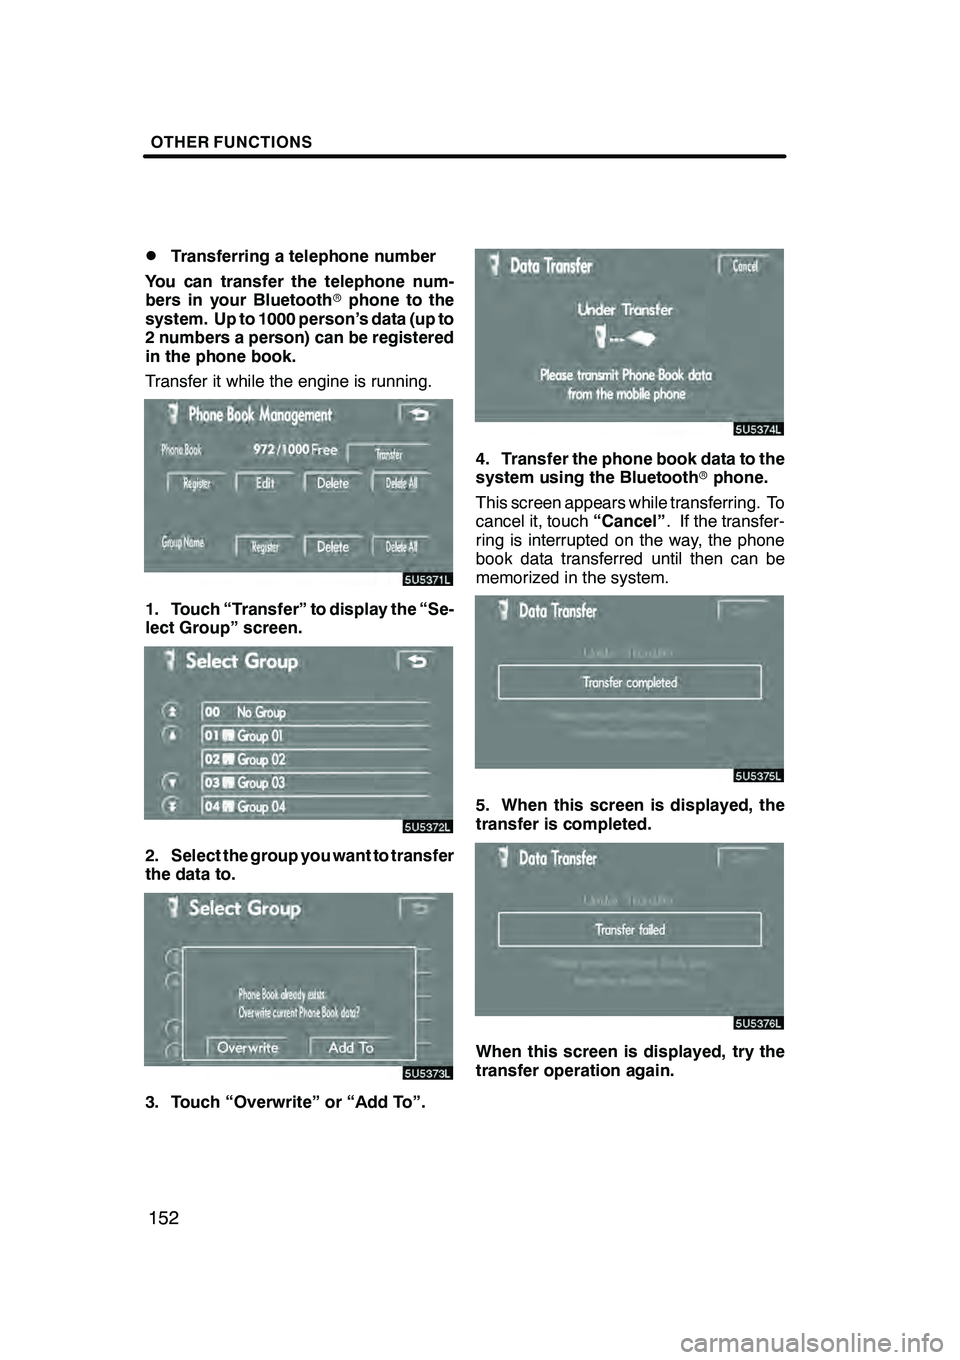
Transferring a telephone number
You can transfer the telephone num-
bers in your Bluetooth rphone to the
system. Up to 1000 person’s data (up to
2 numbers a person) can be registered
in the phone book.
Transfer it while the engine is running.
1. Touch “Transfer” to display the “Se-
lect Group” screen.
2. Select the group you want to transfer
the data to.
3. Touch “Overwrite” or “Add To”.
4. Transfer the phone book data to the
system using the Bluetooth rphone.
This screen appears while transferring. To
cancel it, touch “Cancel”. If the transfer-
ring is interrupted on the way, the phone
book data transferred until then can be
memorized in the system.
5. When this screen is displayed, the
transfer is completed.
When this screen is displayed, try the
transfer operation again.
GX470_Navi_U (OM60D58U) 07/06/16
Page 179 of 312
OTHER FUNCTIONS
178
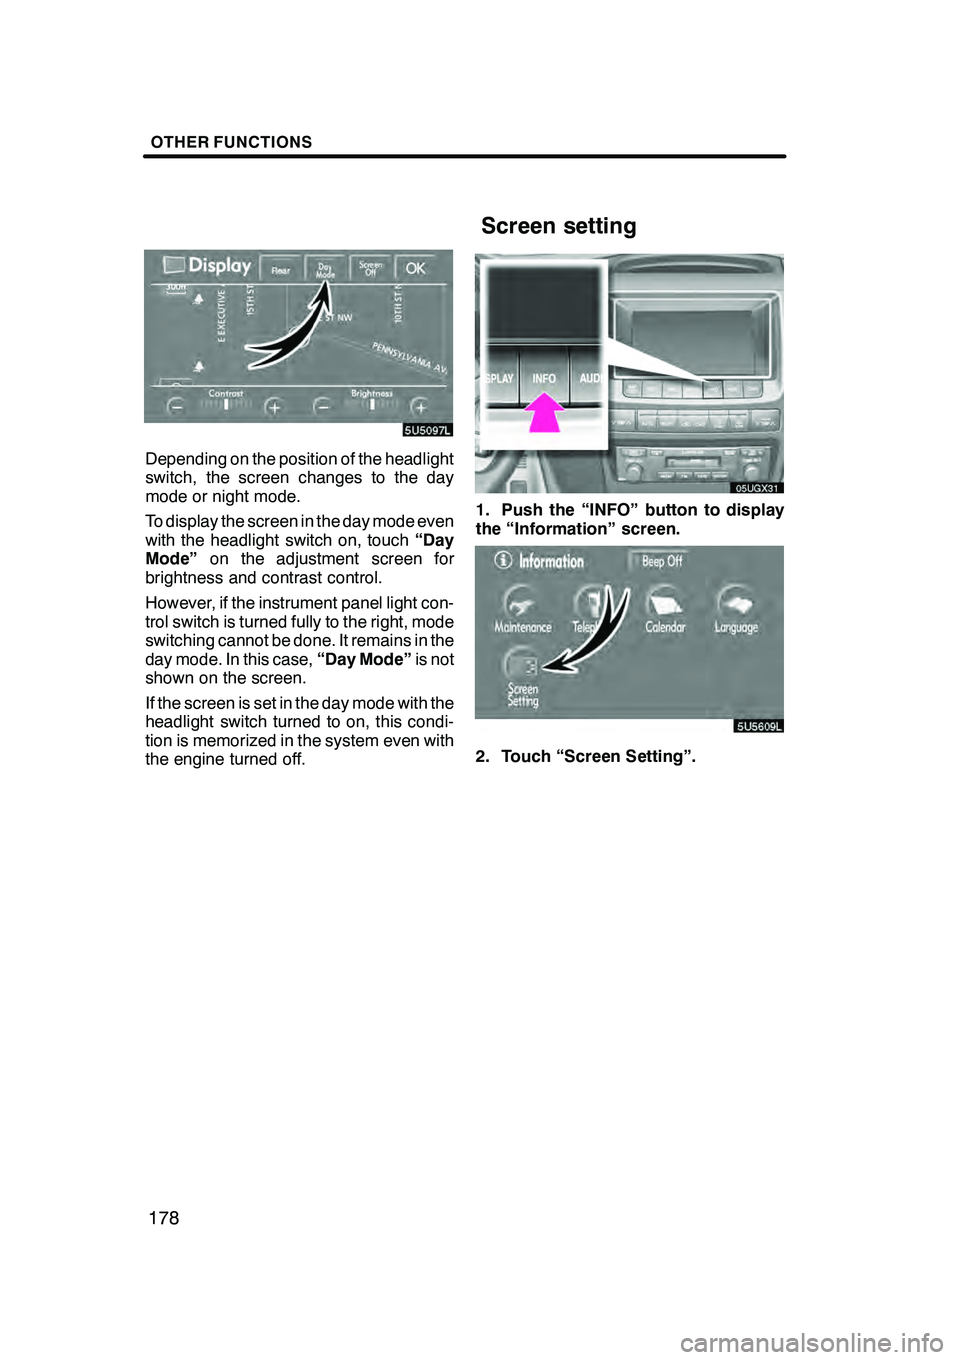
Depending on the position of the headlight
switch, the screen changes to the day
mode or night mode.
To display the screen in the day mode even
with the headlight switch on, touch“Day
Mode” on the adjustment screen for
brightness and contrast control.
However, if the instrument panel light con-
trol switch is turned fully to the right, mode
switching cannot be done. It remains in the
day mode. In this case, “Day Mode”is not
shown on the screen.
If the screen is set in the day mode with the
headlight switch turned to on, this condi-
tion is memorized in the system even with
the engine turned off.
05UGX31
1. Push the “INFO” button to display
the “Information” screen.
5U5609L
2. Touch “Screen Setting”.
GX470_Navi_U (OM60D58U) 07/06/16
Screen setting
Page 186 of 312
AUDIO/VIDEO SYSTEM
185
7“DISC·AUX” button
Push this button to turn the DVD
changer or DVD player on. For de-
tails, see pages 187, 211 and 237.
8“TAPE” button
Push this button to turn the cassette
tape player on. For details, see
pages 187 and 204.
9“FM” button
Push this button to choose an FM sta-
tion. For details, see pages 187 and
192.
10“AM·SAT” button
Push this button to choose either an
AM or SAT station. For details, see
pages 187, 192 and 198.
11“PWR·VOL” knob
Push this knob to turn the audio sys-
tem on and off, and turn it to adjust the
volume. For details, see page 186.
12“SEEK·TRACK” button
Push“”or “”button to seek up
or down for a station, or to access a
desired program, track, file or chap-
ter. For details, see pages 194, 200,
212, 216, 224 and 234.
13button for the cassette tape
Push this button to stop and eject the
cassette tape. For details, see page
204. This section describes some of the basic
features on Lexus audio/video systems.
Some information may not pertain to your
system.
Your audio/video system works when the
engine switch is in the “ACC” or “ON” posi-
tion.
NOTICE
To prevent the battery from being dis-
charged, do not leave the audio/video
system on longer than necessary
when the engine is not running.
GX470_Navi_U (OM60D58U) 07/06/16
Using your audio/video
system —
— Some basics
Page 209 of 312

AUDIO/VIDEO SYSTEM
208
(a) Inserting or ejecting discs
The engine switch must be in the “ACC” or
“ON” position.
Your DVD changer can store up to 6 discs.
DSetting a single disc:
1. Push the “LOAD” button briefly.
The amber indicators at both ends of the
slot start blinking. After the amber indica-
tors change to green and stay on, the DVD
changer door will open.
2. Insert only one disc while the DVD
changer door is open.
You can set a disc at the lowest empty disc
number.
After insertion, the set disc is automatically
loaded.
If the label faces down, the disc cannot be
played. In this case, “DISC×Check” ap-
pears on the screen.
If you do not insert the disc within 15 sec-
onds after pushing the “LOAD”button, the
beep will sound and the operation will be
canceled automatically.
If you need to insert the next disc, repeat
the same procedure to insert another disc.
GX470_Navi_U (OM60D58U) 07/06/16
Page 238 of 312

AUDIO/VIDEO SYSTEM
237
Title:The largest unit of the video and au-
dio programs stored on DVD video discs.
Usually, one piece of movie, one album, or
one audio program is assigned as a title.
Chapter: The unit smaller than that of title.
A title comprises plural chapters.
Manufactured under license from
Dolby Laboratories. “Dolby”, “Pro Log-
ic”, and the double −D symbol are trade-
marks of Dolby Laboratories. Confi-
dential unpublished works.
E 1992 −1997 Dolby Laboratories. All
rights reserved.
This product incorporates copyright
protection technology that is protected
by method claims of certain U.S. pat-
ents and other intellectual property
rights owned by Macrovision Corpora-
tion and other rights owners. Use of
this copyright protection technology
must be authorized by Macrovision
Corporation, and is intended for home
and other limited viewing uses only un-
less otherwise authorized by Macrovi-
sion Corporation. Reverse engineering
or disassembly is prohibited.
“DTS” is a trademark of Digital Theater
Systems, Inc. The DVD player can play DVD video, au-
dio CD, video CD, CD text, dts
−CD or
MP3 disc only when a disc is loaded in
the DVD player. A WMA disc cannot be
played.
Refer to “Rear seat entertainment system”
for details.
For appropriate discs for this player, see
“Audio/video system operating hints” on
page 262.
(a) Inserting the disc
Insert the disc into the slot with the la-
bel side up.
An adapter must be used for 8 cm (3 in.)
discs which are loaded in the same man-
ner as for 12 cm (4.7 in.) discs.
GX470_Navi_U (OM60D58U) 07/06/16
—DVD player operation