lights Lexus GX470 2008 Operating the lights and windshield wipers / LEXUS 2008 GX470 (OM60D82U) User Guide
[x] Cancel search | Manufacturer: LEXUS, Model Year: 2008, Model line: GX470, Model: Lexus GX470 2008Pages: 458, PDF Size: 7.3 MB
Page 92 of 458

92
1-7. Safety information
■System malfunction
*
1: The system judges a person of adult size as an adult. When a smaller adult sits in the front passenger seat, the system may recognize him/
her as a child depending on his/her physique and posture.
*
2: In the event the front passenger does not wear a seat belt.
*3: When a large child who has outgrown a child restraint system sits in the front passenger seat, the sy stem may recognize him/her as an
adult depending on his/her physique and posture.
*
4: Never install a rear-facing child restraint system on the front passen- ger seat. A forward-facing child restraint system should only be
installed on the front passenger seat when it is unavoidable.
( P. 9 8 )
*
5: In case the indicator is not illum inated, consult this manual as for
installing the child restraint system properly. ( P. 9 5 )
Indicator/
warning light “AIR BAG ON” and “AIR BAG OFF”
indicator lights “A I R B A G
OFF”
SRS warning light On
Front passenger’s seat belt reminder light Off
Devices Front passenger airbag
Deactivated
Side airbag in the front passenger seat
Curtain shield airbag
on the front passenger side Activated
Front passenger’s seat belt pretensioner
Page 109 of 458

When driving2
109
2-1. Driving procedures ........ 110Driving the vehicle................... 110
Engine (ignition) switch .......... 118
Automatic transmission ......... 121
Turn signal lever ....................... 124
Parking brake ........................... 125
2-2. Instrument cluster .......... 126 Gauges and meters ................ 126
Indicators and warning lights ......................................... 129
Trip information display ......... 132 2-3. Operating the lights and
windshield wipers ........ 135
Headlight switch ..................... 135
Fog light switch ........................ 137
Windshield wipers and washer ..................................... 138
Rear window wiper and washer ...................................... 141
2-4. Using other driving systems .......................... 142
Cruise control.......................... 142
Four-wheel drive system....... 146
Rear height control air suspension.............................. 149
Electronic modulated suspension.............................. 156
DAC (Downhill Assist Control system) ..................... 157
Driving assist systems ............ 159
2-5. Driving information........ 163 Off-road precautions ............ 163
Cargo and luggage ................ 168
Vehicle load limits .................... 174
Winter driving tips ................... 176
Trailer towing ........................... 180
Dinghy towing .......................... 190
Page 118 of 458

118
2-1. Driving procedures
Engine (ignition) switch
■Turning the key from “ACC” to “LOCK”
■Engine (ignition) switch
“LOCK”:
The steering wheel is locked
and the key can be removed.
“A C C ” :
Some electrical components
such as the audio system can be
used.
“ON”:
All electrical components can
be used.
“START”:
For starting the engine.
■Starting the engine
Check that the parking brake is set.
Turn off unnecessary lights and accessories.
Check that the shift lever is set in “P”.
Sit in the driver’s seat and firmly depress the brake pedal.
Turn the engine switch to the “START” position to start the
engine.
STEP1
STEP2
STEP3
STEP4
STEP5
Shift the shift lever to “P”.
Push in the key and turn to the
“LOCK” position.STEP1
STEP2
Page 124 of 458

124
2-1. Driving procedures
Turn signal lever
■Turn signals can be operated when
The engine switch is in the “ON” position.
■If the indicators flash faster than usual
Check that a light bulb in the front or rear turn signal lights has not burned out.
Left turn
Right turn
Move and hold the lever part-
way to signal a lane change
The left hand signal will flash
until you release the lever.
Move and hold the lever part-
way to signal a lane change
The right hand signal will flash
until you release the lever.
Page 127 of 458

127
2-2. Instrument cluster
2
When drivingInstrument panel light controlThe brightness of the instrument panel lights can be adjusted. Brighter
Darker
Odometer
Displays the total distance the vehicle has been driven.
Trip meter
Displays the distance the vehicle has been driven since the meter was last
reset. Trip meters A and B can be used to record and display different dis-
tances independently.
Page 129 of 458

129
2-2. Instrument cluster
2
When driving
Indicators and warning lights
The indicator and warning lights on the instrument cluster and center
panel inform the driver of the status of the vehicle’s various systems.
Instrument cluster
The units used on the speedometer and some indicators may differ depend-
ing on the target region.
Center panel
Page 131 of 458

131
2-2. Instrument cluster
2
When driving
CAUTION
■If a safety system warning light does not come on
Should a safety system light such as ABS and the SRS airbag warning light not
come on when you turn the engine switch to the “ON” position, this could mean
that these systems are not available to help protect you in an accident, which could
result in death or serious injury. Have the vehicle inspected by your Lexus dealer
immediately if this occurs.
■ Warning lights
Warning lights inform the driver of malfunctions in the indicated
vehicle’s systems. ( P. 381)
*: These lights turn on when the engine switch is turned to the “ON” posi-
tion to indicate that a system check is being performed. They will turn off
after the engine is running, or afte r a few seconds. There may be a mal-
function in a system if the lights do not come on, or turn off. Have the
vehicle inspected by your Lexus dealer.
(U.S.A.)(Canada)(U.S.A.)(Canada)
(if equipped)(U.S.A.)(Canada)
*******
*****
**
Page 133 of 458

133
2-2. Instrument cluster
2
When driving
Display light controlPush and hold the “MODE ” button until “ILL” appears on the display.
Push “ ▲” or “▼ ” to adjust the brightness.
You can adjust the brightness to 3 levels (when the tail lights are off) or 6 lev-
els (when the tail lights are on).
Trip information
■ Driving range
■ Average fuel consumption after refueling
■ Current fuel consumption
■ Average vehicle speed Displays the estimated maximum distance that can
be driven with the quantity of fuel remaining.
This distance is computed based on your average fuel
consumption. As a result, the actual distance that can be
driven may differ from that displayed.
When only a small amount of fuel is added to the tank,
the display may not be updated.
Displays the average fuel
consumption since the
vehicle was last refueled.
Displays the current rate of fuel consumption.
Displays the average vehicle speed since the engine
was started or the function was reset.
The function can be reset by pushing the “RESET” but-
ton for longer than 1 second when the average vehicle
speed is displayed.
Page 135 of 458

135
2
When driving
2-3. Operating the lights and windshield wipers
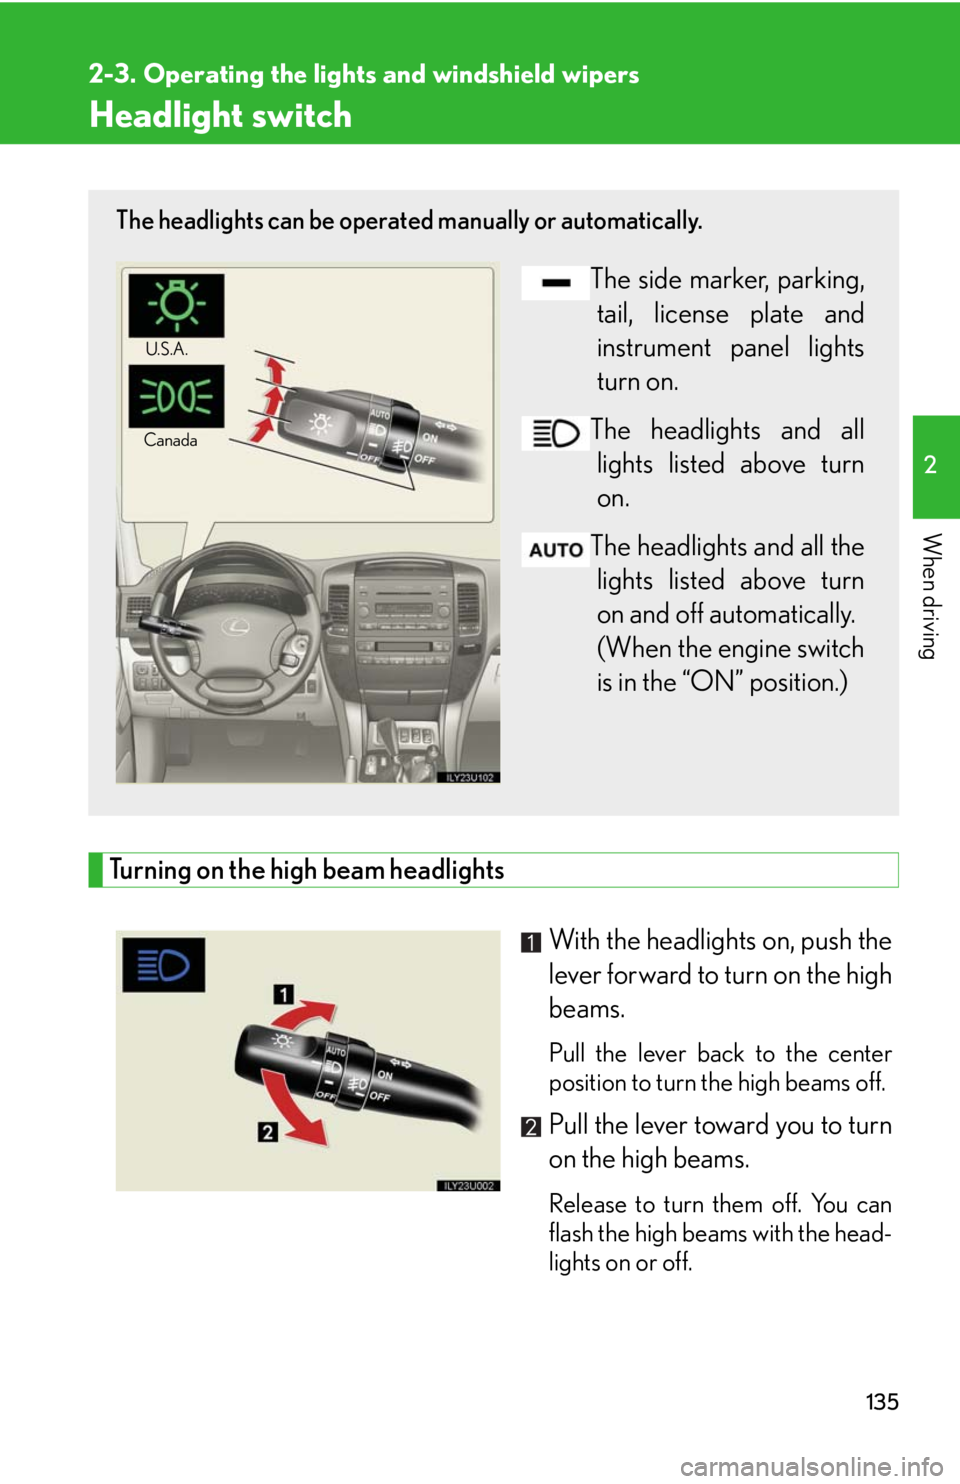
Headlight switch
Turning on the high beam headlightsWith the headlights on, push the
lever forward to turn on the high
beams.
Pull the lever back to the center
position to turn the high beams off.
Pull the lever toward you to turn
on the high beams.
Release to turn them off. You can
flash the high beams with the head-
lights on or off.
The headlights can be operated manually or automatically.
The side marker, parking,
tail, license plate and
instrument panel lights
turn on.
The headlights and all lights listed above turn
on.
The headlights and all the lights listed above turn
on and off automatically.
(When the engine switch
is in the “ON” position.)
U.S.A.
Canada
Page 136 of 458

136
2-3. Operating the lights and windshield wipers
■Daytime running light system
To make your vehicle more visible to other drivers, the front turn signal lights turn on
automatically whenever the engine is started and the parking brake is released.
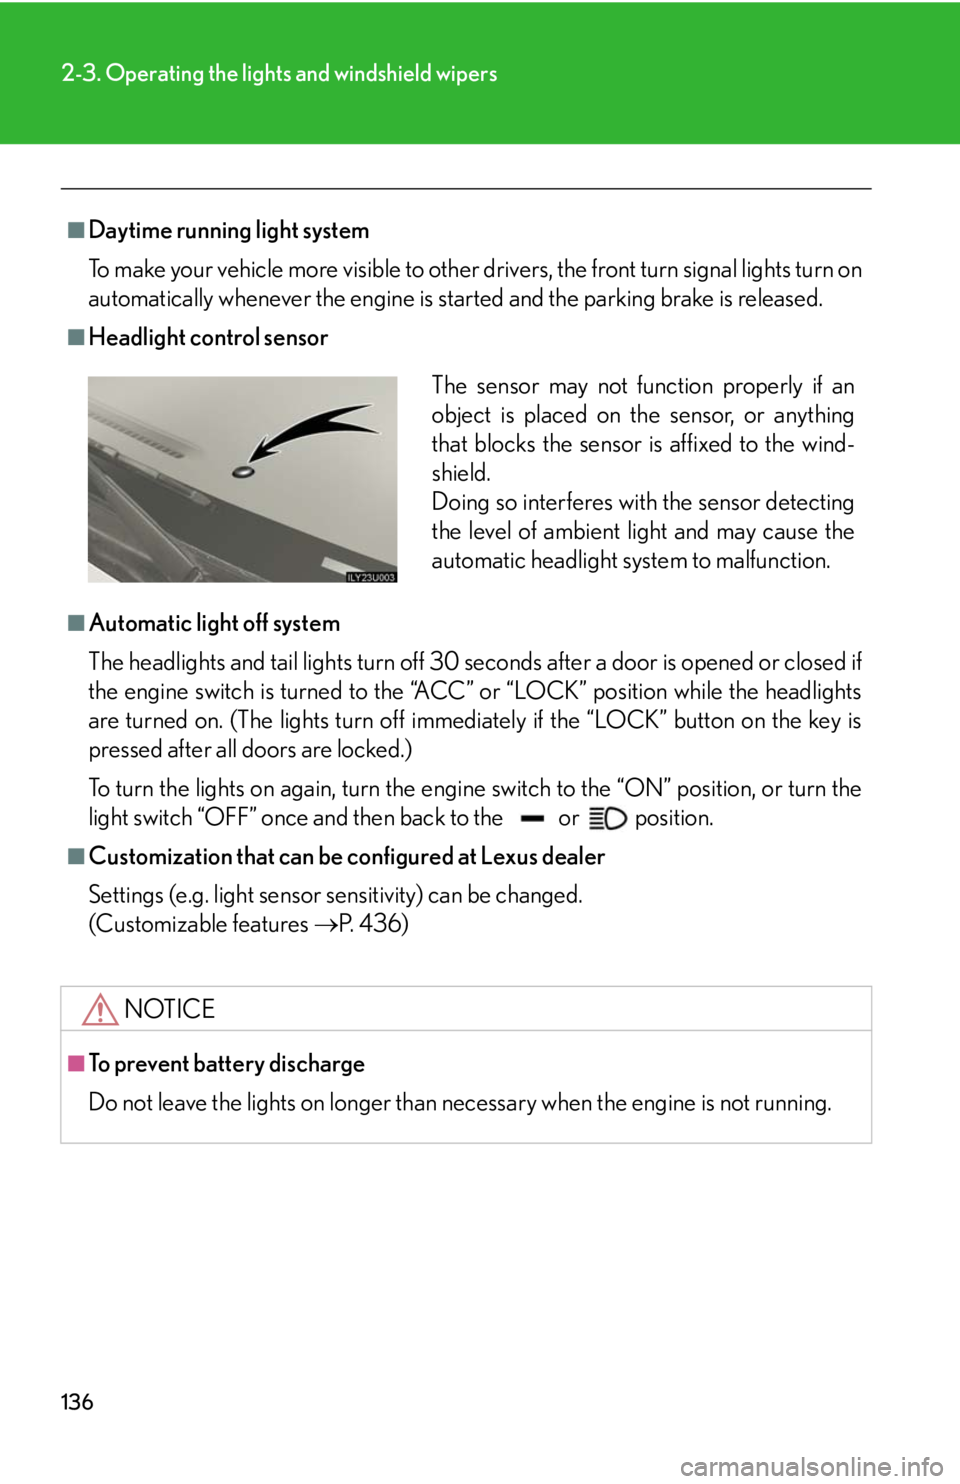
■Headlight control sensor
■Automatic light off system
The headlights and tail lights turn off 30 seconds after a door is opened or closed if
the engine switch is turned to the “ACC” or “LOCK” position while the headlights
are turned on. (The lights turn off immedi ately if the “LOCK” button on the key is
pressed after all doors are locked.)
To turn the lights on again, turn the engine switch to the “ON” position, or turn the
light switch “OFF” once and th en back to the or position.
■Customization that can be configured at Lexus dealer
Settings (e.g. light sensor sensitivity) can be changed.
(Customizable features P. 4 3 6 )
NOTICE
■To prevent battery discharge
Do not leave the lights on longer than necessary when the engine is not running.
The sensor may not function properly if an
object is placed on the sensor, or anything
that blocks the sensor is affixed to the wind-
shield.
Doing so interferes with the sensor detecting
the level of ambient light and may cause the
automatic headlight system to malfunction.