light Lexus HS250h 2011 Do-it-yourself maintenance / LEXUS 2011 HS250H OWNERS MANUAL (OM75037U)
[x] Cancel search | Manufacturer: LEXUS, Model Year: 2011, Model line: HS250h, Model: Lexus HS250h 2011Pages: 628, PDF Size: 10.69 MB
Page 366 of 628

366
3-5. Using the interior lights
■Illuminated entry system
The lights automatically turn on/off according to “POWER” switch mode, the pres-
ence of the electronic key, whether the doors are locked/unlocked, and whether
the doors are opened/closed.
■To prevent 12-volt battery discharge
If the interior lights remain on when the door is not fully closed and the interior light
switch (door position on/ off) is on, the li ghts will go off automatically after 20 min-
utes.
■Customization
Settings (e.g. the time elapsed before the lights turn off) can be changed. (Custom-
izable features P. 5 8 0 )
Pe r s o n a l l i g h t s
Page 367 of 628
367
3
Interior features
3-6. Using the storage features
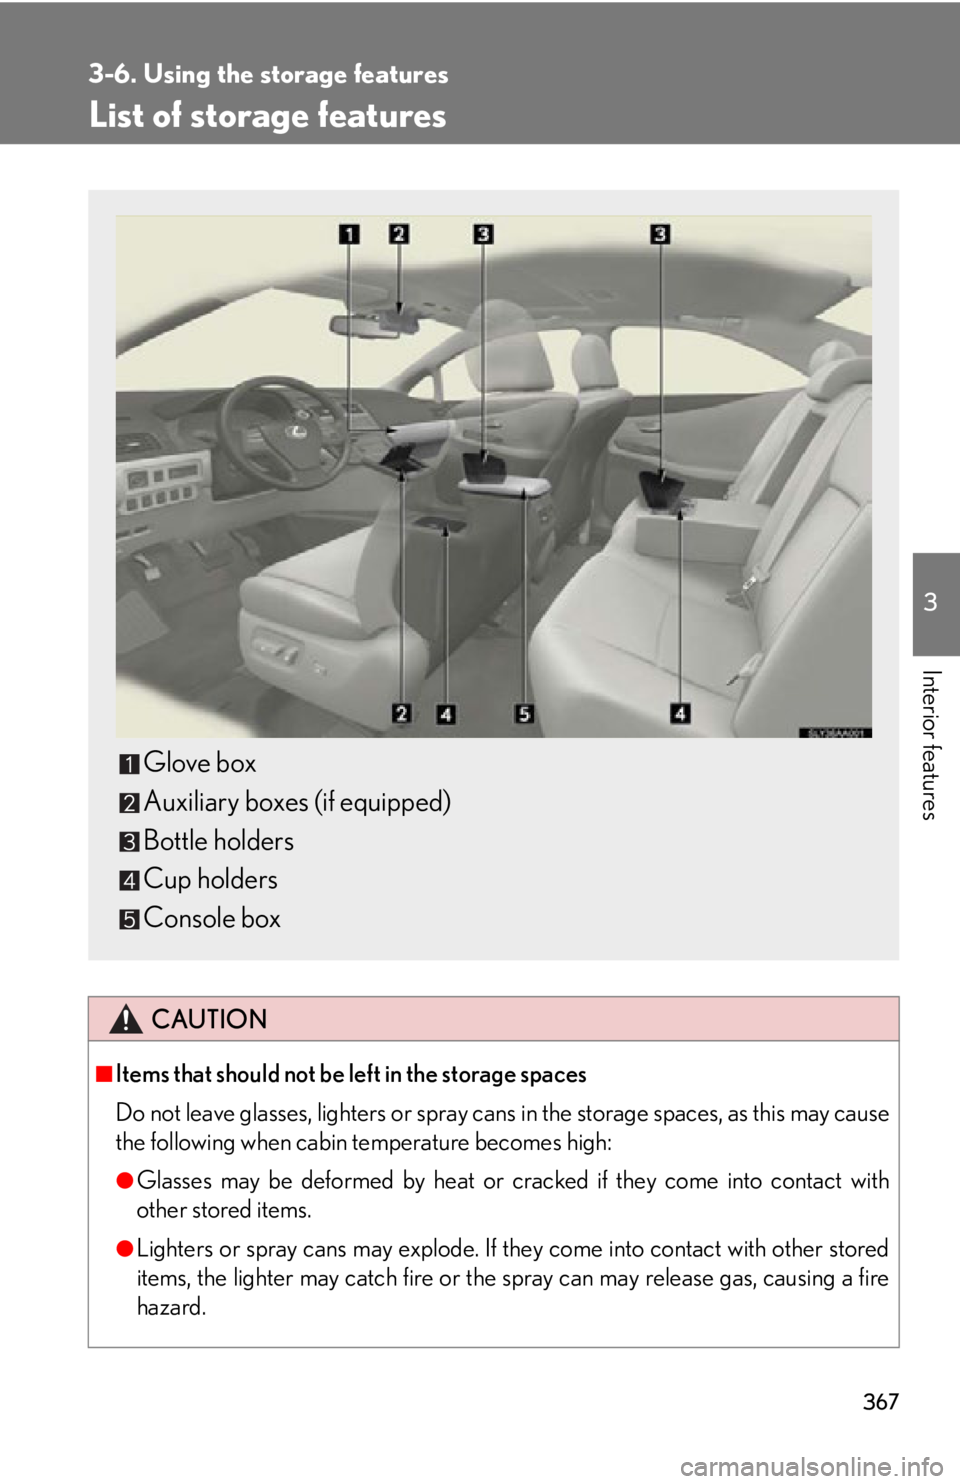
List of storage features
CAUTION
■Items that should not be left in the storage spaces
Do not leave glasses, lighters or spray cans in the storage spaces, as this may cause
the following when cabin temperature becomes high:
●Glasses may be deformed by heat or cracked if they come into contact with
other stored items.
●Lighters or spray cans may explode. If they come into contact with other stored
items, the lighter may catch fire or the spray can may release gas, causing a fire
hazard.
Glove box
Auxiliary boxes (if equipped)
Bottle holders
Cup holders
Console box
Page 376 of 628
376
3-7. Other interior features
Vanity mirrors
NOTICE
■To prevent 12-volt battery discharge
Do not leave the vanity lights on for extended periods while the hybrid system is off.
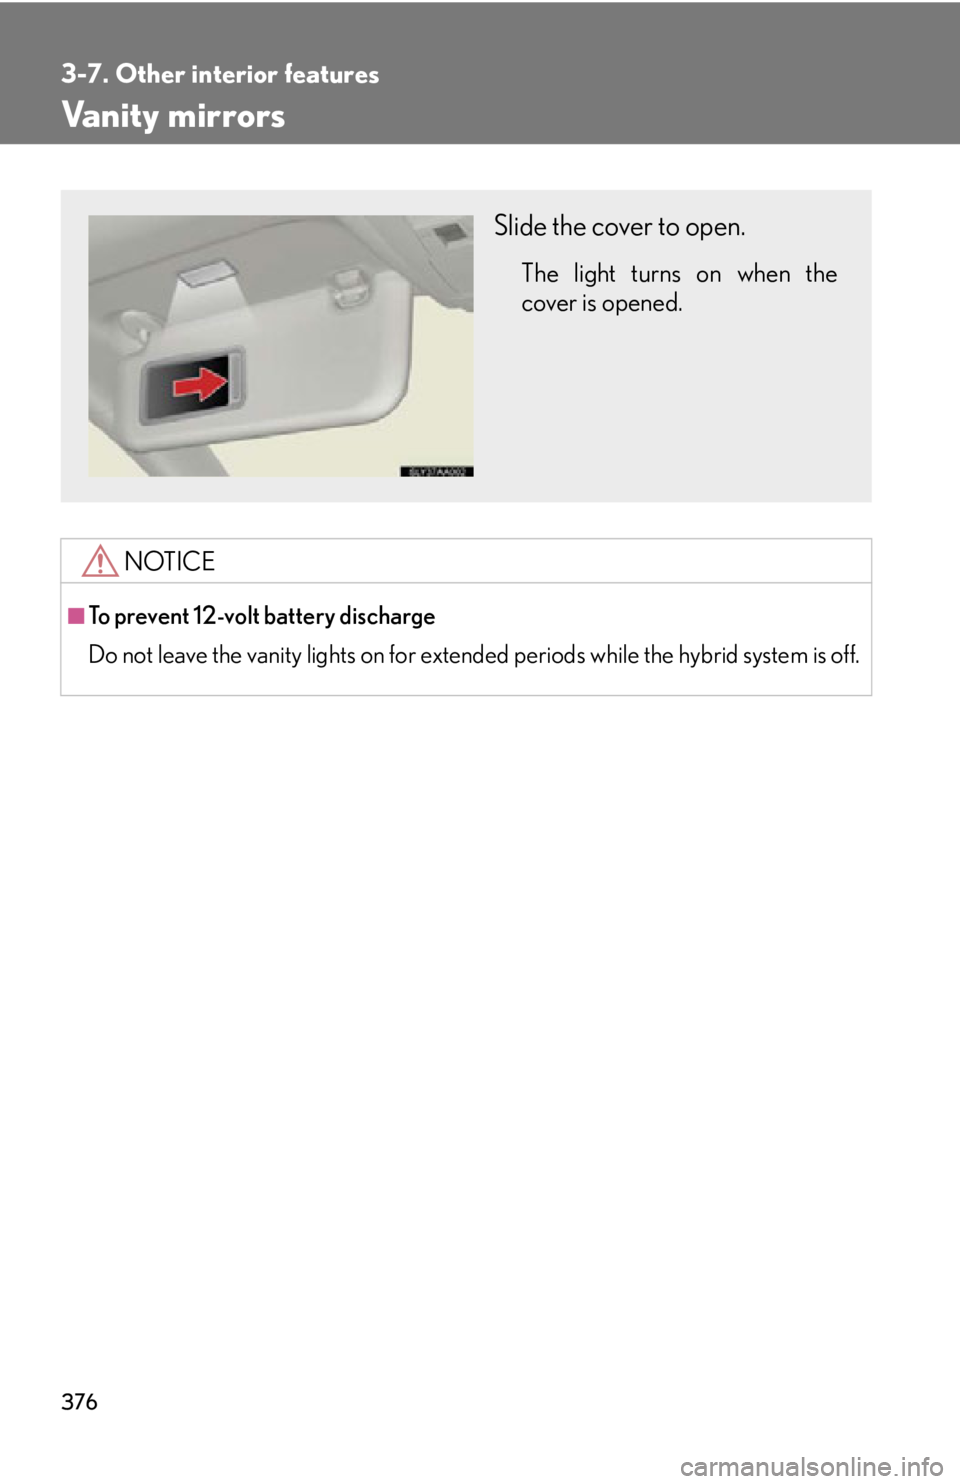
Slide the cover to open.
The light turns on when the
cover is opened.
Page 379 of 628
379
3-7. Other interior features
3
Interior features
Seat heaters and ventilators
: If equipped
■The seat heaters/ventilators can be used when
The “POWER” switch is in ON mode.
■When not in use
Set the knob at “0”. The indicator light turns off.
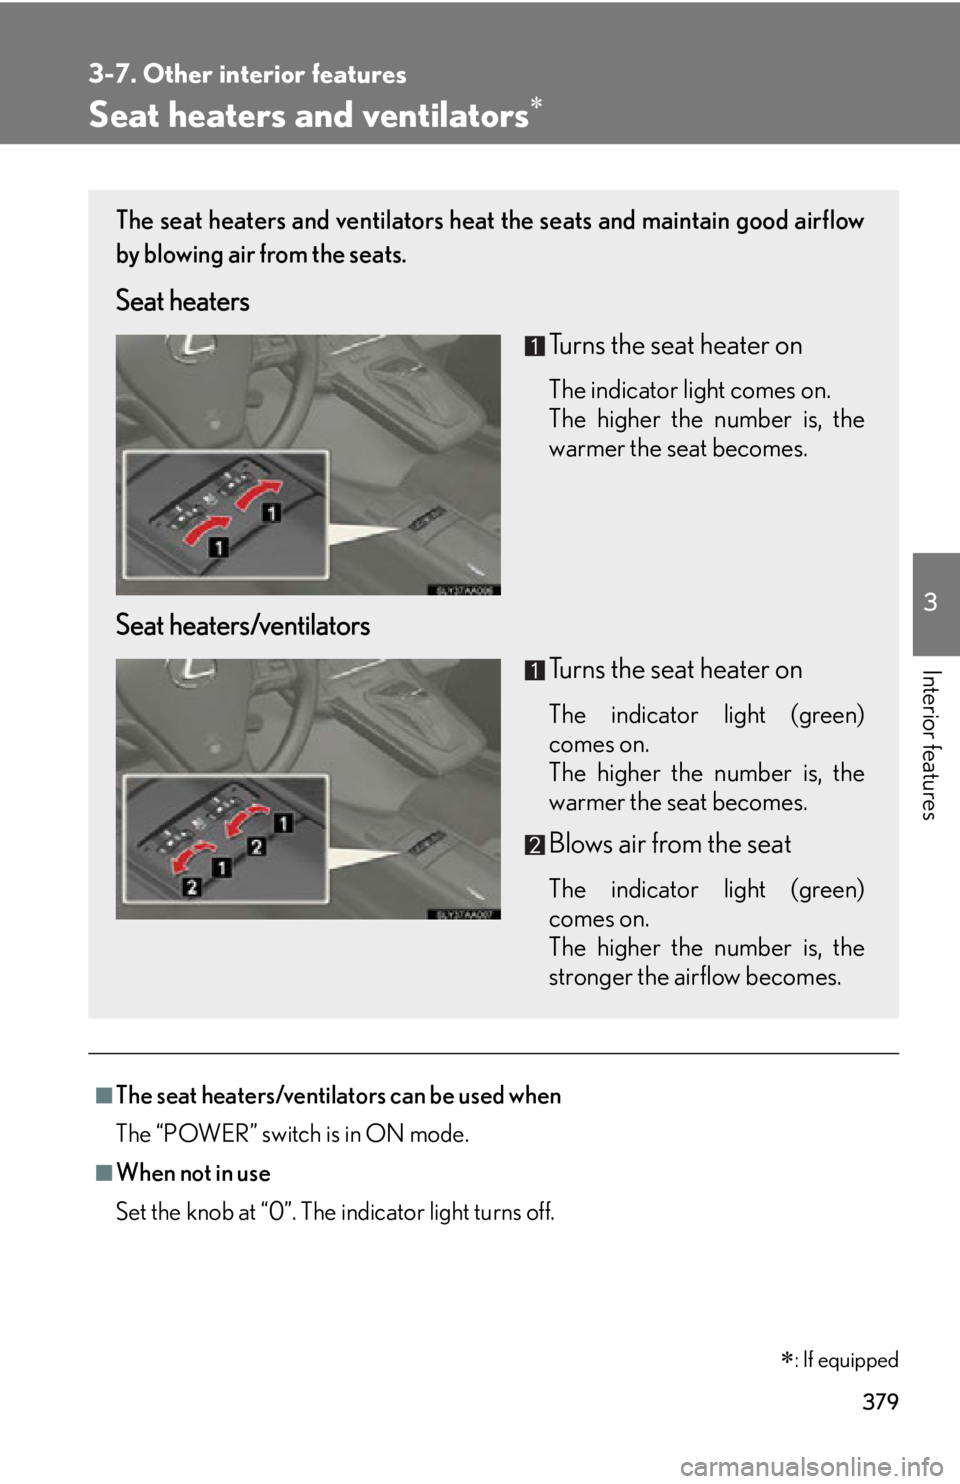
The seat heaters and ventilators heat the seats and maintain good airflow
by blowing air from the seats.
Seat heaters
Turns the seat heater on
The indicator light comes on.
The higher the number is, the
warmer the seat becomes.
Seat heaters/ventilatorsTurns the seat heater on
The indicator light (green)
comes on.
The higher the number is, the
warmer the seat becomes.
Blows air from the seat
The indicator light (green)
comes on.
The higher the number is, the
stronger the airflow becomes.
Page 388 of 628
388
3-7. Other interior features
Garage door opener
The garage door opener (HomeLink® Universal Transceiver) is manufactured
under license from HomeLink®.
Programming the HomeLink® (for U.S.A. owners)
The HomeLink
® compatible transceiver in your vehicle has 3 buttons
which can be programmed to operate 3 different devices. Refer to the
programming method below appropriate for the device.
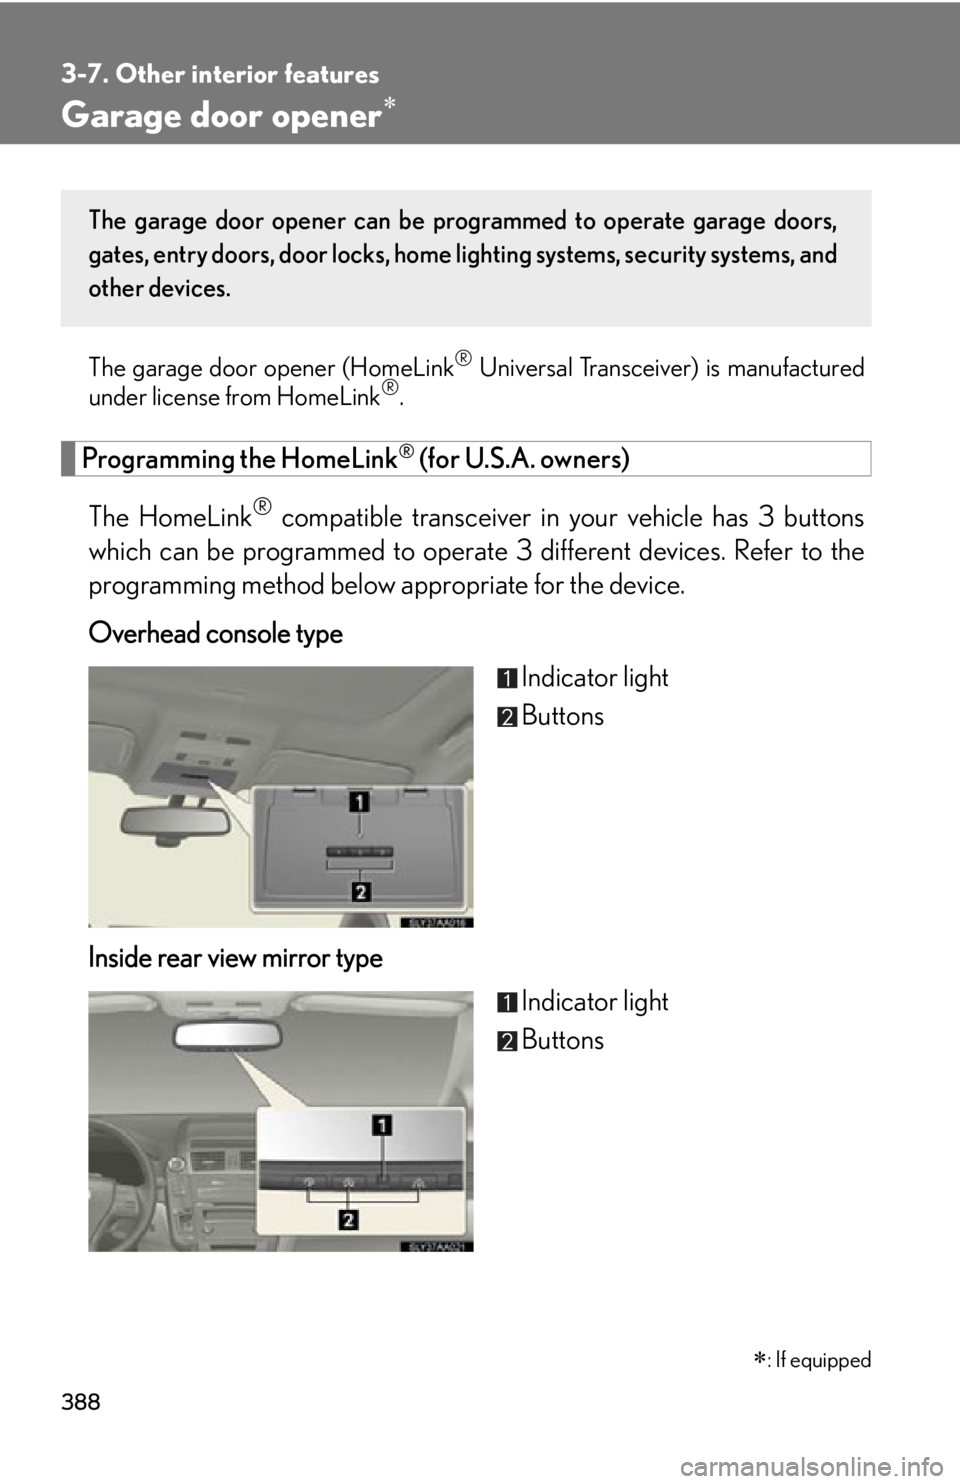
Overhead console type
Indicator light
Buttons
Inside rear view mirror type Indicator light
Buttons
: If equipped
The garage door opener can be pr ogrammed to operate garage doors,
gates, entry doors, door locks, home lighting systems, security systems, and
other devices.
Page 389 of 628
389
3-7. Other interior features
3
Interior features
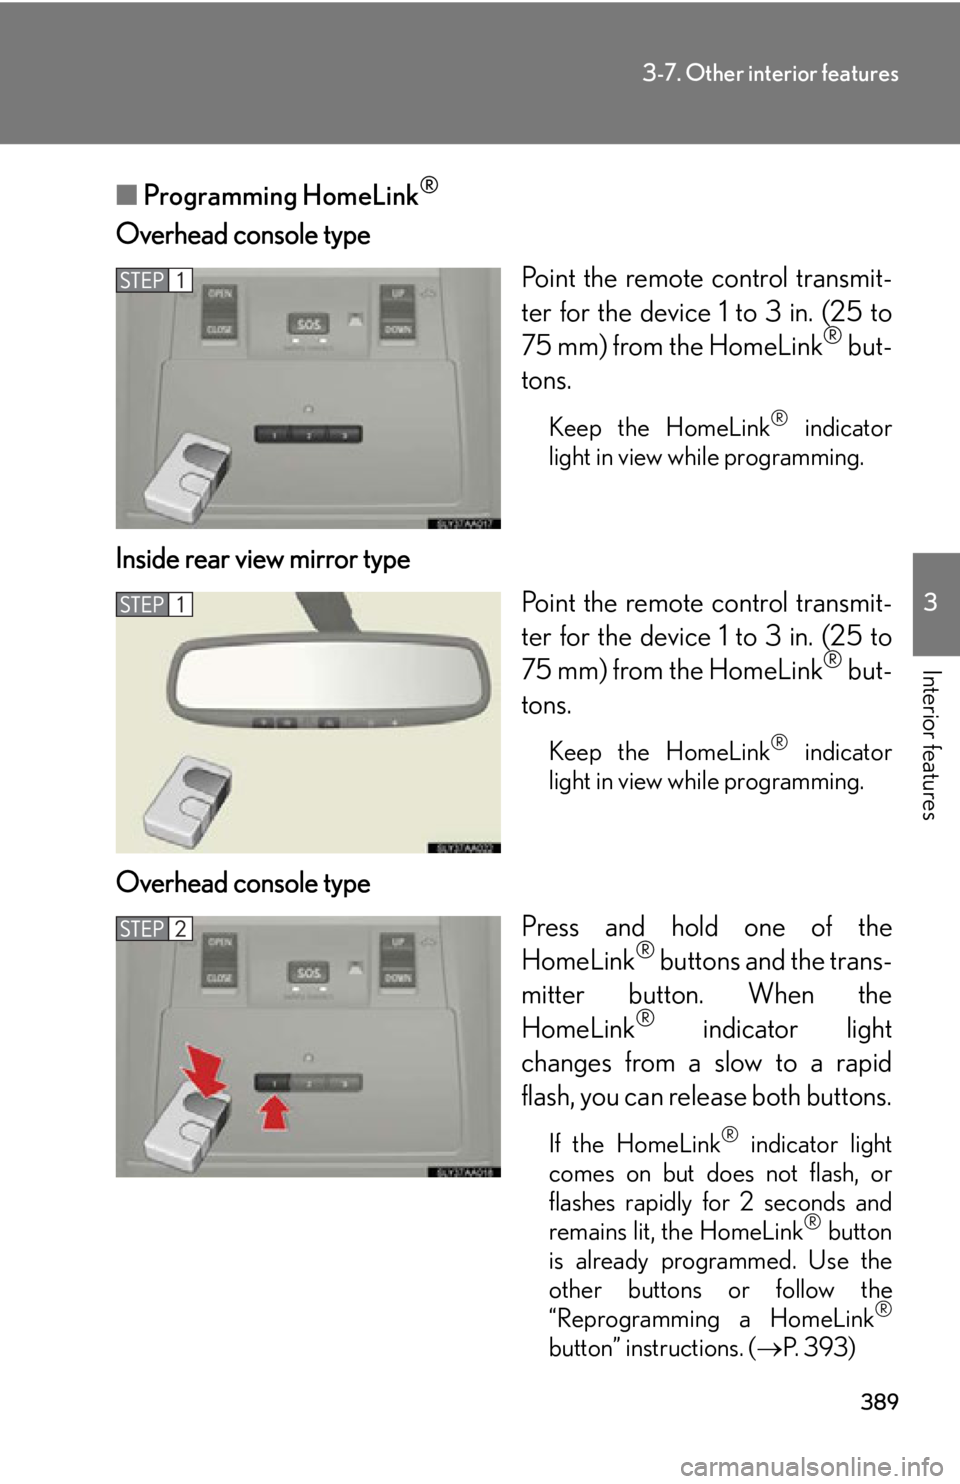
■Programming HomeLink®
Overhead console type
Point the remote control transmit-
ter for the device 1 to 3 in. (25 to
75 mm) from the HomeLink
® but-
tons.
Keep the HomeLink® indicator
light in view while programming.
Inside rear view mirror type
Point the remote control transmit-
ter for the device 1 to 3 in. (25 to
75 mm) from the HomeLink
® but-
tons.
Keep the HomeLink® indicator
light in view while programming.
Overhead console type
Press and hold one of the
HomeLink
® buttons and the trans-
mitter button. When the
HomeLink
® indicator light
changes from a slow to a rapid
flash, you can release both buttons.
If the HomeLink® indicator light
comes on but does not flash, or
flashes rapidly for 2 seconds and
remains lit, the HomeLink
® button
is already programmed. Use the
other buttons or follow the
“Reprogramming a HomeLink
®
button” instructions. ( P. 393)
Page 390 of 628
390
3-7. Other interior features
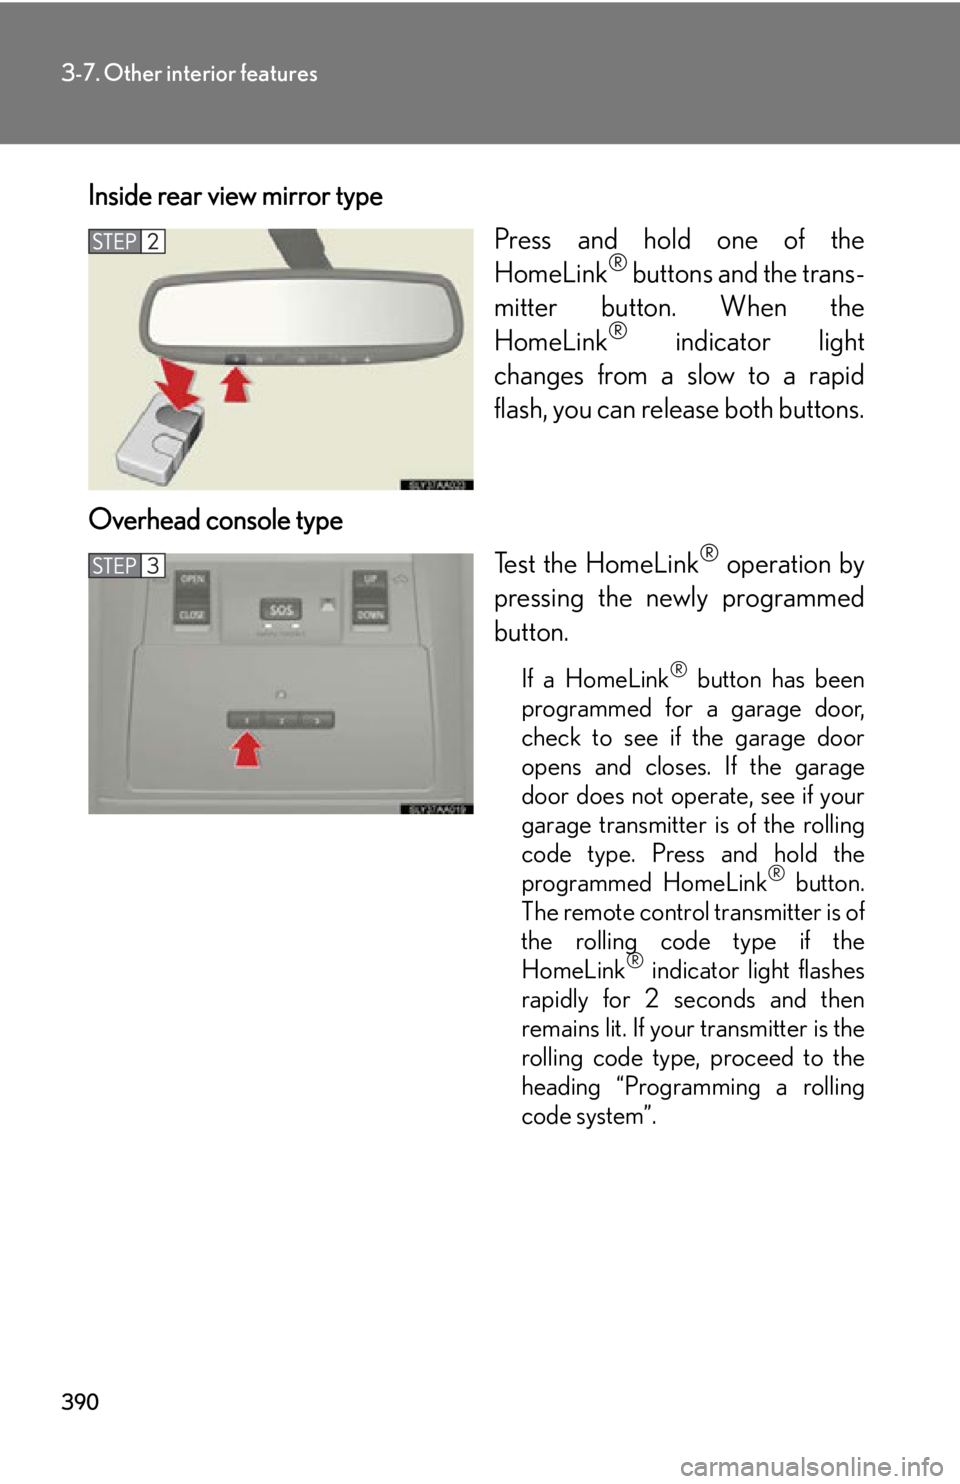
Inside rear view mirror typePress and hold one of the
HomeLink
® buttons and the trans-
mitter button. When the
HomeLink
® indicator light
changes from a slow to a rapid
flash, you can release both buttons.
Overhead console type Test the HomeLink
® operation by
pressing the newly programmed
button.
If a HomeLink® button has been
programmed for a garage door,
check to see if the garage door
opens and closes. If the garage
door does not operate, see if your
garage transmitter is of the rolling
code type. Press and hold the
programmed HomeLink
® button.
The remote control transmitter is of
the rolling code type if the
HomeLink
® indicator light flashes
rapidly for 2 seconds and then
remains lit. If your transmitter is the
rolling code type, proceed to the
heading “Programming a rolling
code system”.
Page 391 of 628
391
3-7. Other interior features
3
Interior features
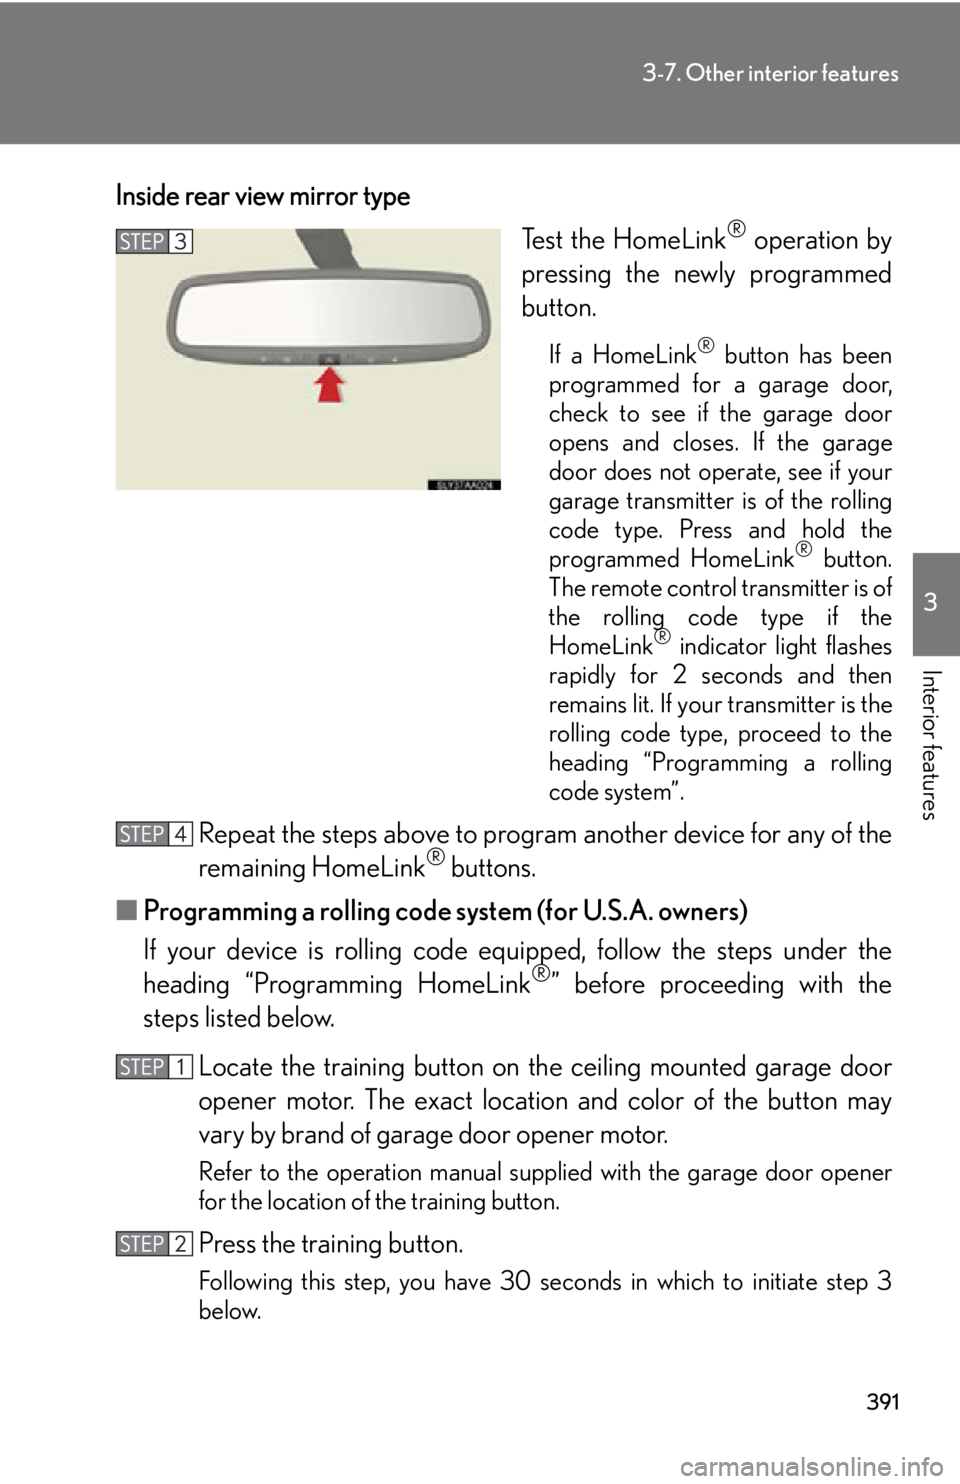
Inside rear view mirror typeTest the HomeLink
® operation by
pressing the newly programmed
button.
If a HomeLink® button has been
programmed for a garage door,
check to see if the garage door
opens and closes. If the garage
door does not operate, see if your
garage transmitter is of the rolling
code type. Press and hold the
programmed HomeLink
® button.
The remote control transmitter is of
the rolling code type if the
HomeLink
® indicator light flashes
rapidly for 2 seconds and then
remains lit. If your transmitter is the
rolling code type, proceed to the
heading “Programming a rolling
code system”.
Repeat the steps above to progra m another device for any of the
remaining HomeLink® buttons.
■ Programming a rolling code system (for U.S.A. owners)
If your device is rolling code eq uipped, follow the steps under the
heading “Programming HomeLink
®” before proceeding with the
steps listed below.
Locate the training button on th e ceiling mounted garage door
opener motor. The exact location and color of the button may
vary by brand of garage door opener motor.
Refer to the operation manual supplied with the garage door opener
for the location of the training button.
Press the training button.
Following this step, you have 30 se conds in which to initiate step 3
below.
Page 392 of 628
392
3-7. Other interior features
Press and hold the vehicle’s programmed HomeLink® button for
2 seconds and release it. Repeat this step once again. The garage
door may open.
If the garage door opens, the programming process is complete. If the
door does not open, press and release the button a third time. This third
press and release will complete the programming process by opening
the garage door.
The ceiling mounted garage door op ener motor should now recognize
the HomeLink
® signal and operate the garage door.
Repeat the steps above to prog ram another rolling code system
for any of the remaining HomeLink® buttons.
■ Programming an entry gate (for U.S. owners)/Programming a
devices in the Canadian market
Place the remote control transmitter 1 to 3 in. (25 to 75 mm)
away from the HomeLink
® buttons.
Keep the HomeLink® indicator light in view while programming.
Press and hold the selected HomeLink® button.
Repeatedly press and release (cycle) the remote control trans-
mitter for 2 seconds each until step 4 is completed.
When the HomeLink
® indicator light star ts to flash rapidly,
release the buttons.
Test the HomeLink
® operation by pressing the newly pro-
grammed button. Check to see if the gate/device operates cor-
rectly.
Repeat the steps above to progra m another device for any of the
remaining HomeLink
® buttons.
■ Programming other devices
To program other devices such as home security systems, home door
locks and lighting, contact your Lexus dealer for assistance.
■ Reprogramming a button
The individual HomeLink
® buttons cannot be erased but can be
reprogrammed. To reprogram a button, follow the “Reprogramming a
HomeLink
® button” instructions.
Page 393 of 628
393
3-7. Other interior features
3
Interior features
Operating HomeLink®
Press the appropriate HomeLink® button. The HomeLink® indicator
light should come on.
The HomeLink® compatible transceiver in your vehicle continues to send a
signal for up to 20 seconds as long as the button is pressed.
Reprogramming a HomeLink® button
Press and hold the desired HomeLink
® button. After 20 seconds, the
HomeLink® indicator light will start flashing slowly. Next, while still press-
ing and holding the HomeLink® button, press and hold the button on the
transmitter until the HomeLink® indicator light changes from a slow to a
rapid flash.
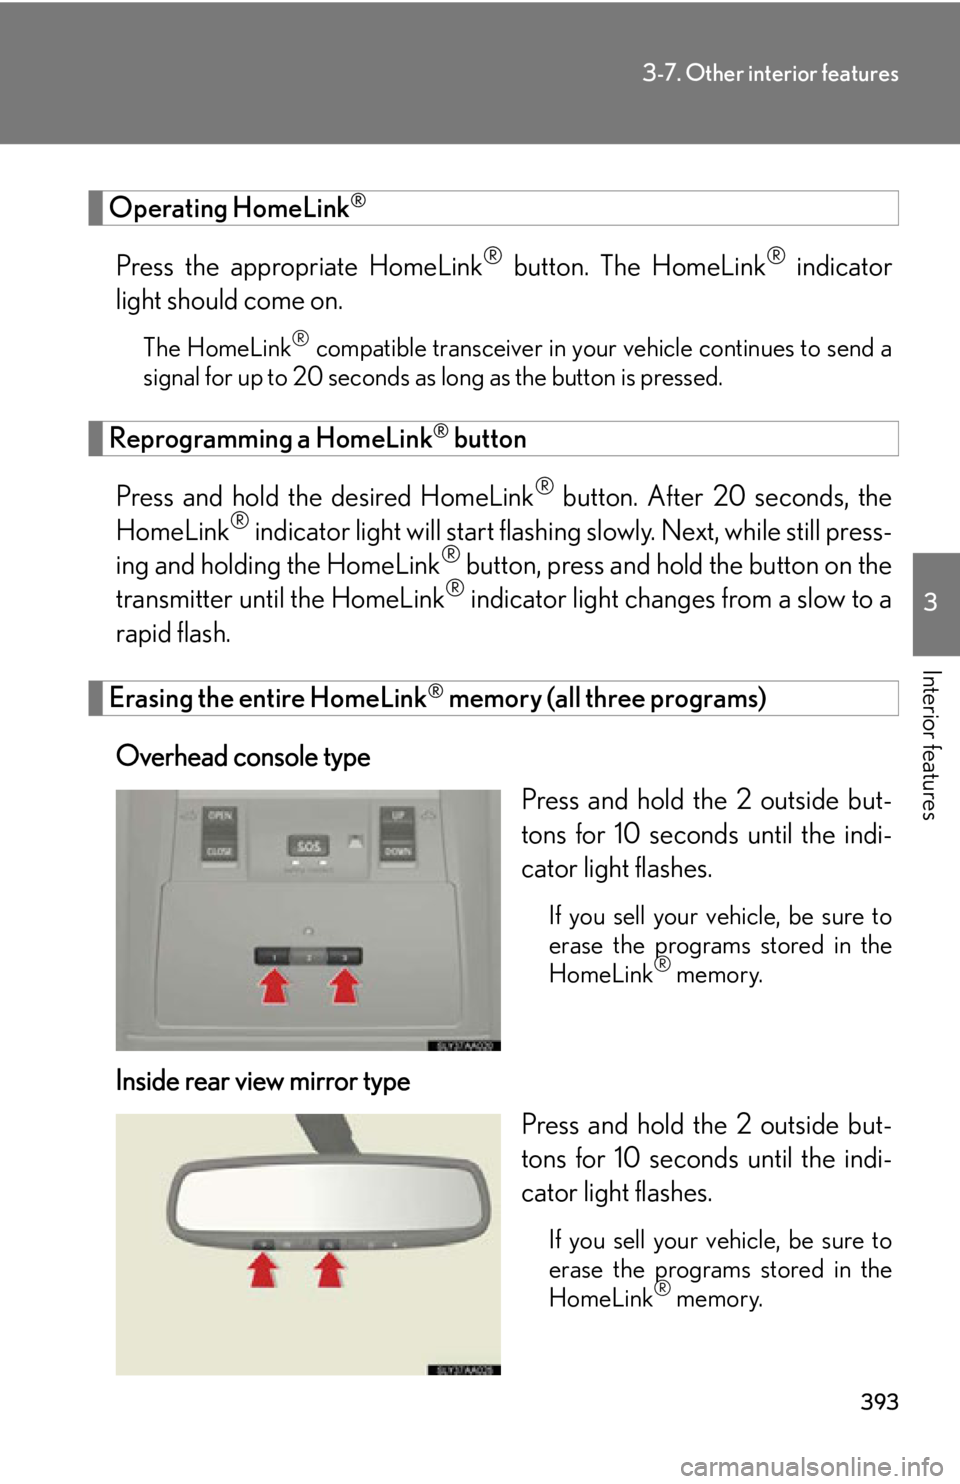
Erasing the entire HomeLink® memory (all three programs)
Overhead console type Press and hold the 2 outside but-
tons for 10 seconds until the indi-
cator light flashes.
If you sell your vehicle, be sure to
erase the programs stored in the
HomeLink
® memory.
Inside rear view mirror typePress and hold the 2 outside but-
tons for 10 seconds until the indi-
cator light flashes.
If you sell your vehicle, be sure to
erase the programs stored in the
HomeLink
® memory.