Lexus HS250h 2011 Hybrid system / LEXUS 2011 HS250H OWNERS MANUAL (OM75037U)
Manufacturer: LEXUS, Model Year: 2011, Model line: HS250h, Model: Lexus HS250h 2011Pages: 628, PDF Size: 10.69 MB
Page 251 of 628
251
2-5. Driving information
2
When driving
CAUTION
■Driving with snow tires
Observe the following precautions to reduce the risk of accidents.
Failure to do so may result in a loss of vehicle control and cause death or serious
injury.
●Use tires of the size specified.
●Maintain the recommended level of air pressure.
●Do not drive in excess of 75 mph (120 km/h), regardless of the type of snow tires
being used.
●Use snow tires on all, not just some wheels.
■Driving with tire chains
Observe the following precautions to reduce the risk of accidents.
Failure to do so may result in the vehicle being unable to be driven safely, and may
cause death or serious injury.
●Do not drive in excess of the speed limit specified for the tire chains being used,
or 30 mph (50 km/h), whichever is lower.
●Avoid driving on bumpy road surfaces or over potholes.
●Avoid sudden turns and braking, as use of chains may adversely affect vehicle
handling.
●Slow down sufficiently before entering a curve to ensure that vehicle control is
maintained.
NOTICE
■Repairing or replacing snow tires
Request repairs or replacement of snow ti res from Lexus dealers or legitimate tire
retailers.
This is because the removal and attachment of snow tires affects the operation of
the tire pressure warning valves and transmitters.
■Fitting tire chains
The tire pressure warning valves and transmitters may not function correctly when
tire chains are fitted.
Page 252 of 628
252
2-5. Driving information
Trailer towing
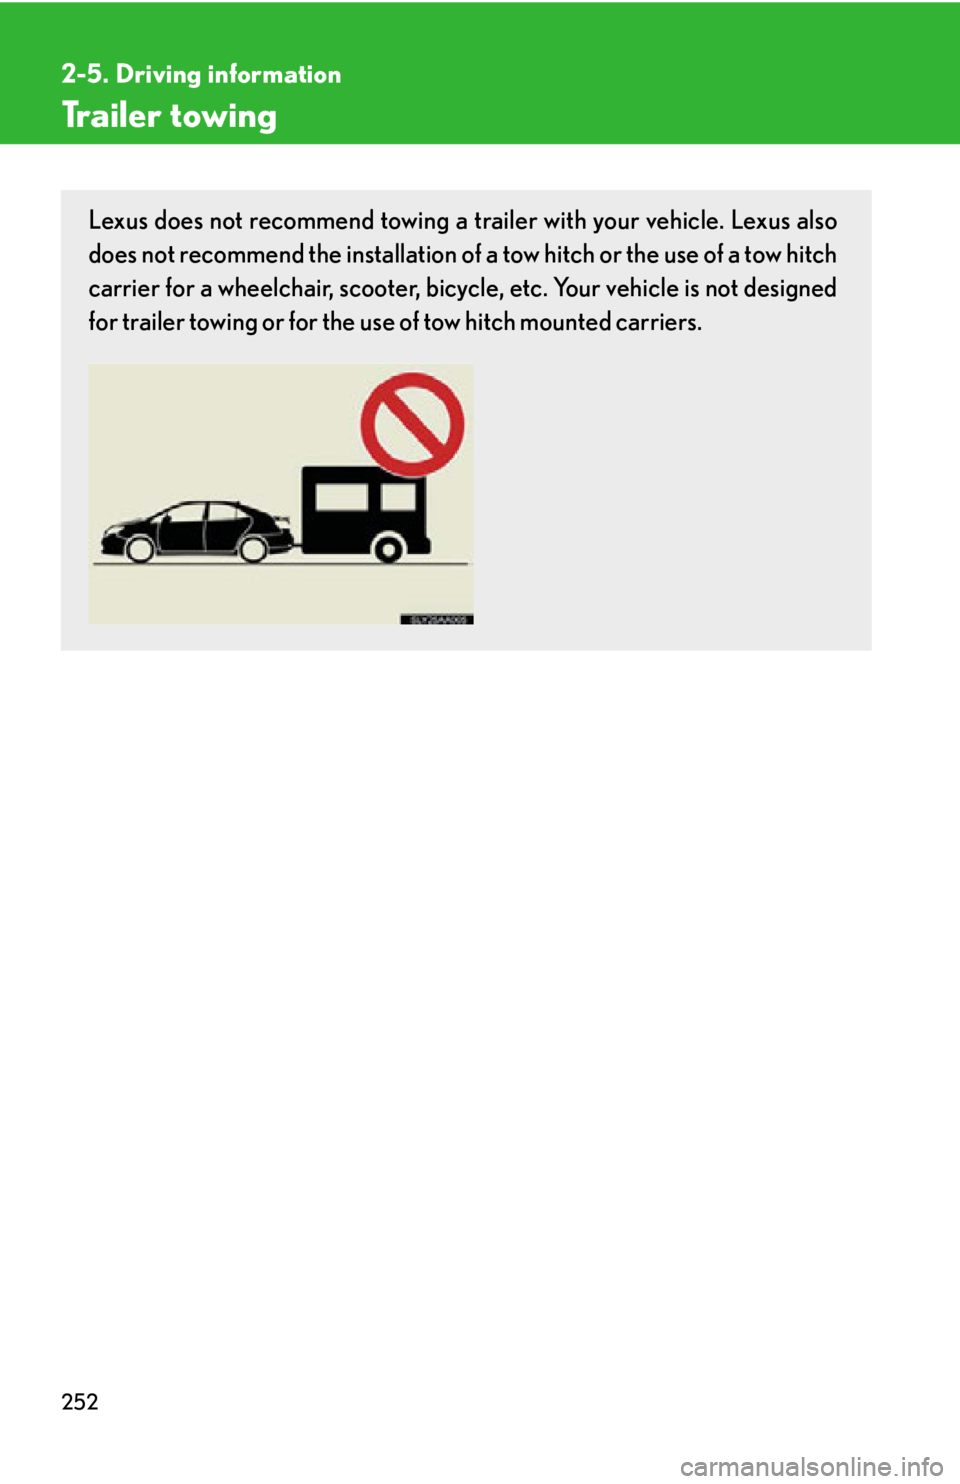
Lexus does not recommend towing a trailer with your vehicle. Lexus also
does not recommend the installation of a tow hitch or the use of a tow hitch
carrier for a wheelchair, scooter, bicycl e, etc. Your vehicle is not designed
for trailer towing or for the us e of tow hitch mounted carriers.
Page 253 of 628
253
2-5. Driving information
2
When driving
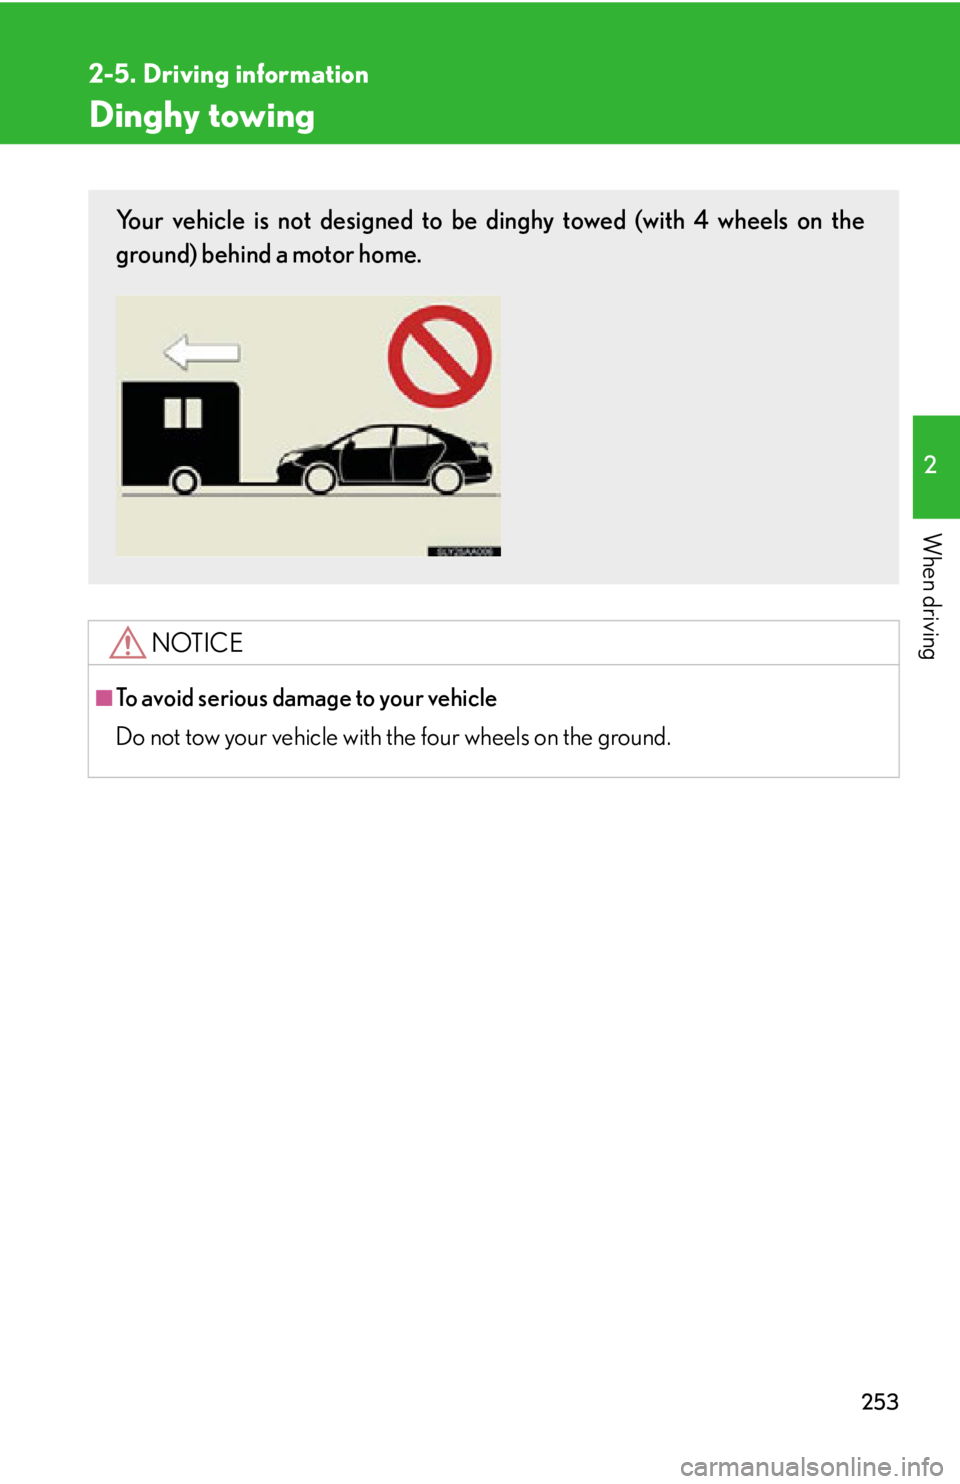
Dinghy towing
NOTICE
■To avoid serious damage to your vehicle
Do not tow your vehicle with the four wheels on the ground.
Your vehicle is not designed to be dinghy towed (with 4 wheels on the
ground) behind a motor home.
Page 254 of 628
254
3-1. Using the air conditioning system and defogger
Automatic air conditioning
system..................................... 256
Rear window defogger switch ...................................... 264
Windshield wiper de-icer .... 265
3-2. Using the audio system Audio system........................... 266
Using the radio ....................... 269
Using the CD player .............. 277
Playing MP3 and WMA discs......................................... 285
Operating an iPod ................. 292
Operating a USB memory.................................. 300
Optimal use of the audio
system..................................... 308
Using the AUX port ................ 311
Using the steering wheel
audio switches....................... 312
Interior features3
Page 255 of 628
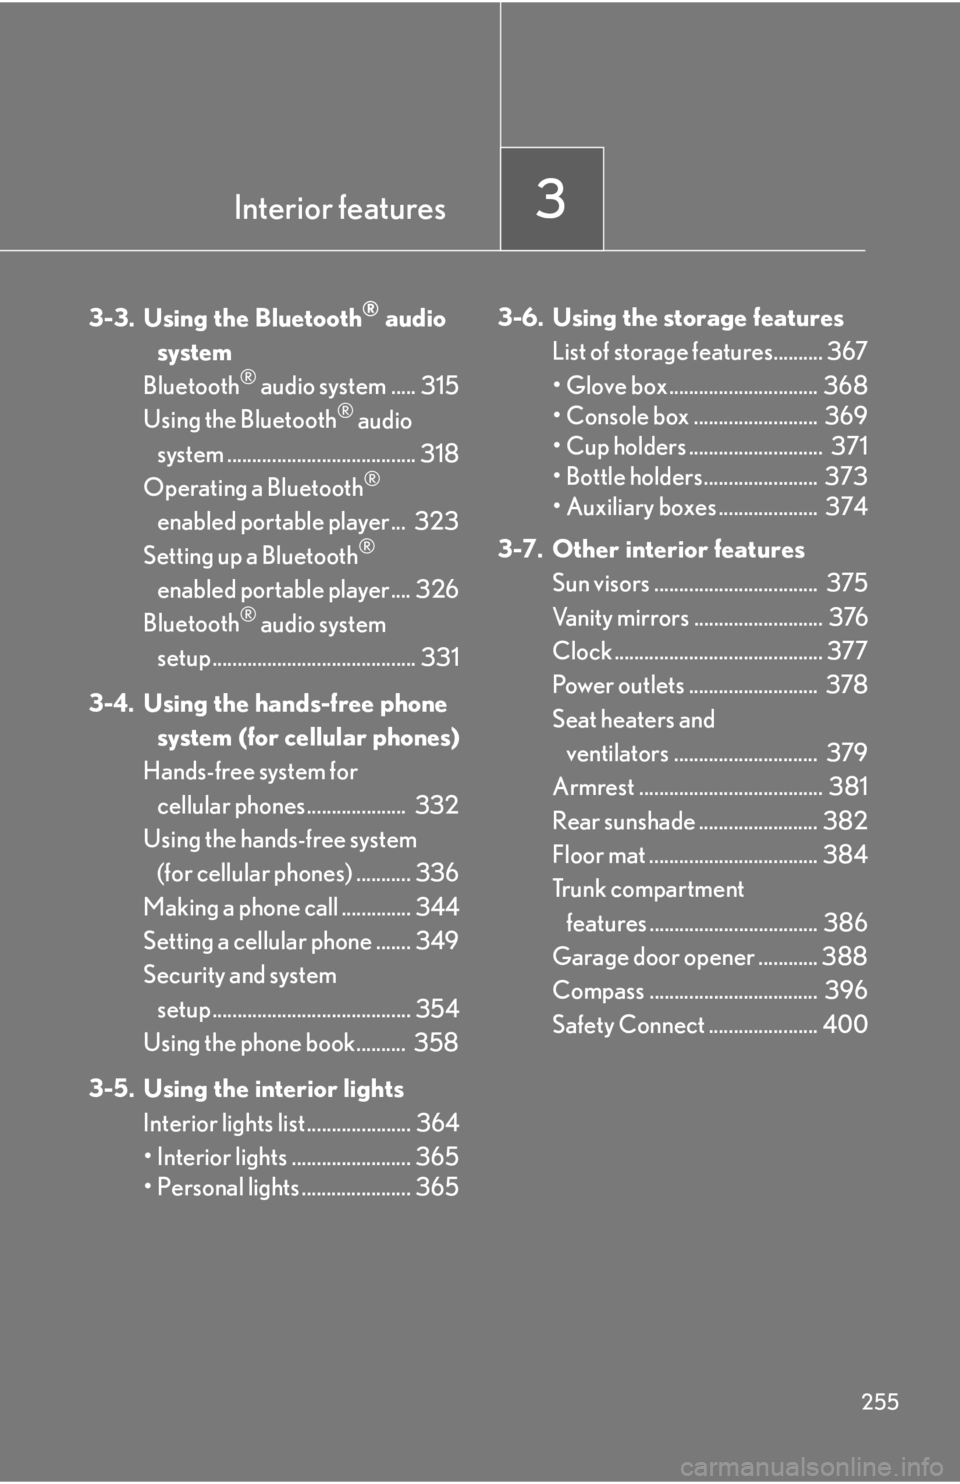
Interior features3
255
3-3. Using the Bluetooth® audio
system
Bluetooth
® audio system ..... 315
Using the Bluetooth® audio
system ...................................... 318
Operating a Bluetooth
®
enabled portable player... 323
Setting up a Bluetooth
®
enabled portable player.... 326
Bluetooth
® audio system
setup ......................................... 331
3-4. Using the hands-free phone system (for cellular phones)
Hands-free system for
cellular phones.................... 332
Using the hands-free system (for cellular phones) ........... 336
Making a phone call .............. 344
Setting a cellular phone ....... 349
Security and system setup ........................................ 354
Using the phone book.......... 358
3-5. Using the interior lights Interior lights list ..................... 364
• Interior lights ........................ 365
• Personal lights ...................... 365 3-6. Using the storage features
List of storage features.......... 367
• Glove box .............................. 368
• Console box ......................... 369
• Cup holders ........................... 371
• Bottle holders....................... 373
• Auxiliary boxes .................... 374
3-7. Other interior features Sun visors ................................. 375
Vanity mirrors .......................... 376
Clock .......................................... 377
Power outlets .......................... 378
Seat heaters and ventilators ............................. 379
Armrest ..................................... 381
Rear sunshade ........................ 382
Floor mat .................................. 384
Trunk compartment features .................................. 386
Garage door opener ............ 388
Compass .................................. 396
Safety Connect ...................... 400
Page 256 of 628
256
3-1. Using the air conditioning system and defogger
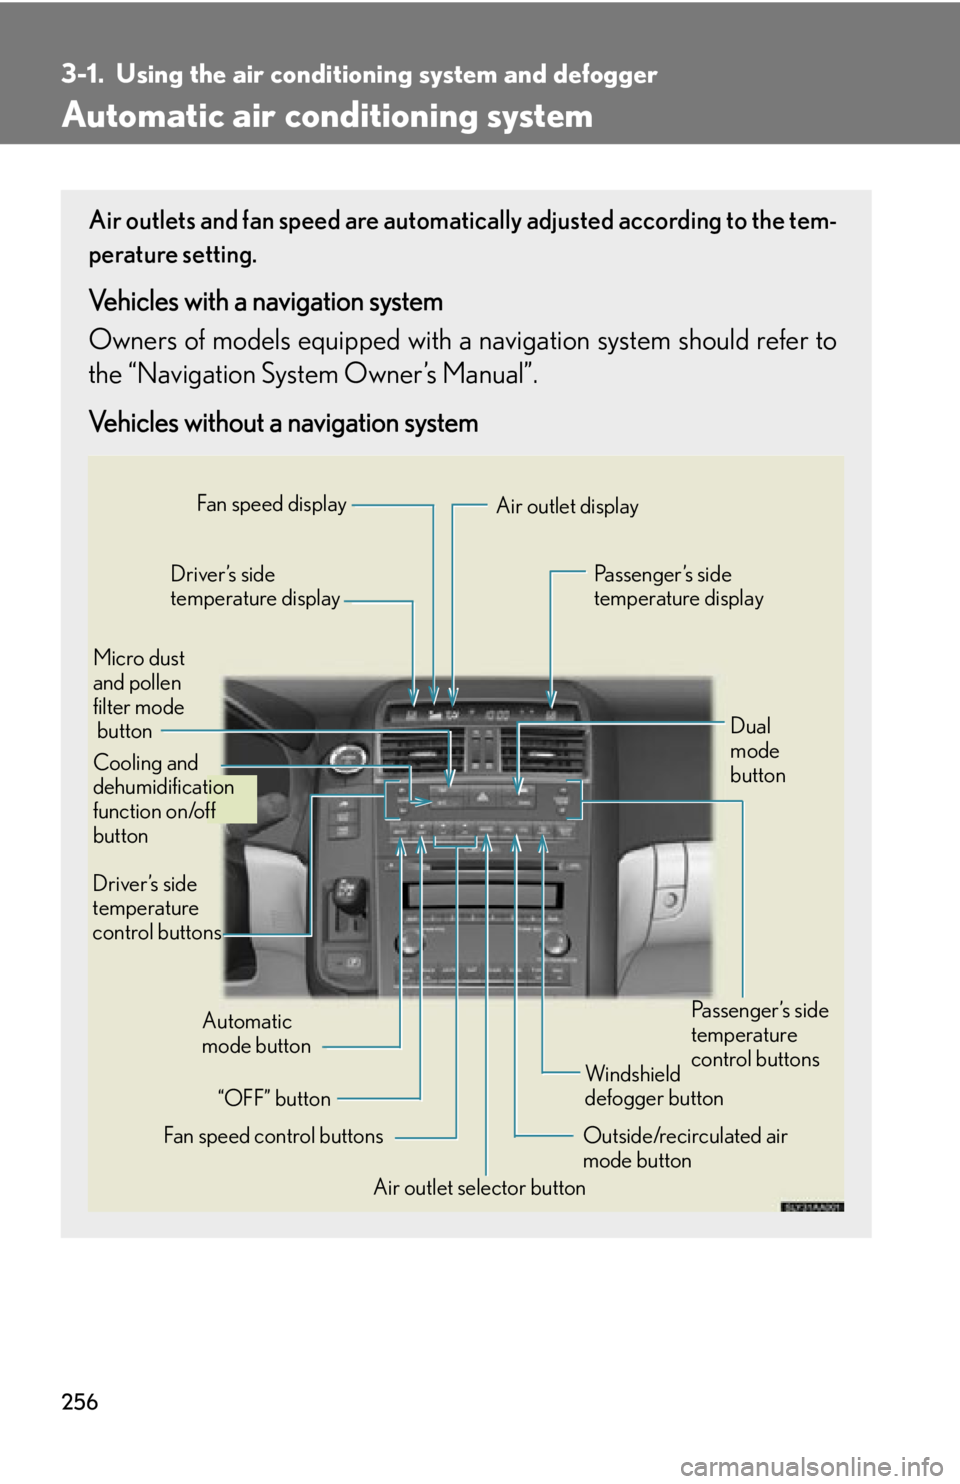
Automatic air conditioning system
Air outlets and fan speed are automati cally adjusted according to the tem-
perature setting.
Vehicles with a navigation system
Owners of models equi pped with a navigation system should refer to
the “Navigation System Owner’s Manual”.
Vehicles without a navigation system
Automatic
mode button
Driver’s side
temperature display
Dual
mode
button
Fan speed control buttons Air outlet display
Fan speed display
Passenger’s side
temperature display
Driver’s side
temperature
control buttons Outside/recirculated air
mode buttonWindshield
defogger button Passenger’s side
temperature
control buttons
Micro dust
and pollen
filter mode
button
“OFF” button Air outlet selector button
Cooling and
dehumidification
function on/off
button
Page 257 of 628
257
3-1. Using the air conditioning system and defogger
3
Interior features
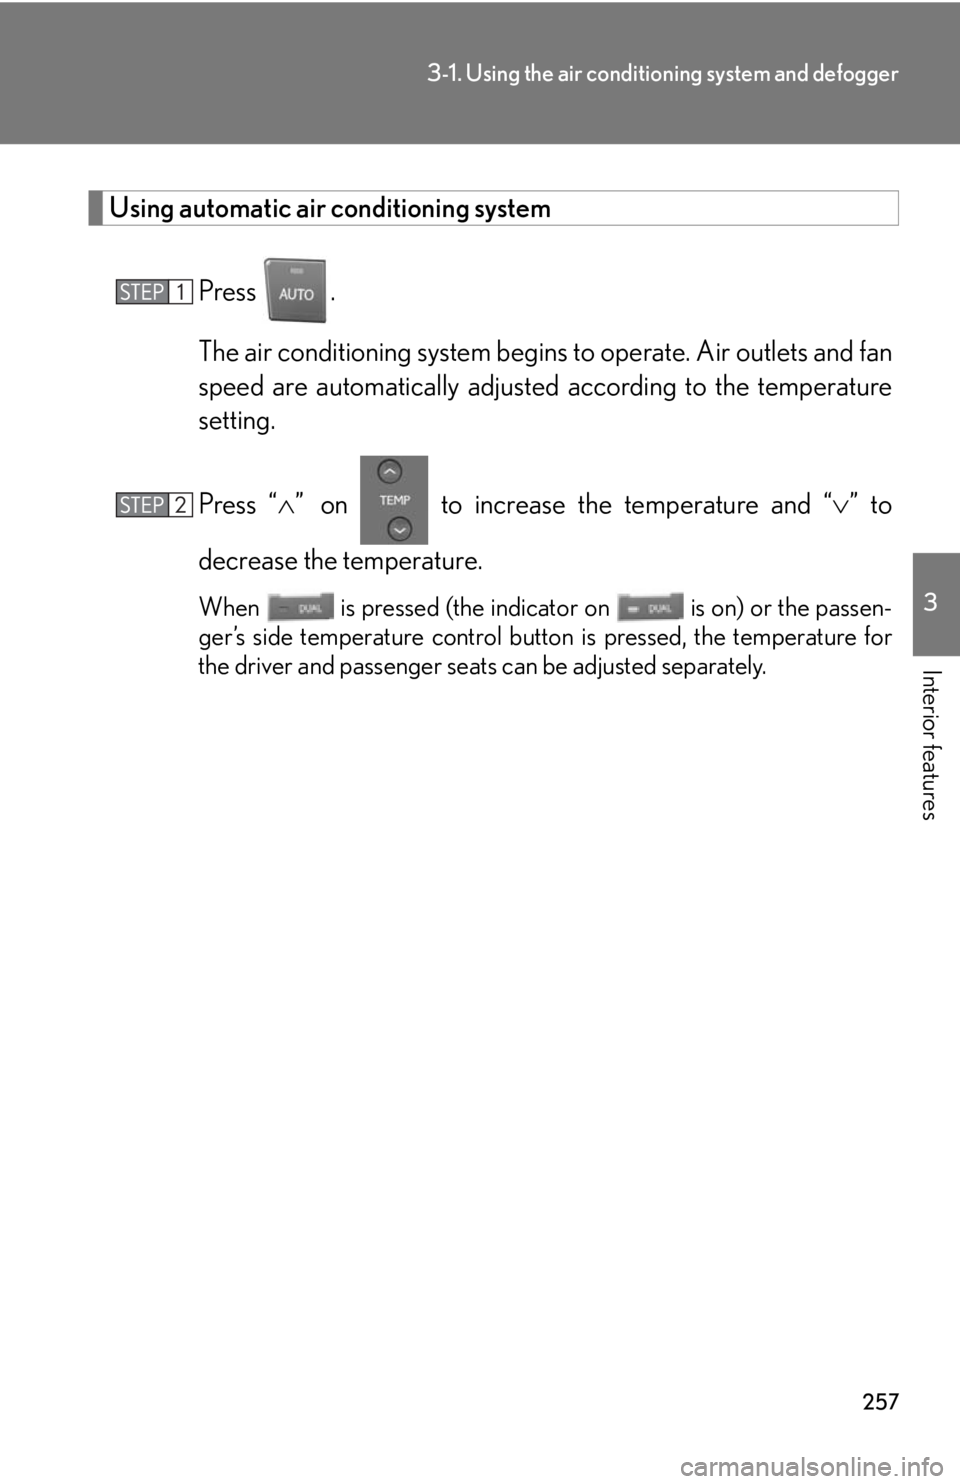
Using automatic air conditioning system
Press .
The air conditioning system begins to operate. Air outlets and fan
speed are automatically adjusted according to the temperature
setting.
Press “ ” on to increase the temperature and “ ” to
decrease the temperature.
When is pressed (the indicator on is on) or the passen-
ger’s side temperature control button is pressed, the temperature for
the driver and passenger seats can be adjusted separately.
Page 258 of 628
258
3-1. Using the air conditioning system and defogger
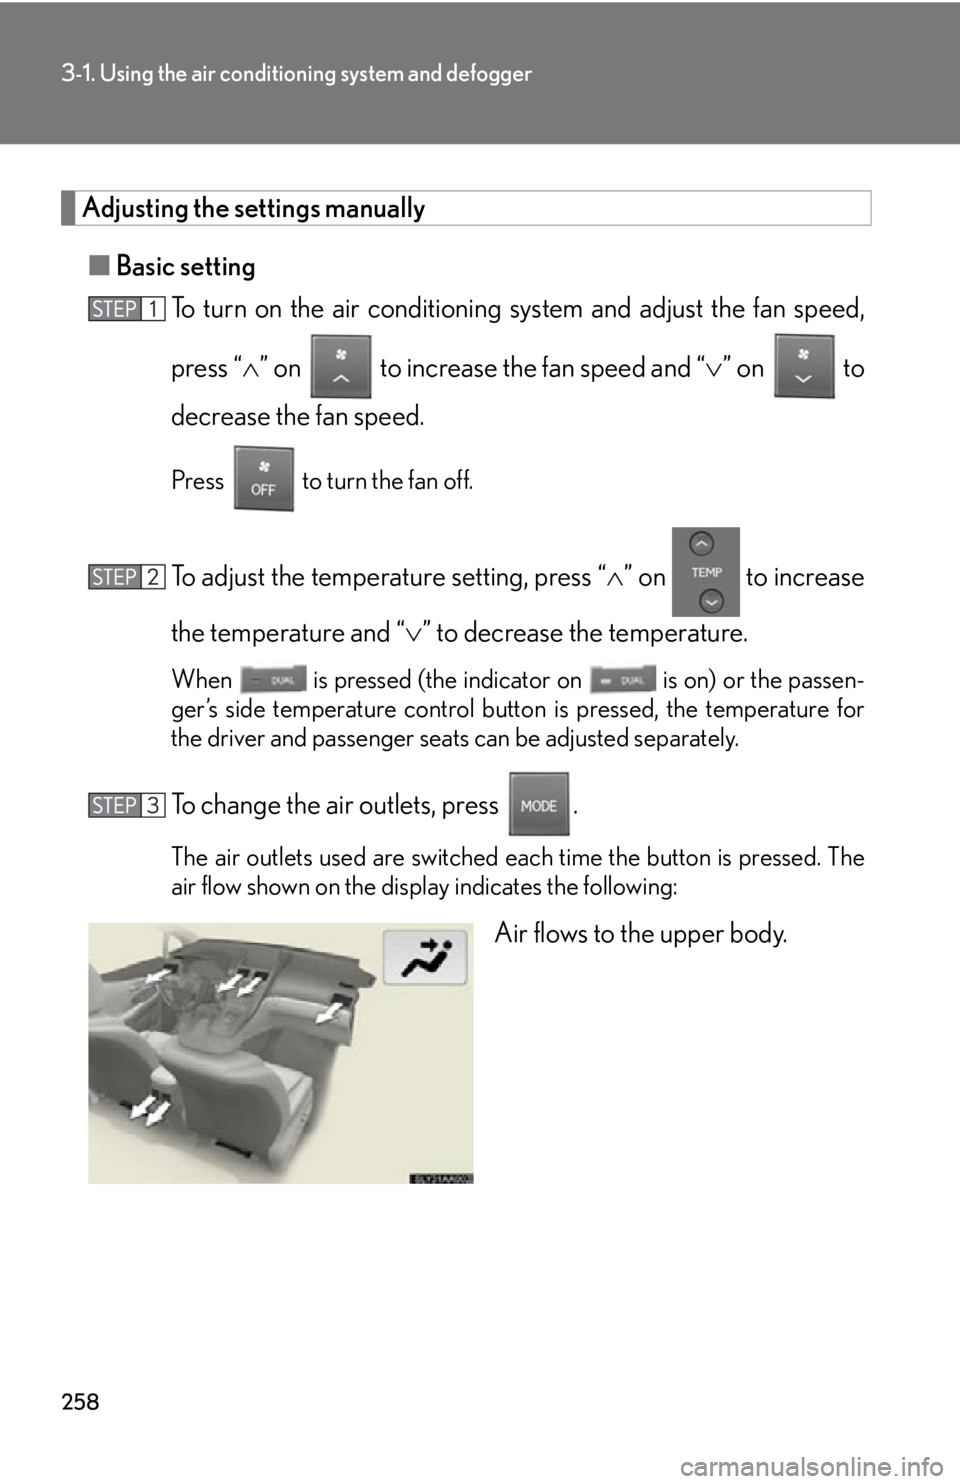
Adjusting the settings manually
■ Basic setting
To turn on the air conditioning system and adjust the fan speed,
press “ ” on to increase the fan speed and “ ” on to
decrease the fan speed.
Press to turn the fan off.
To adjust the temperature setting, press “ ” on to increase
the temperature and “ ” to decrease the temperature.
When is pressed (the indicator on is on) or the passen-
ger’s side temperature control button is pressed, the temperature for
the driver and passenger seats can be adjusted separately.
To change the air outlets, press .
The air outlets used are switched each time the button is pressed. The
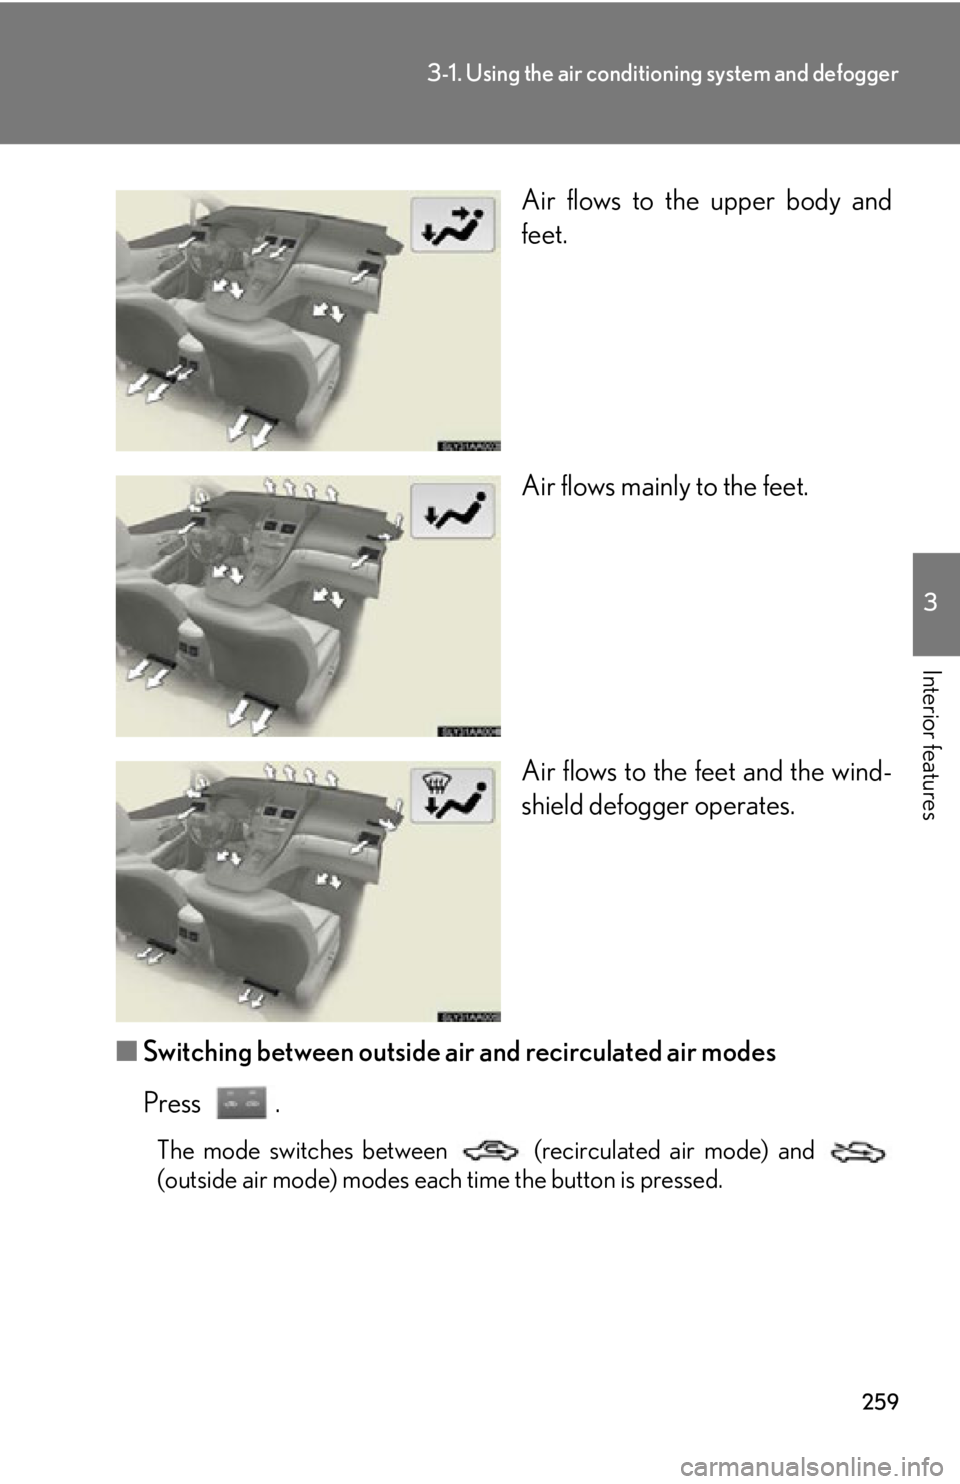
air flow shown on the display indicates the following:
Air flows to the upper body.
Page 259 of 628
259
3-1. Using the air conditioning system and defogger
3
Interior features
Air flows to the upper body and
feet.
Air flows mainly to the feet.
Air flows to the feet and the wind-
shield defogger operates.
■ Switching between outside air and recirculated air modes
Press .
The mode switches between (recirculated air mode) and
(outside air mode) modes each time the button is pressed.
Page 260 of 628
260
3-1. Using the air conditioning system and defogger
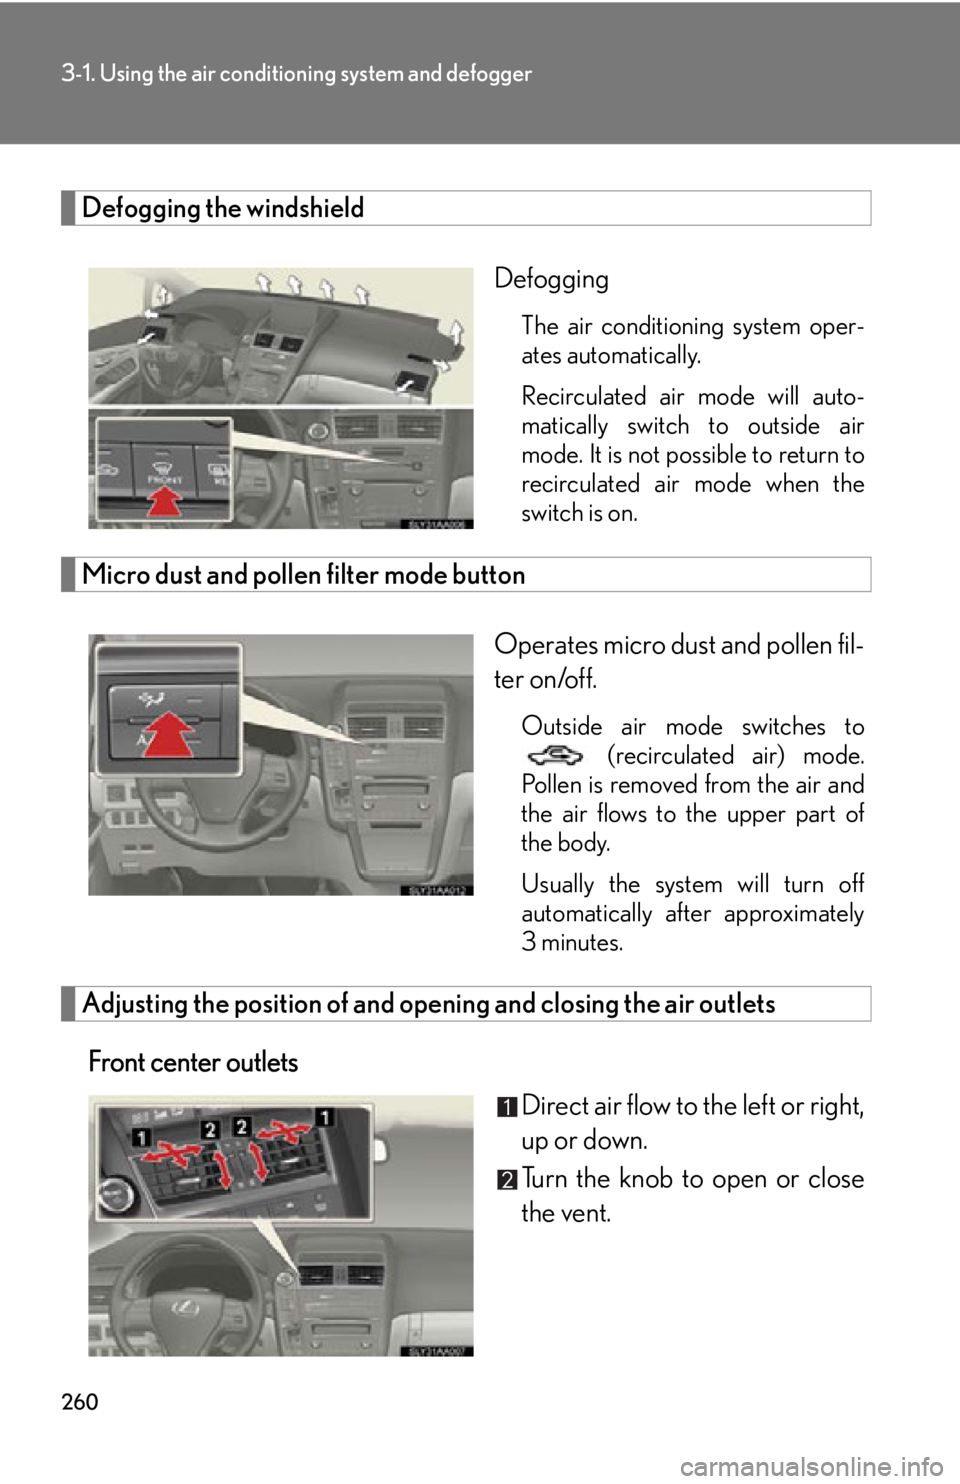
Defogging the windshield
Defogging
The air conditioning system oper-
ates automatically.
Recirculated air mode will auto-
matically switch to outside air
mode. It is not possible to return to
recirculated air mode when the
switch is on.
Micro dust and pollen filter mode buttonOperates micro dust and pollen fil-
ter on/off.
Outside air mode switches to (recirculated air) mode.
Pollen is removed from the air and
the air flows to the upper part of
the body.
Usually the system will turn off
automatically after approximately
3 minutes.
Adjusting the position of and opening and closing the air outlets
Front center outlets Direct air flow to the left or right,
up or down.
Turn the knob to open or close
the vent.