navigation system Lexus HS250h 2012 Navigation Manual
[x] Cancel search | Manufacturer: LEXUS, Model Year: 2012, Model line: HS250h, Model: Lexus HS250h 2012Pages: 413, PDF Size: 5.29 MB
Page 38 of 413
NAVIGATION SYSTEM: BASIC FUNCTIONS
37
U1003LS
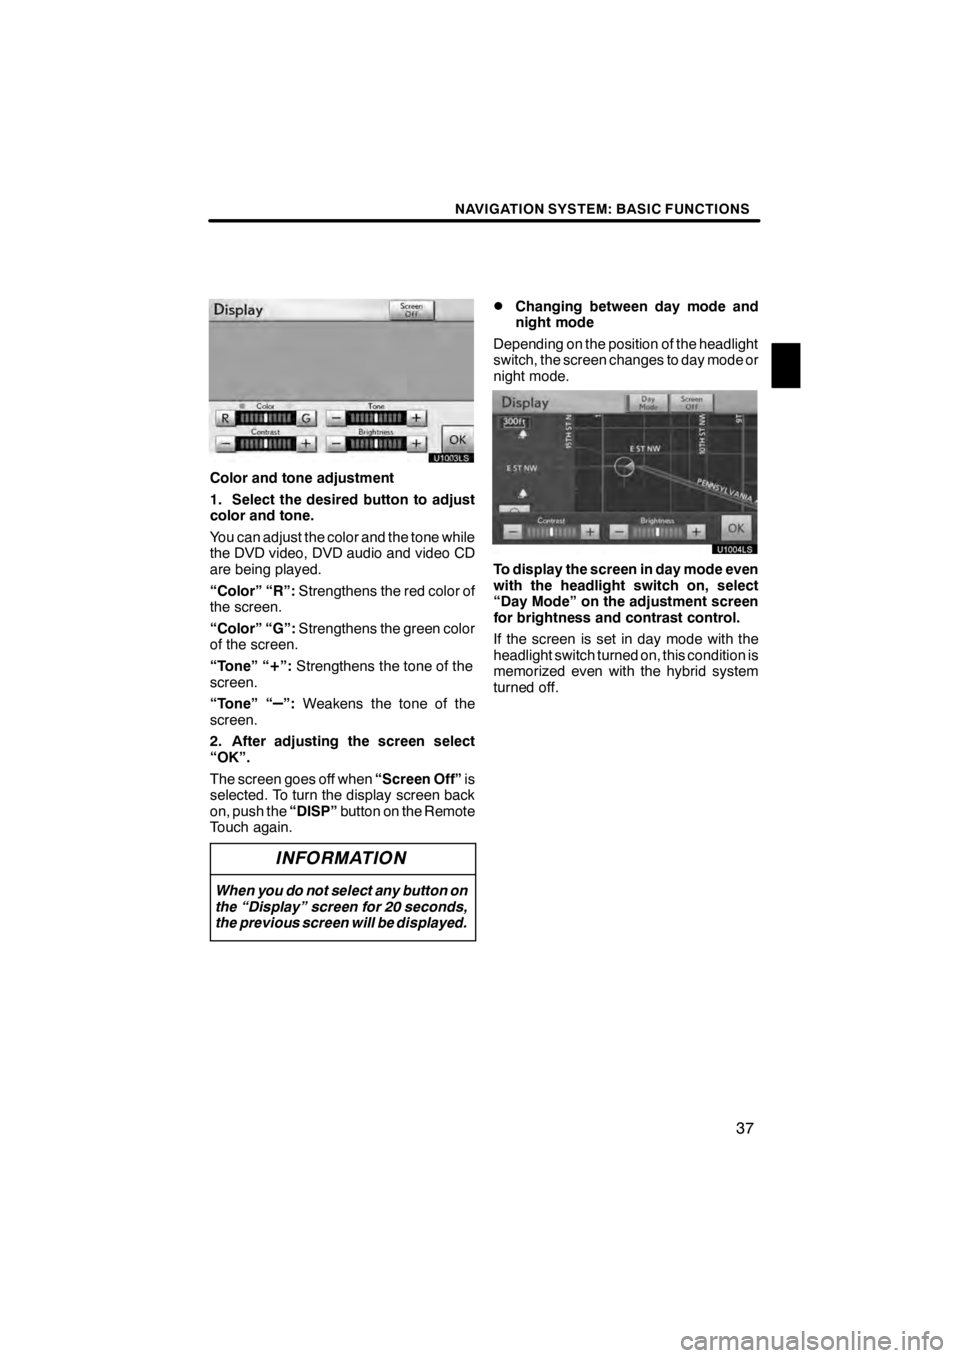
Color and tone adjustment
1. Select the desired button to adjust
color and tone.
You can adjust the color and the tone while
the DVD video, DVD audio and video CD
are being played.
“Color” “R”:Strengthens the red color of
the screen.
“Color” “G”: Strengthens the green color
of the screen.
“Tone” “
+”: Strengthens the tone of the
screen.
“Tone” “
–”: Weakens the tone of the
screen.
2. After adjusting the screen select
“OK”.
The screen goes off when “Screen Off”is
selected. To turn the display screen back
on, push the “DISP”button on the Remote
Touch again.
INFORMATION
When you do not select any button on
the “Display” screen for 20 seconds,
the previous screen will be displayed.
DChanging between day mode and
night mode
Depending on the position of the headlight
switch, the screen changes to day mode or
night mode.
U1004LS
To display the screen in day mode even
with the headlight switch on, select
“Day Mode” on the adjustment screen
for brightness and contrast control.
If the screen is set in day mode with the
headlight switch turned on, this condition is
memorized even with the hybrid system
turned off.
11 08.03HS250h_NAVI_U
75051U
1
Page 39 of 413
NAVIGATION SYSTEM: BASIC FUNCTIONS
38
U1004AASLY
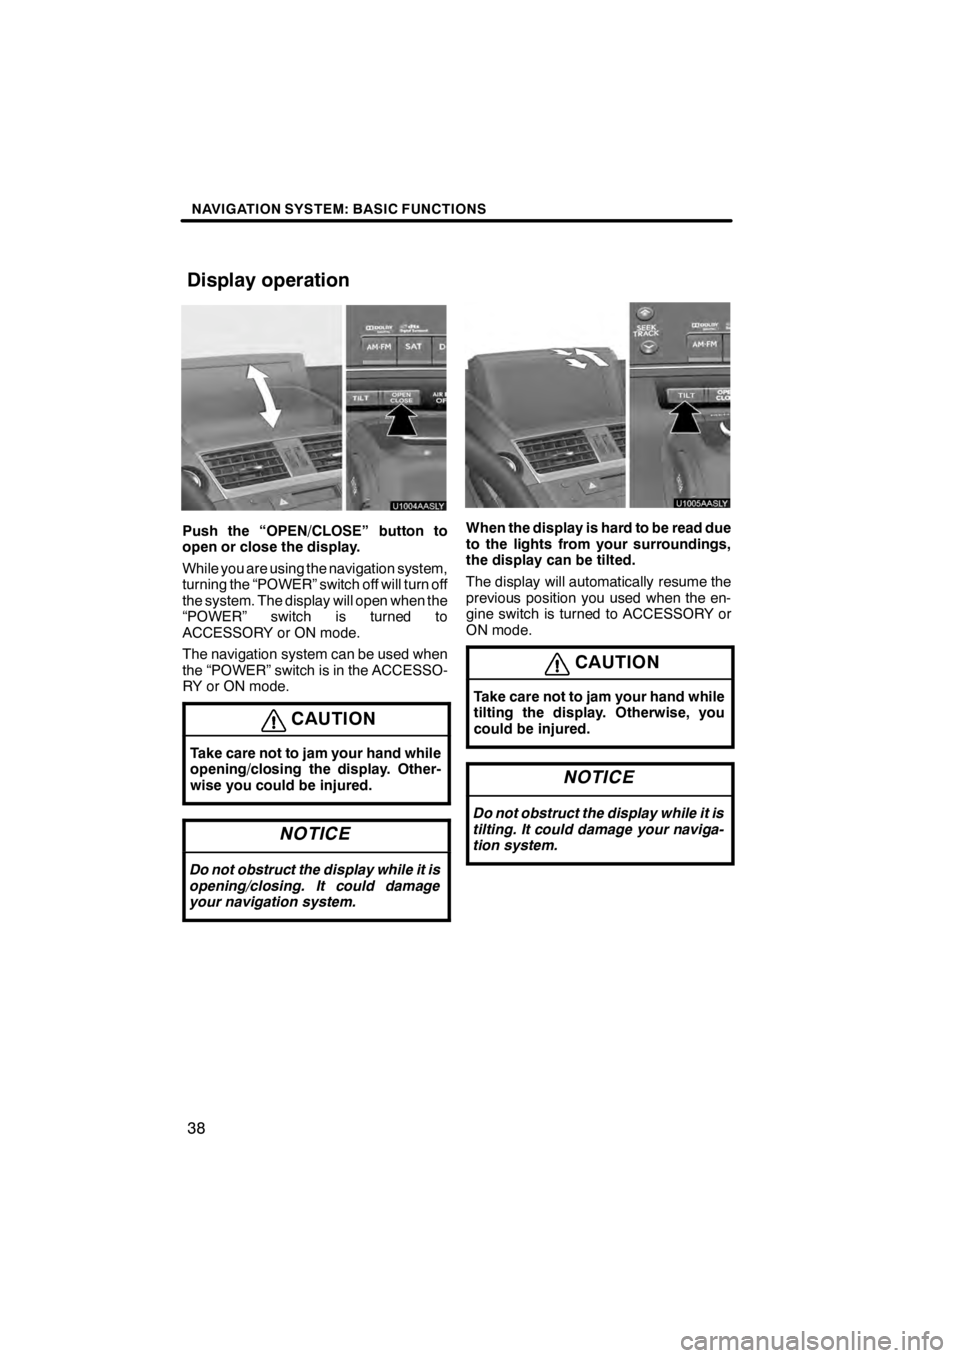
Push the “OPEN/CLOSE” button to
open or close the display.
While you are using the navigation system,
turning the “POWER” switch off will turn off
the system. The display will open when the
“POWER” switch is turned to
ACCESSORY or ON mode.
The navigation system can be used when
the “POWER” switch is in the ACCESSO-
RY or ON mode.
CAUTION
Take care not to jam your hand while
opening/closing the display. Other-
wise you could be injured.
NOTICE
Do not obstruct the display while it is
opening/closing. It could damage
your navigation system.
U1005AASLY
When the display is hard to be read due
to the lights from your surroundings,
the display can be tilted.
The display will automatically resume the
previous position you used when the en-
gine switch is turned to ACCESSORY or
ON mode.
CAUTION
Take care not to jam your hand while
tilting the display. Otherwise, you
could be injured.
NOTICE
Do not obstruct the display while it is
tilting. It could damage your naviga-
tion system.
11 08.03HS250h_NAVI_U
75051U
Display operation
Page 40 of 413
NAVIGATION SYSTEM: BASIC FUNCTIONS
39
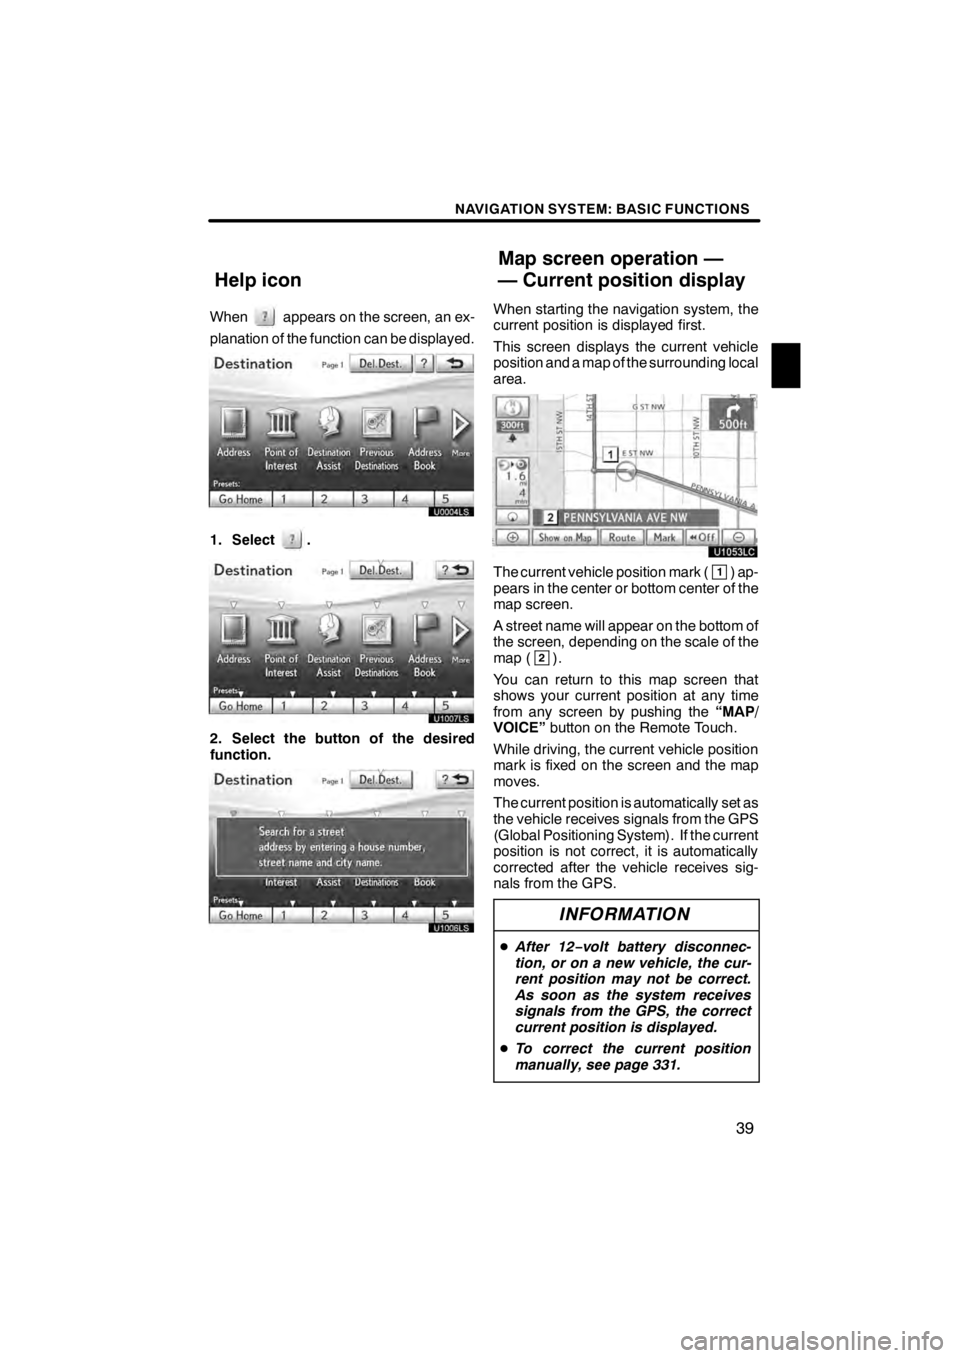
Whenappears on the screen, an ex-
planation of the function can be displayed.
1. Select.
U1007LS
2. Select the button of the desired
function.
U1006LS
When starting the navigation system, the
current position is displayed first.
This screen displays the current vehicle
position and a map of the surrounding local
area.
U1053LC
The current vehicle position mark (1) ap-
pears in the center or bottom center of the
map screen.
A street name will appear on the bottom of
the screen, depending on the scale of the
map (
2).
You can return to this map screen that
shows your current position at any time
from any screen by pushing the “MAP/
VOICE” button on the Remote Touch.
While driving, the current vehicle position
mark is fixed on the screen and the map
moves.
The current position is automatically set as
the vehicle receives signals from the GPS
(Global Positioning System). If the current
position is not correct, it is automatically
corrected after the vehicle receives sig-
nals from the GPS.
INFORMATION
D After 12 −volt battery disconnec-
tion, or on a new vehicle, the cur-
rent position may not be correct.
As soon as the system receives
signals from the GPS, the correct
current position is displayed.
D To correct the current position
manually, see page 331.
11 08.03HS250h_NAVI_U
75051U
Help icon Map screen operation —
— Current position display
1
Page 41 of 413
NAVIGATION SYSTEM: BASIC FUNCTIONS
40
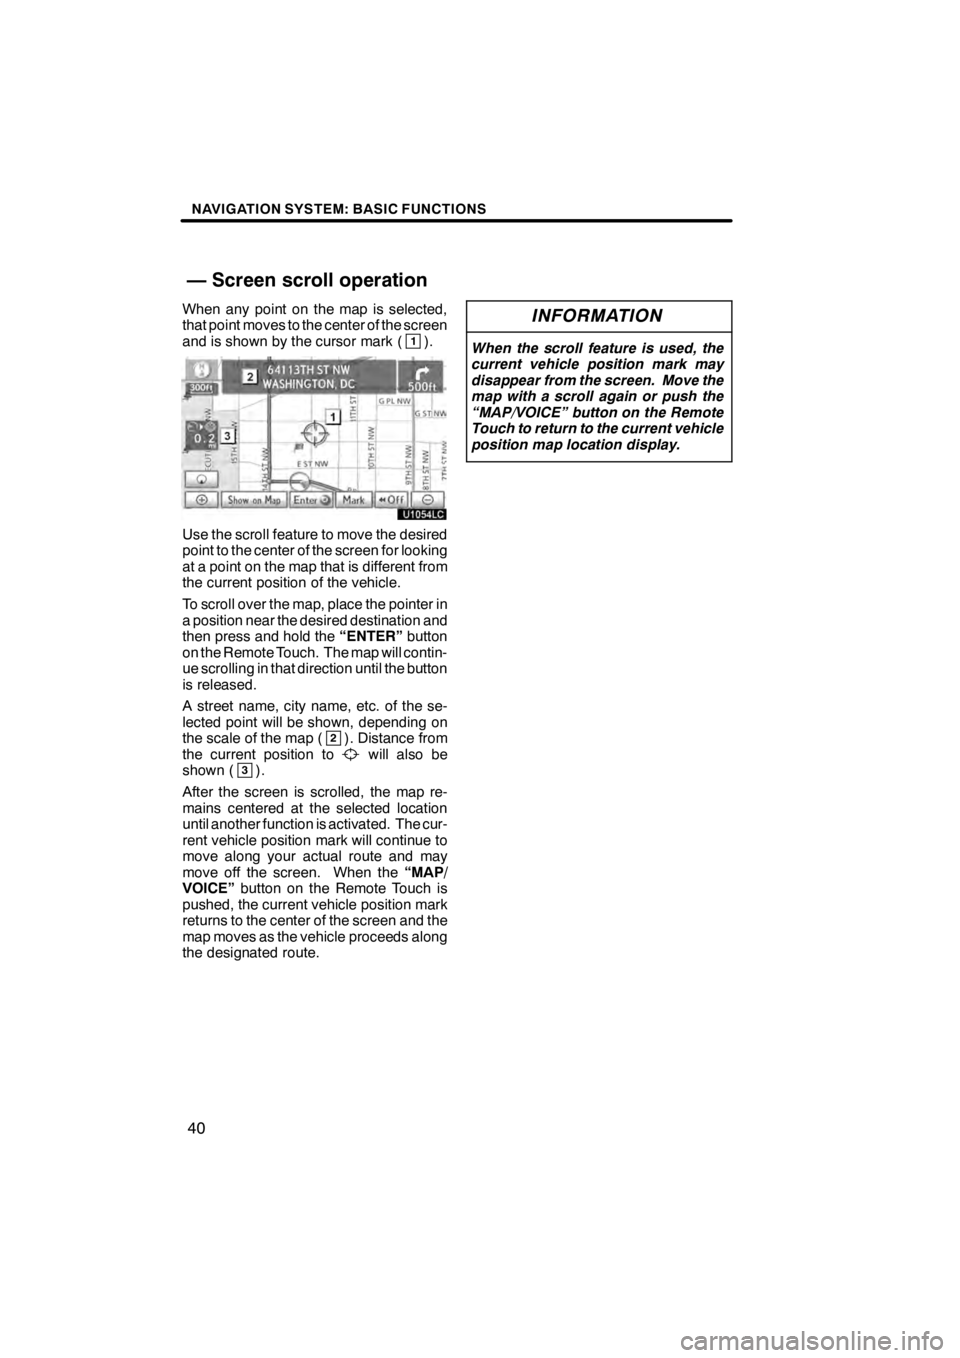
When any point on the map is selected,
that point moves to the center of the screen
and is shown by the cursor mark (
1).
U1054LC
Use the scroll feature to move the desired
point to the center of the screen for looking
at a point on the map that is different from
the current position of the vehicle.
To scroll over the map, place the pointer in
a position near the desired destination and
then press and hold the“ENTER”button
on the Remote Touch. The map will contin-
ue scrolling in that direction until the button
is released.
A street name, city name, etc. of the se-
lected point will be shown, depending on
the scale of the map (
2). Distance from
the current position towill also be
shown (3).
After the screen is scrolled, the map re-
mains centered at the selected location
until another function is activated. The cur-
rent vehicle position mark will continue to
move along your actual route and may
move off the screen. When the “MAP/
VOICE” button on the Remote Touch is
pushed, the current vehicle position mark
returns to the center of the screen and the
map moves as the vehicle proceeds along
the designated route.
INFORMATION
When the scroll feature is used, the
current vehicle position mark may
disappear from the screen. Move the
map with a scroll again or push the
“MAP/VOICE” button on the Remote
Touch to return to the current vehicle
position map location display.
11 08.03HS250h_NAVI_U
75051U
— Screen scroll operation
Page 42 of 413
NAVIGATION SYSTEM: BASIC FUNCTIONS
41
D
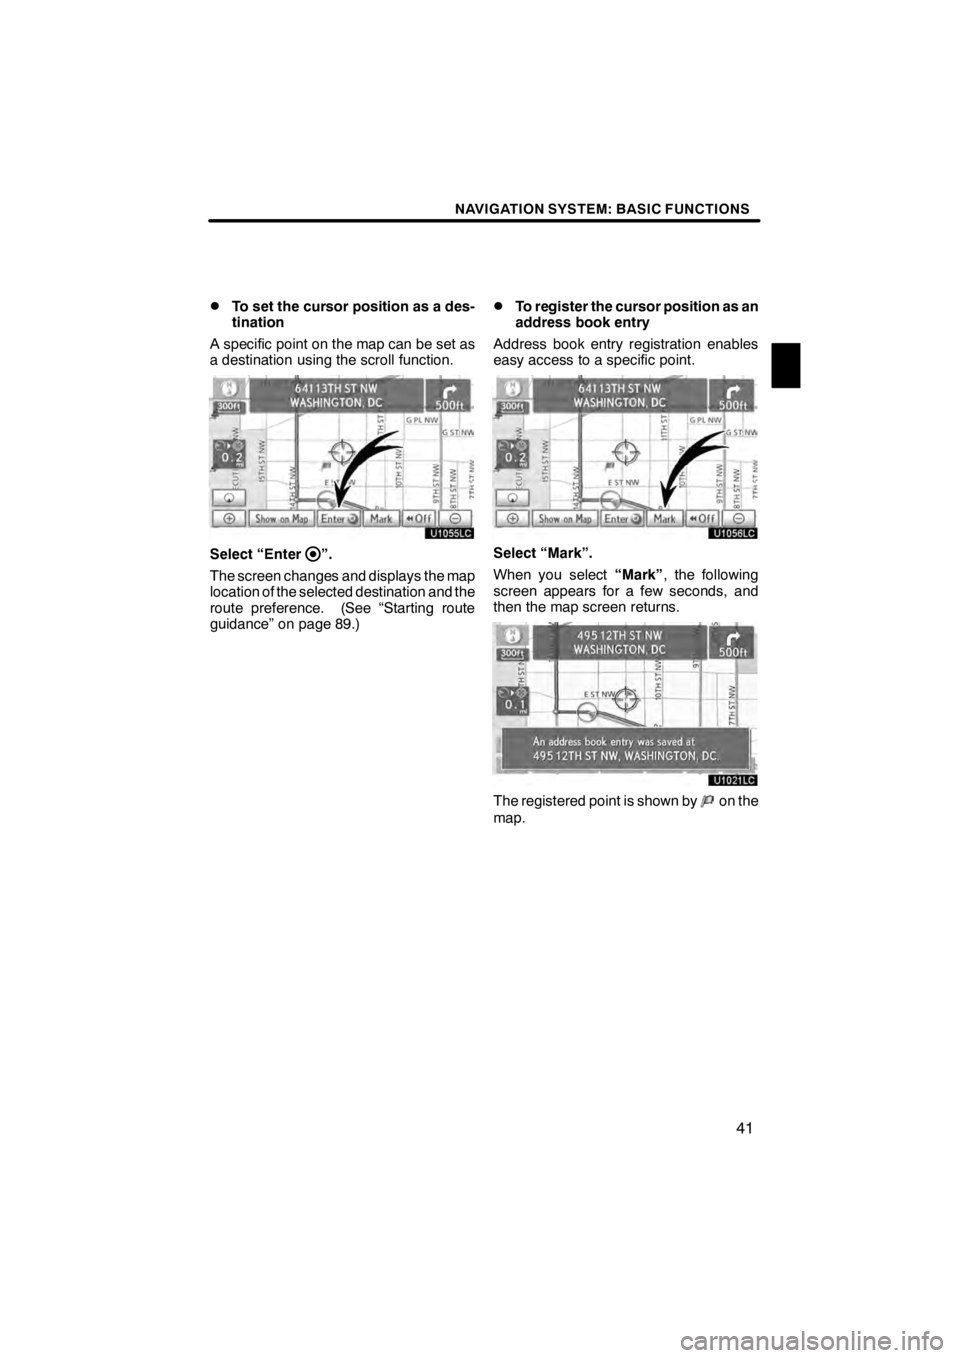
To set the cursor position as a des-
tination
A specific point on the map can be set as
a destination using the scroll function.
U1055LC
Select “Enter”.
The screen changes and displays the map
location of the selected destination and the
route preference. (See “Starting route
guidance” on page 89.)
DTo register the cursor position as an
address book entry
Address book entry registration enables
easy access to a specific point.
U1056LC
Select “Mark”.
When you select “Mark”, the following
screen appears for a few seconds, and
then the map screen returns.
U1021LC
The registered point is shown byon the
map.
11 08.03HS250h_NAVI_U
75051U
1
Page 43 of 413
NAVIGATION SYSTEM: BASIC FUNCTIONS
42
To change the icon or name, etc., see “ (b)
Editing address book entries” on page
124.
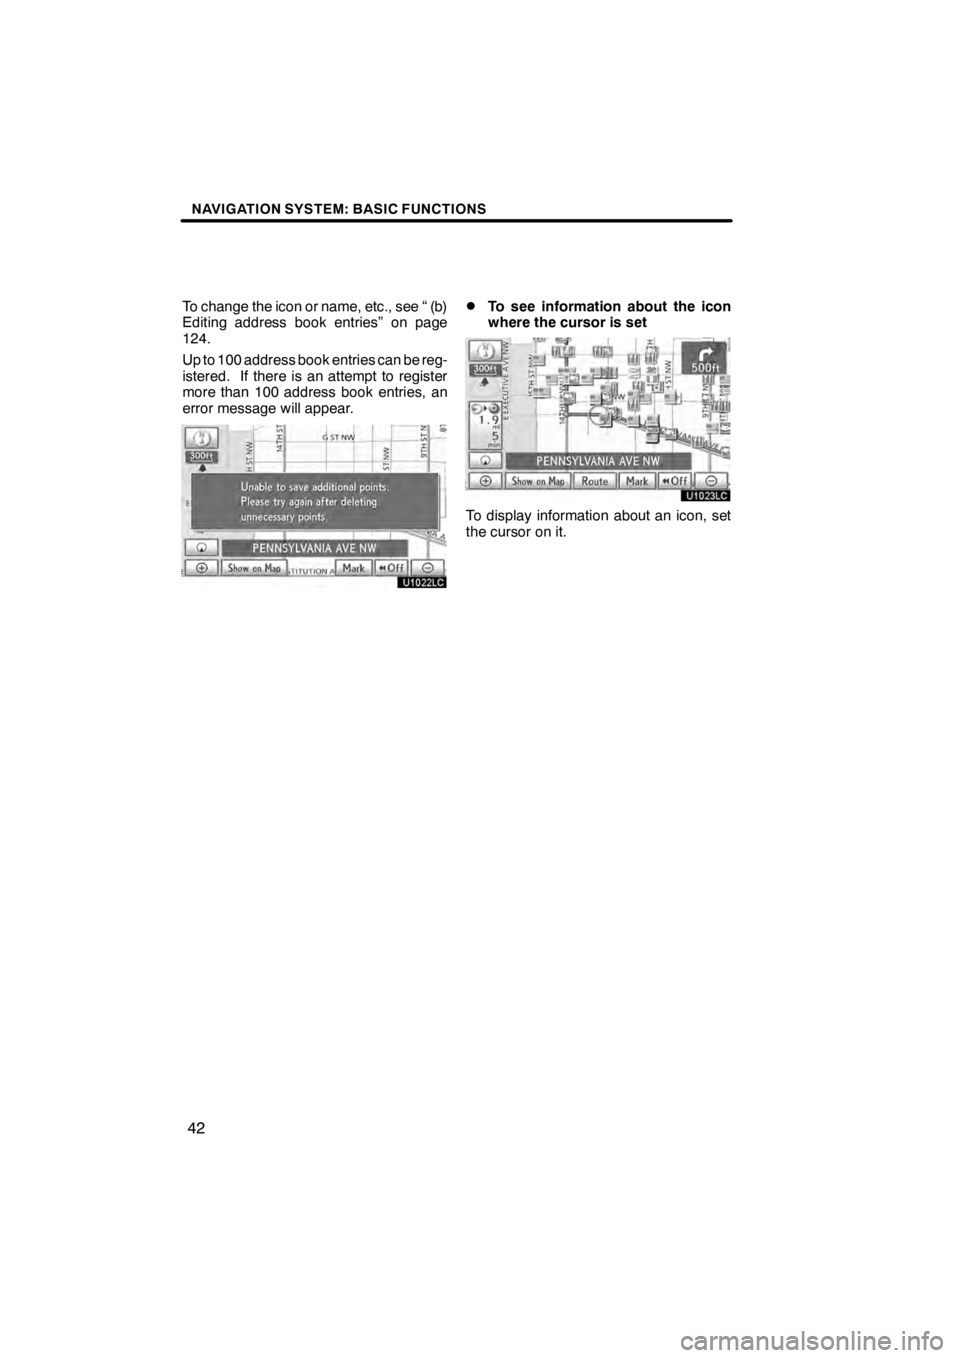
Up to 100 address book entries can be reg-
istered. If there is an attempt to register
more than 100 address book entries, an
error message will appear.
U1022LC
DTo see information about the icon
where the cursor is set
U1023LC
To display information about an icon, set
the cursor on it.
11 08.03HS250h_NAVI_U
75051U
Page 44 of 413
NAVIGATION SYSTEM: BASIC FUNCTIONS
43
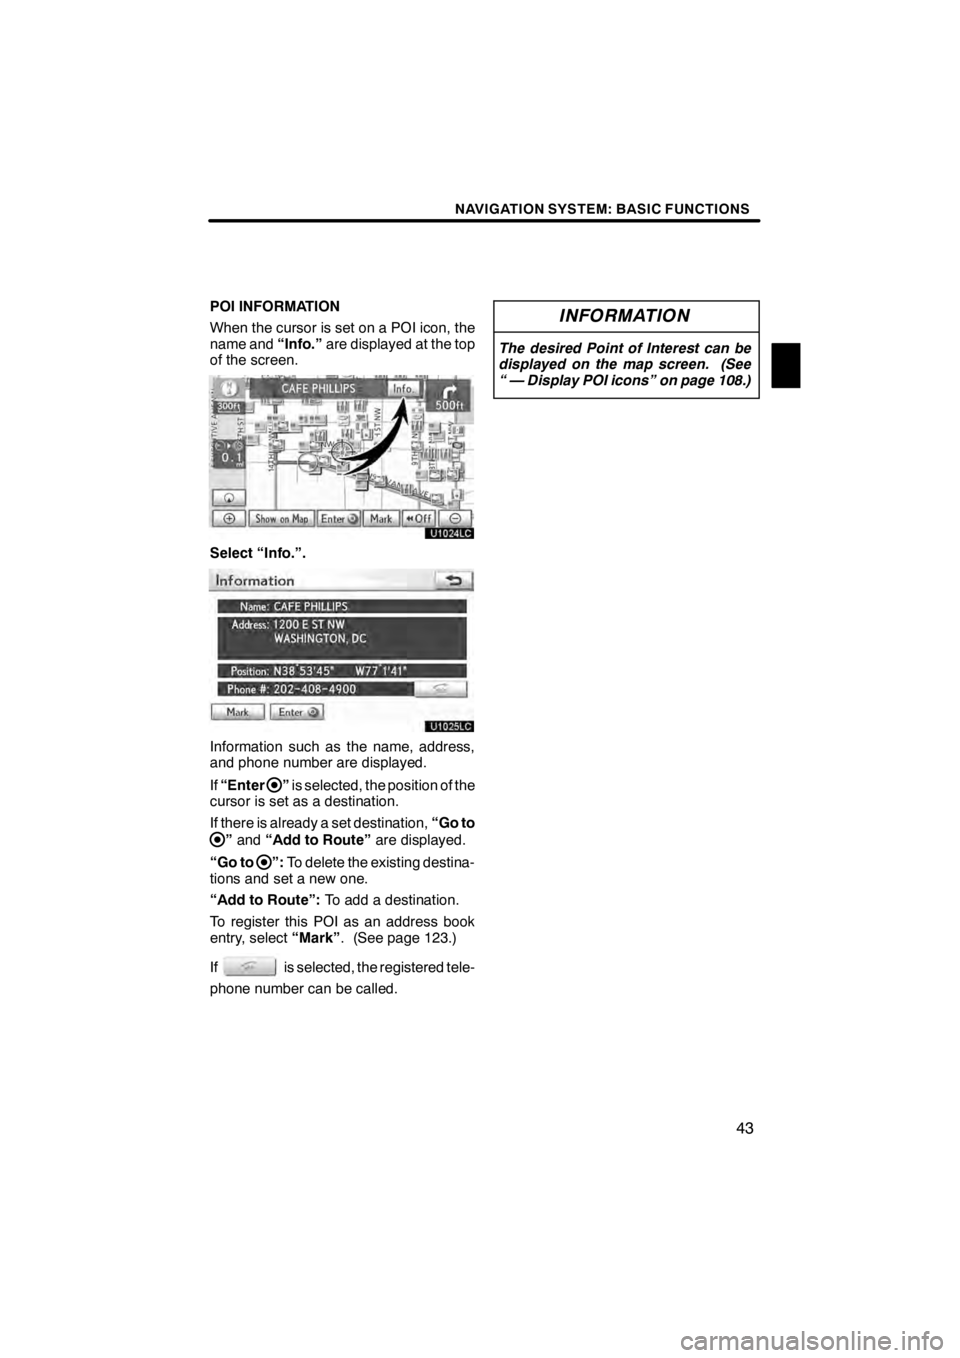
POI INFORMATION
When the cursor is set on a POI icon, the
name and“Info.”are displayed at the top
of the screen.
U1024LC
Select “Info.”.
U1025LC
Information such as the name, address,
and phone number are displayed.
If “Enter
”is selected, the position of the
cursor is set as a destination.
If there is already a set destination, “Go to
”and “Add to Route” are displayed.
“Go to
”: To delete the existing destina-
tions and set a new one.
“Add to Route”: To add a destination.
To register this POI as an address book
entry, select “Mark”. (See page 123.)
If
is selected, the registered tele-
phone number can be called.
INFORMATION
The desired Point of Interest can be
displayed on the map screen. (See
“ — Display POI icons” on page 108.)
11 08.03HS250h_NAVI_U
75051U
1
Page 45 of 413
NAVIGATION SYSTEM: BASIC FUNCTIONS
44
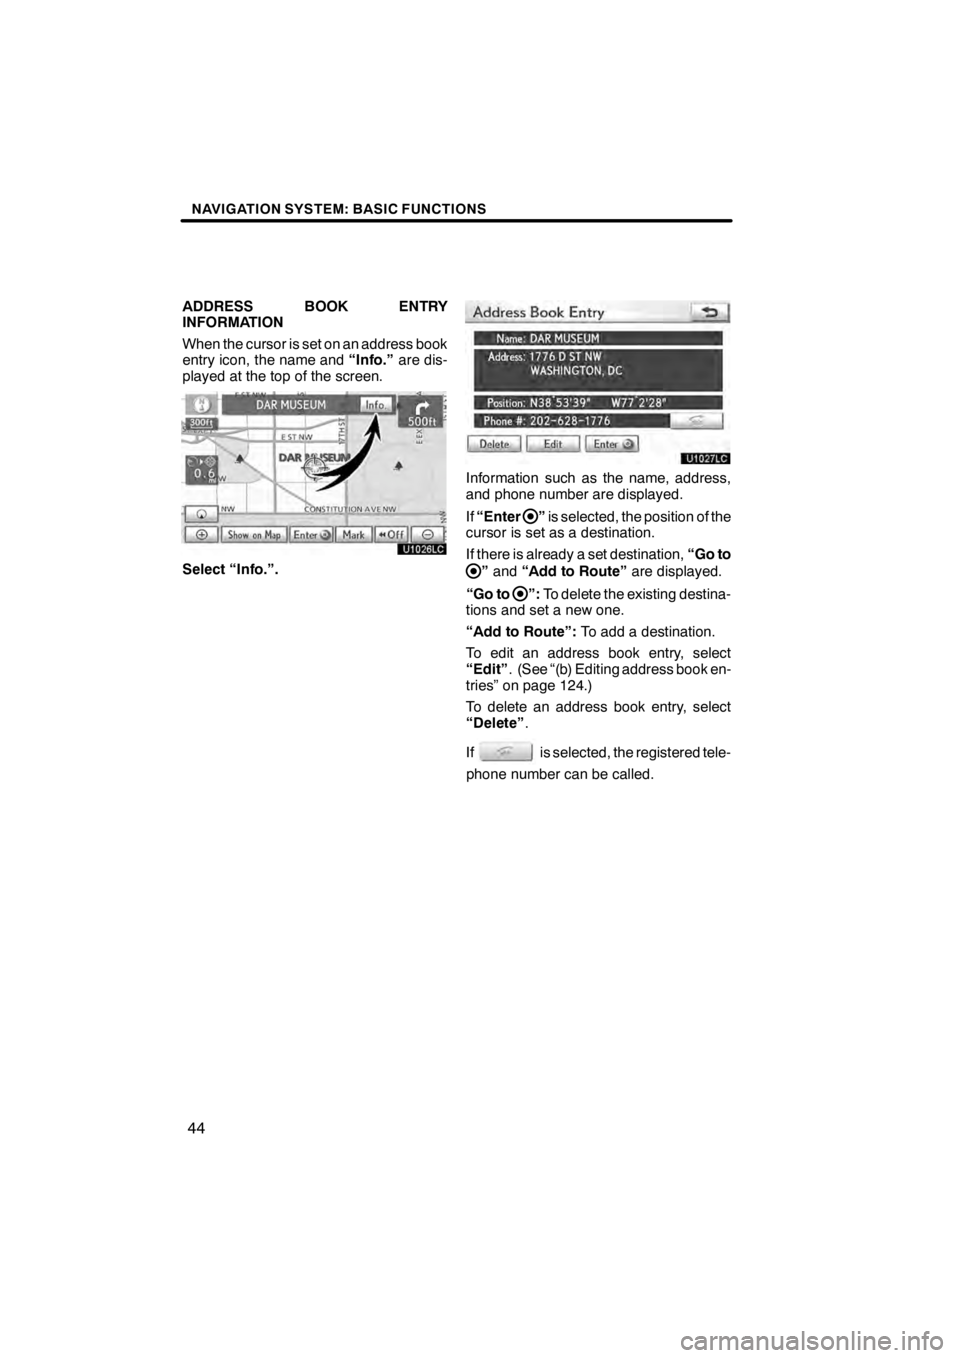
ADDRESS BOOK ENTRY
INFORMATION
When the cursor is set on an address book
entry icon, the name and“Info.”are dis-
played at the top of the screen.
U1026LC
Select “Info.”.
U1027LC
Information such as the name, address,
and phone number are displayed.
If “Enter
”is selected, the position of the
cursor is set as a destination.
If there is already a set destination, “Go to
”and “Add to Route” are displayed.
“Go to
”: To delete the existing destina-
tions and set a new one.
“Add to Route”: To add a destination.
To edit an address book entry, select
“Edit” . (See “(b) Editing address book en-
tries” on page 124.)
To delete an address book entry, select
“Delete” .
If
is selected, the registered tele-
phone number can be called.
11 08.03HS250h_NAVI_U
75051U
Page 46 of 413
NAVIGATION SYSTEM: BASIC FUNCTIONS
45
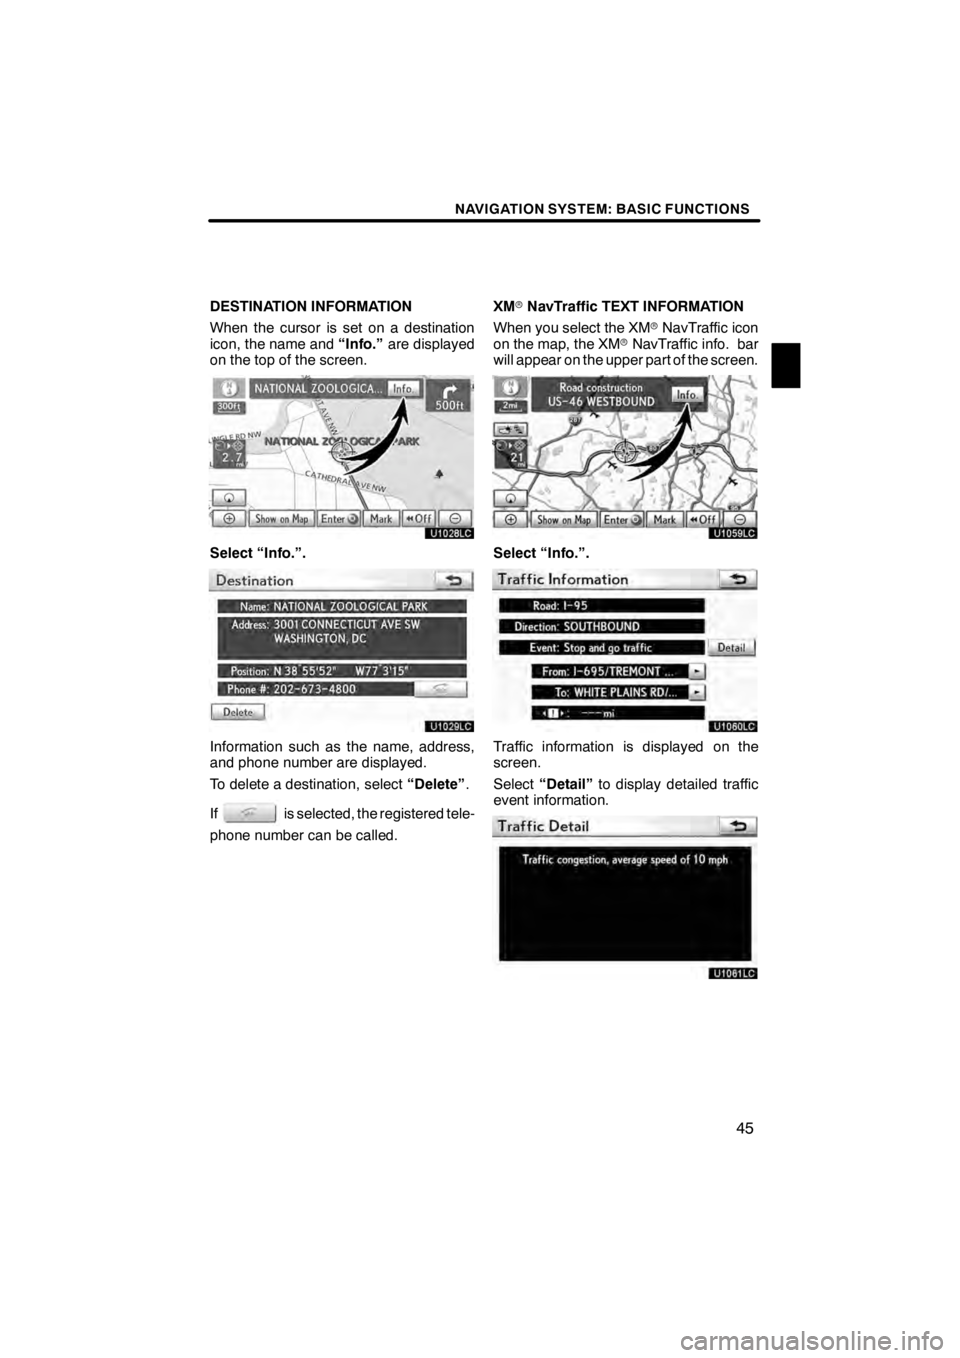
DESTINATION INFORMATION
When the cursor is set on a destination
icon, the name and“Info.”are displayed
on the top of the screen.
U1028LC
Select “Info.”.
U1029LC
Information such as the name, address,
and phone number are displayed.
To delete a destination, select “Delete”.
If
is selected, the registered tele-
phone number can be called. XM
rNavTraffic TEXT INFORMATION
When you select the XM rNavTraffic icon
on the map, the XM rNavTraffic info. bar
will appear on the upper part of the screen.
U1059LC
Select “Info.”.
U1060LC
Traffic information is displayed on the
screen.
Select “Detail” to display detailed traffic
event information.
U1061LC
11 08.03HS250h_NAVI_U
75051U
1
Page 47 of 413
NAVIGATION SYSTEM: BASIC FUNCTIONS
46
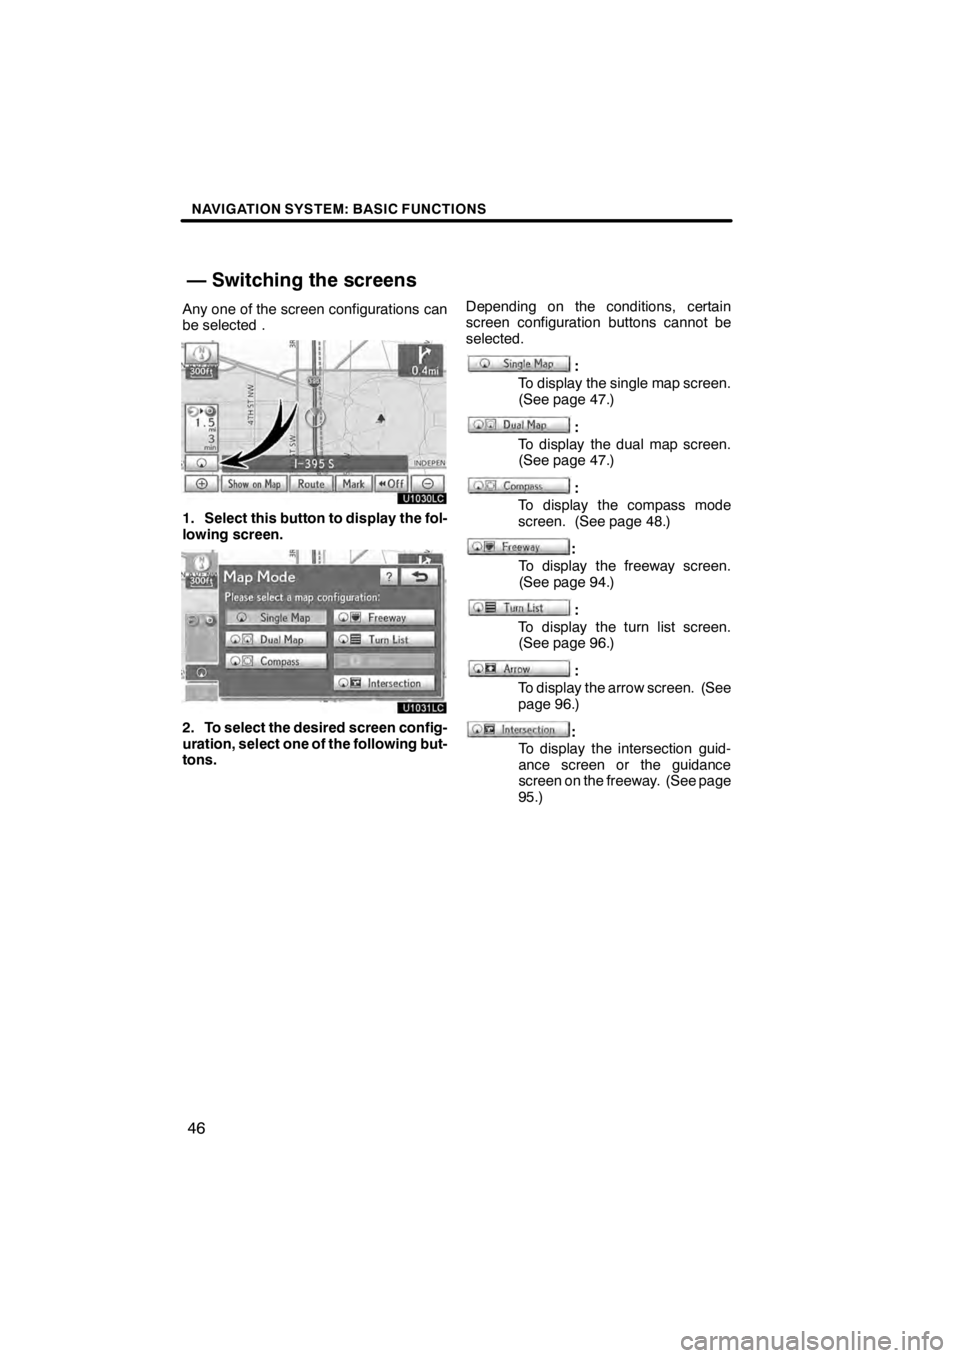
Any one of the screen configurations can
be selected .
U1030LC
1. Select this button to display the fol-
lowing screen.
U1031LC
2. To select the desired screen config-
uration, select one of the following but-
tons.Depending on the conditions, certain
screen configuration buttons cannot be
selected.
:
To display the single map screen.
(See page 47.)
:
To display the dual map screen.
(See page 47.)
:
To display the compass mode
screen. (See page 48.)
:
To display the freeway screen.
(See page 94.)
:
To display the turn list screen.
(See page 96.)
:
To display the arrow screen. (See
page 96.)
:
To display the intersection guid-
ance screen or the guidance
screen on the freeway. (See page
95.)
11 08.03HS250h_NAVI_U
75051U
— Switching the screens