lock Lexus IS F 2010 Workshop Manual
[x] Cancel search | Manufacturer: LEXUS, Model Year: 2010, Model line: IS F, Model: Lexus IS F 2010Pages: 542, PDF Size: 6.77 MB
Page 107 of 542

106
1-7. Safety information
10_IS F_U
Installing child restraints
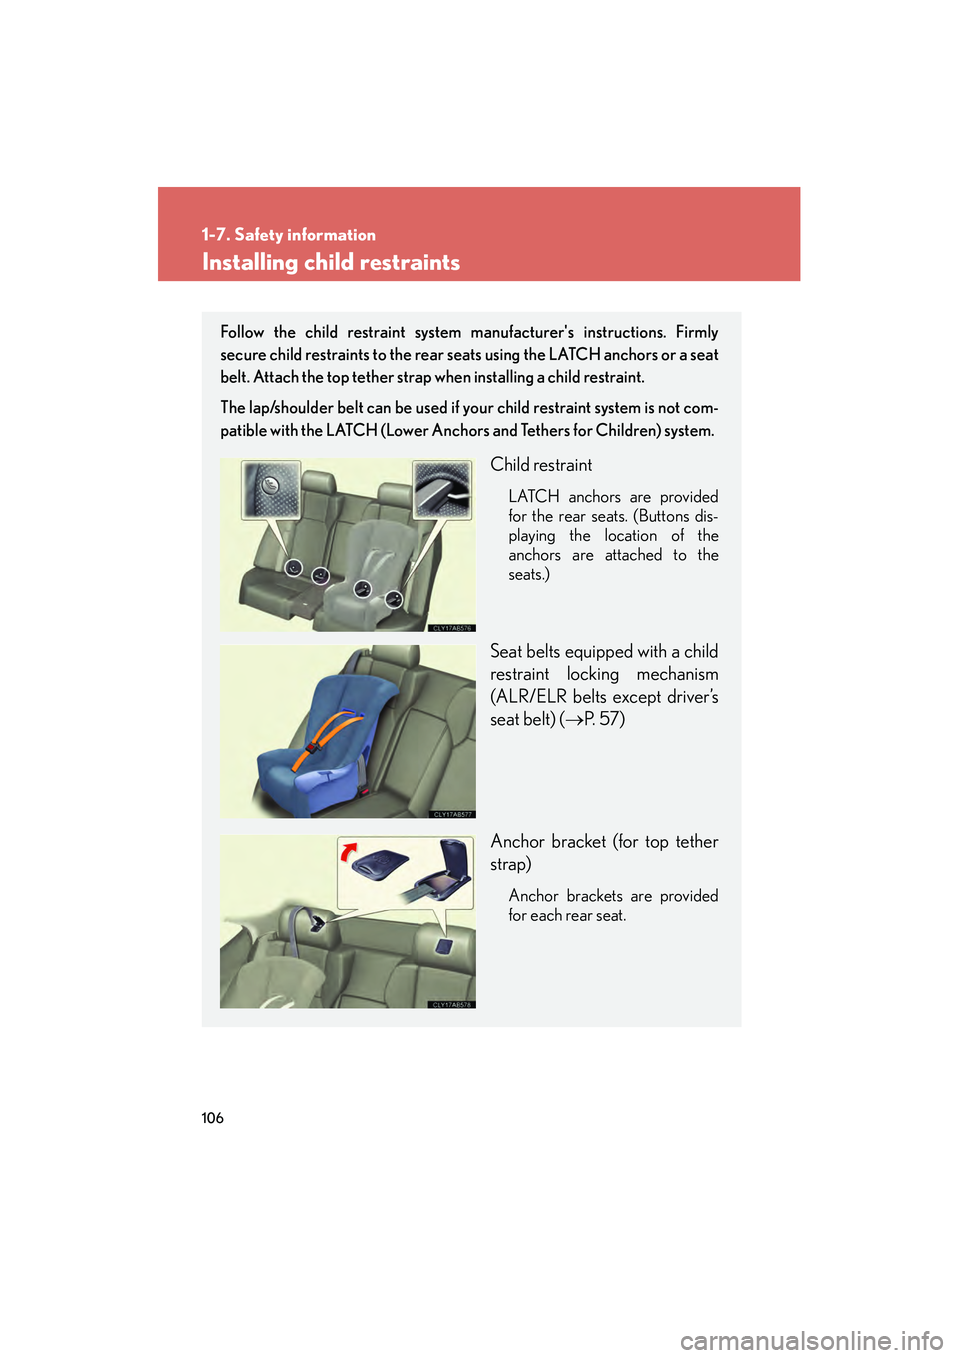
Follow the child restraint system manufacturer's instructions. Firmly
secure child restraints to the rear seats using the LATCH anchors or a seat
belt. Attach the top tether strap when installing a child restraint.
The lap/shoulder belt can be used if your child restraint system is not com-
patible with the LATCH (Lower Anchor s and Tethers for Children) system.
Child restraint
LATCH anchors are provided
for the rear seats. (Buttons dis-
playing the location of the
anchors are attached to the
seats.)
Seat belts equipped with a child
restraint locking mechanism
(ALR/ELR belts except driver’s
seat belt) (→P. 5 7 )
Anchor bracket (for top tether
strap)
Anchor brackets are provided
for each rear seat.
Page 109 of 542

108
1-7. Safety information
10_IS F_UType B
Widen the gap between
the seat cushion and seat-
back slightly.
Latch the buckles onto the
LATCH anchors.
If the child restraint has a
top tether strap, the top
tether strap should be
latched onto the top tether
strap anchors.
For owners in Canada:
The symbol on a child restraint sys-
tem indicates the presence of a
lower connector system.
Installing child restraints using a seat belt (child restraint lock function belt)
■ Rear facing Infant seat/convertible seat
Place the child seat on the rear
seat facing the rear of the vehicle.
Canada only
STEP1
STEP2
STEP3
STEP1
Page 110 of 542

109
1-7. Safety information
1
Before driving
10_IS F_URun the seat belt through the child
seat and insert the plate into the
buckle. Make sure that the belt is
not twisted.
Fully extend the shoulder belt and
then allow it to retract slightly in
order to activate the ALR lock
mode.
Lock mode allows the seat belt to
retract only.
While pushing the child seat down
into the rear seat, allow the shoul-
der belt to retract until the child
seat is securely in place.
After the shoulder belt has
retracted to a point where there is
no slack in the belt, pull the belt to
check that it cannot be extended.
■
Forward facing Convertible seat
Place the child seat on the seat
facing the front of the vehicle.
STEP2
STEP3
STEP4
STEP1
Page 111 of 542

110
1-7. Safety information
10_IS F_URun the seat belt through the child
seat and insert the plate into the
buckle. Make sure that the belt is
not twisted.
Fully extend the shoulder belt and
allow it to retract to put it in lock
mode.
Lock mode allows the seat belt to
retract only.
While pushing the child seat into
the rear seat, allow the shoulder
belt to retract until the child seat is
securely in place.
After the shoulder belt has
retracted to a point where there is
no slack in the belt, pull the belt to
check that it cannot be extended.
If the child restraint has a top tether
strap, the top tether strap should
be latched onto the top tether strap
anchors.
STEP2
STEP3
STEP4
Page 113 of 542

112
1-7. Safety information
10_IS F_U
Child restraint systems with a top tether strapSecure the child restraint using a
seat belt or the lower anchors, and
lock the head restraint in place at
the original position.
Open the anchor bracket cover,
latch the hook onto the anchor
bracket and tighten the top tether
strap.
Make sure the top tether strap is
securely latched.
STEP1
STEP2
■Laws and regulations pertaining to anchorages
The LATCH system conforms to FMVSS225 or CMVSS210.2.
Child restraint systems conforming to FMVSS213 or CMVSS213 specifications
can be used.
This vehicle is designed to conform to the SAE J1819.
CAUTION
■When installing a booster seat
Do not fully extend the shoulder belt to prevent the belt from going to ALR lock
mode: (→P. 5 9 )
ALR mode causes the belt to tighten only which could cause injury or discomfort to
the child.
Page 114 of 542

113
1-7. Safety information
1
Before driving
10_IS F_U
CAUTION
■When installing a child restraint system
Follow the directions given in the child restraint system installation manual and fix
the child restraint system securely in place.
If the child restraint system is not correctly fixed in place, the child or other passen-
gers may be injured or even killed in the event of sudden braking, sudden swerving
or an accident.
●When a booster seat is installed, always ensure that the shoulder belt is posi-
tioned across the center of the child's shoulder. The belt should be kept away
from the child's neck, but not so that it could fall off the child's shoulder. Failing to
do so may result in death or serious injury in the event of sudden braking, sudden
swerving or an accident.
●Make sure the outside rear seat head restraints are not in the folded position.
●Ensure that the belt and tab are securely locked and the seat belt is not twisted.
●Push and pull the child seat from side to side and forward to be sure it is secure.
●After securing a child restraint system, never adjust the seat.
●Follow all installation instructions provided by the child restraint system manufac-
turer.
●If the driver’s seat interferes with the child
restraint system and prevents it from being
attached correctly, attach the child restraint
system to the right-hand rear seat.
●Only put a forward facing or booster child
seat on the front seat when unavoidable.
When installing a forward facing or
booster child seat on the front passenger
seat, move the seat as far back as possible
even if the “AIR BAG OFF” indicator light is
illuminated. Failing to do so may result in
death or serious injury if the airbags deploy
(inflate).
Page 117 of 542

116
10_IS F_U
2-1. Driving procedures
Driving the vehicle
Starting on a steep uphillFirmly set the parking brake and shift the shift lever to D.
Gently depress the accelerator pedal.
Release the parking brake.
The following procedures should be observed to ensure safe driving.
■Starting the engine ( →P. 124)
■ Driving
With the brake pedal depressed, shift the shift lever to D. (→P. 1 2 8 )
Release the parking brake. ( →P. 1 3 7 )
Gradually release the brake pedal and gently depress the
accelerator pedal to accelerate the vehicle.
■ Stopping
With the shift lever in D, depress the brake pedal.
If necessary, set the parking brake.
When the vehicle is stopped for an extended period of time, shift the
shift lever to P or N. (
→P. 1 2 8 )
■Parking the vehicle
With the shift lever in D, depress the brake pedal.
Set the parking brake. (→ P. 1 3 7 )
Shift the shift lever to P. (→ P. 1 2 8 )
Press the “ENGINE START STOP” switch to stop the engine.
Lock the door, making sure that you have the electronic key on
your person.
STEP1
STEP2
STEP3
STEP1
STEP2
STEP1
STEP2
STEP3
STEP4
STEP5
STEP1
STEP2
STEP3
Page 121 of 542

120
2-1. Driving procedures
10_IS F_U
CAUTION
■When the vehicle is stopped
●Do not race the engine.
If the vehicle is in any gear other than P or N, the vehicle may accelerate suddenly
and unexpectedly, and may cause an accident.
●Do not leave the vehicle with the engine running for a long time.
If such a situation cannot be avoided, park the vehicle in an open space and
check that exhaust fumes do not enter the vehicle interior.
●Always keep a foot on the brake pedal while the engine is running to prevent an
accident caused by the vehicle moving.
●To prevent the vehicle from moving and causing an accident, apply the brake
pedal or parking brake when stopping the vehicle on a hill.
■When the vehicle is parked
●Do not leave glasses, cigarette lighters, spray cans, or soft drink cans in the vehi-
cle when it is in the sun.
Doing so may result in the following.
• Gas may leak from a cigarette lighter or spray can, and may lead to a fire.
• The temperature inside the vehicle may cause the plastic lenses and plasticmaterial of eye glasses to deform or crack.
• Soft drink cans may fracture, causing the contents to spray over the interior of the vehicle, and may also cause a short circuit in the vehicle's electrical com-
ponents.
●Always apply the parking brake, shift the shift lever to P, stop the engine and lock
the vehicle.
Do not leave the vehicle unattended while the engine is running.
●Do not touch the exhaust pipes or rear bumper exhaust diffusers while the engine
is running or immediately after turning the engine off.
Doing so may cause burns.
●Do not leave the engine running in an area with snow build-up, or where it is
snowing. If snowbanks build up around the vehicle while the engine is running,
exhaust gases may collect and enter the vehicle. This may lead to death or a seri-
ous health hazard.
Page 127 of 542

126
2-1. Driving procedures
10_IS F_U
■If the engine does not start
The engine immobilizer system may not have been deactivated. (→P. 7 8 )
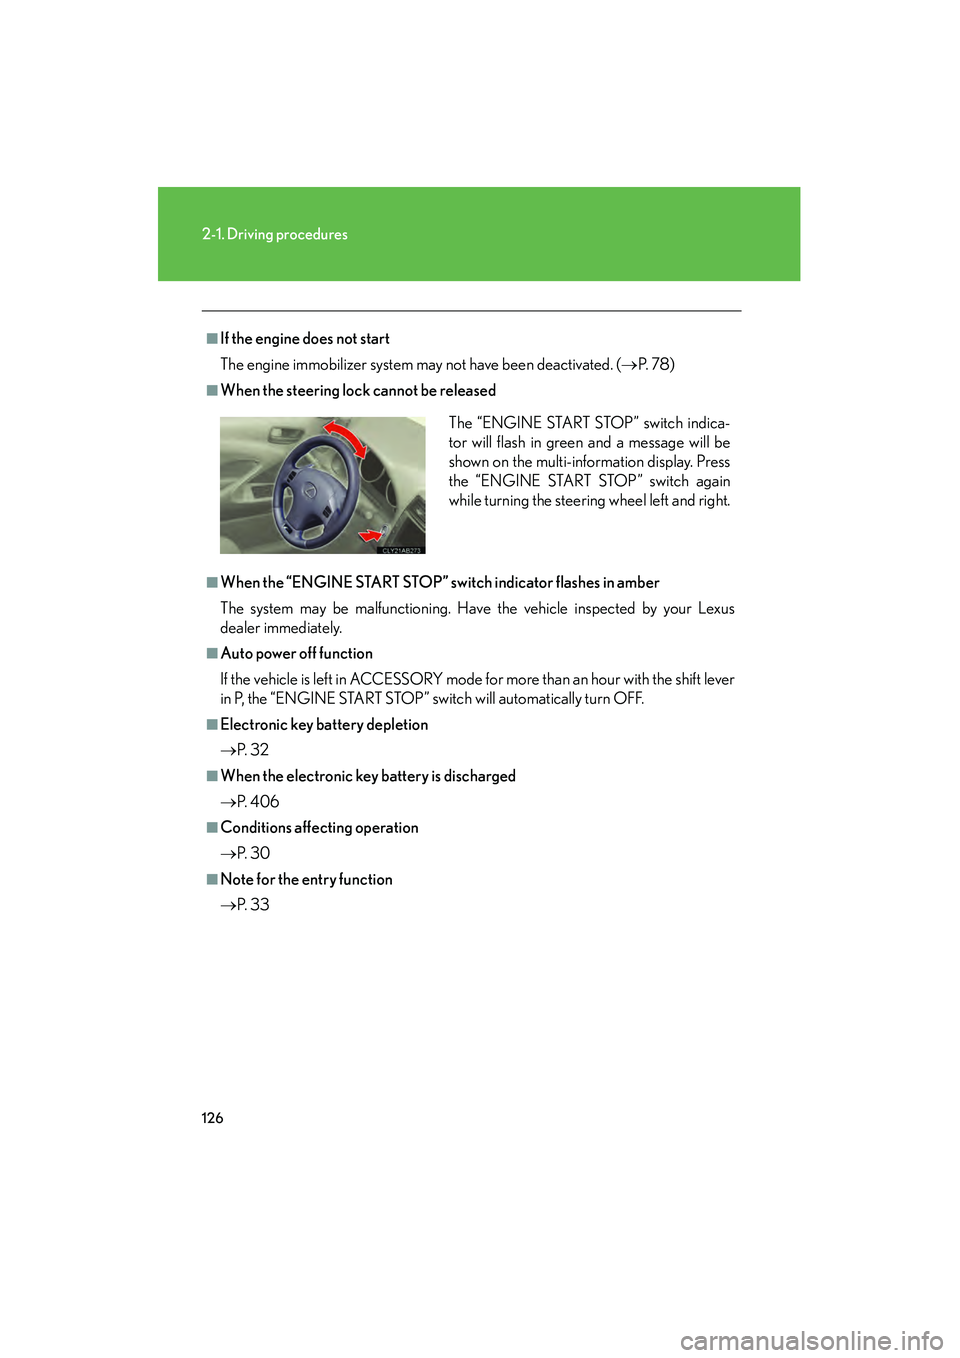
■When the steering lock cannot be released
■When the “ENGINE START STOP” switch indicator flashes in amber
The system may be malfunctioning. Have the vehicle inspected by your Lexus
dealer immediately.
■Auto power off function
If the vehicle is left in ACCESSORY mode for more than an hour with the shift lever
in P, the “ENGINE START STOP” switch will automatically turn OFF.
■Electronic key battery depletion
→P. 3 2
■When the electronic key battery is discharged
→P. 4 0 6
■Conditions affecting operation
→P. 3 0
■Note for the entry function
→P. 3 3 The “ENGINE START STOP” switch indica-
tor will flash in green and a message will be
shown on the multi-information display. Press
the “ENGINE START STOP” switch again
while turning the steering wheel left and right.
Page 152 of 542

151
2-3. Operating the lights and windshield wipers
2
When driving
10_IS F_U
AFS (Adaptive Front—lighting System)AFS (Adaptive Front—lighting System) improves visibility at intersections
and on curves by automatically adjusting the level of the headlights
according to vehicle speed and the degree of the tire’s angle as con-
trolled by steering input.
Operates at speeds of 6 mph (10 km/h) or higher.
■ Deactivating AFS
How to switch: →P. 319
The “AFS OFF” indicator turns on when the AFS is deactivated.
■Daytime running light system
To make your vehicle more visible to other drivers, the headlights turn on automati-
cally (at a reduced intensity) whenever the engine is started and the parking brake
is released. Daytime running lights are not designed for use at night.
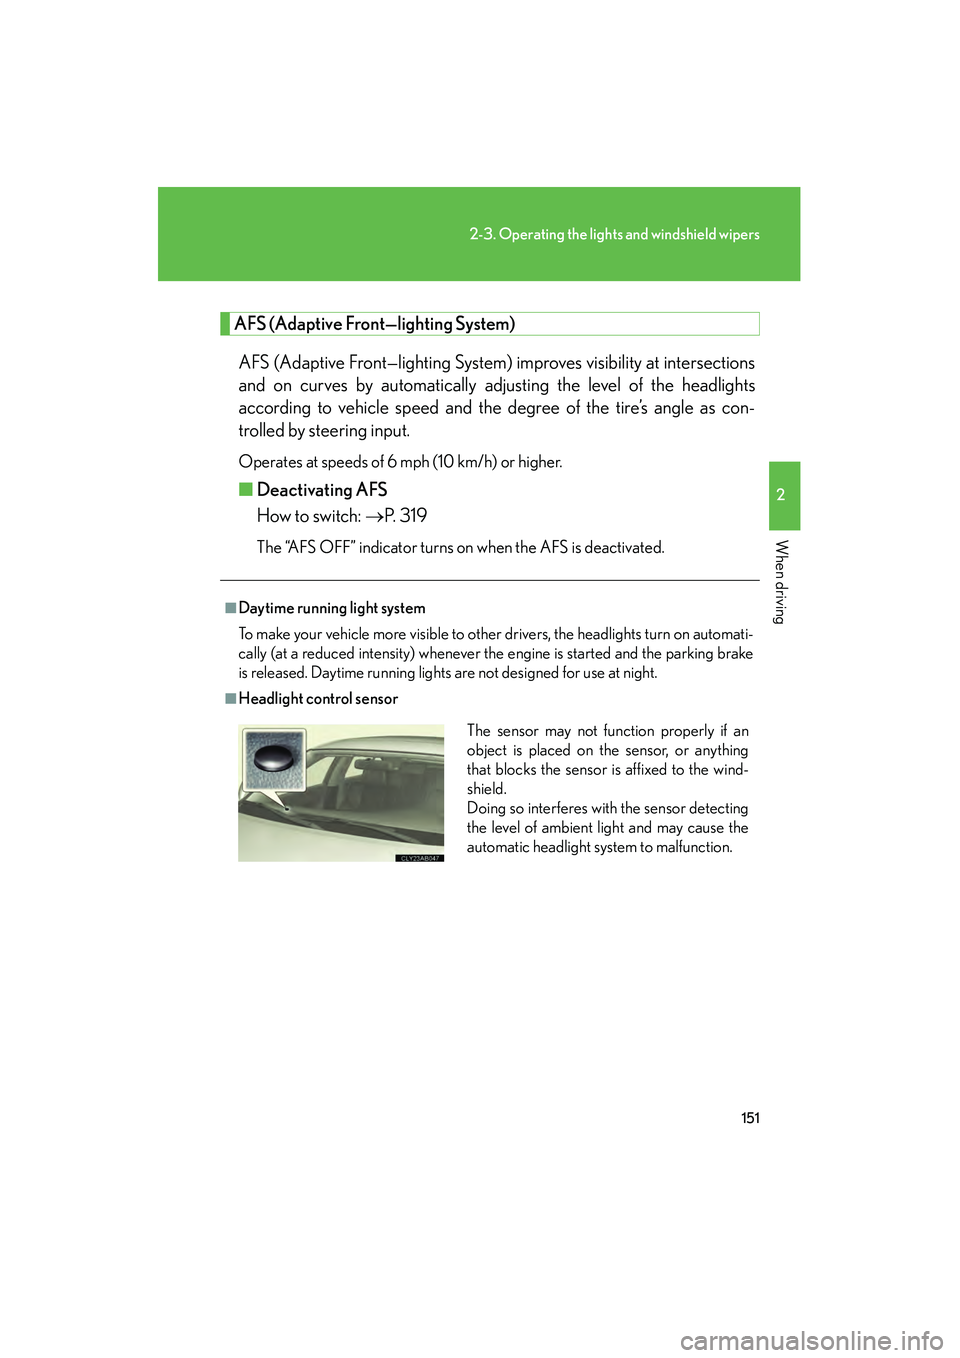
■Headlight control sensor
The sensor may not function properly if an
object is placed on the sensor, or anything
that blocks the sensor is affixed to the wind-
shield.
Doing so interferes with the sensor detecting
the level of ambient light and may cause the
automatic headlight system to malfunction.