rear view mirror Lexus IS200t 2015 User Guide
[x] Cancel search | Manufacturer: LEXUS, Model Year: 2015, Model line: IS200t, Model: Lexus IS200t 2015Pages: 612, PDF Size: 132.21 MB
Page 153 of 612
1533-3. Adjusting the seats
3
Operation of each component
IS200t_EE(OM53D19E)
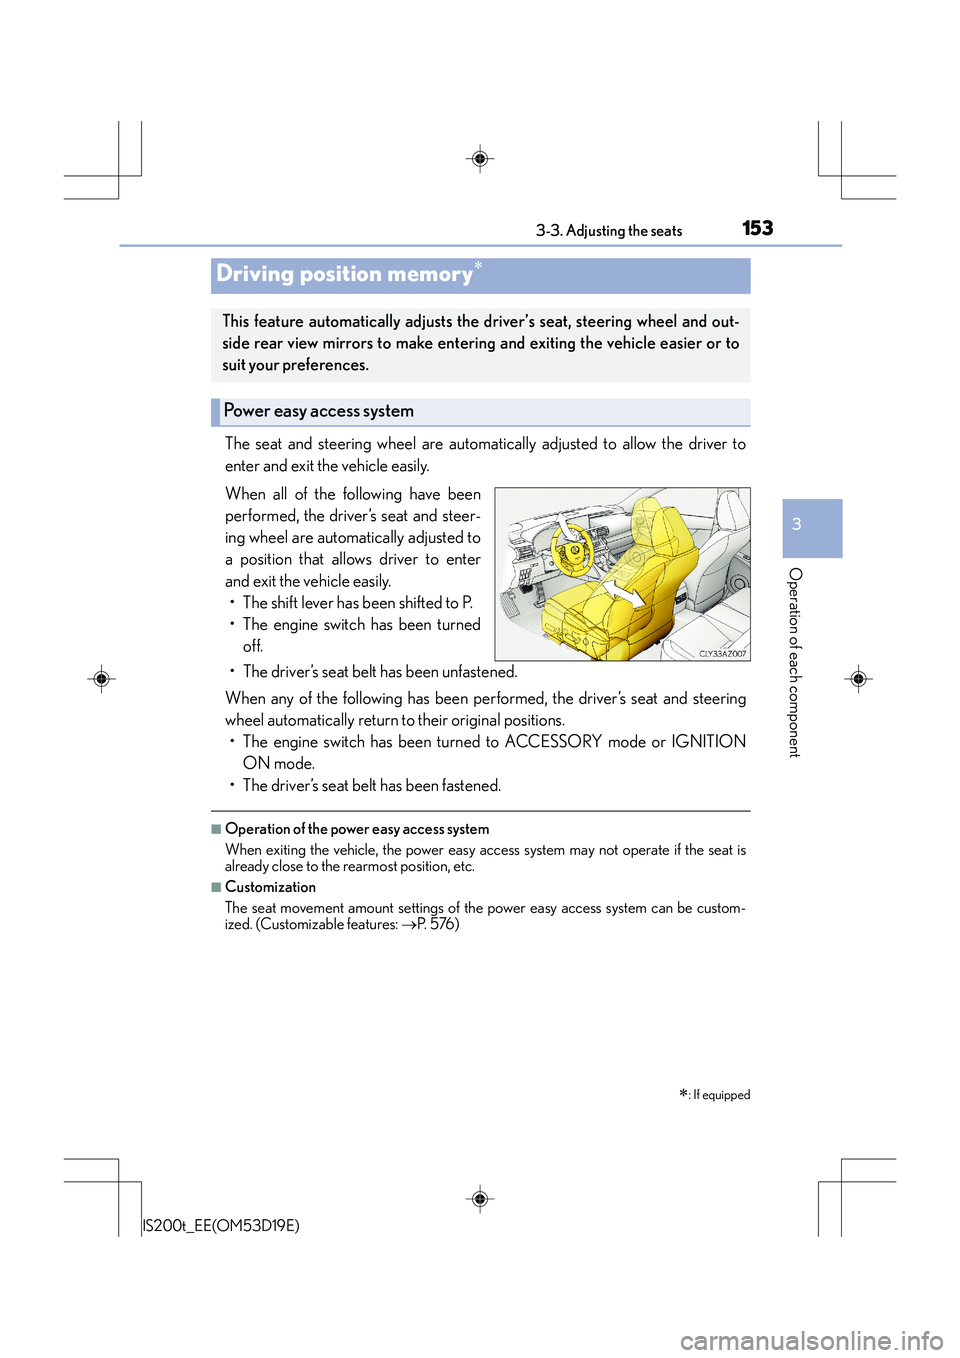
The seat and steering wheel are automatically adjusted to allow the driver to
enter and exit the vehicle easily.
When all of the following have been
performed, the driver’s seat and steer-
ing wheel are automatically adjusted to
a position that allows driver to enter
and exit the vehicle easily.• The shift lever has been shifted to P.
• The engine switch has been turned off.
• The driver’s seat belt has been unfastened.
When any of the following has been performed, the driver’s seat and steering
wheel automatically return to their original positions. • The engine switch has been turned to ACCESSORY mode or IGNITION ON mode.
• The driver’s seat belt has been fastened.
■Operation of the power easy access system
When exiting the vehicle, the power easy access system may not operate if the seat is
already close to the rearmost position, etc.
■Customization
The seat movement amount settings of the power easy access system can be custom-
ized. (Customizable features: →P. 5 76 )
Driving position memory∗
∗
: If equipped
This feature automatically adjusts the driver’s seat, steering wheel and out-
side rear view mirrors to make entering and exiting the vehicle easier or to
suit your preferences.
Power easy access system
Page 154 of 612
1543-3. Adjusting the seats
IS200t_EE(OM53D19E)
Your preferred driving position (the position of the driver’s seat, steering wheel
and outside rear view mirrors) can be recorded and recalled by pressing a but-
ton.
Three different driving positions can be recorded into memory.
■Recording procedure
Check that the shift lever is in P.
Turn the engine switch to IGNITION ON mode.
Adjust the driver’s seat, steering wheel, and outside rear view mirrors to the
desired positions.
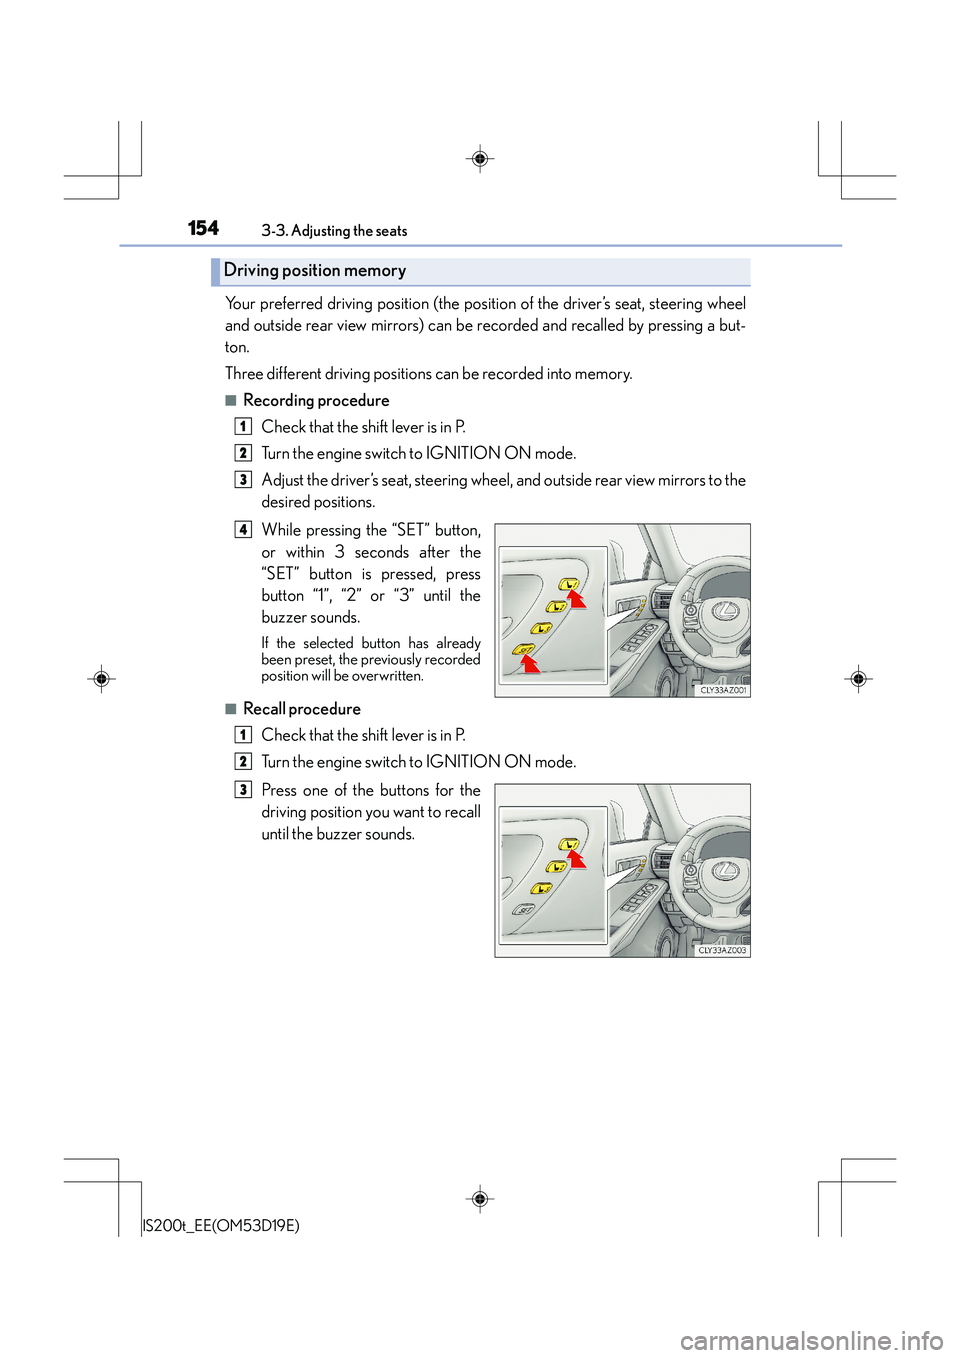
While pressing the “SET” button,
or within 3 seconds after the
“SET” button is pressed, press
button “1”, “2” or “3” until the
buzzer sounds.
If the selected button has already
been preset, the previously recorded
position will be overwritten.
■Recall procedureCheck that the shift lever is in P.
Turn the engine switch to IGNITION ON mode.
Press one of the buttons for the
driving position you want to recall
until the buzzer sounds.
Driving position memory
1
2
3
4
1
2
3
Page 156 of 612
1563-3. Adjusting the seats
IS200t_EE(OM53D19E)
Each electronic key (including a card key) can be registered to recall your pre-
ferred driving position.
■Registering procedure
Record your driving position to button “1”, “2” or “3” before performing the
following:
Carry only the key you want to register, and then close the driver’s door. If 2 or
more keys are in the vehicle, the driving position cannot be recorded properly.Check that the shift lever is in P.
Turn the engine switch to IGNITION ON mode.
Recall the driving position that you want to record.
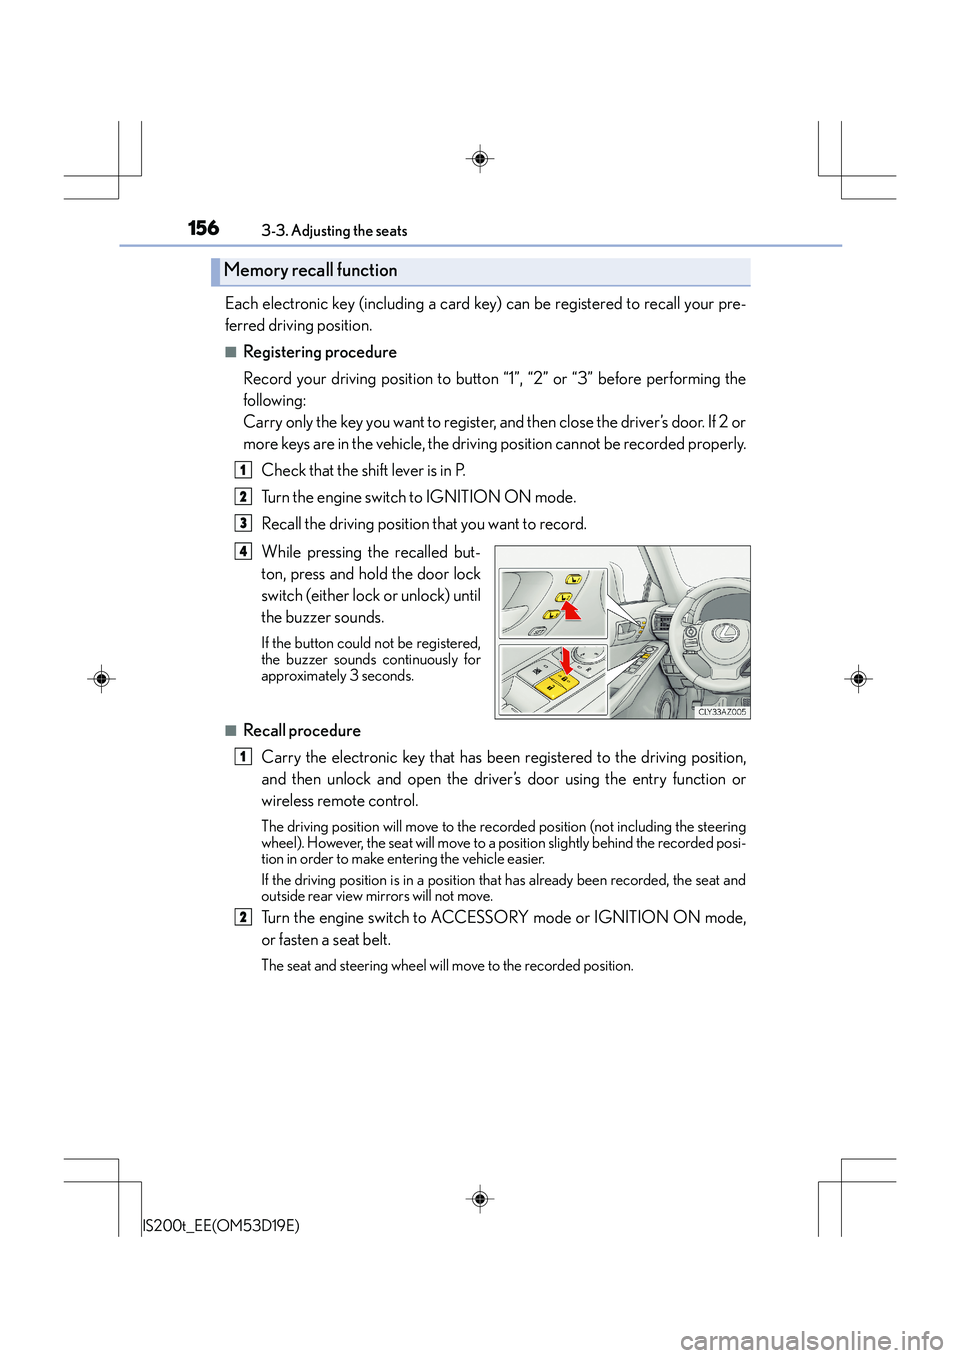
While pressing the recalled but-
ton, press and hold the door lock
switch (either lock or unlock) until
the buzzer sounds.
If the button could not be registered,
the buzzer sounds continuously for
approximately 3 seconds.
■Recall procedureCarry the electronic key that has been registered to the driving position,
and then unlock and open the driver ’s door using the entry function or
wireless remote control.
The driving position will move to the reco rded position (not including the steering
wheel). However, the seat will move to a position slightly behind the recorded posi-
tion in order to make entering the vehicle easier.
If the driving position is in a position that has already been recorded, the seat and
outside rear view mirrors will not move.
Turn the engine switch to ACCESSORY mode or IGNITION ON mode,
or fasten a seat belt.
The seat and steering wheel will move to the recorded position.
Memory recall function
1
2
3
4
1
2
Page 163 of 612
1633-4. Adjusting the steering wheel and mirrors
3
Operation of each component
IS200t_EE(OM53D19E)
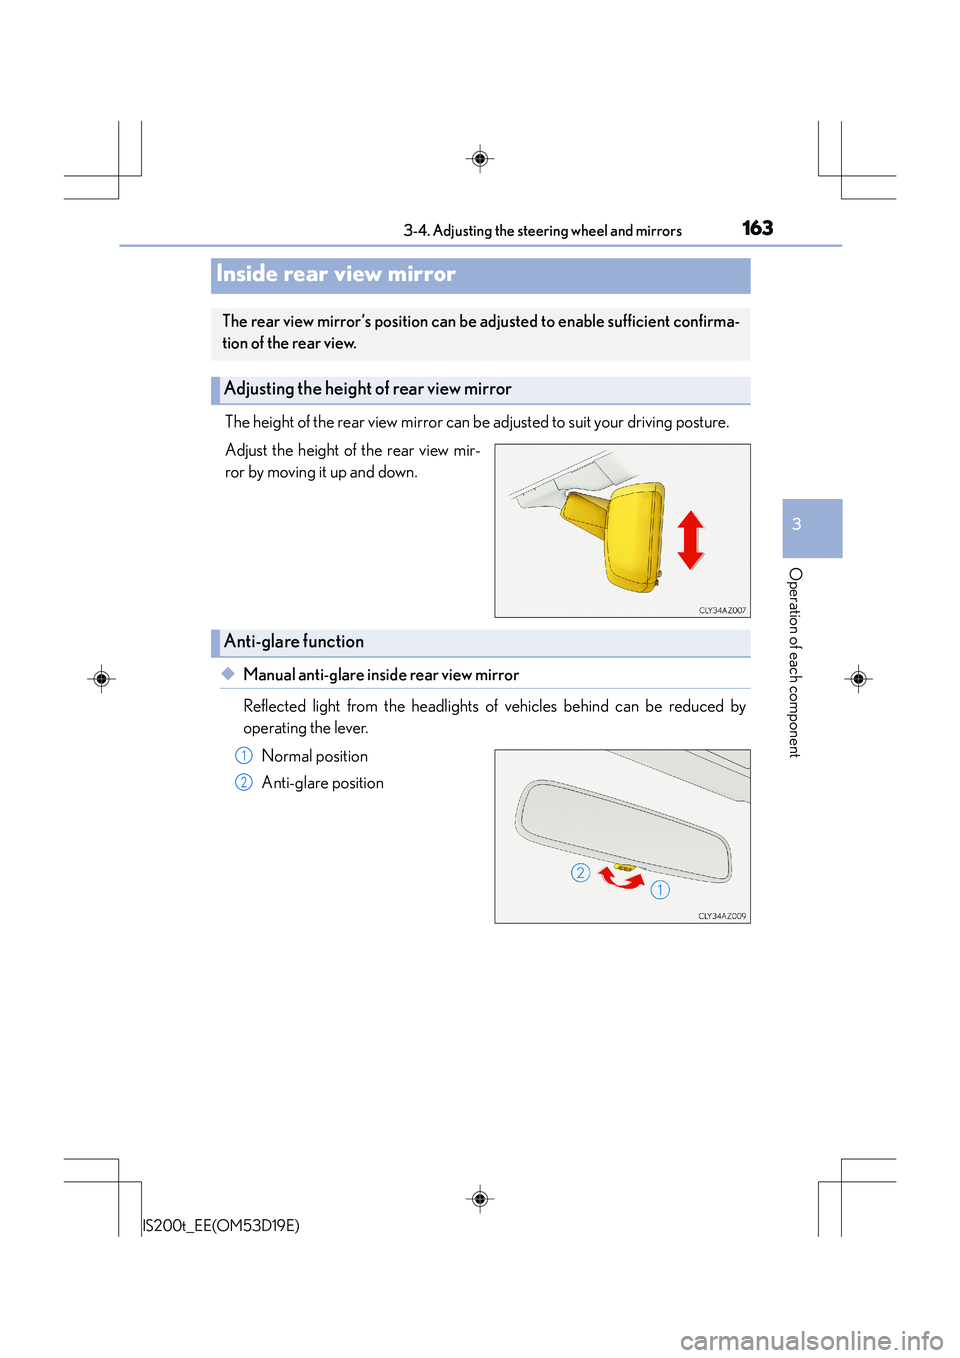
The height of the rear view mirror can be adjusted to suit your driving posture.
Adjust the height of the rear view mir-
ror by moving it up and down.
◆Manual anti-glare inside rear view mirror
Reflected light from the headlights of vehicles behind can be reduced by
operating the lever.Normal position
Anti-glare position
Inside rear view mirror
The rear view mirror’s position can be adjusted to enable sufficient confirma-
tion of the rear view.
Adjusting the height of rear view mirror
Anti-glare function
1
2
Page 164 of 612
1643-4. Adjusting the steering wheel and mirrors
IS200t_EE(OM53D19E)
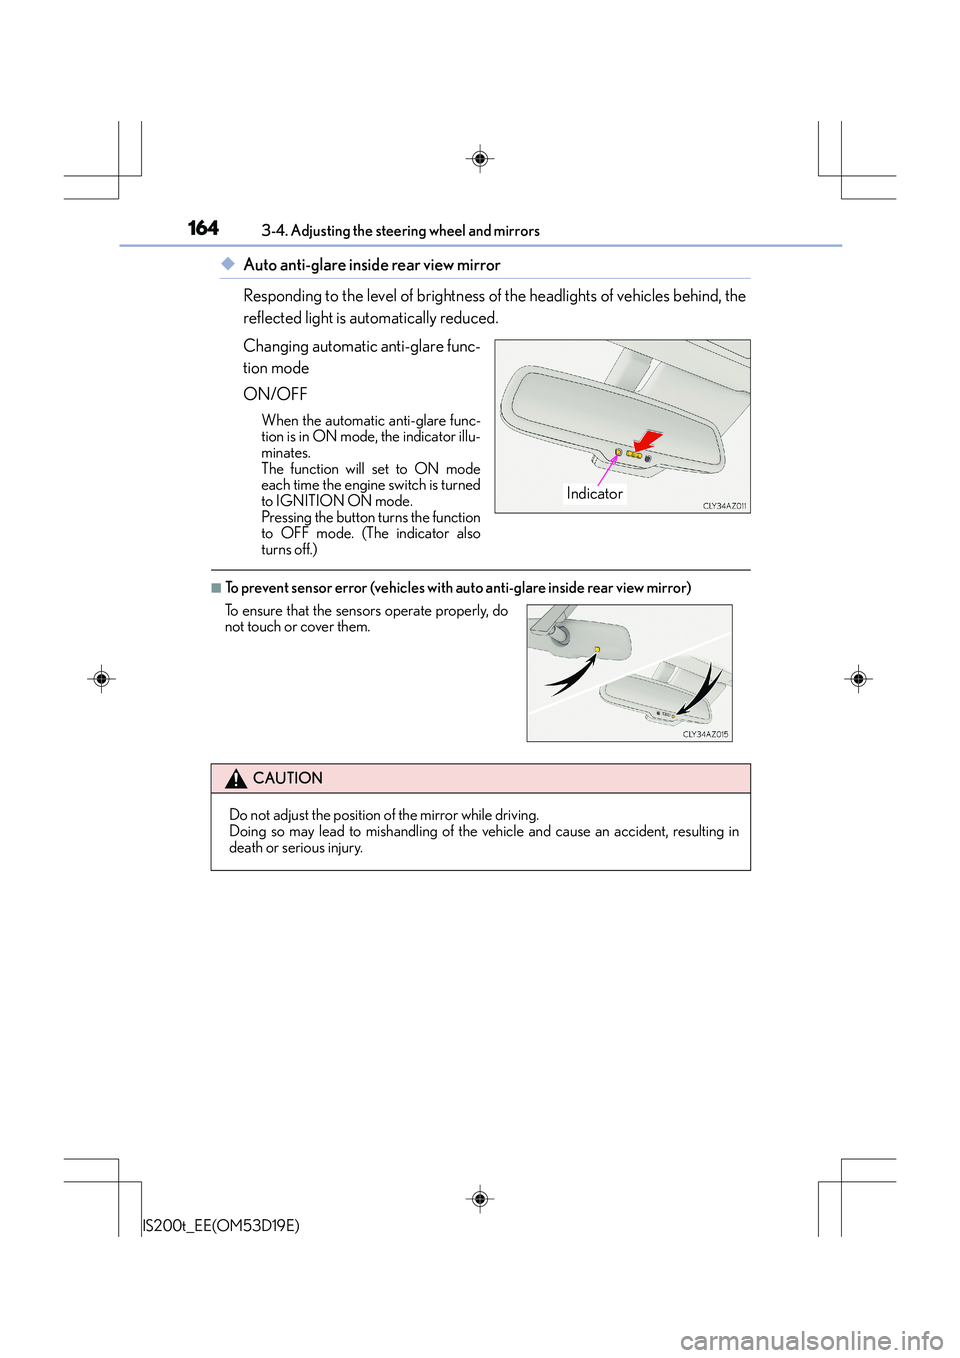
◆Auto anti-glare inside rear view mirror
Responding to the level of brightness of the headlights of vehicles behind, the
reflected light is automatically reduced.
Changing automatic anti-glare func-
tion mode
ON/OFF
When the automatic anti-glare func-
tion is in ON mode, the indicator illu-
minates.
The function will set to ON mode
each time the engine switch is turned
to IGNITION ON mode.
Pressing the button turns the function
to OFF mode. (The indicator also
turns off.)
■To prevent sensor error (vehicles with auto anti-glare inside rear view mirror)
Indicator
To ensure that the sensors operate properly, do
not touch or cover them.
CAUTION
Do not adjust the position of the mirror while driving.
Doing so may lead to mishandling of the vehicle and cause an accident, resulting in
death or serious injury.
Page 165 of 612
1653-4. Adjusting the steering wheel and mirrors
3
Operation of each component
IS200t_EE(OM53D19E)
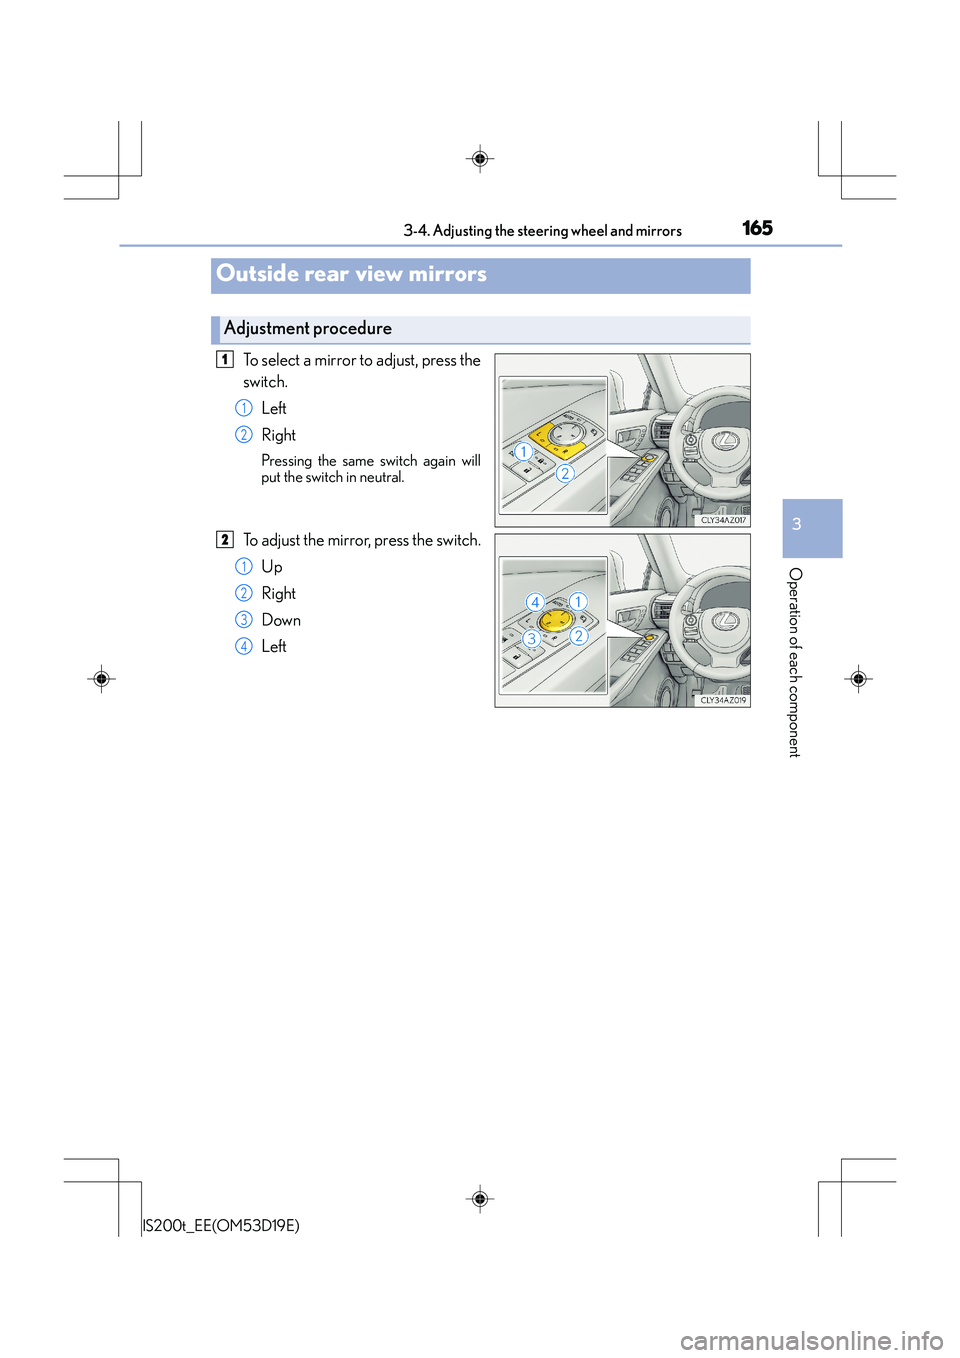
To select a mirror to adjust, press the
switch.Left
Right
Pressing the same switch again will
put the switch in neutral.
To adjust the mirror, press the switch.Up
Right
Down
Left
Outside rear view mirrors
Adjustment procedure
1
1
2
2
1
2
3
4
Page 167 of 612
1673-4. Adjusting the steering wheel and mirrors
3
Operation of each component
IS200t_EE(OM53D19E)
When either “L” or “R” of the mirror select switch is selected, the outside rear
view mirrors will automatically angle downwards when the vehicle is reversing in
order to give a better view of the ground.
To disable this function, select neither “L” nor “R”.
■Adjusting the mirror angle when the vehicle is reversing
With the shift lever in R, adjust the mirror angle at a desired position.
The adjusted angle will be memorized and the mirror will automatically tilt to
the memorized angle whenever the shift lever is shifted to R from next time.
The memorized downward tilt position of the mirror is linked to the normal position
(angle adjusted with the shift lever in othe r than R). Therefore, if the normal posi-
tion is changed after adjustment, the tilt position will also change.
When the normal position is changed, readjust the angle in reversing.
■Mirror angle can be adjusted when
The engine switch is in ACCESSORY or IGNITION ON mode.
■When disconnecting and reconnecting battery terminals
The automatic folding/extending mirror function will return to off as default. To turn the
function on, press the switch again to select on.
■When the mirrors are fogged up
The outside rear view mirrors can be cleared using the mirror defoggers. Turn on the
rear window defogger to turn on the outside rear view mirror defoggers. ( →P. 4 0 4 )
■Automatic adjustment of the mirror angle (if equipped)
A desired mirror face angle can be entered to memory and recalled automatically by the
driving position memory. ( →P. 1 5 3 )
■Auto anti-glare function (if equipped)
When the anti-glare inside rear view mirror is set to automatic mode, the outside rear
view mirrors will activate in conjunction with the anti-glare inside rear view mirror to
reduce reflected light. ( →P. 1 6 4 )
■Using automatic mode in cold weather
When automatic mode is used in cold weather, the door mirror could freeze up and
automatic stowing and return may not be possible. In this case, remove any ice and snow
from the door mirror, then either operate the mirror using manual mode or move the mir-
ror by hand.
■Customization
The automatic mirror folding and extending operation can be changed. (Customizable
features: →P. 5 76 )
Linked mirror function when reversing (if equipped)
Page 168 of 612
1683-4. Adjusting the steering wheel and mirrors
IS200t_EE(OM53D19E)
CAUTION
■Important points while driving
Observe the following precautions while driving.
Failure to do so may result in loss of control of the vehicle and cause an accident, result-
ing in death or serious injury.
●Do not adjust the mirrors while driving.
●Do not drive with the mirrors folded.
●Both the driver and passenger side mirrors must be extended and properly adjusted
before driving.
■When a mirror is moving
To avoid personal injury and mirror malfunction, be careful not to get your hand caught
by the moving mirror.
■When the mirror defoggers are operating
Do not touch the rear view mirror surfaces, as they can become very hot and burn you.
Page 181 of 612
1814-1. Before driving
4
Driving
IS200t_EE(OM53D19E)
CAUTION
Observe the following precautions.
Failure to do so may result in death or serious injury.
■When starting the vehicle
Always keep your foot on the brake pedal while stopped with the engine running. This
prevents the vehicle from creeping.
■When driving the vehicle
●Do not drive if you are unfamiliar with the location of the brake and accelerator ped-
als to avoid depressing the wrong pedal.
• Accidentally depressing the accelerator pedal instead of the brake pedal will result in sudden acceleration that may lead to an accident.
• When backing up, you may twist your body around, leading to a difficulty in oper-
ating the pedals. Make sure to operate the pedals properly.
• Make sure to keep a correct driving posture even when moving the vehicle only slightly. This allows you to depress the brake and accelerator pedals properly.
• Depress the brake pedal using your right foot. Depressing the brake pedal using
your left foot may delay response in an emergency, resulting in an accident.
●Do not drive the vehicle over or stop the vehicle near flammable materials.
The exhaust system and exhaust gases can be extremely hot. These hot parts may
cause a fire if there is any flammable material nearby.
●During normal driving, do not turn off the engine. Turning the engine off while driving
will not cause loss of steering or braking cont rol, but the power assist to these systems
will be lost. This will make it more difficul t to steer and brake, so you should pull over
and stop the vehicle as soon as it is safe to do so.
However, in the event of an emergency, such as if it becomes impossible to stop the
vehicle in the normal way: →P. 4 9 1
●Use engine braking (downshift) to maintain a safe speed when driving down a steep
hill.
Using the brakes continuously may cause the brakes to overheat and lose effective-
ness. ( →P. 2 0 1 )
●Do not adjust the positions of the steering wheel, the seat, or the inside or outside rear
view mirrors while driving.
Doing so may result in a loss of vehicle control.
●Always check that all passengers’ arms, heads or other parts of their body are not
outside the vehicle.
Page 192 of 612
1924-1. Before driving
IS200t_EE(OM53D19E)
■Tire information
●Increase the tire inflation pressure to 20.0 kPa (0.2 kgf/cm2 or bar, 3 psi) greater than
the recommended value when towing. ( →P. 5 7 2 )
●Increase the air pressure of the trailer tires in accordance with the total trailer weight
and according to the values recommended by the manufacturer of your trailer.
■Break-in schedule
Lexus recommends that vehicles fitted with new power train components should not be
used for towing trailers for the first 800 km (500 miles).
■Safety checks before towing
●Check that the maximum load limit for the towing hitch/bracket hitch ball is not
exceeded. Bear in mind that the coupling weight of the trailer will add to the load
exerted on the vehicle. Also make sure that you will not be towing a load that exceeds
the maximum permissible axle capacity.
●Ensure that the trailer load is secure.
●Supplementary outside rear view mirrors shou ld be added to the vehicle if the traffic
behind cannot be clearly seen with standa rd mirrors. Adjust the extending arms of
these mirrors on both sides of the vehicle so that they always provide maximum visibility
of the road behind.
■Maintenance
●Maintenance must be performed more frequently when using the vehicle for towing
due to the greater weight burden placed on the vehicle compared to normal driving.
●Retighten all bolts securing the hitching ball and bracket after towing for approximately
1000 km (600 miles).
NOTICE
■When the rear bumper strengthening material is aluminum
Ensure the steel bracket part does not come directly in contact with that area.
When steel and aluminum come into contact, there is a reaction similar to corrosion,
which will weaken the section concerned and may result in damage. Apply a rust inhib-
itor to parts that will come in co ntact when attaching a steel bracket.