buttons Lexus IS220d 2012 Navigation manual
[x] Cancel search | Manufacturer: LEXUS, Model Year: 2012, Model line: IS220d, Model: Lexus IS220d 2012Pages: 407, PDF Size: 23.8 MB
Page 5 of 407
5
ISF_IS_ISC_Navi_EE ISF_IS_ISC_Navi_EE
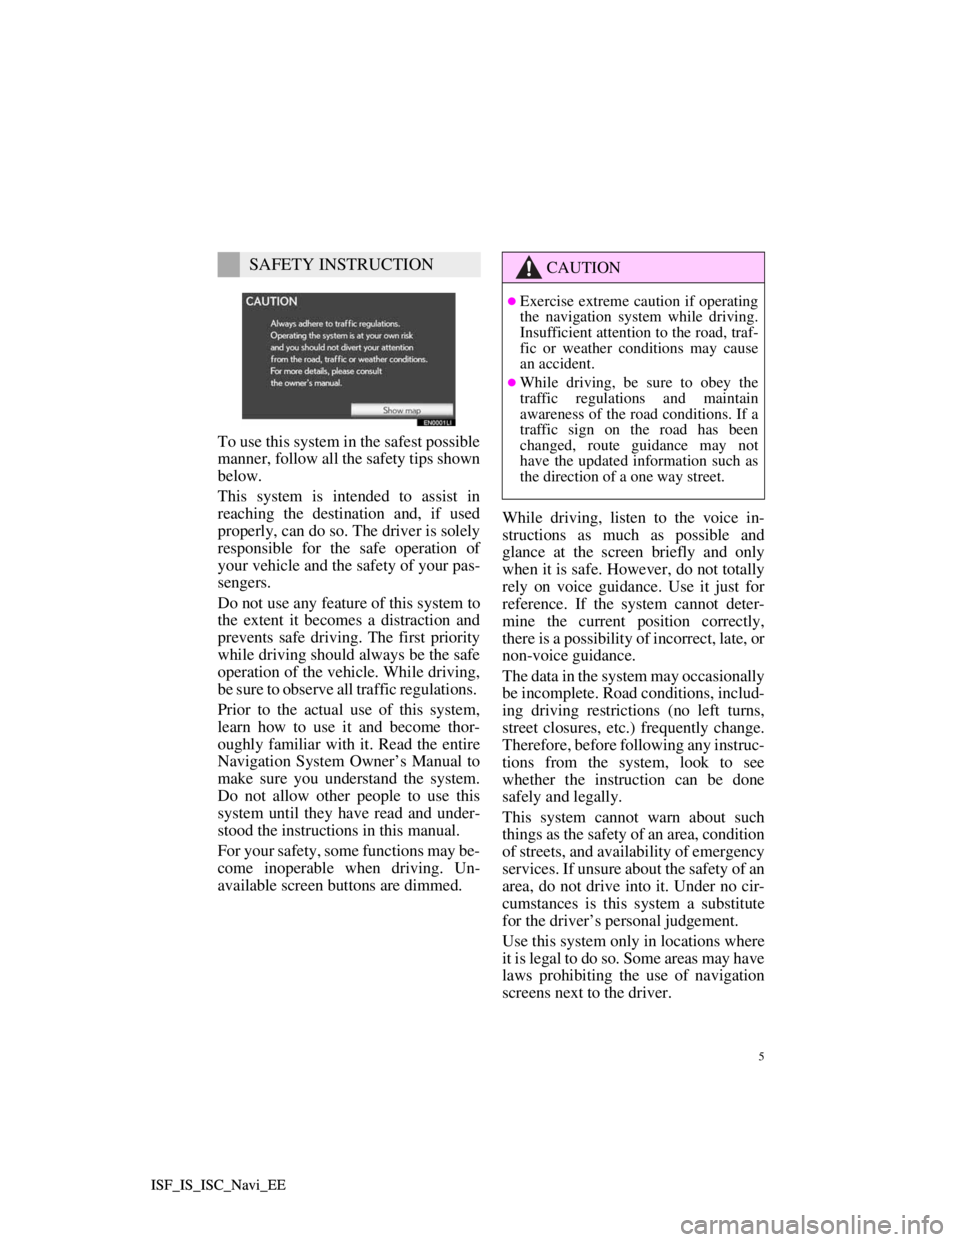
To use this system in the safest possible
manner, follow all the safety tips shown
below.
This system is intended to assist in
reaching the destination and, if used
properly, can do so. The driver is solely
responsible for the safe operation of
your vehicle and the safety of your pas-
sengers.
Do not use any feature of this system to
the extent it becomes a distraction and
prevents safe driving. The first priority
while driving should always be the safe
operation of the vehicle. While driving,
be sure to observe all traffic regulations.
Prior to the actual use of this system,
learn how to use it and become thor-
oughly familiar with it. Read the entire
Navigation System Owner’s Manual to
make sure you understand the system.
Do not allow other people to use this
system until they have read and under-
stood the instructions in this manual.
For your safety, some functions may be-
come inoperable when driving. Un-
available screen buttons are dimmed.While driving, listen to the voice in-
structions as much as possible and
glance at the screen briefly and only
when it is safe. However, do not totally
rely on voice guidance. Use it just for
reference. If the system cannot deter-
mine the current position correctly,
there is a possibility of incorrect, late, or
non-voice guidance.
The data in the system may occasionally
be incomplete. Road conditions, includ-
ing driving restrictions (no left turns,
street closures, etc.) frequently change.
Therefore, before following any instruc-
tions from the system, look to see
whether the instruction can be done
safely and legally.
This system cannot warn about such
things as the safety of an area, condition
of streets, and availability of emergency
services. If unsure about the safety of an
area, do not drive into it. Under no cir-
cumstances is this system a substitute
for the driver’s personal judgement.
Use this system only in locations where
it is legal to do so. Some areas may have
laws prohibiting the use of navigation
screens next to the driver.
SAFETY INSTRUCTIONCAUTION
Exercise extreme caution if operating
the navigation system while driving.
Insufficient attention to the road, traf-
fic or weather conditions may cause
an accident.
While driving, be sure to obey the
traffic regulations and maintain
awareness of the road conditions. If a
traffic sign on the road has been
changed, route guidance may not
have the updated information such as
the direction of a one way street.
Page 14 of 407
14
1. NAVIGATION OPERATION
ISF_IS_ISC_Navi_EE
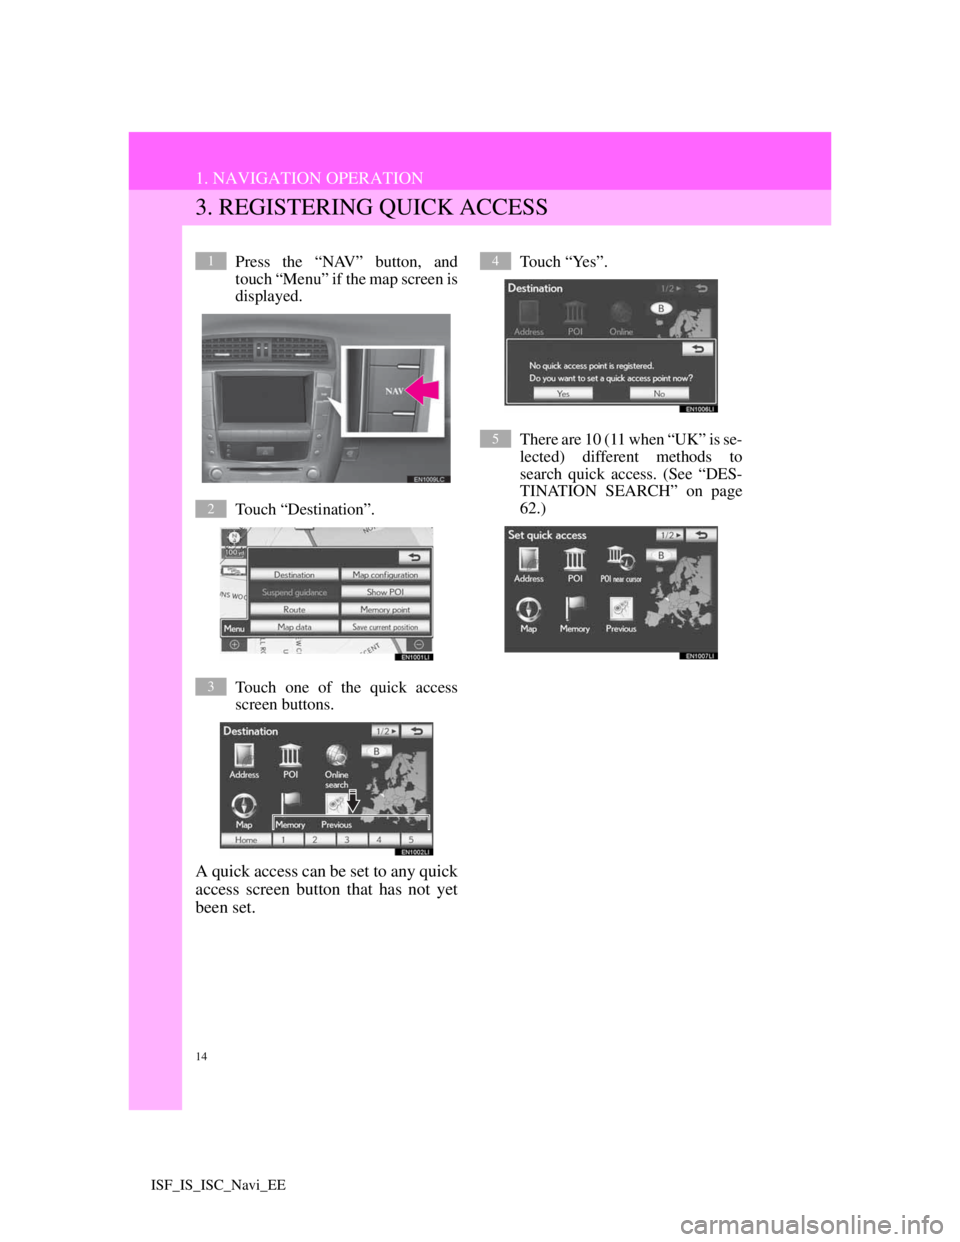
3. REGISTERING QUICK ACCESS
Press the “NAV” button, and
touch “Menu” if the map screen is
displayed.
Touch “Destination”.
Touch one of the quick access
screen buttons.
A quick access can be set to any quick
access screen button that has not yet
been set.
Touch “Yes”.
There are 10 (11 when “UK” is se-
lected) different methods to
search quick access. (See “DES-
TINATION SEARCH” on page
62.)1
2
3
4
5
Page 29 of 407
29
1. BASIC INFORMATION BEFORE OPERATION
2
BASIC FUNCTION
ISF_IS_ISC_Navi_EE
2. TOUCH SCREEN OPERATION
This system is operated mainly by
the buttons on the screen. (Referred
to as screen buttons in this manual.)
When a screen buttons is touched, a
beep sounds. (To set the beep sound,
see page 47.)
NOTICE
To prevent damaging the screen,
lightly touch the screen buttons with
your finger.
Do not use objects other than your
finger to touch the screen.
Wipe off fingerprints using a glass
cleaning cloth. Do not use chemical
cleaners to clean the screen, as they
may damage the touch screen.
INFORMATION
If the system does not respond to
touching a screen button, move your
finger away from the screen and then
touch it again.
Dimmed screen buttons cannot be
operated.
The displayed image may become
darker and moving images may be
slightly distorted when the screen is
cold.
In extremely cold conditions, the map
may not be displayed and the data
input by a user may be deleted. Also,
the screen buttons may be harder than
usual to depress.
When you look at the screen through
polarized material such as polarized
sunglasses, the screen may be dark
and hard to see. If so, look at the
screen from different angles, adjust
the screen settings on the “Display”
screen or take off your sunglasses.
Page 43 of 407
43
1. BASIC INFORMATION BEFORE OPERATION
2
BASIC FUNCTION
ISF_IS_ISC_Navi_EE
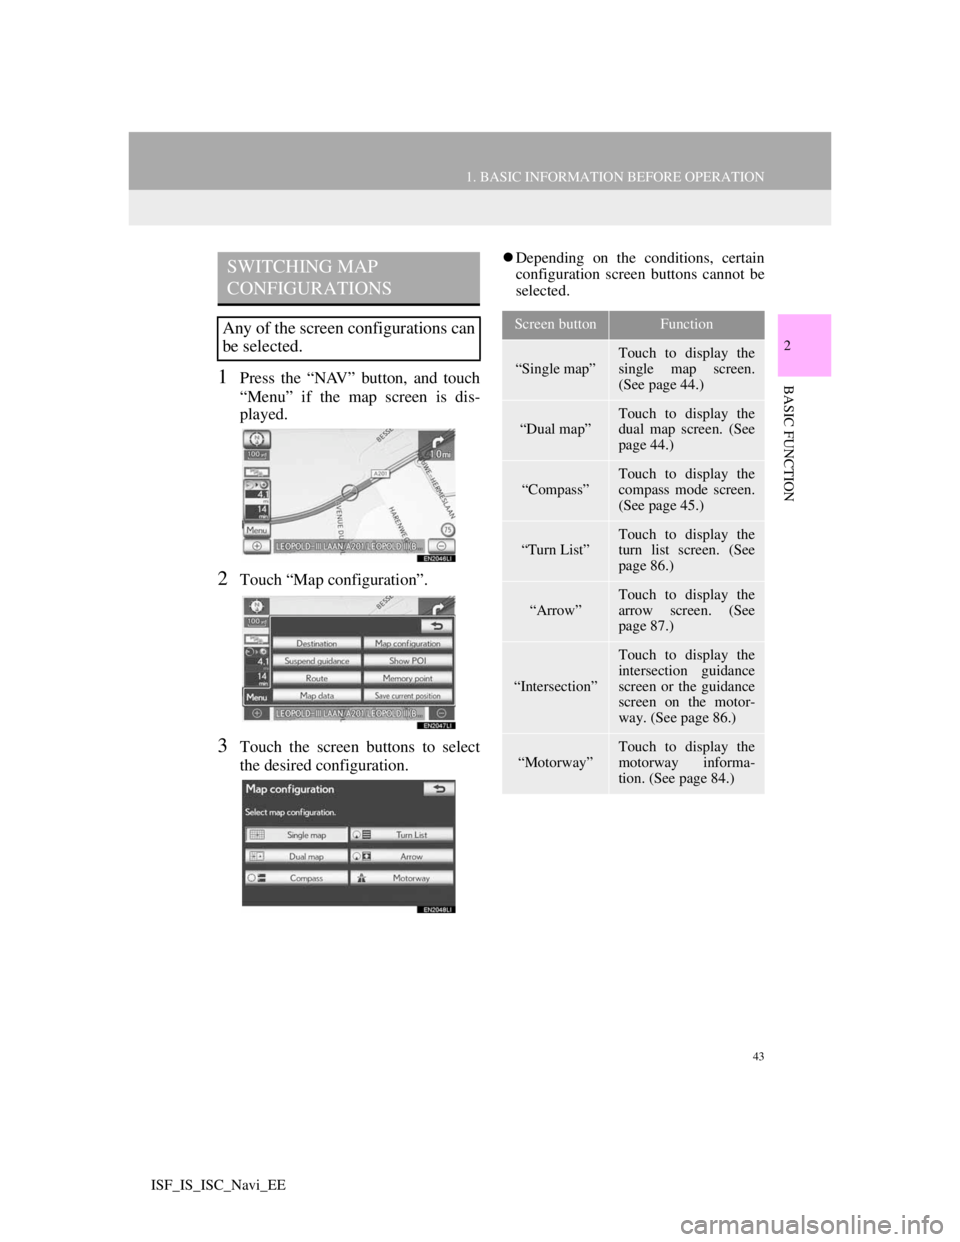
1Press the “NAV” button, and touch
“Menu” if the map screen is dis-
played.
2Touch “Map configuration”.
3Touch the screen buttons to select
the desired configuration.
Depending on the conditions, certain
configuration screen buttons cannot be
selected.SWITCHING MAP
CONFIGURATIONS
Any of the screen configurations can
be selected.Screen buttonFunction
“Single map”
Touch to display the
single map screen.
(See page 44.)
“Dual map”Touch to display the
dual map screen. (See
page 44.)
“Compass”
Touch to display the
compass mode screen.
(See page 45.)
“Turn List”
Touch to display the
turn list screen. (See
page 86.)
“Arrow”Touch to display the
arrow screen. (See
page 87.)
“Intersection”
Touch to display the
intersection guidance
screen or the guidance
screen on the motor-
way. (See page 86.)
“Motorway”
Touch to display the
motorway informa-
tion. (See page 84.)
Page 56 of 407
54
2. SETUP
ISF_IS_ISC_Navi_EE
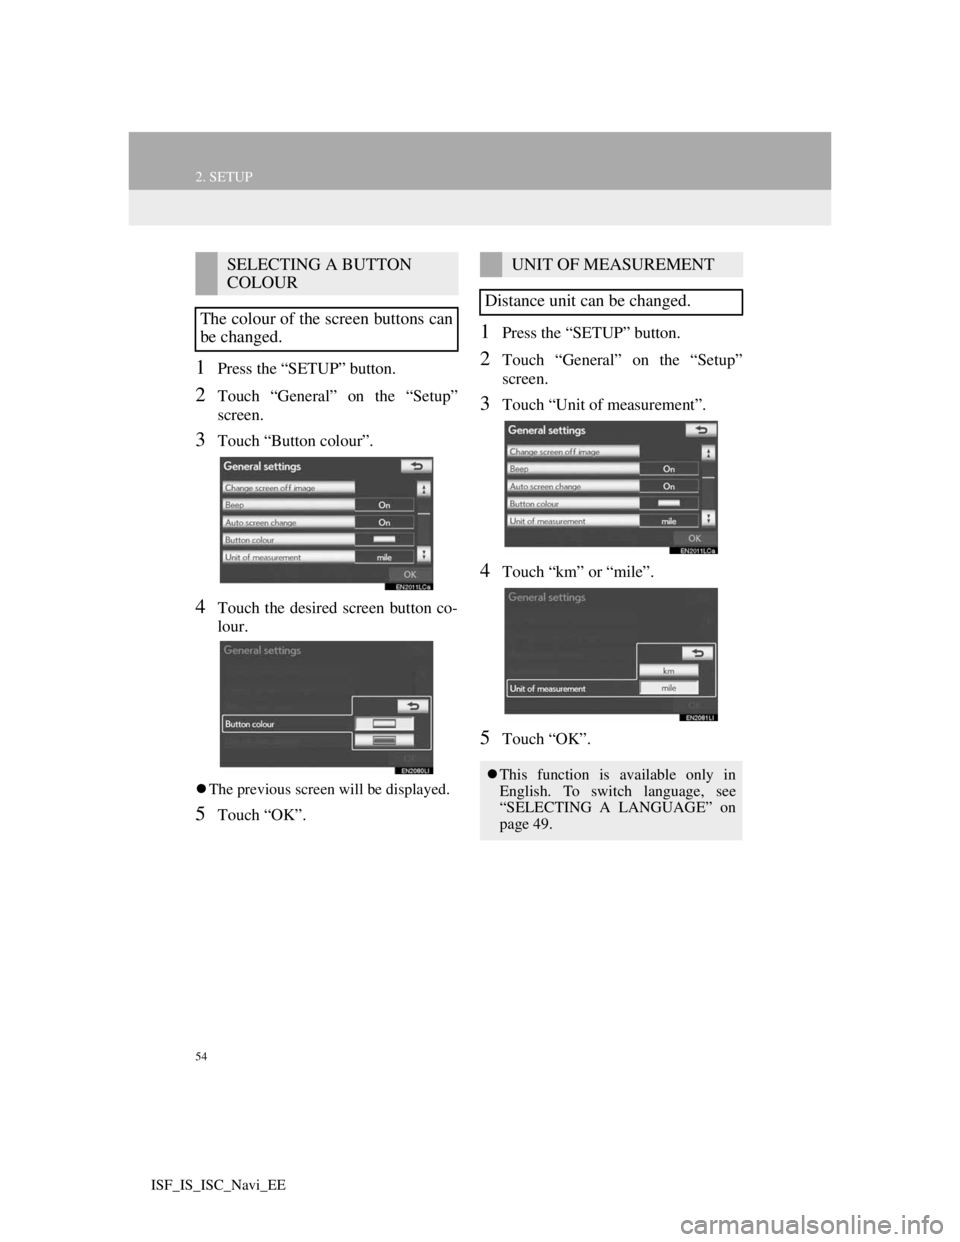
1Press the “SETUP” button.
2Touch “General” on the “Setup”
screen.
3Touch “Button colour”.
4Touch the desired screen button co-
lour.
The previous screen will be displayed.
5Touch “OK”.
1Press the “SETUP” button.
2Touch “General” on the “Setup”
screen.
3Touch “Unit of measurement”.
4Touch “km” or “mile”.
5Touch “OK”.
SELECTING A BUTTON
COLOUR
The colour of the screen buttons can
be changed.UNIT OF MEASUREMENT
Distance unit can be changed.
This function is available only in
English. To switch language, see
“SELECTING A LANGUAGE” on
page 49.
Page 63 of 407
61
1. DESTINATION SEARCH
3
NAVIGATION SYSTEM
ISF_IS_ISC_Navi_EE
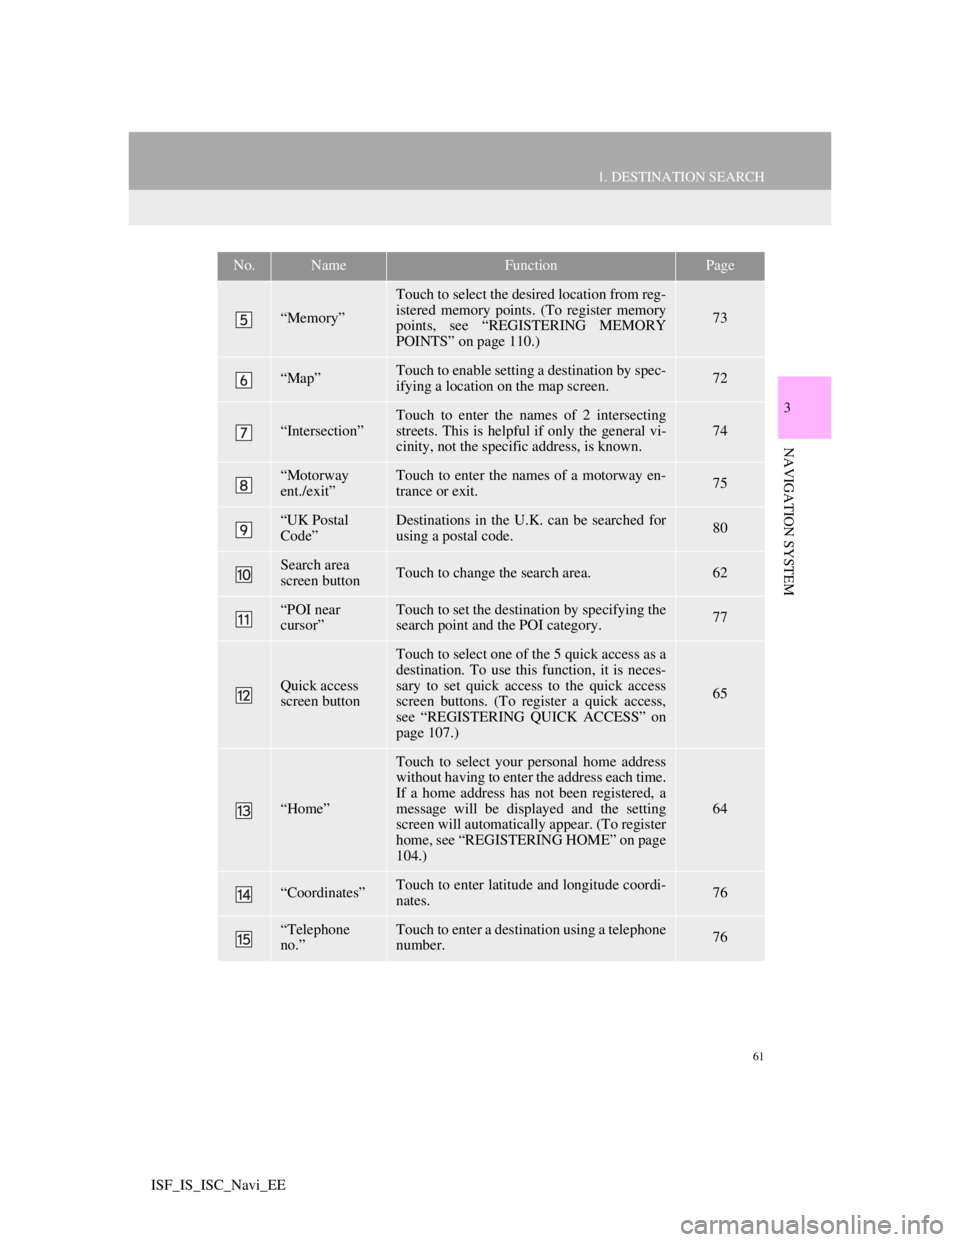
“Memory”
Touch to select the desired location from reg-
istered memory points. (To register memory
points, see “REGISTERING MEMORY
POINTS” on page 110.)
73
“Map”Touch to enable setting a destination by spec-
ifying a location on the map screen.72
“Intersection”
Touch to enter the names of 2 intersecting
streets. This is helpful if only the general vi-
cinity, not the specific address, is known.
74
“Motorway
ent./exit”Touch to enter the names of a motorway en-
trance or exit.75
“UK Postal
Code”Destinations in the U.K. can be searched for
using a postal code.80
Search area
screen buttonTouch to change the search area.62
“POI near
cursor”Touch to set the destination by specifying the
search point and the POI category.77
Quick access
screen button
Touch to select one of the 5 quick access as a
destination. To use this function, it is neces-
sary to set quick access to the quick access
screen buttons. (To register a quick access,
see “REGISTERING QUICK ACCESS” on
page 107.)
65
“Home”
Touch to select your personal home address
without having to enter the address each time.
If a home address has not been registered, a
message will be displayed and the setting
screen will automatically appear. (To register
home, see “REGISTERING HOME” on page
104.)
64
“Coordinates”Touch to enter latitude and longitude coordi-
nates.76
“Telephone
no.”Touch to enter a destination using a telephone
number.76
No.NameFunctionPage
Page 67 of 407
65
1. DESTINATION SEARCH
3
NAVIGATION SYSTEM
ISF_IS_ISC_Navi_EE
1Press the “NAV” button, and touch
“Menu” if the map screen is dis-
played.
2Touch “Destination” on the “Menu”
screen.
3Touch any of the quick access screen
buttons (1-5) on the “Destination”
screen.
The screen changes and displays the
map location of the quick access and
the road preference. (See “STARTING
ROUTE GUIDANCE” on page 81.)
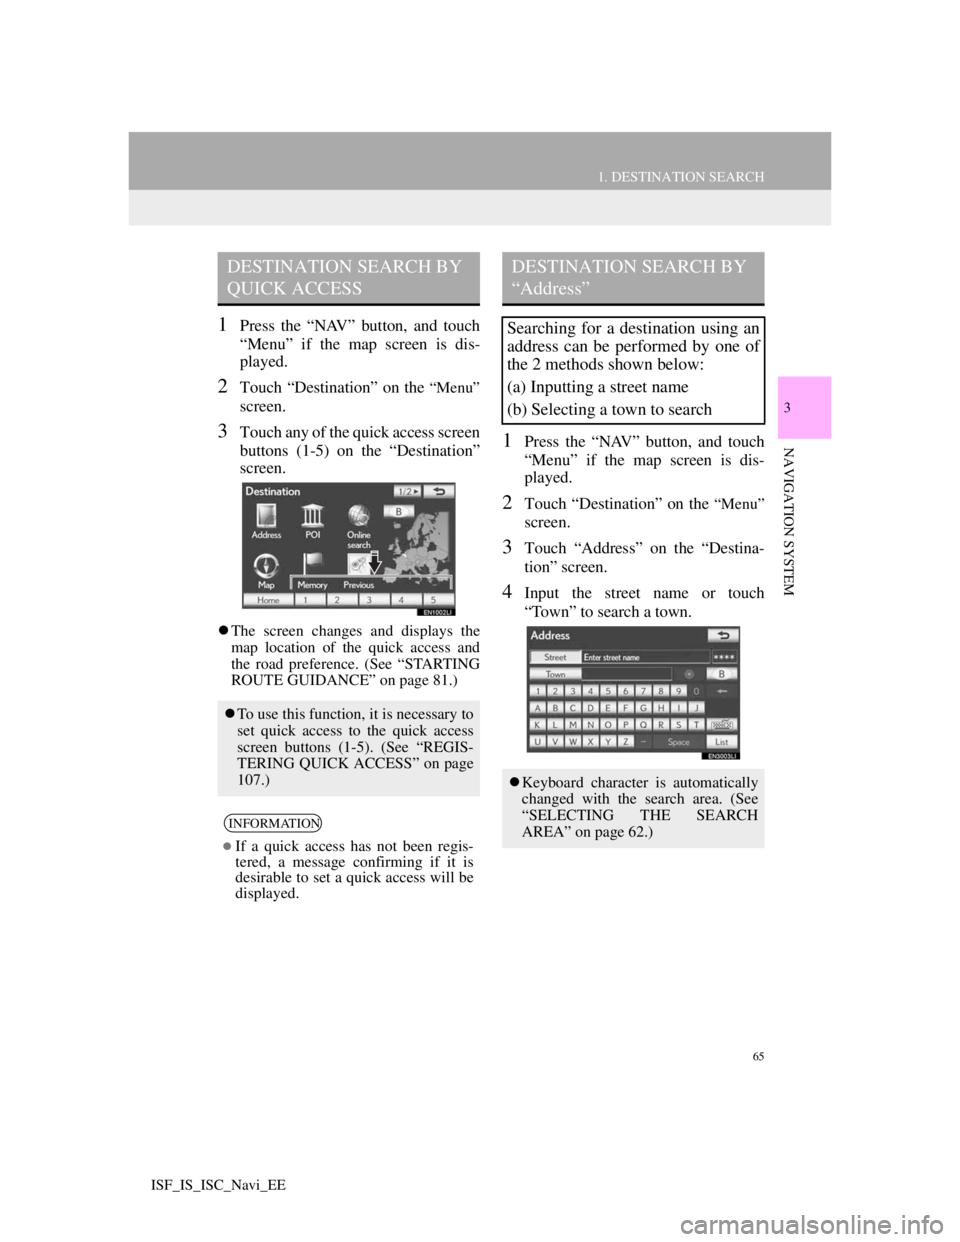
1Press the “NAV” button, and touch
“Menu” if the map screen is dis-
played.
2Touch “Destination” on the “Menu”
screen.
3Touch “Address” on the “Destina-
tion” screen.
4Input the street name or touch
“Town” to search a town.
DESTINATION SEARCH BY
QUICK ACCESS
To use this function, it is necessary to
set quick access to the quick access
screen buttons (1-5). (See “REGIS-
TERING QUICK ACCESS” on page
107.)
INFORMATION
If a quick access has not been regis-
tered, a message confirming if it is
desirable to set a quick access will be
displayed.
DESTINATION SEARCH BY
“Address”
Searching for a destination using an
address can be performed by one of
the 2 methods shown below:
(a) Inputting a street name
(b) Selecting a town to search
Keyboard character is automatically
changed with the search area. (See
“SELECTING THE SEARCH
AREA” on page 62.)
Page 81 of 407
79
1. DESTINATION SEARCH
3
NAVIGATION SYSTEM
ISF_IS_ISC_Navi_EE
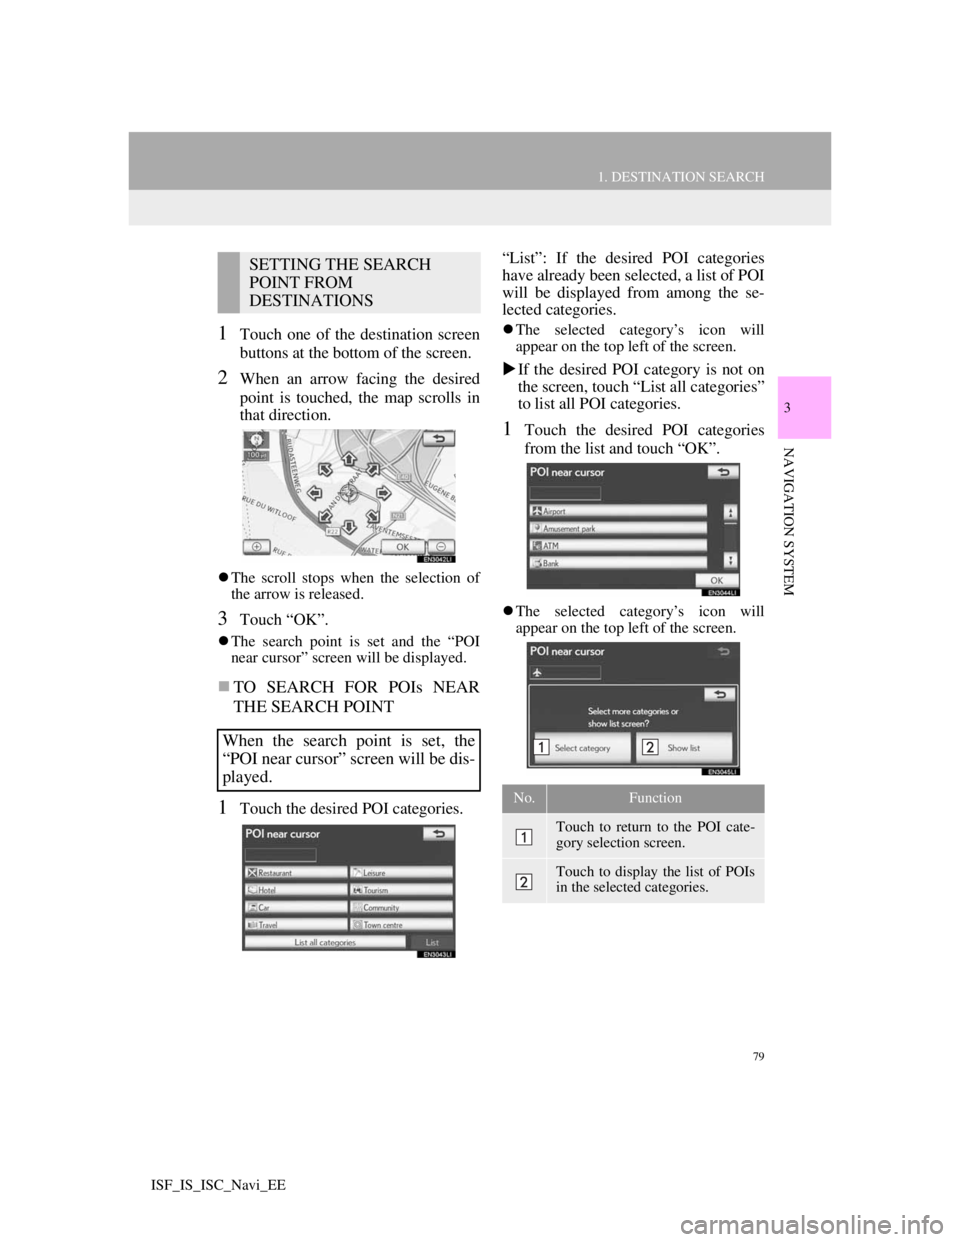
1Touch one of the destination screen
buttons at the bottom of the screen.
2When an arrow facing the desired
point is touched, the map scrolls in
that direction.
The scroll stops when the selection of
the arrow is released.
3Touch “OK”.
The search point is set and the “POI
near cursor” screen will be displayed.
TO SEARCH FOR POIs NEAR
THE SEARCH POINT
1Touch the desired POI categories.“List”: If the desired POI categories
have already been selected, a list of POI
will be displayed from among the se-
lected categories.
The selected category’s icon will
appear on the top left of the screen.
If the desired POI category is not on
the screen, touch “List all categories”
to list all POI categories.
1Touch the desired POI categories
from the list and touch “OK”.
The selected category’s icon will
appear on the top left of the screen.
SETTING THE SEARCH
POINT FROM
DESTINATIONS
When the search point is set, the
“POI near cursor” screen will be dis-
played.
No.Function
Touch to return to the POI cate-
gory selection screen.
Touch to display the list of POIs
in the selected categories.
Page 108 of 407
106
3. MEMORY POINTS
ISF_IS_ISC_Navi_EE
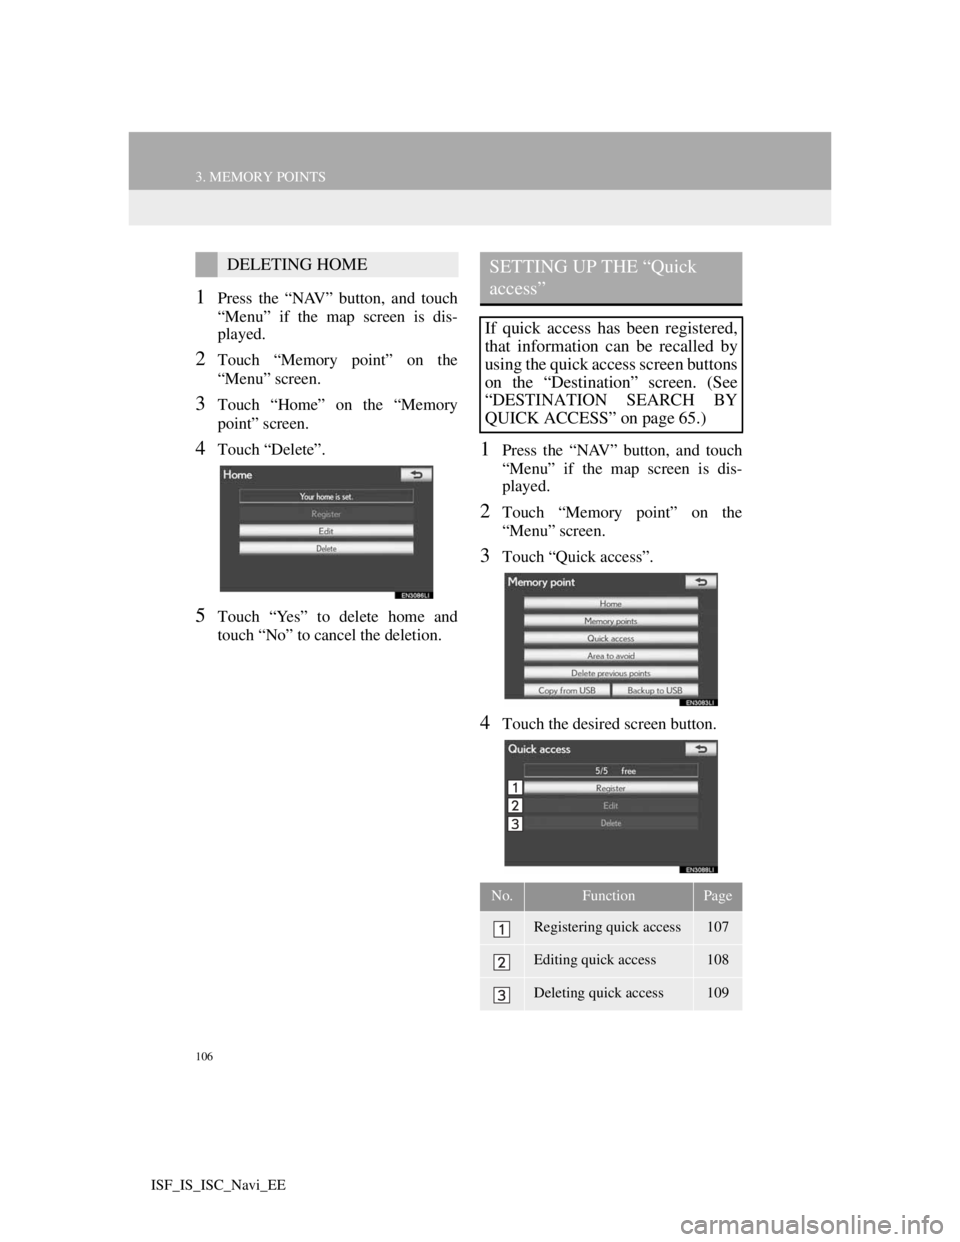
1Press the “NAV” button, and touch
“Menu” if the map screen is dis-
played.
2Touch “Memory point” on the
“Menu” screen.
3Touch “Home” on the “Memory
point” screen.
4Touch “Delete”.
5Touch “Yes” to delete home and
touch “No” to cancel the deletion.
1Press the “NAV” button, and touch
“Menu” if the map screen is dis-
played.
2Touch “Memory point” on the
“Menu” screen.
3Touch “Quick access”.
4Touch the desired screen button.
DELETING HOMESETTING UP THE “Quick
access”
If quick access has been registered,
that information can be recalled by
using the quick access screen buttons
on the “Destination” screen. (See
“DESTINATION SEARCH BY
QUICK ACCESS” on page 65.)
No.FunctionPage
Registering quick access107
Editing quick access108
Deleting quick access109
Page 115 of 407
113
3. MEMORY POINTS
3
NAVIGATION SYSTEM
ISF_IS_ISC_Navi_EE
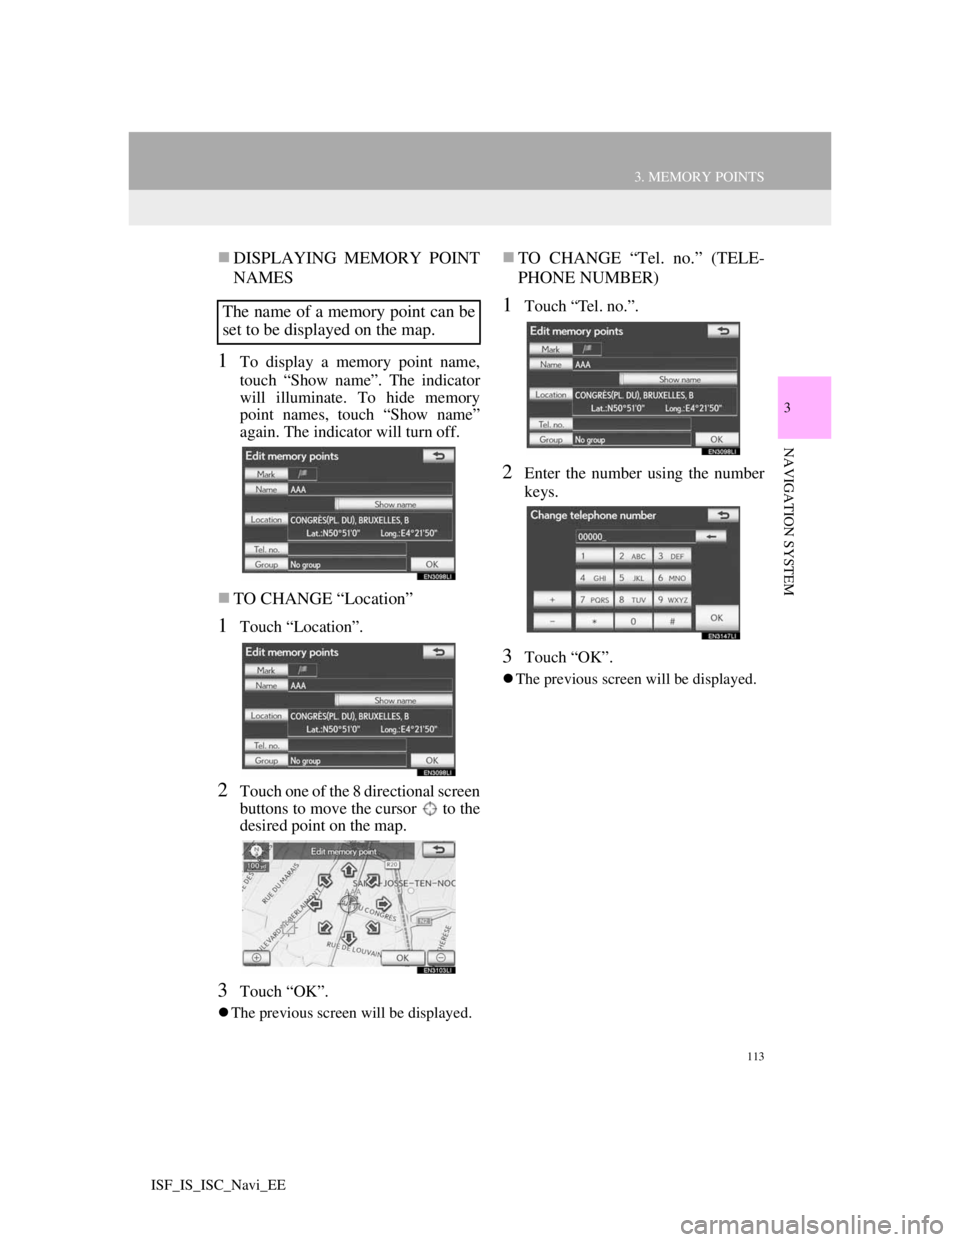
DISPLAYING MEMORY POINT
NAMES
1To display a memory point name,
touch “Show name”. The indicator
will illuminate. To hide memory
point names, touch “Show name”
again. The indicator will turn off.
TO CHANGE “Location”
1Touch “Location”.
2Touch one of the 8 directional screen
buttons to move the cursor to the
desired point on the map.
3Touch “OK”.
The previous screen will be displayed.
TO CHANGE “Tel. no.” (TELE-
PHONE NUMBER)
1Touch “Tel. no.”.
2Enter the number using the number
keys.
3Touch “OK”.
The previous screen will be displayed.
The name of a memory point can be
set to be displayed on the map.