key Lexus IS220d 2012 Owner's Guide
[x] Cancel search | Manufacturer: LEXUS, Model Year: 2012, Model line: IS220d, Model: Lexus IS220d 2012Pages: 609, PDF Size: 14.63 MB
Page 135 of 609

127
1-7. Safety information
1
Before driving
IS250/220d/200d_EE(1) For CRS which do not carry the ISO/XX size class identifica-
tion (A to G), for the applicable mass group, the car manufac-
turer shall indicate the vehicle specific ISOFIX child restraint
system(s) recommended for each position.
Key of letters inserted in the above table:
IUF:Suitable for ISOFIX forward child restraints systems of uni-
versal category approved for use in this mass group.
X: ISOFIX position not suitable for ISOFIX child restraint sys-
tems in this mass group and/or this size class.
The child restraint systems mentioned in the table may not be
available outside of the EU area.
Other child restraint systems different from the systems mentioned
in the table can be used, but the suitability of the systems must be
carefully checked with the child restraint system manufacturer and
retailer.
Page 149 of 609
141
1-7. Safety information
1
Before driving
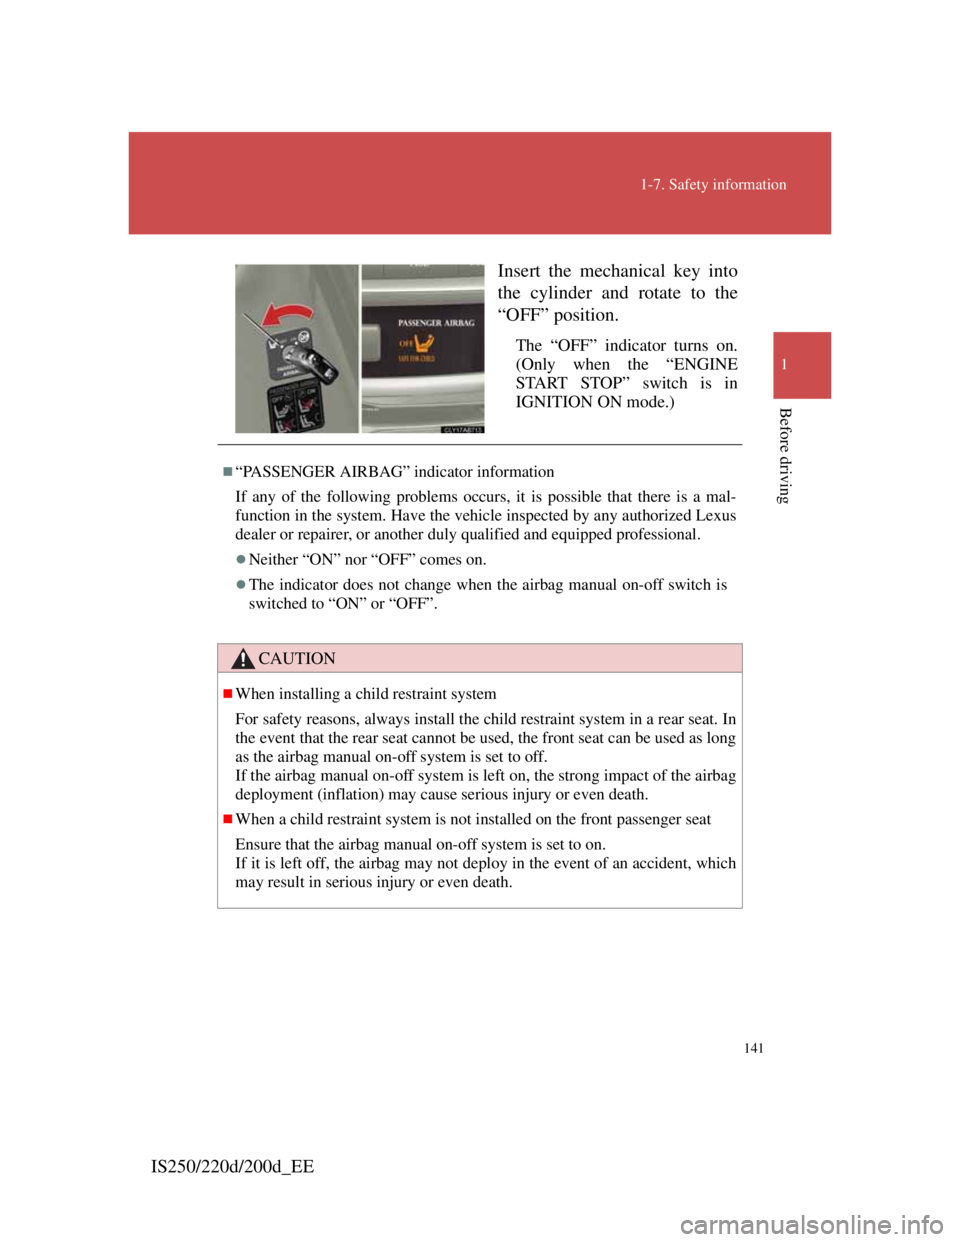
IS250/220d/200d_EEInsert the mechanical key into
the cylinder and rotate to the
“OFF” position.
The “OFF” indicator turns on.
(Only when the “ENGINE
START STOP” switch is in
IGNITION ON mode.)
“PASSENGER AIRBAG” indicator information
If any of the following problems occurs, it is possible that there is a mal-
function in the system. Have the vehicle inspected by any authorized Lexus
dealer or repairer, or another duly qualified and equipped professional.
Neither “ON” nor “OFF” comes on.
The indicator does not change when the airbag manual on-off switch is
switched to “ON” or “OFF”.
CAUTION
When installing a child restraint system
For safety reasons, always install the child restraint system in a rear seat. In
the event that the rear seat cannot be used, the front seat can be used as long
as the airbag manual on-off system is set to off.
If the airbag manual on-off system is left on, the strong impact of the airbag
deployment (inflation) may cause serious injury or even death.
When a child restraint system is not installed on the front passenger seat
Ensure that the airbag manual on-off system is set to on.
If it is left off, the airbag may not deploy in the event of an accident, which
may result in serious injury or even death.
Page 152 of 609
143
2-1. Driving procedures
2
When driving
IS250/220d/200d_EE
Starting on a steep uphill
Automatic transmission
Firmly set the parking brake and shift the shift lever to D.
Gently depress the accelerator pedal.
Release the parking brake.
Manual transmission
With the parking brake firmly set and the clutch pedal fully
depressed, shift the shift lever into 1.
Lightly depress the accelerator pedal at the same time as
gradually releasing the clutch pedal.
Release the parking brake.
Parking the vehicle
Automatic transmission
With the shift lever in D, depress the brake pedal.
Set the parking brake. (P. 171)
Shift the shift lever to P. (P. 161)
Press the “ENGINE START STOP” switch to stop the
engine.
Lock the door, making sure that you have the electronic
key on your person.
Manual transmission
While depressing the clutch pedal, depress the brake
pedal.
Set the parking brake. (P. 171)
Shift the shift lever into N. (P. 168)
Press the “ENGINE START STOP” switch to stop the
i
STEP1
STEP2
STEP3
STEP4
STEP5
STEP1
STEP2
STEP3
STEP4
STEP1
STEP2
STEP3
STEP1
STEP2
STEP3
Page 165 of 609
156
2-1. Driving procedures
IS250/220d/200d_EE
Engine (ignition) switch
Performing the following operations when carrying the electronic key
on your person starts the engine or changes “ENGINE START STOP”
switch modes.
Starting the engine
Automatic transmission
Check that the parking brake is set.
Check that the shift lever is set in P.
Sit in the driver’s seat and firmly depress the brake pedal.
The “ENGINE START STOP” switch indicator turns green.
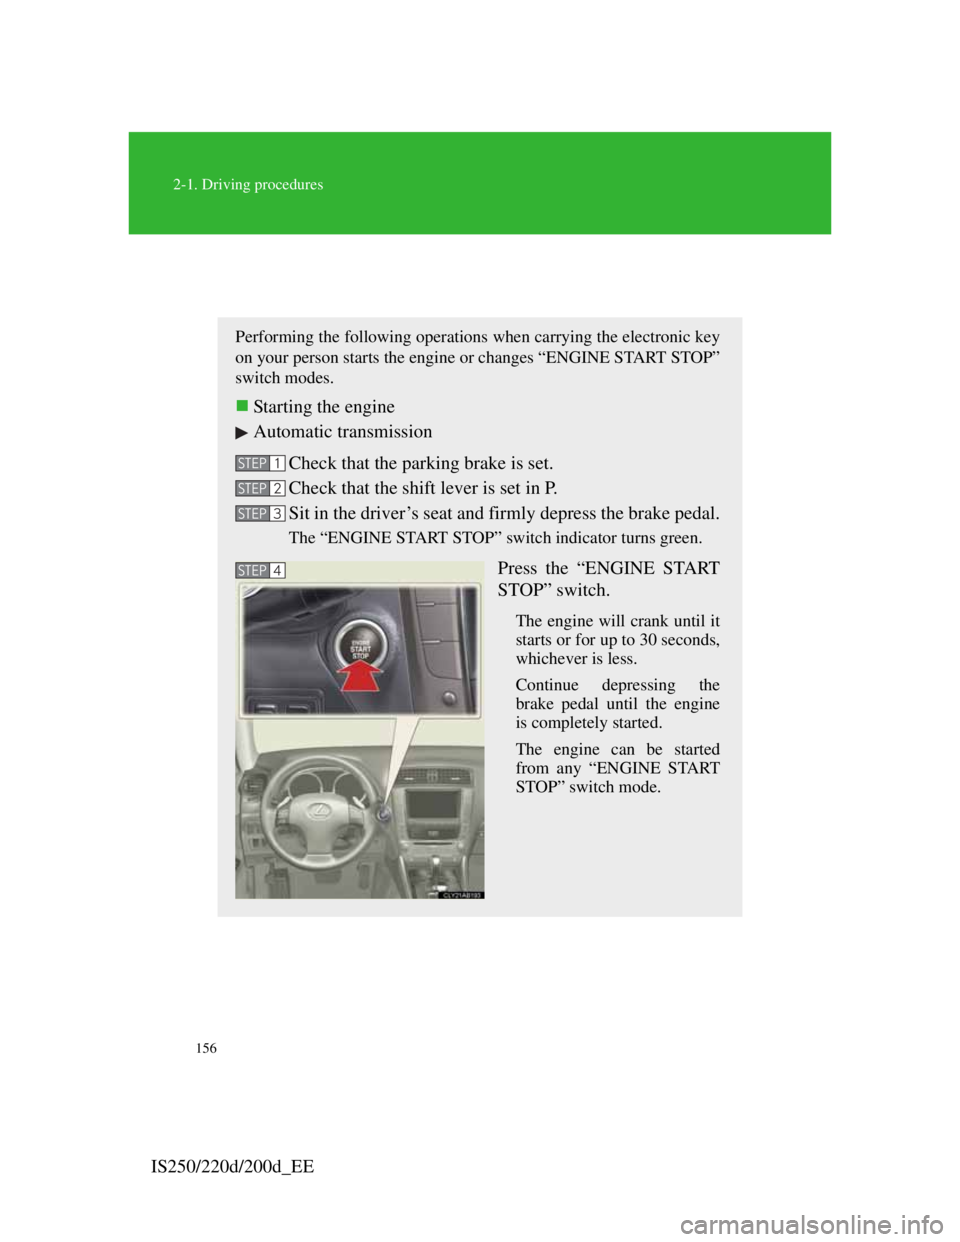
Press the “ENGINE START
STOP” switch.
The engine will crank until it
starts or for up to 30 seconds,
whichever is less.
Continue depressing the
brake pedal until the engine
is completely started.
The engine can be started
from any “ENGINE START
STOP” switch mode.
STEP1
STEP2
STEP3
STEP4
Page 168 of 609
159
2-1. Driving procedures
2
When driving
IS250/220d/200d_EE
If the engine does not start
The engine immobilizer system may not have been deactivated. (P. 9 6 )
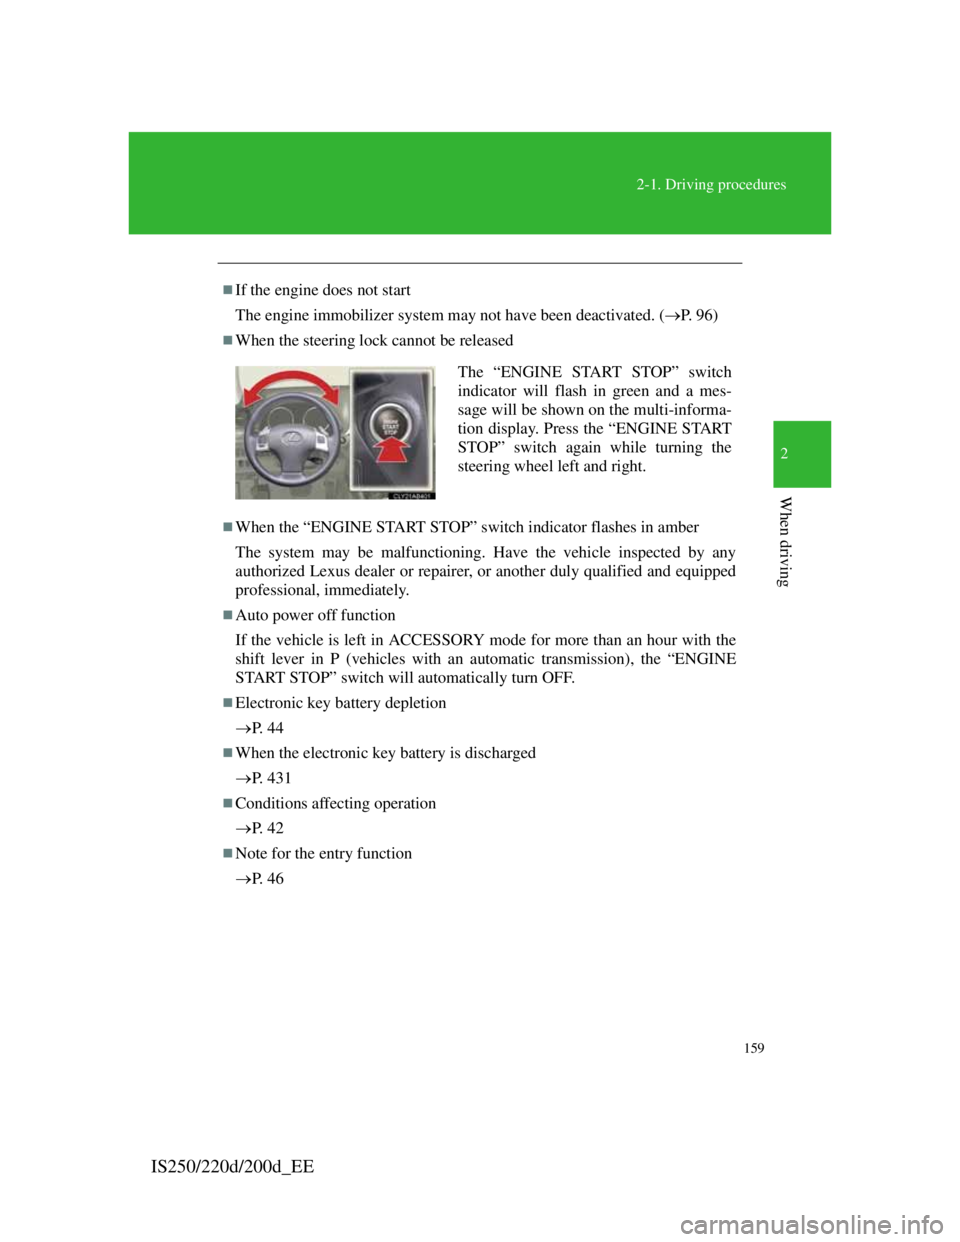
When the steering lock cannot be released
When the “ENGINE START STOP” switch indicator flashes in amber
The system may be malfunctioning. Have the vehicle inspected by any
authorized Lexus dealer or repairer, or another duly qualified and equipped
professional, immediately.
Auto power off function
If the vehicle is left in ACCESSORY mode for more than an hour with the
shift lever in P (vehicles with an automatic transmission), the “ENGINE
START STOP” switch will automatically turn OFF.
Electronic key battery depletion
P. 4 4
When the electronic key battery is discharged
P. 4 3 1
Conditions affecting operation
P. 4 2
Note for the entry function
P. 4 6
The “ENGINE START STOP” switch
indicator will flash in green and a mes-
sage will be shown on the multi-informa-
tion display. Press the “ENGINE START
STOP” switch again while turning the
steering wheel left and right.
Page 260 of 609
246
2-5. Driving information
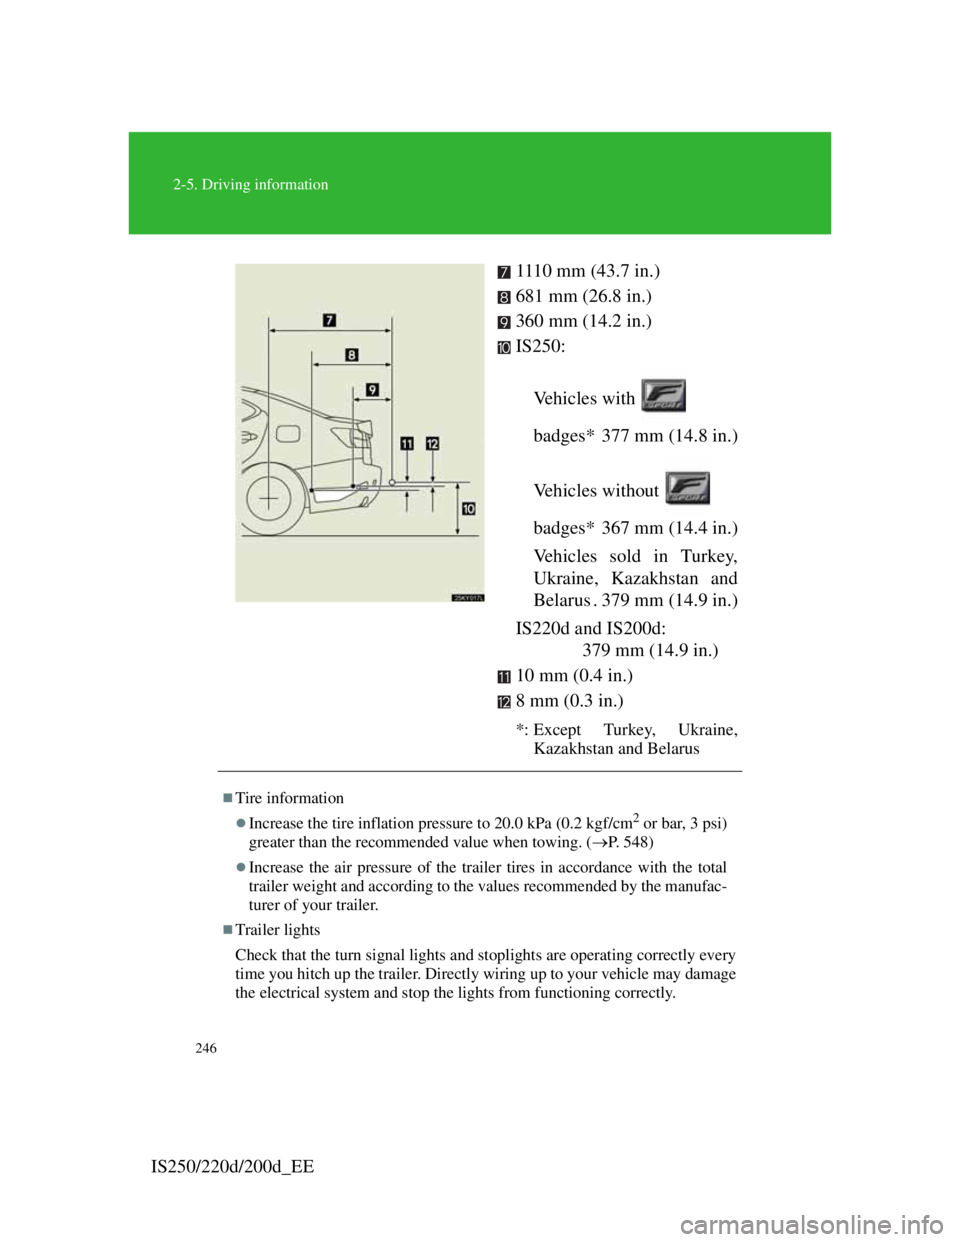
IS250/220d/200d_EE1110 mm (43.7 in.)
681 mm (26.8 in.)
360 mm (14.2 in.)
IS250:
Vehicles with
badges* 377 mm (14.8 in.)
Vehicles without
badges* 367 mm (14.4 in.)
Vehicles sold in Turkey,
Ukraine, Kazakhstan and
Belarus . 379 mm (14.9 in.)
IS220d and IS200d:
379 mm (14.9 in.)
10 mm (0.4 in.)
8 mm (0.3 in.)
*: Except Turkey, Ukraine,
Kazakhstan and Belarus
Tire information
Increase the tire inflation pressure to 20.0 kPa (0.2 kgf/cm2 or bar, 3 psi)
greater than the recommended value when towing. (P. 548)
Increase the air pressure of the trailer tires in accordance with the total
trailer weight and according to the values recommended by the manufac-
turer of your trailer.
Trailer lights
Check that the turn signal lights and stoplights are operating correctly every
time you hitch up the trailer. Directly wiring up to your vehicle may damage
the electrical system and stop the lights from functioning correctly.
Page 331 of 609

314
3-3. Using the Bluetooth® audio system
IS250/220d/200d_EE
Using the Bluetooth® audio system for the first time
Before using the Bluetooth
® audio system, it is necessary to regis-
ter a Bluetooth® enabled portable player in the system. Follow the
procedure below to register (pair) a portable player:
Press and select “BT•A MENU” using ,
and .
Select “BT•A Setup” using , and .
Select “Pair Audio” using , and .
Select “Record Name” using , and , and
say the name to be registered after the beep.
The name to be registered will be repeated aloud.
Select “Confirm” using , and .
A passkey will be displayed.
Input the passkey into the audio player.
Refer to the manual that comes with the portable player for the
operation of the portable player.
If the portable player has a Bluetooth® phone, the phone can be
registered at the same time.
When “Pair Phone?” is displayed, select “Yes” or “No”
using , and . (Bluetooth
® phone P.
326)
STEP1
STEP2
STEP3
STEP4
STEP5
STEP6
STEP7
Page 332 of 609

315
3-3. Using the Bluetooth® audio system
3
Interior features
IS250/220d/200d_EE
Menu list of the Bluetooth® audio system
First menuSecond
menuThird menuOperation detail
“Setup”
“BT•A
Setup”
“Pair Audio”Registering a portable player
“Select Audio”Selecting a portable player to
be used
“Change Name”Changing the registered
name of a portable player
“List Audios”Listing the registered porta-
ble players
“Set Passkey”Changing the passkey
“Delete Audio”Deleting a registered porta-
ble player
“System
Setup”
“Guidance Vol”Setting voice guidance vol-
ume
“Device Name”Displaying the Bluetooth®
device address and name
“Initialize”Initializing the system
Operations that cannot be performed while driving
Operating the system with , and
Registering a portable player to the system
Changing the passkey
P. 3 2 1
Page 336 of 609

319
3-3. Using the Bluetooth® audio system
3
Interior features
IS250/220d/200d_EE
Setting up a Bluetooth® enabled portable player
Registering a portable player in the Bluetooth® audio system allows
the system to function. The following functions can be used for regis-
tered portable players:
Functions and operation procedures
To enter the menu for each function, follow the steps below.
Press to select “BT•A MENU” or press the off-
hook switch and select “Setup” using , and
.
Select “BT•A Setup” using , and .
Select one of the following items using , and
:
Registering a portable player
“Pair Audio”
Selecting a portable player to be used
“Select Audio”
Changing the registered name of a portable player
“Change Name”
Listing the registered portable players
“List Audios”
Changing the passkey
“Set Passkey”
Deleting a registered portable player
STEP1
STEP2
STEP3
Page 338 of 609

321
3-3. Using the Bluetooth® audio system
3
Interior features
IS250/220d/200d_EE
Changing the passkey
Select “Set Passkey” using , and .
Select a 4 to 8-digit number using , and .
The number should be input 1 digit at a time.
When the entire number to be registered as a passkey has
been input, press again.
If the number to be registered has 8 digits, pressing is not
necessary.
Deleting a registered portable player
Select “Delete Audio” using , and .
Select the desired portable player to be deleted using ,
and .
If the portable player to be deleted is paired as a Bluetooth
® phone,
the registration of the mobile phone can be deleted at the same
time.
When “Del Phone?” is displayed, select “Yes” or “No”
using , and . (Bluetooth
® phone P.
326)
The number of portable players that can be registered
Up to 2 portable players can be registered in the system.
STEP1
STEP2
STEP3
STEP1
STEP2
STEP3