change time Lexus IS220d 2012 Owner's Manual
[x] Cancel search | Manufacturer: LEXUS, Model Year: 2012, Model line: IS220d, Model: Lexus IS220d 2012Pages: 609, PDF Size: 14.63 MB
Page 26 of 609

IS250/220d/200d_EE
26
For your information
Main Owner’s Manual
Please note that this manual covers all models and all equipment, including
options. Therefore, you may find some explanations for equipment not
installed on your vehicle.
All specifications provided in this manual are current at the time of printing.
However, because of the Lexus policy of continual product improvement,
we reserve the right to make changes at any time without notice.
Depending on specifications, the vehicle shown in the illustrations may dif-
fer from your vehicle in terms of color and equipment.
Accessories, spare parts and modification of your Lexus
A wide variety of non genuine spare parts and accessories for Lexus vehi-
cles are currently available in the market. Using these spare parts and acces-
sories which are not genuine Lexus produces may adversely affect the safety
of your vehicle, even though these parts may be approved by certain author-
ities in your country. Toyota Motor Corporation therefore cannot accept any
liability or guarantee spare parts and accessories which are not genuine
Lexus Products, nor for replacement or installation involving such parts.
This vehicle should not be modified with non genuine Lexus products. Mod-
ification with non genuine Lexus products could affect its performance,
safety or durability, and may even violate governmental regulations. In addi-
tion, damage or performance problem resulting from the modification may
not be covered under warranty.
Page 43 of 609

43
1-2. Opening, closing and locking the doors and trunk
1
Before driving
IS250/220d/200d_EE
Switching the door unlock function
It is possible to set which doors the entry function unlocks.
Turn the “ENGINE START STOP” switch OFF.
Cancel the intrusion sensor of the alarm system to prevent unin-
tended triggering of the alarm during the setting change. (P. 1 0 2 )
When the indicator on the key surface is turned off, push and
hold or for approximately 5 seconds while pushing
on the key.
The setting changes each time an operation is performed, as shown below.
(When changing the setting continuously, release the buttons, wait for at
least 5 seconds, and repeat step 3.)
To prevent unintended triggering of the alarm, unlock the doors using the
electronic key and open and close a door once after the settings have been
changed. (If a door is not opened within 30 seconds after is pressed, the
doors will be locked again and the alarm will automatically be set.)
In case that the alarm is triggered, immediately stop the alarm. (P. 102)
STEP1
STEP2
STEP3
Multi-informa-
tion displayUnlocking doorsBeep
Hold the driver's door han-
dle to unlock only the
driver's door.
Exterior: Beeps three
times
Interior: Pings once
Hold the front passenger’s
door handle to unlock all
doors.
Hold either front door han-
dle to unlock all doors.Exterior: Beeps twice
Interior: Pings once
Page 159 of 609

150
2-1. Driving procedures
IS250/220d/200d_EE
When driving on slippery road surfaces
Sudden braking, acceleration and steering may cause tire slippage and
reduce your ability to control the vehicle, resulting in an accident.
Sudden changes in engine speed, such as engine braking caused by up-
shifting or down-shifting, may cause the vehicle to skid, resulting in an
accident.
After driving through a puddle, lightly depress the brake pedal to make
sure that the brakes are functioning properly. Wet brake pads may prevent
the brakes from functioning properly. If the brakes on only one side are
wet and not functioning properly, steering control may be affected, result-
ing in an accident.
When shifting the shift lever
With automatic transmission vehicles, be careful not to shift the shift lever
with the accelerator pedal depressed.
This may lead to unexpected rapid acceleration of the vehicle that may
cause an accident and result in death or serious injury.
If you hear a squealing or scraping noise (brake pad wear indicators)
Have the brake pads checked and replaced by any authorized Lexus dealer
or repairer, or another duly qualified and equipped professional, as soon as
possible.
Rotor damage can result if the pads are not replaced when needed.
Front brake only: Moderate levels of brake pad and disc wear allow
enhanced front braking power. As a result, the discs may wear more quickly
than conventional brake discs. Therefore, when replacing the brake pads,
Lexus recommends that you also have the thickness of the discs measured.
It is dangerous to drive the vehicle when the wear limits of the brake pads
and/or those of the brake discs are exceeded.
When the vehicle is stopped
Do not race the engine.
If the vehicle is in any gear other than P (vehicles with an automatic trans-
mission only) or N the vehicle may accelerate suddenly and unexpectedly,
and may cause an accident.
Do not leave the vehicle with the engine running for a long time.
If such a situation cannot be avoided, park the vehicle in an open space
and check that exhaust fumes do not enter the vehicle interior.
Page 167 of 609
158
2-1. Driving procedures
IS250/220d/200d_EE
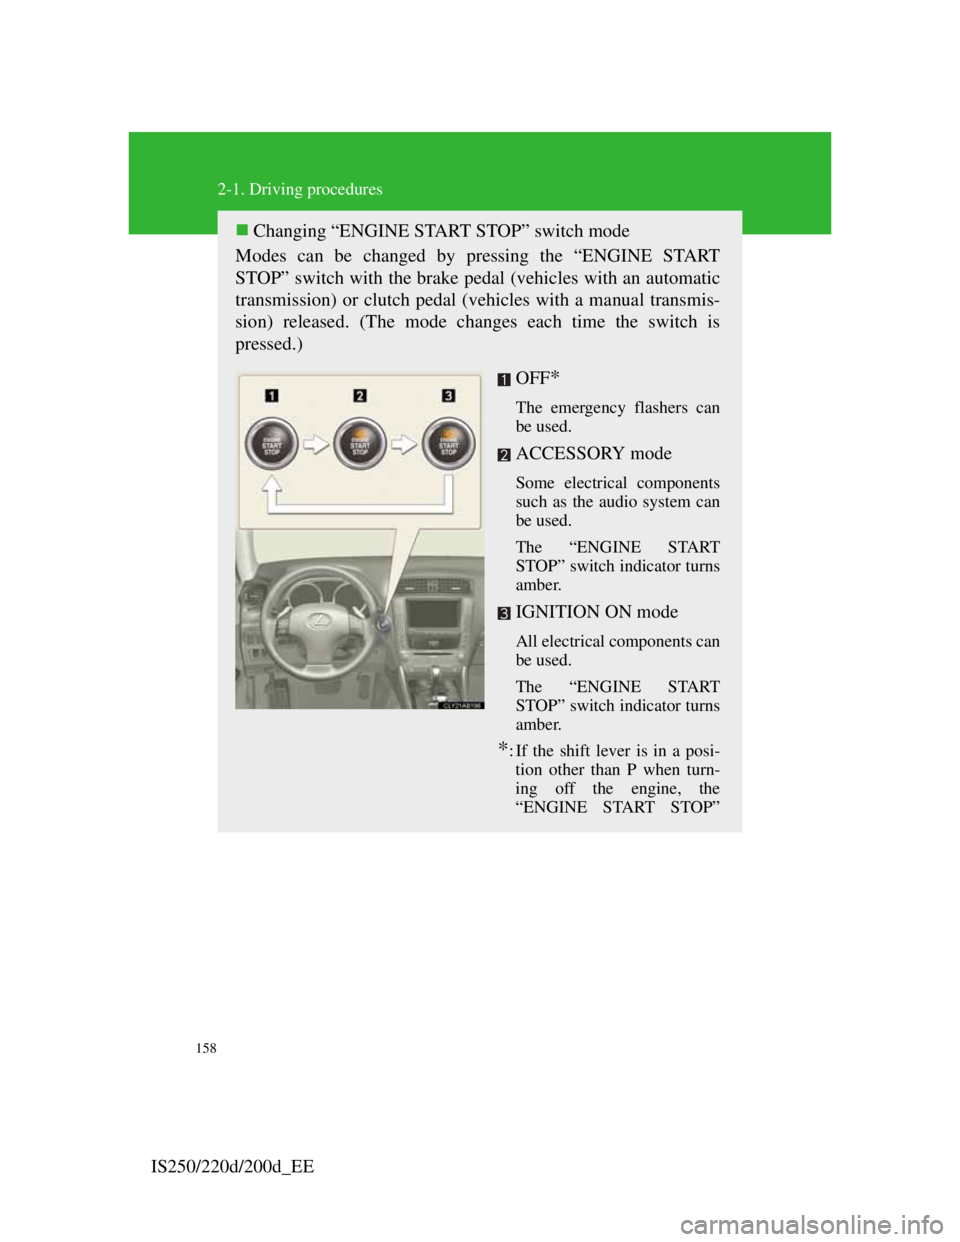
Changing “ENGINE START STOP” switch mode
Modes can be changed by pressing the “ENGINE START
STOP” switch with the brake pedal (vehicles with an automatic
transmission) or clutch pedal (vehicles with a manual transmis-
sion) released. (The mode changes each time the switch is
pressed.)
OFF
*
The emergency flashers can
be used.
ACCESSORY mode
Some electrical components
such as the audio system can
be used.
The “ENGINE START
STOP” switch indicator turns
amber.
IGNITION ON mode
All electrical components can
be used.
The “ENGINE START
STOP” switch indicator turns
amber.
*: If the shift lever is in a posi-
tion other than P when turn-
ing off the engine, the
“ENGINE START STOP”
Page 187 of 609
175
2-2. Instrument cluster
2
When driving
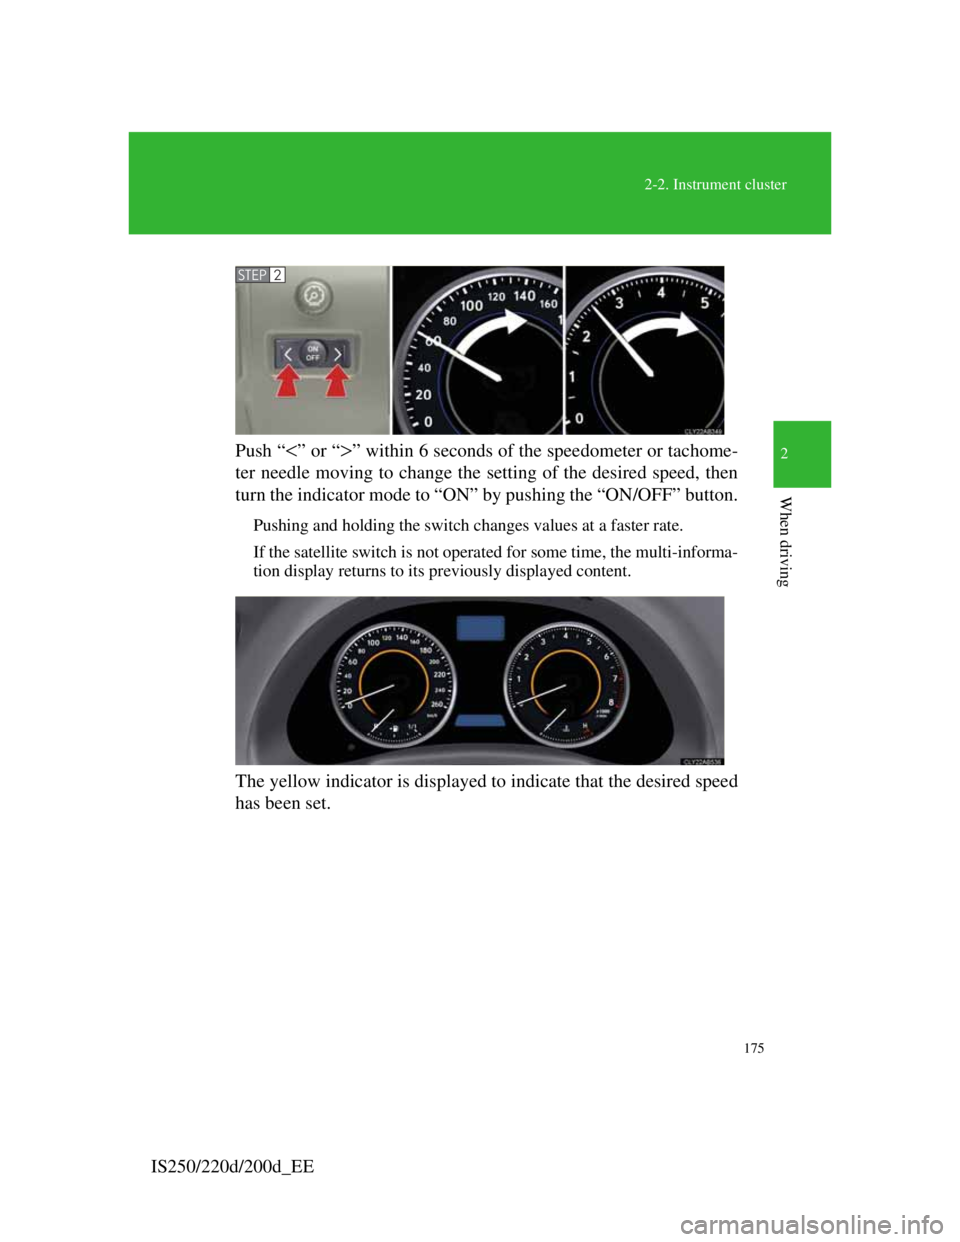
IS250/220d/200d_EEPush “
” or “” within 6 seconds of the speedometer or tachome-
ter needle moving to change the setting of the desired speed, then
turn the indicator mode to “ON” by pushing the “ON/OFF” button.
Pushing and holding the switch changes values at a faster rate.
If the satellite switch is not operated for some time, the multi-informa-
tion display returns to its previously displayed content.
The yellow indicator is displayed to indicate that the desired speed
has been set.
STEP2
Page 211 of 609
199
2-4. Using other driving systems
2
When driving
IS250/220d/200d_EE
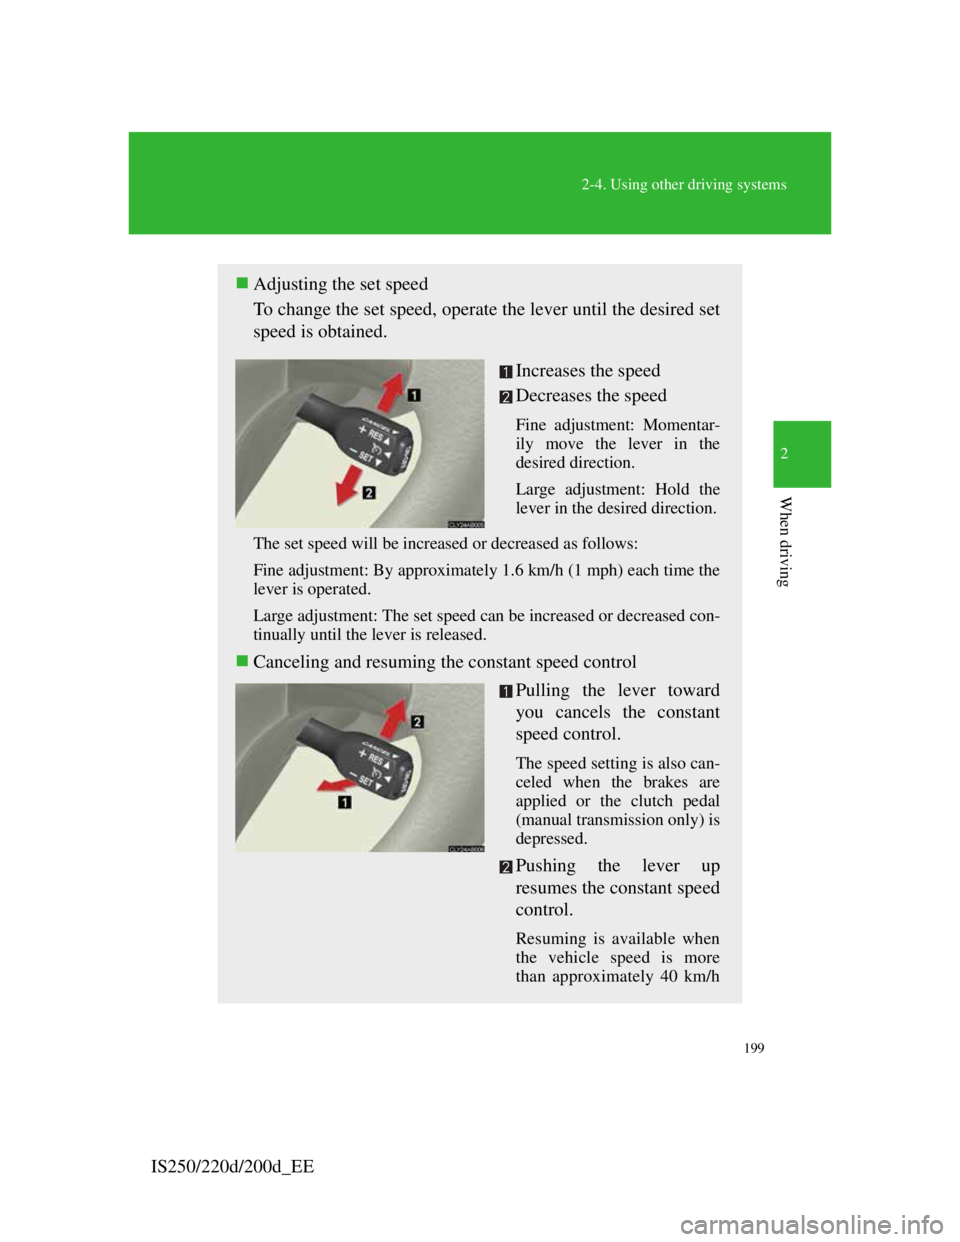
Adjusting the set speed
To change the set speed, operate the lever until the desired set
speed is obtained.
Increases the speed
Decreases the speed
Fine adjustment: Momentar-
ily move the lever in the
desired direction.
Large adjustment: Hold the
lever in the desired direction.
The set speed will be increased or decreased as follows:
Fine adjustment: By approximately 1.6 km/h (1 mph) each time the
lever is operated.
Large adjustment: The set speed can be increased or decreased con-
tinually until the lever is released.
Canceling and resuming the constant speed control
Pulling the lever toward
you cancels the constant
speed control.
The speed setting is also can-
celed when the brakes are
applied or the clutch pedal
(manual transmission only) is
depressed.
Pushing the lever up
resumes the constant speed
control.
Resuming is available when
the vehicle speed is more
than approximately 40 km/h
Page 216 of 609

204
2-4. Using other driving systems
IS250/220d/200d_EE
Adjusting the set speed
To change the set speed, operate the lever until the desired set
speed is displayed.
Increases the speed
Decreases the speed
Fine adjustment: Momentar-
ily move the lever in the
desired direction.
Large adjustment: Hold the
lever in the desired direction.
In the vehicle-to-vehicle distance control mode, the set speed will
be increased or decreased as follows:
• When the set speed is shown in “MPH”
Fine adjustment: By approximately 8 km/h (5 mph) each time the
lever is operated
Large adjustment: By approximately 8 km/h (5 mph) for each
0.75 seconds the lever is held
• When the set speed is shown in “km/h”
Fine adjustment: By approximately 5 km/h (3.1 mph) each time
the lever is operated
Large adjustment: By approximately 5 km/h (3.1 mph) for each
0.75 seconds the lever is held
In the constant speed control mode (P. 209), the set speed will be
increased or decreased as follows:
Fine adjustment: By approximately 1.6 km/h (1 mph) each time the
lever is operated
Large adjustment: The set speed can be increased or decreased con-
tinually until the lever is released.
Page 285 of 609
270
3-2. Using the audio system
IS250/220d/200d_EE
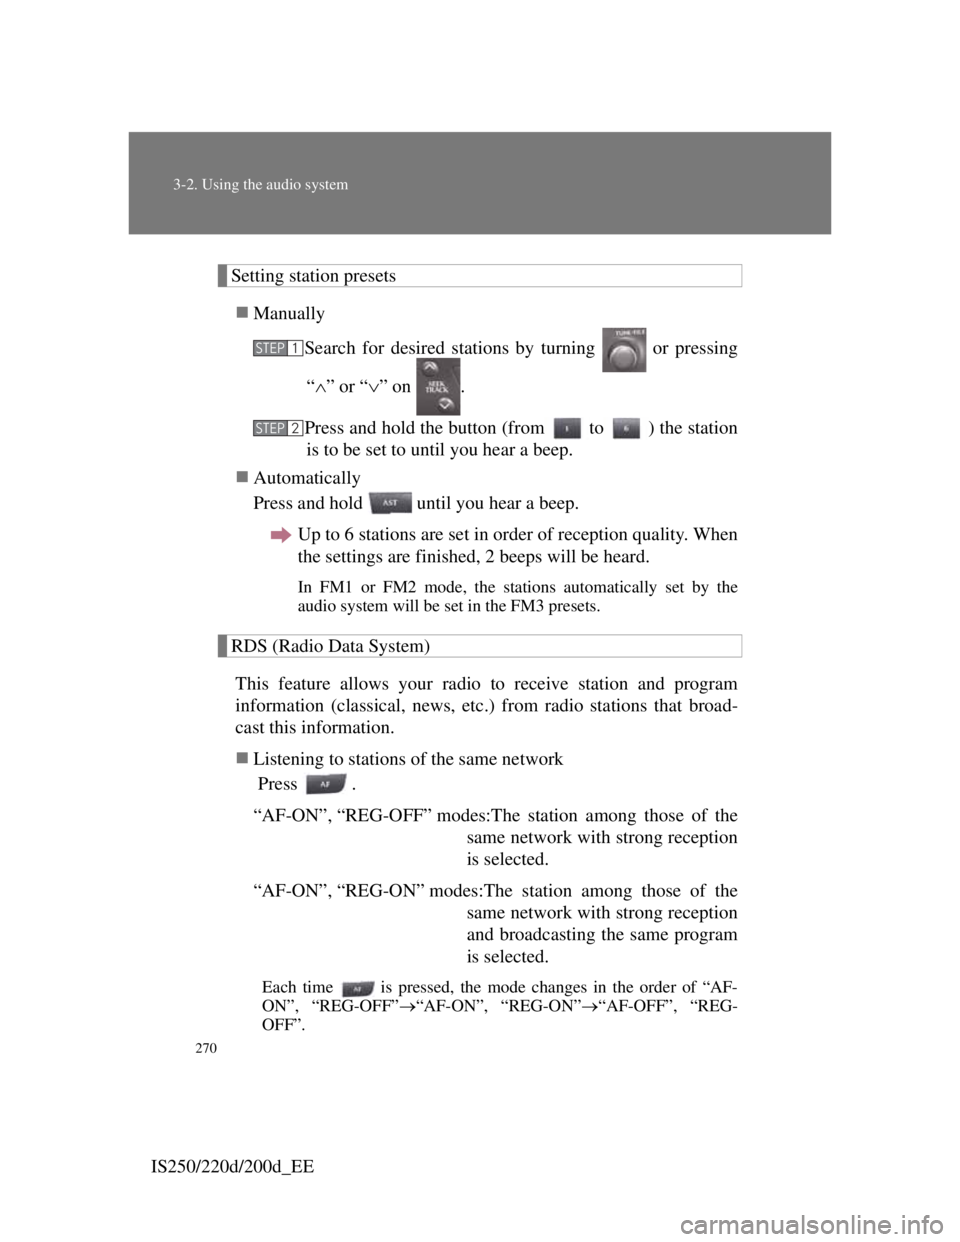
Setting station presets
Manually
Search for desired stations by turning or pressing
“” or “” on .
Press and hold the button (from to ) the station
is to be set to until you hear a beep.
Automatically
Press and hold until you hear a beep.
Up to 6 stations are set in order of reception quality. When
the settings are finished, 2 beeps will be heard.
In FM1 or FM2 mode, the stations automatically set by the
audio system will be set in the FM3 presets.
RDS (Radio Data System)
This feature allows your radio to receive station and program
information (classical, news, etc.) from radio stations that broad-
cast this information.
Listening to stations of the same network
Press .
“AF-ON”, “REG-OFF” modes:The station among those of the
same network with strong reception
is selected.
“AF-ON”, “REG-ON” modes:The station among those of the
same network with strong reception
and broadcasting the same program
is selected.
Each time is pressed, the mode changes in the order of “AF-
ON”, “REG-OFF”“AF-ON”, “REG-ON”“AF-OFF”, “REG-
OFF”.
STEP1
STEP2
Page 286 of 609
271
3-2. Using the audio system
3
Interior features
IS250/220d/200d_EESpecifying program type
Press
.
Each time is pressed, the program type changes in the order of
“NEWS”“SPORTS”“TALK”“POP”“CLASSICS”.
Traffic information
Press .
TP mode: The system automatically switches to traffic informa-
tion when a broadcast with a traffic information signal
is received.
The station returns to the previous one when the traffic
information ends.
TA mode: Traffic information can be heard only when a signal is
received. The system switches to the mute mode when
a signal is not received. In the CD or MP3/WMA
mode, the system automatically switches to traffic
information when a signal is received.
The audio system returns to mute, CD or MP3/WMA
mode when the traffic information ends.
The audio system mode changes as follows each time is
pressed.
FM modes: “TP”“TA”off
Modes other than the radio modes: “TA”off
Emergency broadcast reception mode
“ALARM” appears in the display in the event that an emergency
broadcast is received, and the emergency broadcast is aired.
Page 291 of 609

276
3-2. Using the audio system
IS250/220d/200d_EE
Repeat play
To repeat a track
Press (RPT).
To repeat all of the tracks on a CD
Press and hold (RPT) until you hear a beep.
Playing and pausing tracks
To play or pause a track, press ( ).
Switching the display
Press .
Each time is pressed, the display changes in the order of Track
no./Elapsed timeCD titleTrack title.
Display
Up to 12 characters can be displayed at a time.
If there are 13 characters or more, pressing and holding until you
hear a beep will display the remaining characters.
A maximum of 24 characters can be displayed.
If is pressed until you hear a beep again or has not been pressed for 6
seconds or more, the display will return to the first 12 characters.
Depending on the contents recorded, the characters may not be displayed
properly or may not be displayed at all.
Canceling random and repeat playback
Press (RAND) or (RPT) again.