light Lexus IS250 2006 Using the audio system / LEXUS 2006 IS350/250 THROUGH APRIL 2006 PROD. (OM53508U) Owner's Guide
[x] Cancel search | Manufacturer: LEXUS, Model Year: 2006, Model line: IS250, Model: Lexus IS250 2006Pages: 433, PDF Size: 10.9 MB
Page 71 of 433
53
1-6. Anti-theft system
1
Before driving
■Alarm operation
The alarm is triggered in the following situations
●A locked door or trunk is opened in any way other than using a wireless remote
control, such as someone exiting the vehicle after the alarm is activated.
●The hood is opened while the vehicle is locked.
●The battery is reconnected.
■When the battery is disconnected
Be sure to cancel the alarm system.
If the battery is discharged before canceling the alarm, the system may be triggered
when the battery is reconnected.
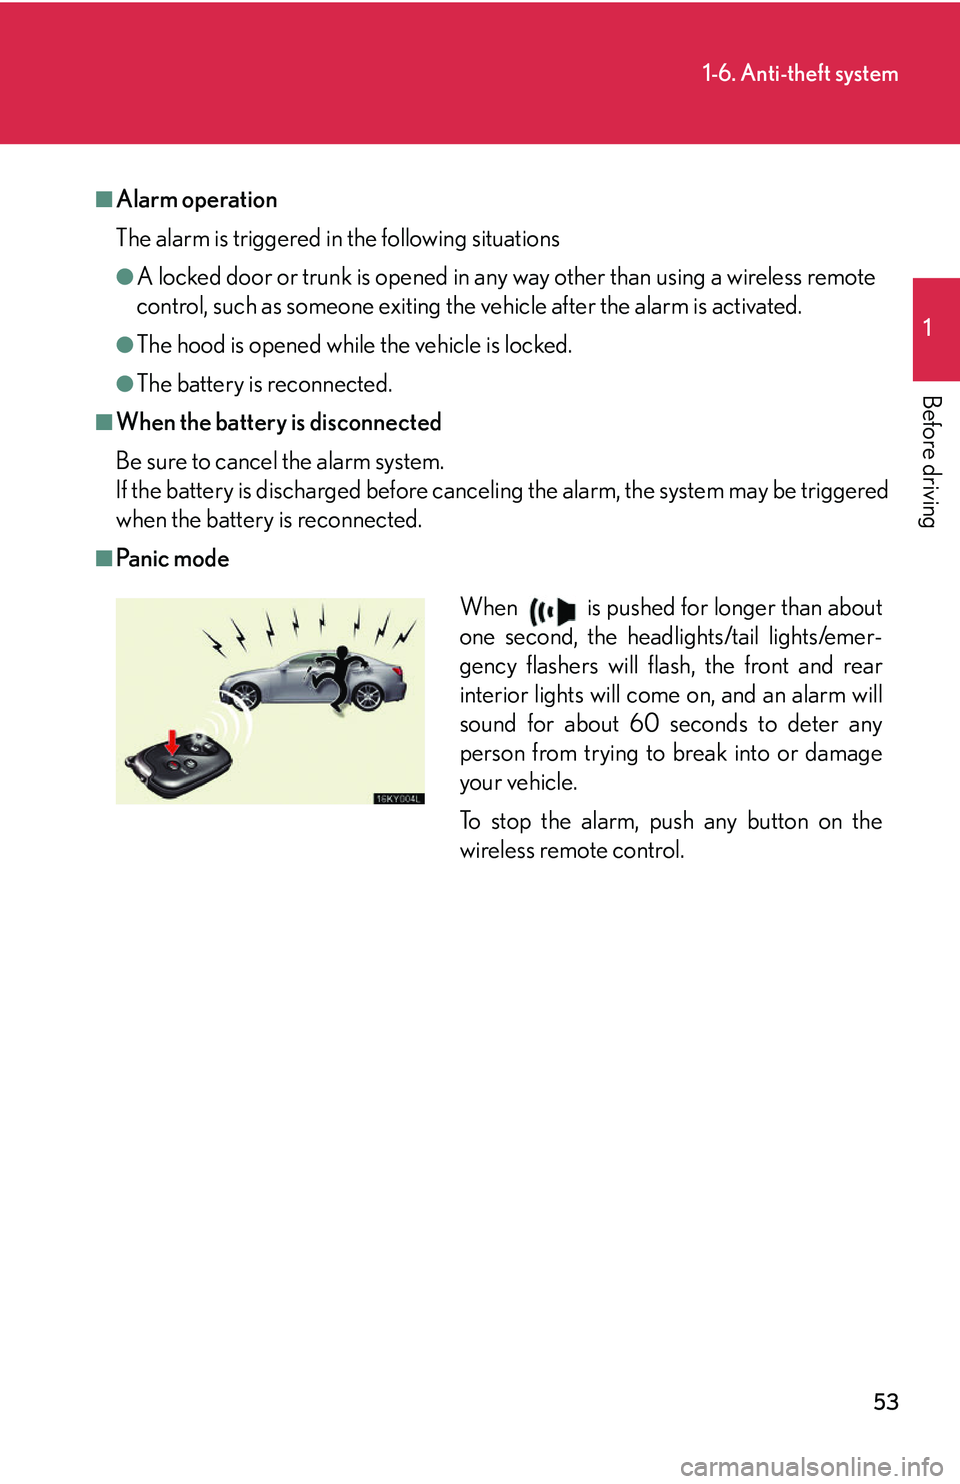
■Pa n i c m o d e
When is pushed for longer than about
one second, the headlights/tail lights/emer-
gency flashers will flash, the front and rear
interior lights will come on, and an alarm will
sound for about 60 seconds to deter any
person from trying to break into or damage
your vehicle.
To stop the alarm, push any button on the
wireless remote control.
Page 76 of 433
58
1-7. Safety information
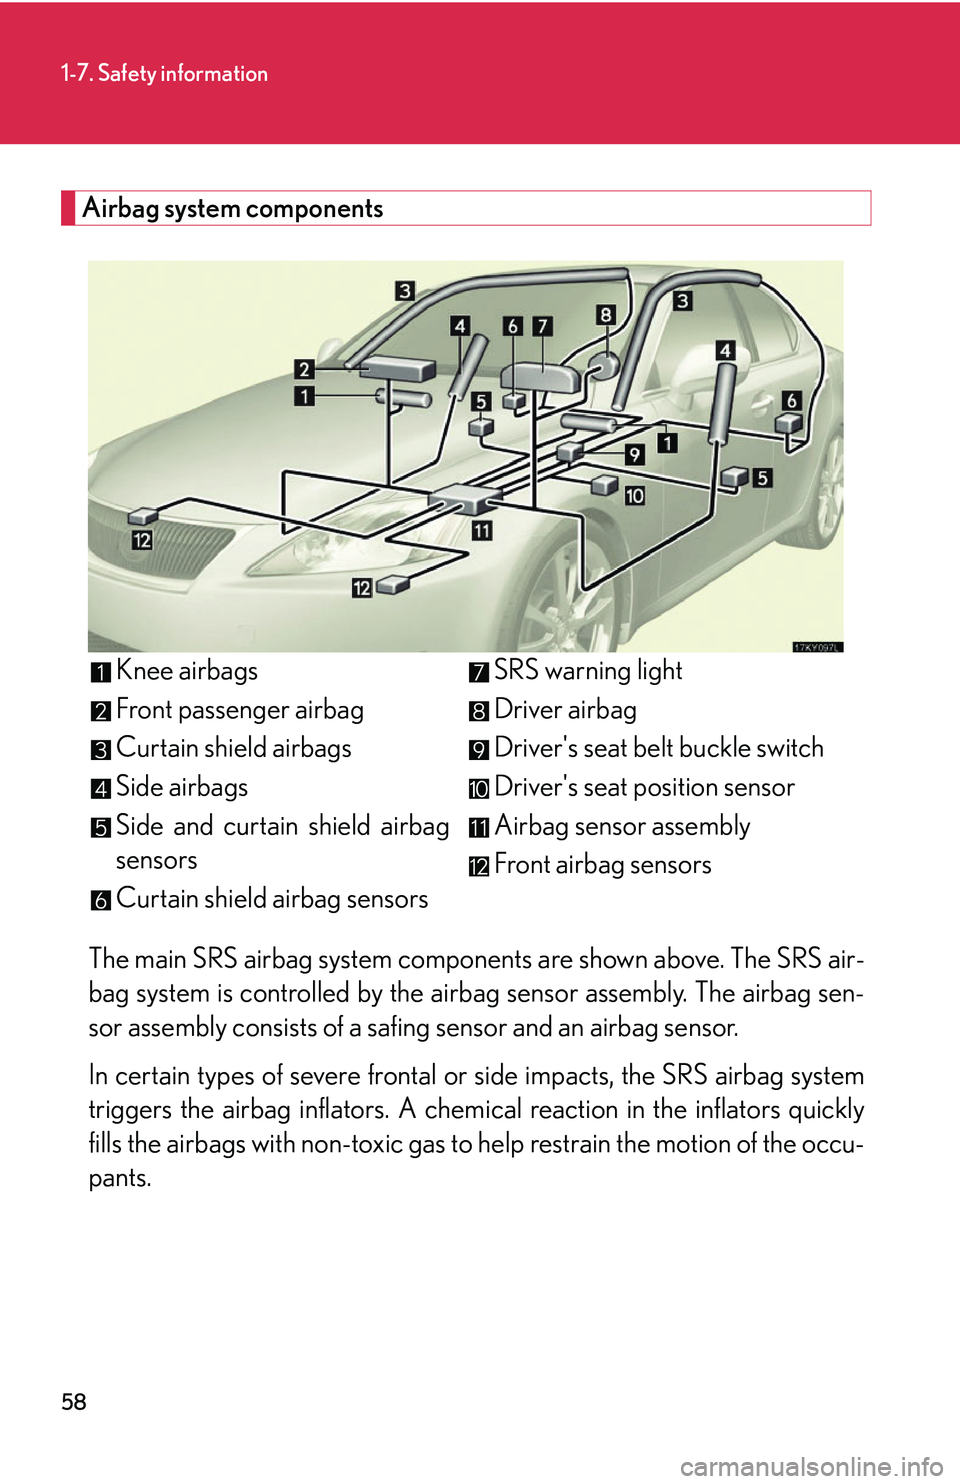
Airbag system componentsThe main SRS airbag system componen ts are shown above. The SRS air-
bag system is controlled by the airb ag sensor assembly. The airbag sen-
sor assembly consists of a safing sensor and an airbag sensor.
In certain types of severe frontal or side impacts, the SRS airbag system
triggers the airbag inflators. A chemica l reaction in the inflators quickly
fills the airbags with non-toxic gas to he lp restrain the motion of the occu-
pants. Knee airbags
Front passenger airbag
Curtain shield airbags
Side airbags
Side and curtain shield airbag
sensors
Curtain shield airbag sensors
SRS warning light
Driver airbag
Driver's seat belt buckle switch
Driver's seat position sensor
Airbag sensor assembly
Front airbag sensors
Page 77 of 433

59
1-7. Safety information
1
Before driving
■If the SRS airbags deploy (inflate)
●Bruising and slight abrasions may result from contact with a deploying (inflating)
SRS airbag.
●A loud noise and white powder will be emitted.
●Parts of the airbag module (steering wheel hub, airbag cover and inflator) as
well as the front seats, and parts of the front pillar and roof side rail, may be hot
for several minutes. The airbag itself may also be hot.
●The front windshield may crack.
■Operating conditions (front airbags)
●The SRS front airbags will deploy if the severity of the frontal impact is above the
designed threshold level, comparable to an approximate 15 mph (25 km/h) col-
lision when the vehicle impacts straight into a fixed barrier that does not move
or deform.
However, this threshold velocity will be considerably higher if the vehicle strikes
an object, such as a parked vehicle or sign pole, which can move or deform on
impact, or if the vehicle is involved in an underride collision (e.g. a collision in
which the front of the vehicle "underrides", or goes under, the bed of a truck, etc.).
●It is possible that in some collisions where the forward deceleration of the vehi-
cle is very close to the designed thresh old level, the SRS front airbags and the
seat belt pretensioners ma y not activate together.
■Operating conditions (side and curtain shield airbags)
The SRS side airbags and curtain shield ai rbags are designed to inflate when the
passenger compartment is subjected to a severe impact from the side.
Page 81 of 433
63
1-7. Safety information
1
Before driving
CAUTION
■SRS airbag precautions
Observe the following precautions regarding the airbags. Failure to do so may
cause death or serious injury.
●The driver and all passengers in the vehicle must wear their seat belts properly.
The SRS airbags are supplemental devices to be used with the seat belts.
●The SRS driver airbag deploys with considerable force, and can cause death or
serious injury especially if the driver is very close to the airbag. The National
Highway Traffic Safety Admini stration ("NHTSA") advises:
Since the risk zone for driver airbag is th e first 2 - 3 in. (50 - 75 mm) of inflation,
placing yourself 10 in. (250 mm) from your driver airbag provides you with a
clear margin of safety. This distance is measured from the center of the steering
wheel to your breastbone. If you sit less than 10 in. (250 mm) away now, you can
change your driving position in several ways:
• Move your seat to the rear as far as you can while still reaching the pedals
comfortably.
• Slightly recline the back of the seat. Al though vehicle designs vary, many driv-
ers can achieve the 10 in. (250 mm) distance, even with the driver seat all the
way forward, simply by reclining the back of the seat somewhat. If reclining
the back of your seat makes it hard to see the road, raise yourself by using a
firm, non-slippery cushion, or raise the seat if your vehicle has that feature.
• If your steering wheel is adjustable, ti lt it downward. This points the airbag
toward your chest instead of your head and neck.
The seat should be adjusted as recommended by NHTSA above, while still main-
taining control of the foot pedals, steering wheel, and your view of the instrument
panel controls.
Page 90 of 433

72
1-7. Safety information
Installing child restraints using a seat belt (child restraint lock function belt)
■Rear facing child seat Infant/convertible
Place the child seat on the rear
seat facing the rear of the vehicle.
Run the seat belt through the infant
seat and insert the plate into the
buckle. Make sure that the belt is
not twisted.
Fully extend the shoulder belt and
then allow it to retract slightly in
order to activate the ALR lock
mode.
Lock mode allows the seat belt to
retract only.
STEP1
STEP2
STEP3
Page 91 of 433

73
1-7. Safety information
1
Before driving
While pushing the child seat down
into the rear seat, allow the shoul-
der belt to retract until the child
seat is securely in place.
After the shoulder belt has
retracted to a point where there is
no slack in the belt, pull the belt to
check that it cannot be extended.
■Forward facing Convertible child seat
Place the child seat on the seat
facing the front of the vehicle.
Run the seat belt through the child
seat and insert the plate into the
buckle. Make sure that the belt is
not twisted.
Fully extend the shoulder strap and
then allow it to retract slightly into
the ALR lock mode.
Lock mode allows the seat belt to
retract only.
STEP4
STEP1
STEP2
STEP3
Page 99 of 433
When driving2
81
2-1. Driving procedures ................. 82Driving the vehicle ....................... 82
Starting the engine ...................... 89
Automatic Transmission ............ 92
Manual Transmission .................. 96
Turn signal lever ............................ 98
Parking brake ................................. 99
2-2. Instrument cluster................... 100 Gauges and meters .................. 100
Indicators and warning lights.............................................. 106
Multi-information display........ 109
2-3. Operating the lights and windshield wipers .................. 113
Headlight switch ........................... 113
Fog light switch.............................. 116
Windshield wipers and washer............................................ 117
Headlight cleaner switch ........ 120 2-4. Using other driving
systems ..................................... 121
Cruise control ............................... 121
Dynamic radar cruise control .......................................... 124
Lexus parking assist-sensor .............................. 133
Driving assist systems............... 139
PCS (Pre-Collision System)........................................ 144
2-5. Driving information................ 147 Cargo and luggage.................... 147
Vehicle load limits ...................... 150
Winter driving tips ....................... 151
Trailer towing................................ 156
Dinghy towing (vehicles with an
automatic transmission) ........ 157
Dinghy towing (vehicles with a manual
transmission) ............................. 158
Page 101 of 433
83
2-1. Driving procedures
2
When driving
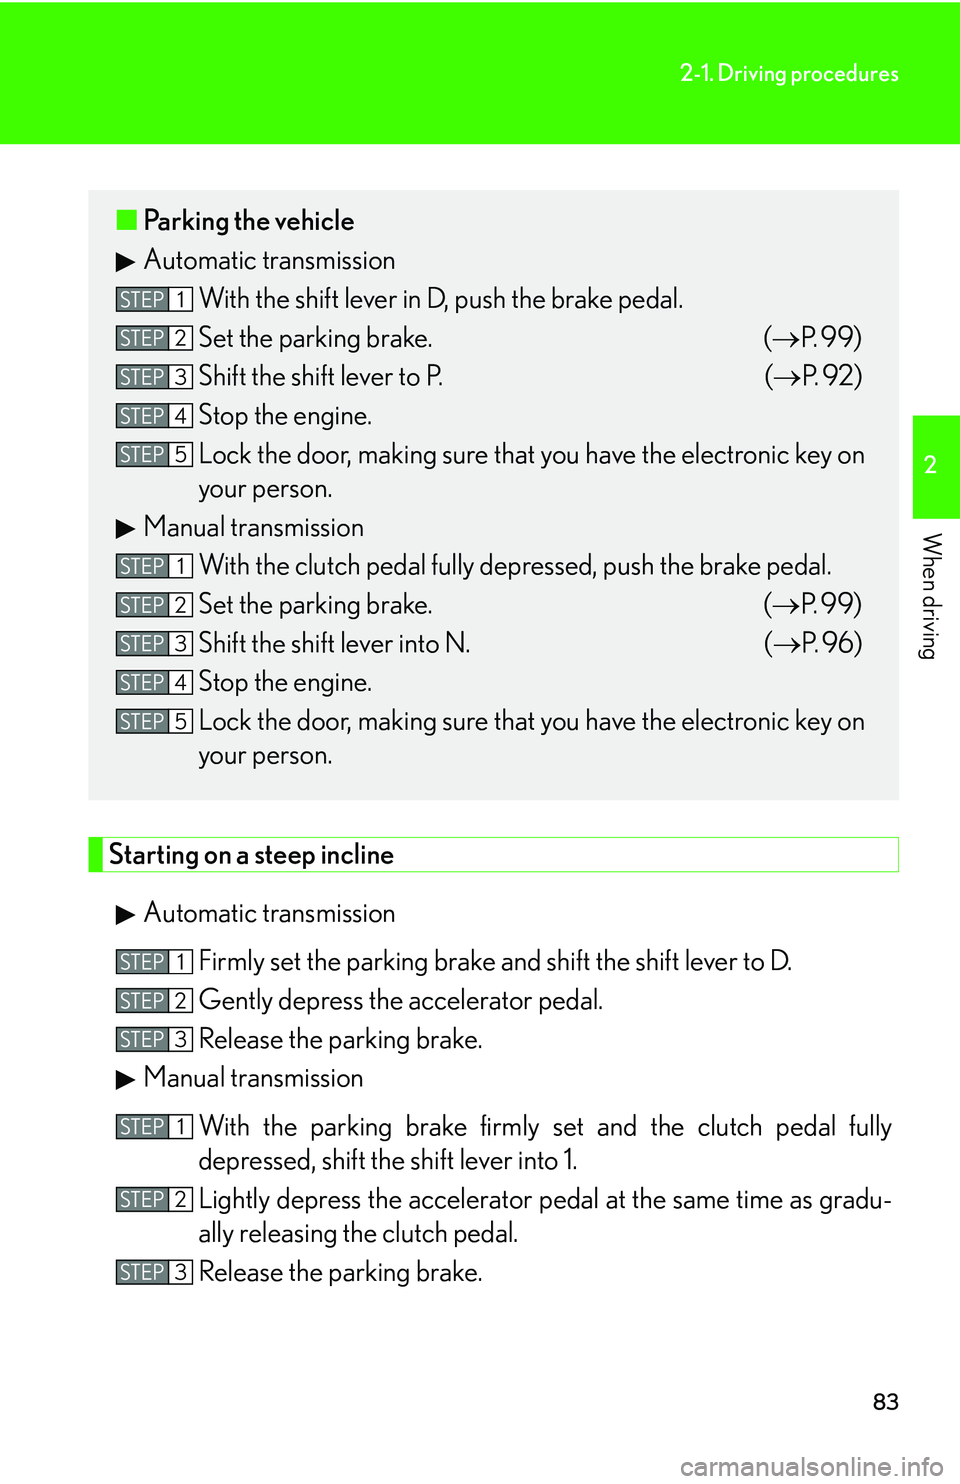
Starting on a steep inclineAutomatic transmission Firmly set the parking brake and shift the shift lever to D.
Gently depress the accelerator pedal.
Release the parking brake.
Manual transmission
With the parking brake firmly set and the clutch pedal fully
depressed, shift the shift lever into 1.
Lightly depress the accelerator pedal at the same time as gradu-
ally releasing the clutch pedal.
Release the parking brake.
■ Parking the vehicle
Automatic transmission
With the shift lever in D, push the brake pedal.
Set the parking brake. ( P. 99)
Shift the shift lever to P. ( P. 9 2 )
Stop the engine.
Lock the door, making sure that you have the electronic key on
your person.
Manual transmission With the clutch pedal fully depressed, push the brake pedal.
Set the parking brake. ( P. 99)
Shift the shift lever into N. ( P. 9 6 )
Stop the engine.
Lock the door, making sure that you have the electronic key on
your person.
STEP1
STEP2
STEP3
STEP4
STEP5
STEP1
STEP2
STEP3
STEP4
STEP5
STEP1
STEP2
STEP3
STEP1
STEP2
STEP3
Page 104 of 433
86
2-1. Driving procedures
CAUTION
■When shifting the shift lever
With automatic transmission vehicles, be careful not to shift the shift lever with the
accelerator pedal depressed.
This may lead to unexpected rapid acceleration of the vehicle that may cause an
accident and result in death or serious injury.
■When the vehicle is stopped
●Do not race the engine.
If the vehicle is in any gear other than P (vehicles with an automatic transmission
only) or N the vehicle may accelerate suddenly and unexpectedly, and may cause
an accident.
●Do not leave the vehicle with the engine running for a long time.
If such a situation cannot be avoided, park the vehicle in an open space and
check that exhaust fumes do no t enter the vehicle interior.
●With automatic transmission vehicles, always keep a foot on the brake pedal
while the engine is running to prevent an accident caused by the vehicle moving.
■When the vehicle is parked
●Do not leave glasses, cigarette lighters, spray cans, or soft drink cans in the vehi-
cle when it is in the sun.
Failure to do so may result in the following.
• Gas may leak from a cigarette lighter or spray can, and may lead to a fire.
• The temperature inside the vehicle may cause the plastic lenses and plastic material of eye glasses to deform or crack.
• Soft drink cans may fracture, causing the contents to spray over the interior of
the vehicle, and may also cause a short circuit in the vehicle's electrical com-
ponents.
●Always apply the parking brake, shift the shift lever to P (vehicles with an auto-
matic transmission only), stop the engine and lock the vehicle.
Do not leave the vehicle unattend ed while the engine is running.
●Do not touch the exhaust pipe while the engine is running or immediately after
turning the engine off.
Doing so may cause burns.
●Do not leave the engine running in an area with snow build up, or where snow is
expected to fall.
Exhaust gases may enter the vehicle and cause gas poisoning.
Page 116 of 433
98
2-1. Driving procedures
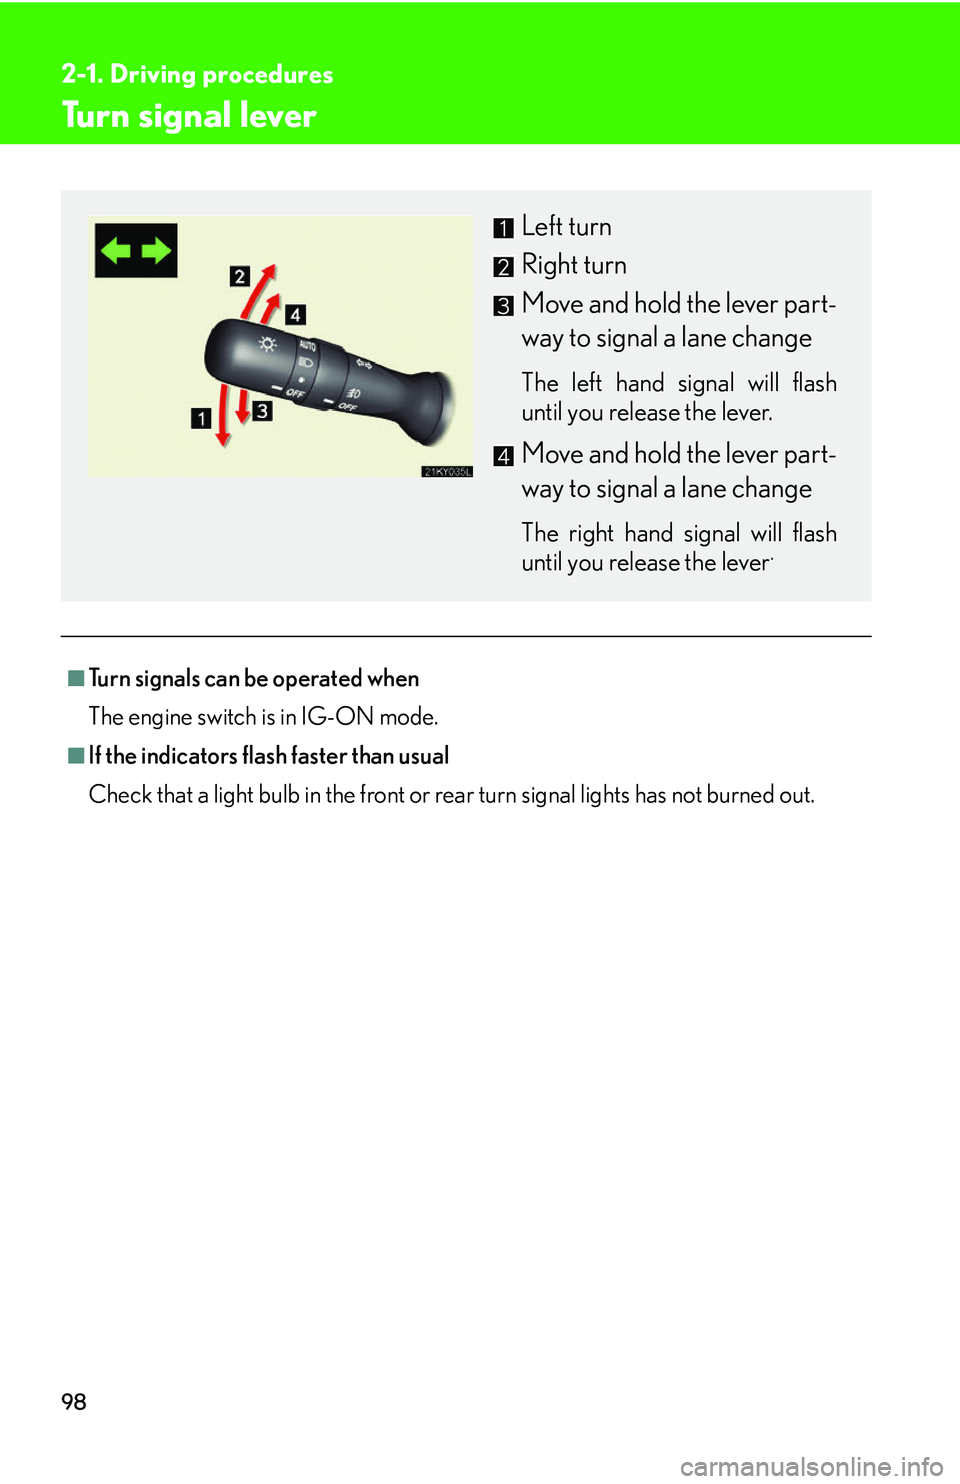
Turn signal lever
■Turn signals can be operated when
The engine switch is in IG-ON mode.
■If the indicators flash faster than usual
Check that a light bulb in the front or rear turn signal lights has not burned out.
Left turn
Right turn
Move and hold the lever part-
way to signal a lane change
The left hand signal will flash
until you release the lever.
Move and hold the lever part-
way to signal a lane change
The right hand signal will flash
until you release the lever.