ad blue Lexus IS250 2010 Navigation Manual
[x] Cancel search | Manufacturer: LEXUS, Model Year: 2010, Model line: IS250, Model: Lexus IS250 2010Pages: 391, PDF Size: 38.06 MB
Page 260 of 391
AUDIO/VIDEO SYSTEM
259
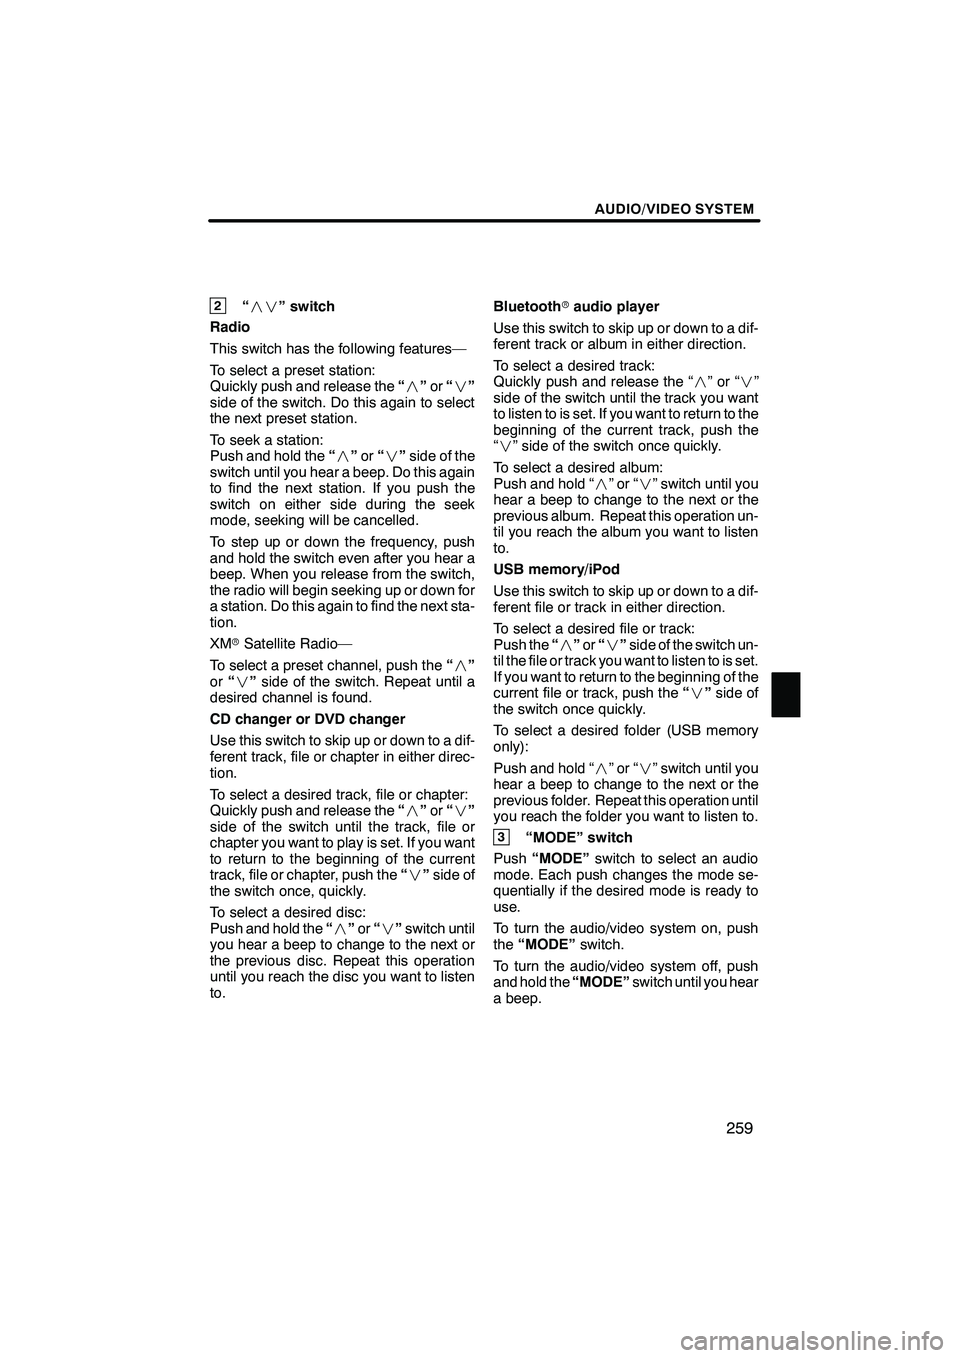
2“” switch
Radio
This switch has the following features—
To select a preset station:
Quickly push and release the “” or“”
side of the switch. Do this again to select
the next preset station.
To seek a station:
Push and hold the “” or“” side of the
switch until you hear a beep. Do this again
to find the next station. If you push the
switch on either side during the seek
mode, seeking will be cancelled.
To step up or down the frequency, push
and hold the switch even after you hear a
beep. When you release from the switch,
the radio will begin seeking up or down for
a station. Do this again to find the next sta-
tion.
XM rSatellite Radio—
To select a preset channel, push the “”
or “” side of the switch. Repeat until a
desired channel is found.
CD changer or DVD changer
Use this switch to skip up or down to a dif-
ferent track, file or chapter in either direc-
tion.
To select a desired track, file or chapter:
Quickly push and release the “” or“”
side of the switch until the track, file or
chapter you want to play is set. If you want
to return to the beginning of the current
track, file or chapter, push the “” side of
the switch once, quickly.
To select a desired disc:
Push and hold the “” or“” switch until
you hear a beep to change to the next or
the previous disc. Repeat this operation
until you reach the disc you want to listen
to. Bluetooth
raudio player
Use this switch to skip up or down to a dif-
ferent track or album in either direction.
To select a desired track:
Quickly push and release the “ ”or“”
side of the switch until the track you want
to listen to is set. If you want to return to the
beginning of the current track, push the
“” side of the switch once quickly.
To select a desired album:
Push and hold “ ”or“” switch until you
hear a beep to change to the next or the
previous album. Repeat this operation un-
til you reach the album you want to listen
to.
USB memory/iPod
Use this switch to skip up or down to a dif-
ferent file or track in either direction.
To select a desired file or track:
Push the “” or“” side of the switch un-
til the file or track you want to listen to is set.
If you want to return to the beginning of the
current file or track, push the “” side of
the switch once quickly.
To select a desired folder (USB memory
only):
Push and hold “ ”or“” switch until you
hear a beep to change to the next or the
previous folder. Repeat this operation until
you reach the folder you want to listen to.
3“MODE” switch
Push “MODE” switch to select an audio
mode. Each push changes the mode se-
quentially if the desired mode is ready to
use.
To turn the audio/video system on, push
the “MODE” switch.
To turn the audio/video system off, push
and hold the “MODE”switch until you hear
a beep.
ISF/IS NAVI (U)
Finish
7
Page 296 of 391
SECTION11
SETUP
295
SETUP
DGeneral settings 296 .......................................
(Used for language selection and the on/off settings of
operation sounds and automatic screen change.)
D Clock settings 300
.........................................
(Used for changing time zones and the on/off settings of
daylight saving time.)
D Voice settings 302
.........................................
(Voice guidance can be set.)
D Navigation settings 305
....................................
(“Home” and “Preset Destinations” can be set and edited.)
D Detailed navigation settings 305
.............................
(Average cruising speed, displayed screen contents,
and POI icon categories can be set.)
D Telephone settings 314
.....................................
(Bluetooth rphones can be registered.)
D Audio settings 353
.........................................
(Settings are available for portable audio devices and
Bluetooth raudio devices players.)
D Vehicle settings 360
.......................................
(Vehicle information can be set.)
D Other settings 367
.........................................
(Used for changing settings for Lexus Insider and
XM rSports and Stocks.)
ISF/IS NAVI (U)
Finish
11
Page 300 of 391
SETUP
299
D
Unit of measurement
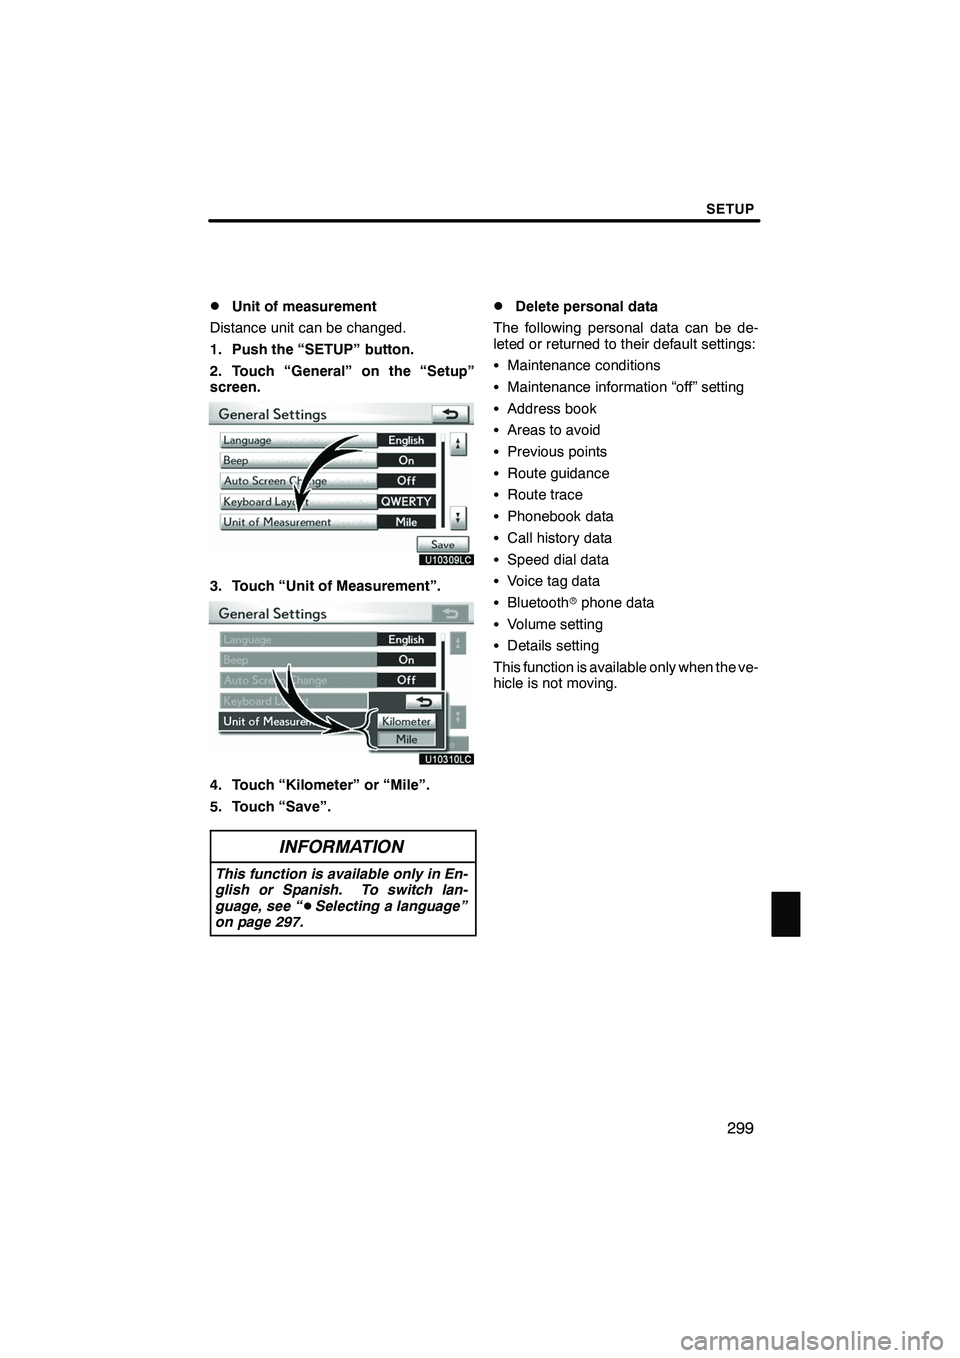
Distance unit can be changed.
1. Push the “SETUP” button.
2. Touch “General” on the “Setup”
screen.
3. Touch “Unit of Measurement”.
4. Touch “Kilometer” or “Mile”.
5. Touch “Save”.
INFORMATION
This function is available only in En-
glish or Spanish. To switch lan-
guage, see “ DSelecting a language”
on page 297.
DDelete personal data
The following personal data can be de-
leted or returned to their default settings:
S Maintenance conditions
S Maintenance information “off” setting
S Address book
S Areas to avoid
S Previous points
S Route guidance
S Route trace
S Phonebook data
S Call history data
S Speed dial data
S Voice tag data
S Bluetooth rphone data
S Volume setting
S Details setting
This function is available only when the ve-
hicle is not moving.
ISF/IS NAVI (U)
Finish
11
Page 318 of 391

SETUP
317
D
Registering a Bluetooth
rphone
1. Touch “(add new)” to register your
cellular phone to the system.
2. When this screen is displayed, input
the passcode displayed on the screen
into the phone.
For the operation of the phone, see the
manual that comes with your cellular
phone.
If you want to cancel it, touch “Cancel”.
3. When the connection is completed,
this screen is displayed.
You do not need to enter the phone in case
of using the same one.
When this screen is displayed, follow the
guidance on the screen to try again.
ISF/IS NAVI (U)
Finish
11
Page 319 of 391

SETUP
318
When another Bluetoothrdevice is
connected
When another Bluetooth rdevice is cur-
rently connected, this screen is displayed.
If you want to disconnect it, touch “Yes”.
INFORMATION
When you register your phone,
Bluetooth raudio will disconnect. It
will reconnect automatically when
you finish registration. It will not be
reconnected depending on the phone
you are using.
You can also register a new Bluetooth r
phone in the following way.
1. Push the “SETUP” button.
2. Touch “Phone”.
3. Touch “Manage Phone”.
4. Touch “Options”.
5. Touch “New Phone”.
ISF/IS NAVI (U)
Finish
Page 320 of 391

SETUP
319
6. Touch “(empty)” to register your
cellular phone to the system.
The following operations are the same
as the operation after you touch “(add
new)”.
DSelecting a Bluetoothrphone
In case you register more than one
Bluetooth rphone, you need to choose
a favorite one.
You can select the Bluetooth rphone
from a maximum of 4 numbers.
“(add new)” is displayed when you have
not registered a Bluetooth rphone yet.
Although you can register up to 4
Bluetooth rphones in the system, only one
Bluetooth rphone can function at a time.
1. Touch the phone to connect.
The Bluetooth rmark is displayed when
you connect the phone.
ISF/IS NAVI (U)
Finish
11
Page 321 of 391

SETUP
320
2. The “Connect Bluetooth*” screen is
displayed.
3. When the result message is dis-
played, you can use the Bluetoothr
phone.
*: Bluetooth is a registered trademark of
Bluetooth SIG, Inc. When you connect the phone while
Bluetooth
raudio is playing
This screen is displayed, and the
Bluetooth raudio will stop temporarily.
When another Bluetooth rdevice is
connected
When another Bluetooth rdevice is cur-
rently connected, this screen is displayed.
If you want to disconnect it, touch “Yes”.
ISF/IS NAVI (U)
Finish
Page 322 of 391
SETUP
321
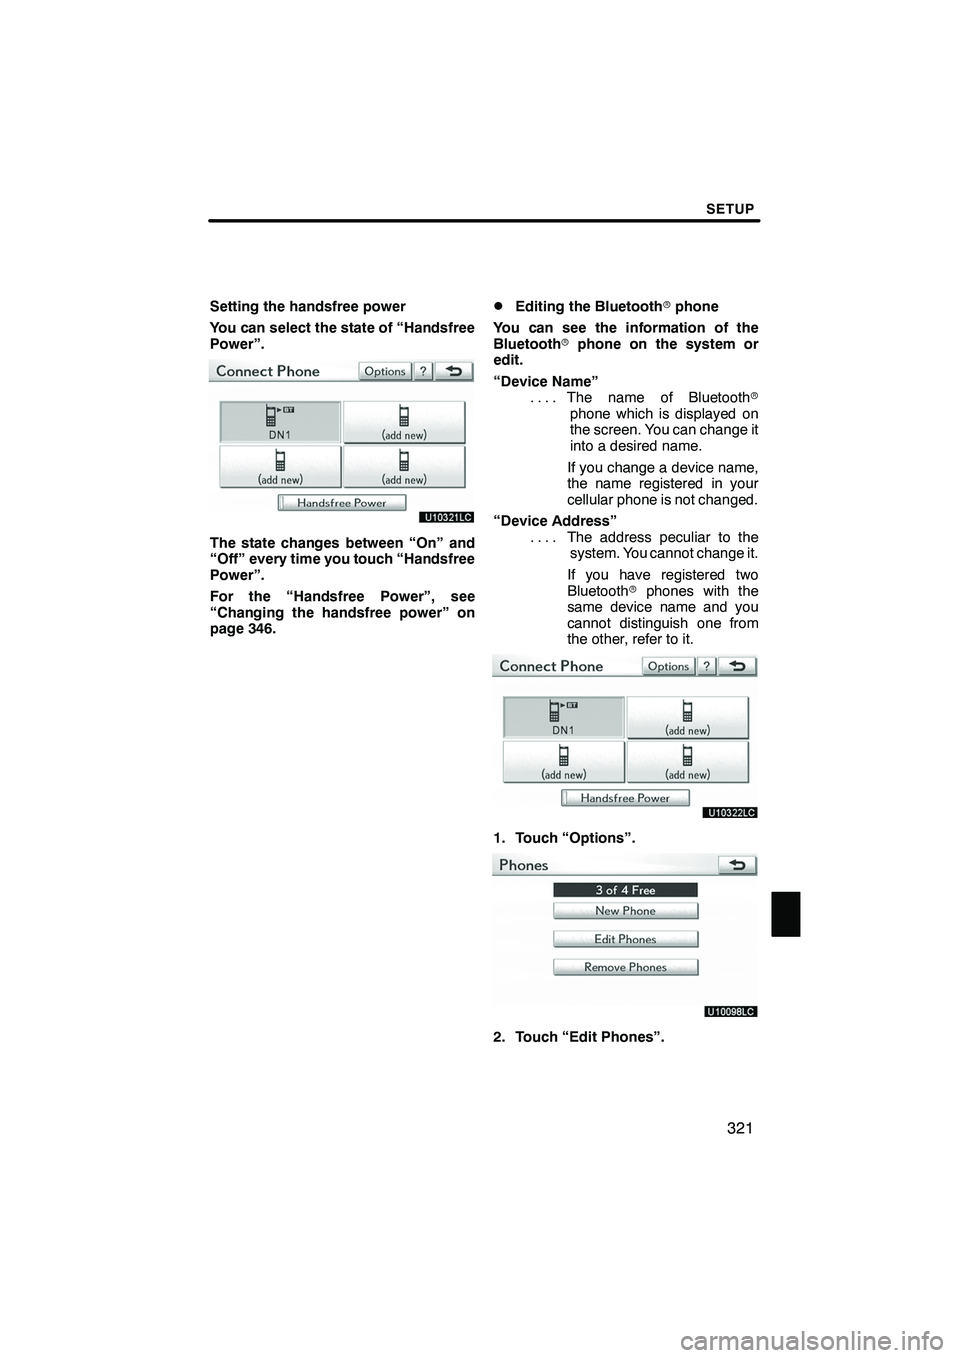
Setting the handsfree power
You can select the state of “Handsfree
Power”.
The state changes between “On” and
“Off” every time you touch “Handsfree
Power”.
For the “Handsfree Power”, see
“Changing the handsfree power” on
page 346.
DEditing the Bluetoothrphone
You can see the information of the
Bluetooth rphone on the system or
edit.
“Device Name” The name of Bluetooth r
....
phone which is displayed on
the screen. You can change it
into a desired name.
If you change a device name,
the name registered in your
cellular phone is not changed.
“Device Address” The address peculiar to the
....
system. You cannot change it.
If you have registered two
Bluetooth rphones with the
same device name and you
cannot distinguish one from
the other, refer to it.
1. Touch “Options”.
2. Touch “Edit Phones”.
ISF/IS NAVI (U)
Finish
11
Page 324 of 391

SETUP
323
D
Deleting a Bluetooth
rphone
1. Touch “Options”.
2. Touch “Remove Phones”.
3. Touch the desired phone or touch
“Select All”, then touch “Delete”.
You can touch multiple phones and delete
them at the same time.
4. Touch “Yes”.
INFORMATION
When you delete a Bluetooth r
phone, the phonebook data will be
deleted at the same time.
ISF/IS NAVI (U)
Finish
11
Page 327 of 391
SETUP
326
D
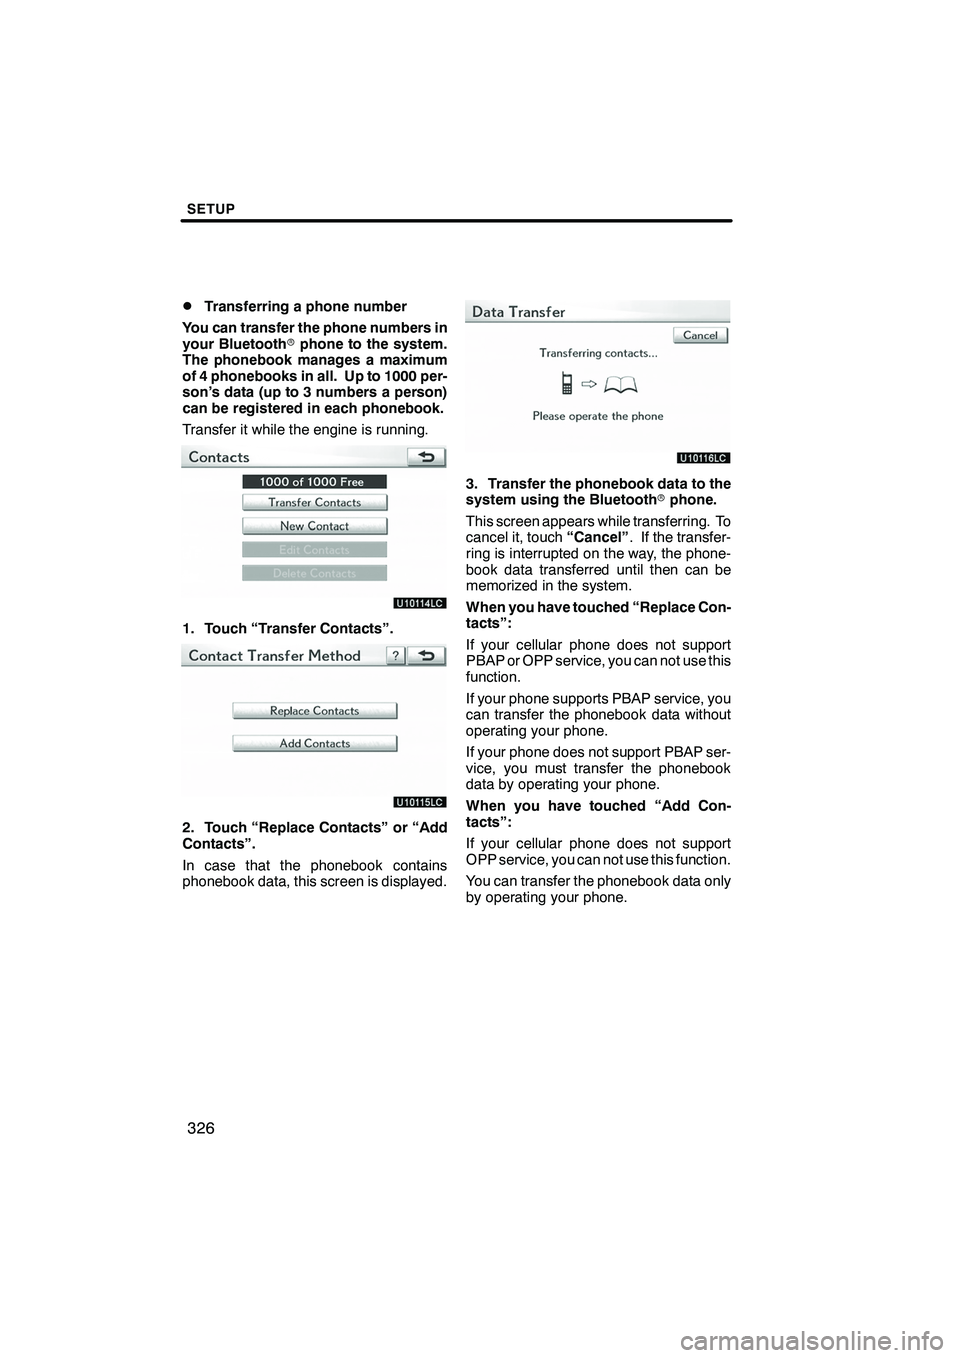
Transferring a phone number
You can transfer the phone numbers in
your Bluetooth rphone to the system.
The phonebook manages a maximum
of 4 phonebooks in all. Up to 1000 per-
son’s data (up to 3 numbers a person)
can be registered in each phonebook.
Transfer it while the engine is running.
1. Touch “Transfer Contacts”.
2. Touch “Replace Contacts” or “Add
Contacts”.
In case that the phonebook contains
phonebook data, this screen is displayed.
3. Transfer the phonebook data to the
system using the Bluetooth rphone.
This screen appears while transferring. To
cancel it, touch “Cancel”. If the transfer-
ring is interrupted on the way, the phone-
book data transferred until then can be
memorized in the system.
When you have touched “Replace Con-
tacts”:
If your cellular phone does not support
PBAP or OPP service, you can not use this
function.
If your phone supports PBAP service, you
can transfer the phonebook data without
operating your phone.
If your phone does not support PBAP ser-
vice, you must transfer the phonebook
data by operating your phone.
When you have touched “Add Con-
tacts”:
If your cellular phone does not support
OPP service, you can not use this function.
You can transfer the phonebook data only
by operating your phone.
ISF/IS NAVI (U)
Finish