change time Lexus IS250 2010 Using The Air Conditioning System And Defogger / LEXUS 2010 IS350 IS250 OWNERS MANUAL (OM53A23U)
[x] Cancel search | Manufacturer: LEXUS, Model Year: 2010, Model line: IS250, Model: Lexus IS250 2010Pages: 578, PDF Size: 16.25 MB
Page 19 of 578

19
For your information
Main Owner’s Manual
Please note that this manual applies to all models and explains all equipment, includ-
ing options. Therefore, you may find some explanations for equipment not installed
on your vehicle.
All specifications provided in this manual are current at the time of printing. How-
ever, because of the Lexus policy of continual product improvement, we reserve the
right to make changes at any time without notice.
Depending on specifications, the vehicle shown in the illustration may differ from
your vehicle in terms of color and equipment.
Noise from under vehicle after turning off the engine
Approximately five hours after the engine is turned off, you may hear sound coming
from under the vehicle for several minutes. This is the sound of a fuel evaporation
leakage check and, it does not indicate a malfunction.
Accessories, spare parts and modification of your Lexus
A wide variety of non-genuine spare parts and accessories for Lexus vehicles are
currently available in the market. You should know that Toyota does not warrant
these products and is not responsible for their performance, repair, or replacement,
or for any damage they may cause to, or adverse effect they may have on, your
Lexus vehicle.
This vehicle should not be modified with non-genuine Lexus products. Modification
with non-genuine Lexus products could affect its performance, safety or durability,
and may even violate governmental regulations. In addition, damage or perfor-
mance problems resulting from the modification may not be covered under war-
ranty.
Page 33 of 578
33
1-2. Opening, closing and locking the doors and trunk
1
Before driving
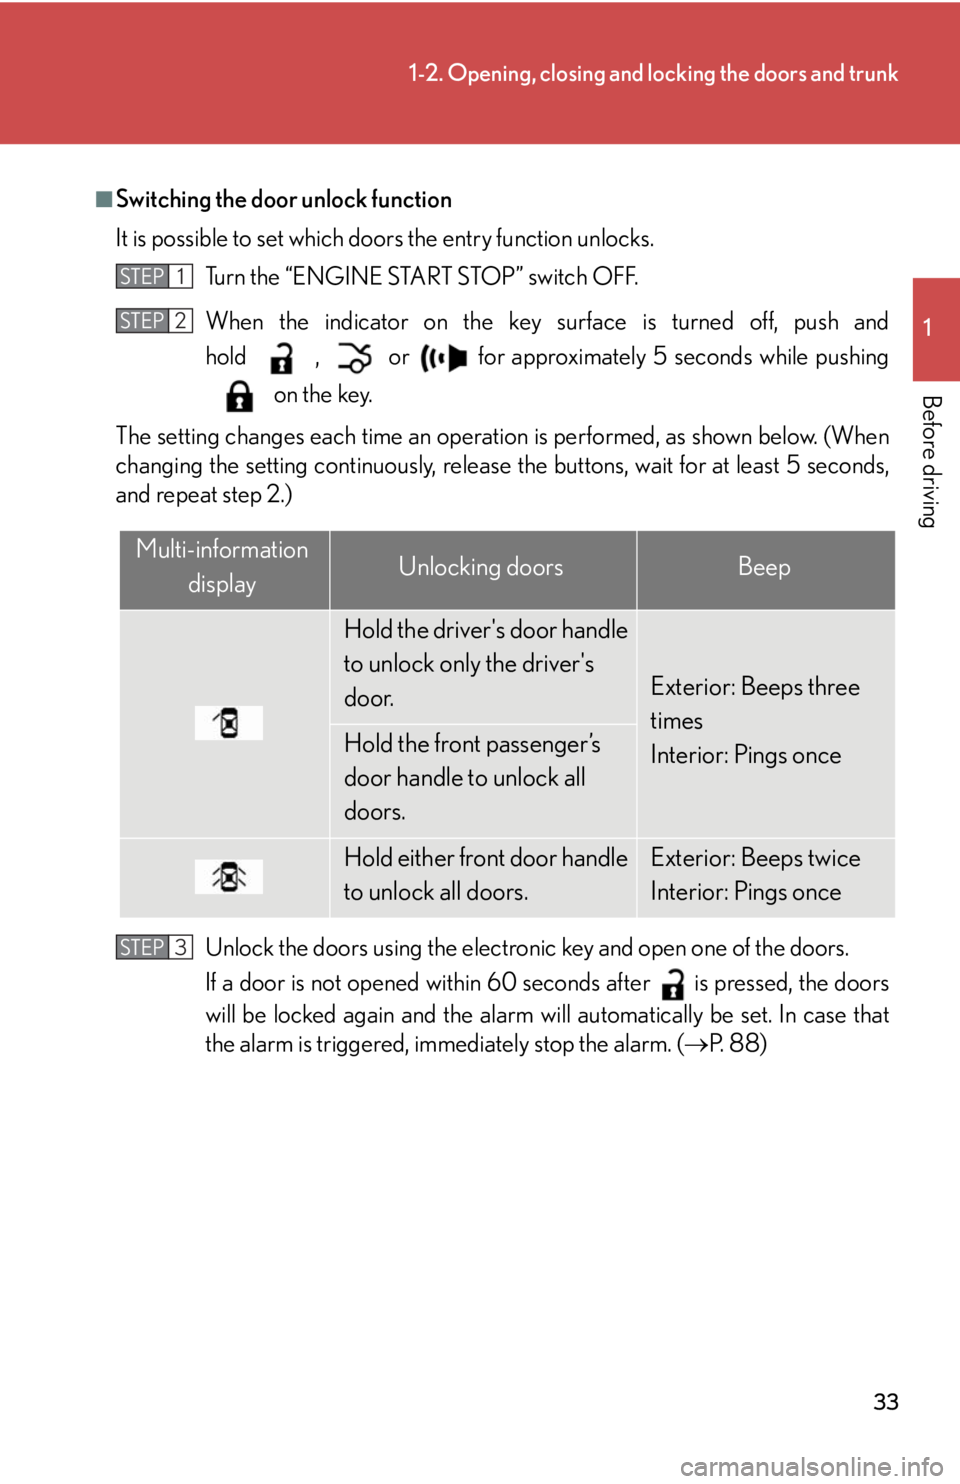
■Switching the door unlock function
It is possible to set which doors the entry function unlocks.
Turn the “ENGINE START STOP” switch OFF.
When the indicator on the key surface is turned off, push and
hold , or for approximately 5 seconds while pushing
on the key.
The setting changes each time an operation is performed, as shown below. (When
changing the setting continuously, release the buttons, wait for at least 5 seconds,
and repeat step 2.)
Unlock the doors using the electronic key and open one of the doors.
If a door is not opened within 60 seconds after is pressed, the doors
will be locked again and the alarm will automatically be set. In case that
the alarm is triggered, immediately stop the alarm. (P. 8 8 )
STEP1
STEP2
Multi-information
displayUnlocking doorsBeep
Hold the driver's door handle
to unlock only the driver's
door.
Exterior: Beeps three
times
Interior: Pings once
Hold the front passenger’s
door handle to unlock all
doors.
Hold either front door handle
to unlock all doors.Exterior: Beeps twice
Interior: Pings once
STEP3
Page 81 of 578

81
1-4. Opening and closing the windows and moon roof
1
Before driving
■When the moon roof does not close normally
Perform the following procedure:
●If the moon roof closes but then re-opens slightly
Press and hold the “CLOSE” switch.*
1
The moon roof will close, reopen and pause for approximately 10 sec-
onds.*2 Then it will close again, tilt up and pause for approximately 1 sec-
ond. Finally, it will tilt down, open and close.
Check to make sure that the moon roof is completely closed and then
release the switch.
●If the moon roof tilts down but then tilts back up
Press and hold the “TILT” switch*
1 until the moon roof moves into the tilt
up position and stops.
Release the “TILT” switch once and then press and hold the “TILT” switch
again.*
1
The moon roof will pause for approximately 10 seconds in the tilt up posi-
tion.*2 Then it will adjust slightly and pause for approximately 1 second.
Finally, it will tilt down, open and close.
Check to make sure that the moon roof is completely closed and then
release the switch.
*
1: If the switch is released at the incorrect time, the procedure will have to be per-
formed again from the beginning.
*
2: If the switch is released after the above mentioned 10 second pause, automatic
operation will be disabled. In that case, press and hold the “CLOSE” or “TILT”
switch, and the moon roof will tilt up and pause for approximately 1 second.
Then it will tilt down, open and close. Check to make sure that the moon roof is
completely closed and then release the switch.
If the moon roof does not fully close even after performing the above procedure
correctly, have the vehicle inspected by your Lexus dealer.
■Customization that can be configured at Lexus dealer
Settings (e.g. linked door lock operation) can be changed.
(Customizable features P. 5 5 0 )
STEP1
STEP2
STEP1
STEP2
STEP3
Page 129 of 578

129
2-1. Driving procedures
2
When driving
CAUTION
■When driving on slippery road surfaces
●Sudden braking, acceleration and steering may cause tire slippage and reduce
your ability to control the vehicle, resulting in an accident.
●Sudden changes in engine speed, such as engine braking caused by up-shifting
or down-shifting, may cause the vehicle to skid, resulting in an accident.
●After driving through a puddle, lightly depress the brake pedal to make sure that
the brakes are functioning properly. Wet brake pads may prevent the brakes from
functioning properly. If the brakes on only one side are wet and not functioning
properly, steering control may be affected, resulting in an accident.
■When shifting the shift lever
With automatic transmission vehicles, be careful not to shift the shift lever with the
accelerator pedal depressed.
This may lead to unexpected rapid acceleration of the vehicle that may cause an
accident and result in death or serious injury.
■When the vehicle is stopped
●Do not race the engine.
If the vehicle is in any gear other than P (vehicles with an automatic transmission
only) or N the vehicle may accelerate suddenly and unexpectedly, and may cause
an accident.
●Do not leave the vehicle with the engine running for a long time.
If such a situation cannot be avoided, park the vehicle in an open space and
check that exhaust fumes do not enter the vehicle interior.
●With automatic transmission vehicles, always keep a foot on the brake pedal
while the engine is running to prevent an accident caused by the vehicle moving.
Page 136 of 578
136
2-1. Driving procedures
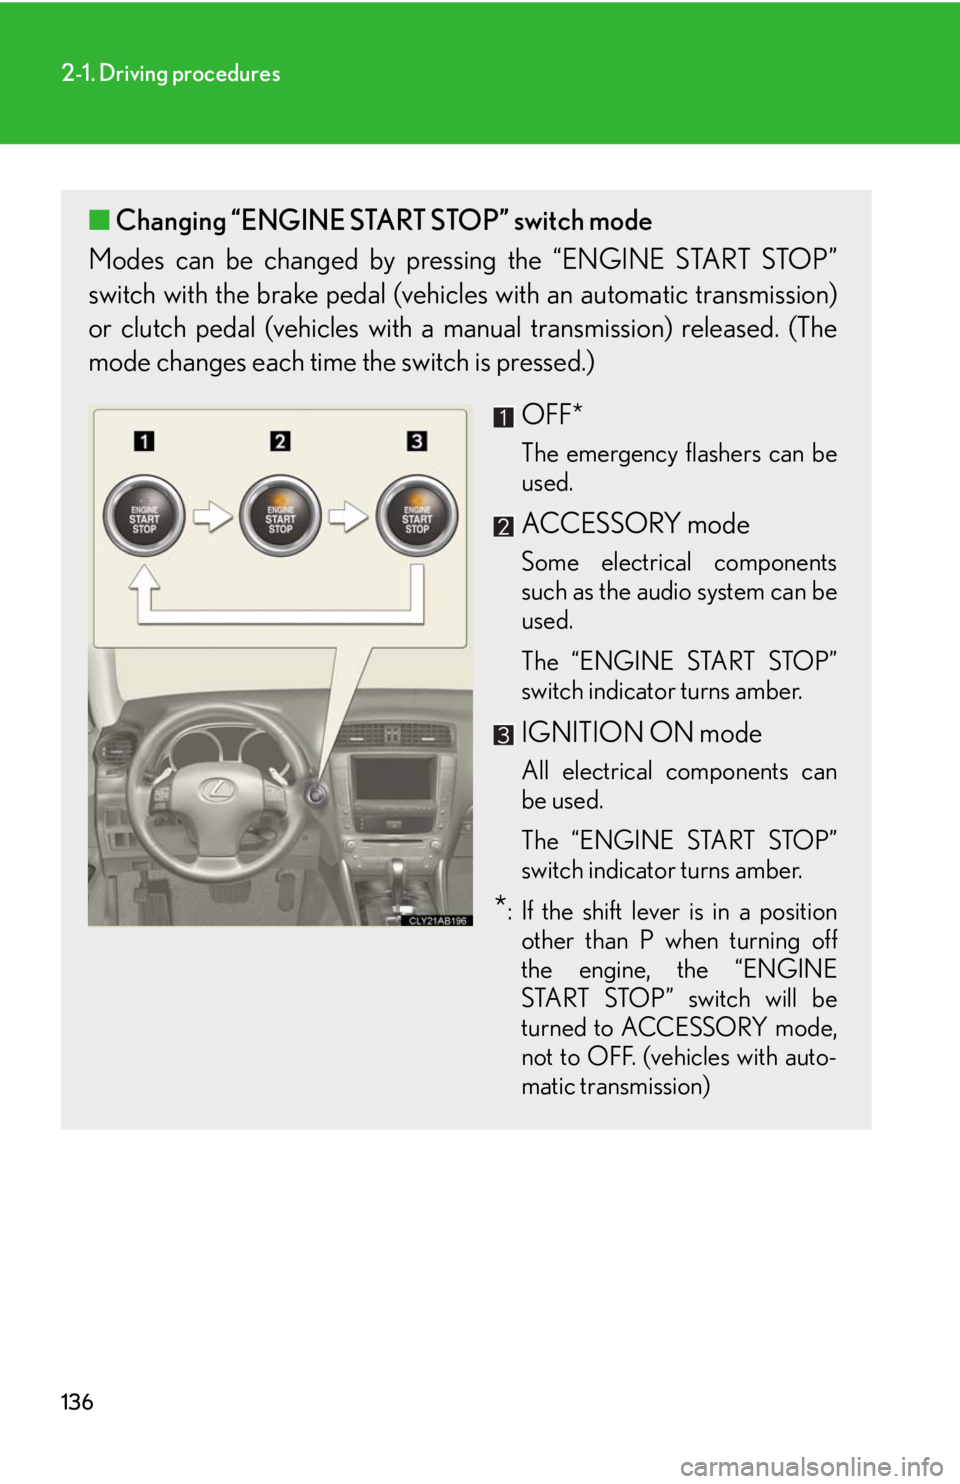
■Changing “ENGINE START STOP” switch mode
Modes can be changed by pressing the “ENGINE START STOP”
switch with the brake pedal (vehicles with an automatic transmission)
or clutch pedal (vehicles with a manual transmission) released. (The
mode changes each time the switch is pressed.)
OFF*
The emergency flashers can be
used.
ACCESSORY mode
Some electrical components
such as the audio system can be
used.
The “ENGINE START STOP”
switch indicator turns amber.
IGNITION ON mode
All electrical components can
be used.
The “ENGINE START STOP”
switch indicator turns amber.
*: If the shift lever is in a position
other than P when turning off
the engine, the “ENGINE
START STOP” switch will be
turned to ACCESSORY mode,
not to OFF. (vehicles with auto-
matic transmission)
Page 155 of 578
155
2-2. Instrument cluster
2
When driving
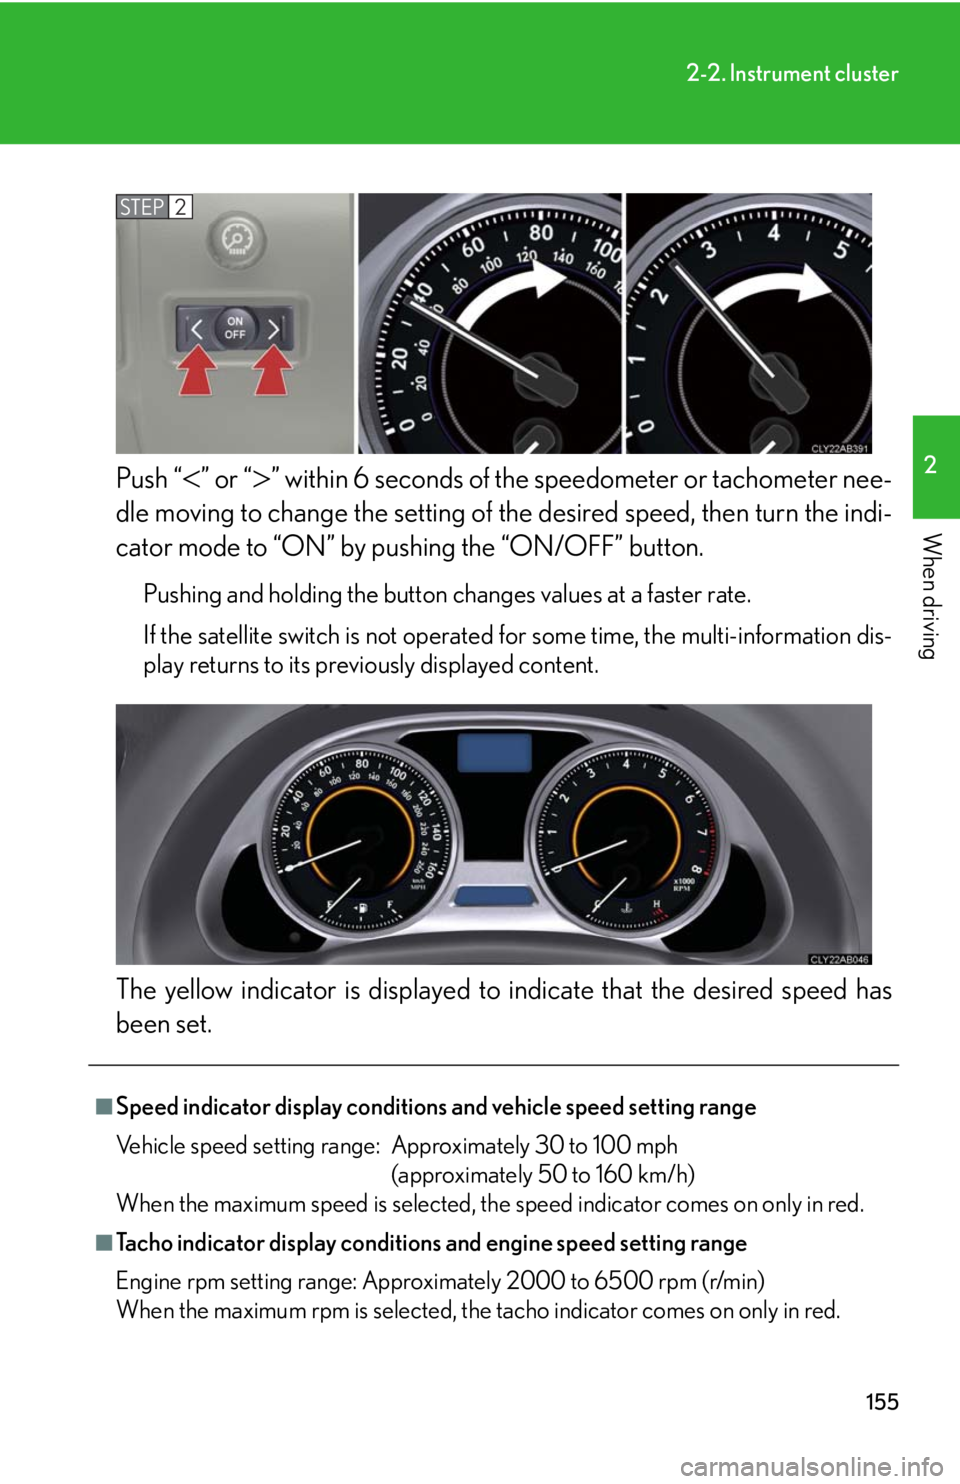
Push “” or “” within 6 seconds of the speedometer or tachometer nee-
dle moving to change the setting of the desired speed, then turn the indi-
cator mode to “ON” by pushing the “ON/OFF” button.
Pushing and holding the button changes values at a faster rate.
If the satellite switch is not operated for some time, the multi-information dis-
play returns to its previously displayed content.
The yellow indicator is displayed to indicate that the desired speed has
been set.
STEP2
■Speed indicator display conditions and vehicle speed setting range
Vehicle speed setting range: Approximately 30 to 100 mph
(approximately 50 to 160 km/h)
When the maximum speed is selected, the speed indicator comes on only in red.
■Tacho indicator display conditions and engine speed setting range
Engine rpm setting range: Approximately 2000 to 6500 rpm (r/min)
When the maximum rpm is selected, the tacho indicator comes on only in red.
Page 181 of 578
181
2-4. Using other driving systems
2
When driving
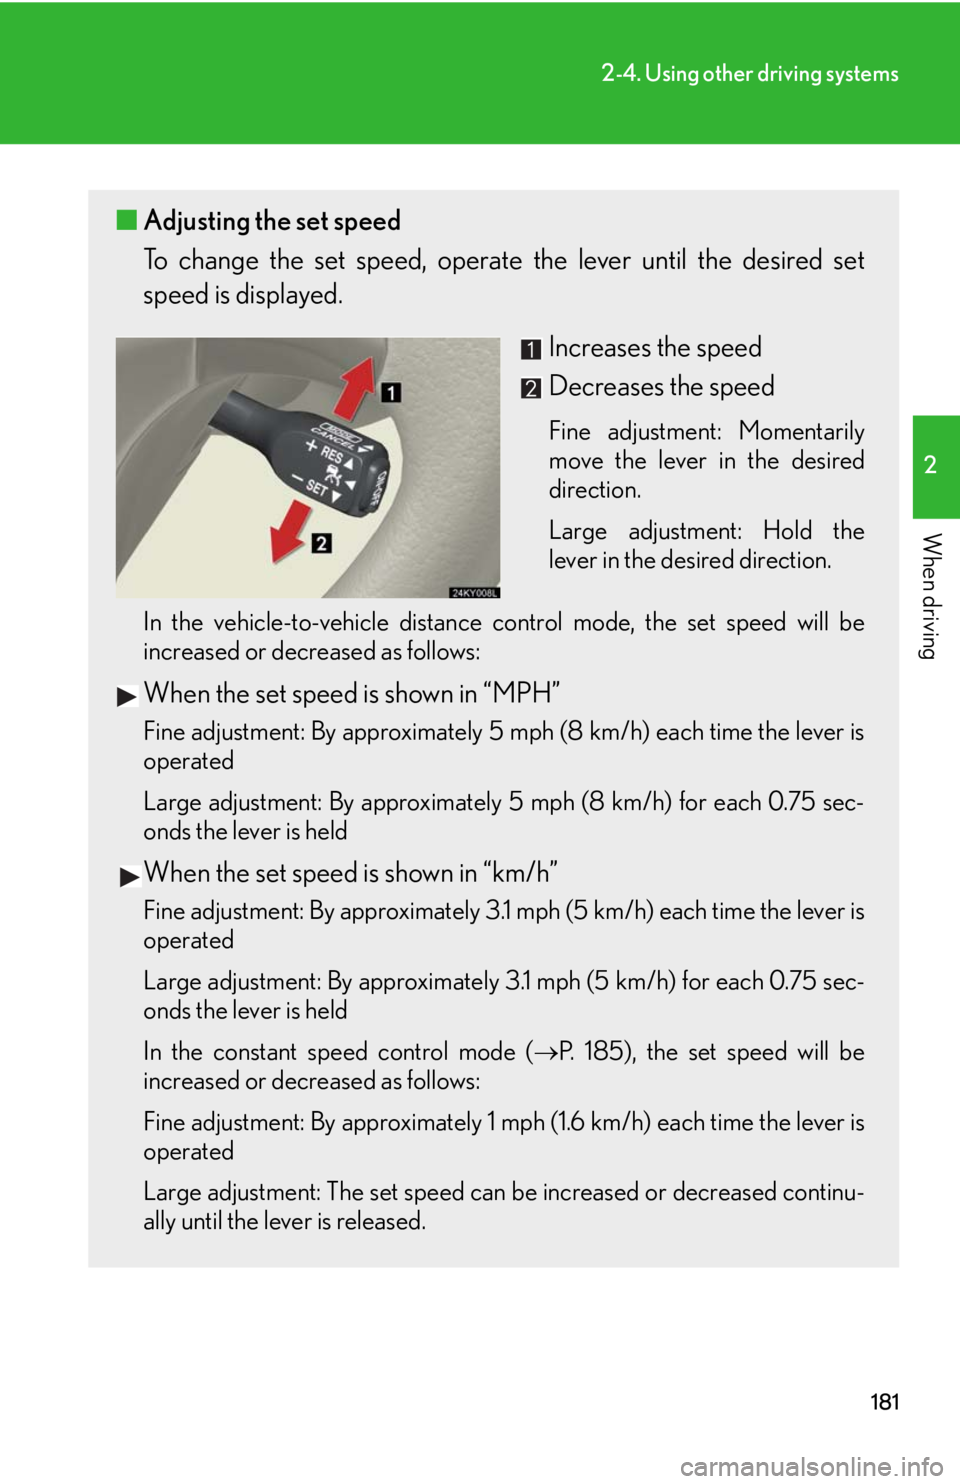
■Adjusting the set speed
To change the set speed, operate the lever until the desired set
speed is displayed.
Increases the speed
Decreases the speed
Fine adjustment: Momentarily
move the lever in the desired
direction.
Large adjustment: Hold the
lever in the desired direction.
In the vehicle-to-vehicle distance control mode, the set speed will be
increased or decreased as follows:
When the set speed is shown in “MPH”
Fine adjustment: By approximately 5 mph (8 km/h) each time the lever is
operated
Large adjustment: By approximately 5 mph (8 km/h) for each 0.75 sec-
onds the lever is held
When the set speed is shown in “km/h”
Fine adjustment: By approximately 3.1 mph (5 km/h) each time the lever is
operated
Large adjustment: By approximately 3.1 mph (5 km/h) for each 0.75 sec-
onds the lever is held
In the constant speed control mode (
P. 185), the set speed will be
increased or decreased as follows:
Fine adjustment: By approximately 1 mph (1.6 km/h) each time the lever is
operated
Large adjustment: The set speed can be increased or decreased continu-
ally until the lever is released.
Page 230 of 578
228
3-1. Using the air conditioning system and defogger
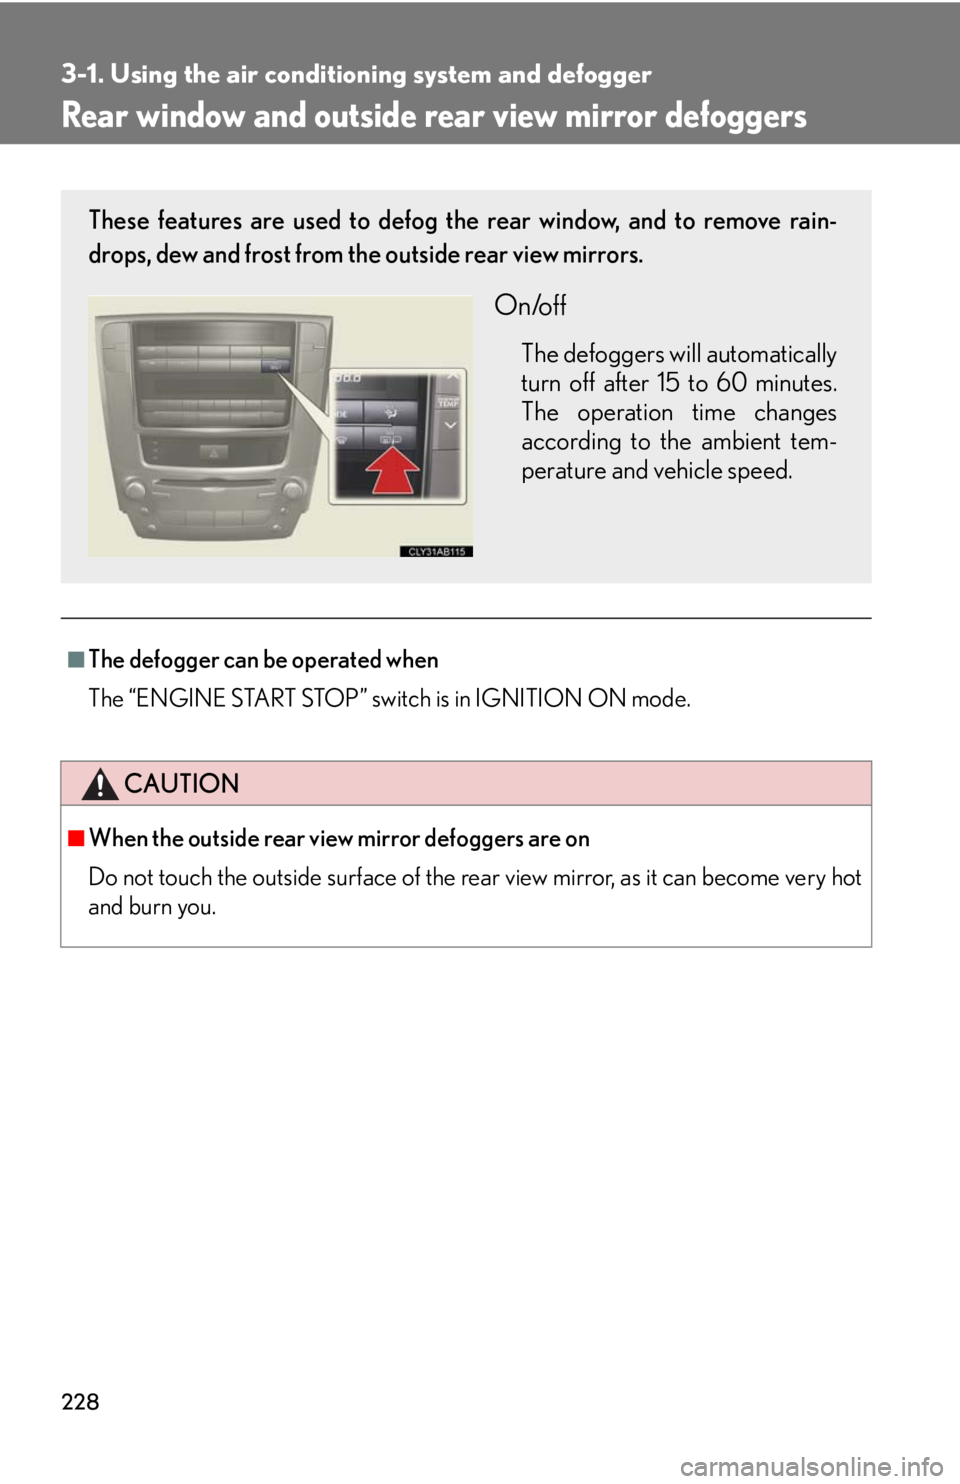
Rear window and outside rear view mirror defoggers
■The defogger can be operated when
The “ENGINE START STOP” switch is in IGNITION ON mode.
CAUTION
■When the outside rear view mirror defoggers are on
Do not touch the outside surface of the rear view mirror, as it can become very hot
and burn you.
These features are used to defog the rear window, and to remove rain-
drops, dew and frost from the outside rear view mirrors.
On/off
The defoggers will automatically
turn off after 15 to 60 minutes.
The operation time changes
according to the ambient tem-
perature and vehicle speed.
Page 237 of 578
235
3-2. Using the audio system
3
Interior features
RDS (Radio Data System) (type A)
This feature allows your radio to receive station identification information
and program information (classical, jazz, etc.) from radio stations which
broadcast this information.
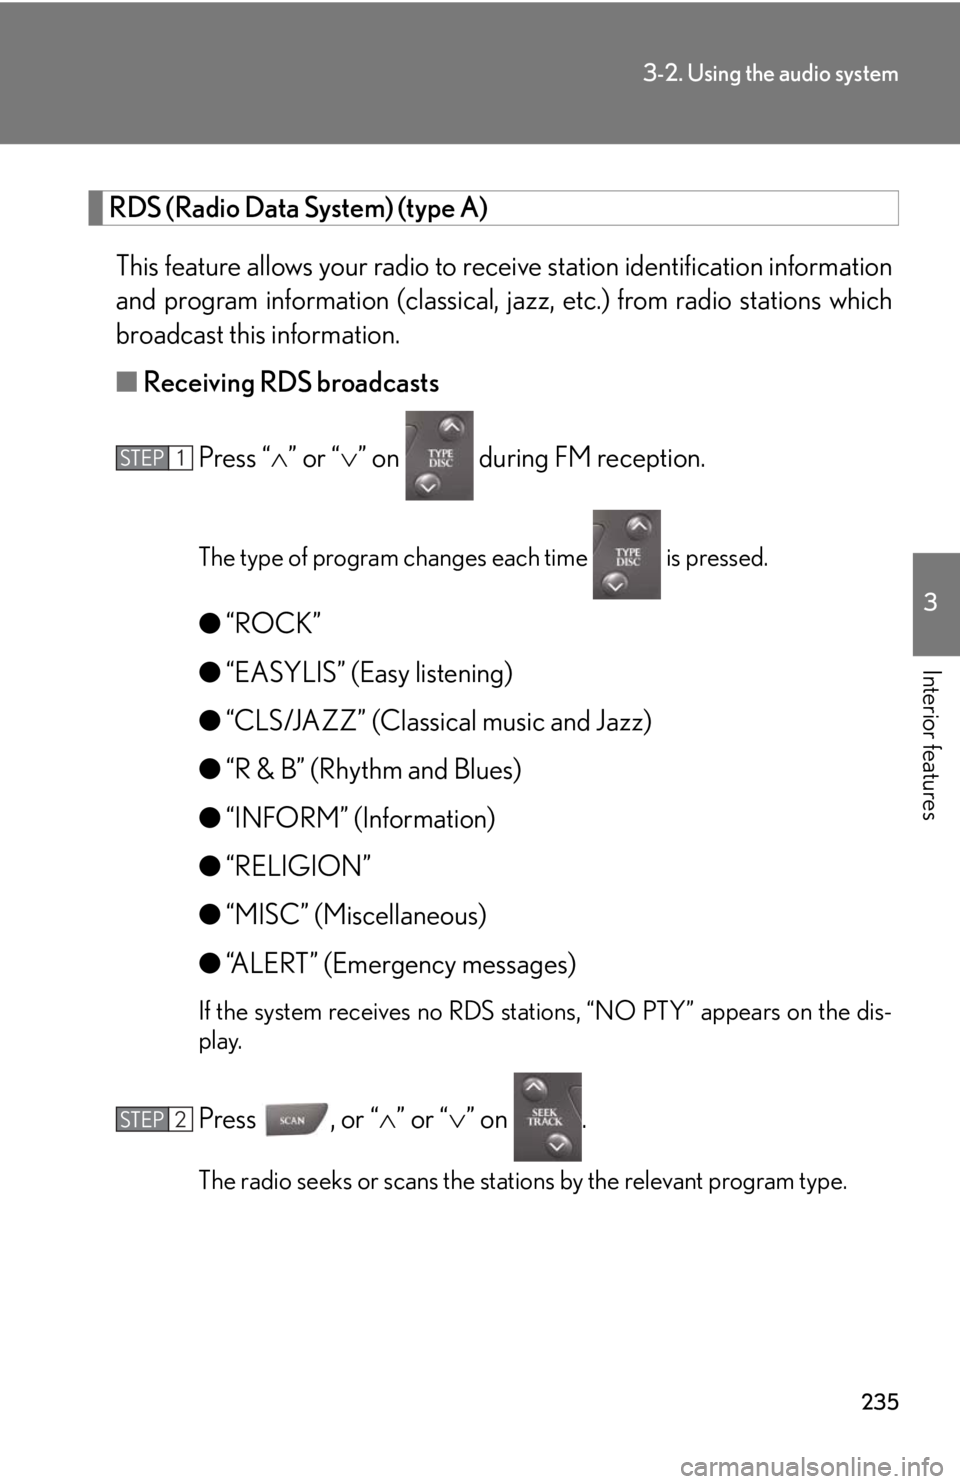
■Receiving RDS broadcasts
Press “” or “” on during FM reception.
The type of program changes each time is pressed.
●“ROCK”
●“EASYLIS” (Easy listening)
●“CLS/JAZZ” (Classical music and Jazz)
●“R & B” (Rhythm and Blues)
●“INFORM” (Information)
●“RELIGION”
●“MISC” (Miscellaneous)
●“ALERT” (Emergency messages)
If the system receives no RDS stations, “NO PTY” appears on the dis-
play.
Press , or “” or “” on .
The radio seeks or scans the stations by the relevant program type.
STEP1
STEP2
Page 238 of 578
236
3-2. Using the audio system
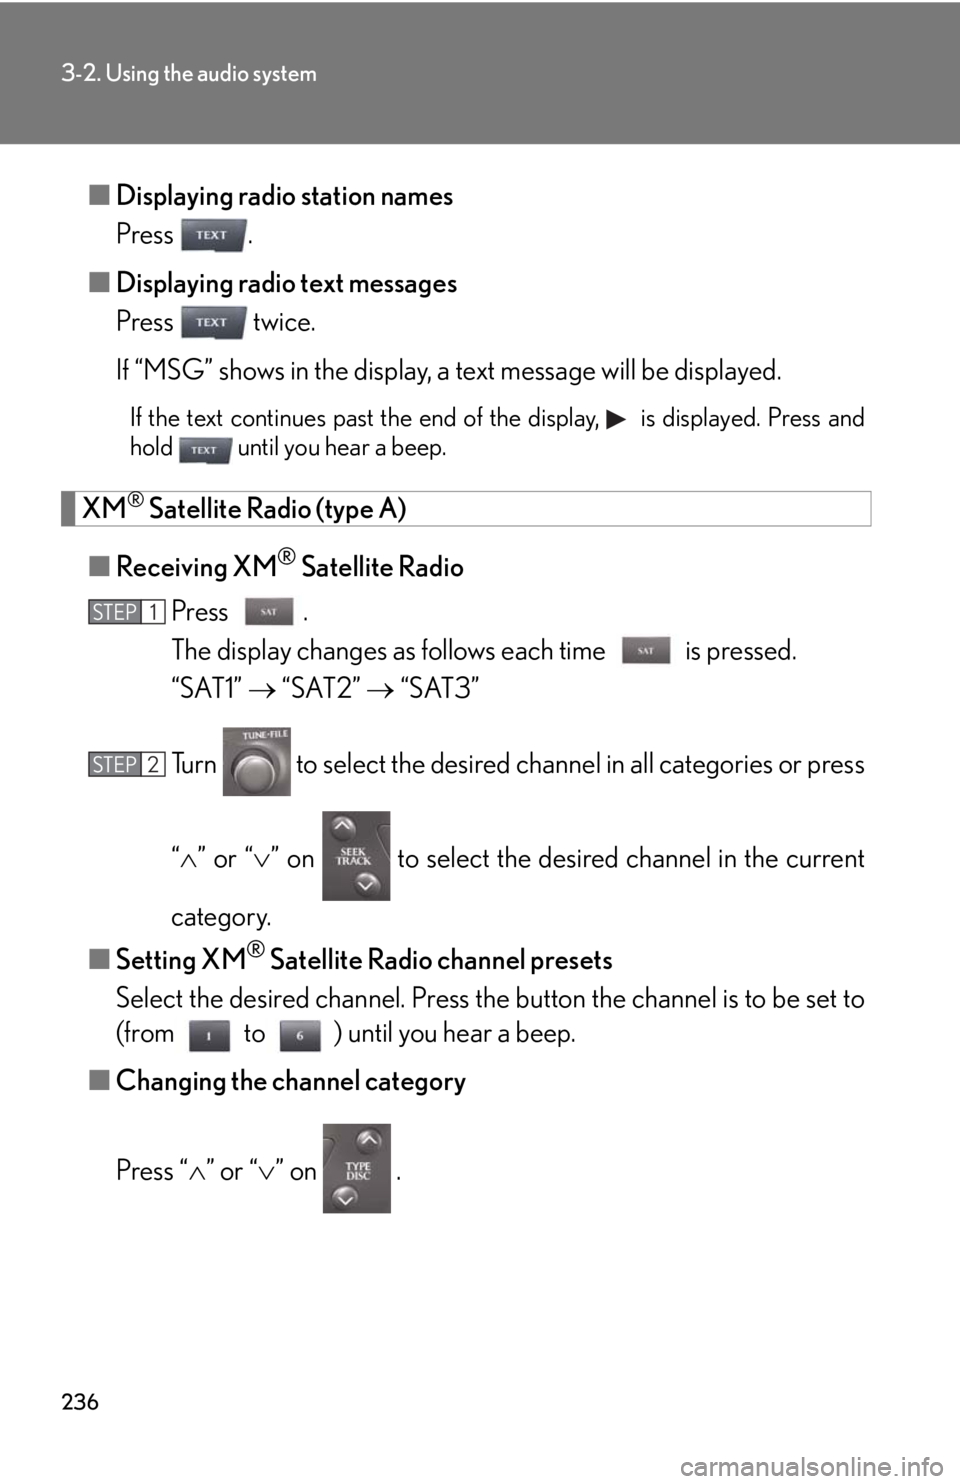
■Displaying radio station names
Press .
■Displaying radio text messages
Press twice.
If “MSG” shows in the display, a text message will be displayed.
If the text continues past the end of the display, is displayed. Press and
hold until you hear a beep.
XM® Satellite Radio (type A)
■Receiving XM
® Satellite Radio
Press .
The display changes as follows each time is pressed.
“SAT1” “SAT2” “SAT3”
Turn to select the desired channel in all categories or press
“” or “” on to select the desired channel in the current
category.
■Setting XM
® Satellite Radio channel presets
Select the desired channel. Press the button the channel is to be set to
(from to ) until you hear a beep.
■Changing the channel category
Press “” or “” on .
STEP1
STEP2