check LEXUS IS300 2022 Repair Manual
[x] Cancel search | Manufacturer: LEXUS, Model Year: 2022, Model line: IS300, Model: LEXUS IS300 2022Pages: 440, PDF Size: 22.72 MB
Page 294 of 440

2926-3. Do-it-yourself maintenance
■Engine coolant reservoir
The coolant level is satisfactory if it is
between the “FULL” and “LOW” lines
on the reservoir when the engine is
cold.
IS350 AWD/IS350/IS300
IS300
IS500
Reservoir cap
“FULL” line
“LOW” line
If the level is on or below the “LOW” line,
add coolant up to the “FULL” line.
( P.357)
■Intercooler coolant reservoir
(IS300)
The coolant level is satisfactory if it is
WARNING
●Dispose of used oil and filters only in a
safe and acceptable manner. Do not
dispose of used oil and filters in house-
hold trash, in sewers or onto the
ground.
Call your Lexus dealer, service station
or auto parts store for information
concerning recycling or disposal.
●Do not leave used engine oil within the
reach of children.
NOTICE
■To prevent serious engine damage
Check the oil level on a regular basis.
■When replacing the engine oil
●Be careful not to spill engine oil on the
vehicle components.
●Avoid overfilling, or the engine could
be damaged.
●Check the oil level on the dipstick
every time you refill the vehicle.
●Be sure the engine oi l filler cap is prop-
erly tightened.
Checking the coolant
A
B
C
Page 295 of 440

2936-3. Do-it-yourself maintenance
6
Maintenance and care
between the “F” and “L” lines on the
reservoir when the engine is cold.Reservoir cap
“F” line
“L” line
If the level is on or below the “L” line, add
coolant up to the “F” line. ( P.357)
■Coolant selection
Only use “Toyota Super Long Life Coolant”
or a similar high qua lity ethylene glycol
based non-silicate, non-amine, non-nitrite,
and non-borate coolant with long-life
hybrid organic acid technology.
U.S.A.:
“Toyota Super Long Life Coolant” is a mix-
ture of 50% coolan t and 50% deionized
water. (Minimum temperature: -31°F
[-35°C])
Canada:
“Toyota Super Long Life Coolant” is a mix-
ture of 55% coolant and 45% deionized
water. (Minimum te mperature: -44°F
[-42°C])
For more details about engine coolant, con-
tact your Lexus dealer.
■If the coolant level drops within a short
time of replenishing
Visually check the radiator, hoses, engine
coolant reservoir cap, drain cock and water
pump.
If you cannot find a leak, have your Lexus
dealer test the cap and check for leaks in
the cooling system.
Check the radiator, condenser and
intercooler radiator (if equipped) and
clear away any foreign objects.
If any of the above parts are extremely
dirty or you are not sure of their condi-
tion, have your vehicle inspected by
your Lexus dealer.
A
B
C
WARNING
■When the engine is hot
Do not remove the engine coolant reser-
voir cap, intercooler coolant reservoir
cap (IS300), or coolant inlet cap.
( P.360)
The cooling system may be under pres-
sure and may spray hot coolant if the cap
is removed, causing serious injuries, such
as burns.
NOTICE
■When adding coolant
Coolant is neithe r plain water nor
straight antifreeze. The correct mixture
of water and antifreeze must be used to
provide proper lubrication, corrosion
protection and cooling. Be sure to read
the antifreeze or coolant label.
■If you spill coolant
Be sure to wash it off with water to pre-
vent it from damaging parts or paint.
Checking the radiator, con-
denser and intercooler radiator
(if equipped)
WARNING
■When the engine is hot
Do not touch the radiator, condenser or
intercooler radiator (if equipped) as they
may be hot and cause serious injuries,
such as burns.
Page 296 of 440

2946-3. Do-it-yourself maintenance
■Checking fluid level
The brake fluid level should be
between the “MAX” and “MIN” lines
on the tank.
■Adding fluid
Make sure to check the fluid type and
prepare the necessary item.
Fluid type
SAE J1703 or FMVSS No.116 DOT 3
brake fluid
Item
Clean funnel
■Brake fluid can absorb moisture from
the air
Excess moisture in the brake fluid can cause
a dangerous loss of br aking efficiency. Use
only newly opened brake fluid.
Check the battery as follows.
■Battery exterior
Make sure that the battery terminals
are not corroded and that there are no
loose connections, cracks, or loose
clamps.
Terminals
Hold-down clamp
■Before recharging
When recharging, the battery produces
hydrogen gas which is flammable and
explosive. Therefore, observe the following
before recharging:
●If recharging with th e battery installed on
the vehicle, be sure to disconnect the
ground cable.
●Make sure the power switch on the char-
ger is off when connecting and discon-
necting the charger cables to the battery.
Checking and adding the brake
fluid
WARNING
■When filling the reservoir
Take care as brake fluid can harm your
hands and eyes and damage painted sur-
faces.
If fluid gets on your hands or in your eyes,
flush the affected area with clean water
immediately.
If you still experience discomfort, see a
doctor.
NOTICE
■If the fluid level is low or high
It is normal for the brake fluid level to go
down slightly as the brake pads wear out
or when the fluid level in the accumulator
is high.
If the reservoir need s frequent refilling,
there may be a serious problem.
Battery
A
B
Page 298 of 440

2966-3. Do-it-yourself maintenance
If any washer does not work or the
warning message appears on the
multi-information display, the washer
tank may be empty. Add washer fluid.Check if the treadw
ear indicators are
showing on the tires. Also check the
tires for uneven wear, such as excessive
wear on one side of the tread.
Check the spare tire condition and
pressure if not rotated.
New tread
Worn tread
Treadwear indicator
The location of treadwear indicators is
shown by a “TWI” or “ ” mark, etc.,
molded into the side wall of each tire.
Replace the tires if the treadwear indica-
tors are showing on a tire.
NOTICE
■When recharging the battery
Never recharge the battery while the
engine is running. Also, be sure all acces-
sories are turned off.
Adding the washer fluid
WARNING
■When adding washer fluid
Do not add washer fluid when the engine
is hot or running as washer fluid contains
alcohol and may catch fire if spilled on
the engine, etc.
NOTICE
■Do not use any fluid other than
washer fluid
Do not use soapy water or engine anti-
freeze instead of washer fluid.
Doing so may cause streaking on the
vehicle’s painted surfaces, as well as
damaging the pump leading to problems
of the washer fluid not spraying.
■Diluting washer fluid
Dilute washer fluid with water as neces-
sary.
Refer to the freezing temperatures listed
on the label of the washer fluid bottle.
Tires
Replace or rotate tires in accor-
dance with maintenance schedules
and treadwear.
Checking tires
A
B
C
Page 299 of 440

2976-3. Do-it-yourself maintenance
6
Maintenance and care
■When to replace your vehicle’s tires
Tires should be replaced if:
●The treadwear indicators are showing on
a tire.
●You have tire damage such as cuts, splits,
cracks deep enough to expose the fabric,
and bulges indicating internal damage
●A tire goes flat repeatedly or cannot be
properly repaired due to the size or loca-
tion of a cut or other damage
If you are not sure, consult with your Lexus
dealer.
■Tire life
Any tire over 6 years old must be checked
by a qualified technician even if it has sel-
dom or never been used or damage is not
obvious.
■Maximum load of tire
Check that the maximum load of the
replacement tire is greater than 1/2 of the
Gross Axle Weight Ratings (GAWR) of
either the front axle or the rear axle, which-
ever is greater.
For the GAWR, see the Certification Label.
For the maximum load of the tire, see the
load limit at maximum cold tire inflation
pressure mentioned on the sidewall of the
tire. ( P.378)
■Tire types
●Summer tires
Summer tires are high-speed performance
tires best suited to highway driving under
dry conditions. Since summer tires do not
have the same traction performance as
snow tires, summer tires are inadequate for
driving on snow-covered or icy roads. For
driving on snow-covered roads or icy roads, the use of snow tires is recom-
mended. When installing snow tires, be
sure to replace all four tires.
●All season tires
All season tires are designed to provide
better traction in snow and to be adequate
for driving in most winter conditions as well
as for use year-round. All season tires,
however, do not have adequate traction
performance compared with snow tires in
heavy or loose snow. Also, all season tires
fall short in accelerati on and handling per-
formance compared with summer tires in
highway driving.
●Snow tires
For driving on snow-covered roads or icy
roads, we recommend us ing snow tires. If
you need snow tires, select tires of the
same size, construction and load capacity
as the originally installed tires. Since your
vehicle has radial tires as original equip-
ment, make sure your snow tires also have
radial construction. Do not install studded
tires without first checking local regula-
tions for possible restrictions. Snow tires
should be installe d on all wheels.
( P.234)
■Low profile tires
Generally, low profile tires will wear more
rapidly and tire grip performance will be
reduced on snowy and/or icy roads when
compared to standard tires. Be sure to use
snow tires or tire chains* on snowy and/or
icy roads and drive car efully at a speed
appropriate for road and weather condi-
tions.
*: Vehicles with front an d rear tires of dif-
fering sizes: Tire chains cannot be
mounted. Snow tires should be used
instead.
■If the tread on snow tires wears down
below 0.16 in. (4 mm)
The effectiveness of the tires as snow tires is
lost.
Page 301 of 440
2996-3. Do-it-yourself maintenance
6
Maintenance and care
If this accidentally occurs, either turn the
engine switch to off and then to IGNITION
ON mode, or initialize the system after
checking that the tire pressure is properly
adjusted.
Your vehicle is equipped with a tire
pressure warning system that uses tire
pressure warning valves and transmit-
ters to detect low tire inflation pressure
before serious problems arise.
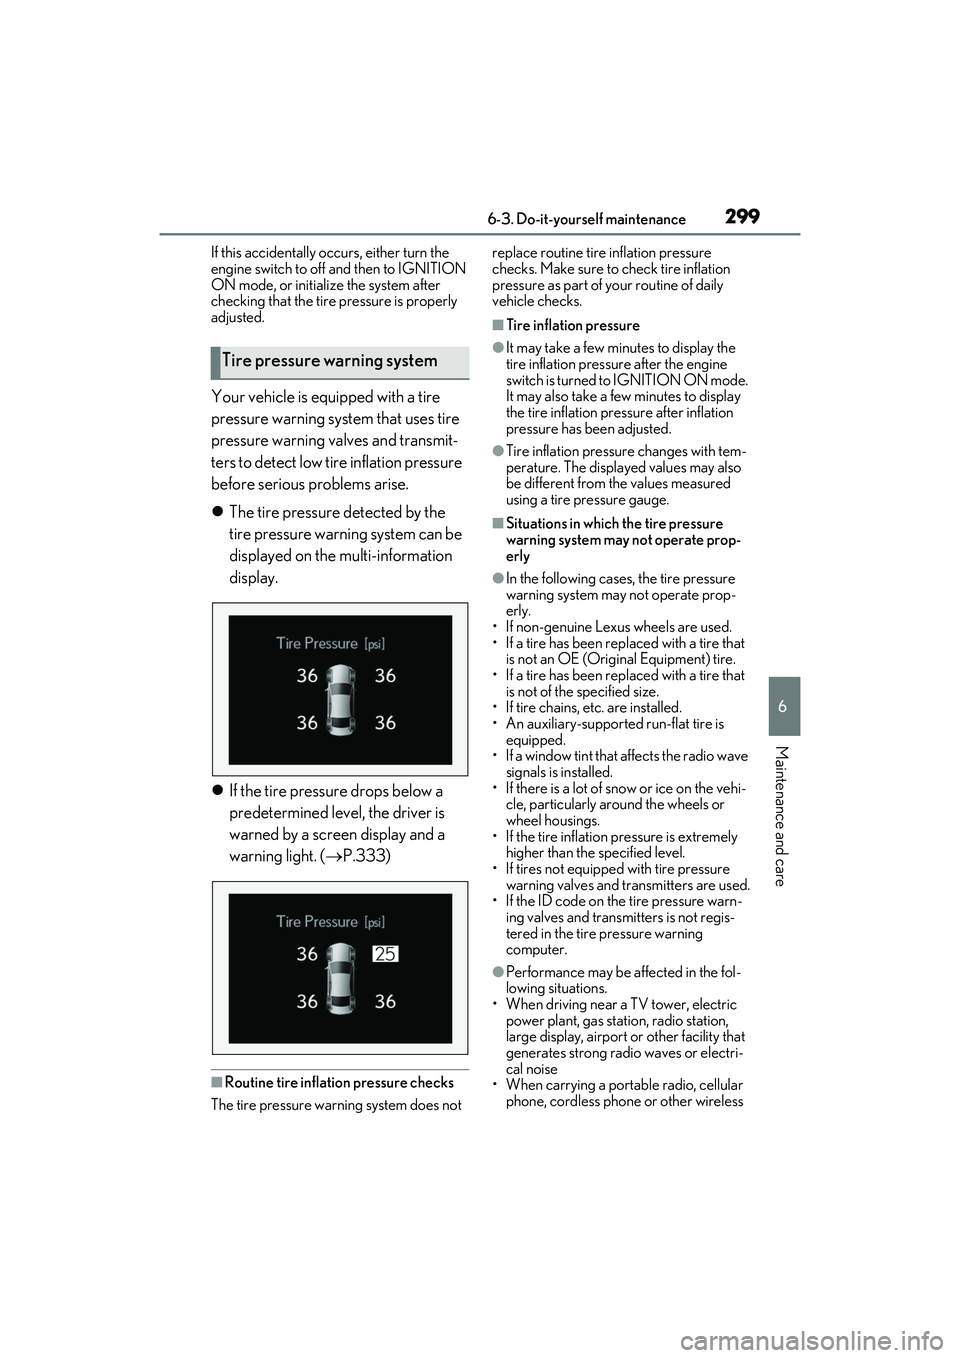
The tire pressure detected by the
tire pressure warning system can be
displayed on the multi-information
display.
If the tire pressure drops below a
predetermined level, the driver is
warned by a screen display and a
warning light. ( P.333)
■Routine tire inflation pressure checks
The tire pressure warning system does not replace routine tire
inflation pressure
checks. Make sure to check tire inflation
pressure as part of your routine of daily
vehicle checks.
■Tire inflation pressure
●It may take a few minutes to display the
tire inflation pressu re after the engine
switch is turned to IGNITION ON mode.
It may also take a few minutes to display
the tire inflation pressure after inflation
pressure has b een adjusted.
●Tire inflation pressure changes with tem-
perature. The displayed values may also
be different from the values measured
using a tire pressure gauge.
■Situations in which the tire pressure
warning system may not operate prop-
erly
●In the following cases, the tire pressure
warning system may not operate prop-
erly.
• If non-genuine Lexus wheels are used.
• If a tire has been replaced with a tire that is not an OE (Original Equipment) tire.
• If a tire has been replaced with a tire that is not of the specified size.
• If tire chains, etc. are installed.
• An auxiliary-supported run-flat tire is
equipped.
• If a window tint that affects the radio wave signals is installed.
• If there is a lot of snow or ice on the vehi-
cle, particularly around the wheels or
wheel housings.
• If the tire inflation pressure is extremely
higher than the specified level.
• If tires not equipped with tire pressure warning valves and transmitters are used.
• If the ID code on the tire pressure warn- ing valves and transmitters is not regis-
tered in the tire pressure warning
computer.
●Performance may be af fected in the fol-
lowing situations.
• When driving near a TV tower, electric power plant, gas station, radio station,
large display, airport or other facility that
generates strong radi o waves or electri-
cal noise
• When carrying a portable radio, cellular
phone, cordless phone or other wireless
Tire pressure warning system
Page 306 of 440

3046-3. Do-it-yourself maintenance
The recommended cold tire inflation
pressure and tire size are displayed on
the tire and loading information label.
( P.372)
Tire valve
Tire pressure gauge 1
Remove the tire valve cap.
2 Press the tip of the tire pressure
gauge onto the tire valve.
3 Read the pressure using the gauge
gradations.
4 If the tire inflation pressure is not at
the recommended level, adjust the
pressure.
If you add too much air, press the
center of the valve to deflate.
5 After completing the tire inflation
pressure measurement and adjust-
ment, apply soapy water to the
valve and check for leakage.
6 Put the tire valve cap back on.
■Tire inflation pressure check interval
You should check tire inflation pressure
every two weeks, or at least once a month.
Do not forget to check the spare.
■Effects of incorrect tire inflation pres-
sure
Driving with incorrect ti re inflation pressure
may result in the following:
●Reduced fuel economy
●Reduced driving comfort and poor han-
dling
●Reduced tire life due to wear
●Reduced safety
●Damage to the drive train
If a tire needs frequent inflating, have it
checked by your Lexus dealer.
■Instructions for checking tire inflation
pressure
When checking tire inflation pressure,
observe the following:
●Check only when the tires are cold.
If your vehicle has been parked for at
least 3 hours or has not been driven for
more than 1 mile or 1.5 km, you will get an
accurate cold tire inflation pressure read-
Tire inflation pressure
Checking the specified tire infla-
tion pressure
Inspection and adjustment pro-
cedure
A
B
Page 308 of 440

3066-3. Do-it-yourself maintenance
Use only Lexus wheel bolts and
wrenches designed for use with
your aluminum wheels.
When rotating, repairing or chang-
ing your tires, check that the wheel
bolts are still tight after driving 621
miles (1000 km).
Be careful not to damage the alumi-
num wheels when using tire chains.
Use only Lexus genuine balance
weights or equivalent and a plastic
or rubber hammer when balancing
your wheels.
WARNING
●Never use an inner tube in a leaking
wheel which is designed for a tubeless
tire.
Doing so may result in an accident,
causing death or serious injury.
●Use the correct wheel bolts for the
wheels to be installed. For details, con-
tact your Lexus dealer.
■Wheel bolts
Observe the following precautions to
reduce the risk of death or serious injury:
●Do not over tighten.
●Never use oil or grease on the wheel
bolts. Oil and grease may cause the
wheel bolts to be excessively tight-
ened, leading to bolt or disc wheel
damage. In addition, the oil or grease
can cause the wheel bolts to loosen
and the wheel may fall off, causing a
serious accident. Remove any oil or
grease from the wheel bolts.
●If there are any cracks or deformations
in the wheel bolts, or if the surface
treatment becomes worn, have the
wheel bolts replaced at your Lexus
dealer. Failure to follow these precau-
tions could cause the wheel bolts to
loosen and the tire to fall off, resulting
in death or serious injury.
NOTICE
■Replacing tire pressure warning
valves and transmitters
●Because tire repair or replacement
may affect the tire pressure warning
valves and transmitters, make sure to
have tires serviced by your Lexus
dealer or other qual ified service shop.
In addition, make sure to purchase
your tire pressure warning valves and
transmitters at your Lexus dealer.
●Ensure that only genuine Lexus wheels
are used on your vehicle.
Tire pressure warning valves and trans-
mitters may not work properly with
non-genuine wheels.
Aluminum wheel precautions
Page 309 of 440

3076-3. Do-it-yourself maintenance
6
Maintenance and care
1Turn the engine switch off.
2 Open the glove box. Lift up the side
with the stay, disconnect the stay
tabs and remove the partition by
pulling horizontally.
3 Press the tabs and remove the filter
cover. 4
Press the tabs and remove the filter
case.
5 Remove the air conditioning filter
from the filter case and replace it
with a new one.
The “ UP” marks shown on the filter
and the filter case sh ould be pointing up.
■Checking interval
Inspect and replace the air conditioning fil-
ter according to the maintenance schedule.
In dusty areas or areas with heavy traffic
flow, early replacement may be required.
(For scheduled maintenance information,
please refer to the “Owner’s Manual Sup-
plement” or “Scheduled Maintenance”.)
■If air flow from the vents decreases dra-
matically
The filter may be clogged. Check the filter
and replace if necessary.
■Air conditioning filt er with deodorizing
function
When fragrances are placed in your vehi-
cle, the deodorizing effect may become
significantly weakened in a short period.
Air conditioning filter
The air conditioning filter must be
changed regularly to maintain air
conditioning efficiency.
Removal method
Page 312 of 440

3106-3. Do-it-yourself maintenance
1Turn the engine switch off.
2 Open the fuse box cover.
Engine compartment: type A fuse
box
Push the tab in and lift the lid off.
Engine compartment: type B fuse
box
Push the tab in and lift the lid off.
Driver’s side instrument panel
Remove the lid.
3Remove the fuse with the pullout
tool.
Only type A fuses can be removed
using the pullout tool.
4 Check if the fuse is blown.
Type A and B:
Replace the blown fuse with a new fuse of
an appropriate amperage rating. The
amperage rating can be found on the fuse
box lid.
Type C and D:
Contact your Lexus dealer.
Type A
Normal fuse
Checking and replacing
fuses
If any of the electrical components
do not operate, a fuse may have
blown. If this happens, check and
replace the fuses as necessary.
Checking and replacing fuses
A